 Losing files is a real pain. Be it critical work-related documents or personal data; it’s frustrating to deal with missing or disappeared files. However, many handy techniques exist to find your disappeared files and folders.
This article features 15 techniques to find and recover your missing files. Read along carefully, and experiment with all the tips to maximize your chances of finding your missing files.
Table of Contents
Why Do Files Suddenly Disappear on Windows 10?
| Reason | Description |
| 🥷🏼 Hidden files | Sometimes, Windows, by default, applies the hidden file attribute to specific files and folders – thus, resulting in disappeared files. |
| 🪟 Different Windows account | If you are on a temporary or different Windows account, your files will not be accessible. |
| 🦠 Virus or malware | Viruses like worms modify file attributes, resulting in hidden or deleted files. |
| 💾 File system errors | File system errors lead to corruption and incorrect file permissions, which can abruptly hide files or revoke file access. |
| 📚 Indexing errors | Indexing errors impact the search index database – which Windows relies on for querying local search results. Indexing errors can result in inaccurate searches, making locating specific files and folders challenging. |
| 💽 Bad sectors on the hard drive | Bad sectors on the hard drive are physically or logically damaged sections. If these disk sectors store your files, you will witness files disappearing. |
| 🔄 Windows updates | In certain scenarios like an interrupted Windows update, specific file components are damaged, resulting in disappeared or missing files. |
Method 1: Recover Lost Files with Data Recovery Software
Data recovery applications are the holy grail for finding deleted or missing files. Data recovery software can rescue you if you suspect that you accidentally deleted a file or folder.
💯 Among the several data recovery applications out there, Disk Drill stands apart thanks to its ability to scan and reveal existing and deleted files and folders. Moreover, Disk Drill is a highly versatile application with the tool supporting major Windows file systems, including FAT32, NTFS, etc. Lastly, Disk Drill helps restore files with their original filename and folder structure.
Here’s how you can find missing files and recover them using Disk Drill:
- Download, install and launch Disk Drill for Windows.
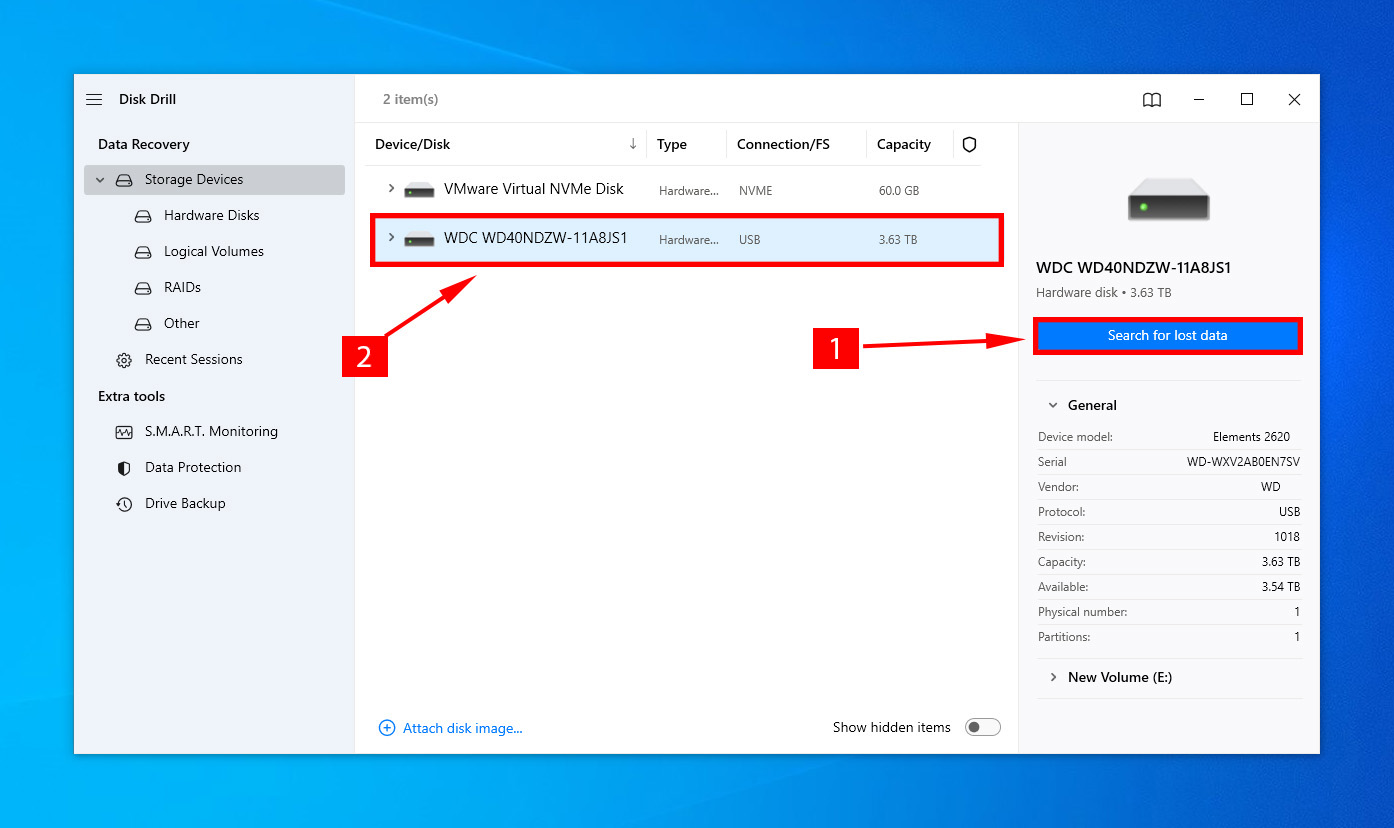
- From the list of drives, select your internal hard drive and click on Search for lost data.
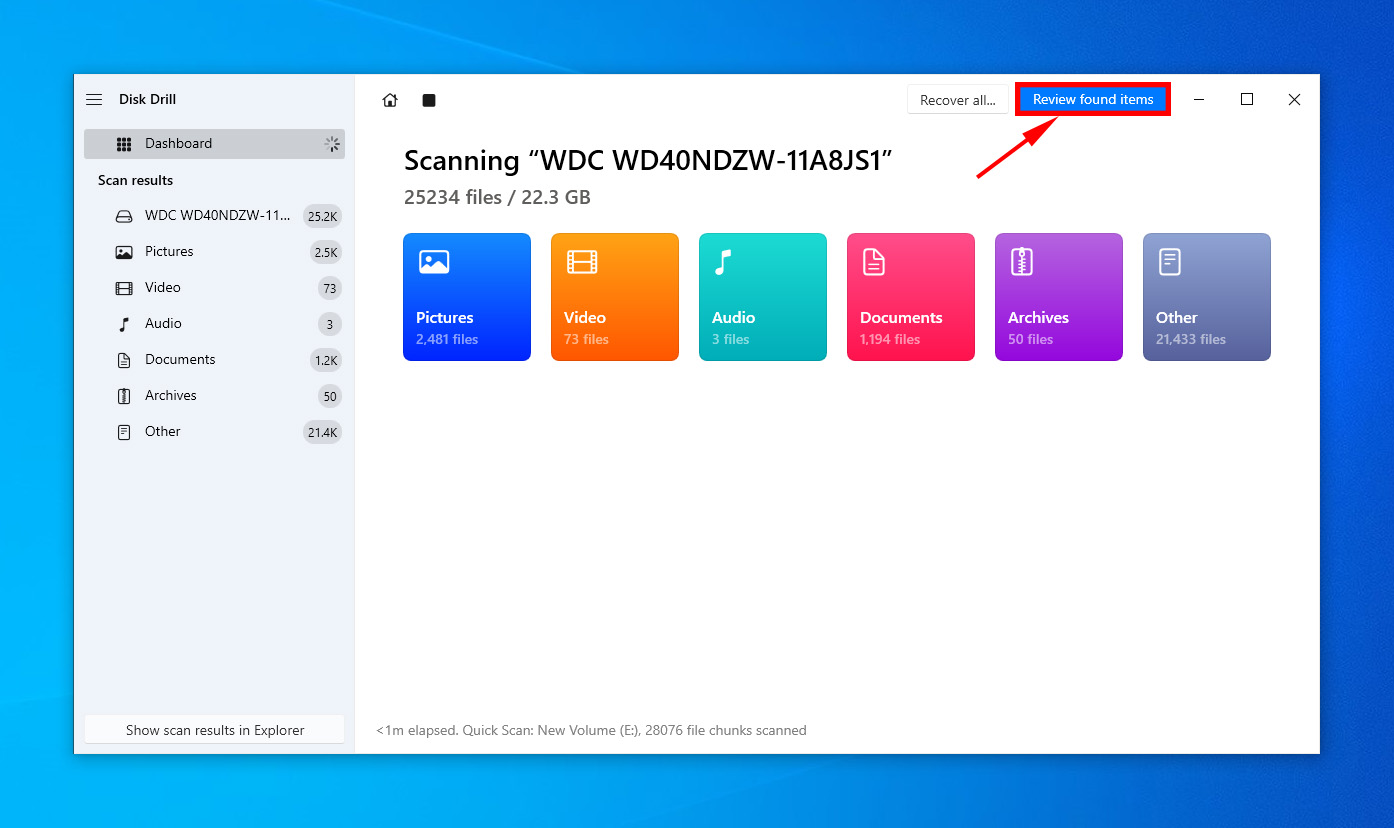
- Wait for the scan to terminate, and then select Review Found items to explore the recoverable files.
- Now, click on existing to unravel files already present on your hard drive. The existing feature is incredible for finding missing or disappeared files you are sure weren’t deleted.
- Expand the deleted or lost dropdown to reveal deleted files you can recover.
- Select the files you want to recover and click Recover. You can filter the scan results by typing in a specific file type.
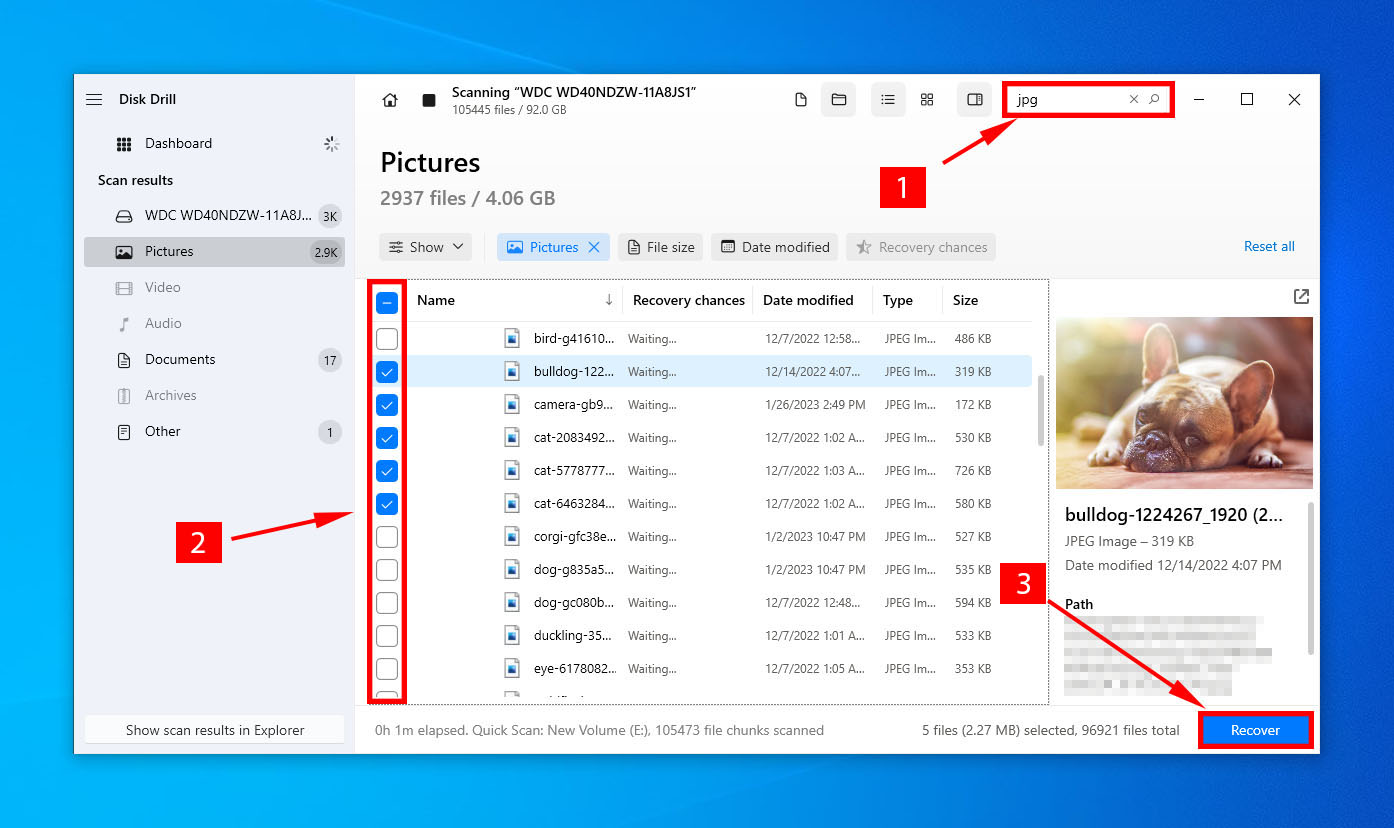
🔍 I’ve narrowed down the scan results to hunt for jpg files.
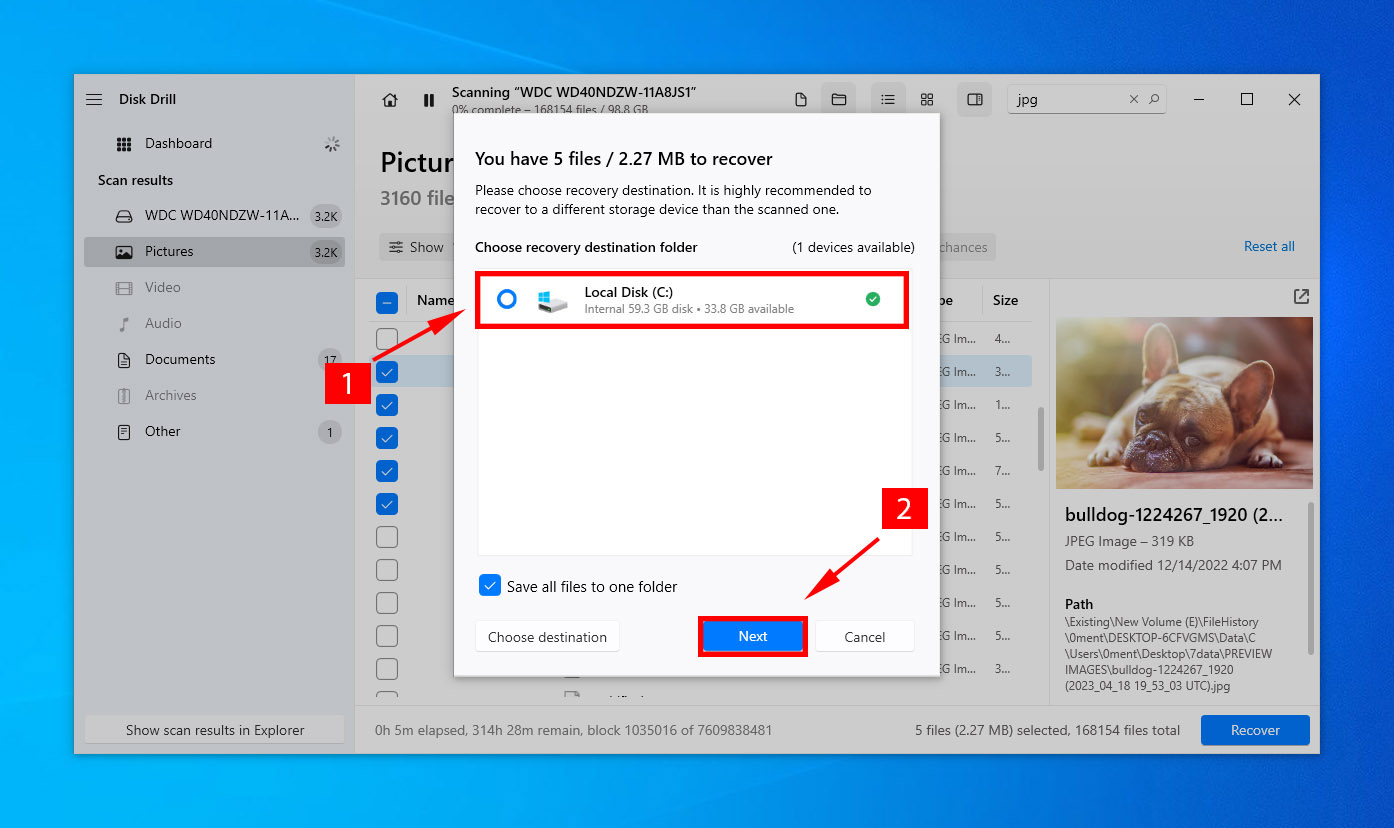
- Finally, select a destination for saving your recovered data, and click Next. Disk Drill permits free data recovery for up to 500 MB.
Method 2: Check the Profile You Are Signed In To
A common reason why your files are suddenly missing is that you probably logged into the wrong profile or user account on Windows. If you’re using a shared computer with multiple profiles, ensure you have logged into the right profile to access your disappeared files.
Here are a few ways you can switch accounts:
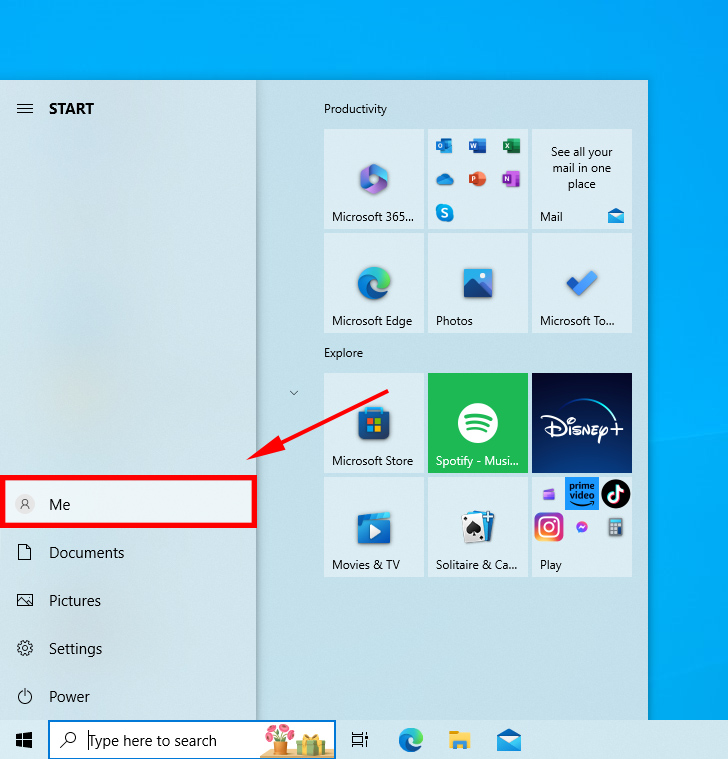
- Go to Start > click on the user name > toggle to a different user account.
- Alternatively, you can also switch users from the task manager. Use the shortcut CTRL + ALT + DELETE to pull up the task manager. Now, select switch user to log into the right profile.
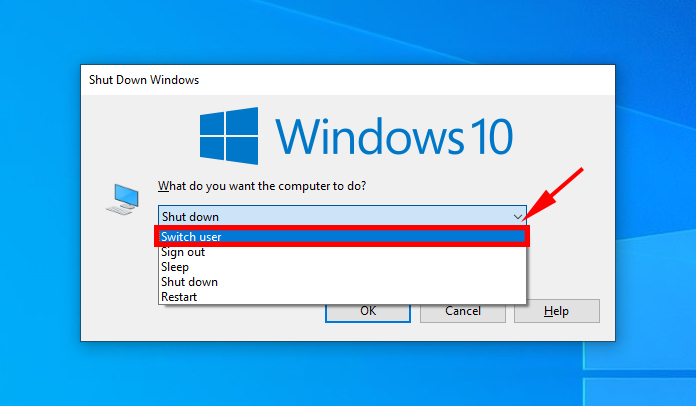
- Lastly, you can also switch users from the shutdown terminal. Use the shortcut ALT + F4, and click on switch user.
Method 3: Search for Lost Files in File Explorer
Upon discovering that a file has gone missing, you can follow these efficient steps to search for it using File Explorer in Windows:
- Open up File Explorer using the shortcut Windows key + E.
- Hit CTRL + F to enable the search function.
- Type in the file name, and wait for Windows to scan your hard drive for the exact or similarly named files.
- Refine your search by clicking on Search options, enabling you to alter the search scope.
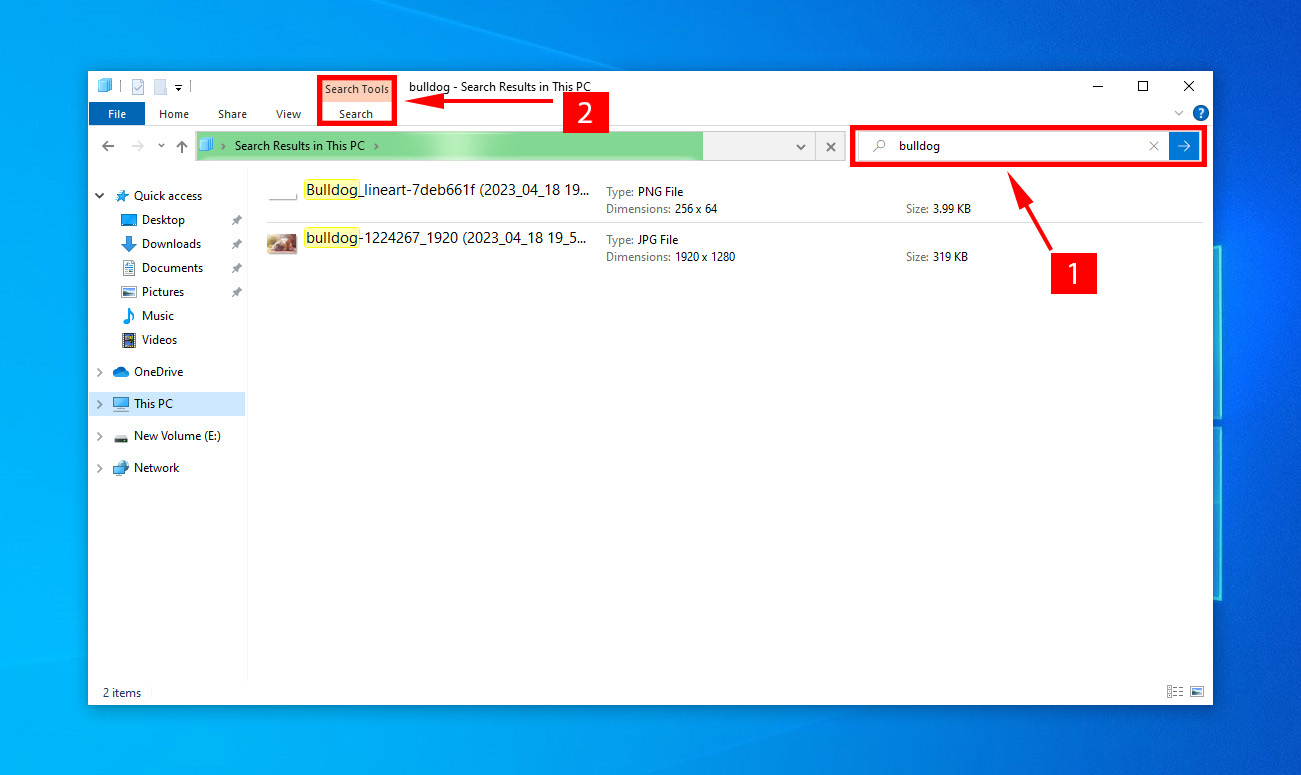
- Also, filter your search based on other file attributes like date modified, file type, size, etc.
Method 4: Enable an Administrator account
Here’s how you can enable an administrator account to gain access to files with special privileges:
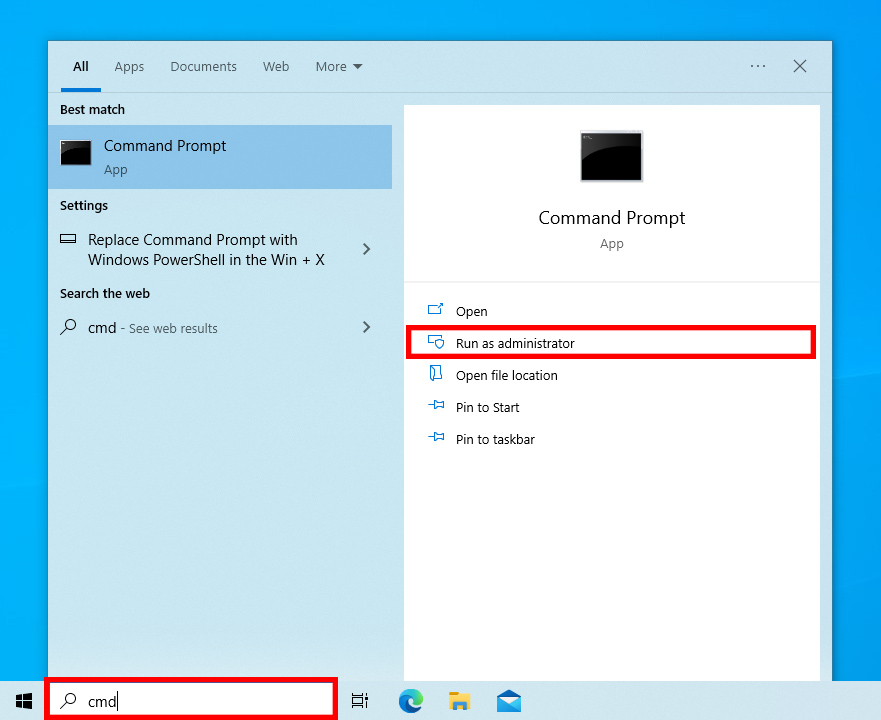
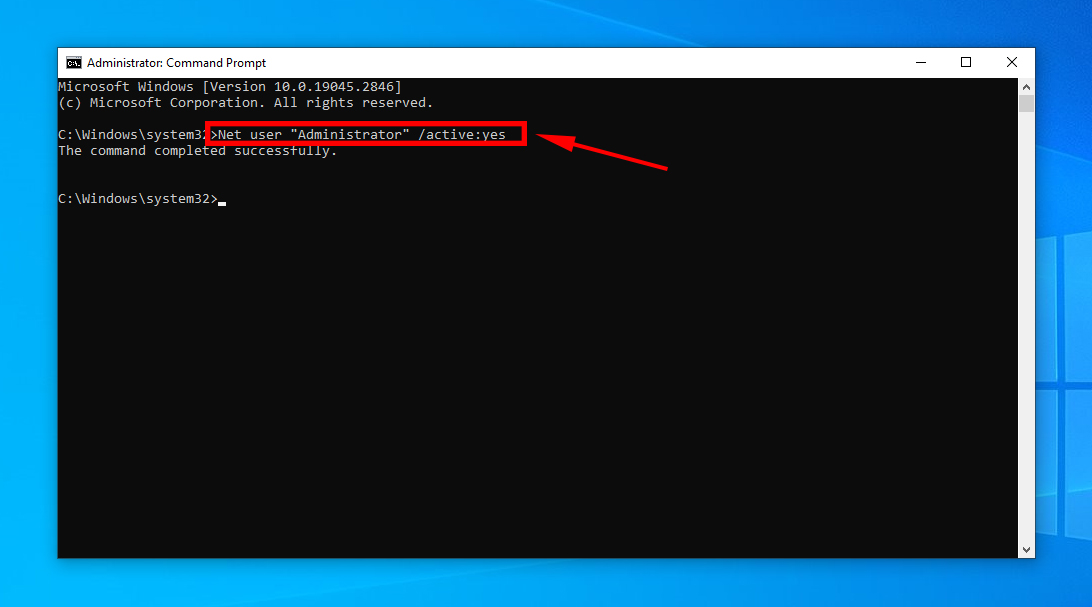
- Open an elevated Command Prompt (CMD window) by clicking Run as administrator next to a CMD search result.
- Key in the following command, and hit Enter:
Net user "Administrator" /active:yes
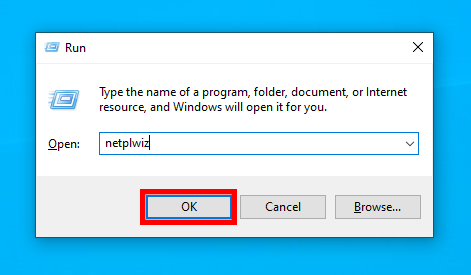
Alternatively, here’s another way you can enable administrative rights on your account:
- Open Run using the shortcut Windows key + R, and search for netplwiz.
- Now, click on your user name, and go to properties.
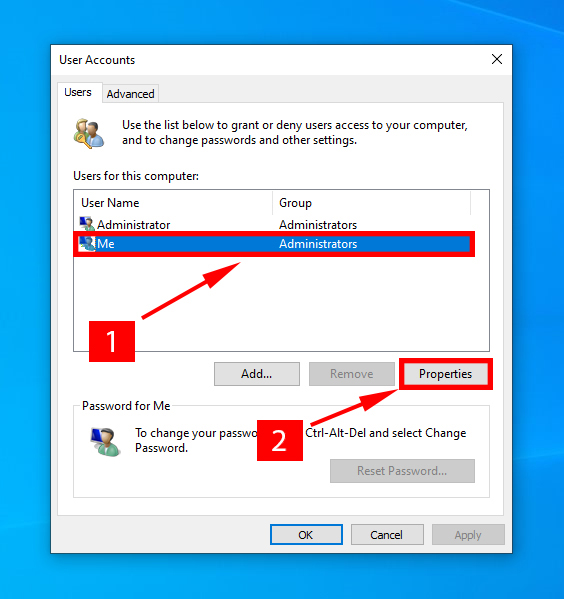
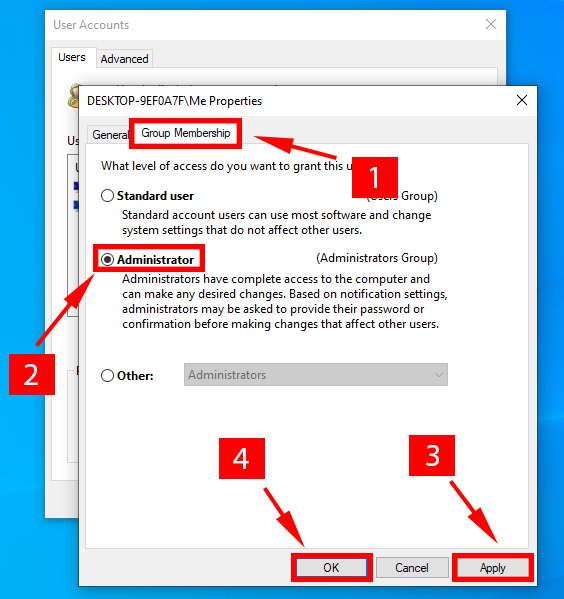
- Go to the group membership tab, enable administrative rights for your profile, and click Apply > Ok.
Method 5: Check the Recycle Bin
Checking the recycle bin is a very primitive yet overlooked step in recovering missing files. Here’s how you can recover files using the recycle bin:
- Open Start, search for the recycle bin, and open it.
- Use the shortcut CTRL + F to shift focus to the search box and key in your filename.
- Right-click on your missing files, and click Restore.
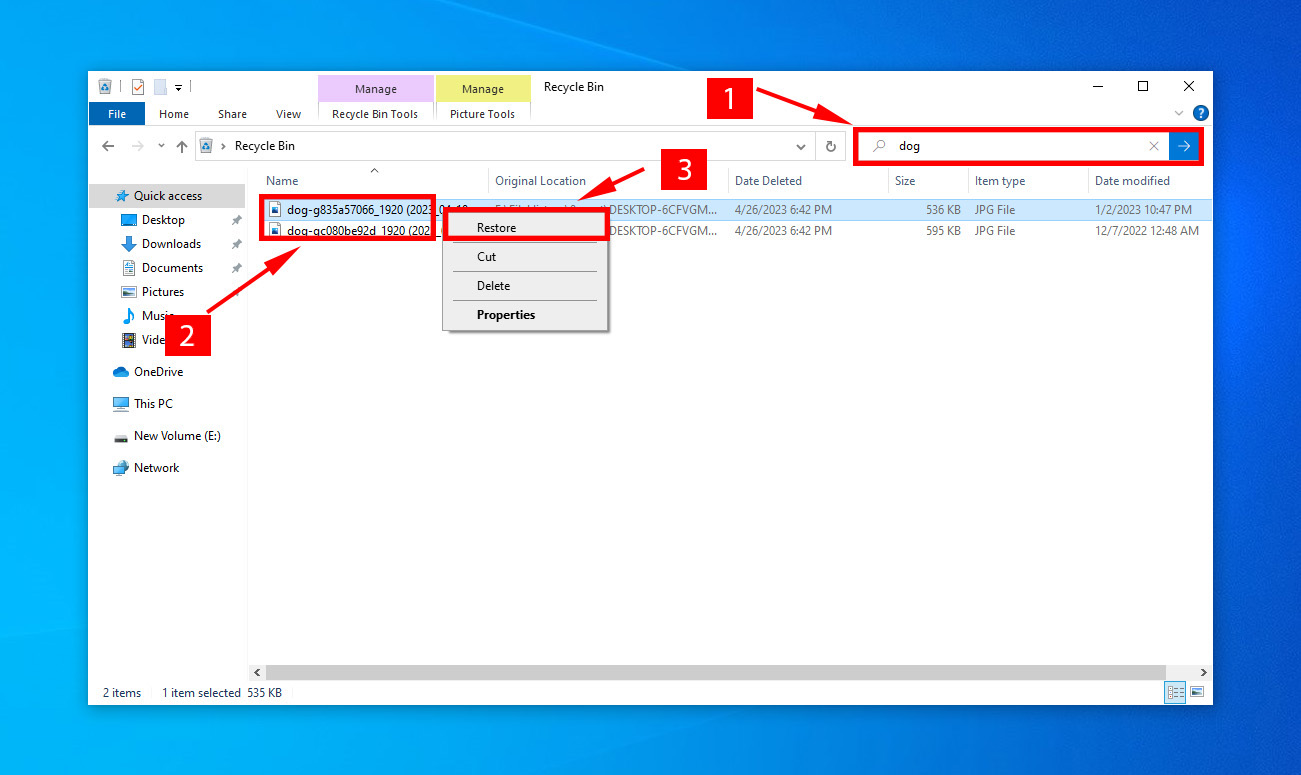
- Individually select files by CTRL + clicking the file or use CTRL + A to select all the files, and then select Restore the selected items.
Method 6: Show Hidden Files
Here’s a very straightforward guide to unhiding files from File Explorer:
- Open up File Explorer using the shortcut Windows key + E.
- Click on your hard drive > click View > Options.
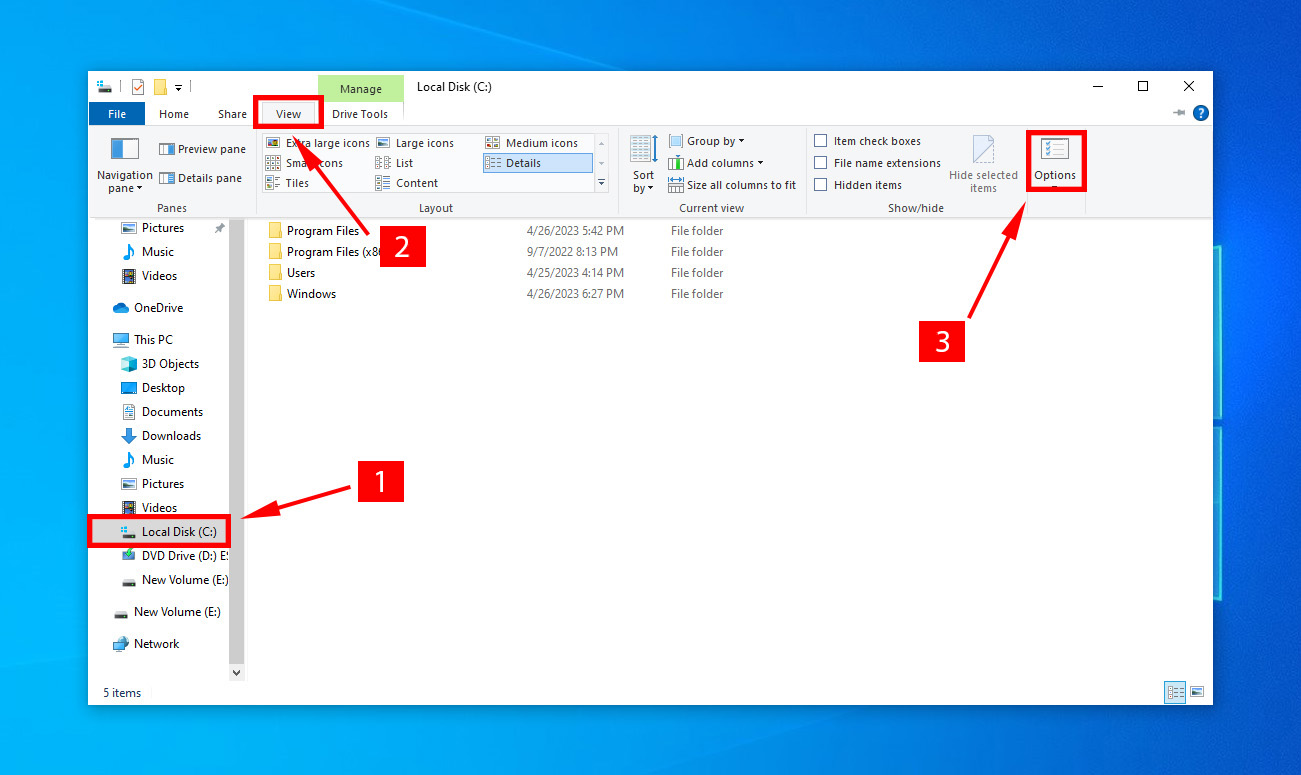
- Navigate to the view tab, and select “Show hidden files, folders, and drives” option.
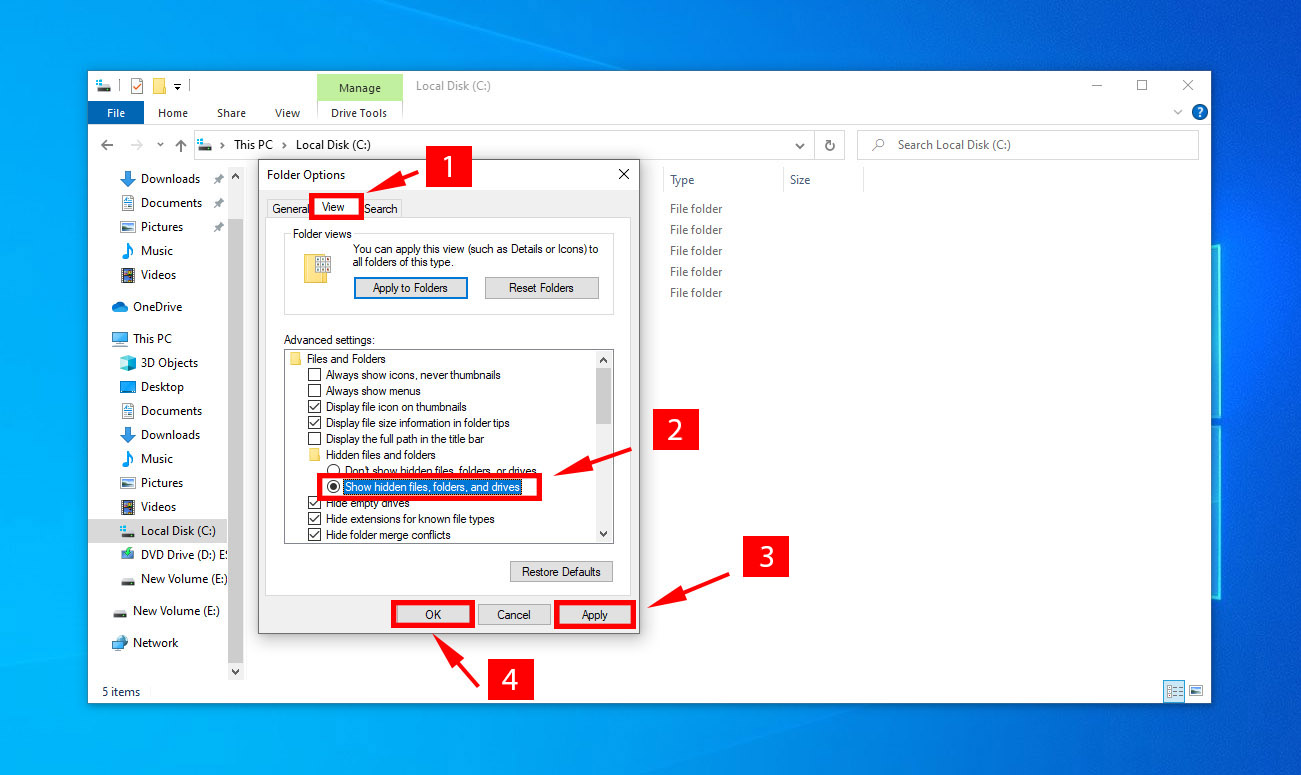
- Then click “Apply” > “OK”.
✅ This method clears the hidden file attribute on your missing files and folders.
Method 7: Check the User Folder
Another nifty approach to locating lost files is searching the user folder. The user profile folder contains your personal files from popular folders like Desktop and Documents.
Here’s how you can access your user profile folder:
- Open up File Explorer using the shortcut Windows key + E.
- Click on the address bar, key in this command, and press Enter:
%USERPROFILE%
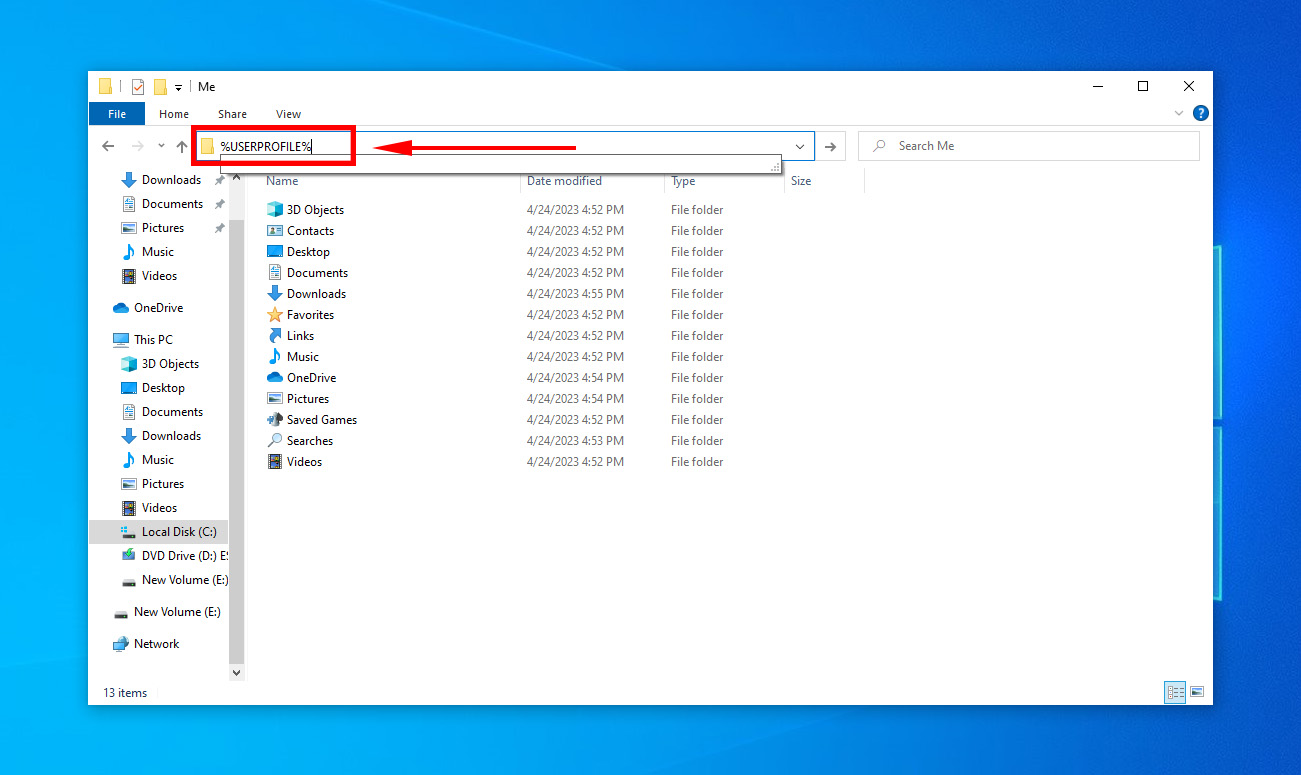
- You can now employ a local search by using the shortcut CTRL + F to search your missing files within your user profile folder.
Method 8: Change Indexing Options
The Windows Search Indexer is an in-built feature that operates as a background service that creates a database repository of all your files and folders. Consequently, your search results become much more streamlined and efficient.
🔍 You may have accidentally excluded certain folders from the search index – which results in inaccurate search results.
Here’s how you can reset the indexing options:
- Type into the search bar and open indexing options.
- Click on Modify. Now select or deselect target drives and folders as per your search requirements.
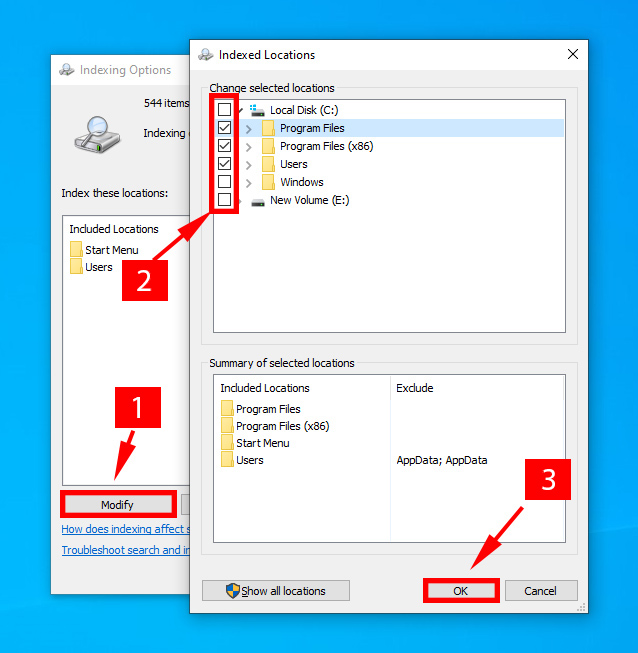
- Click on Show all locations to reveal all folders and drivers.
- Once you have altered the indexing scope, click OK.
- Try searching for your missing files now.
Method 9: Turn off the Fast Startup Option
Fast startup is a fantastic hack for boosting your computer’s bootup times. The science behind the fast startup is that while shutting down, your computer stores a brief snapshot of the current state in a hibernation file. Consequently, the next time you boot, your computer uses information from this hibernation file to start up quickly.
📁 Since Fast startup takes a snapshot of a certain time in the past, further changes you make to folders don’t get reflected while booting up – this could explain why sometimes, files suddenly disappear.
As a result, disabling fast startup can help your PC to display all the latest files and folders.
Here’s how you can disable Fast startup:
- Open Control Panel.
- Navigate to System and Security.
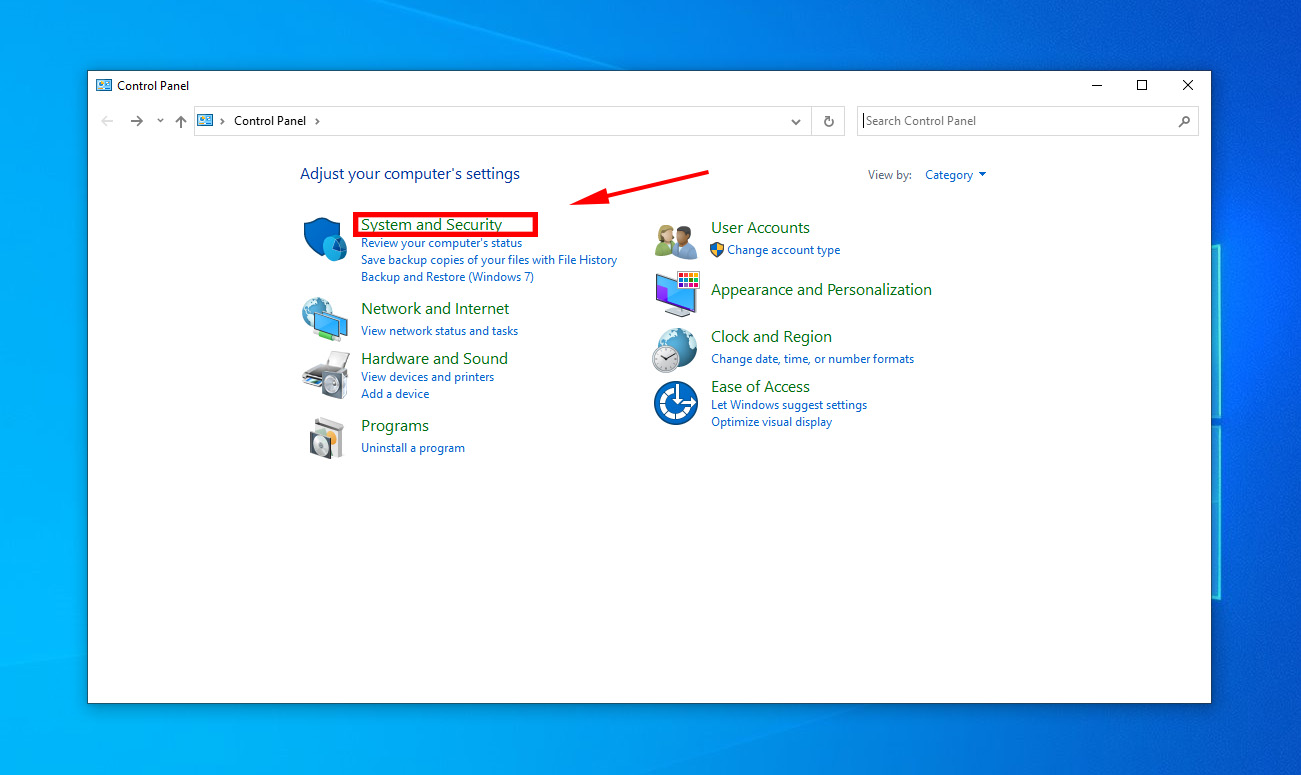
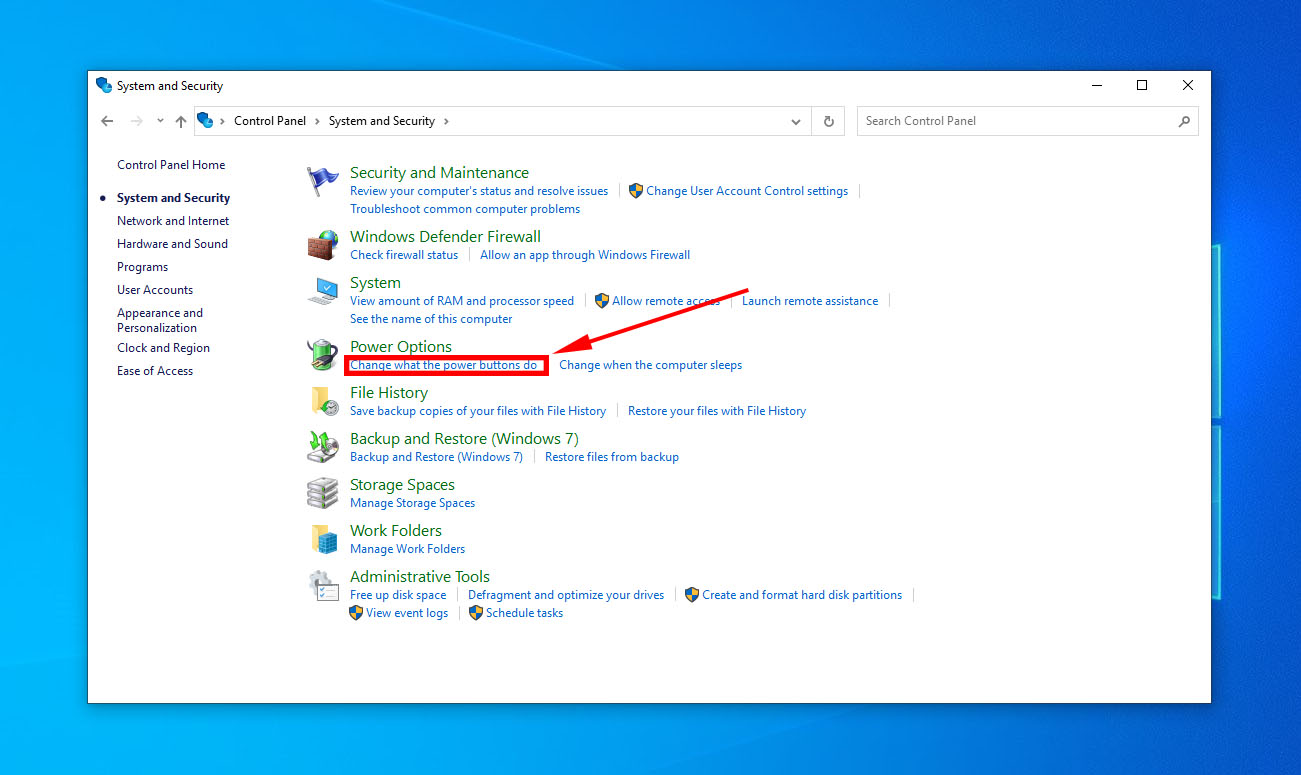
- Now select Power Options > Choose what the power buttons do.
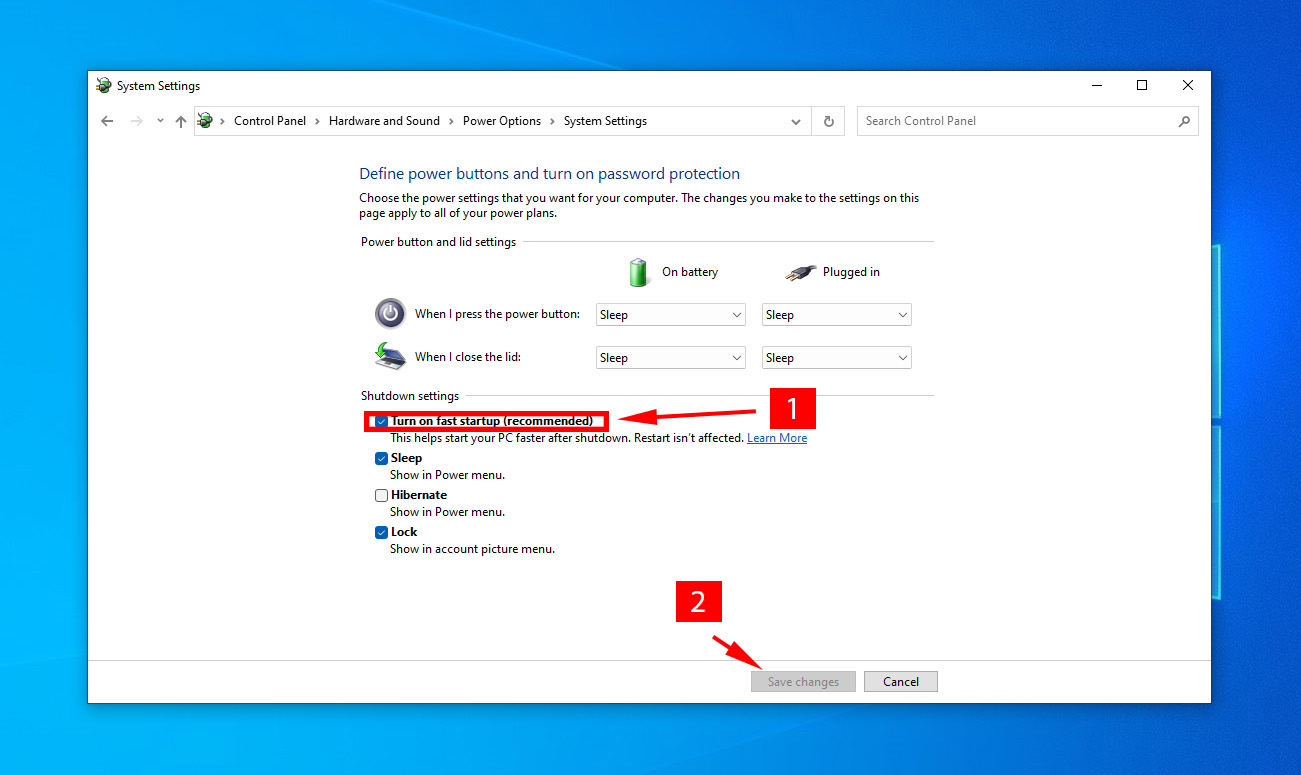
- Click on “change settings that are currently available,” > disable Fast startup > Save changes.
Method 10: Restore Files From a Windows Backup and Restore
Backup and restore helps you retrieve files from a previously created backup. However, if you have never configured a backup, skip to the next tip.
Here’s how you can restore files from a backup:
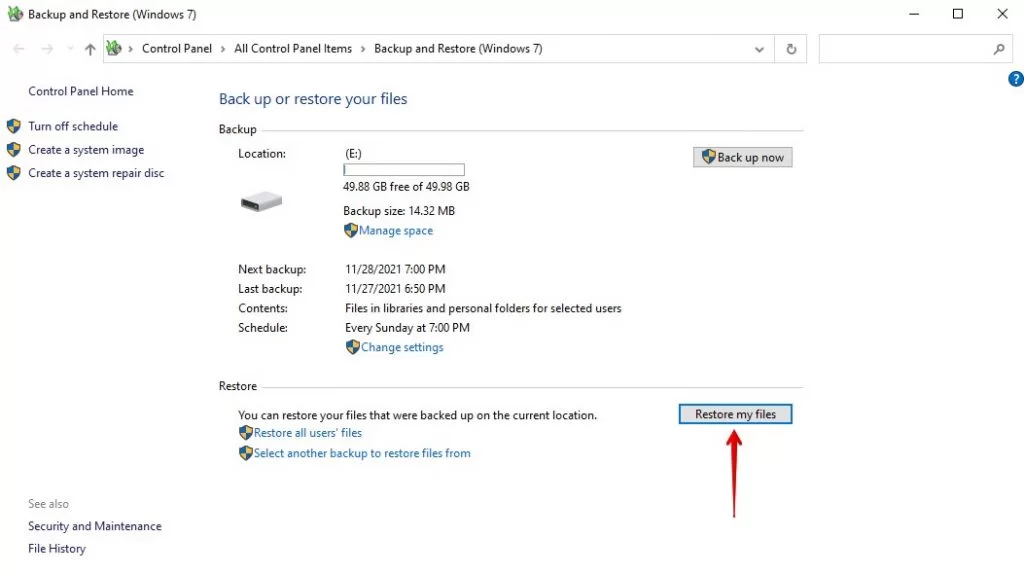
- Navigate to Backup Settings > Backup and Restore (Windows 7).
- Click on Restore my files.
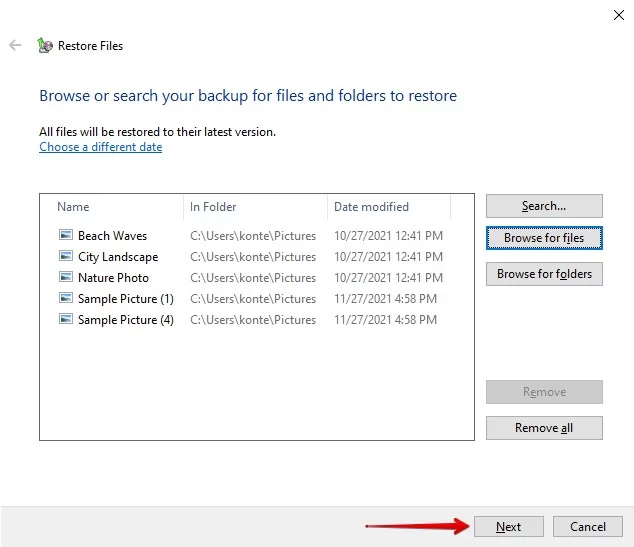
- Click on search to include specific files and folders, and then click Next.
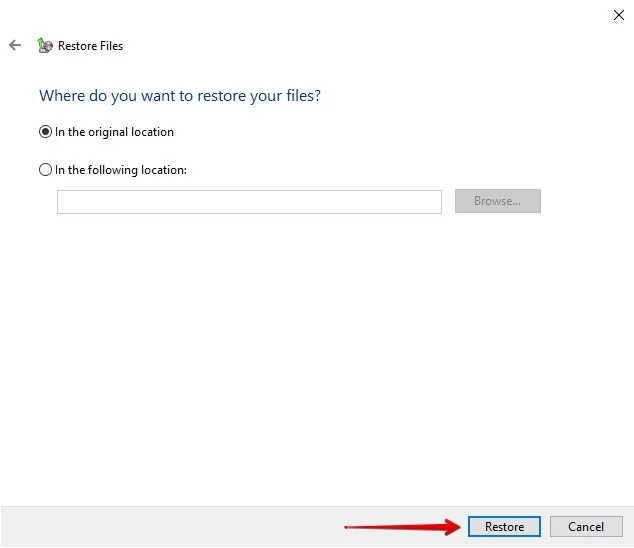
- Click Restore to finalize the file retrieval process.
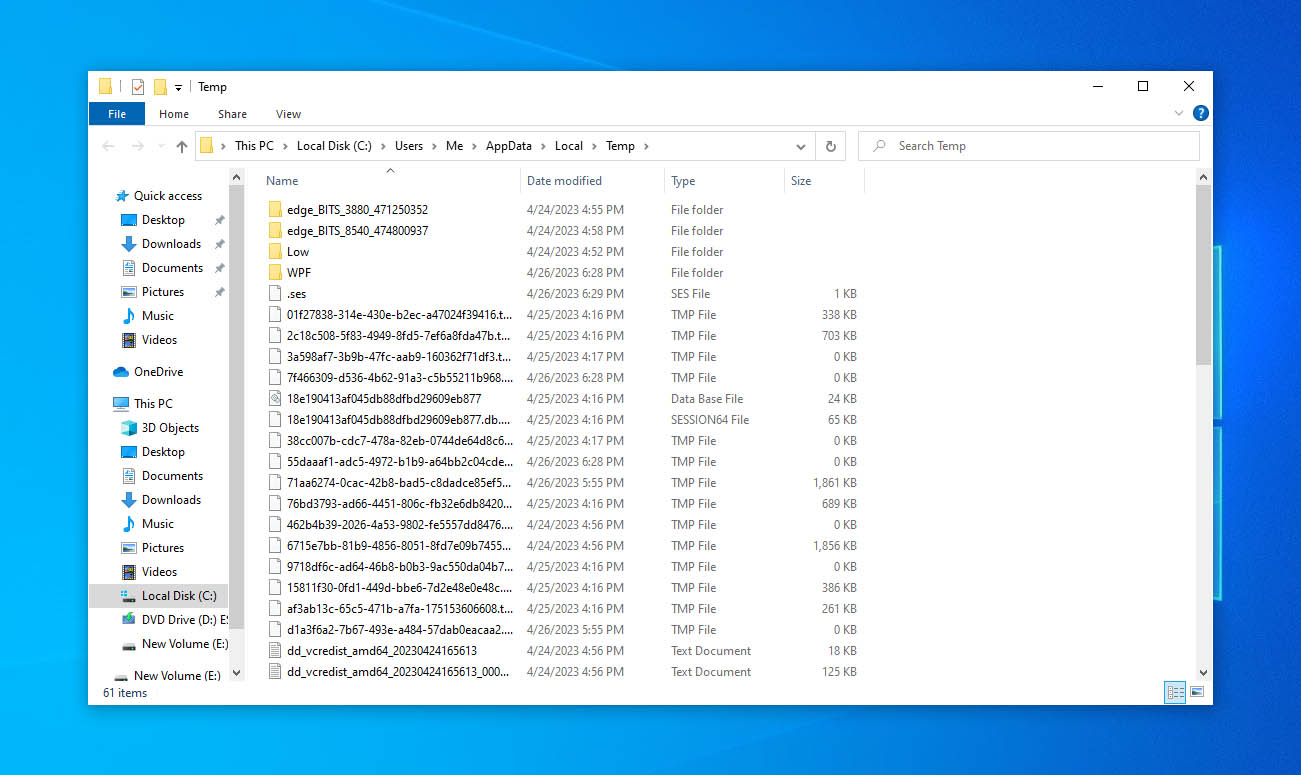
Method 11: Check appdata/temp files
Windows uses the temp folder to store temporary files, cookies, cache, and unsaved application data. For instance, if you were working on a Word document and your PC abruptly crashed, you could find your unsaved document in the temp folder.
Here’s how you can access the temp folder:
- Type
%temp%in the search bar.
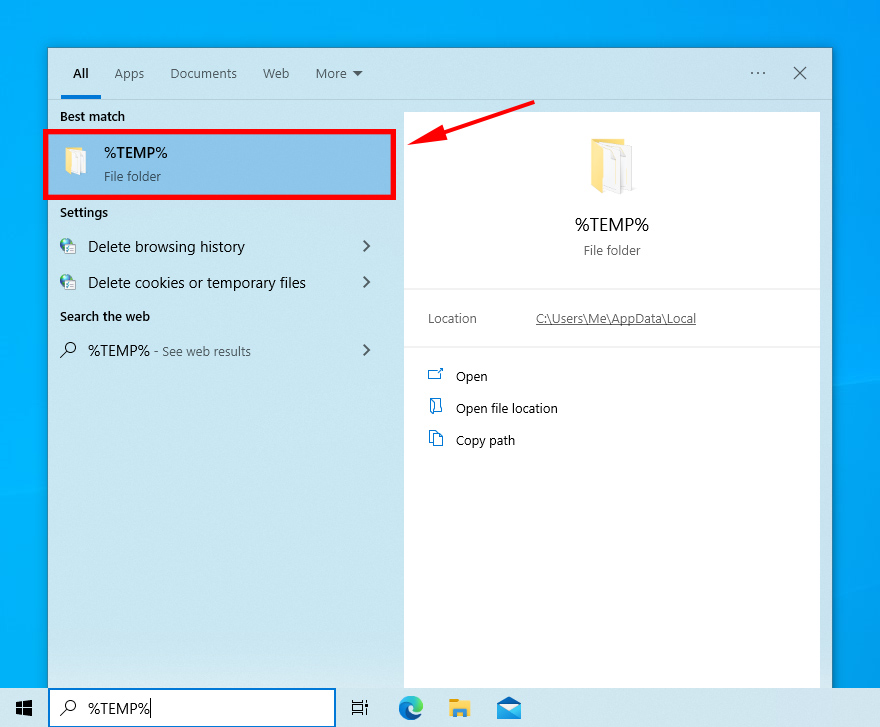
- Open the folder, and scroll through to find your missing files.
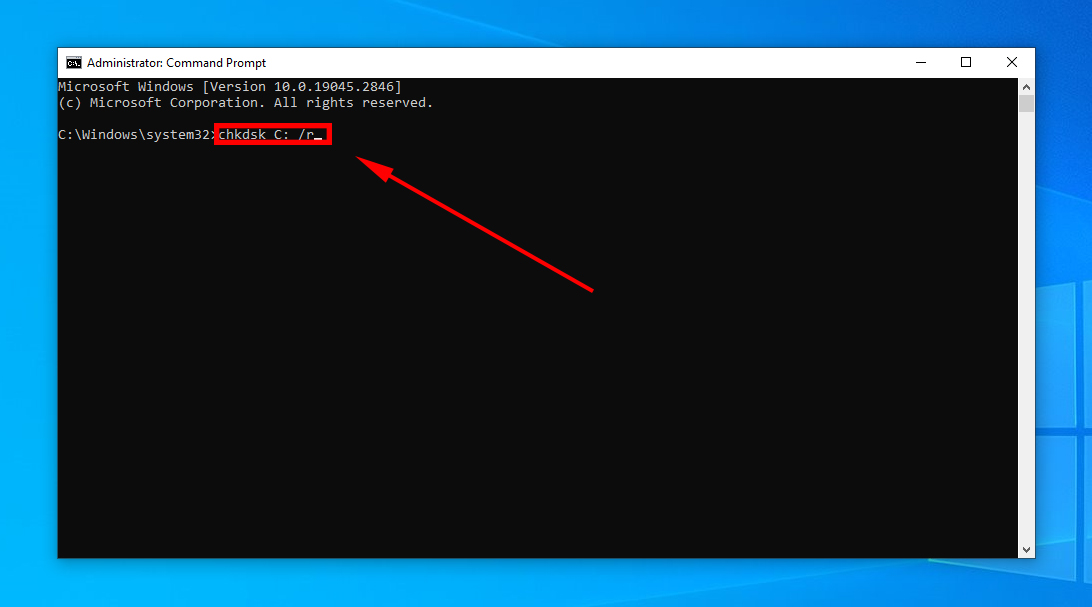
Method 12: Use CHKDSK or Error Checking Tool
CHKDSK (Check Disk) is a Windows utility to detect and resolve file system errors on your hard drive. While CHKDSK’s primary function isn’t to unhide missing files, the utility can fix issues surrounding bad logical sectors that could have resulted in your files disappearing.
Here’s how you leverage CHKDSK using CMD:
- Open an elevated command prompt window by running CMD as an administrator.
- Key in the following command, and hit Enter.
chkdsk X: /rReplace X with your internal drive letter. The /r parameter triggers CHKDSK to detect and fix bad sectors.
🔍 The error-checking tool replicates the CHKDSK tool, except with a better user interface. Here’s how you can employ the disk error-checking tool:
- Open up File Explorer using the shortcut Windows key + E.
- Right-click on your hard drive, and select Properties > Tools > Check.
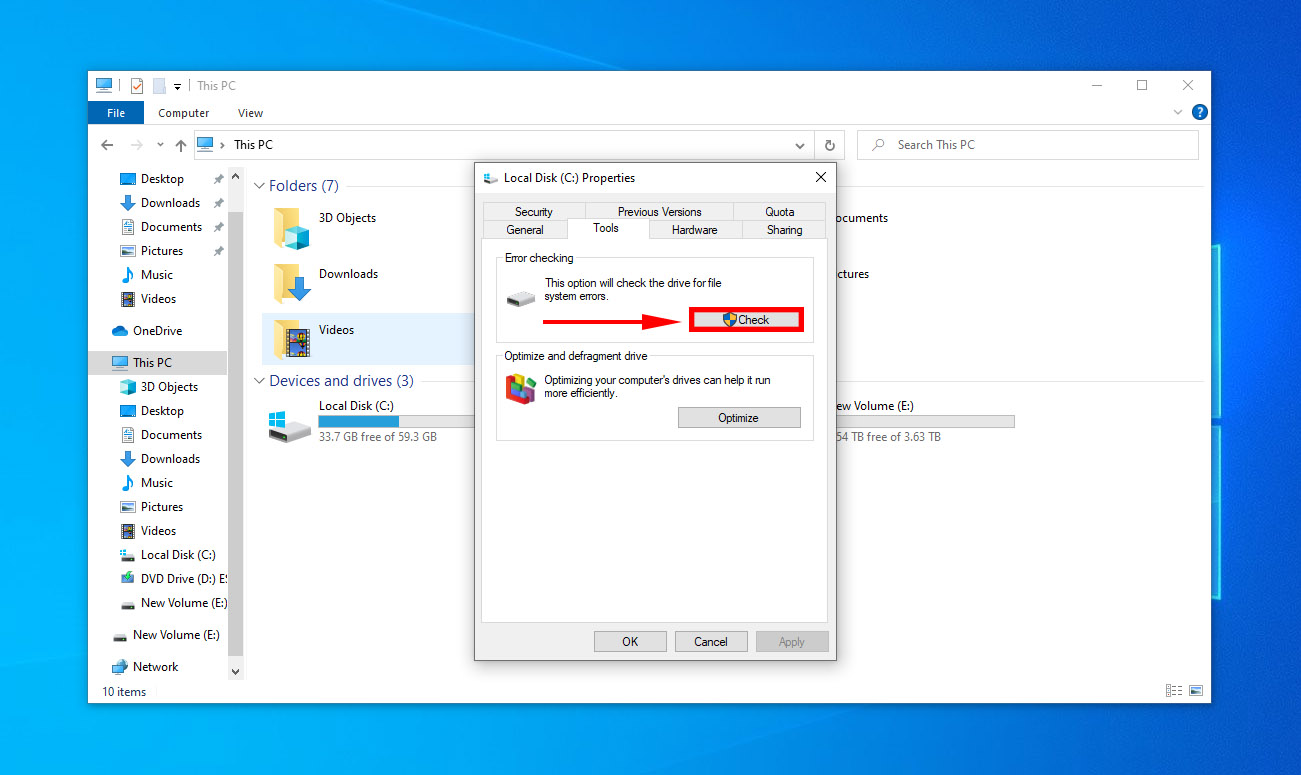
- Click on scan and repair drive.
Method 13: Set the folder with missing files to hidden and read-only
This is an interesting approach where you deliberately apply the hidden attribute to your target folder, and then attempt to revert the settings. Here’s how you can do so:
- Open up File Explorer using the shortcut Windows key + E.
- Locate your target folder, and right-click it.
- Go to Properties > Attributes > check “Hidden” > Apply > Ok.
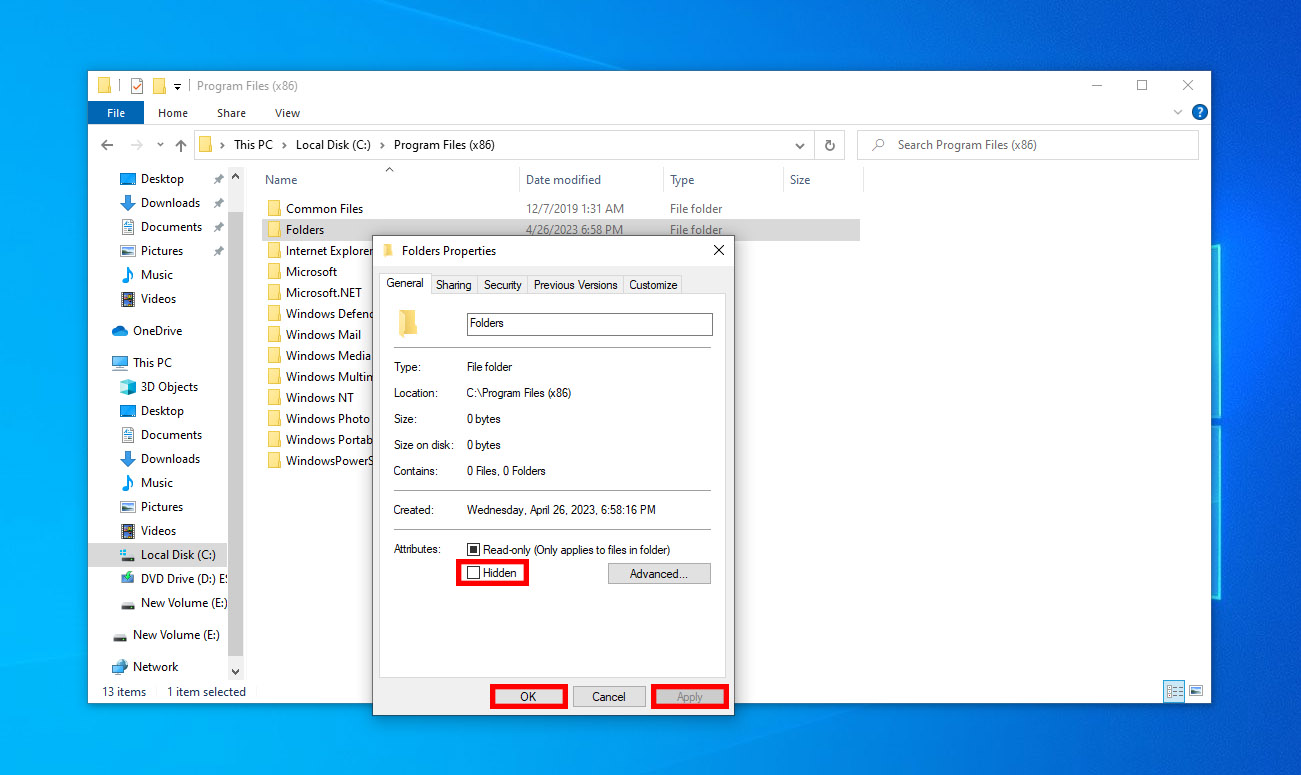
- To revert the settings, follow the same approach and then uncheck the hidden attribute
- Go back to your folder and check if you can find the missing files.
Method 14: Check Antivirus Software Quarantine
Occasionally, an antivirus program may quarantine files it deems suspicious. If you believe these files are secure, follow these steps to restore them:
🛡️ I’m using Microsoft Defender for this tutorial. The steps are identical to other third-party antivirus tools.
- Go to Settings > Privacy & Security > Virus & threat protection.
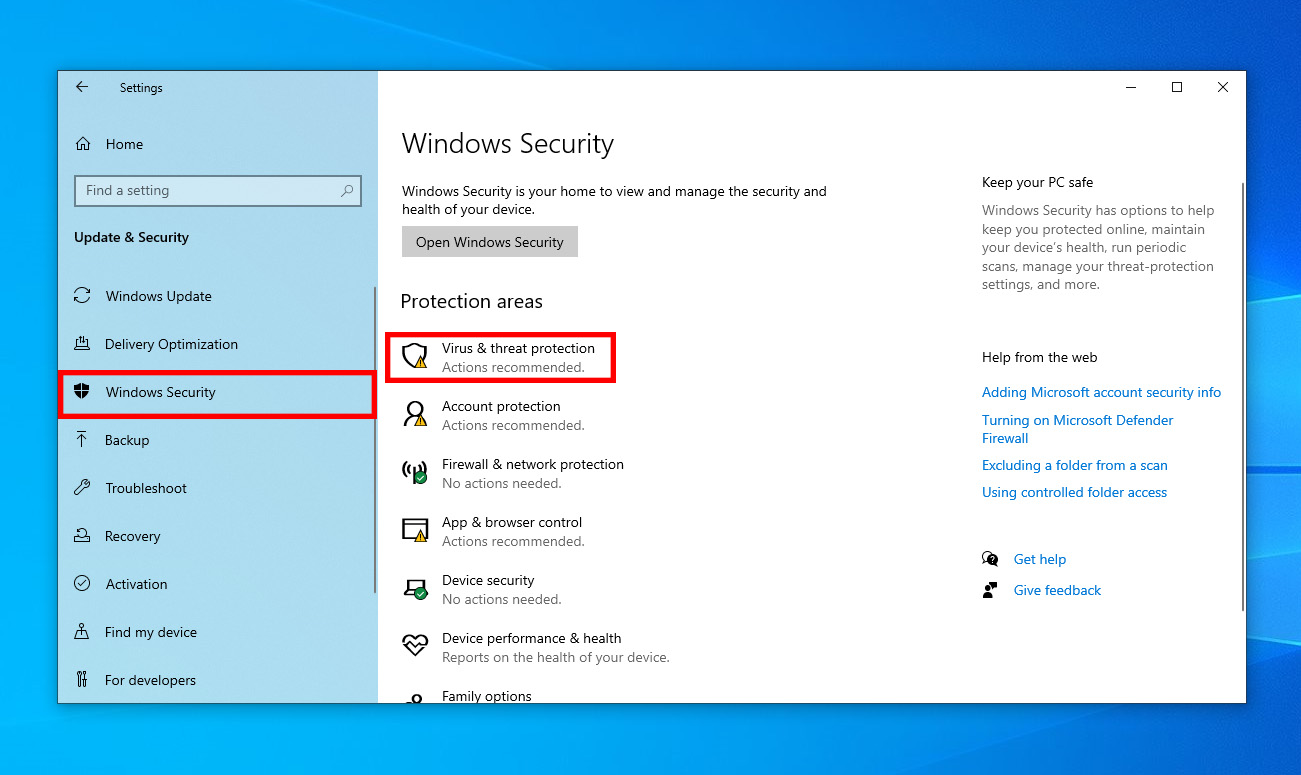
- Now, click Protection history and filter the list to quarantined items.
- Locate your files, and restore them. To prevent future quarantining of your files, you can add them to an exclusion list.
Method 15: Restore Microsoft Onedrive backup
If you previously configured a periodic Microsoft Onedrive backup regime, you could restore the latest backup to retrieve your missing files and folders.
Here’s how you can restore a Microsoft Onedrive backup:
- Log in to your OneDrive account.
- From the left navigation pane, Click Settings > Options.
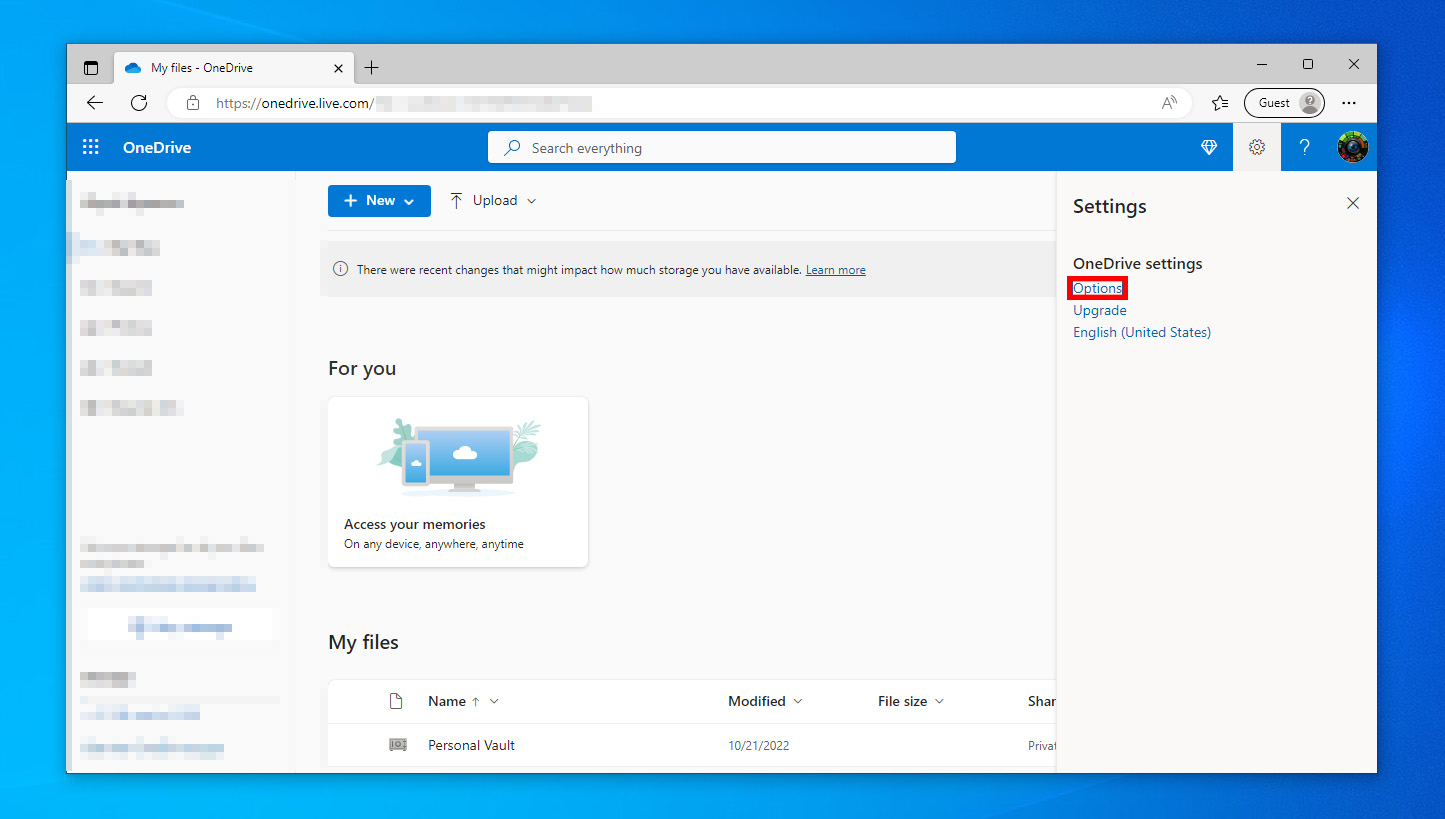
- Expand the menu > Restore your OneDrive.
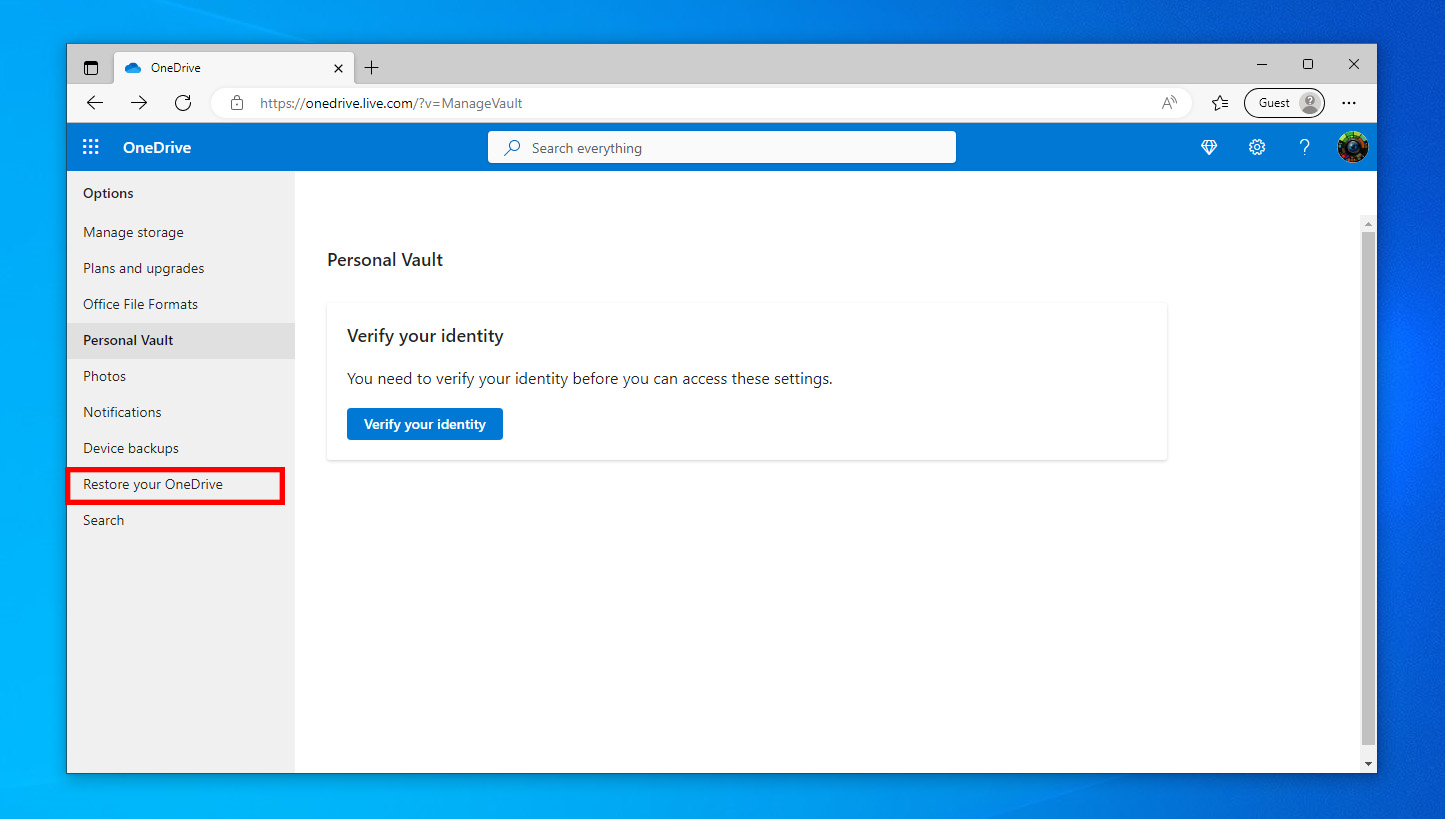
- Now, expand the dropdown list to select a date or click Custom date and time.
- Browse through the activity chart to undo any recent activities


