
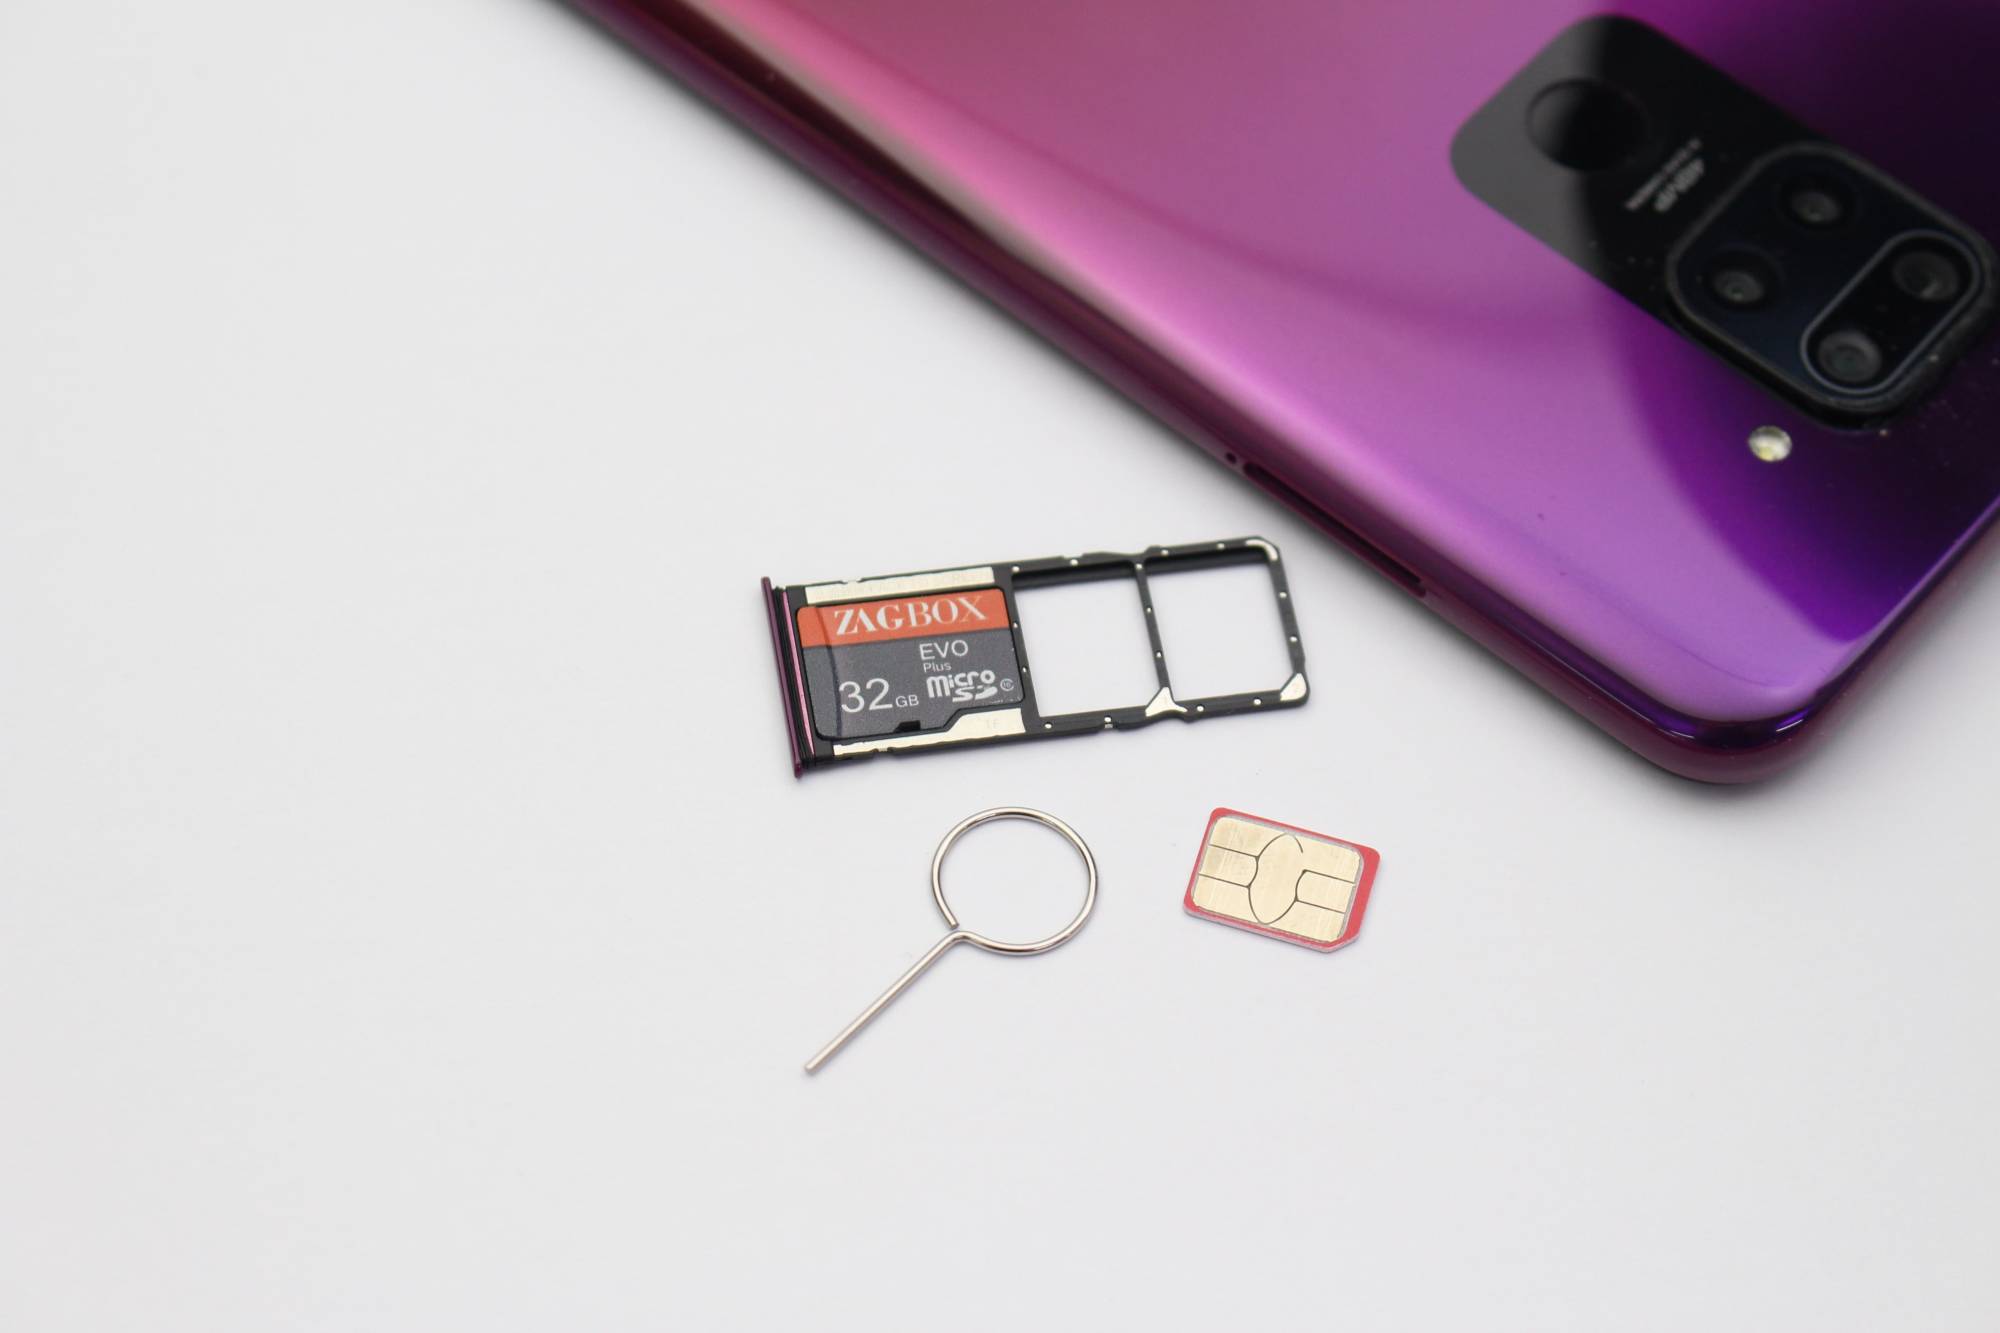
As an Android user, you likely use an SD card to expand your phone’s storage capacity, and store photos, videos, and other types of files. But accidents happen, and you may mistakenly delete some of these files, or they may go missing due to other reasons. In most cases, you can get back these deleted files by being proactive and following proper data recovery etiquette. The sections below describe the process in an easy-to-understand manner.
Table of Contents
Why is It Possible to Recover Deleted Files on Android
Did you know that when you delete files on your phone or computer, they’re not really deleted at all? On an Android phone, when you delete a file, Android marks the space that it was taking up as empty. In other words, it acts as if it has space free. And, when it needs that space, it will write over that file. But in the meantime, before it writes over that file with a new file, the old files is still there, even if it doesn’t show up as being available within Android.
Because of that, there are a few ways to increase your chances of being able to recover a deleted file. No matter when you find out you deleted a file:
- stop using your phone as much as possible as soon as you discover that your files have been lost.
- don’t install any new apps, don’t take any more photos, and don’t download any files — as it’s possible that those files will be written over the old file that you lost.
- a good way to make sure that you don’t accidentally download files in the background is to put your phone on airplane mode. That way, your phone won’t automatically download images and emails sent to you.
- if you can stand not using your phone right now, you could completely turn your device off — that way not even the Android operating system is writing over your old files.
Where to Look First For Lost Android Files
Once you have stopped using your phone and ensured that it’s no longer writing files to your SD card, there are a few things to check before resorting to more intense data recovery techniques.
Method 1: Check the App-Specific Trash Folder
While Android doesn’t have a native Recycle Bin feature, most third-party file explorers and photo apps offer it within the app. Your first course of action should be to look in these app-specific trash folders and see if your files are there. If they are, you can restore them.
As an example, let’s take the Google Photos app:
- Launch the Google Photos app on your phone.
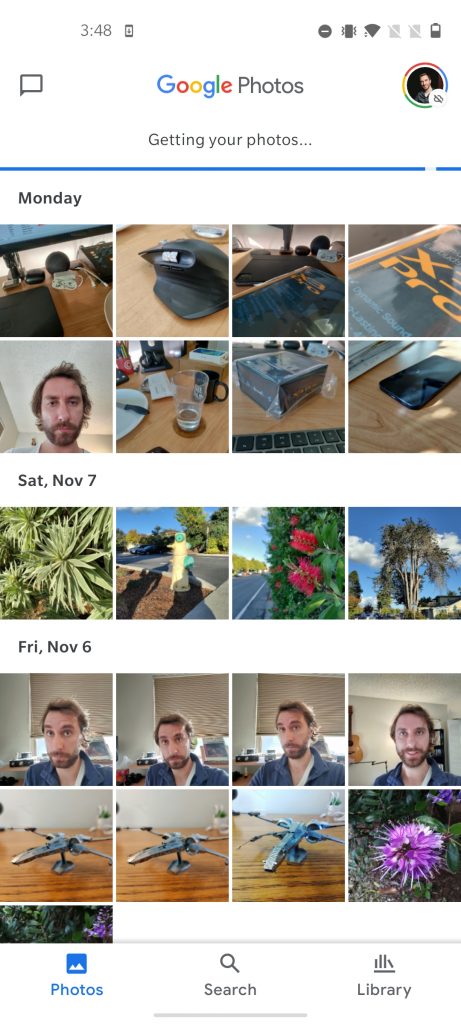
- Tap on Library.
- Tap on the Bin option to see recently deleted photos and videos.
- Long tap on a photo/video to select it. Select all the photos you wish to restore and tap Restore.
The process will be similar for all apps–find the Recycle Bin/Trash/Bin folder, select the files you wish to restore, and tap the restore option. However, not all apps may keep deleted files for 60 days, like Google Photos does.
Method 2: Check for Lost Files in Messengers
It may be a long shot, but you could check messaging services like Facebook Messenger, Telegram, or WhatsApp for missing files. This only works if you sent or received the files using these messaging services.
Let’s take a look at WhatsApp to better explain this method:
- Open WhatsApp.
- Open the chat in which you’ve received or sent the file.
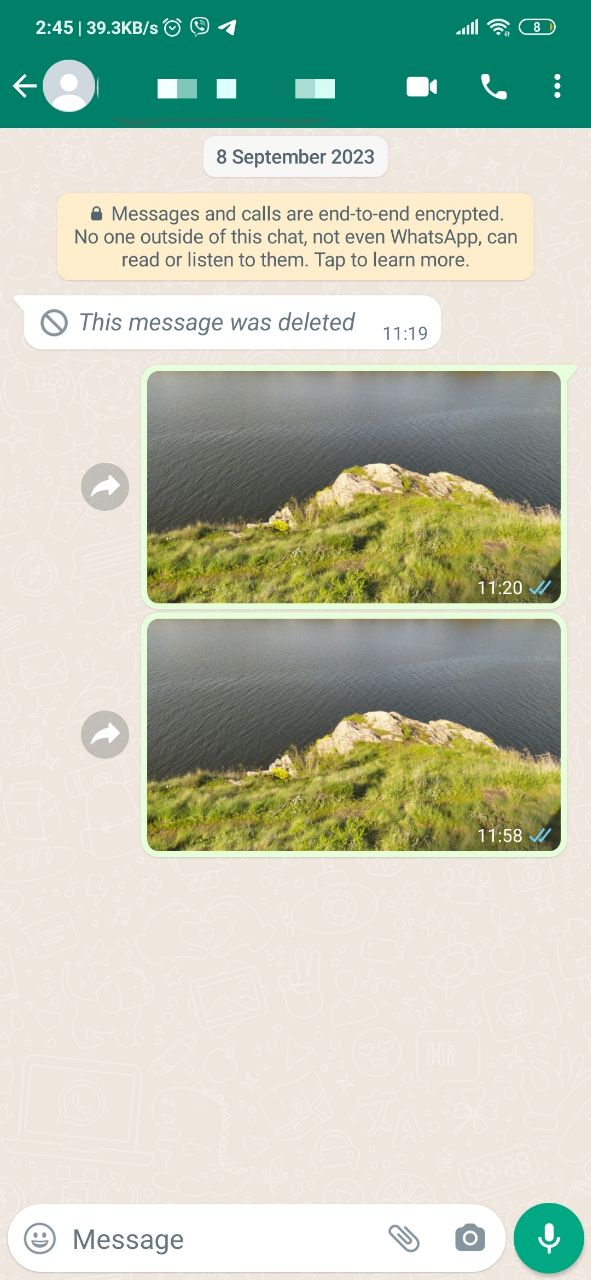
- Tap on the contact name at the top.
- Tap on Media, Links, and Docs to see all the files sent or received on the chat.
- Download the required files accordingly.
If you have lost files due to a virus attack, you should immediately turn off your device and skip straight to the data recovery tool below. The same is true of any device failure, or situation in which you can’t turn on your phone, like if you damaged it.
How to Recover Data from Android SD Card
If it turns out you need to turn to another data recovery method, you may need to look at third-party tools. There are a few data recovery tools out there, and you can download them even straight from the Google Play Store.
Method 1: Recover Deleted Files by Directly Connecting SD Card
Disk Drill is a data recovery tool that can scan SD cards and other types of storage, search for lost or deleted files, and save them to your computer. From there, you can search through those files and save them back to your phone, or keep them on your computer.
There are a few ways to connect your phone’s storage to your computer to be used with Disk Drill. Either you could take the SD card out of your phone, and connect it to your computer using a card reader, or you could connect your actual phone to your computer. Taking your SD card out is by far the easiest method, so we’ll start with instructions for that.
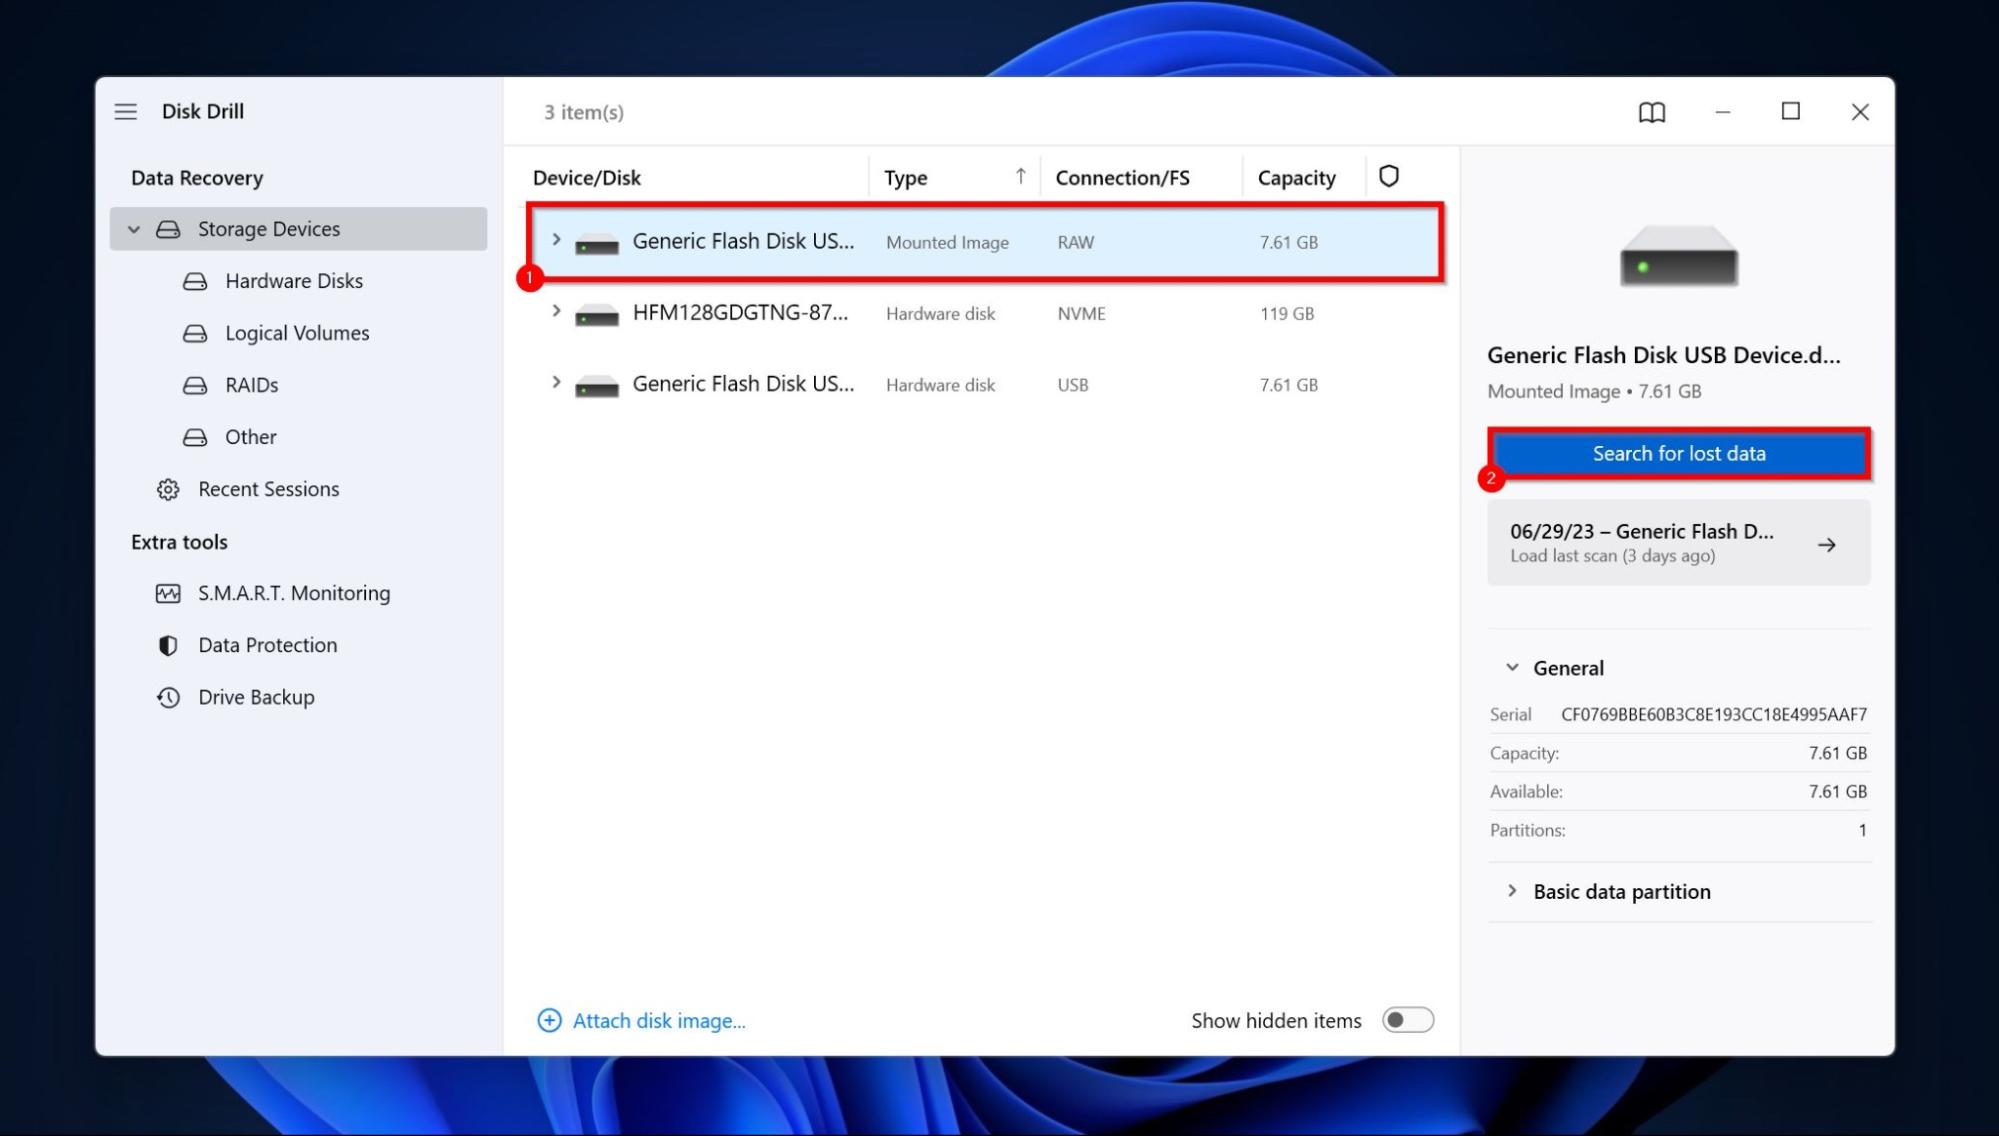
- Download Disk Drill and install it.
- Connect the SD card to your PC. Ensure you use a quality adapter.
- Open Disk Drill, select the SD card and click on Search for lost data to begin the data recovery scan.
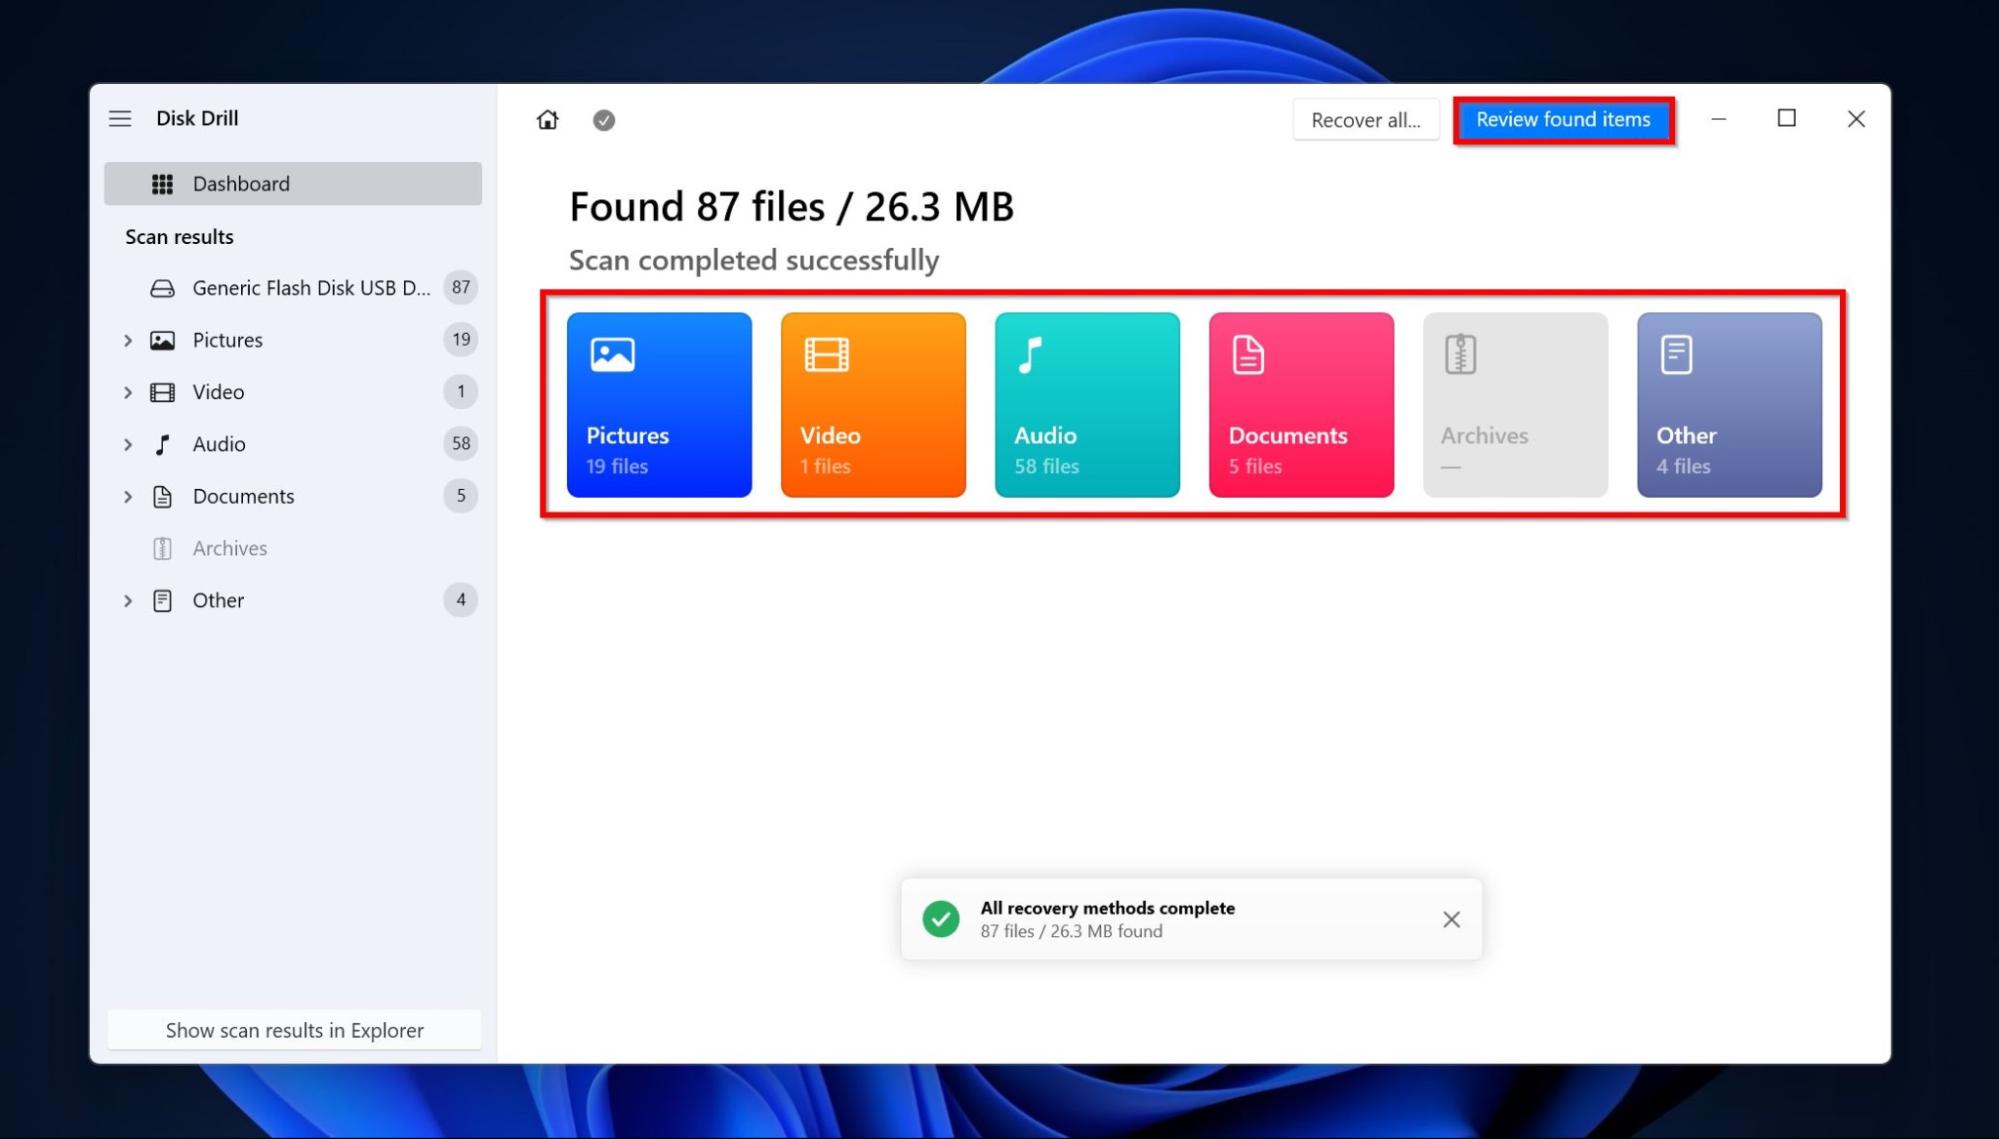
- Click on Review found items once the scan completes. If you only wish to see specific file types, click on the relevant file type tile instead (Pictures, Video, Documents, Archives, and Other).
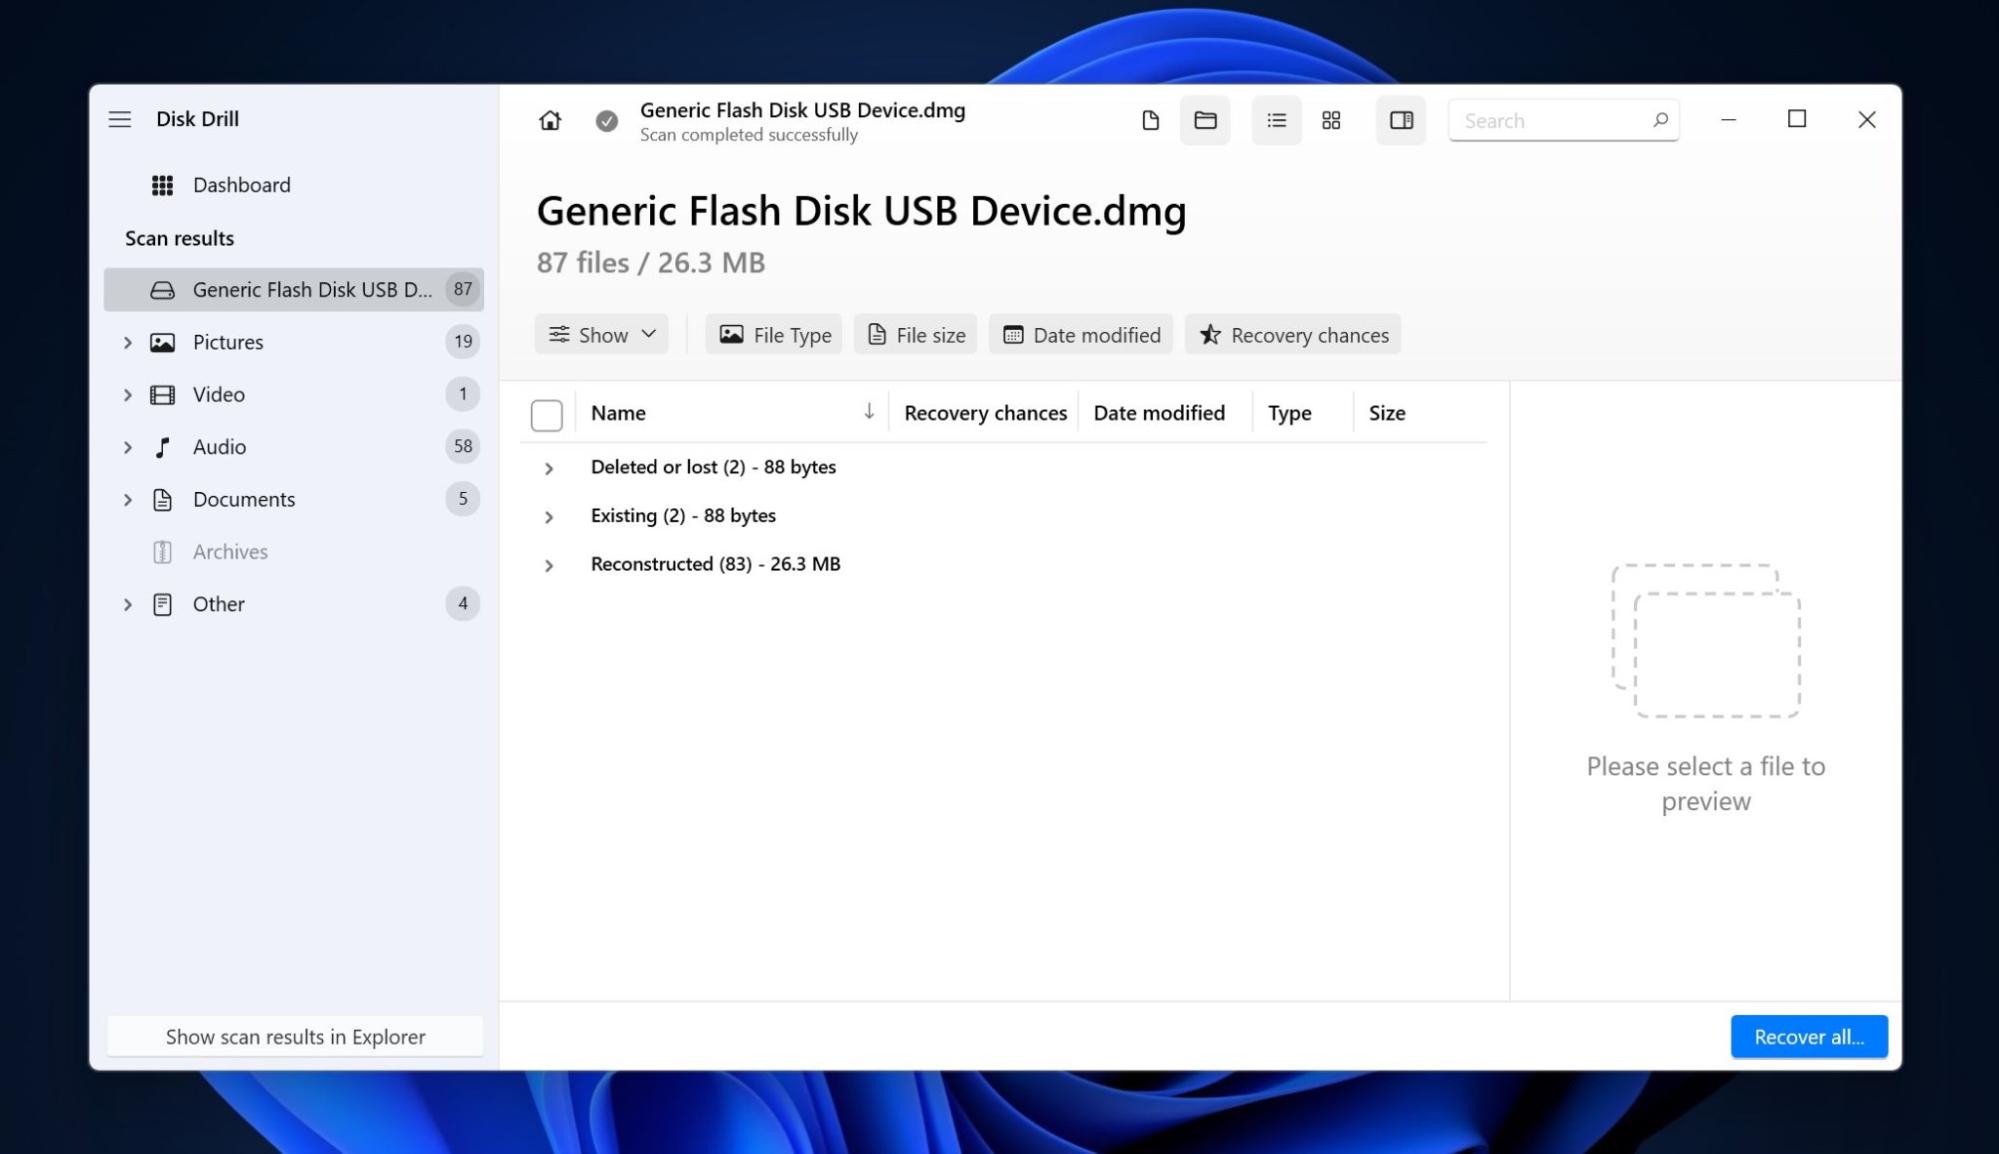
- Expand the Deleted or lost and Reconstructed sections.
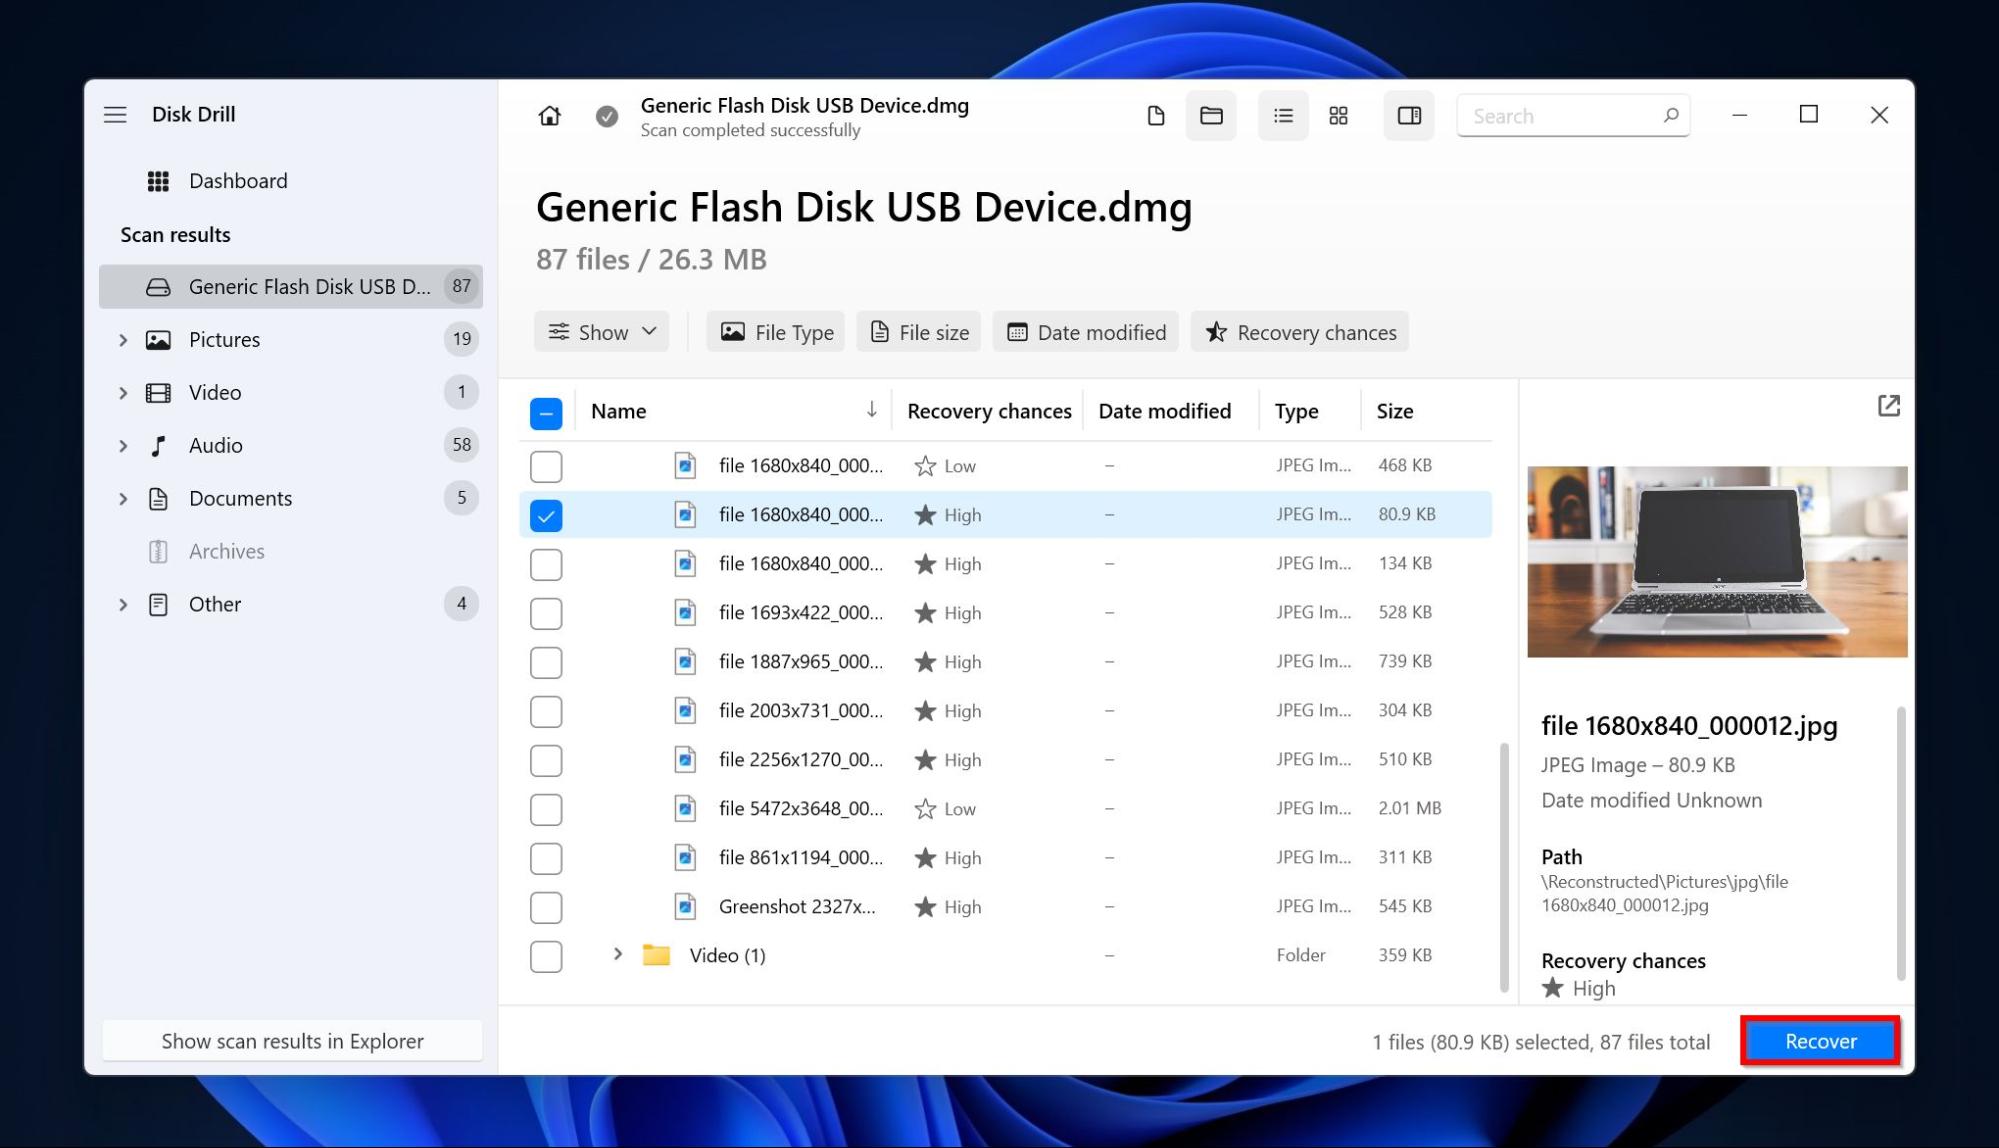
- Select the files you wish to recover. Disk Drill displays a preview of the currently selected file, but you can manually preview any file by clicking the eye icon next to its filename. Click on Recover.
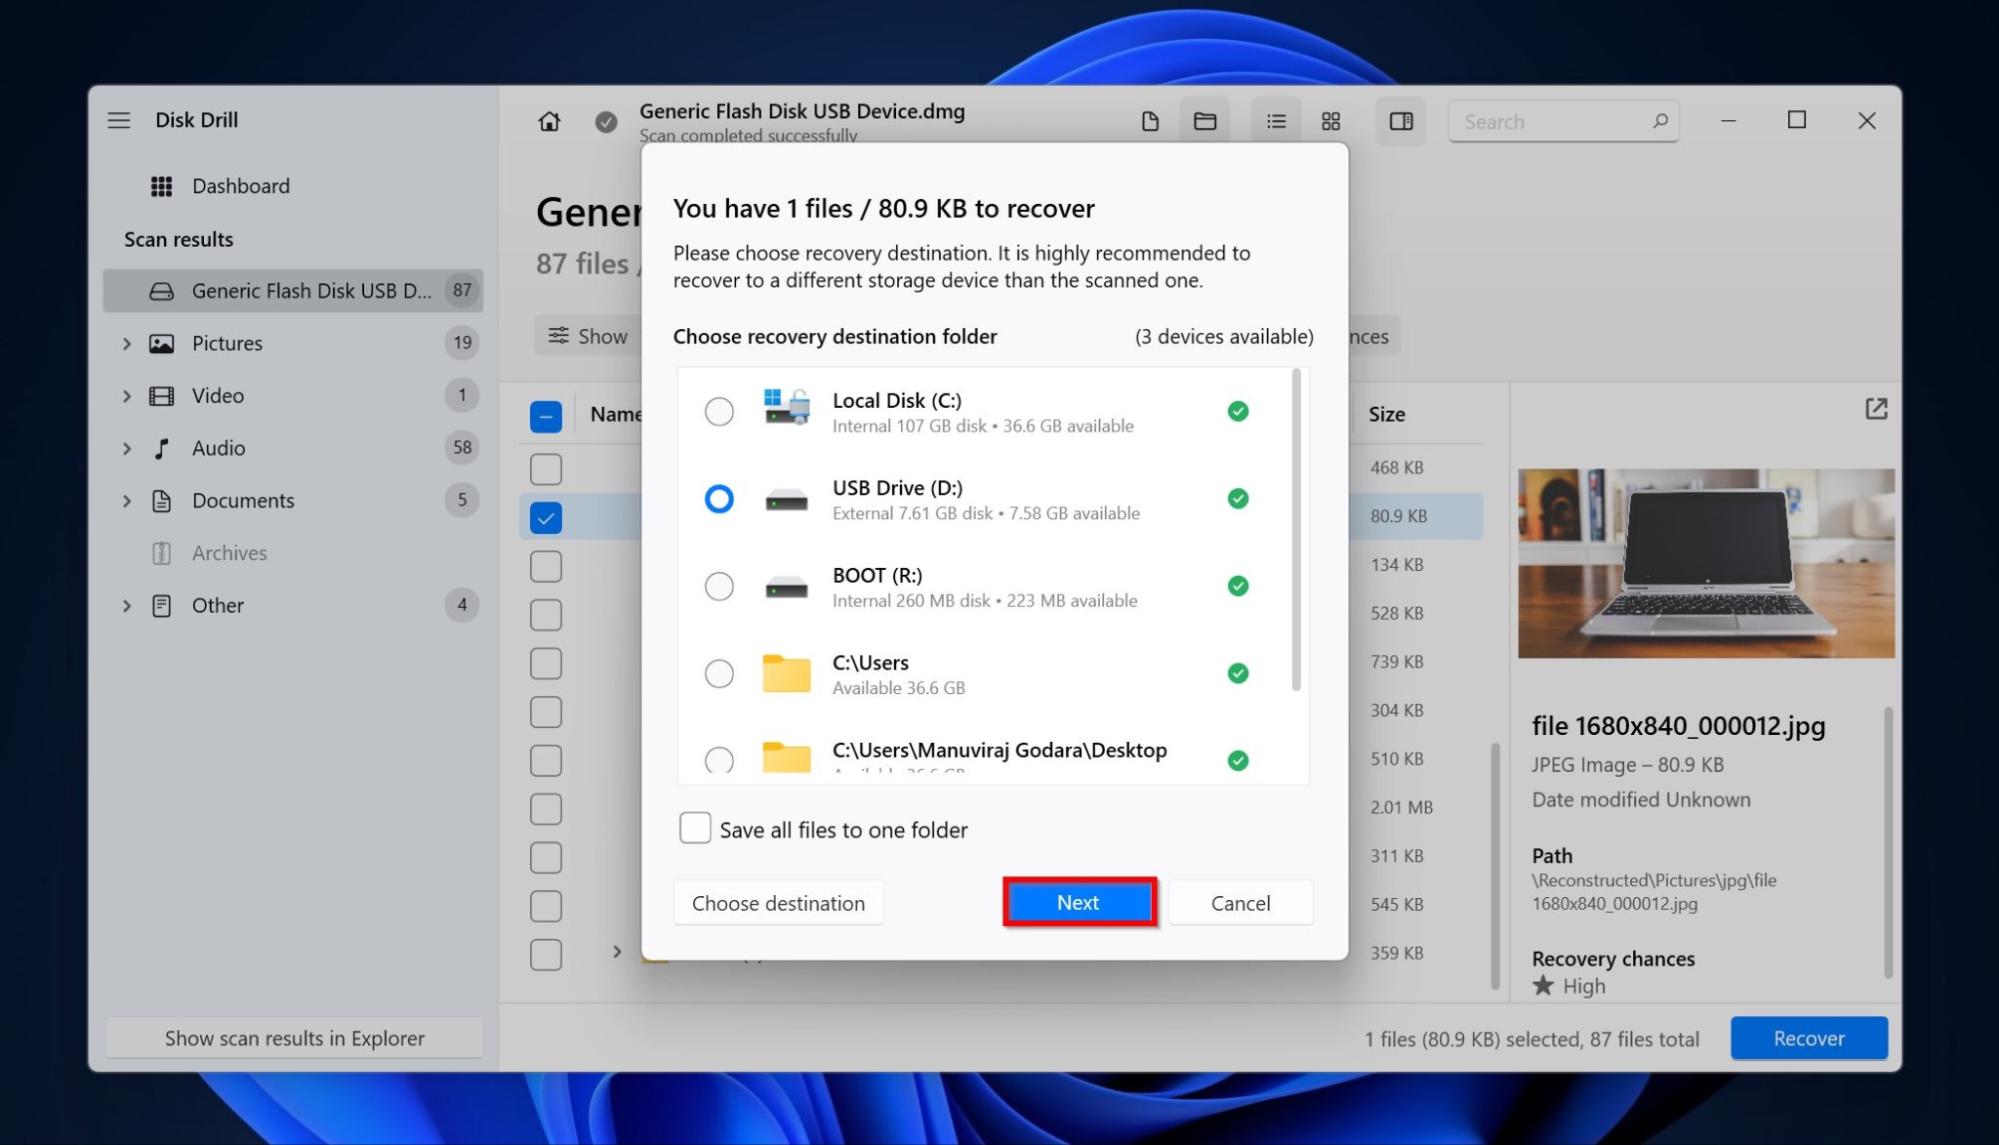
- Choose a recovery destination for the files and click Next. It’s best to not recover these files directly to the SD cards, unless you’re sure you don’t want to recover any more files from it and the SD card itself is perfectly fine.
- Disk Drill will recover the selected files.
Note: You can use Disk Drill to recover data from your SD card while it’s inside the smartphone, but it will require you to root your smartphone. However, we recommend that you directly connect the SD card to your PC – it works for both macOS and Windows versions of Disk Drill and also prevents Android processes from overwriting the deleted files.
Method 2: Recover Data from the SD Card by Connecting the Smartphone to Your PC
If you’re unable to procure a micro SD card adapter, or prefer to directly connect the smartphone to your PC, a tool like Tenorshare UltData is a good choice. We recommend this method in situations where you just wish to recover deleted photos, and WhatsApp app data like pictures, videos, chats, and documents. You won’t need to root your phone when using Ult Data, but the functionality is quite limited when compared to Disk Drill.
Note: UltData will install an app on your Android device, which can sometimes overwrite the files you wish to recover. Additionally, the app requires numerous permissions, which can pose a security risk.
Here’s how to use UltData to recover data from your Android phone’s SD card:
- Download and install UltData on your PC.
- Connect your smartphone to the PC using a USB cable. Ensure that you’ve enabled USB debugging.
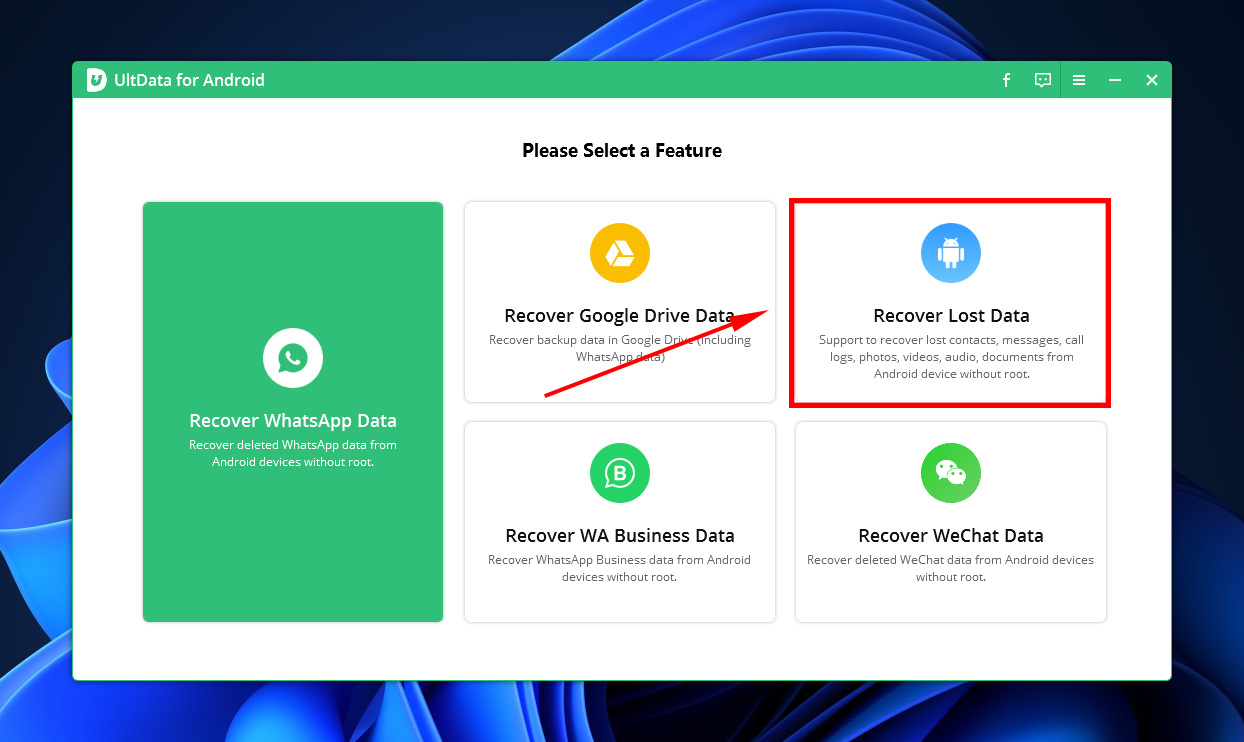
- Launch the UltData app on your computer and choose Recover lost data.
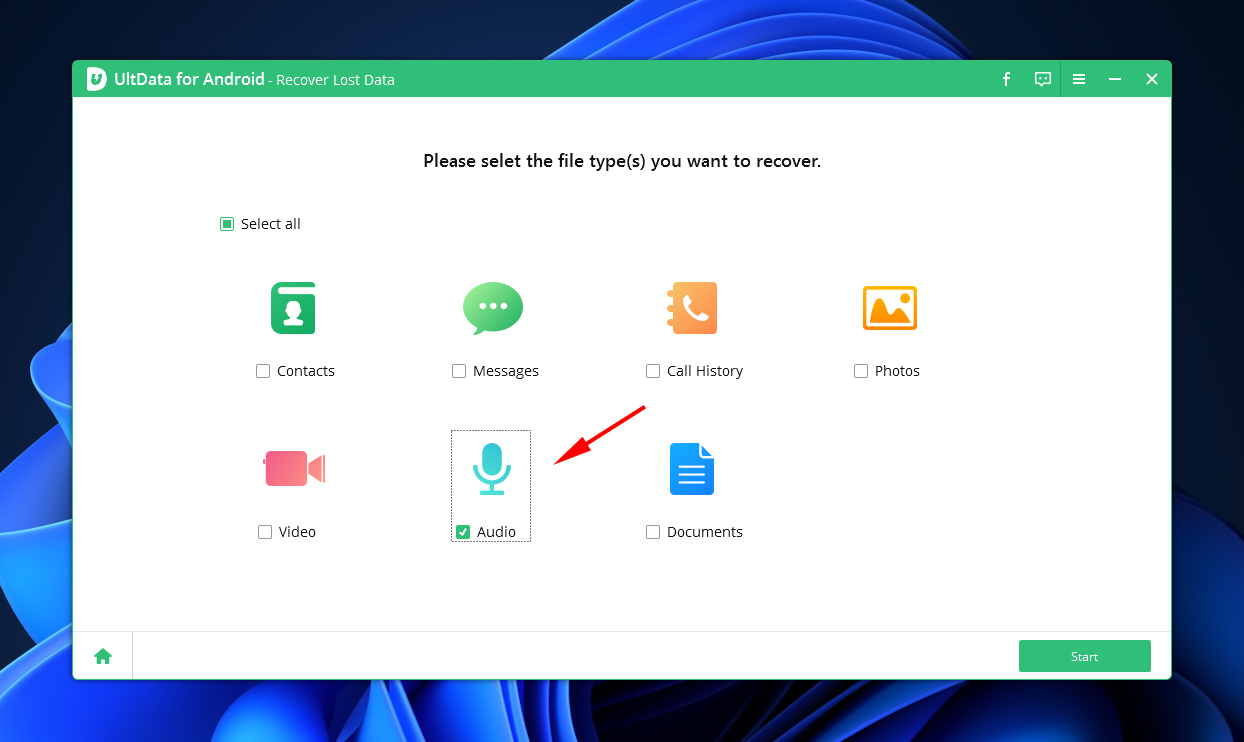
- Select the file types you wish to recover and click Start.
- Wait for UltData to scan your smartphone.
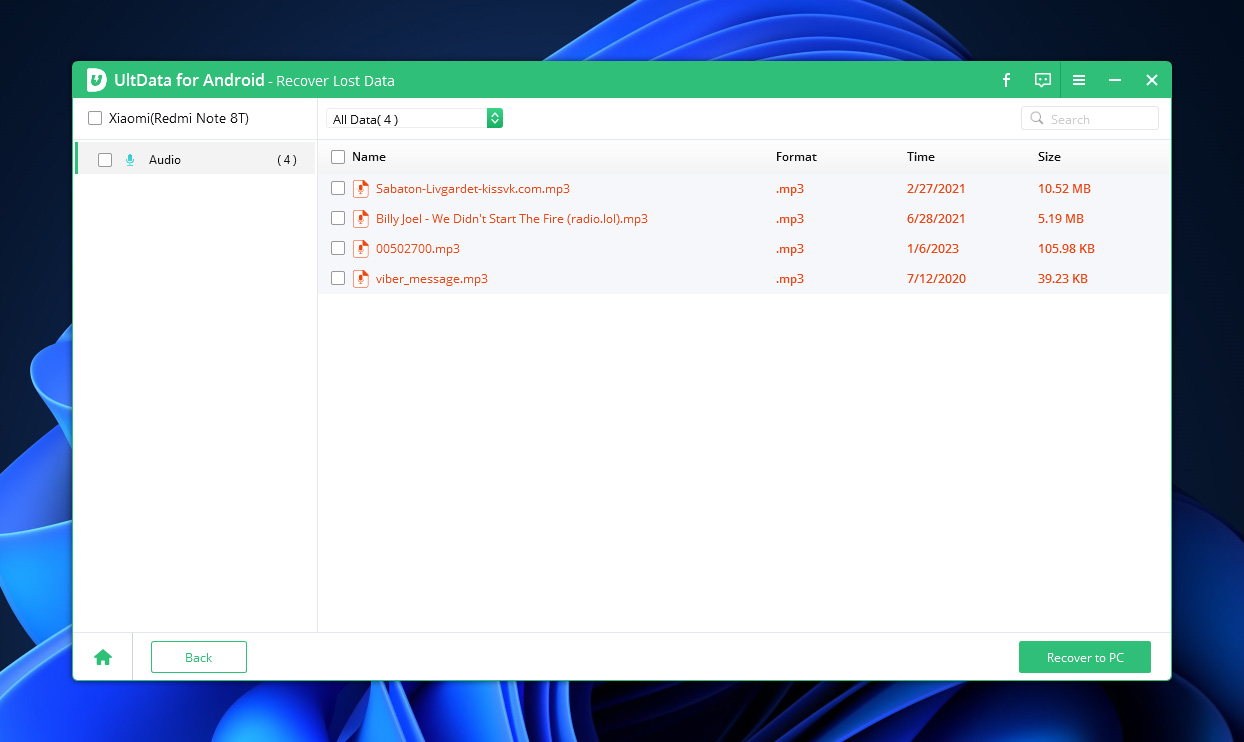
- Select the files you wish to recover and click the Recover option.
Method 3: Recover Data from the SD Card Without a PC
Don’t have access to a PC? You can still perform a limited data recovery procedure using an Android data recovery app, Disk Digger. The app has a free version that lets you recover images and videos. While photos can be recovered without rooting your phone, video recovery requires you to root the device. The paid version supports recovery of all file types, but you also need to root your Android phone for it to work.
Here’s how to use DiskDigger to recover data from your Android SD card:
- Download DiskDigger from the Google Play Store.
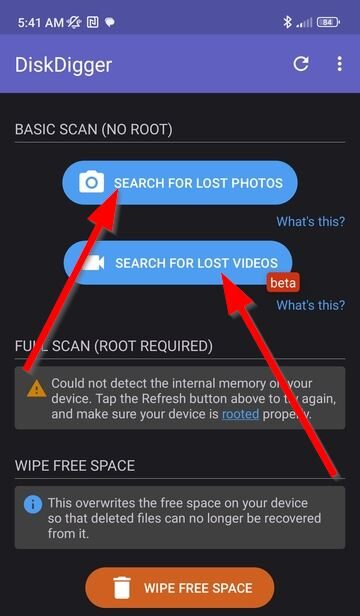
- Launch the app. You’ll see two options—Basic Scan, and Deep Scan. If your Android device is not rooted, stick to Basic Scan, which lets you recover deleted images only. On rooted Android devices, you can use Deep Scan, which lets you recover all file types.
- Tap on the required scan type.
- Select the file types you wish to recover and tap OK.
 Tick the files you’d like to recover and tap the Recover option.
- Choose whether you’d like to save the files to an app (such as Google Drive), a local storage location, or you’d like to upload them to an FTP server.
Preventing Data Loss in the Future
There are a few things you can do to prevent data loss in the future, though the method will vary from app to app and file to file.
📷 Use Google Photos on your Android device. Google Photos automatically backs your photos up to the cloud, meaning that if you lose your device or it malfunctions, you’ll still have access.
☁️ Other apps have similar cloud storage solutions. If you use Photoshop, for example, you can automatically back up your images to your Adobe Creative Cloud. And, if you use Microsoft Office apps, you may have backed files up to Microsoft OneDrive.
📲 Make sure that full backups of your phone are enabled. To enable backups, open Settings, tap “System,” then tap “Backup” and toggle the switch to on.
Conclusion
There are several reasons that could lead to data loss from your Android SD card, but the good news is that you can almost always recover your files if you act quickly and use the correct data recovery methods. But, before proceeding with full-fledged data recovery, it’s a good idea to check app-specific trash folders and messaging apps like WhatsApp for your files.
If you need to perform data recovery, we always recommend that you connect the SD card directly to your PC and then use a reputable data recovery tool like Disk Drill to recover your data. If that’s not possible, you can use tools like UltData and DiskDigger to perform data recovery.
FAQ
- Download Disk Drill and install it on your PC.
- Connect the SD card to your PC.
- Open Disk Drill, select the SD card, and click Search for lost data.
- Click on Review found items.
- Select the files you wish to recover and click Recover.
- Choose a recovery destination for the files and click Next.
- Download Disk Drill and install it.
- Connect the micro SD card to your PC.
- Launch Disk Drill, select the micro SD card, and click Search for lost data.
- Click Review found items.
- Select the files you wish to recover and click Recover.
- Select a recovery destination for the files and click Next.


")

