
Almost everyone has accidentally replaced a valuable file at least once in their life. All it takes for such a mistake to happen is just one click of the mouse. Luckily, there are a few ways out of such an inconvenient situation.
So how to recover overwritten files on Mac? What should you do if you don’t have a backup available with the original file? Read on to get an answer to all your questions.
Table of Contents
Where Do Replaced Files Go on Mac?
It can happen insanely fast: you create a new file called, for example, invoice.docx, and when saving the file, it occurs to you that there already is a file with such a name on your Mac. Then you get asked whether you want to replace it with the new one and if you click Yes instead of No, it may seem like the old file is gone forever.
But what happens to the replaced file? Overall, here’s how file overwriting works:
- The original file gets flagged by macOS as deleted.
- The new file gets saved somewhere on the disk.
This is especially true with modern SSDs. When you overwrite a file, the drive performs wear leveling, and therefore there are high chances that the other file will be saved to a different location. In this process, the original file doesn’t actually get erased (it just stays ignored), making it possible to recover it.
However, there are many different file systems and implementations of them, so if you want to recover a file replaced by another file with the same name, it is best to stop using the disk where that file is located and start the recovery process as soon as possible.
4 Methods to Recover Replaced Files on Mac
In general, if you accidentally overwrote a file, there are four main ways you can recover it: with the help of data recovery software, via Time Machine, from a cloud backup, or using your file history. You should choose a suitable method depending on your situation.
Here are step-by-step instructions for each file recovery method.
Method 1: Data Recovery Software
Using data recovery software is one of the quickest and hassle-free ways of recovering overwritten files on your device. A great example of such software is Disk Drill. It is a reliable and versatile data recovery tool that can be used for restoring overwritten files on Windows and Mac computers.
It will be possible to recover an accidentally replaced file on your Mac with the help of such software only if the file is still physically located on your disk and hasn’t been overwritten with new data.
Important: As soon as you notice that a file has been mistakenly replaced, stop using the disk on which the file is located. This will increase your chances of successfully recovering it.
Follow these steps to recover saved over files on Mac via Disk Drill:
- If you want to recover overwritten files on an external hard drive, then connect it to your Mac (if the file’s located directly on your Mac, skip this step).
- Launch Disk Drill.
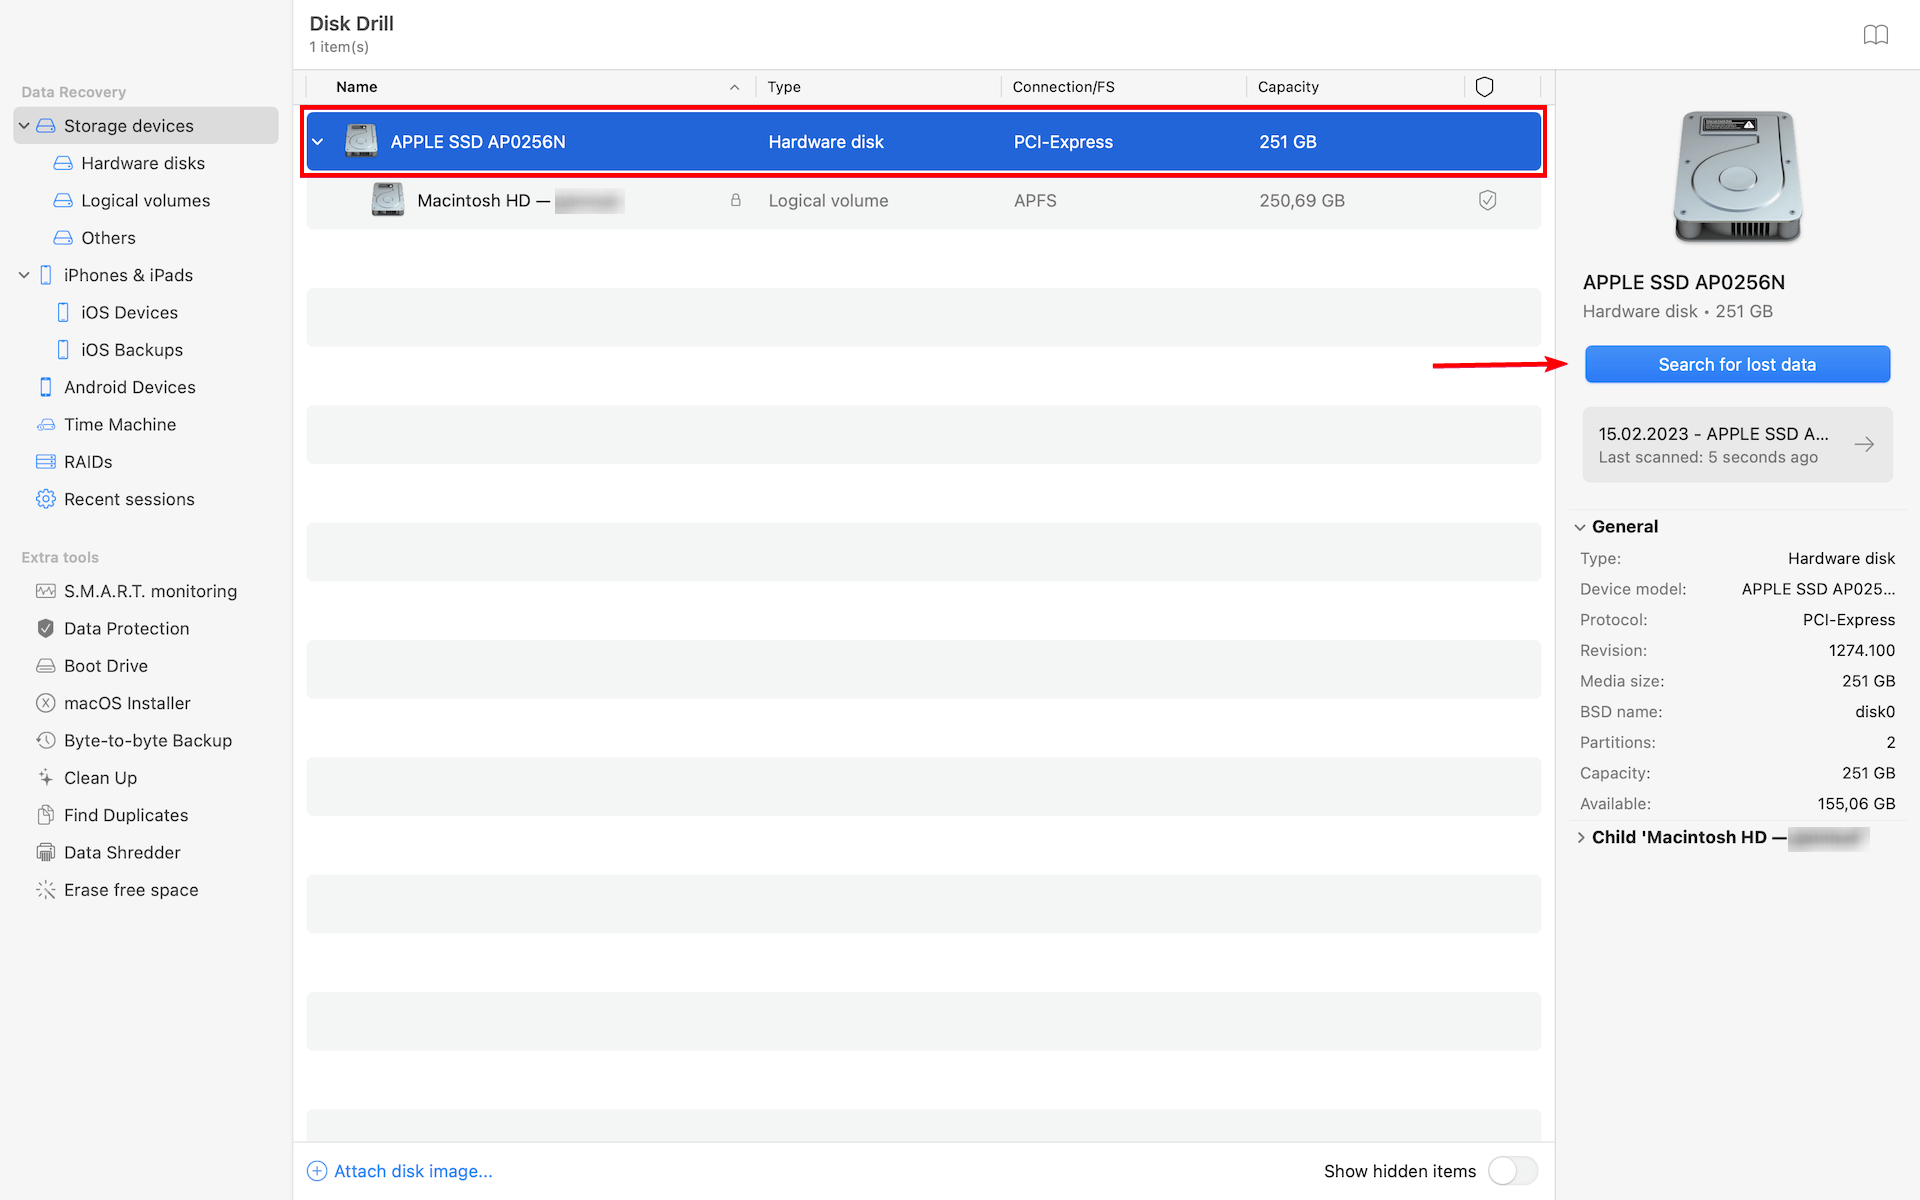
- From the sidebar, click the Storage devices tab. Look for the drive containing the needed files on the list and click it. Click the Search for lost data button.
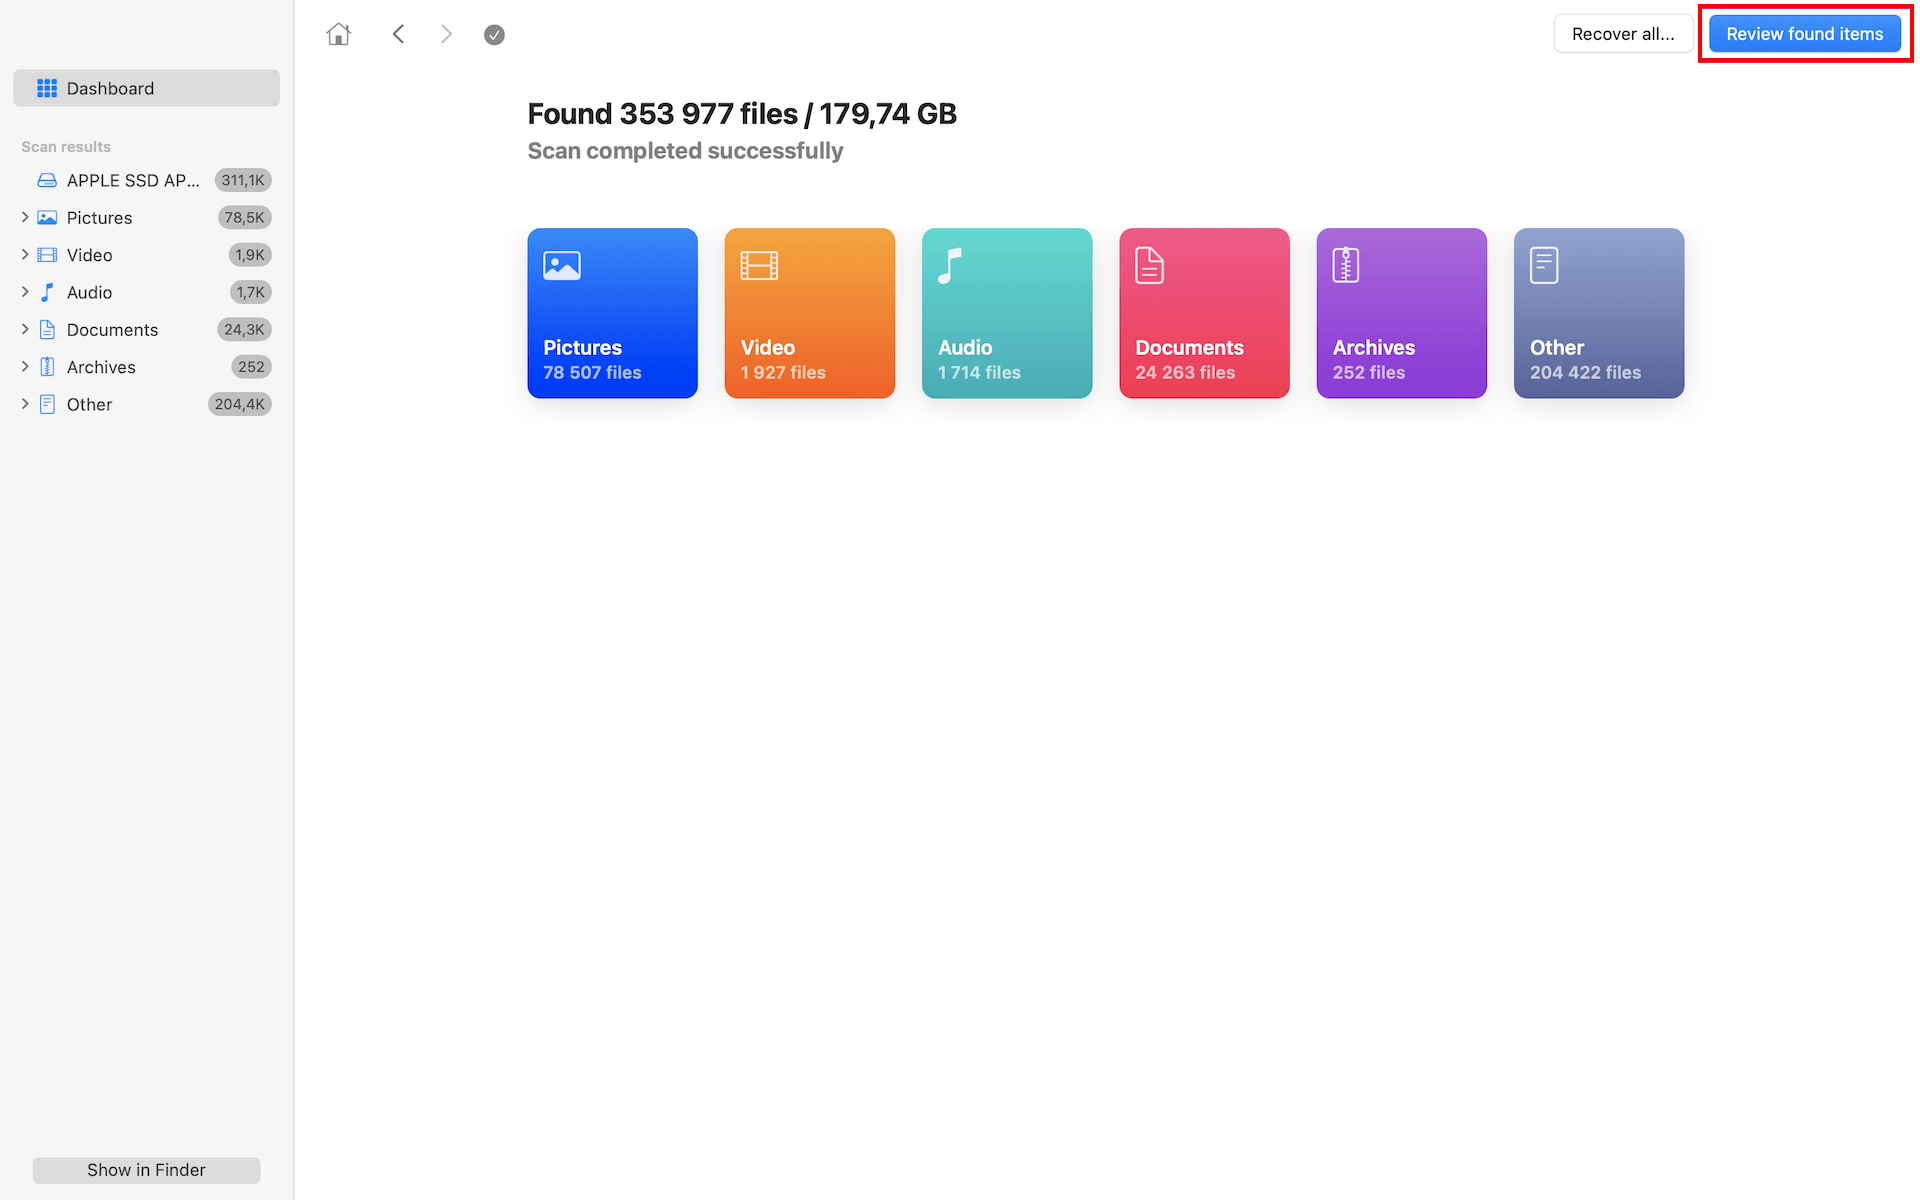
- During the scan, you’ll be able to preview the found files. To do it, click the Review found items button.
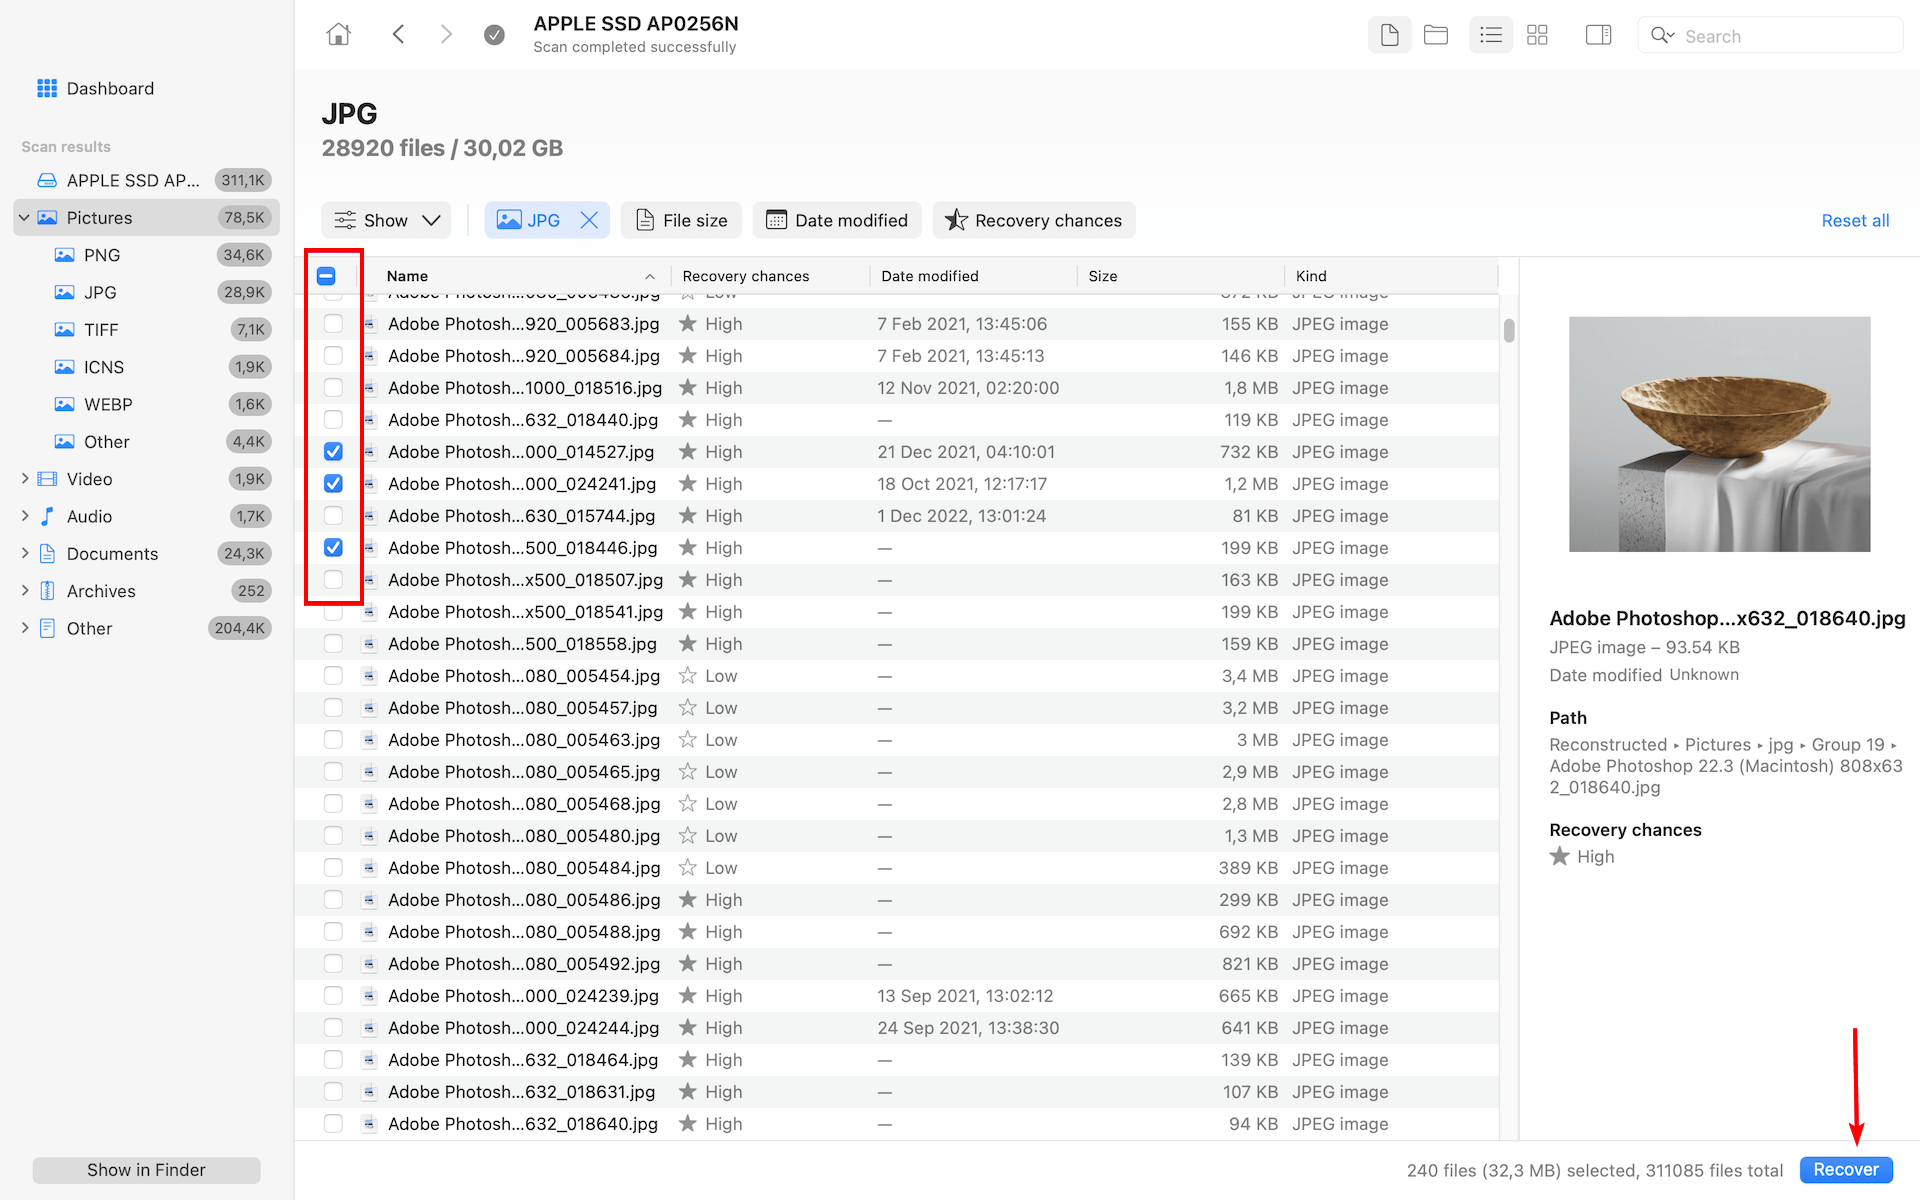
- Once you find the overwritten file, select it by placing a checkmark near the file. Click Recover to retrieve your file.
- Choose where you want to store the recovered file and click Next to proceed.
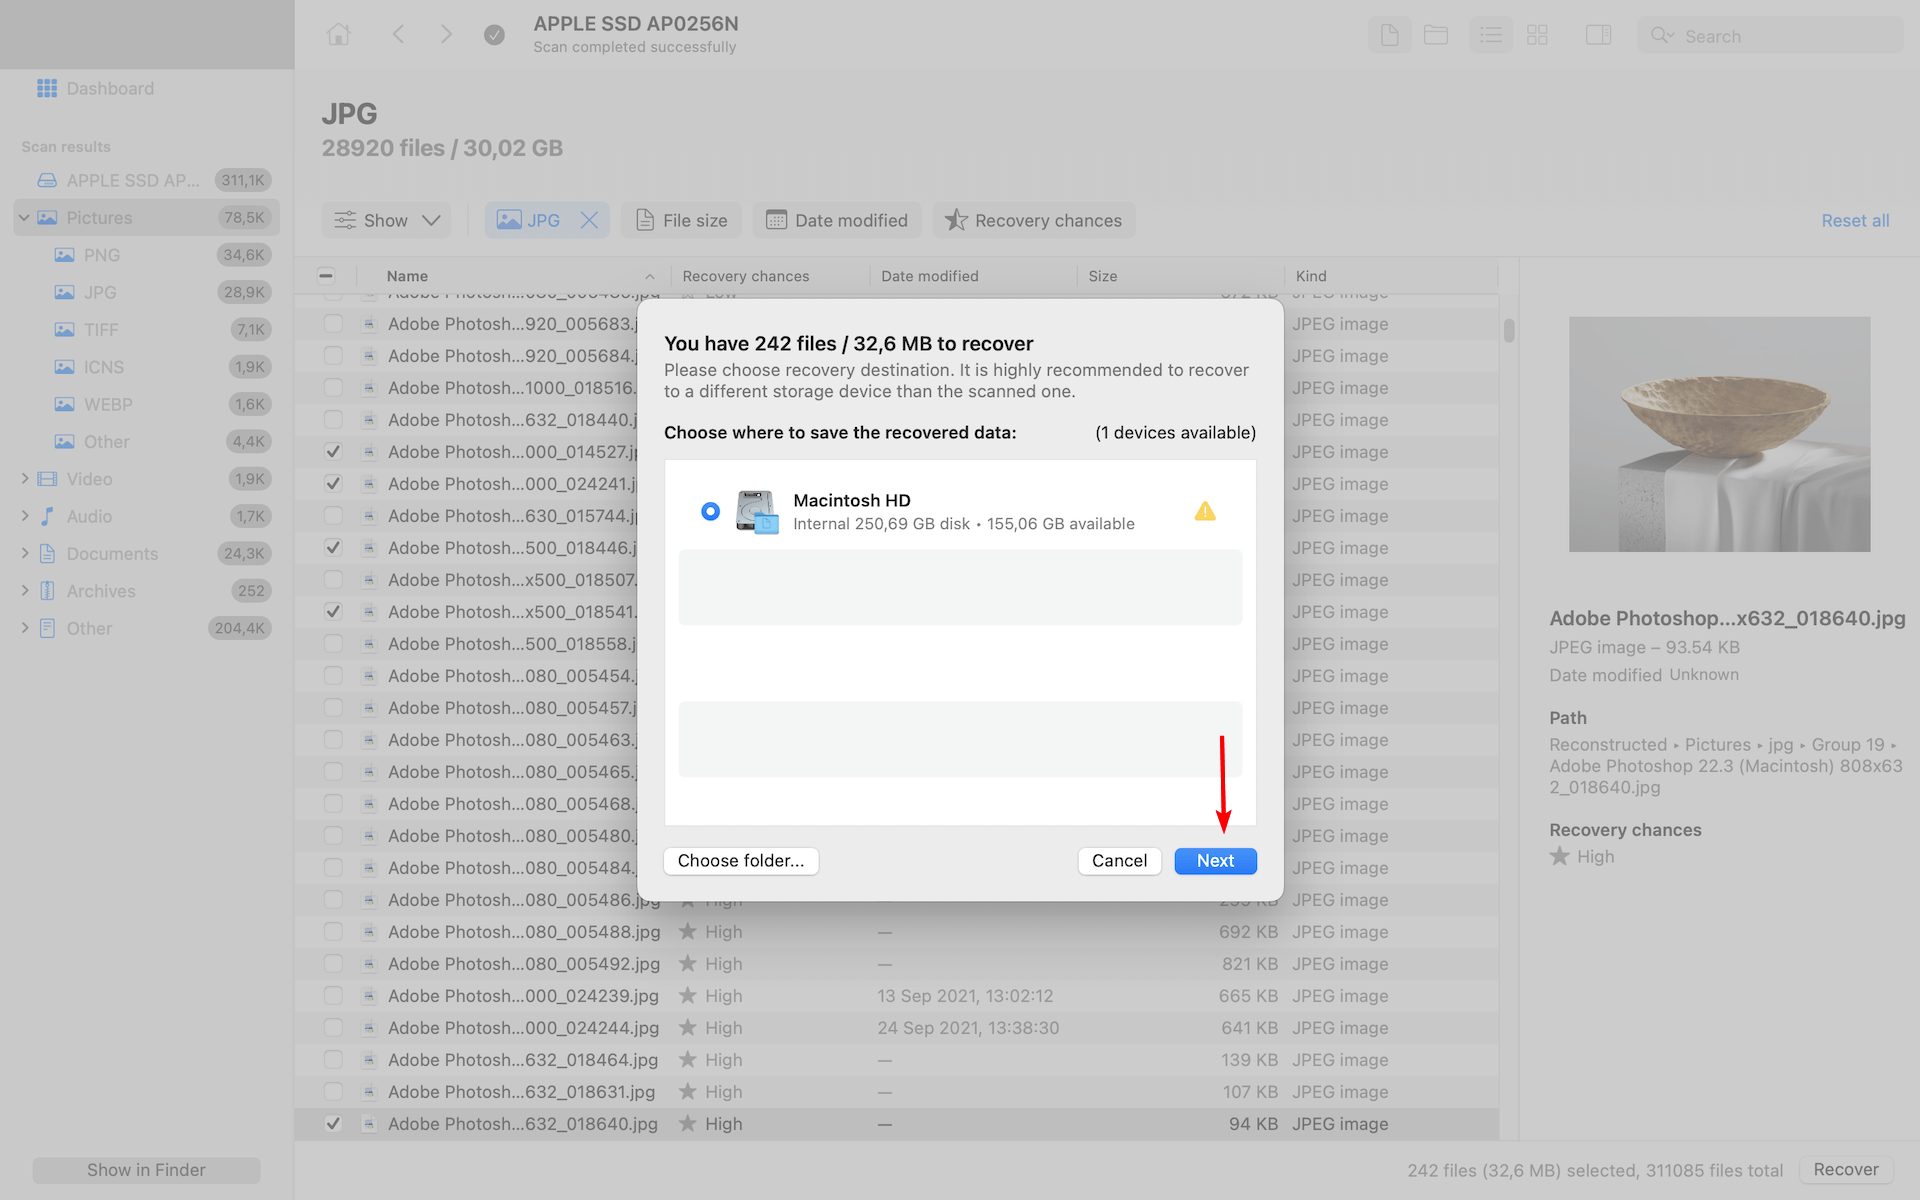
Important: It is best not to restore the overwritten file to its original location to avoid file corruption.
Method 2: Time Machine
Time Machine is a built-in macOS tool that can be used for various purposes, including for recovering accidentally replaced files on Mac. However, there is one major drawback of this software: if your backup doesn’t contain the original file, you won’t be able to restore it.
Here’s what you should do to recover a file that was replaced via Time Machine:
- Connect the external drive containing your Time Machine backup to your Mac.
- Launch Finder (press Command + Shift) and open the folder that contains the overwritten file.
- From the Menu Bar, click the Time Machine icon.
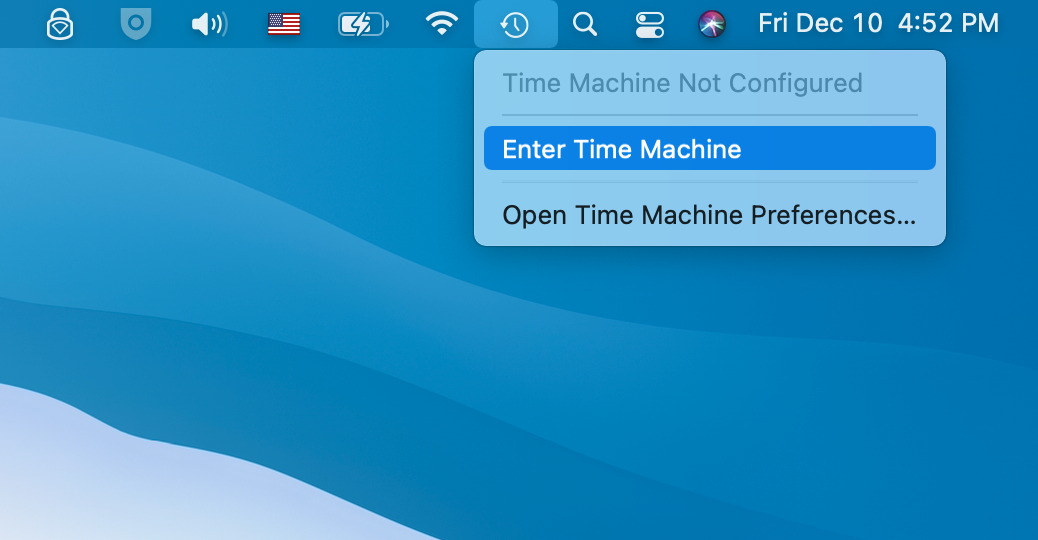
- Click Enter Time Machine.
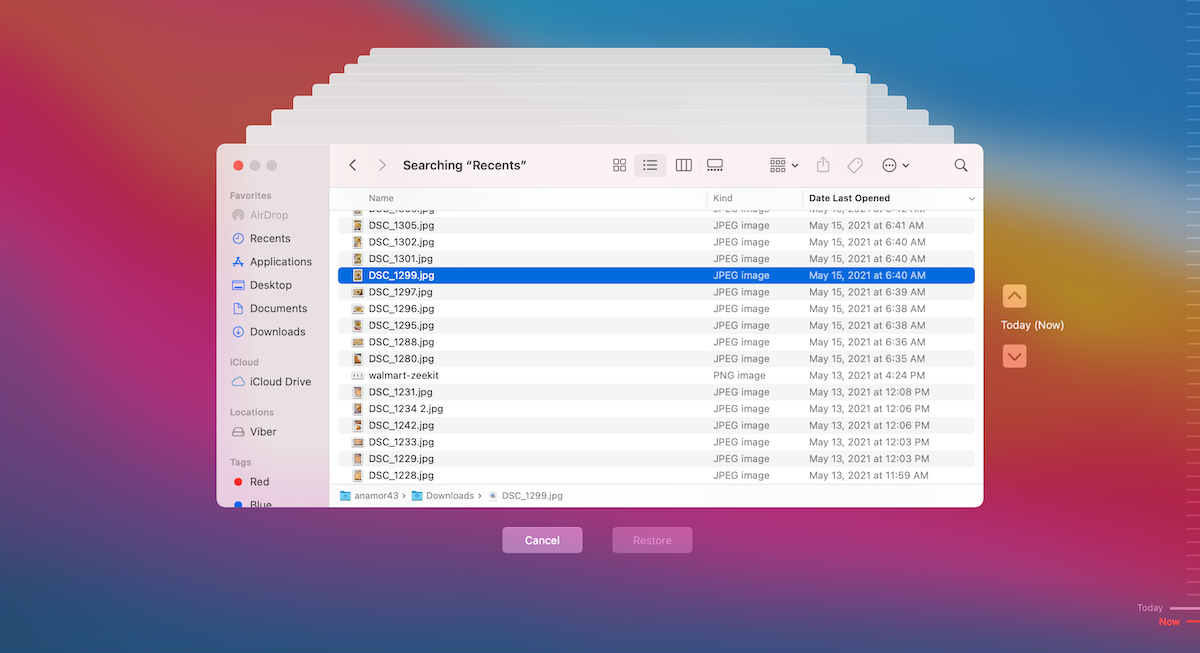
- Use the arrows next to the screen to navigate through your backups. Once you’ve found the needed file version, hit Space Bar to preview it, or click it to select the file. Then click Restore on the bottom of the screen.
That’s it! After doing this, the original file should reappear on your Mac.
Method 3: Cloud backups
If instead of backing up your Mac via Time Machine, you use a cloud backup service, it’s possible to use that service to restore replaced files. Whether you’re using iCloud or any other online backup service (Dropbox, Google Drive, or OneDrive), the process of recovering overwritten files should be pain-free and quick.
Keep in mind: if you’re using iCloud as your backup service, it will store your deleted files for 30 days before erasing them permanently. This is a good thing since you’ll have some time to retrieve the needed files.
Here’s how to recover replaced files on Mac via iCloud:
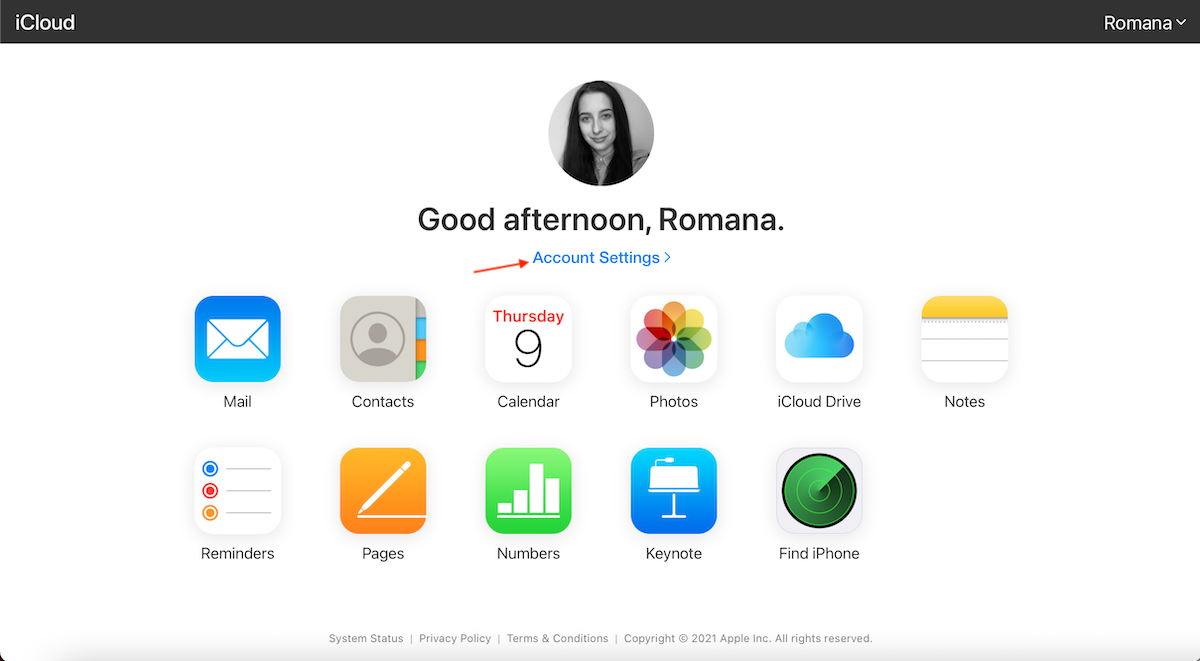
- Head to iCloud.com and log into your account.
- Click Account Settings.
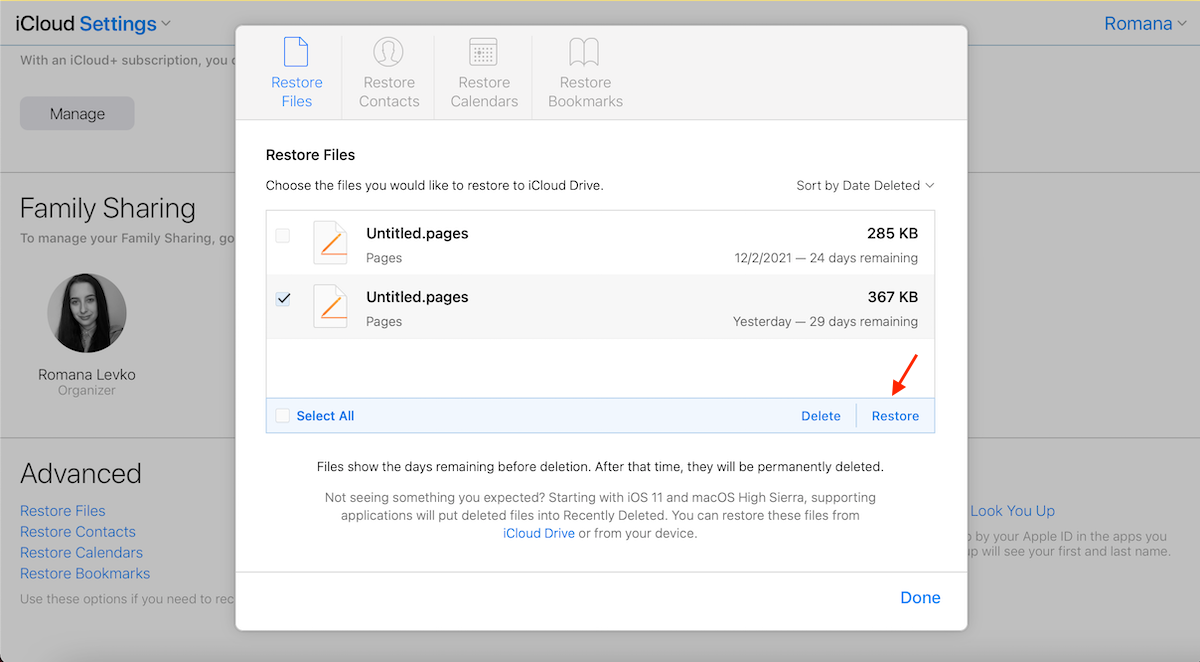
- Scroll to the bottom of the page until you see the Advanced tab. Click Restore Files.
- The service will show you all of the available files. Place a checkmark next to the needed file to select it.
- Click Restore under the list to restore the chosen file.
If you’re using a different online backup service, you should be able to get back a file you replaced as long as that service keeps a history of changes made to your files and as long as you’ve completed a backup at the right time.
Method 4: Document Versions
Many apps that are used on a macOS-powered computer (such as Pages, Keynote, Word, Excel, and others) have a feature called Revert To that lets you view your file history.
If you want to recover an overwritten file on your Mac directly through the app that way used to create that file, here’s what you should do:
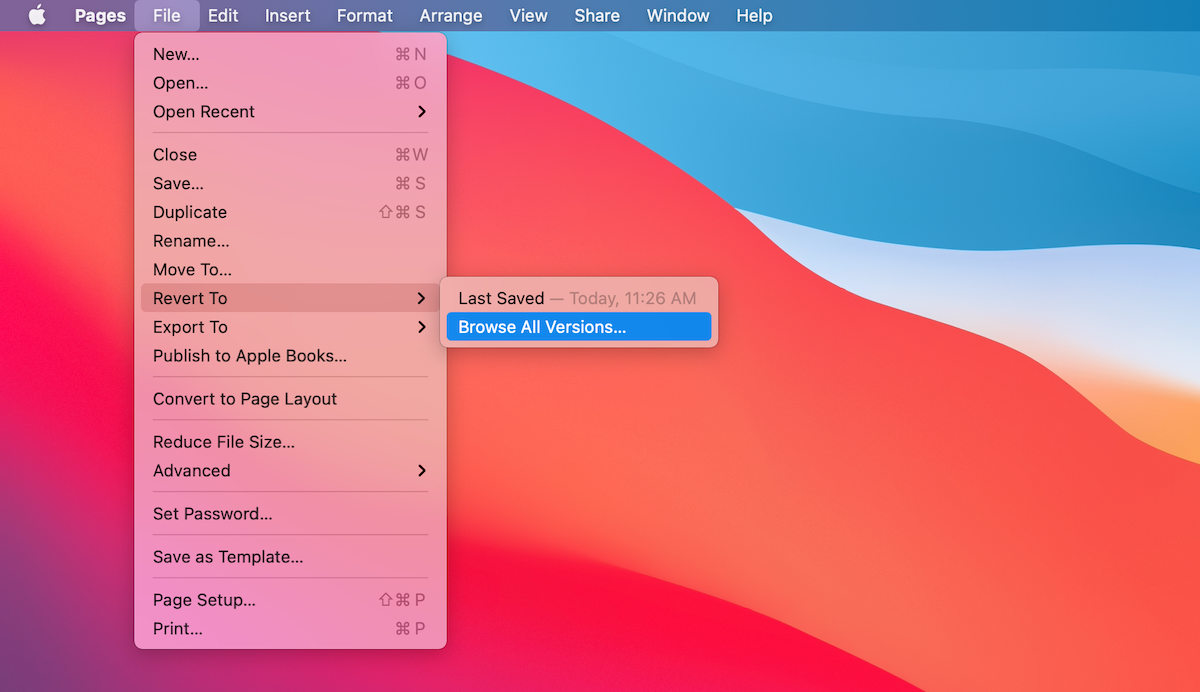
- Find the file that you wish to restore and open it. Then from the top screen menu, click File > Revert To and then click Browse All Versions.
- Scroll through all of the available file versions using the arrows on the right of the screen.
- Once you’ve found the needed version, click the Restore button to recover the file (or if you want to save both the overwritten file and the other version, press and hold the Option key and click Restore a Copy).
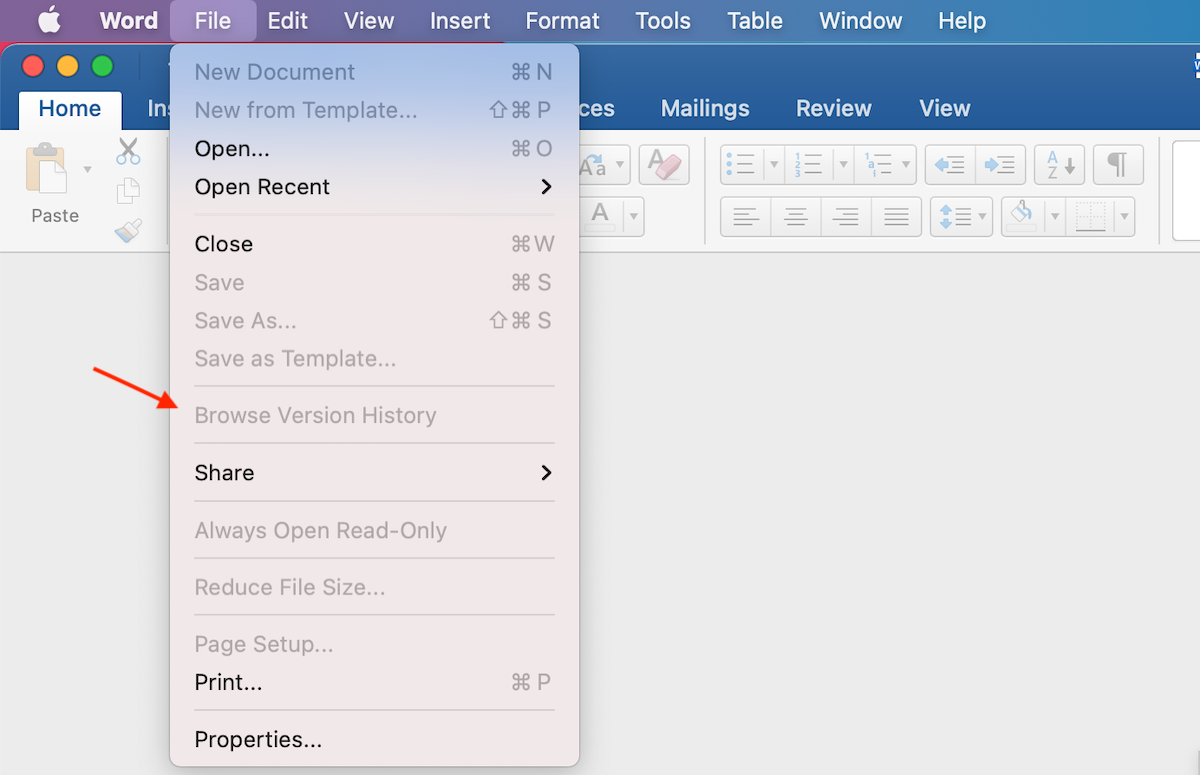
If you need to restore a file through non-native macOS apps (Microsoft Word, for instance), do the following:
- Double-click the needed file to open it.
- From the top menu, click File > Browse Version History (or if you’re using Microsoft 365 for Mac, use the app’s title bar to choose the needed document and then click Browse Version History).
- Click the needed file version.
- Once the chosen file version opens, click File > Save to save the recovered file on your Mac.
Depending on the application you’re using, the process of recovering overwritten files may slightly differ.


