 Typically, new disks are what prompt macOS to ask you to initialize the disk. This is perfectly normal. However, how do you deal with a scenario in which this happens on a disk that has been used before? We’re here to help you out. The sections below outline how to fix an uninitialized disk on a Mac, without damaging your files.
Table of Contents
What Does an Uninitialized Disk Mean on Mac
An uninitialized disk doesn’t have any partition table, partitions, or a formatting scheme on it. Essentially, the disk is completely blank and is unfit for storing data until it is initialized and formatted.
There are two reasons why a disk shows up as “uninitialized” on your Mac:
- The disk is brand new. It hasn’t been connected to any other Mac, formatted, and partitioned before. In this case, there’s nothing to worry about, as most disks need to be initialized manually before being used.
- If the disk has been used before and still shows up as uninitialized, it is a cause for concern. Here, your Mac is having trouble reading the disk. This could signal a failing disk and data corruption.
So, why does a disk that was previously in use, show up as uninitialized in macOS? Well, there could be several reasons.
The most common ones are:
| Reason | Description |
| 🔗 Connection issues | If the disk is improperly connected to the system, it could show up as uninitialized. A loose connection, damaged cables and ports, and an accumulation of dust in the ports can all prevent your Mac from reading the disk properly. |
| 🦠 Malware | Computer viruses and other types of malware can cause logically corruption on your disk and sometimes directly delete all your data. |
| 📂 Faulty partition | Corrupted or faulty partitions can prevent macOS from reading your drive properly, resulting in it showing up as uninitialized. |
| 💿 Bad sectors | Bad sectors are unreadable areas on your disk. While all disks will develop a few bad sectors as part of normal wear and tear, an accumulation of bad sectors will result in data loss and read/write issues on it. |
| 🔨 Physical damage | Damage due to physical shock, heat, or water can damage any of the numerous moving components in a hard drive. This can prevent your PC from reading the drive properly, causing it to show up as uninitialized. |
How to Recover Data From an Uninitialized Disk
When it comes to fixing an uninitialized disk, you should prioritize data recovery. The disk could be on a swift path to failure, or the only fix could be to format it. Luckily, modern data recovery programs can recover data from an uninitialized disk.
But, data recovery scans are quite stressful to your drive. And performing them on an uninitialized disk that’s already corrupt, may be a recipe for disaster. To prevent further damage to your drive, you need to create a disk image (soft copy) of it and then scan the disk image for recoverable data.
For our tutorial, we opted to use Disk Drill because it lets you create a disk image as well as scan it, within a single interface. The program is compatible with all major file systems, and it’ll also work with disks that have no file system at all (RAW). It even saves your scans in case you’re unable to recover all the data in one go.
Note: If the drive is physically damaged, do not attempt DIY data recovery. It’s best to contact a professional data recovery service instead.
Here’s how to recover data from an uninitialized disk on a Mac:
Step 1:Create a Byte-to-Byte Backup (Disk Image) of the Uninitialized Disk
- Download Disk Drill on a working Mac and install it.
- Connect the uninitialized disk to the computer.
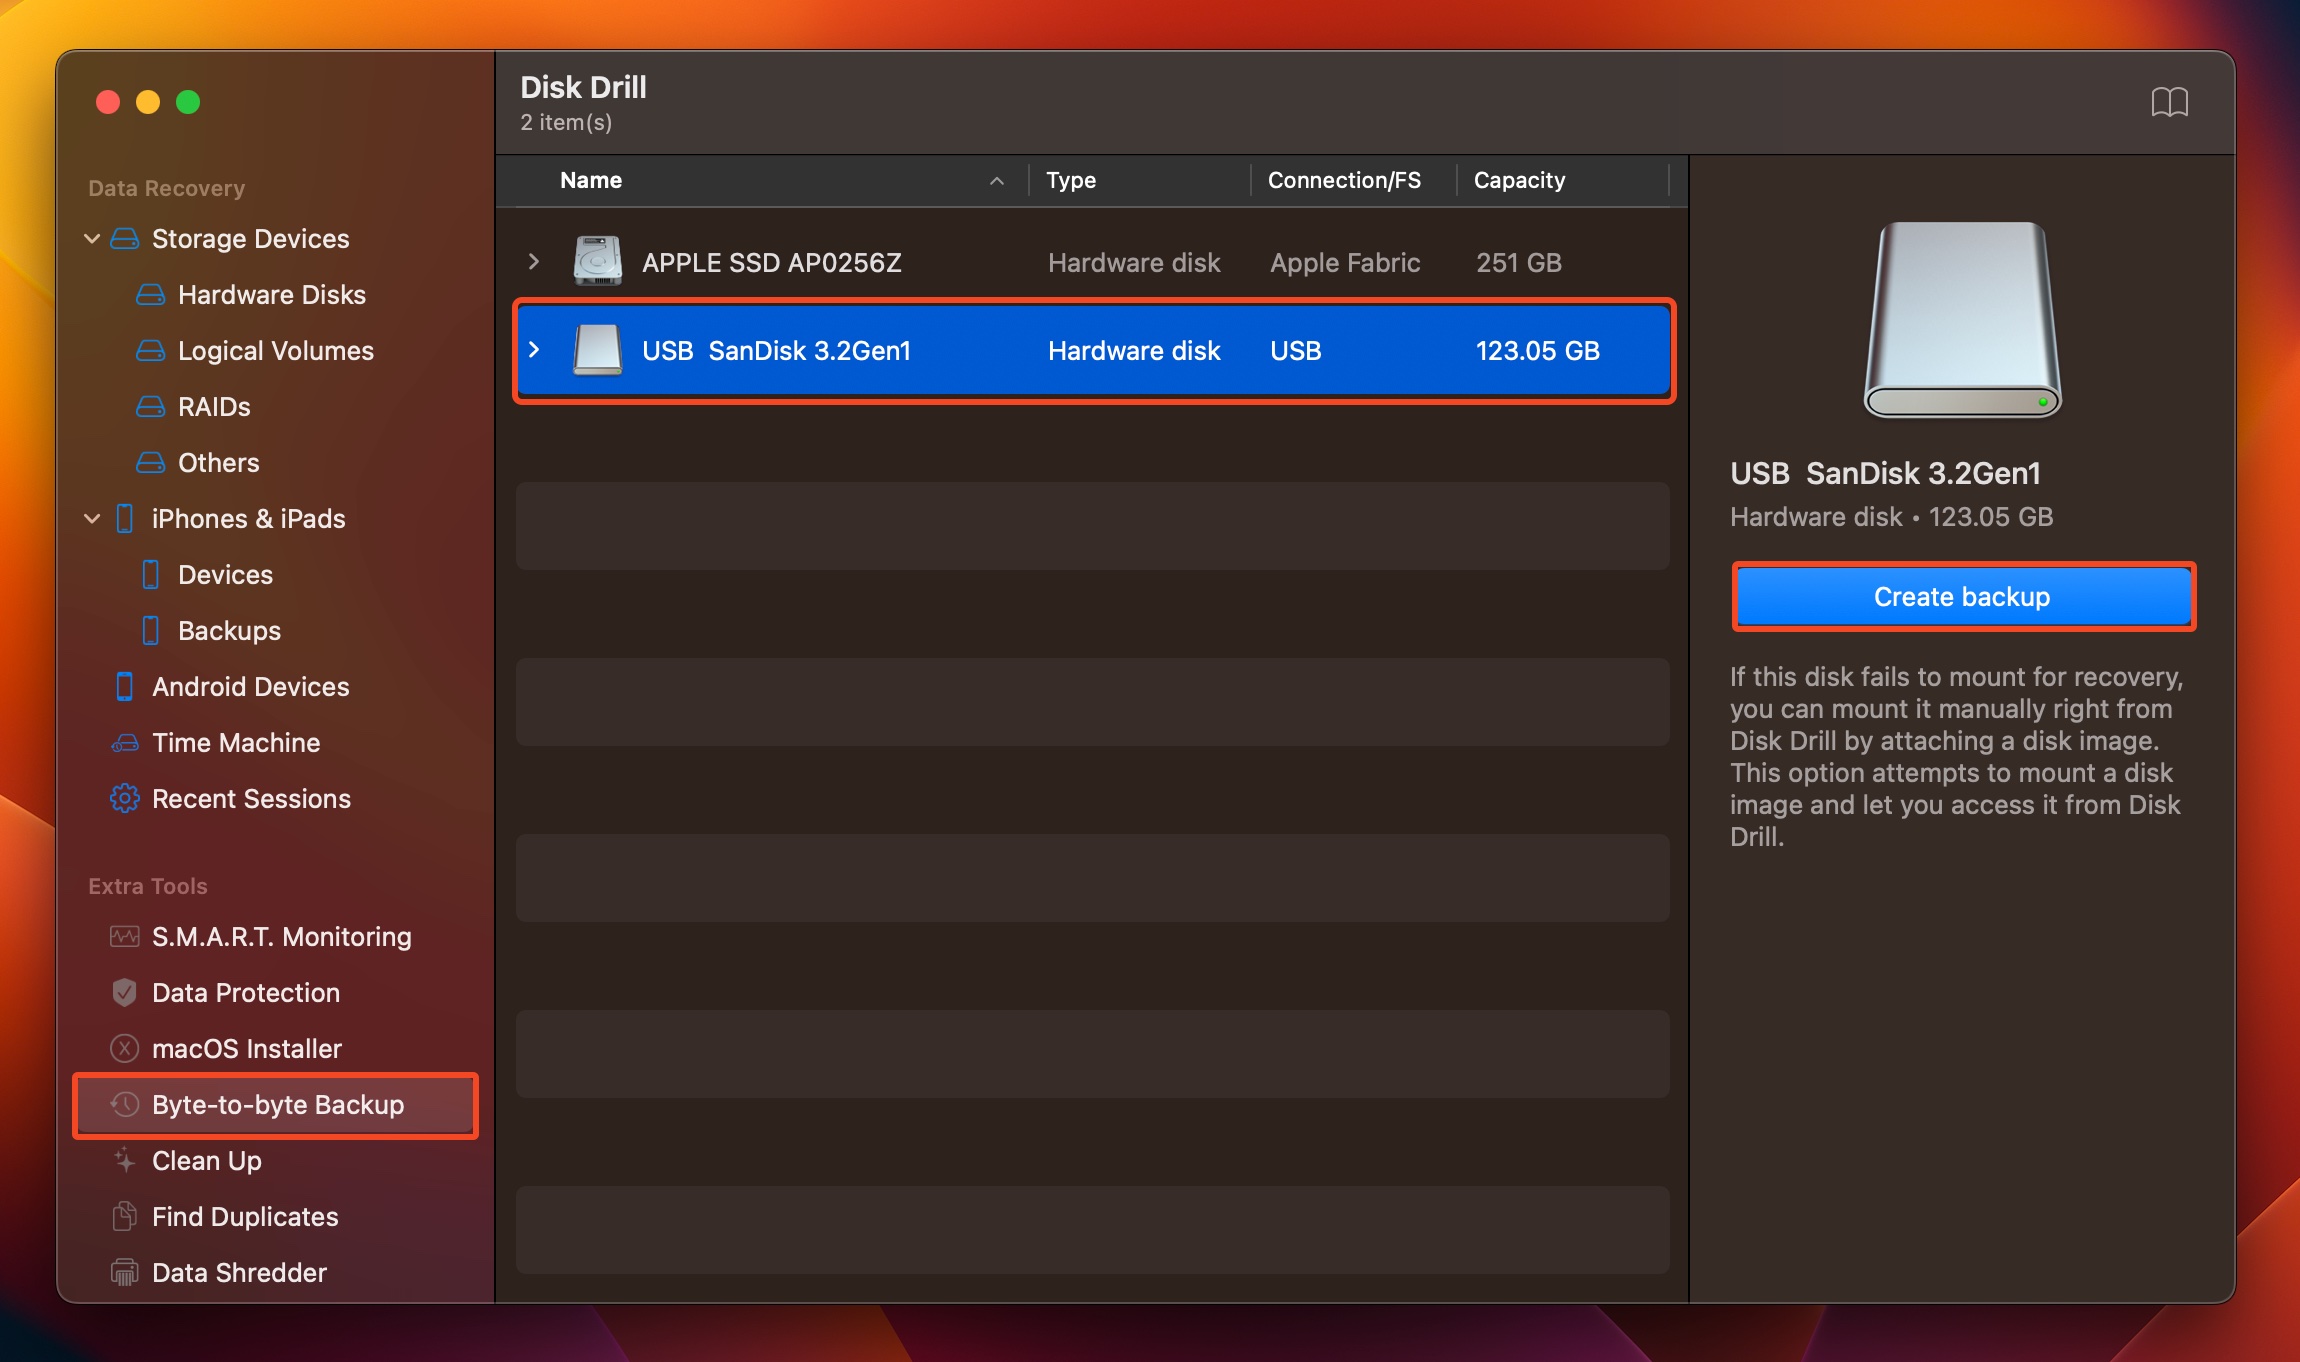
- Open Disk Drill and click on Byte-to-byte Backup, under Extra Tools.
- Select the uninitialized disk and click on Create Backup.
- Choose the disk image’s save location. It should have free space that is equal to or more than the uninitialized disk’s total storage size. Click on Save.
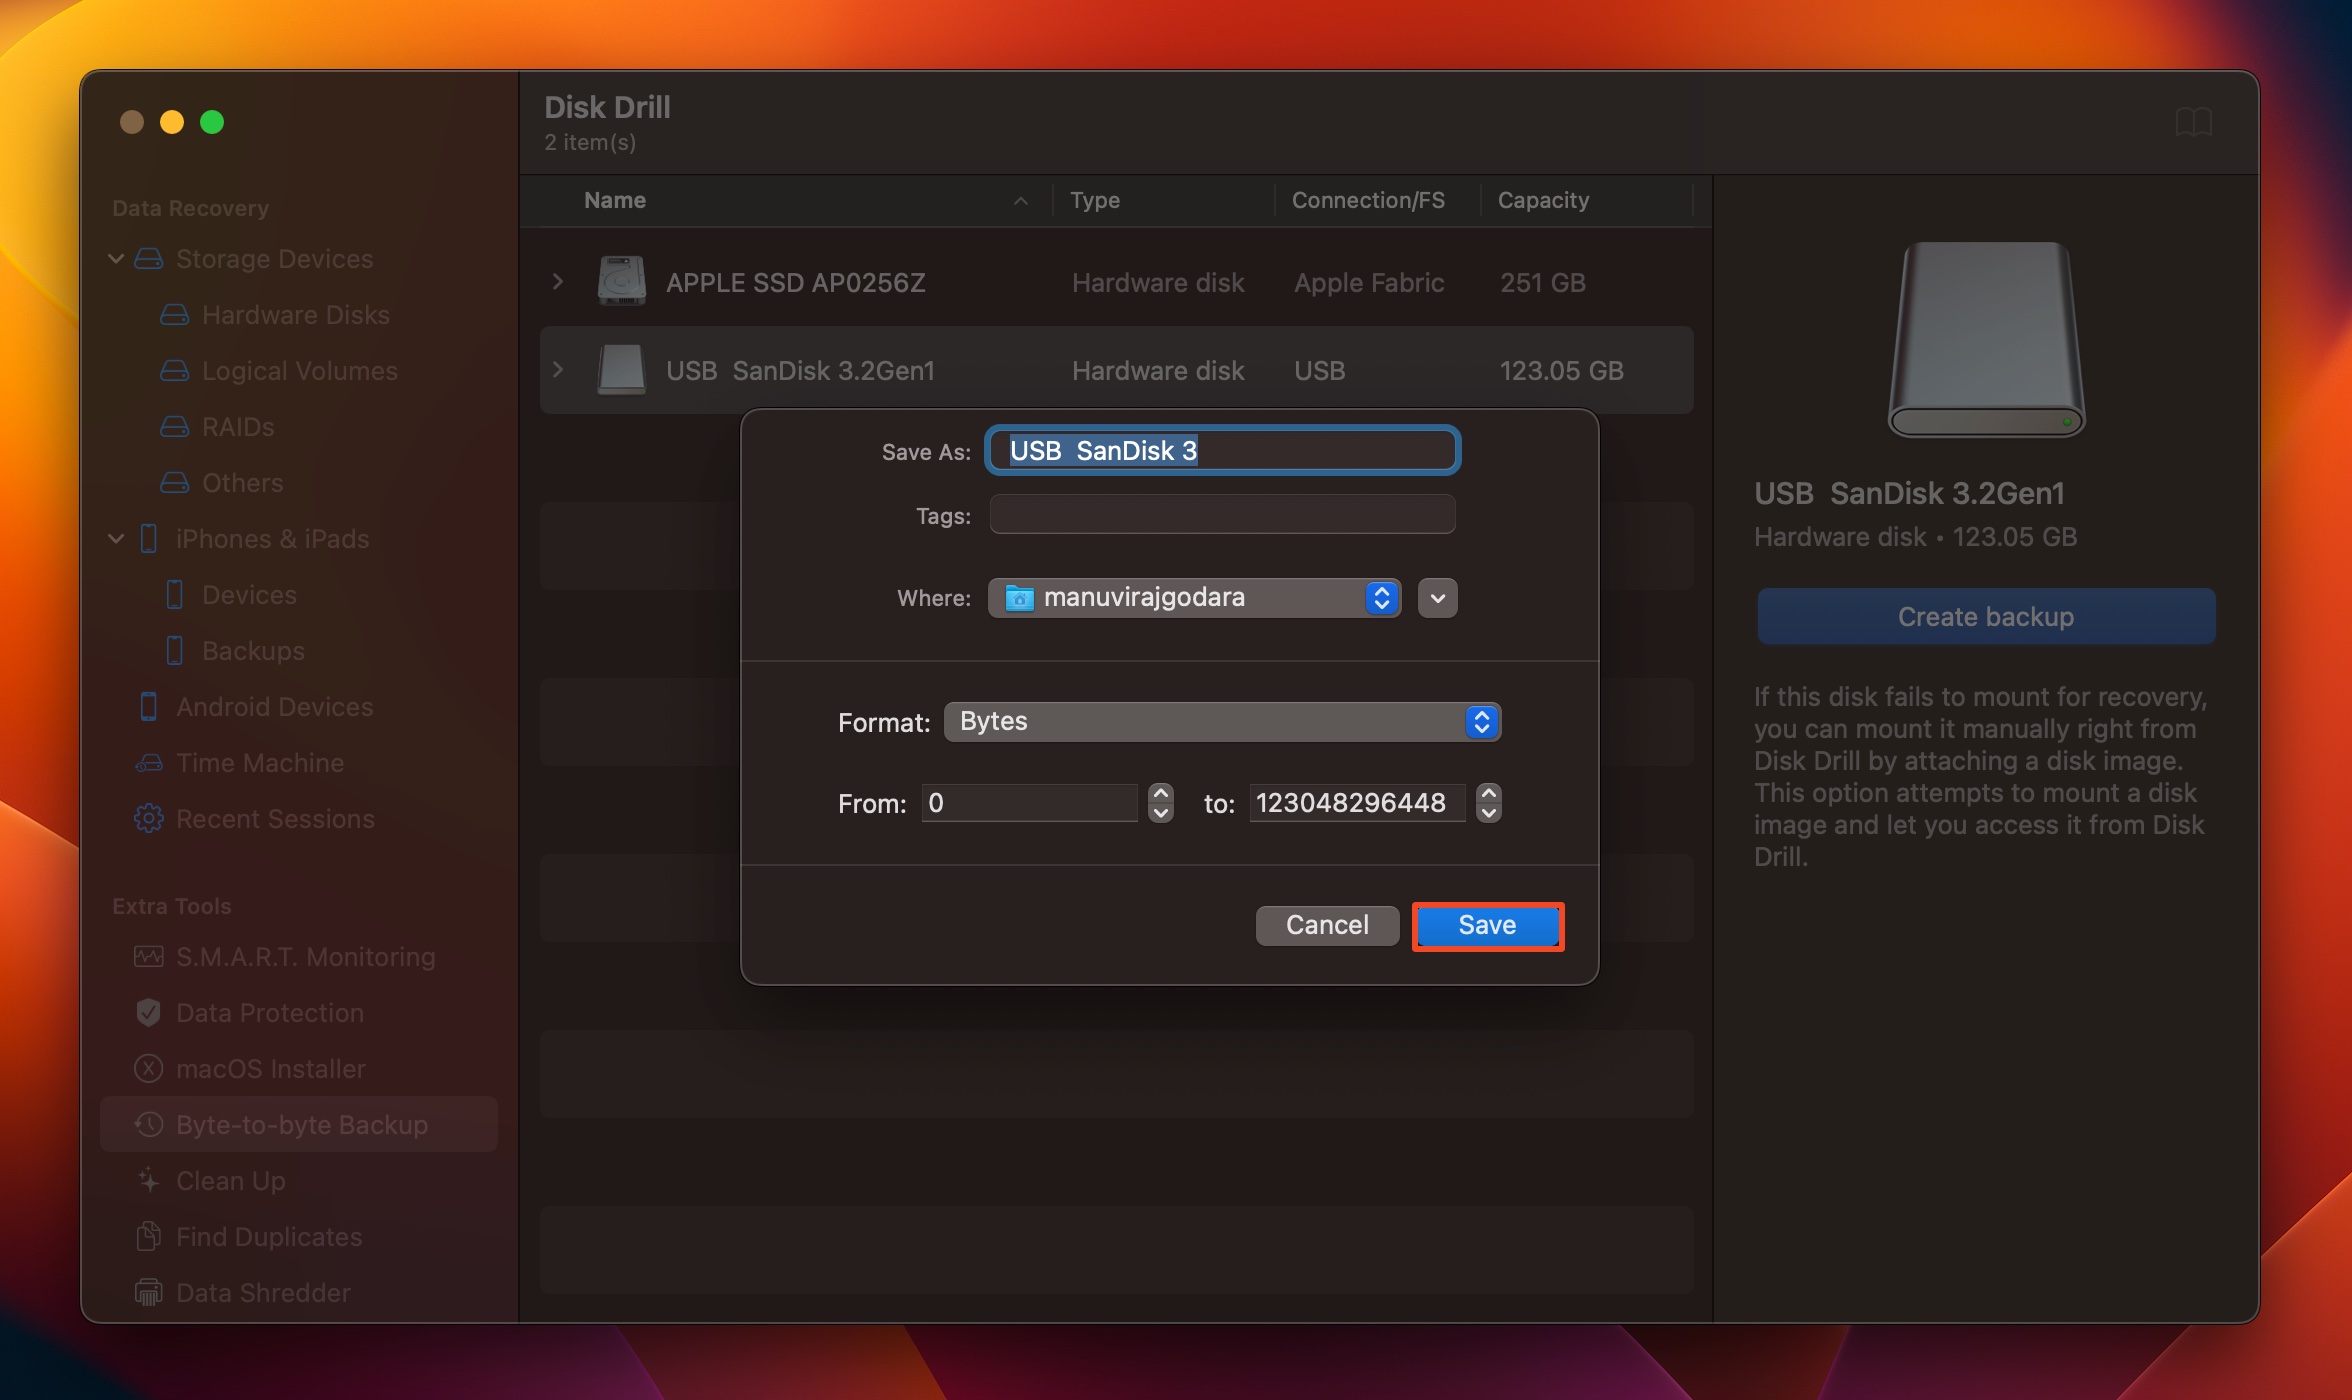
- Disk Drill will create the disk image.
Step 2:Recover Data from the Disk Image
- Open Disk Drill and ensure you’re on the Storage Devices screen.
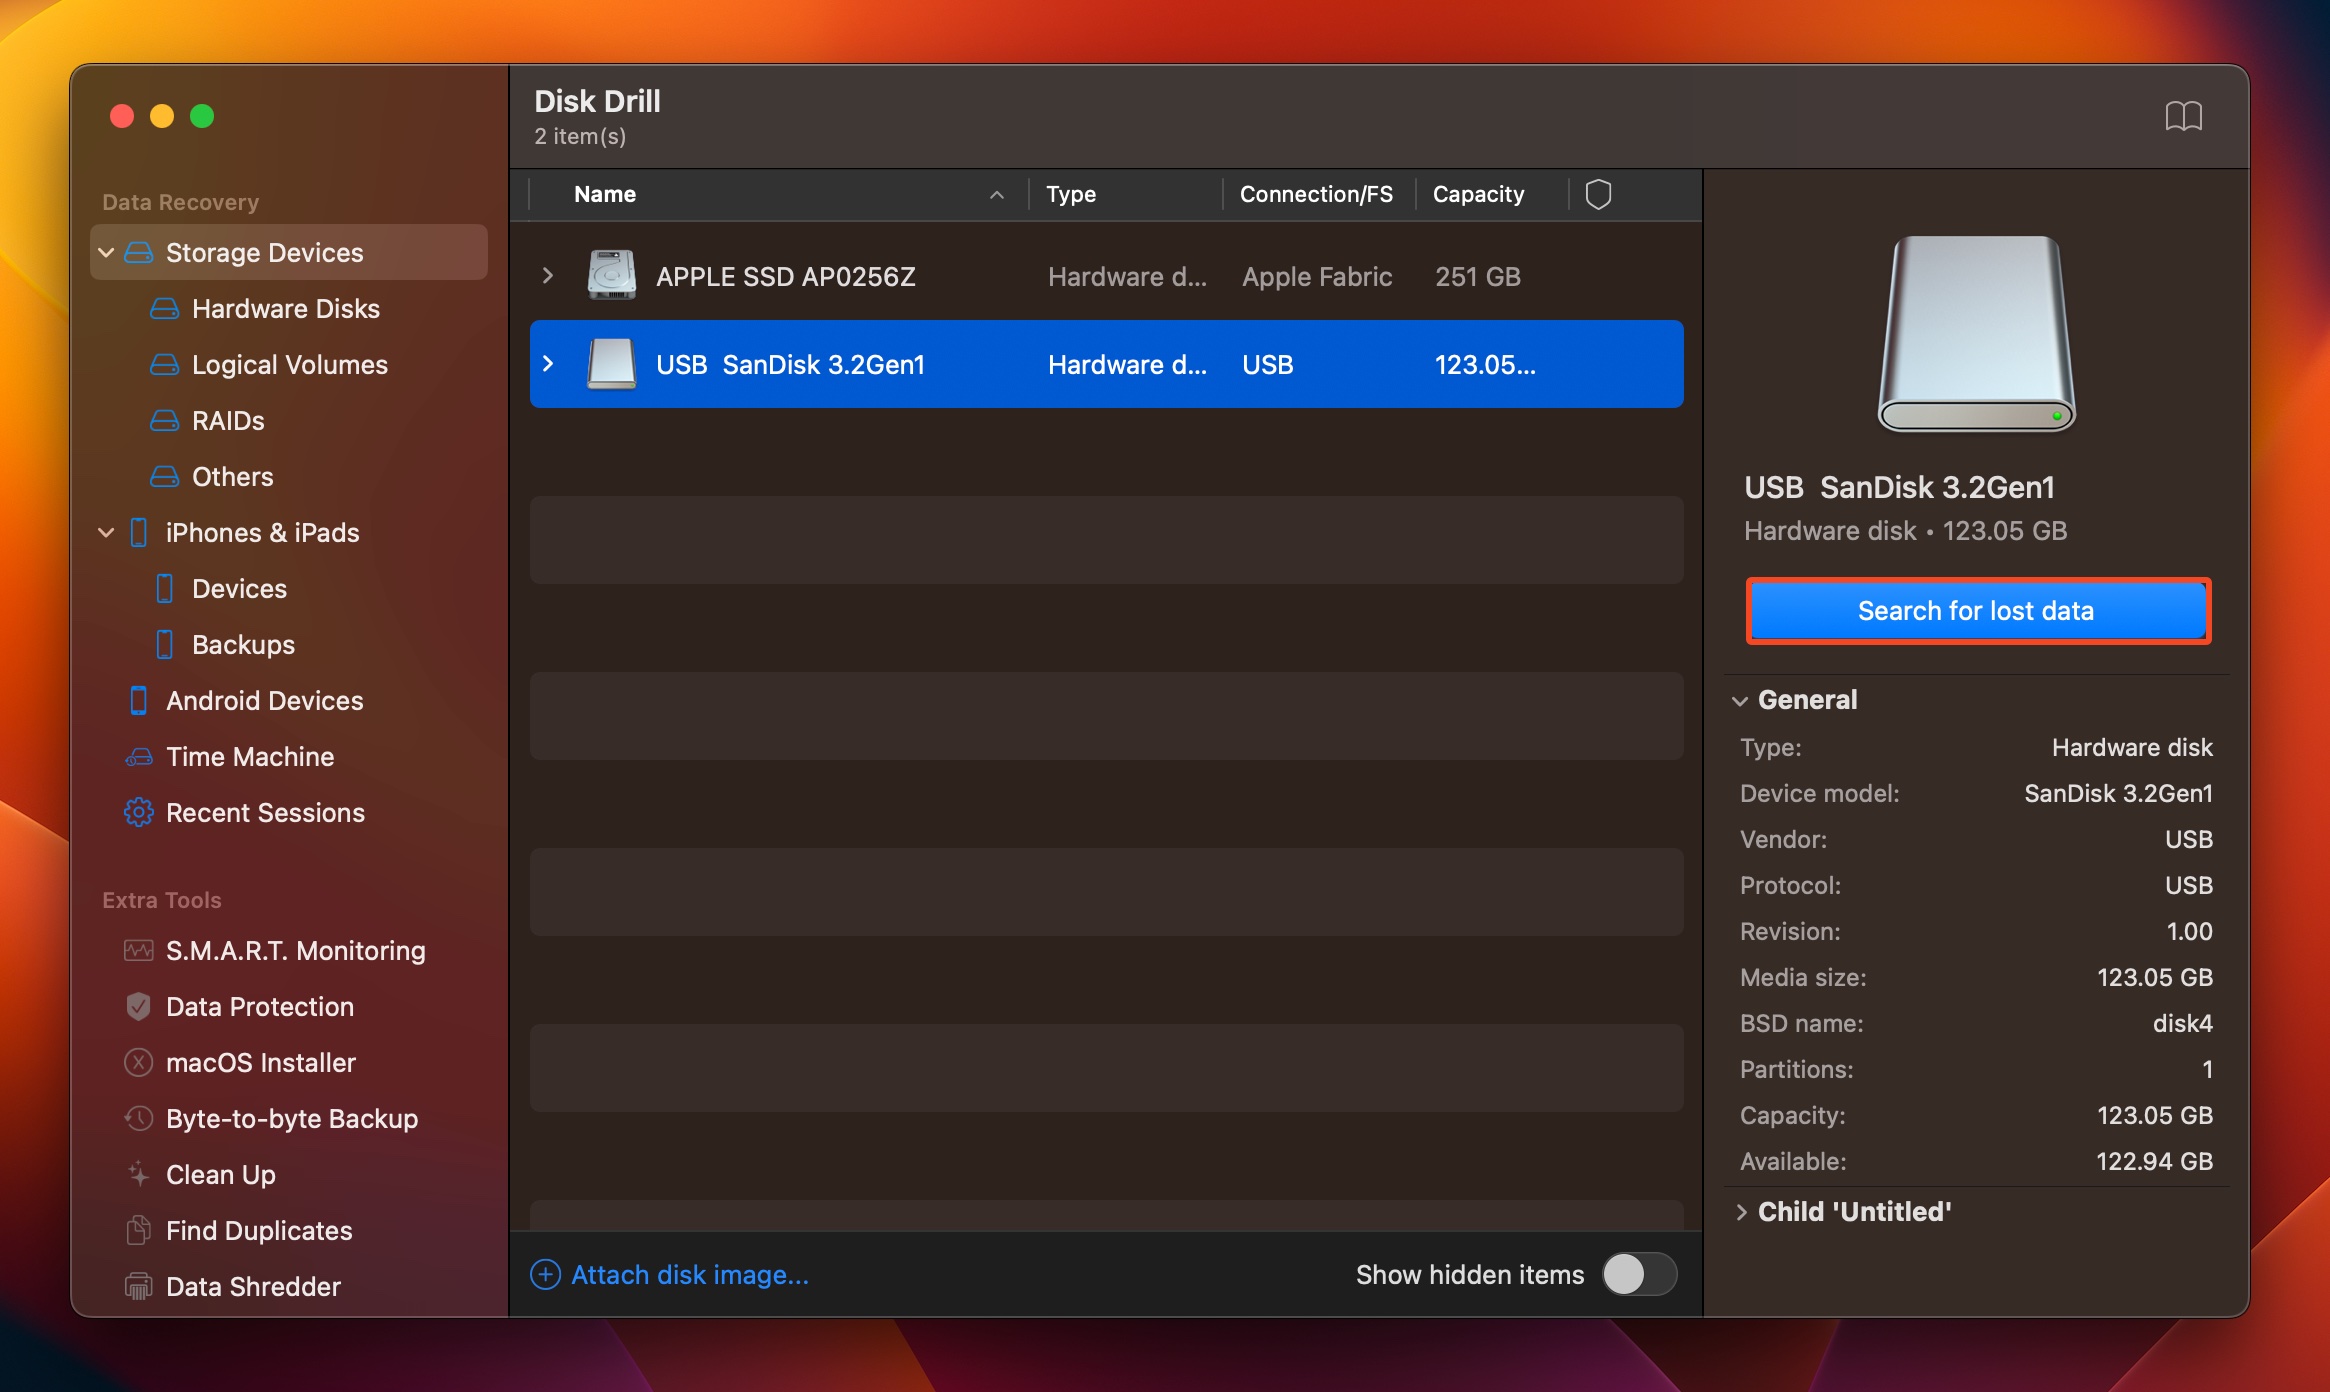
- Click on Attach disk image, browse for the disk image you’d created previously, and double-click on it. It’ll be added as a mounted disk image in the Storage Devices screen.
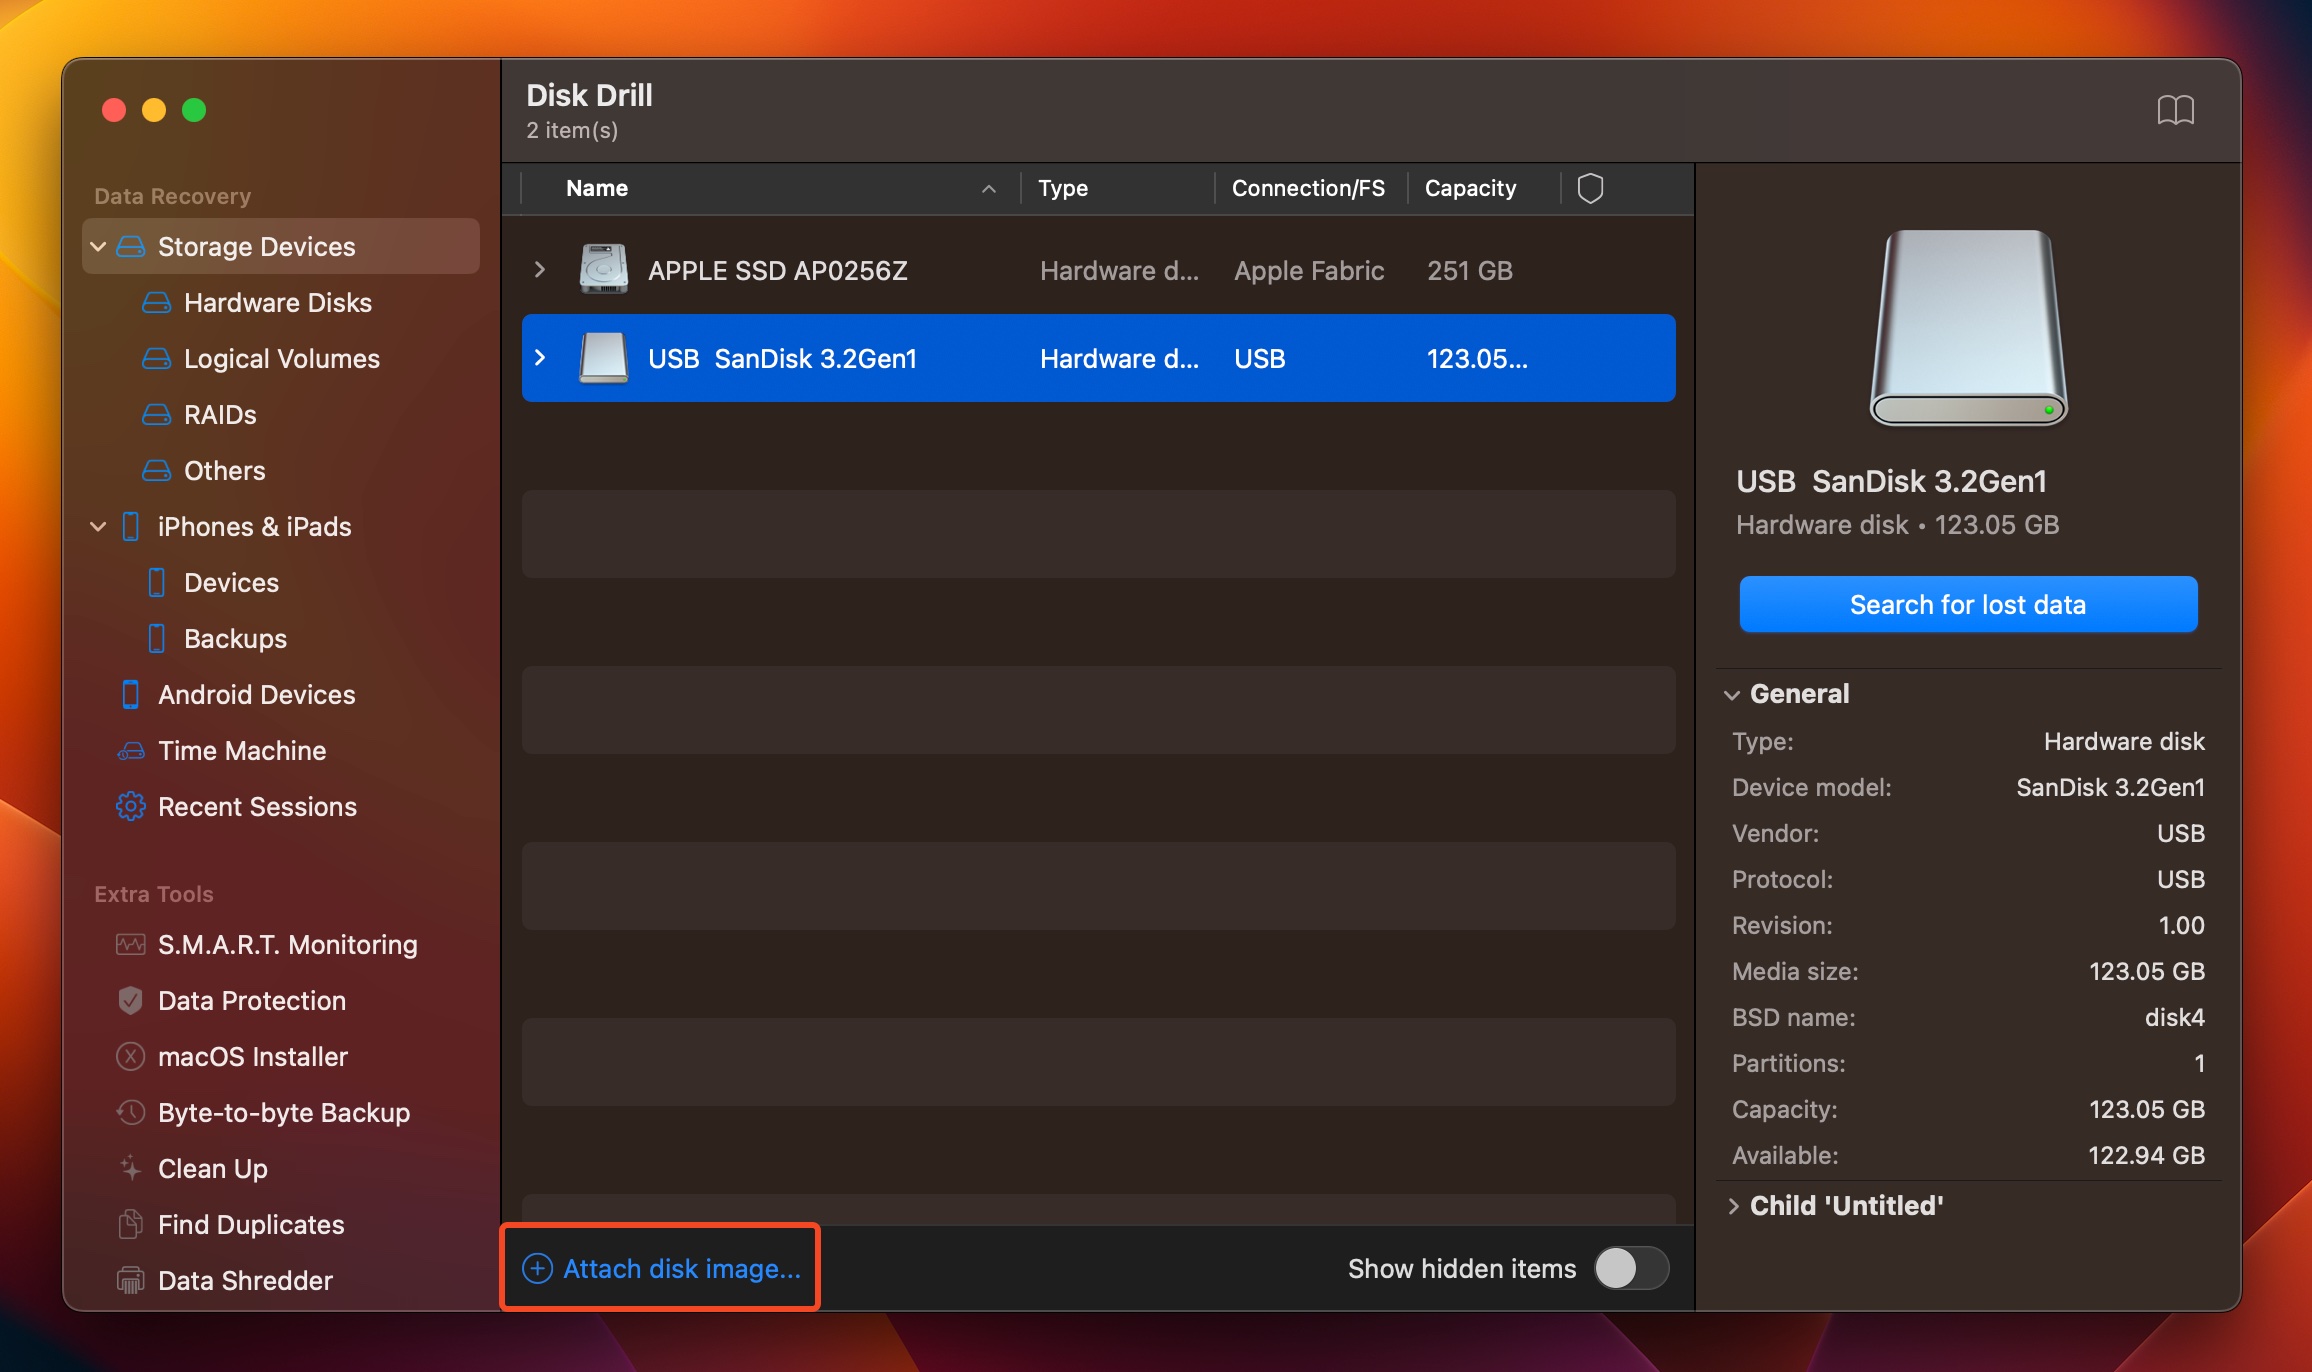
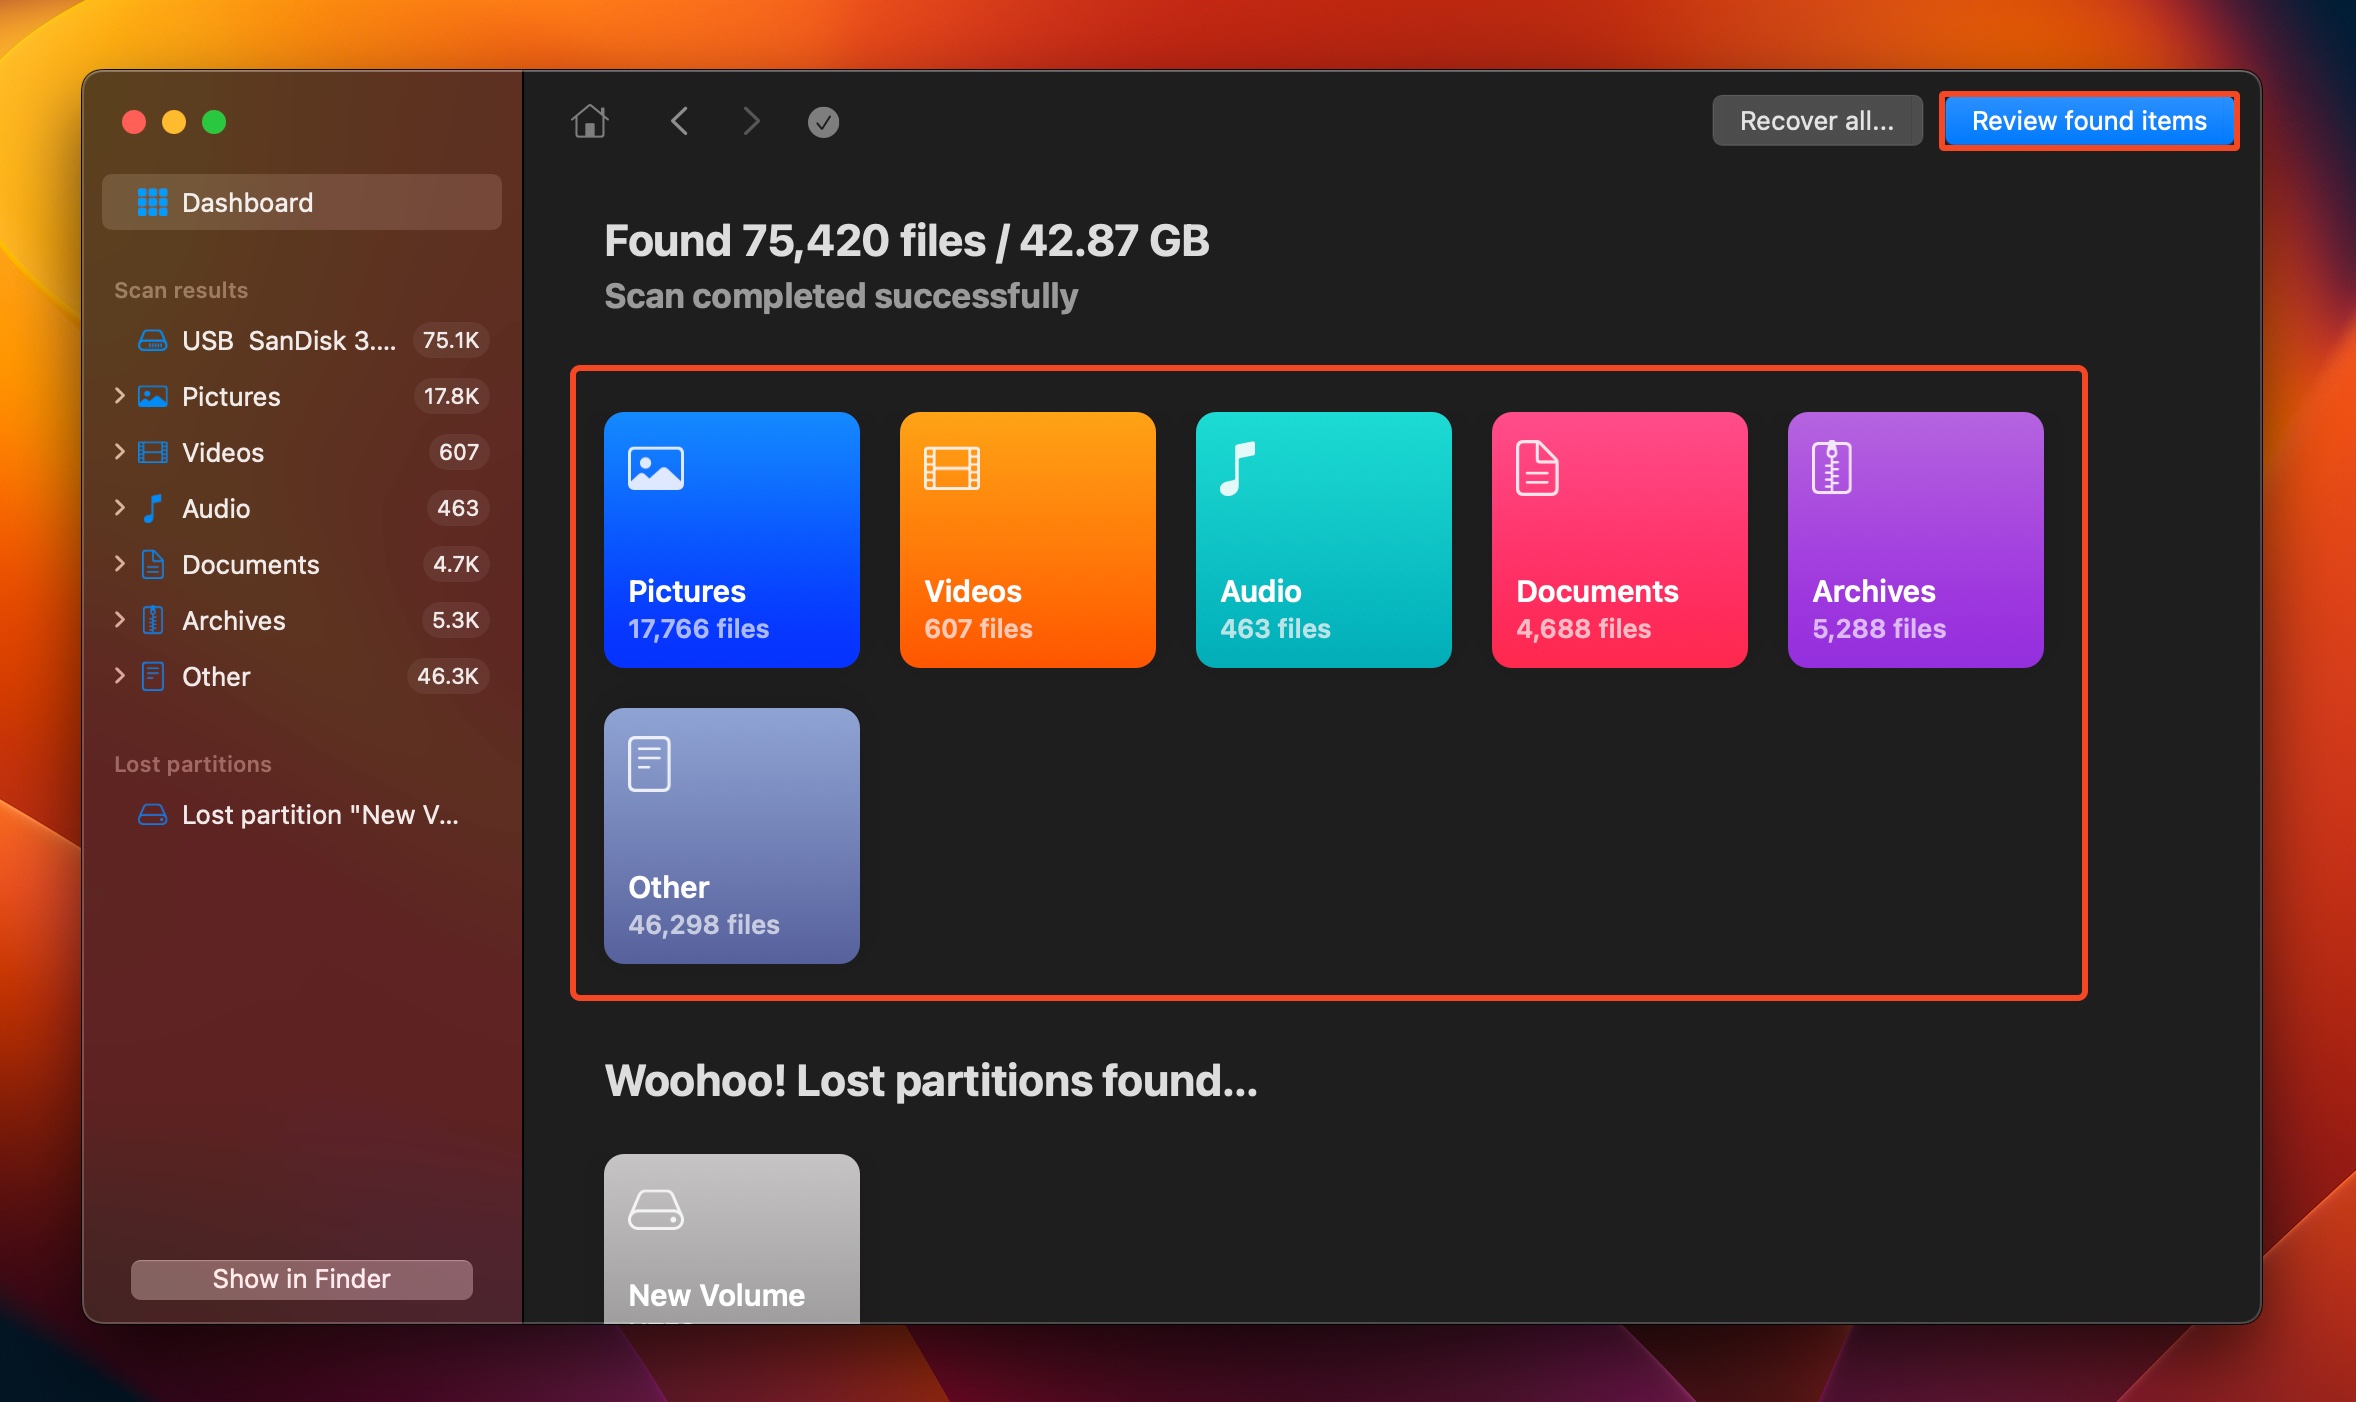
- Select the disk image and click on Search for lost data.
- Click on Review found items. If you only wish to see certain types of recoverable files, click on the relevant option instead (Pictures, Videos, Audio, Documents, Archives, and Other).
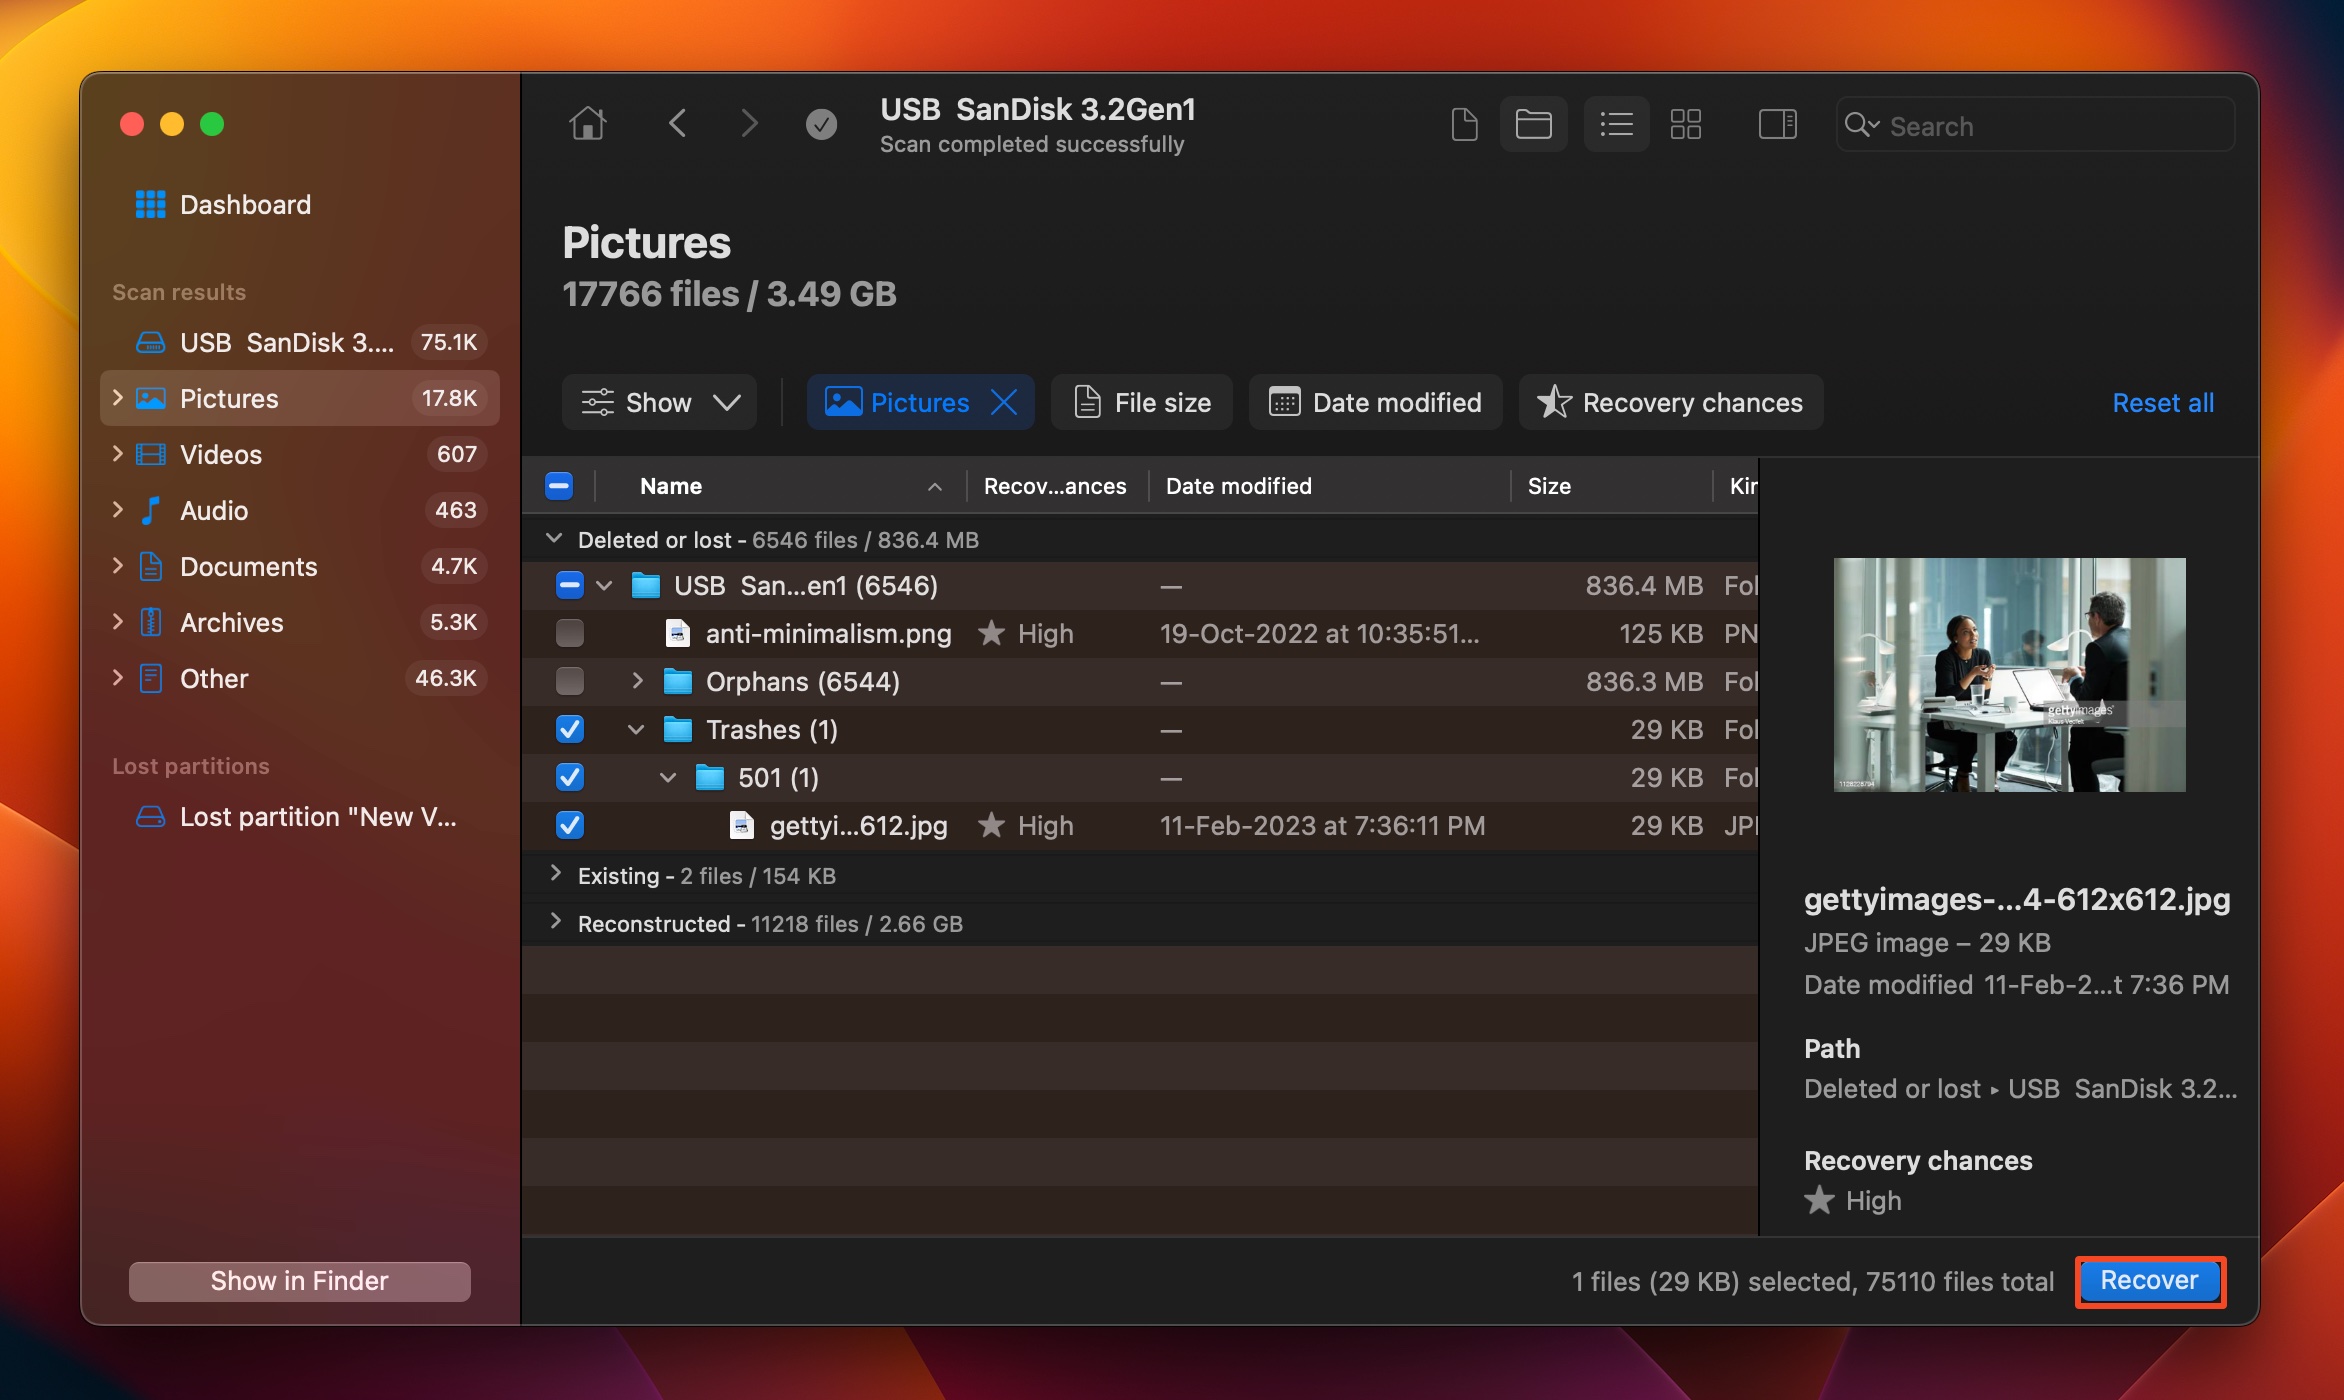
- Select the files you wish to recover. Disk Drill displays a preview of the currently selected files. Click on Recover after you’ve confirmed your selection.
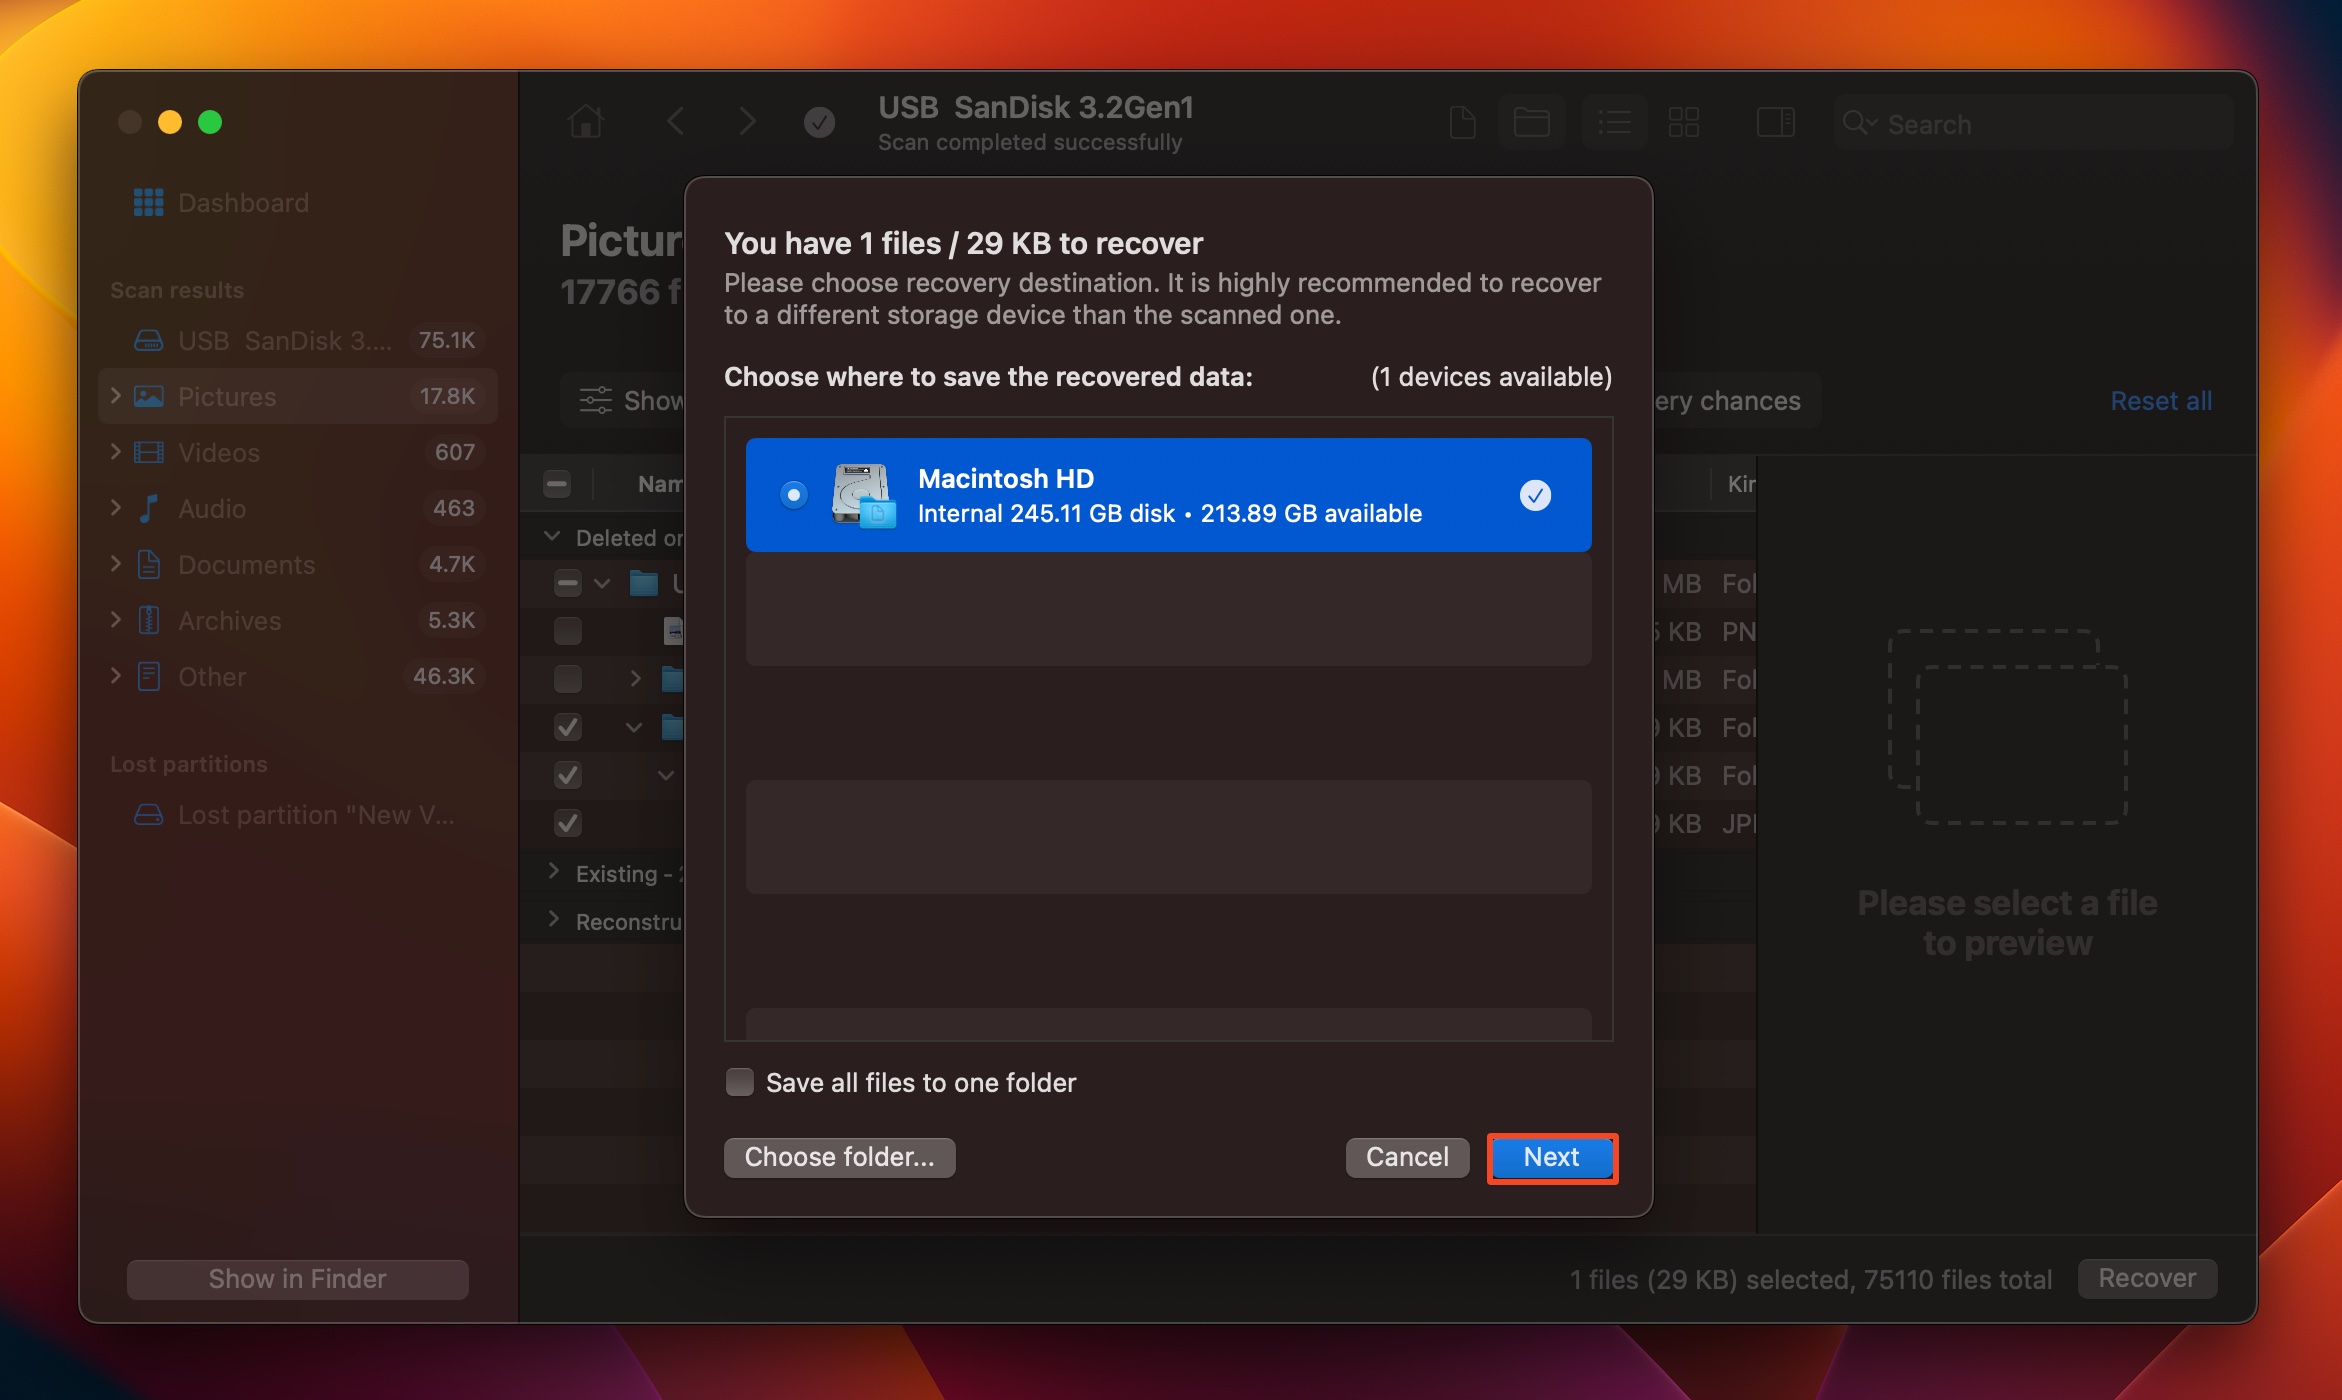
- Pick a recovery destination for the files and click Next.
- Disk Drill will recover the selected files.
You can see the recoverable files using Disk Drill’s free version, but to recover them, you’ll need to upgrade to Disk Drill Pro.
How to Initialize a Disk on Mac
While initialization itself doesn’t remove any data, the process is typically followed by a format–which wipes out your files. Unlike Windows, macOS doesn’t have a clearly labeled Initialize disk option. You’ll only see the Initialize option when your Mac displays the ‘This disk is not readable” message when you connect the drive.
To effectively “initialize” the disk on a Mac, you’ll need to use the Erase option within Disk Utility. This option formats the drive, so ensure you’ve recovered your data beforehand.
Here’s how you can initialize a disk on macOS:
- Go to Finder > Applications > Utilities, and click on Disk Utility. You can simply search for it in Spotlight (Command + Space) as well.
- Select your drive in the left pane, and click on Erase towards the top of the window.
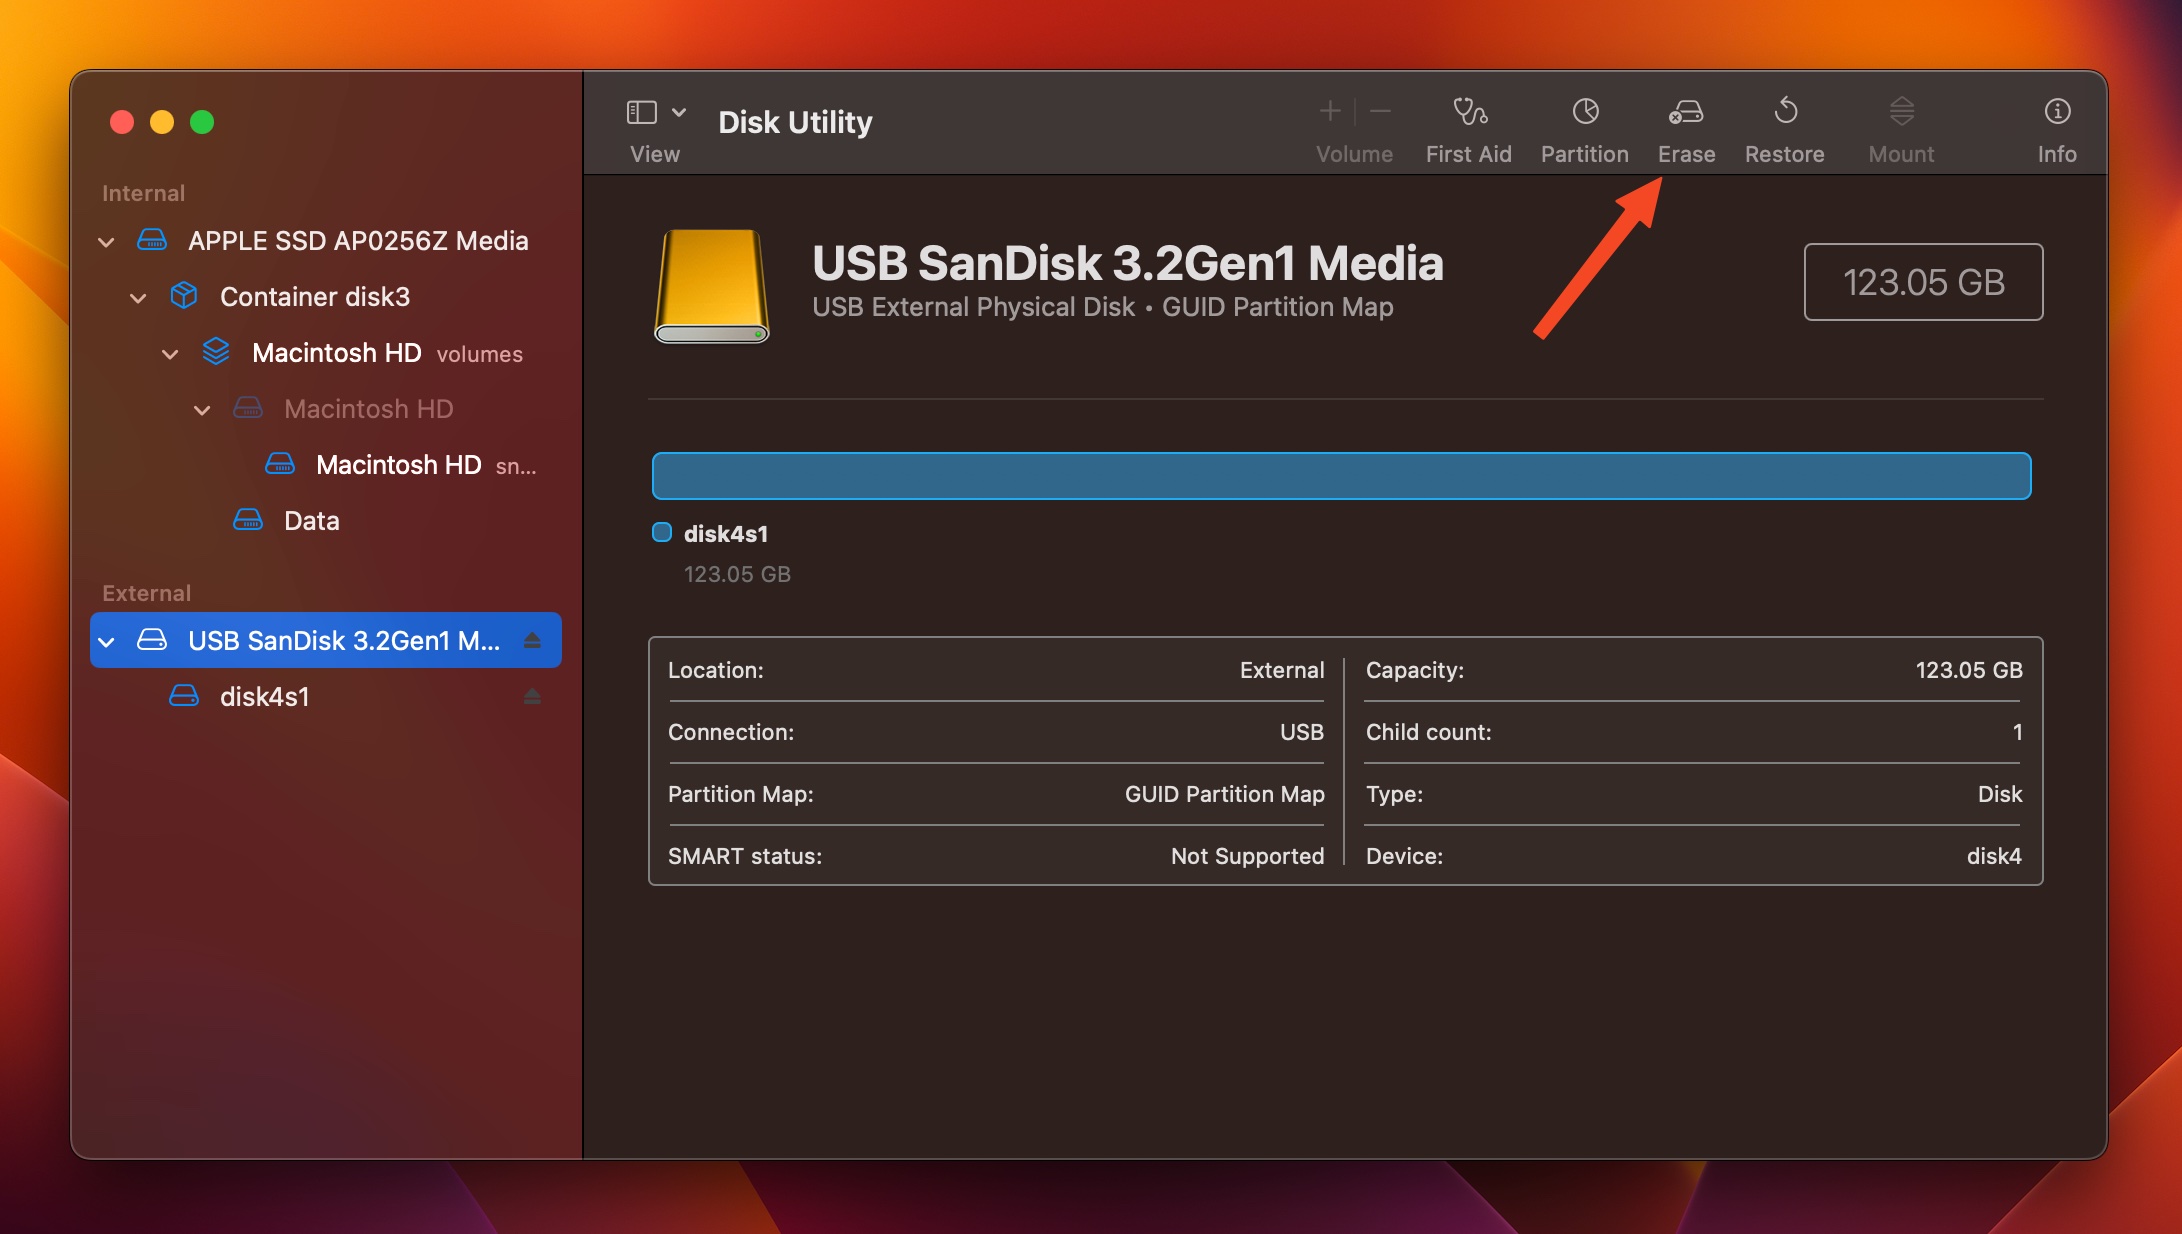
- In the Erase parameters window, choose a Name, File System, and Partition Scheme. You can also leave the options as they are. Click on Erase.
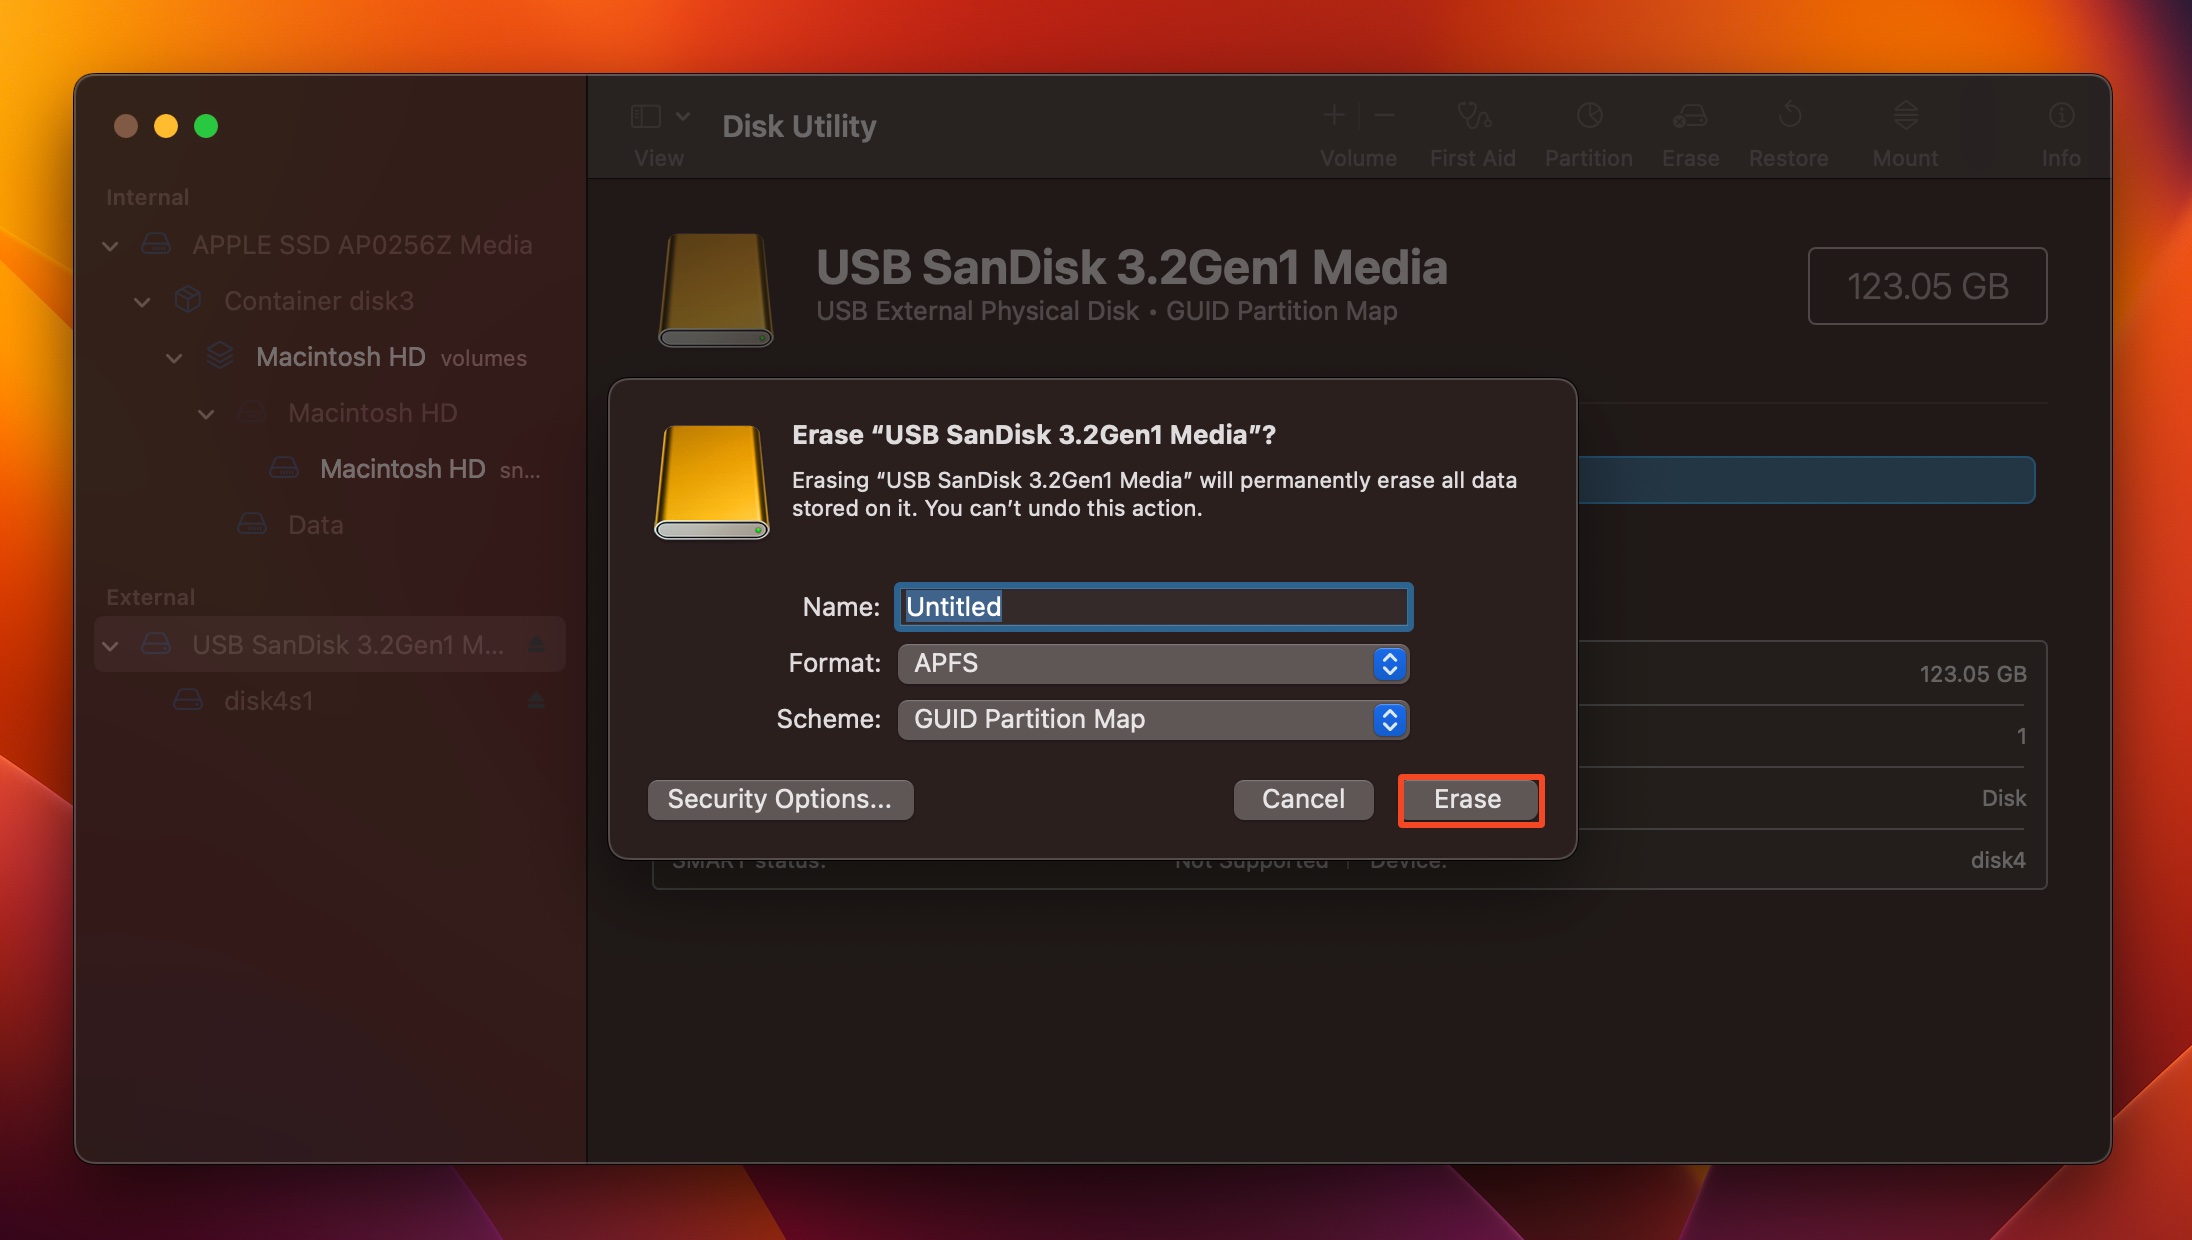
- Your drive will be initialized and formatted.
What to Do When You Can’t Initialize the Disk
It’s likely you could run into problems when initializing the disk. If you face any errors, or macOS refuses to initialize the disk, here are some tips to help you out.
Method 1: Check the Connections
A loose, or damaged cable will prevent your PC and the drive from communicating properly. In such cases, macOS won’t be able to initialize the disk, since it cannot detect it properly in the first place. It’s also advisable to check the cables, and ports for signs of damage. External hard drive USB cables are particularly susceptible to damage.
Try connecting the drive to another Mac computer and see if the error persists. It’s best to use new cables to connect the drive, just to ensure that the issue is with the disk and not a faulty cable or an issue with macOS itself.
Method 2: Reboot Your Mac
The humble Restart option is used to remedy all kinds of problems on a Mac. In this case, too, perform a reboot and attempt to initialize the disk again. A reboot option prompts your PC to load up all system files and the drivers again. It also refreshes the Disk Utility.
To reboot your Mac, go to the Apple menu and choose Restart.
Method 3: Ensure that MacOS is Updated
Software updates on your Mac ensure that common bugs and other errors are addressed. It’s possible that the version of macOS you’re running is outdated, and a simple Software update will allow you to initialize the drive properly.
Updating your Mac using Software Update will ensure that your system is running the latest drivers–which help hardware and software components communicate with each other.
To check for software updates, go to the Apple menu and click on System Preferences > Software Update. If there are any updates, macOS will display an option to download and install it.
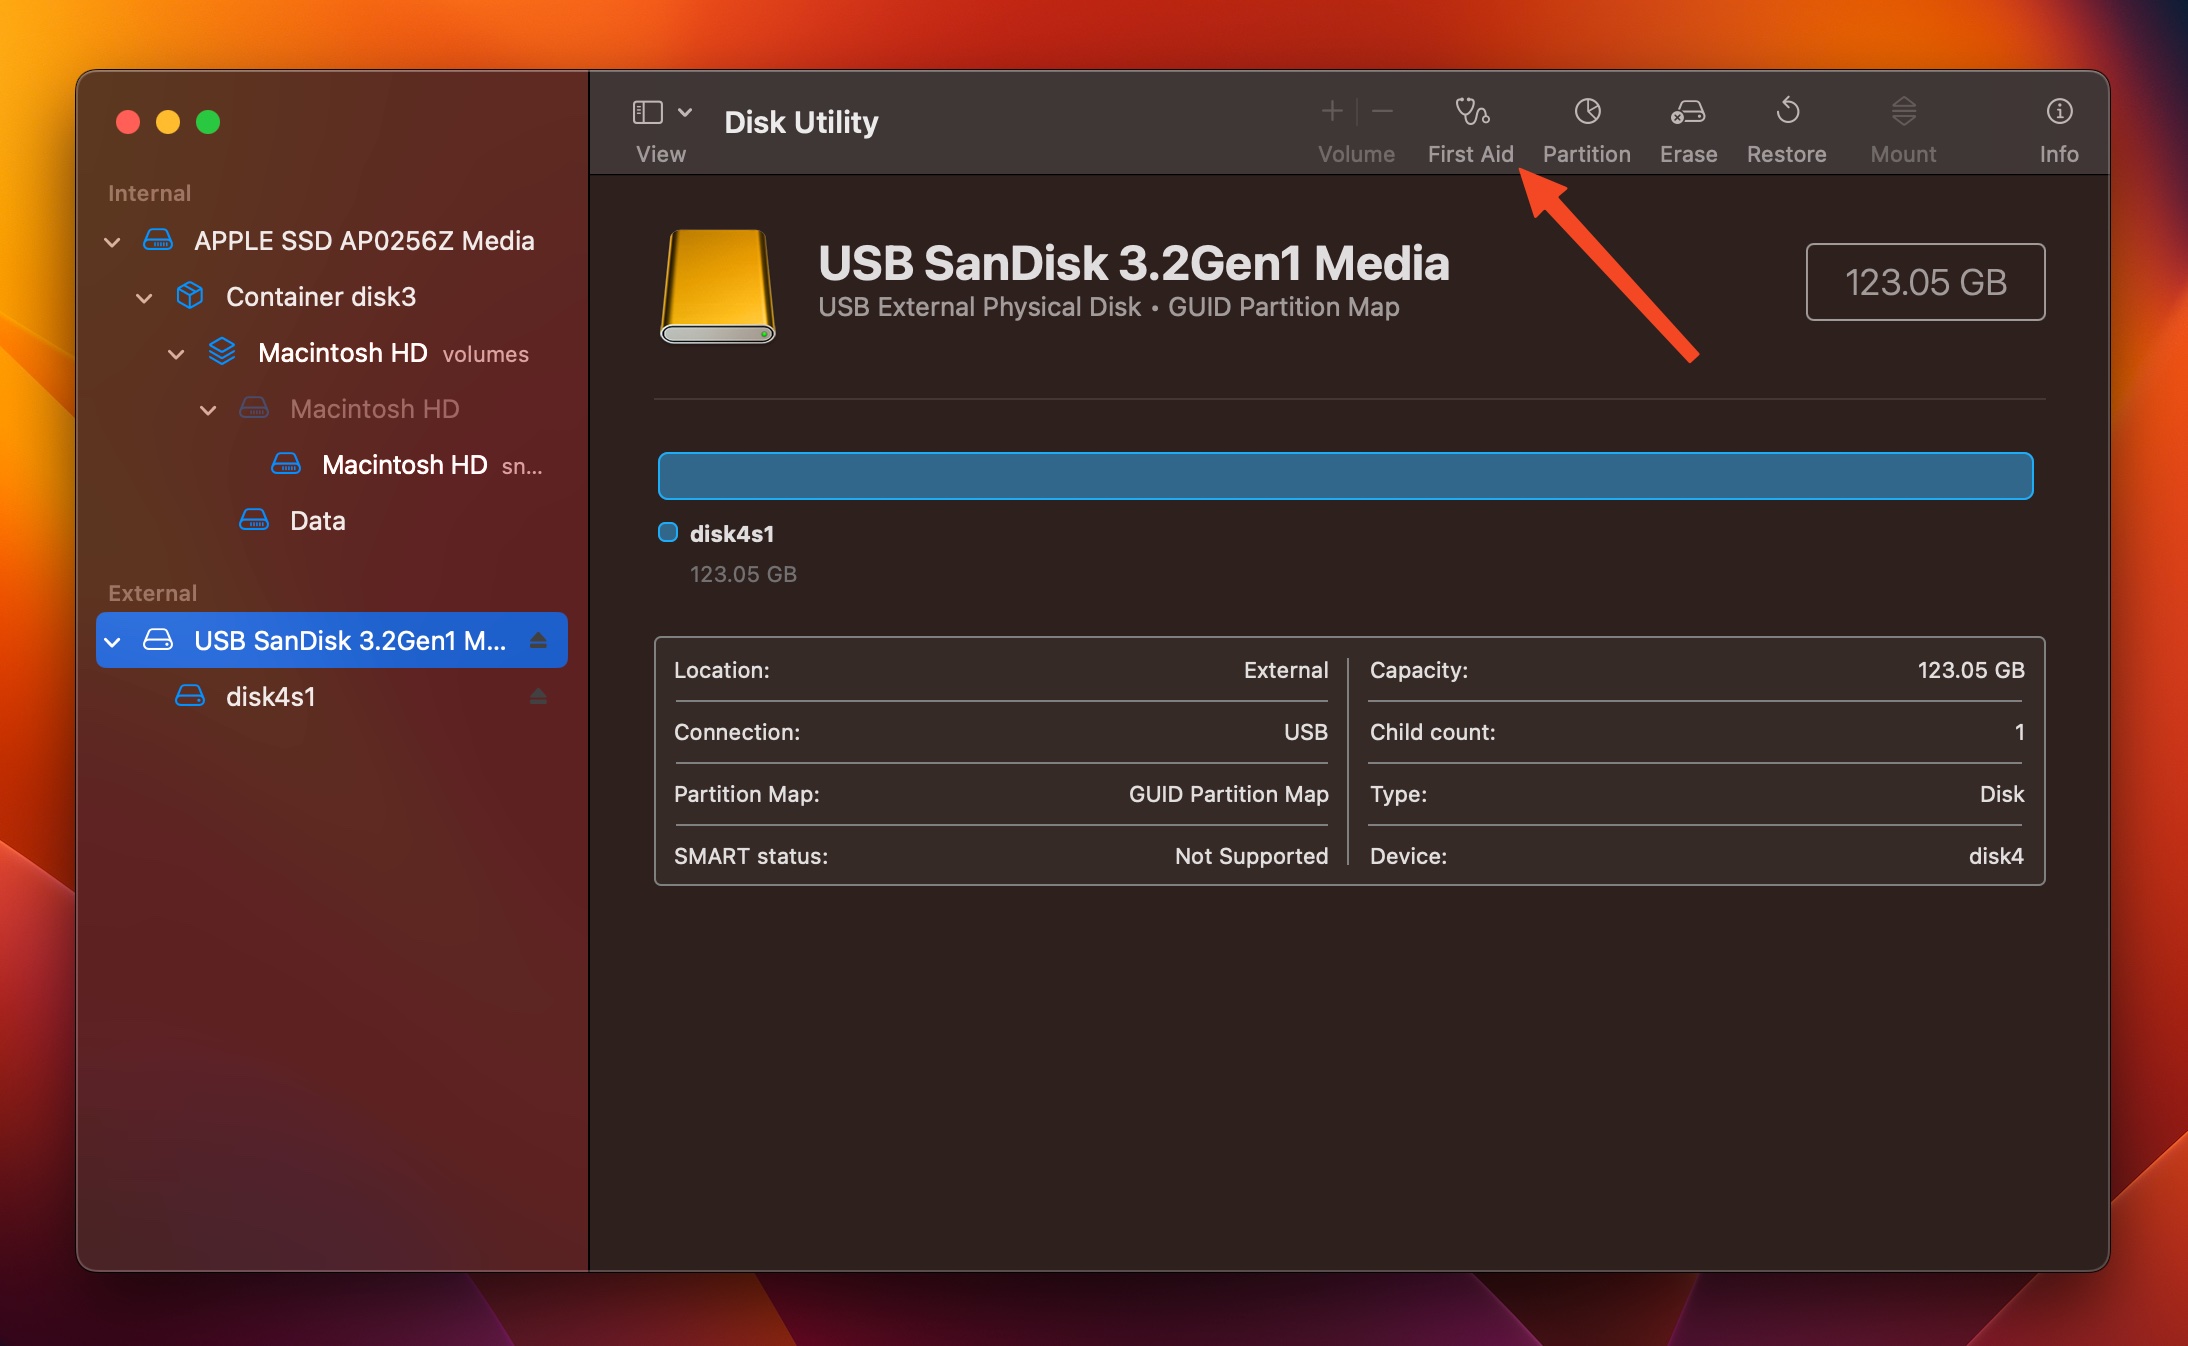
Method 4: Use the First Aid Feature in Disk Utility
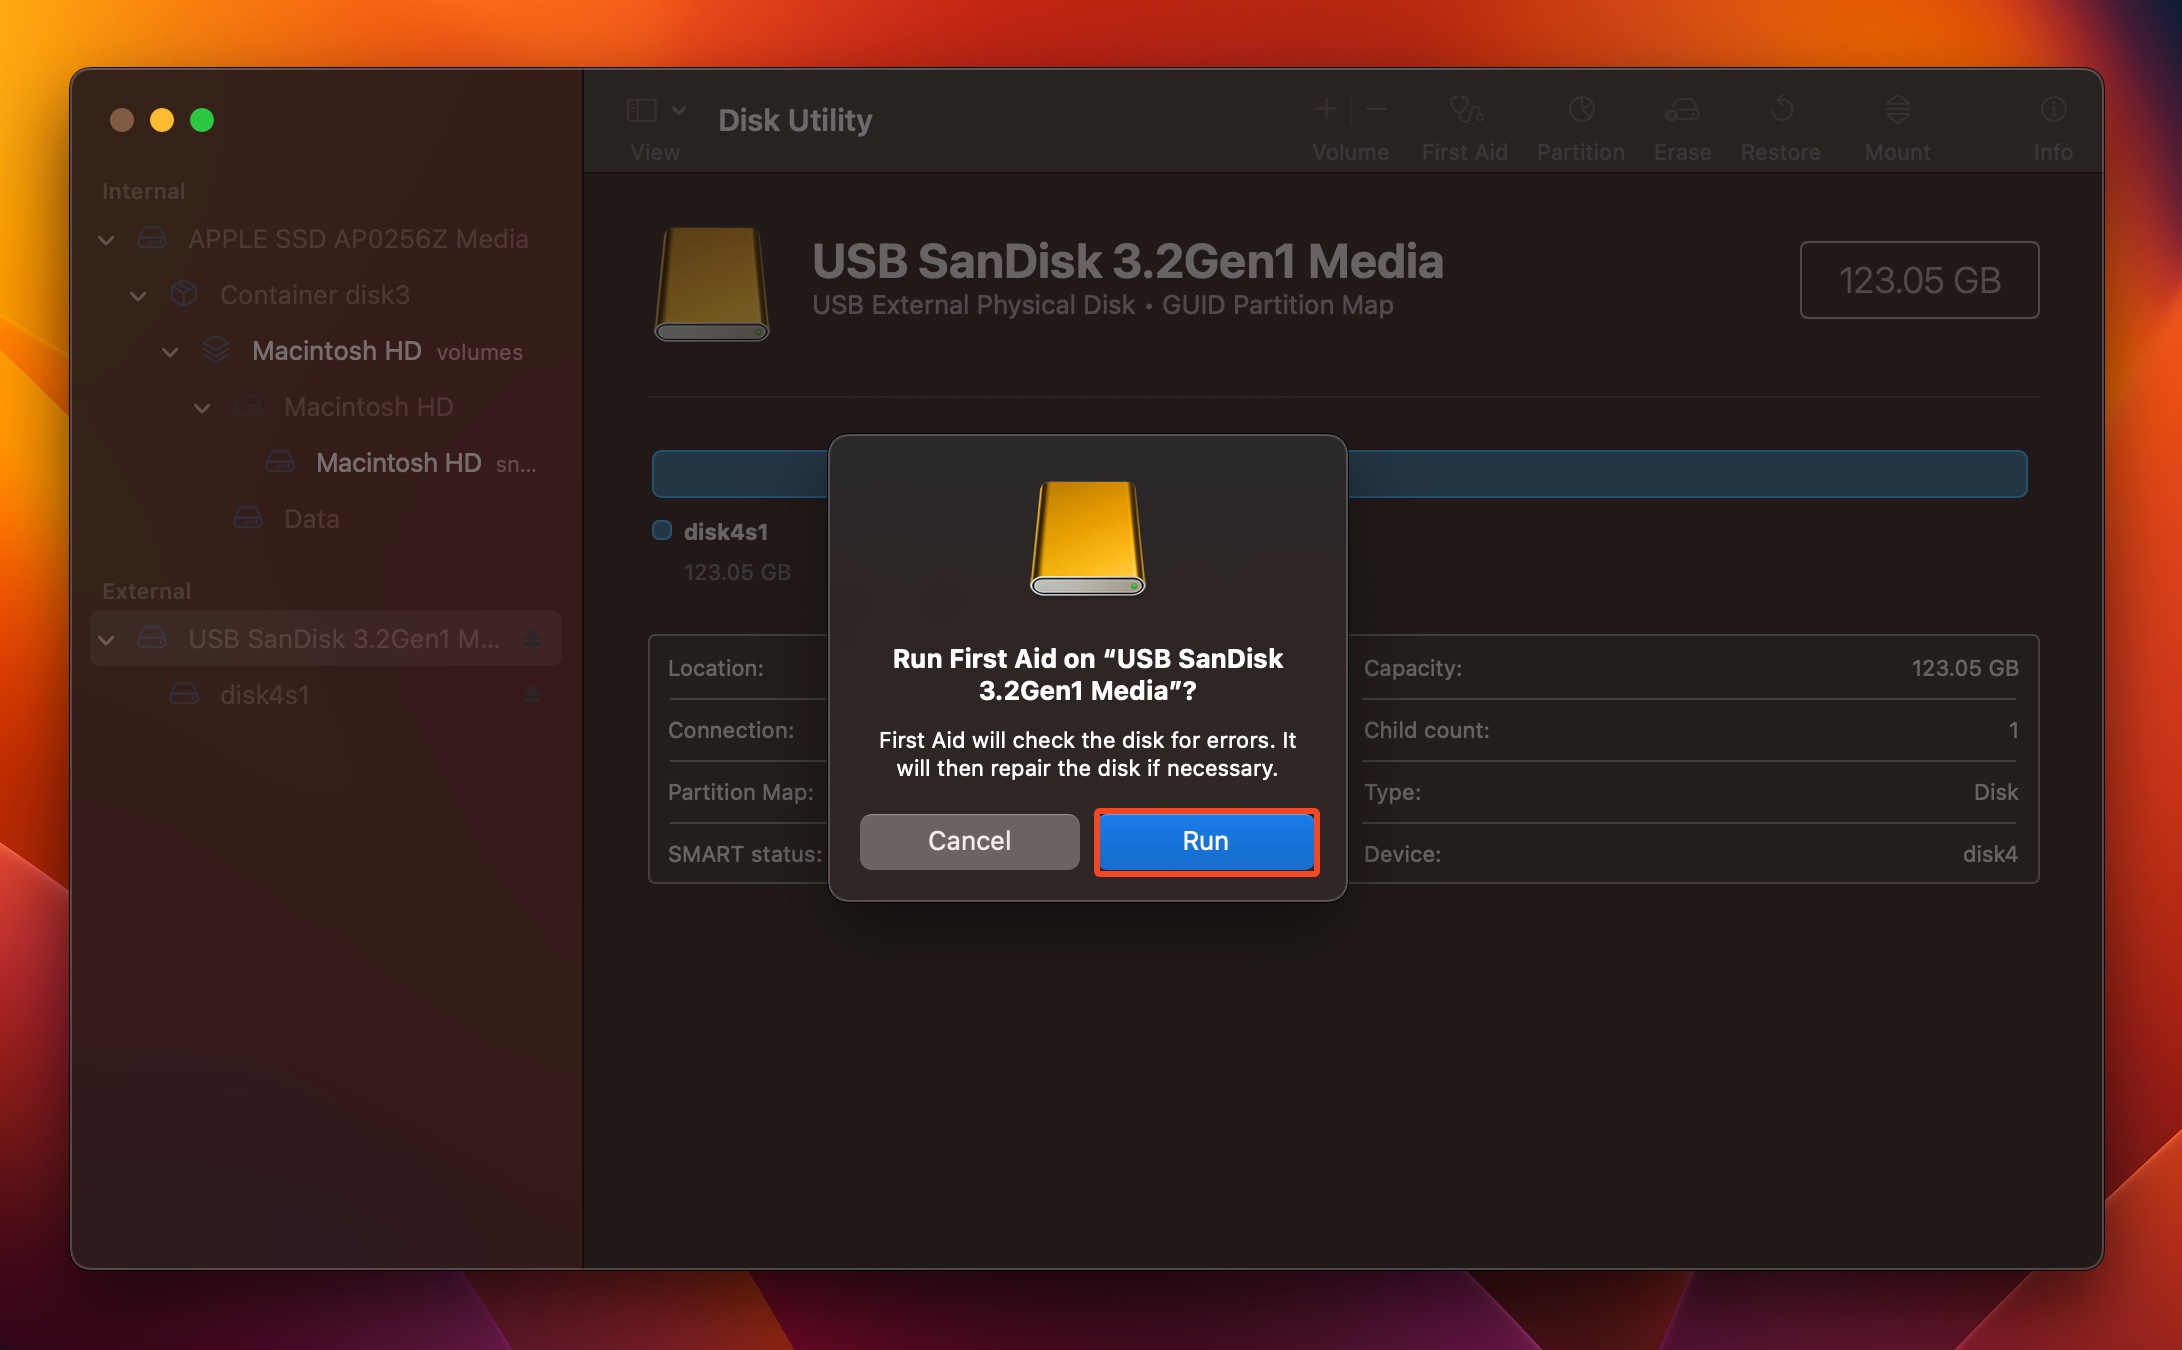
The First Aid feature on macOS can automatically detect and fix a variety of disk errors. It’s a good idea to run this tool when dealing with an uninitialized disk on a Mac. First Aid can be found in the macOS Disk Utility. If your Mac is not starting up, you can use First Aid in macOS Recovery.
To use the First Aid feature on a Mac, follow these steps:
- Open Disk Utility by going to Finder > Applications > Utilities >Disk Utility. You can search for it in Spotlight (Command + Space) as well.
- Click on View > Show All Devices.
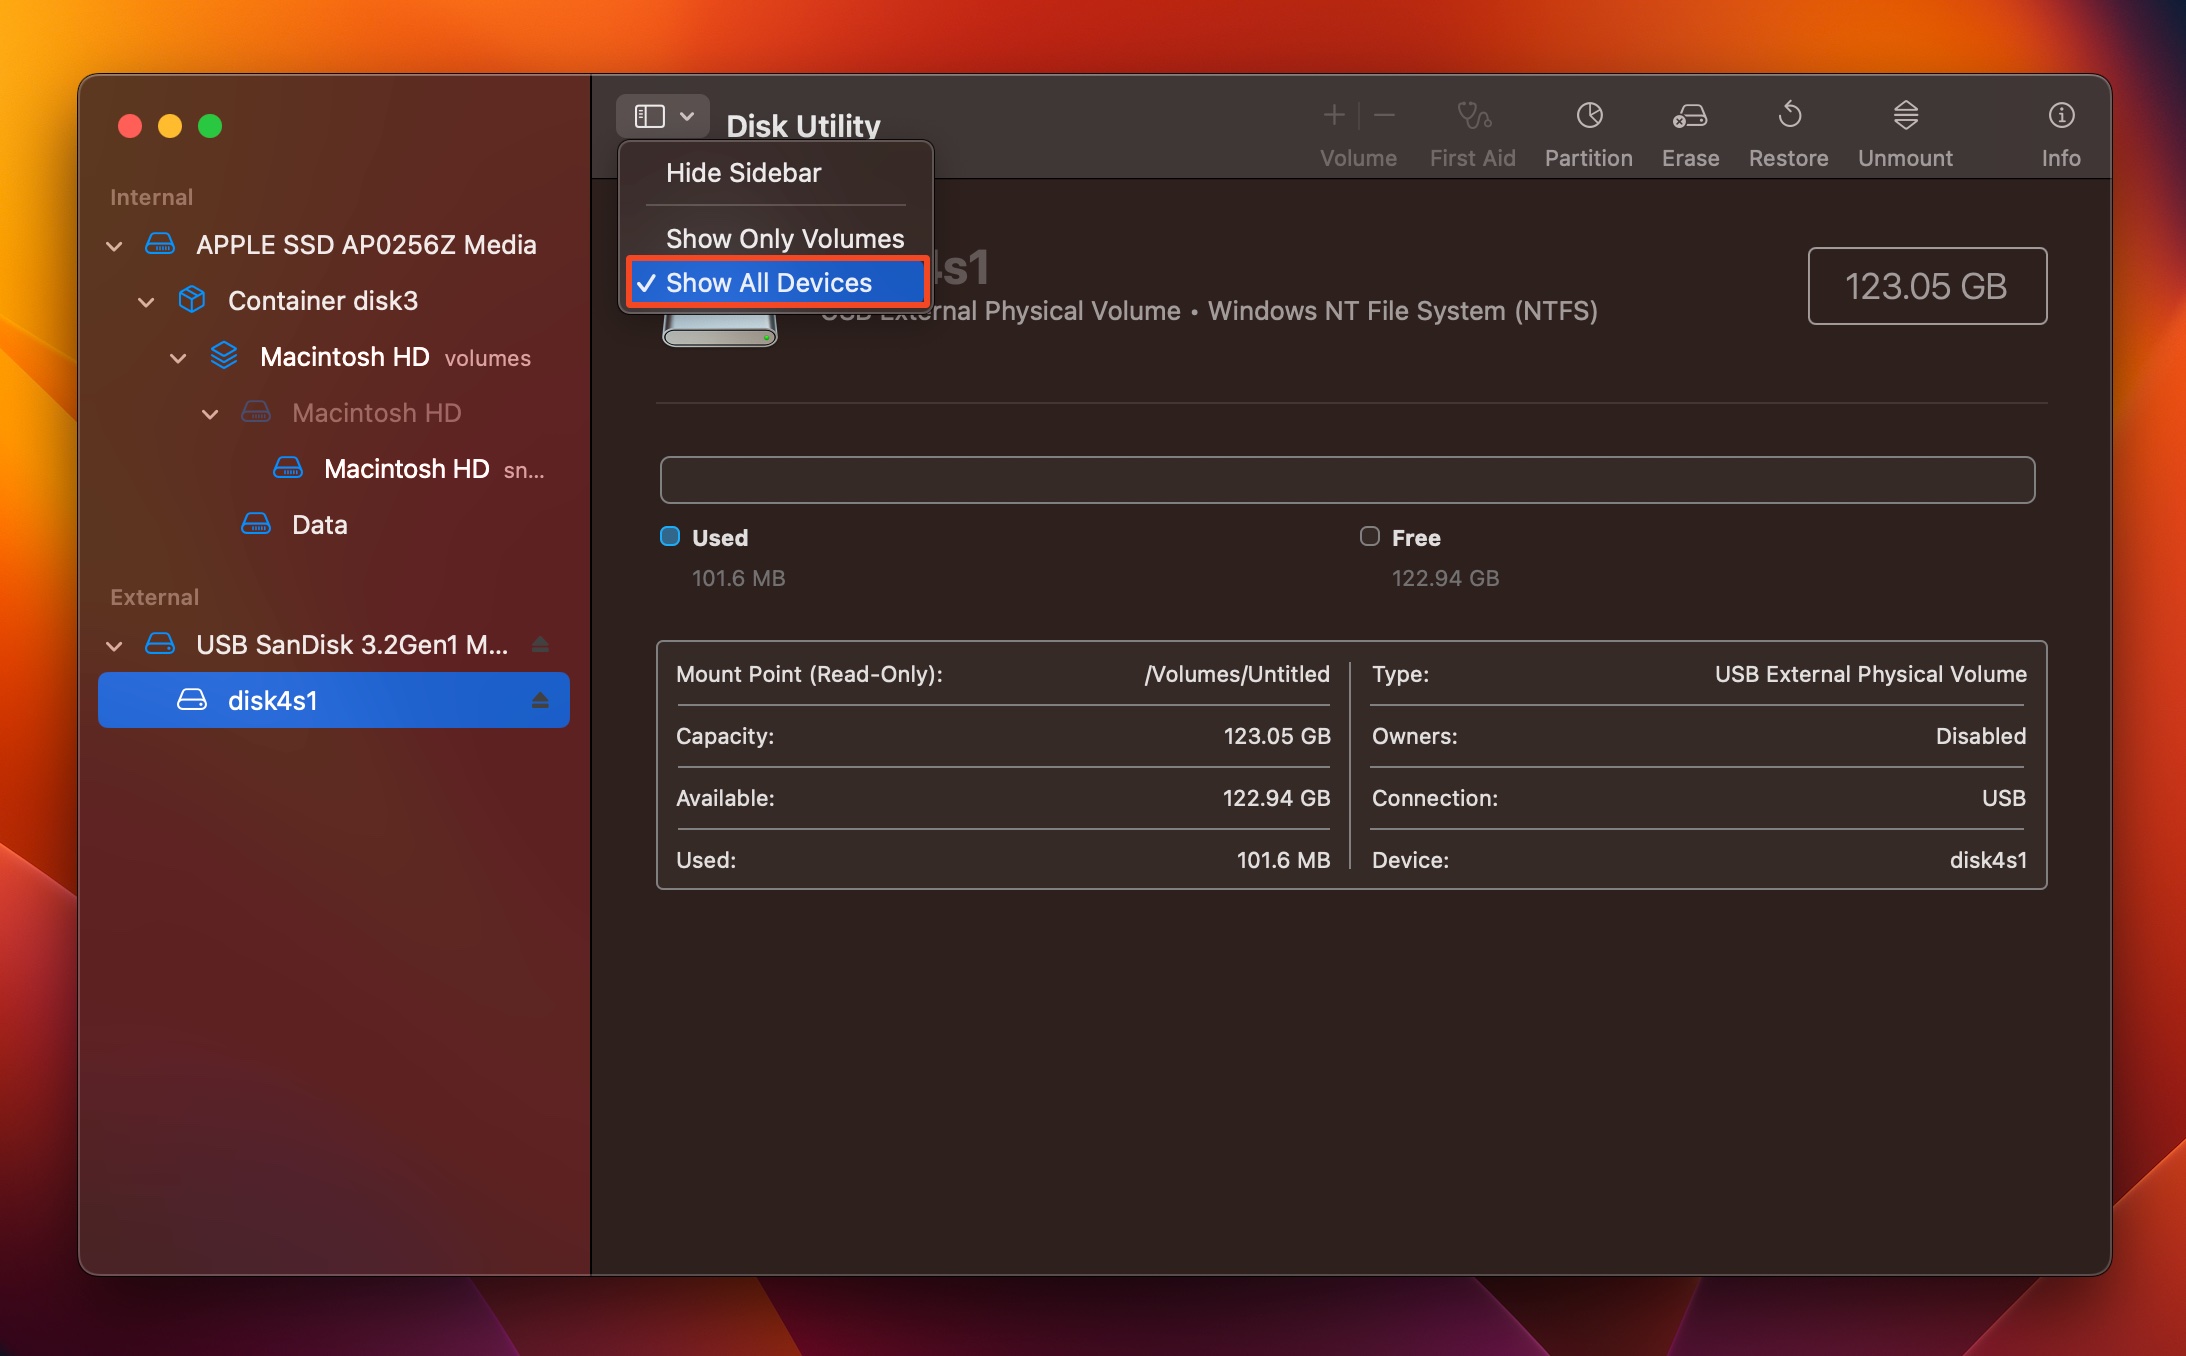
- Select the disk which doesn’t initialize and click on the First Aid option.
- Click on Run or Repair Now in the next window.
Method 4: Connect the Disk to Another Mac and Erase It
So far, if you’ve had no luck in fixing the uninitialized disk, you should attempt to format it. It’s best to connect the drive to another Mac and then use the Erase feature in the Disk Utility. Do this after ensuring that you’re running the latest version of macOS and there are no connection issues on the drive.
To format the disk in macOS, follow these steps:
- Go to Finder > Applications > Utilities > Disk Utility.
- Select the disk you wish to format and click Erase.
- Choose the format parameters according to your needs and click Erase.
Method 5: Reinstall macOS
If nothing helps you initialize the disk, reinstalling macOS is the only method left at your disposal, apart from contacting a professional data recovery service. A clean install will give you a fresh start and should resolve most issues that you may face when initializing the disk.
To reinstall macOS, you first need to enter Recovery Mode. The steps for this will differ, depending on whether you’re running an Intel or M1/M2 based Mac.
For Intel-based Macs, this is how you can enter Recovery Mode:
- Click on the Apple logo on your Mac.
- Choose Restart.
- Hold the Command + R keys until you see a spinning globe or an Apple logo.
- You’ll boot into macOS’ Recovery Mode.
For M1/M2 Macs, the process looks like this:
- Switch off the Mac.
- Press and keep holding the Power button.
- Click on Options > Continue to open Recovery.
In the Recovery mode, choose Reinstall macOS from the options. Enter your Apple ID and your Mac will begin reinstallation.
Conclusion
There are various ways to fix an uninitialized disk on a Mac. Sometimes, a simple reconnection of the drive or a macOS reboot is all that’s necessary. In other cases, you may need to use more complex fixes. But usually, an old disk that suddenly shows up as uninitialized is a warning bell that the drive itself is damaged and could be on the verge of failure.
Data recovery programs make it easy to undo data loss, but they’re not effective in all scenarios. The best way to secure your data is to create regular backups and store them on a local storage drive as well as on the cloud.
FAQ
- Open Disk Utility.
- Select the disk and click Erase.
- Choose the format parameters and click Erase.
- Open the Terminal app.
- Type diskutil list and press Enter.
- Note down the disk number of the drive you wish to format (e.g. /dev/disk1).
- Type diskutil eraseDisk format name /dev/diskx and press Enter. Replace format with the file system, you want the disk to use, replace name with the label you want the disk to have, and replace x after disk with the disk number.
- Open Disk Utility.
- Select the disk and click Erase.
- Choose the required parameters and click Erase.
- Hard drive is disabled in Finder Preferences.
- Damaged cables and ports.
- The disk uses a file system that macOS doesn’t recognize.


