 There can be multiple reasons for data loss on internal and external solid-state drives: corruption, damage, or even human error. If you’ve noticed that some or all of the files went missing from your Mac’s SSD, don’t panic just yet since there still might be a chance of getting them back.
Read on to find out how to recover data from a Mac SSD the easiest and quickest way possible.
Table of Contents
Is It Possible to Recover Data from an SSD?
Yes, it’s possible to restore data from an SSD on a Mac. But, of course, the success rate of the data recovery process will depend on how much time has passed since you noticed that the files got missing and on the reason why data loss occurred in the first place.
If your external or internal solid-state drive has physical damage, faulty firmware, or is infected with ransomware, the chances that you would be able to recover data from it are significantly lower.
And, also, probably the biggest influence on the effectiveness of Mac SSD data recovery has the TRIM command.
What Is TRIM and How It Influences SSD Data Recovery?
TRIM is a built-in feature that’s enabled by default on most Mac solid-state drives. Its main task is to ensure a quick read/write process on your SSD by managing available storage space. Whenever you delete a file or folder from your solid-state drive, this command marks it as invalid and allows the drive to immediately get rid of those data blocks.
This tool is known to have a strong positive impact on the SSD’s performance and its overall lifespan. But unfortunately, when it comes to recovering data from a Mac solid-state drive with TRIM, this feature becomes a huge problem.
Important: You’ll have higher chances in recovering the lost data from your Mac SSD if you start the process as soon as possible. This way, you might be able to bring your files back before TRIM marks them as invalid.
How to Recover Data from an SSD on Mac
When it comes to recovering lost files from a Mac SSD, the best option is to use specialized data recovery software. After testing a few apps, we decided that Disk Drill is best for such a task since it has proven to be effective, user-friendly, and reliable.
Follow these steps to recover data from a Mac SSD drive with Disk Drill:
- Download Disk Drill and follow the onscreen instructions to install the app.
- Launch the application.
- Choose Storage devices on the sidebar and click the solid-state drive from which you wish to recover data.
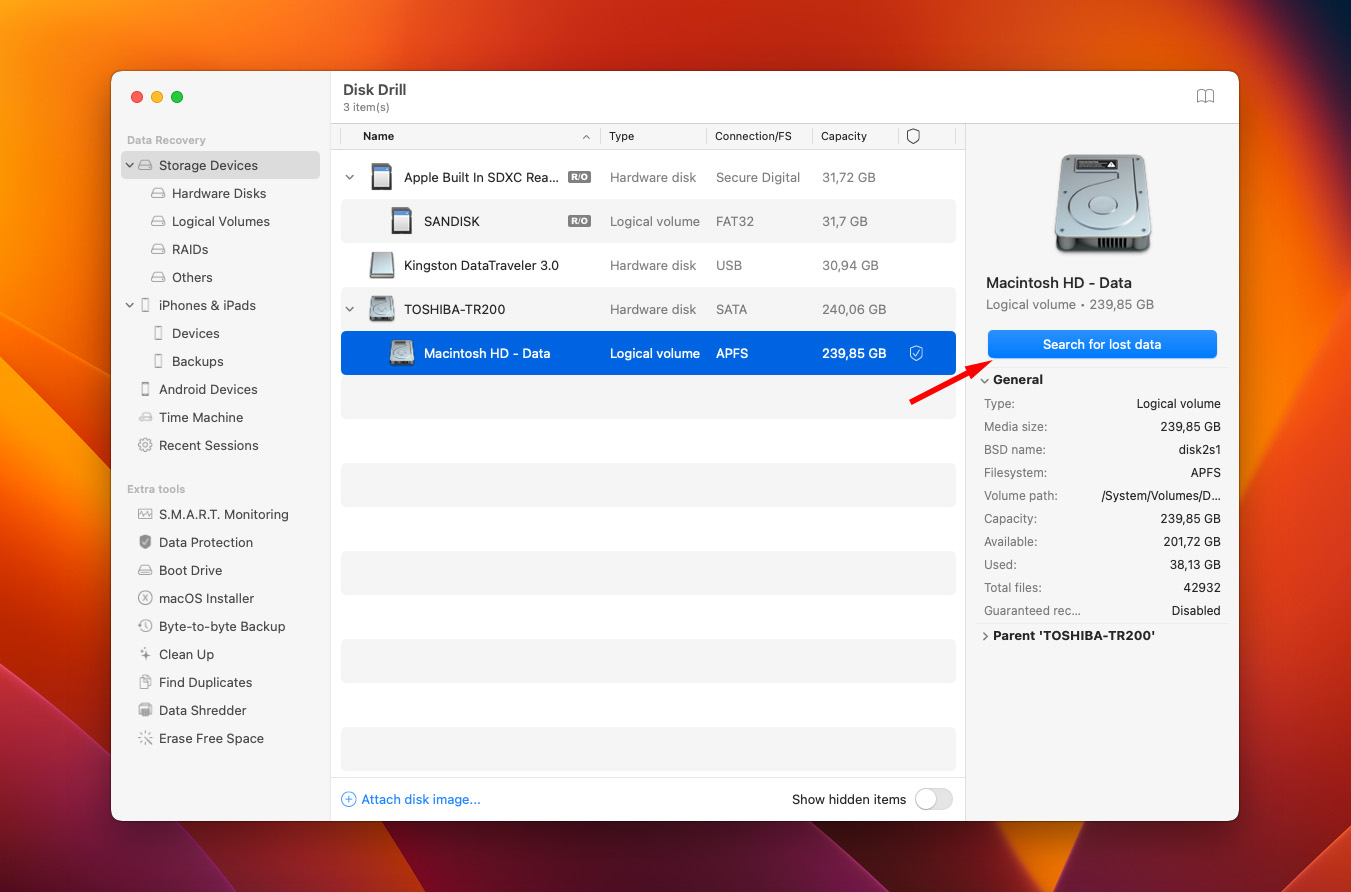
- Software will use all recovery methods by default so just click the Search for lost data button to initiate a scan.
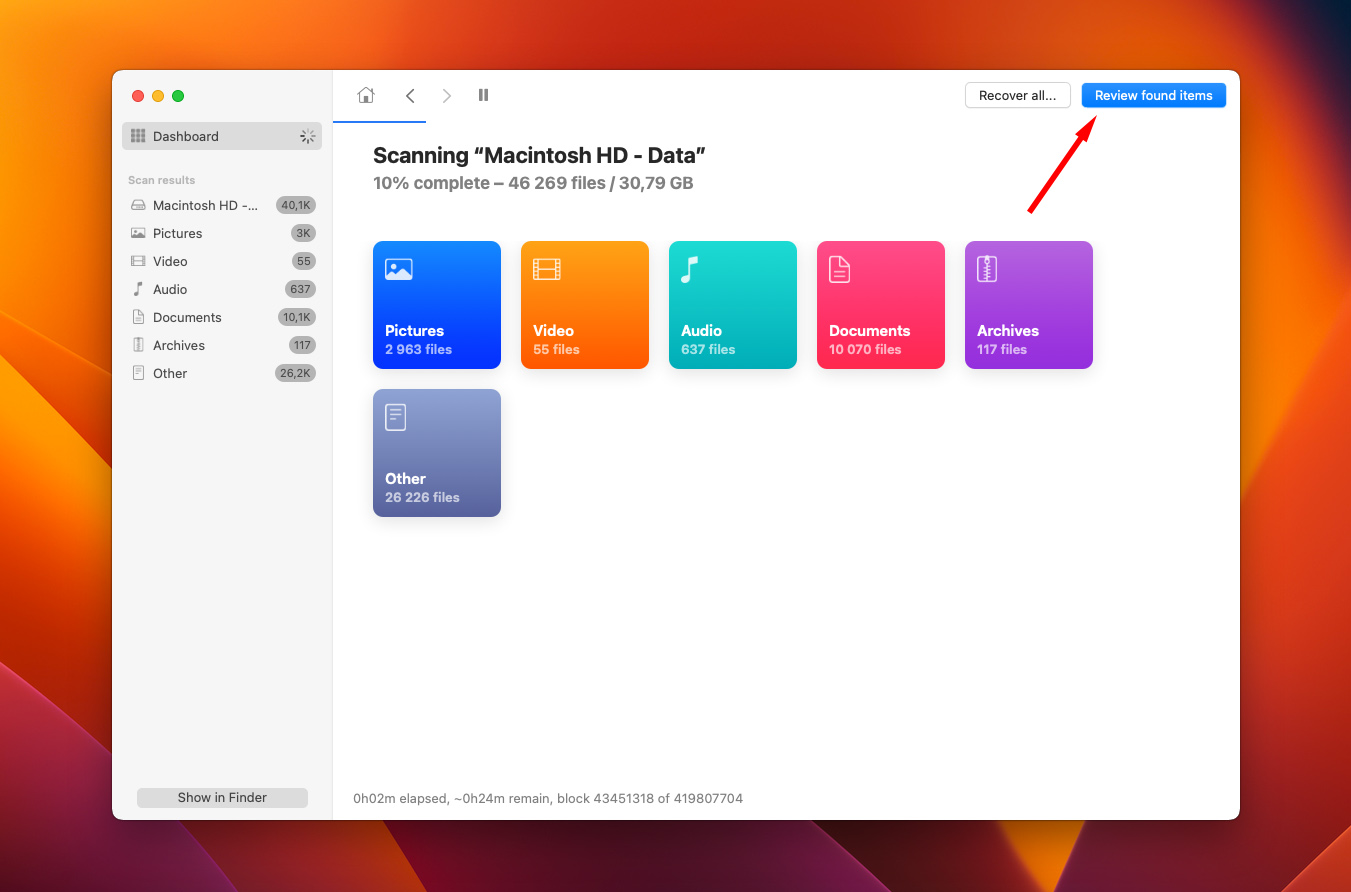
- Click the Review found items button to preview the found data on your SSD.
- Either select separate files or folders that you wish to recover or click the box on top of the files list to choose all of the data.
- Click the Recover button.
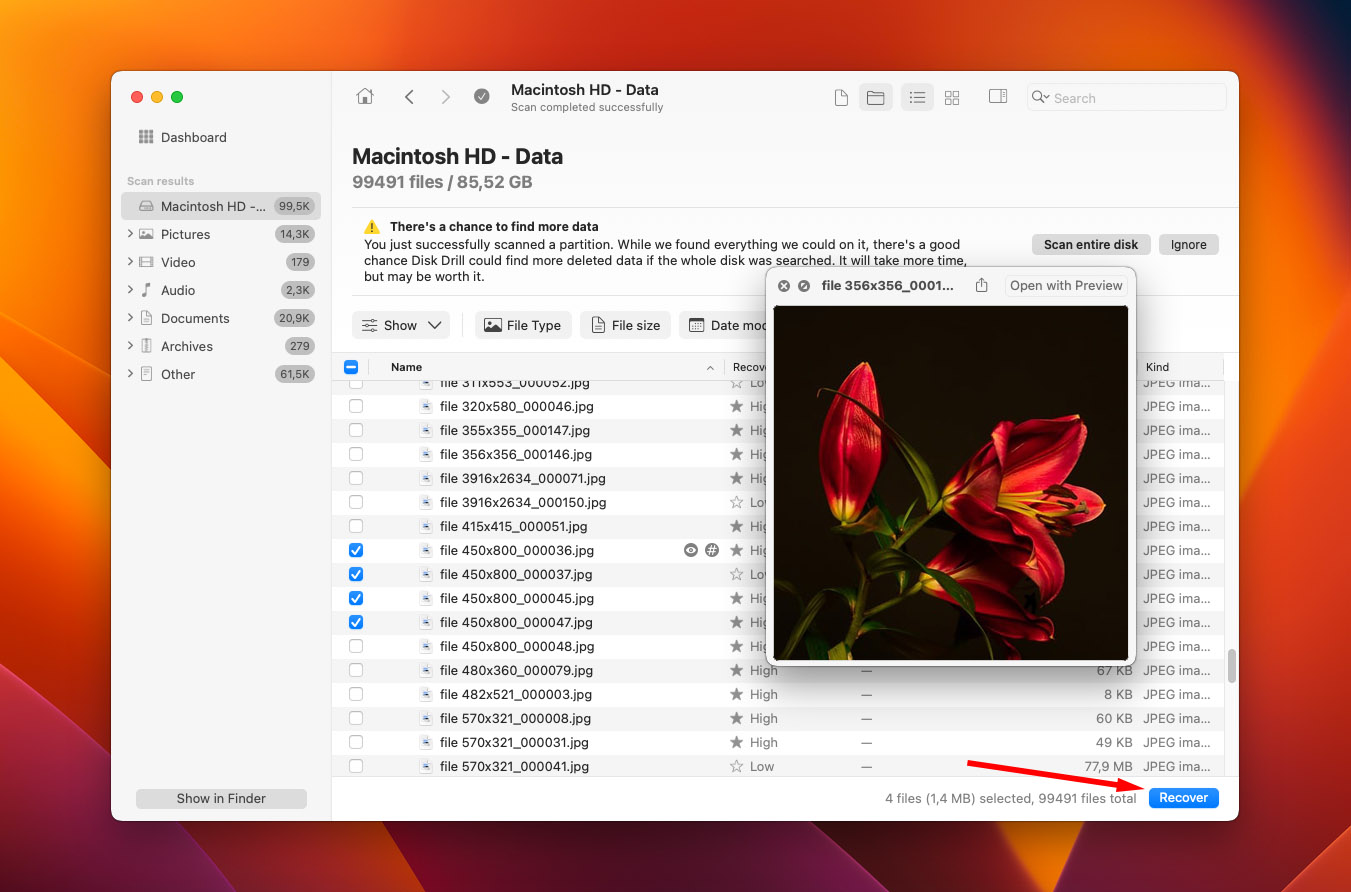
- Choose the destination for the recovered data (choose a drive that’s different from the one you’re trying to recover to avoid data overwriting) and click OK.
If your SSD is failing, then it’s best to create a byte-to-byte image of the drive before moving forward with the data recovery process. This will help to avoid further data loss and therefore increase your chances of finding more potentially recoverable data.
Here’s how to create a backup disk image of your SSD on your Mac with Disk Drill:
- Open the Disk Drill app on your Mac.
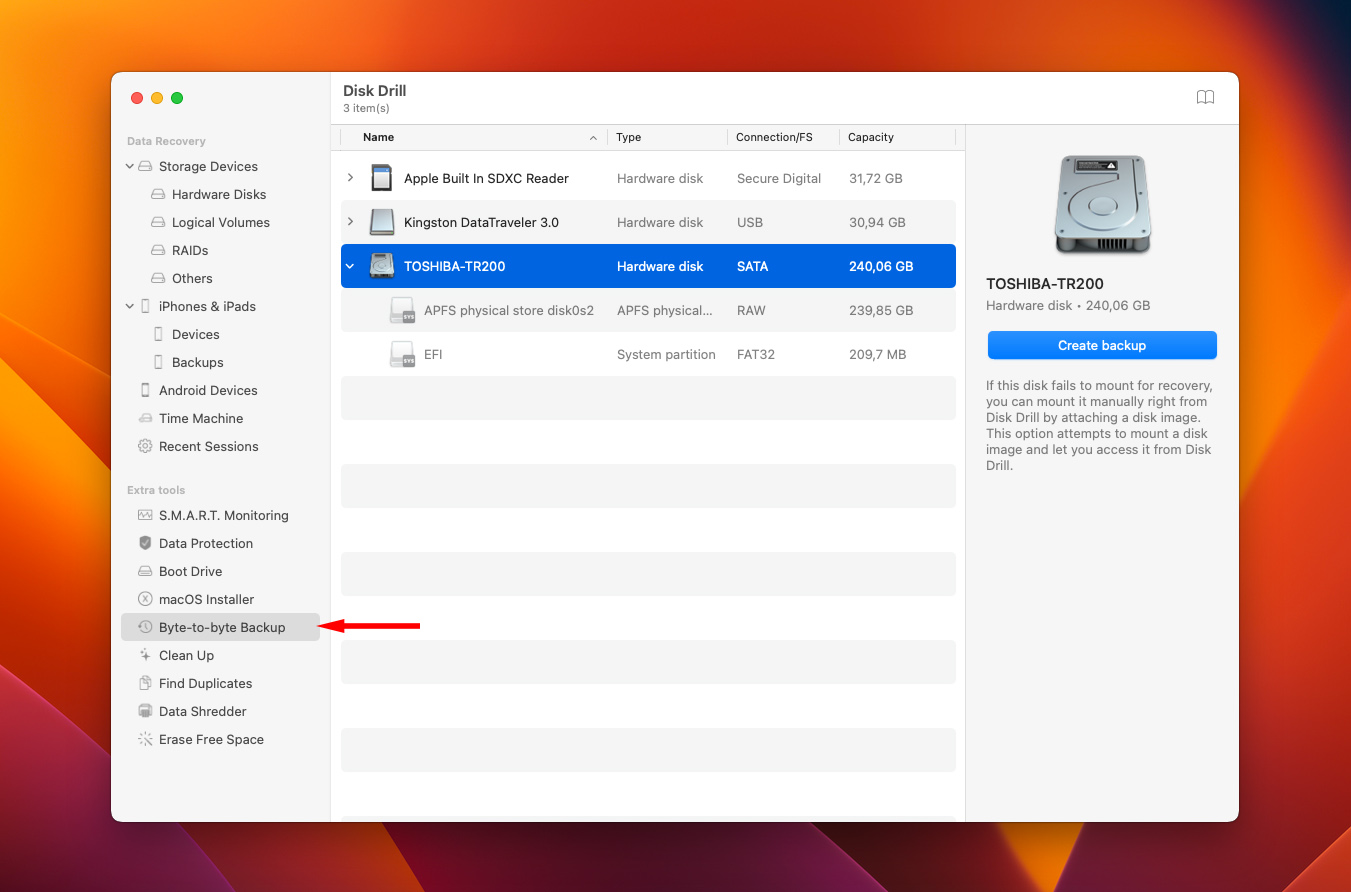
- On the sidebar at the left, choose Byte-to-byte Backup.
- Click OK, let’s do it
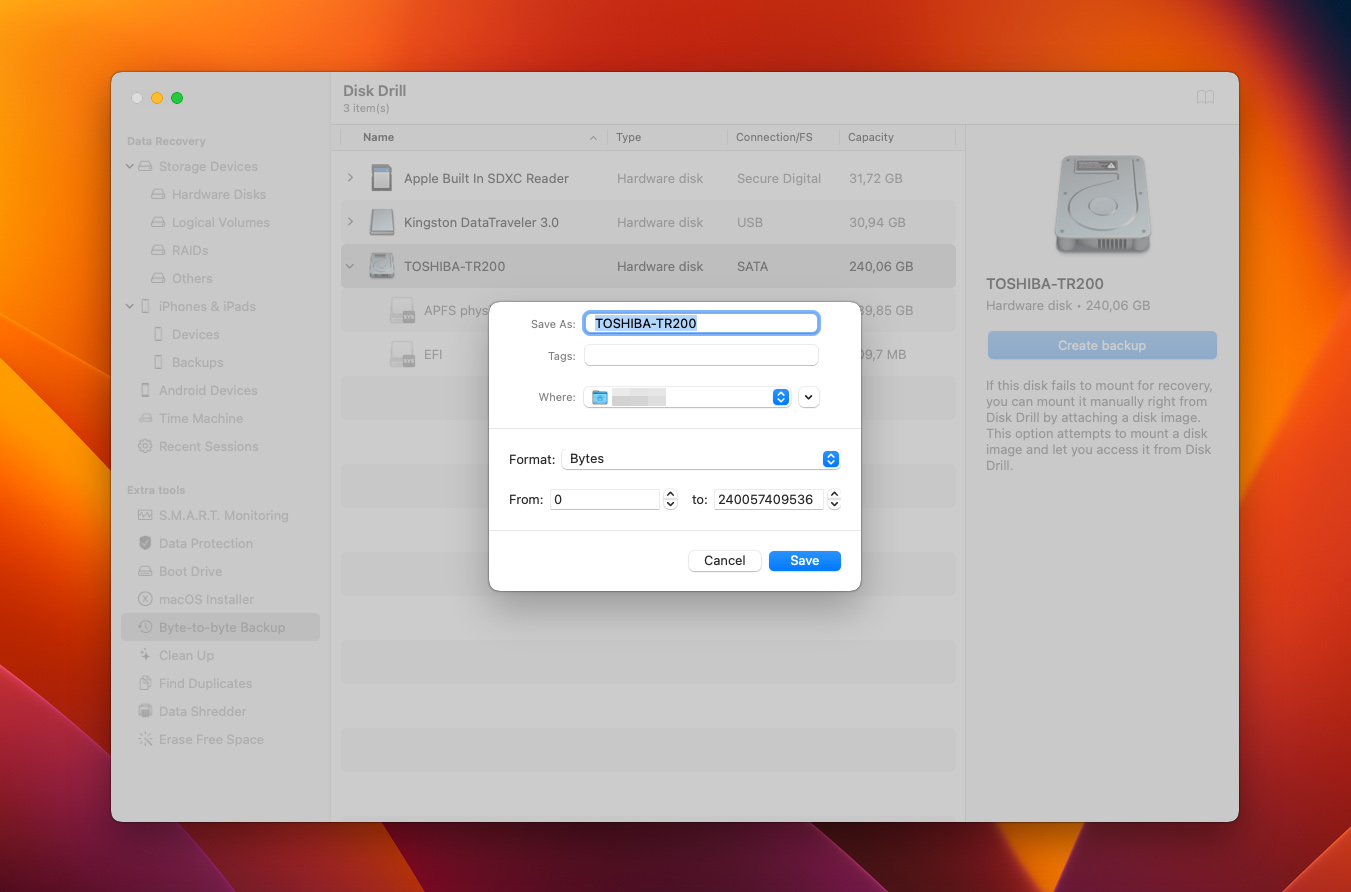
- Select your SSD from the list of available devices and then click Create Backup.
- Enter a name for your file, choose its destination, and click Save.
Once the application has finished creating the byte-to-byte copy of your solid-state drive, scan it with Disk Drill (follow the steps described above) and recover the SSD data.
How to Check Whether TRIM Is Enabled on Your SSD
If you need to recover deleted data from an SSD, the good news is that not all SSDs have TRIM support, so maybe this issue isn’t really an issue in your situation. Or it’s possible that this tool is already disabled on your drive, allowing you to easily perform data recovery.
Here’s how to check whether TRIM is enabled on your SSD on Mac:
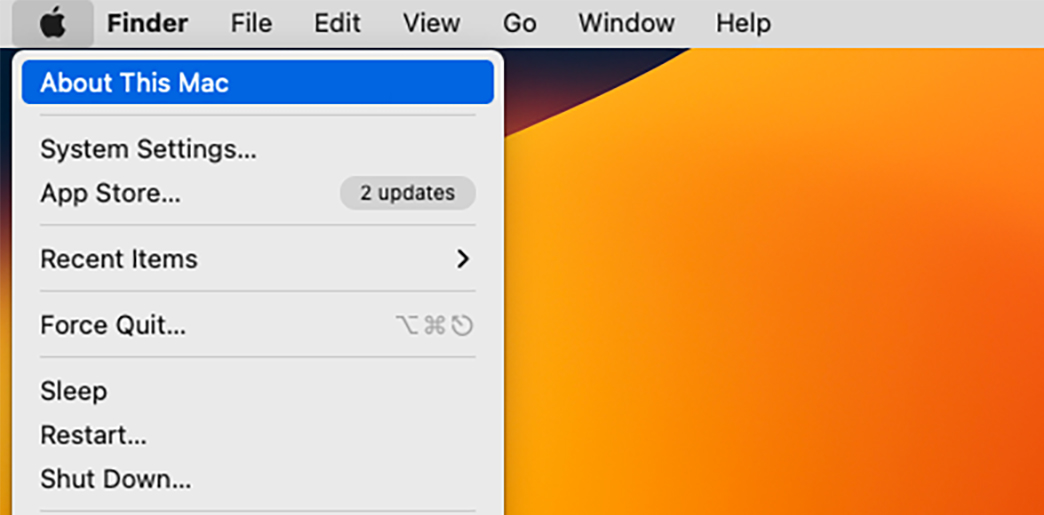
- Open the Apple menu on the top-right of your Mac’s screen.
- Click About This Mac.
- In the Overview tab, click the System Report button.
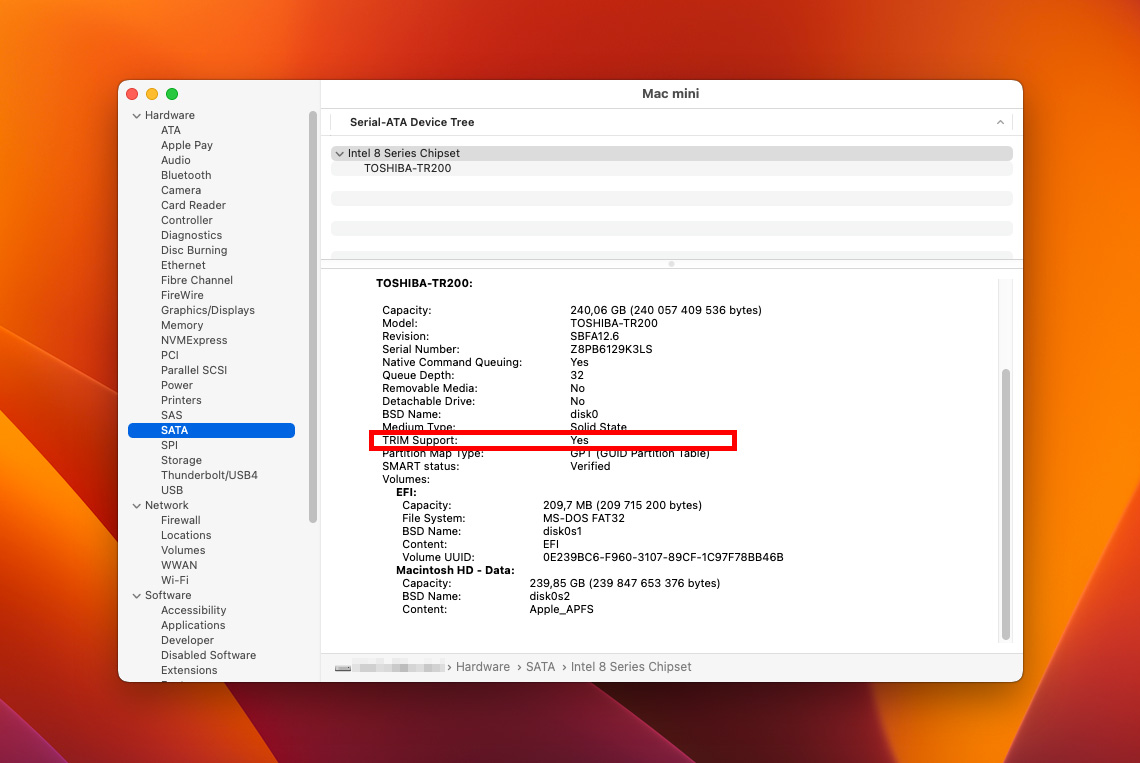
- Under Hardware on the sidebar, choose either NVMExpress or SATA/SATA Express (depending on your Mac).
- On the right side of the screen, look for TRIM Support. If it says Yes near it, then this feature is enabled on your Mac’s SSD.
You might be wondering right now — why not just disable TRIM on the Mac SSD to avoid having any issues with recovering the missing files?
If that’s what you want, then you can make this change with the help of the Terminal app on your Mac. Simply launch it, copy-paste sudo trimforce disable into Terminal, and hit Enter.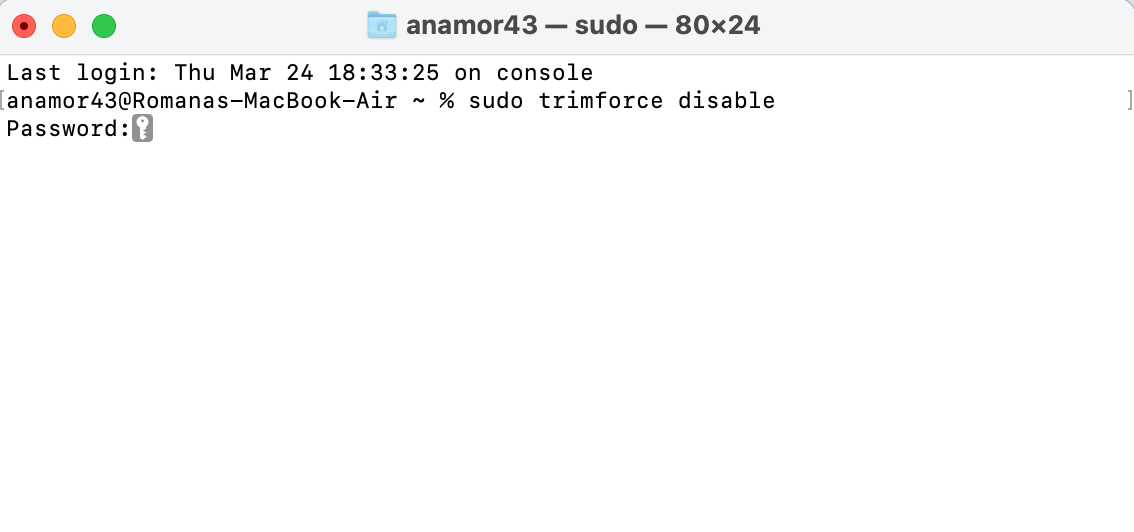
Note: Keep in mind that even though this may increase your chances of recovering data from the SSD, it will slow down your solid-state drive and affect its performance.
FAQ
- It runs incredibly slow
- New files can't be written
- Apps freeze for no reason
- It won't boot and frequently crashes
- Boot into Recovery mode on your Mac and perform data recovery using a Time Machine backup (works only if you have a Time Machine backup in place).
- Connect your Mac using Target Disk Mode and transfer the data to another fully functioning Mac.
- Try using data recovery software in Recovery mode for your SSD.


