 The first thing most of us do when a drive doesn’t work like it should, is use the First Aid feature in Disk Utility to repair it. But, what if the macOS Disk Utility can’t repair the disk and throws up errors? How do you recover your data and get your disk working again? We’ll answer these questions in the sections below.
Table of Contents
Why Can’t MacOS Disk Utility Repair My Disk?
It’s important to determine why the macOS Disk Utility is unable to repair your drive. The drive may simply be incompatible with your Mac, or it could be on the verge of failure due to extensive logical or physical damage.
Broadly speaking, your Mac’s Disk Utility is unable to repair your drive because of the following reasons:
- 🗃️ Logical Damage: The Disk Utility’s job is to repair file system and formatting errors on your disk. However, if the damage is too extensive, and the disk is not even readable properly, the utility won’t be able to help you out. Sometimes, First Aid will run on the drive, but it will display a message stating that the errors couldn’t be repaired.
- 🔨 Physical Damage: In addition to the gradual wearing down of parts, heat, water, and physical shock can damage your drive. Hard drives are especially susceptible to this because they have numerous moving parts. The Disk Utility’s First Aid feature cannot help you in cases involving physical damage.
- 🔗 Connection Issues: If the Disk Utility can’t repair an external hard drive, the connector cables or ports may be damaged. It could also be a simple case of a loose connection that’s preventing your Mac from reading the drive properly.
Regardless of why Disk Utility is unable to repair your drive, it’s always best to recover any important files from the drive as soon as possible.
How to Recover Data from a Drive That MacOS Can’t Repair
It may not always be possible to simply copy files off a drive that your Mac’s Disk Utility can’t repair. The drive may be inaccessible in Finder, experiencing performance issues, or some of your data may have already been deleted. Even if the drive seems to be working fine, we recommend you create a disk image/backup of the entire drive and recover data from the disk image.
There are numerous data recovery programs that can directly scan your drive and recover data from it, but only a few support creating disk images as well as scanning them, in one interface.
One such program is Disk Drill, which we’ll use to demonstrate the backup and recovery process for disk that macOS can’t repair. We opted for Disk Drill as it’s extremely easy-to-use, supports a wide variety of file systems across macOS and Windows (it even works with drives without a file system), and lets you create and scan disk images within a single UI.
Here’s how to use Disk Drill and recover data from a drive that Disk Utility can’t repair:
Step 1: Create a Backup of the Drive
- Download Disk Drill and install it.
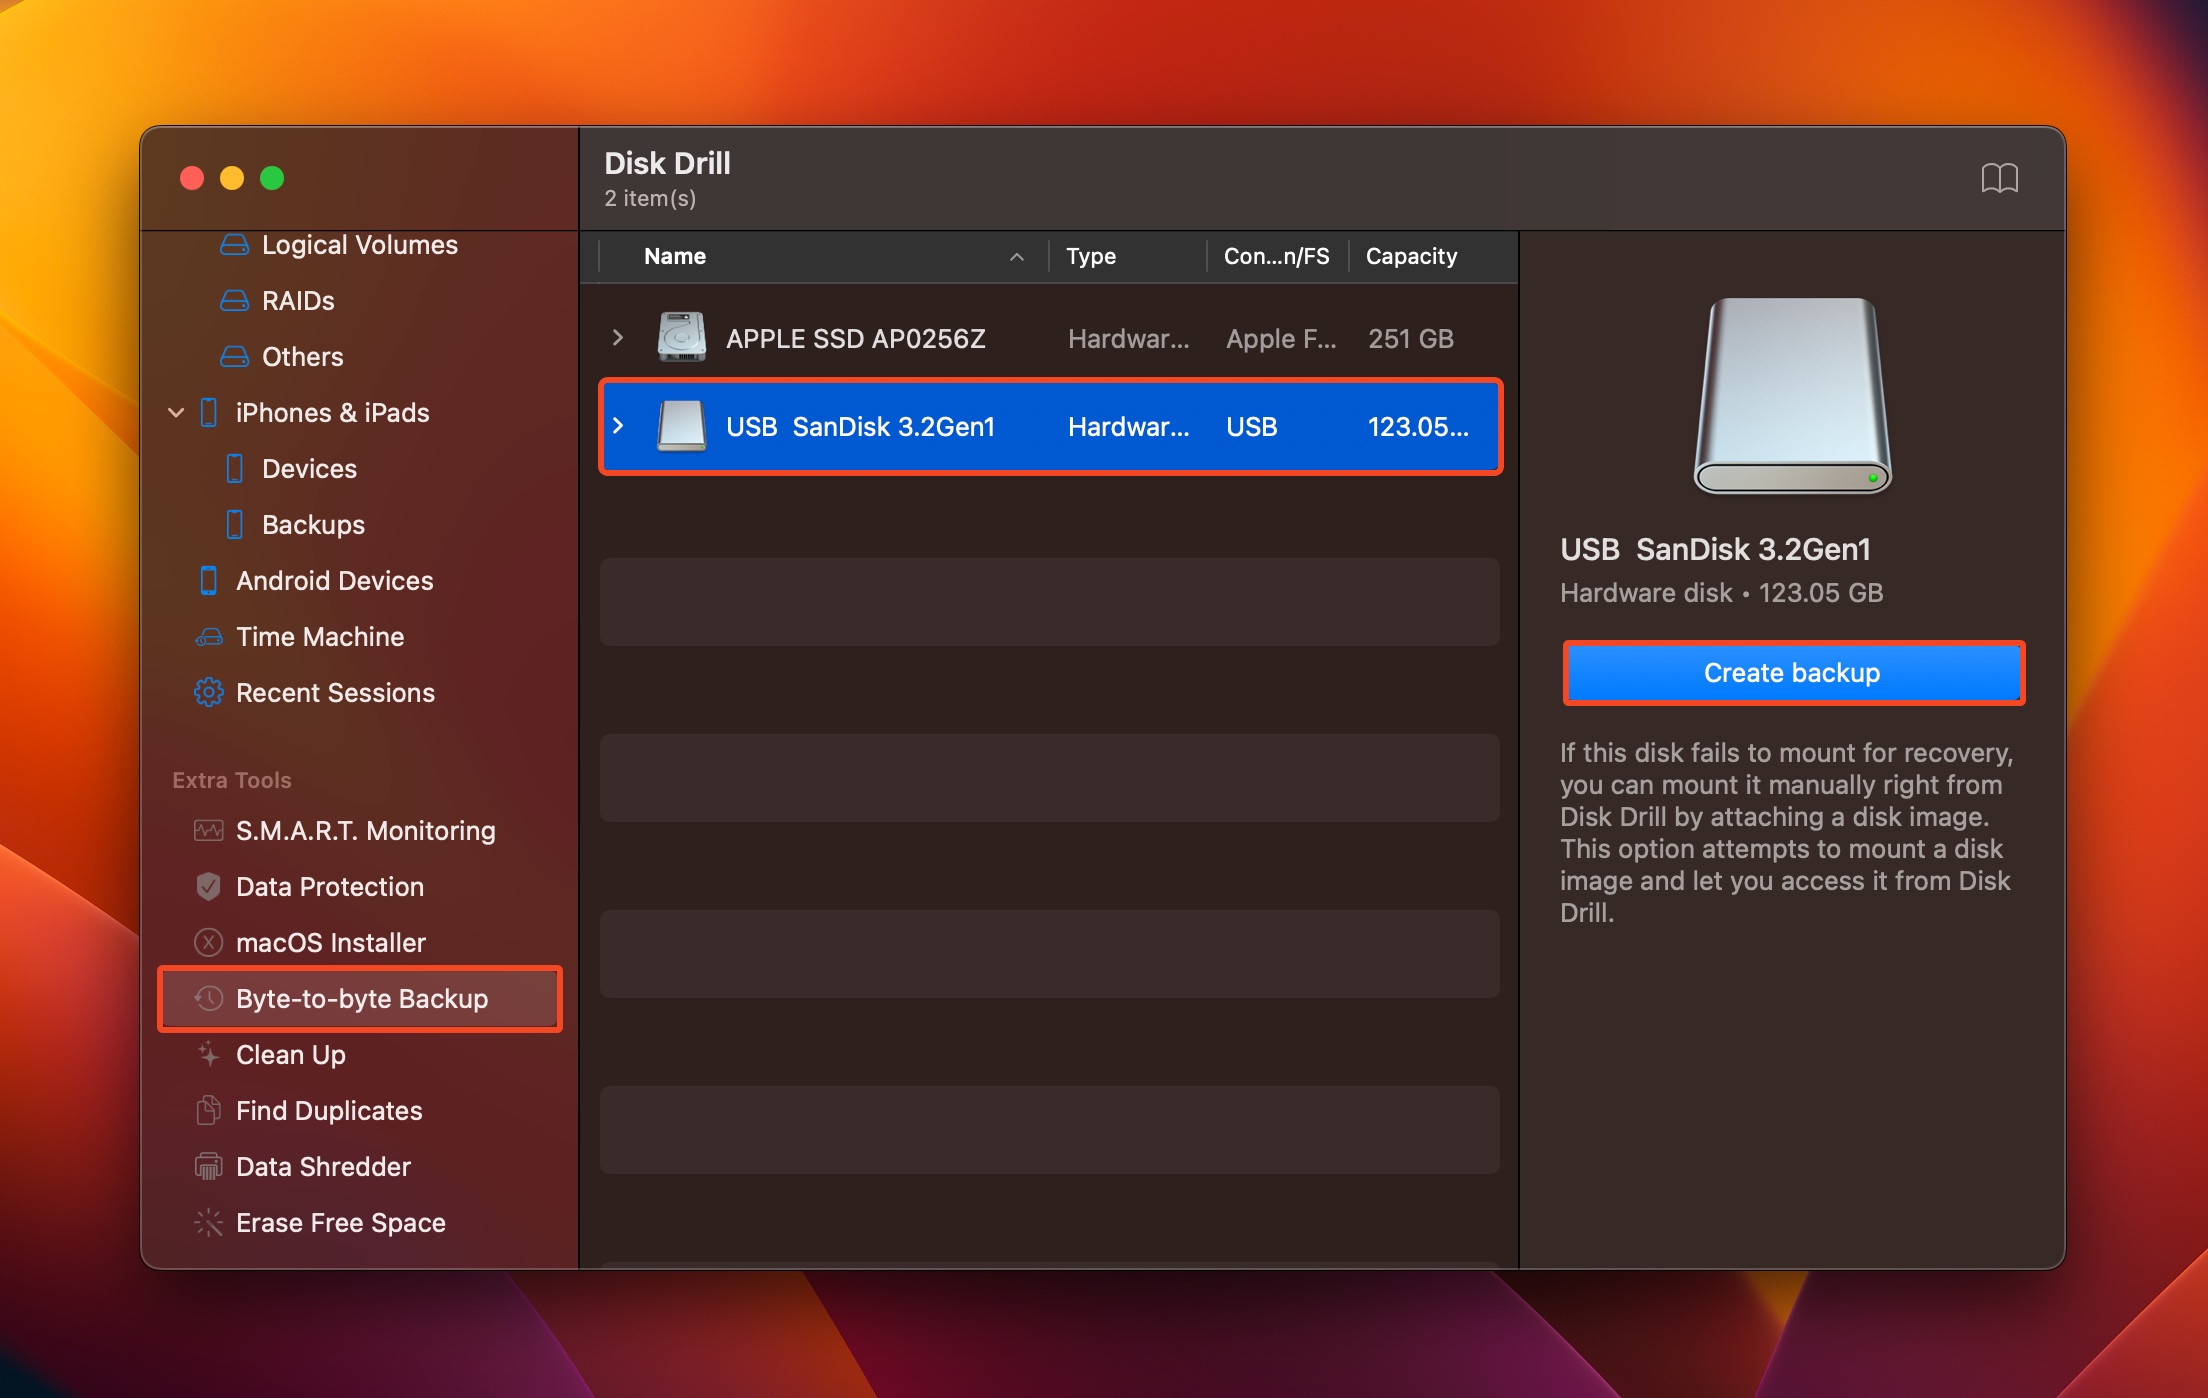
- Open Disk Drill, and click on the Byte-to-Byte Backup option in the sidebar.
- Select the affected disk and click Create Backup.
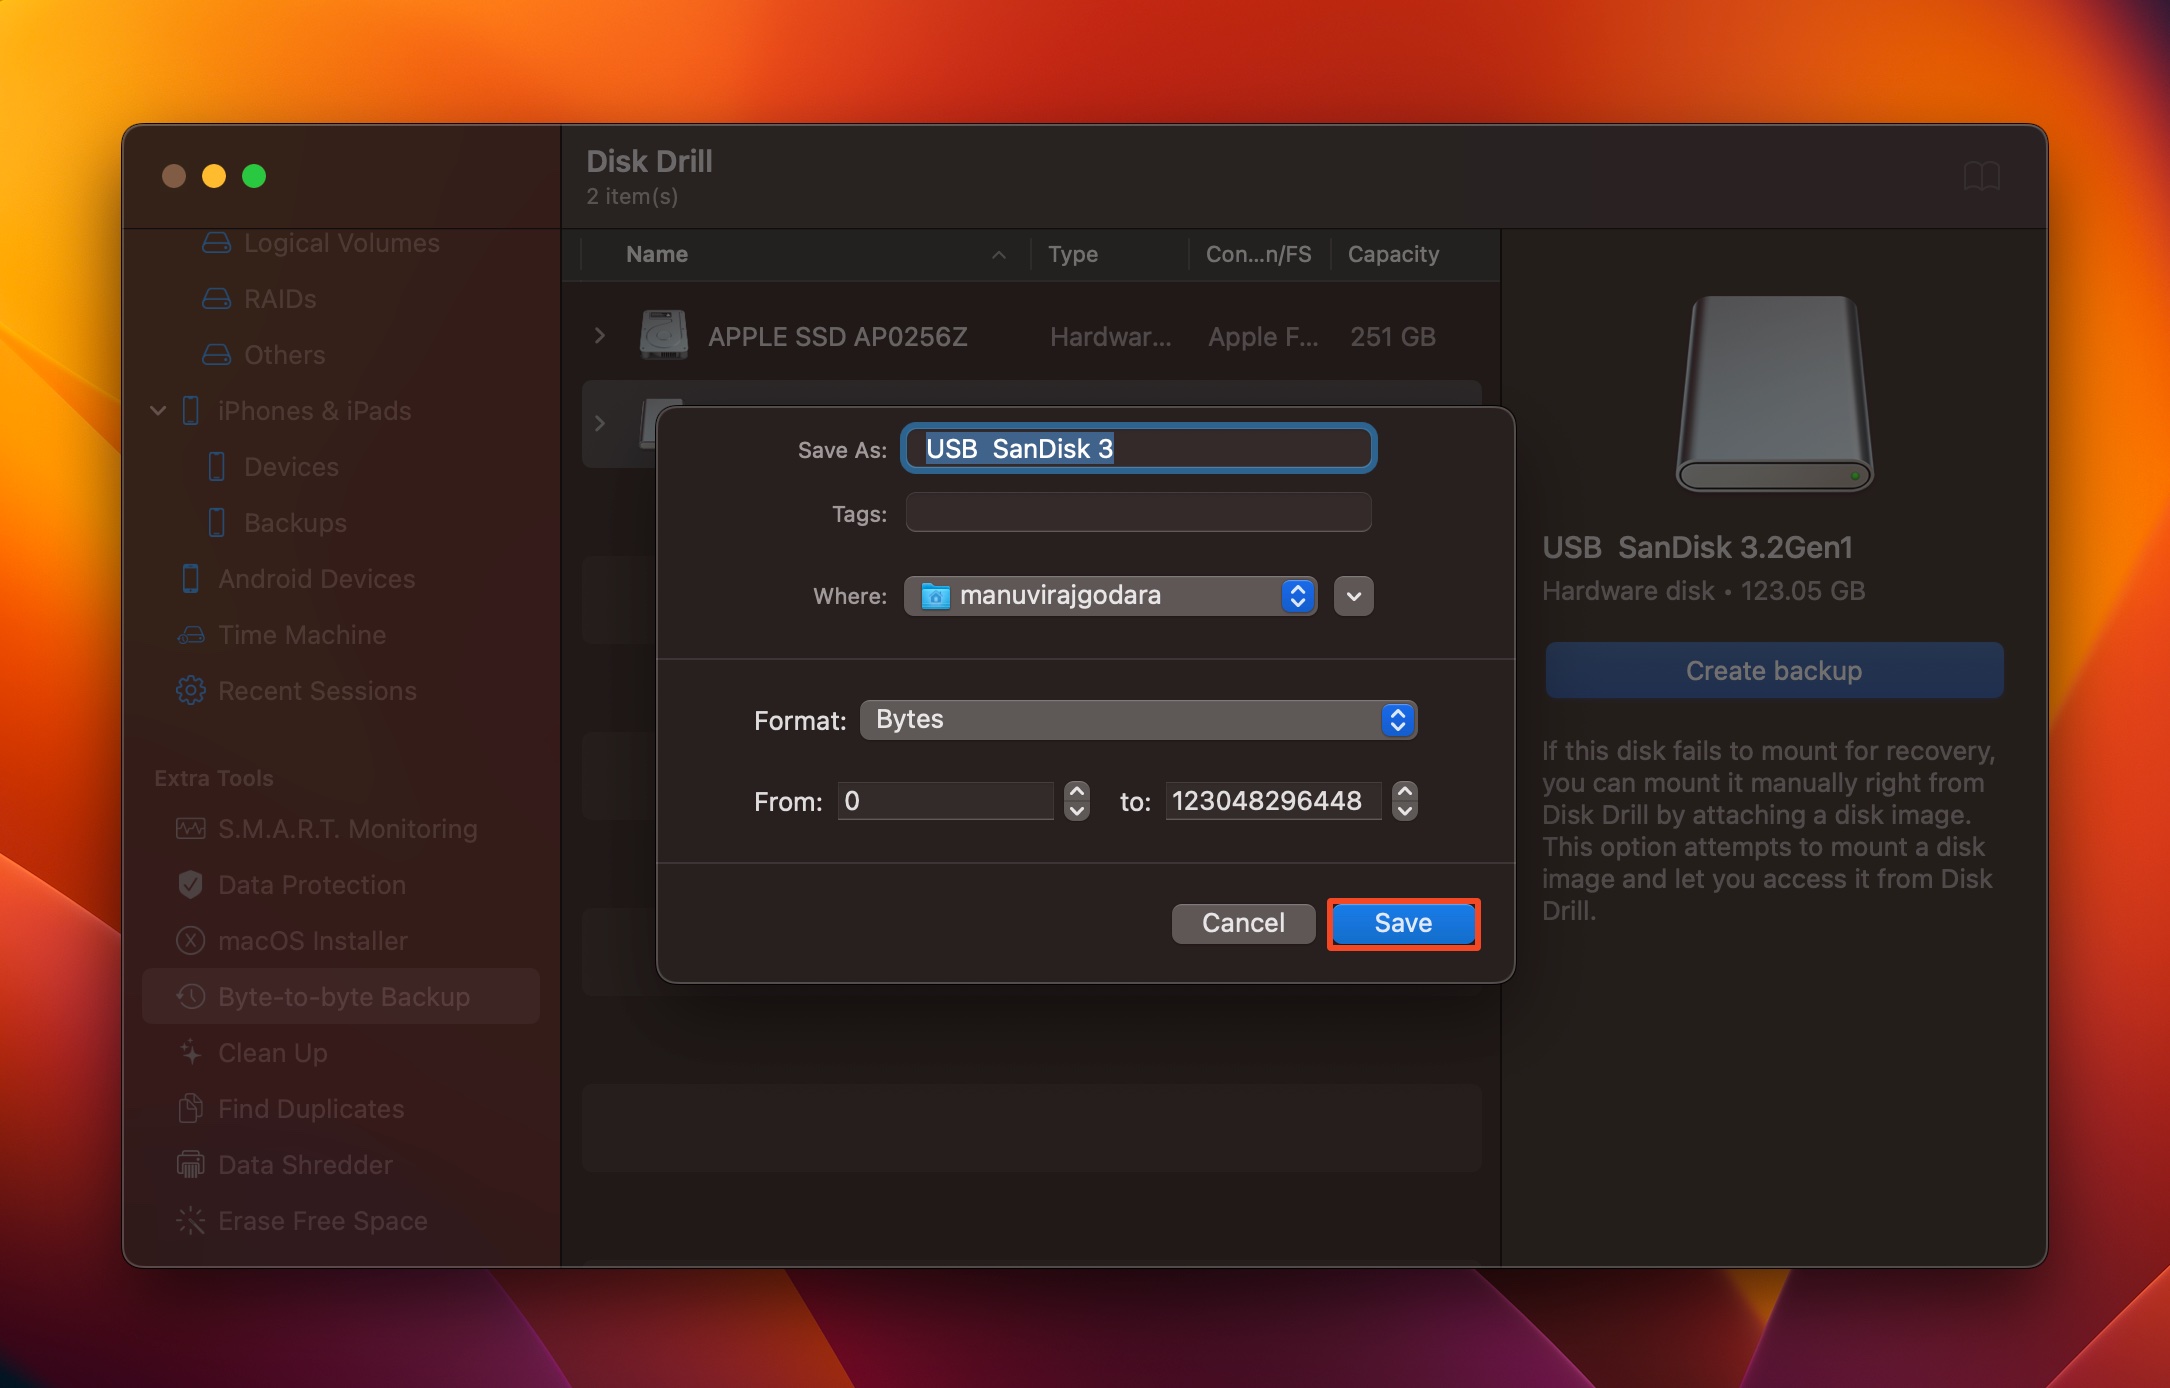
- Choose where you wish to save the disk image and click Save. The destination should have enough free space (equal to or more than the affected drive’s total storage capacity).
- Disk Drill will create the disk image.
Step 2: Scan the Disk Image for Your Files
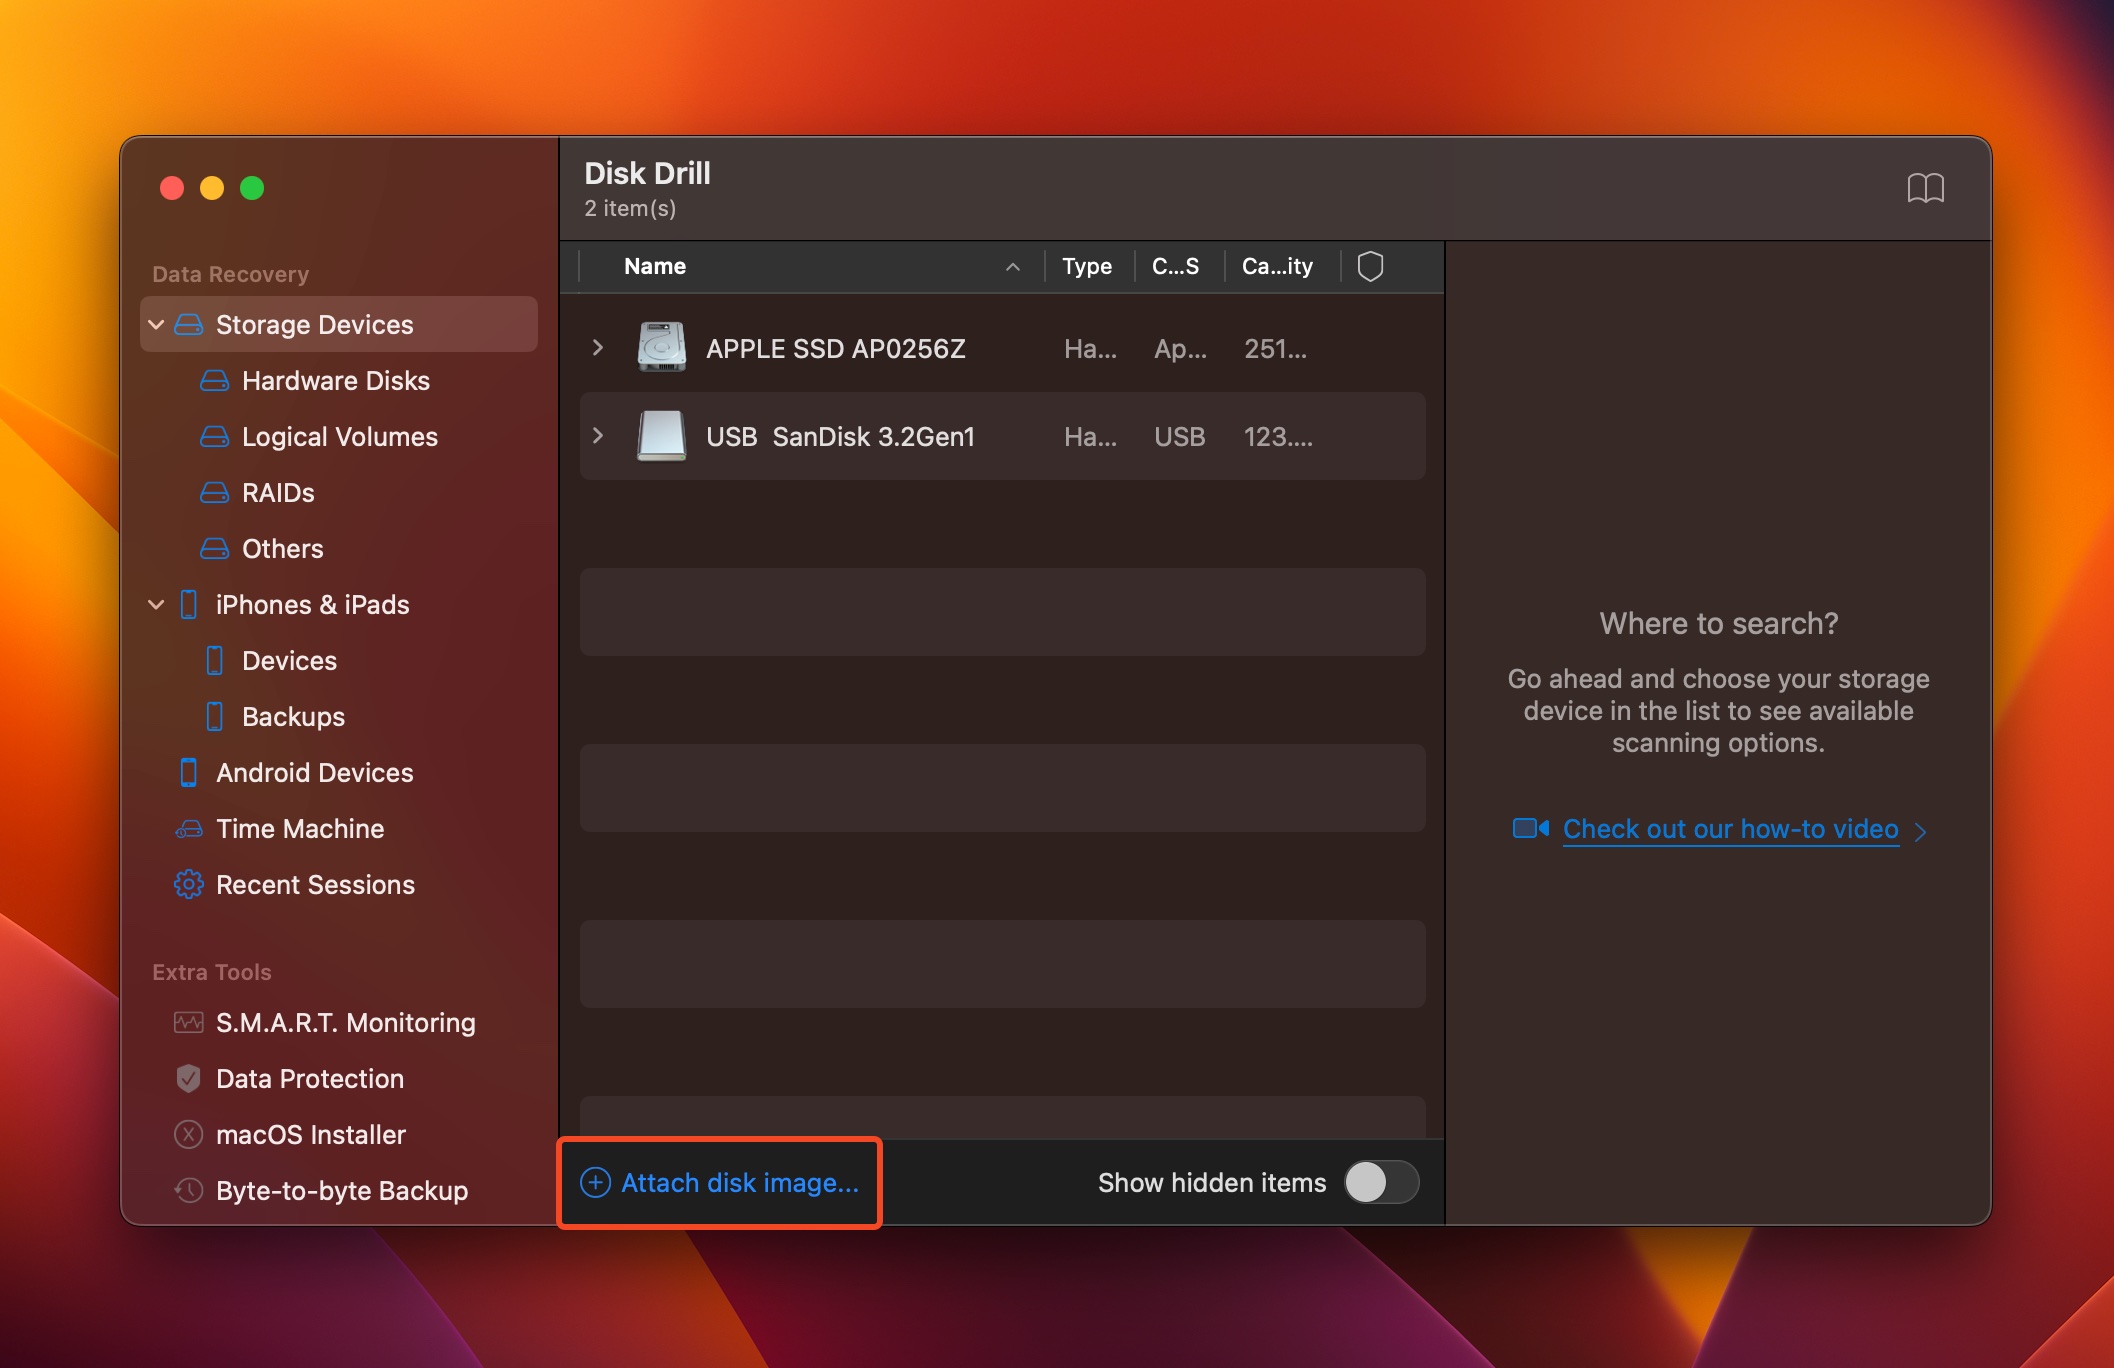
- Open Disk Drill and ensure you’re on the Storage Devices tab.
- Click on Attach disk image and browse for the backup you created earlier. Double-click on it. It’ll be added to Disk Drill as a mounted storage drive.
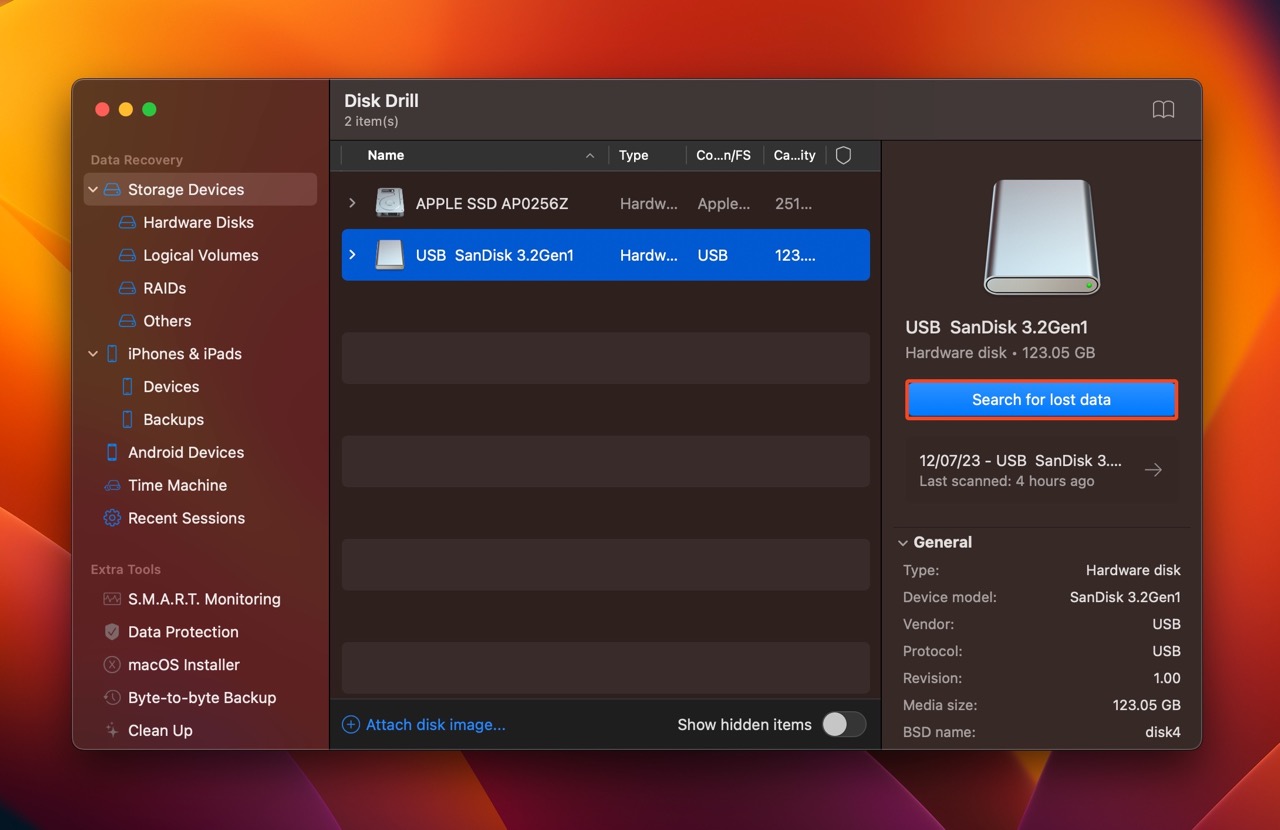
- Select the disk image and click Search for lost data.
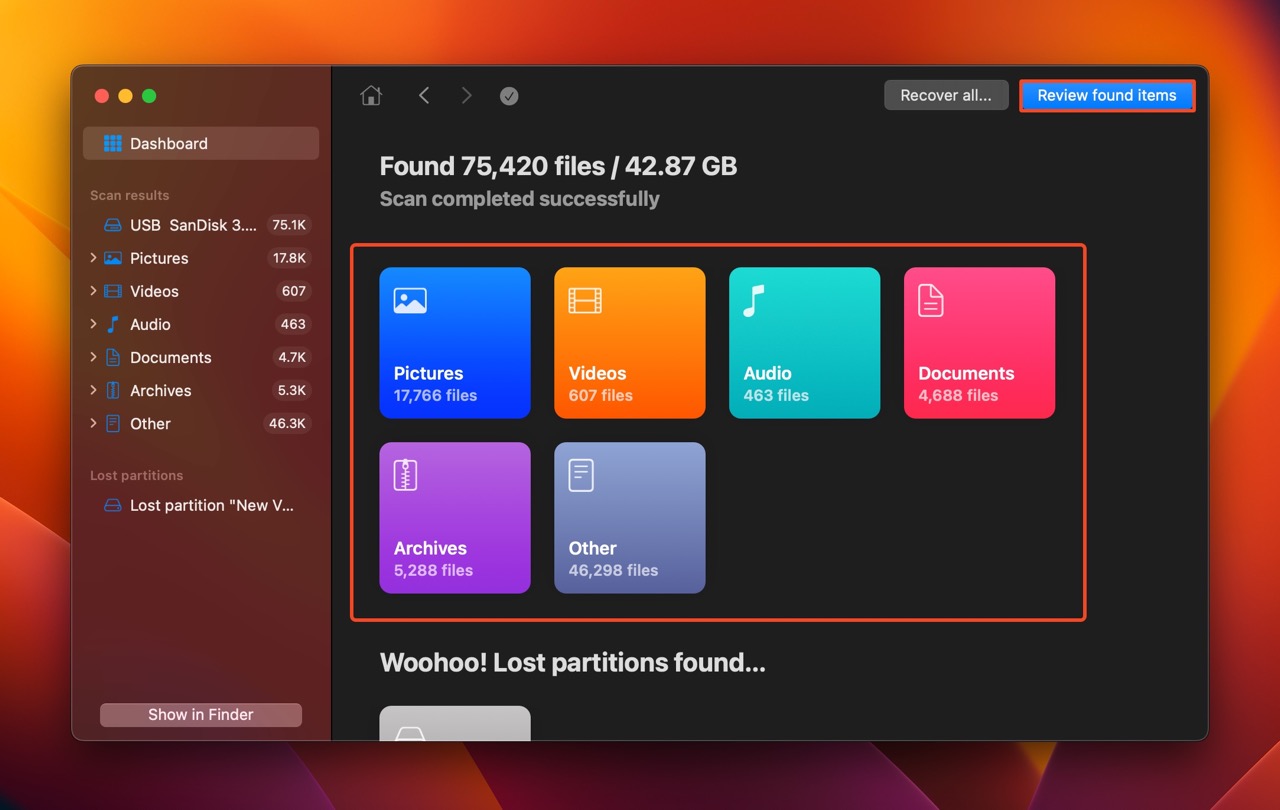
- Click on Review found items. You can opt to filter out the results by clicking on the relevant file type, instead (Pictures, Video, Audio, Documents, Archives, and Other).
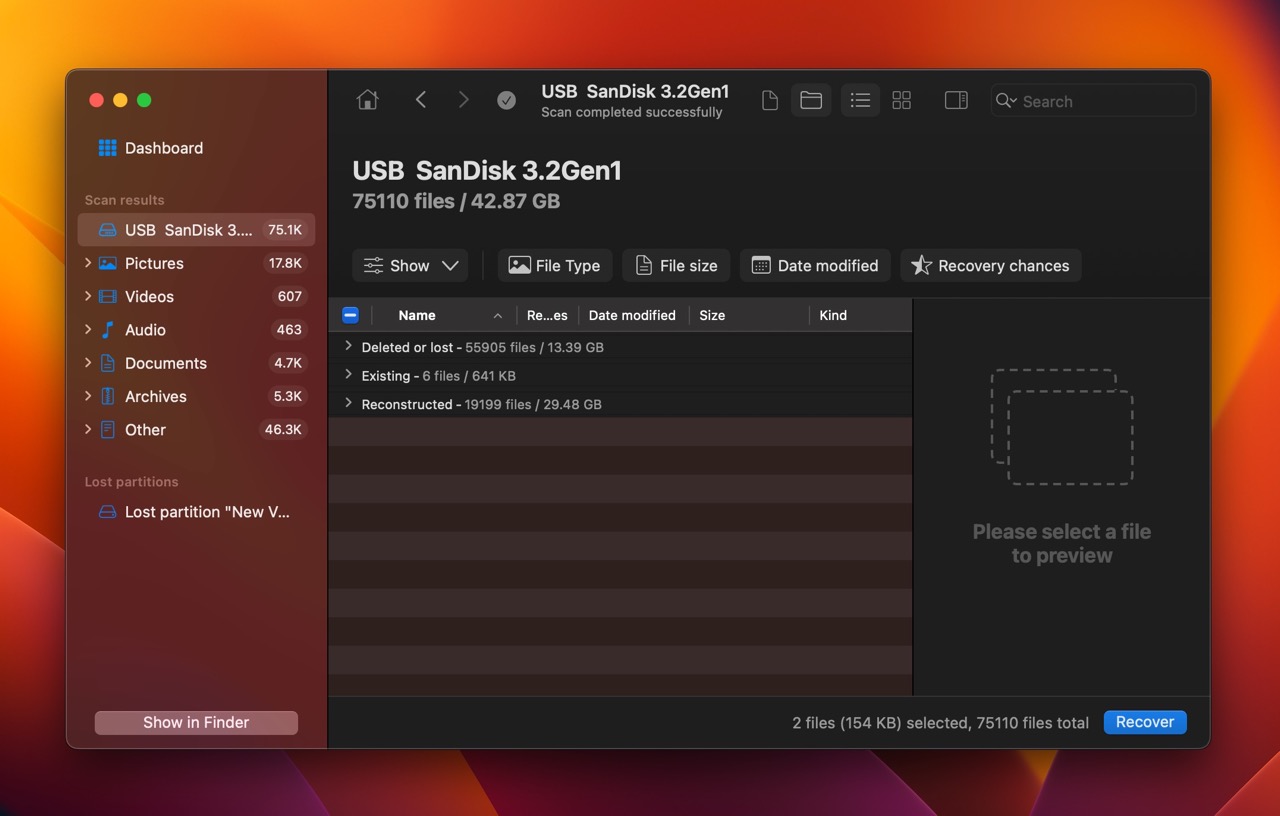
- Expand the Existing section to view the presently stored files on your drive. If you’re looking to recover deleted data, expand the Deleted or lost and Reconstructed sections.
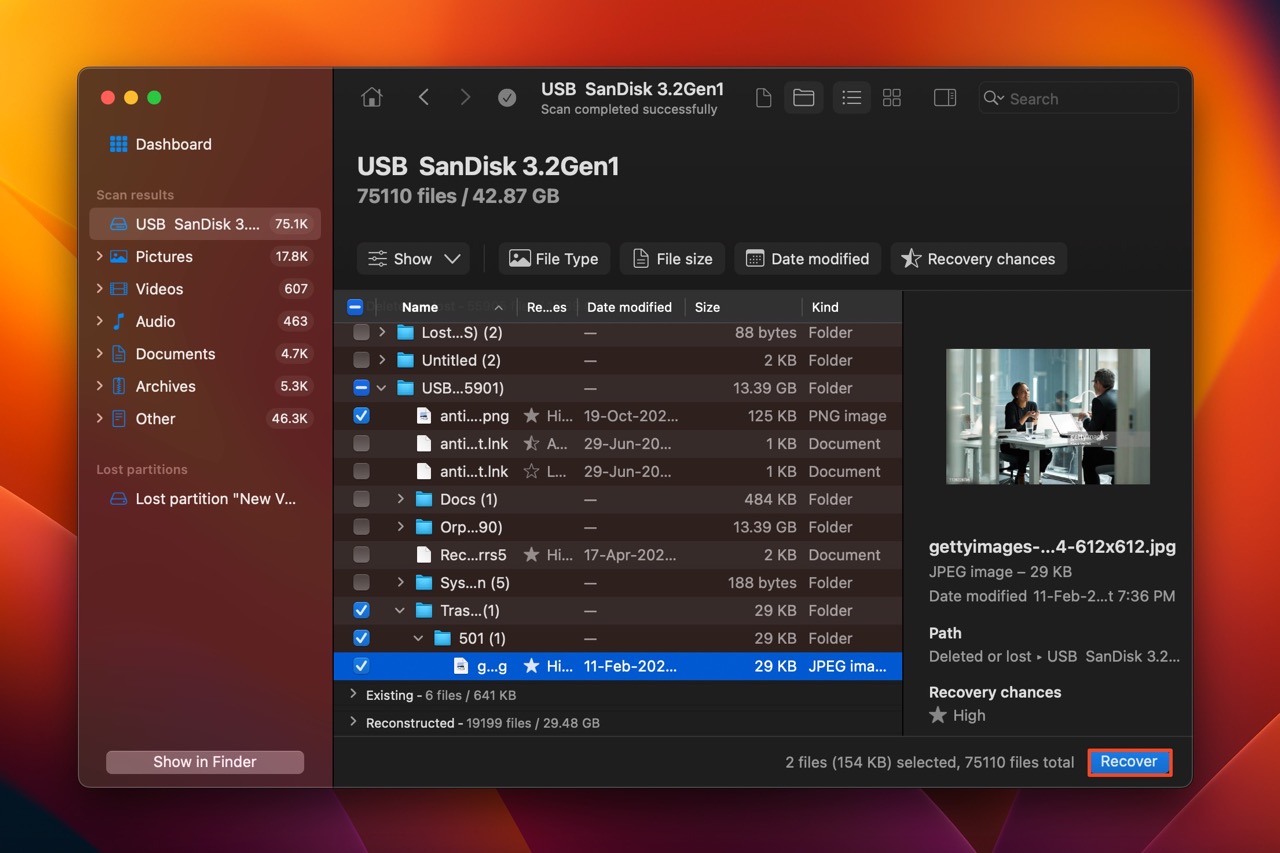
- Select the files you wish to recover and click on Recover. Disk Drill displays a preview of the currently selected file.
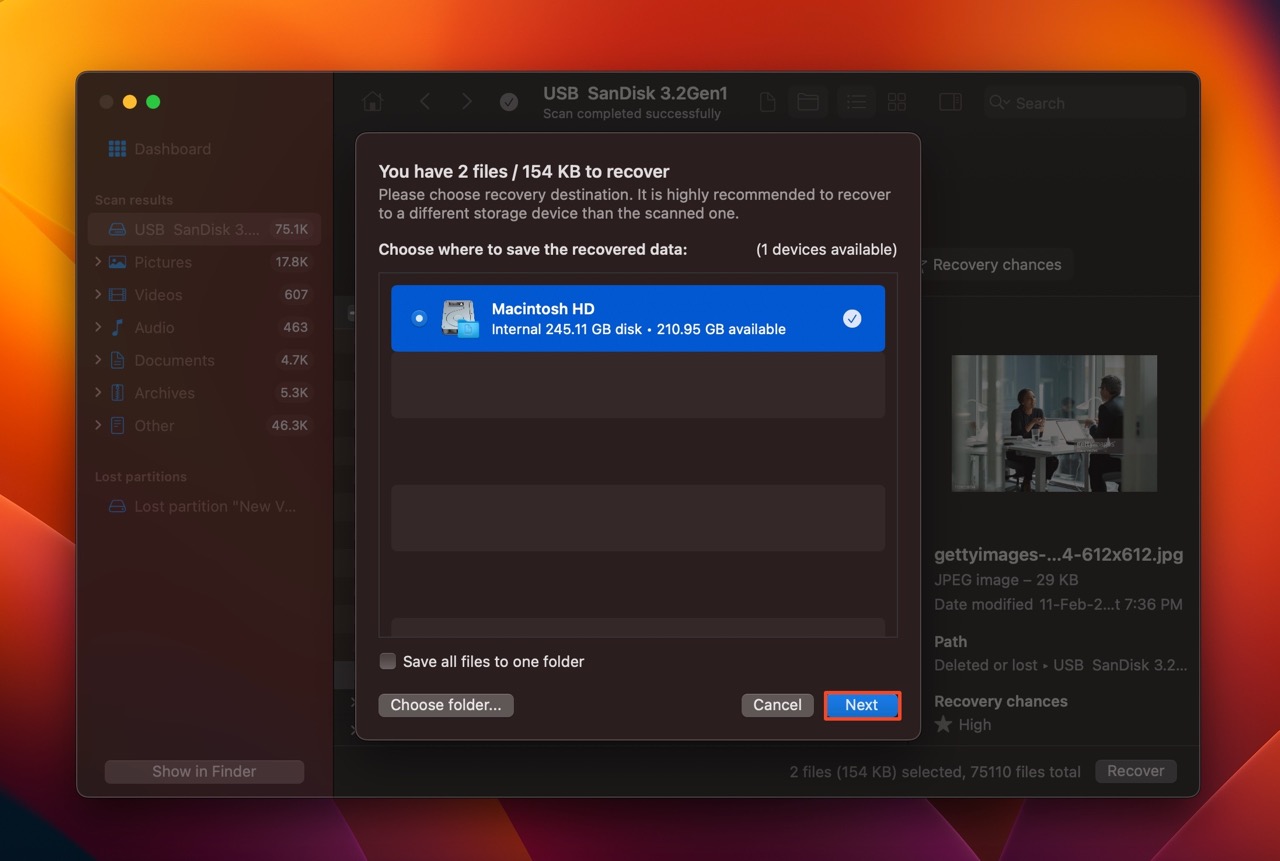
- Choose a recovery destination for the files and click Next.
- Disk Drill will recover the selected files.
Note: You can view recoverable files using the free version of Disk Drill, but to recover them, you’ll need to purchase the Pro version of the program.
How to Fix a Drive that MacOS Can’t Repair
You’re not out of options if the First Aid feature in macOS’ Disk Utility is unable to repair your disk, or the repair disk option (First Aid) is not available on your Mac.
Some things you can do to combat the issue, are:
Method 1:Restart Your Mac
Before proceeding to more elaborate fixes, simply reboot your Mac. This prompts macOS to reload all drivers and configuration files, and can help in cases where Mac is having trouble detecting your drive. A restart also clears up any unnecessary background processes that were taking up the device’s memory.
To reboot your Mac, click on the Apple menu in the top-left corner of your screen, and choose Restart.
Method 2:Attempt Disk Repair on Another Mac
To determine whether the problem lies with your Mac device or the disk, connect the drive to another Mac computer and attempt to repair it. To do so, open Disk Utility, select your drive and click on First Aid. If the disk still can’t be fixed, the problem is, indeed, with the drive, and not your Mac.
Here, it’s also best to double-check the connection. Try using a different USB cable and ensure that your Mac’s USB ports are not damaged. If you’re using a USB C-to-A converter, try using a different adapter and see if the error persists.
Method 3:Run Disk Utility in Safe Mode
Often, background processes and other Mac features can prevent Disk Utility from effectively detecting and repairing your drive. To combat this, you need to boot your Mac in Safe Mode and then attempt to repair the drive using Disk Utility.
The process of booting a Mac in Safe Mode will differ, depending on whether you’re using an Intel-based Mac, or an Apple Silicon one.
For Intel-based Macs, here’s how you boot into Safe Mode:
- Go to the Apple menu and click Restart. Immediately press and hold the Shift key after doing this.
- Release the Shift key when you see the log in screen.
- Log in to the Mac. You may have to do this twice.
- You’ll see the “Safe Boot” option in the menu bar in the first or second log
For Apple Silicon (M1 & M2) Macs, here’s how you boot into Safe Mode:
- Shut down your Mac (Apple menu > Shut Down).
- Press and hold down the power button until you see the “Loading startup options” message.
- Choose the disk volume you wish to boot from. Typically, this will be “Macintosh HD.”
- Press and hold the Shift key and then click “Continue in Safe Mode.”
Once you’ve booted your Mac in Safe Mode, follow these steps to repair your disk:
- Open Disk Utility. You can do it using Finder > Go > Utilities, or simply search for Disk Utility in Spotlight Search (Command + Space).
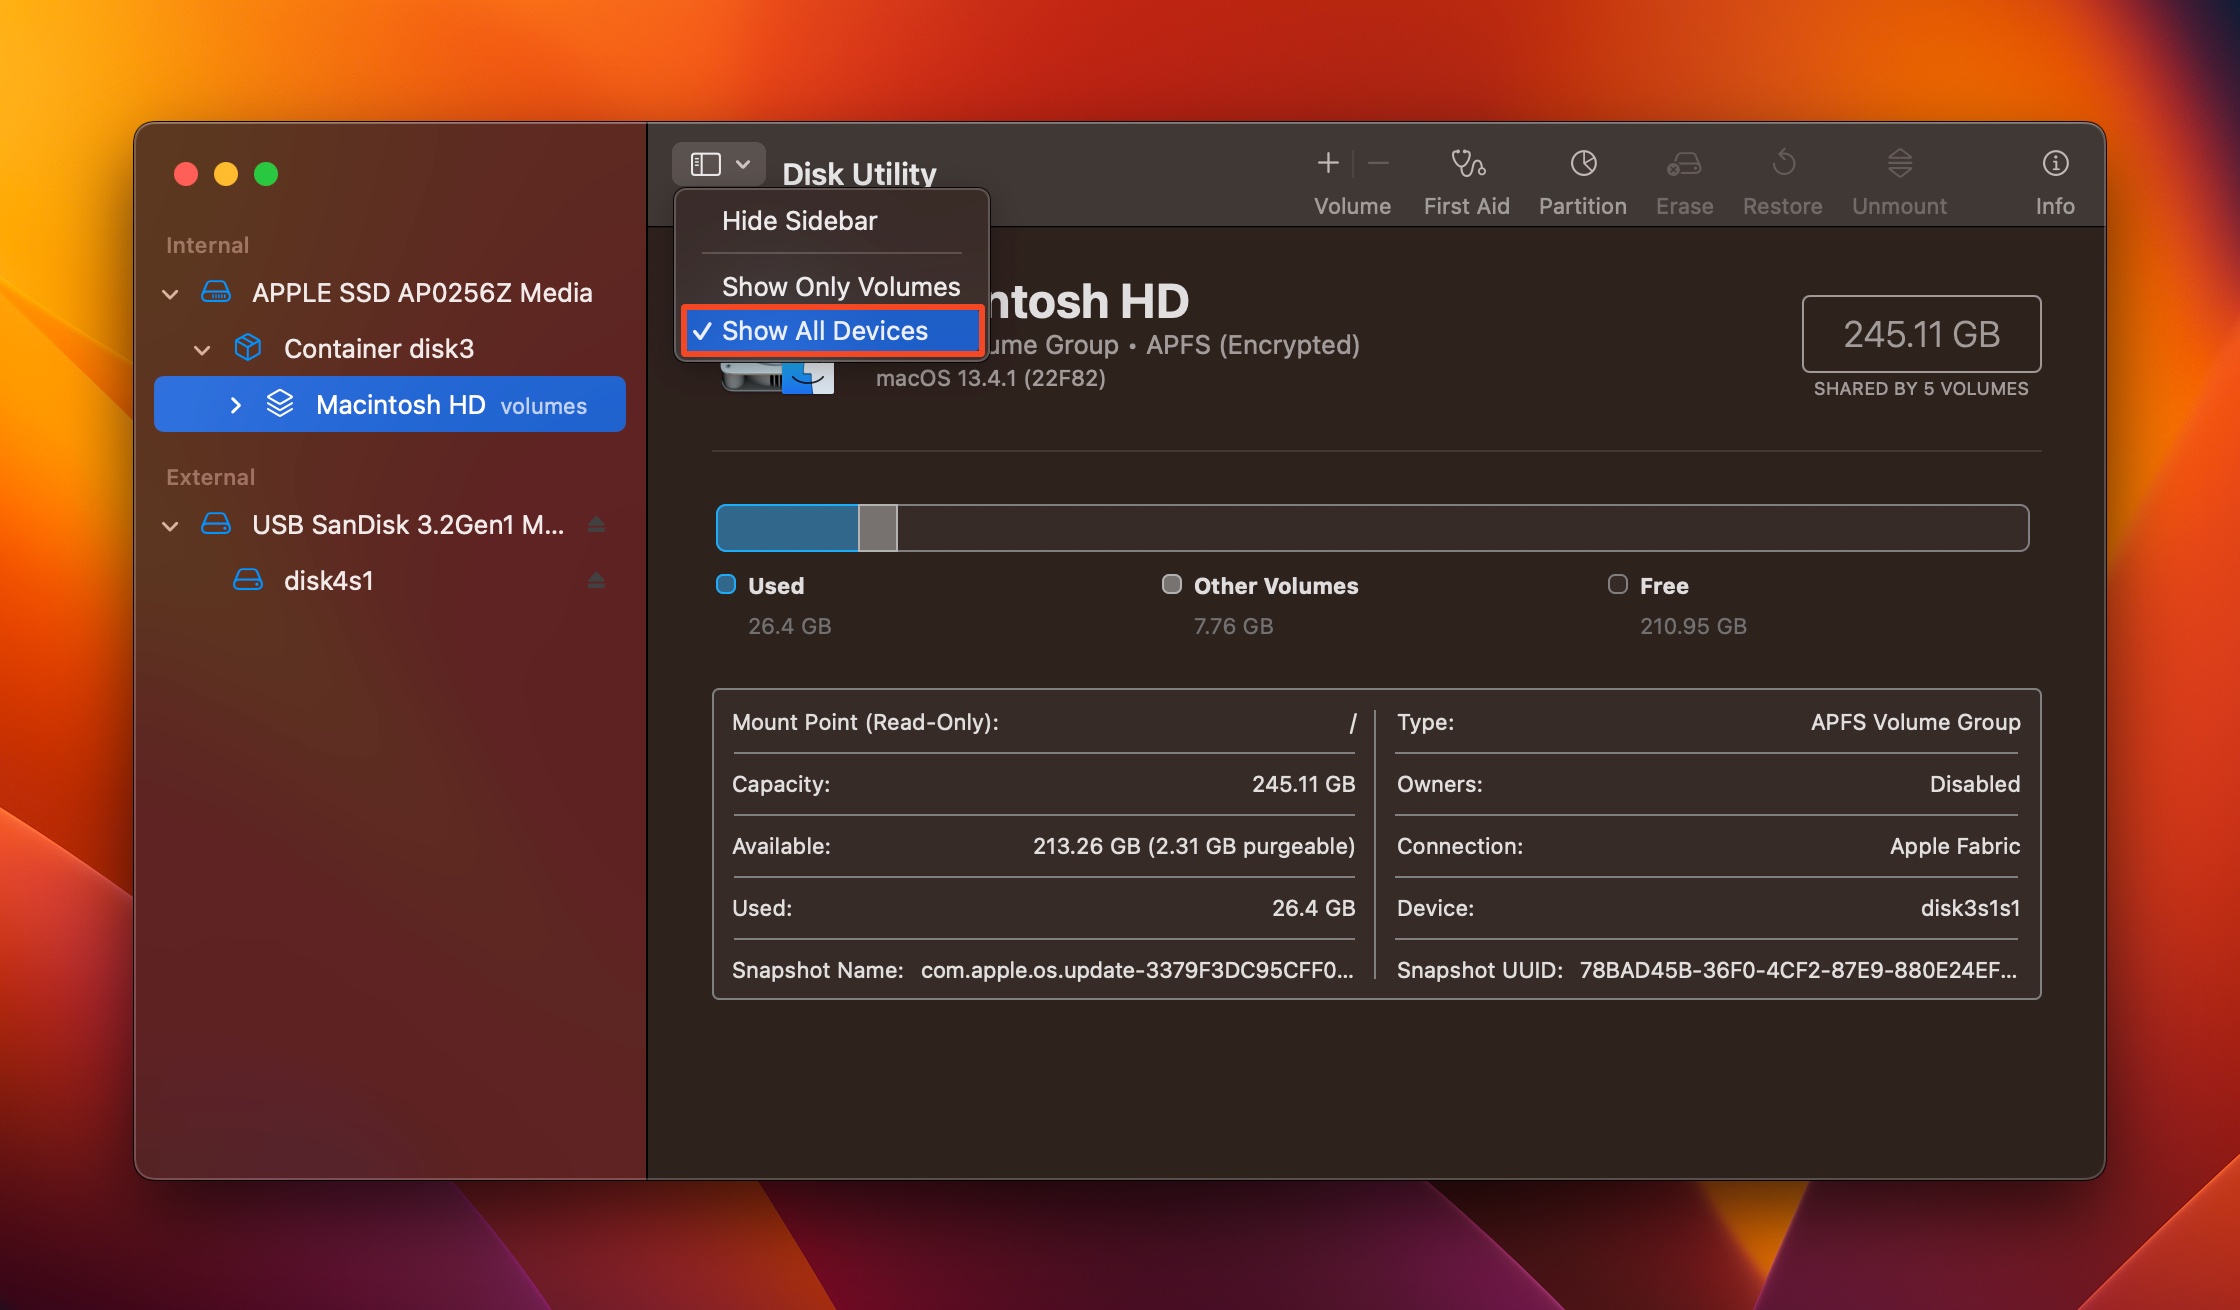
- Click on View > Show All Devices.
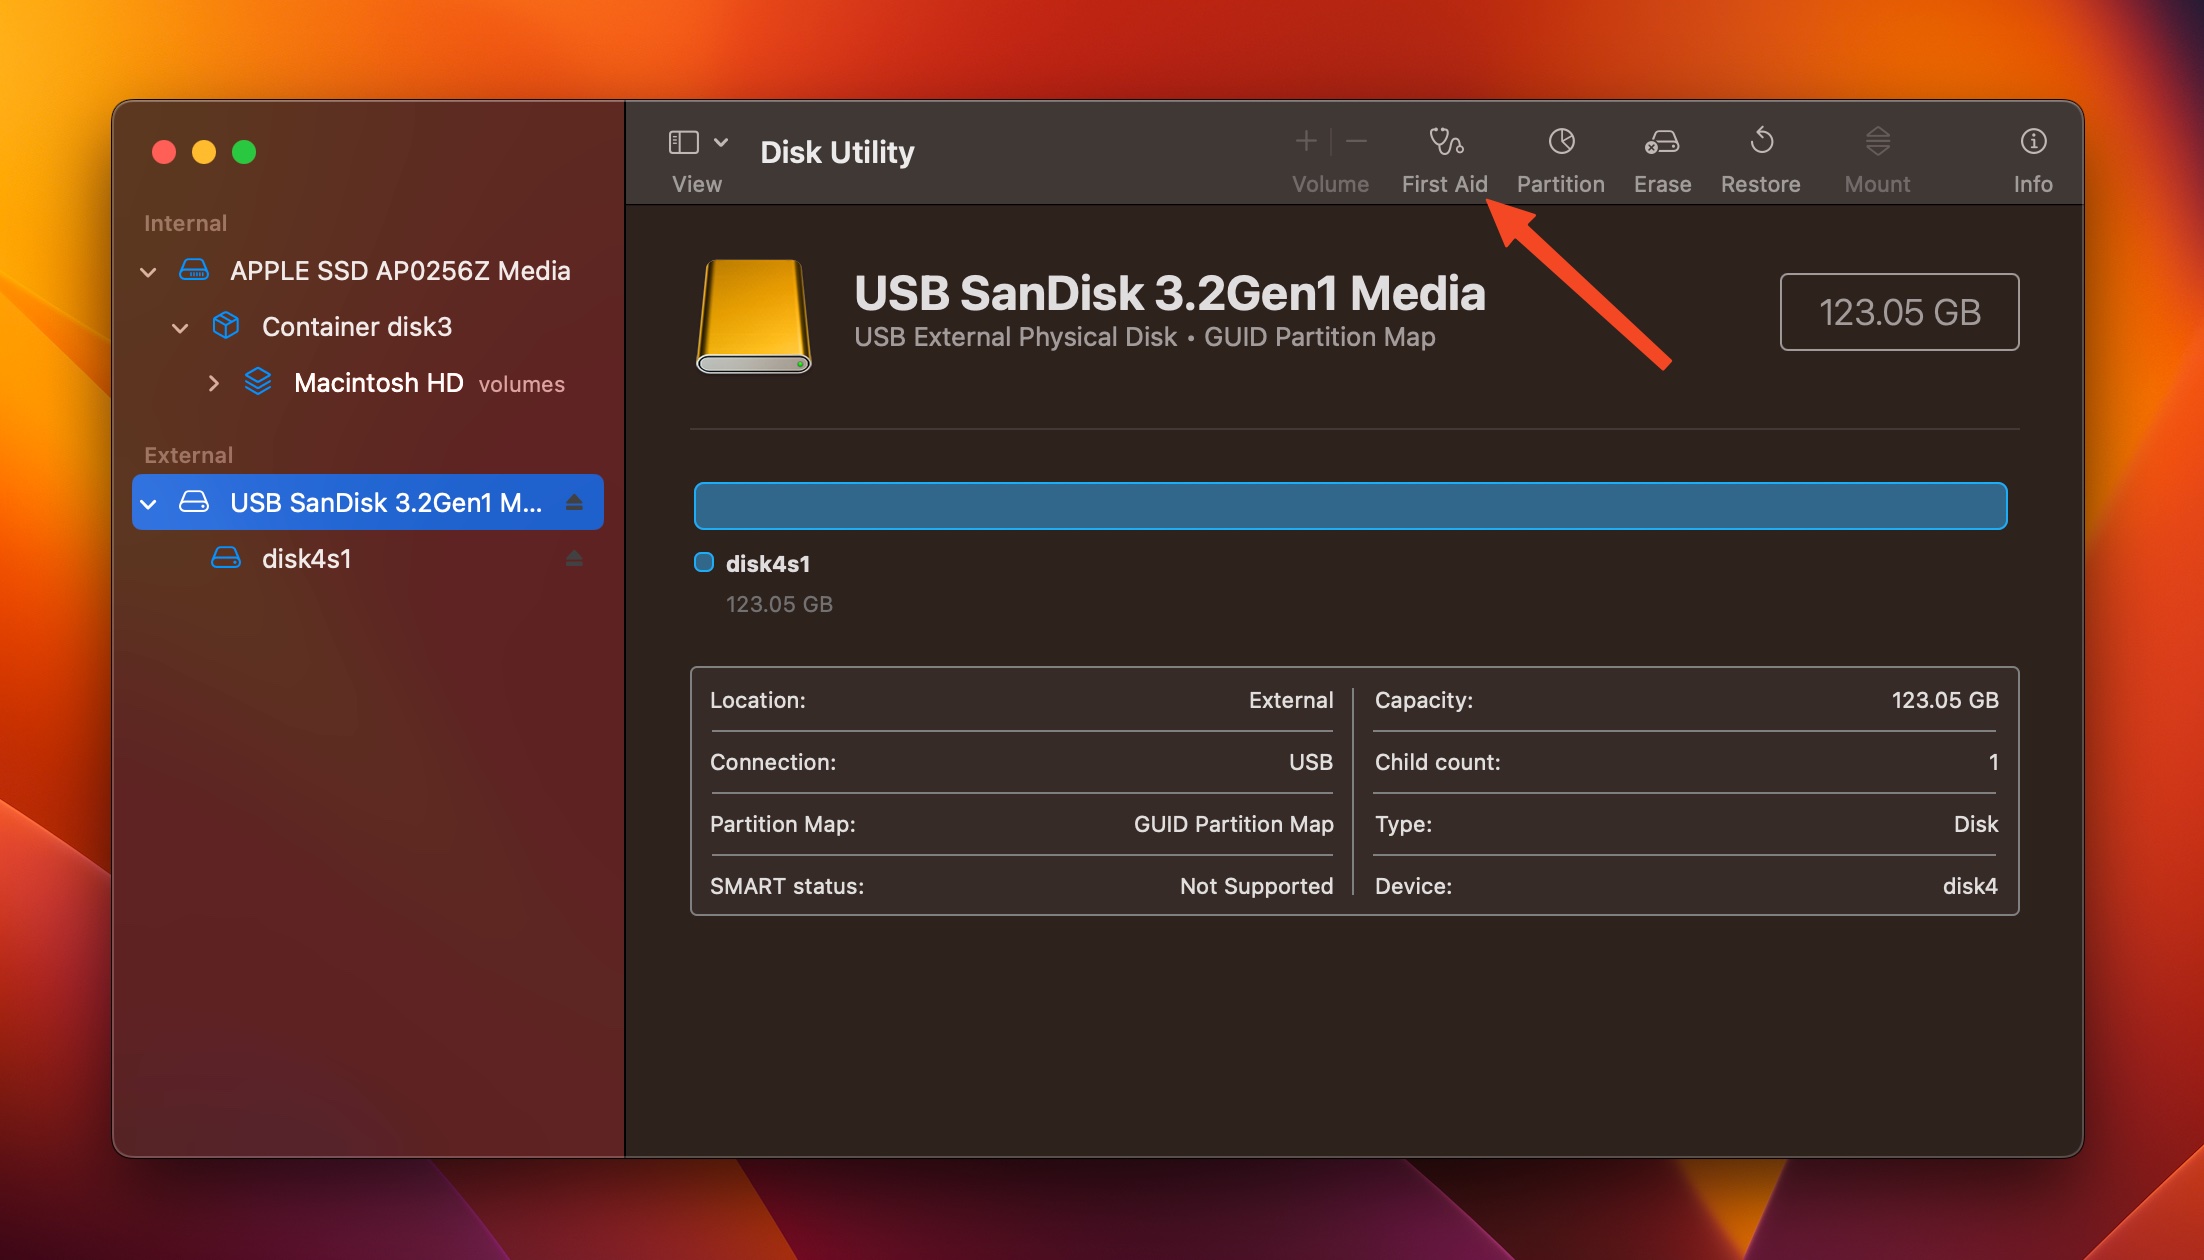
- Select a volume from your drive and click on First Aid.
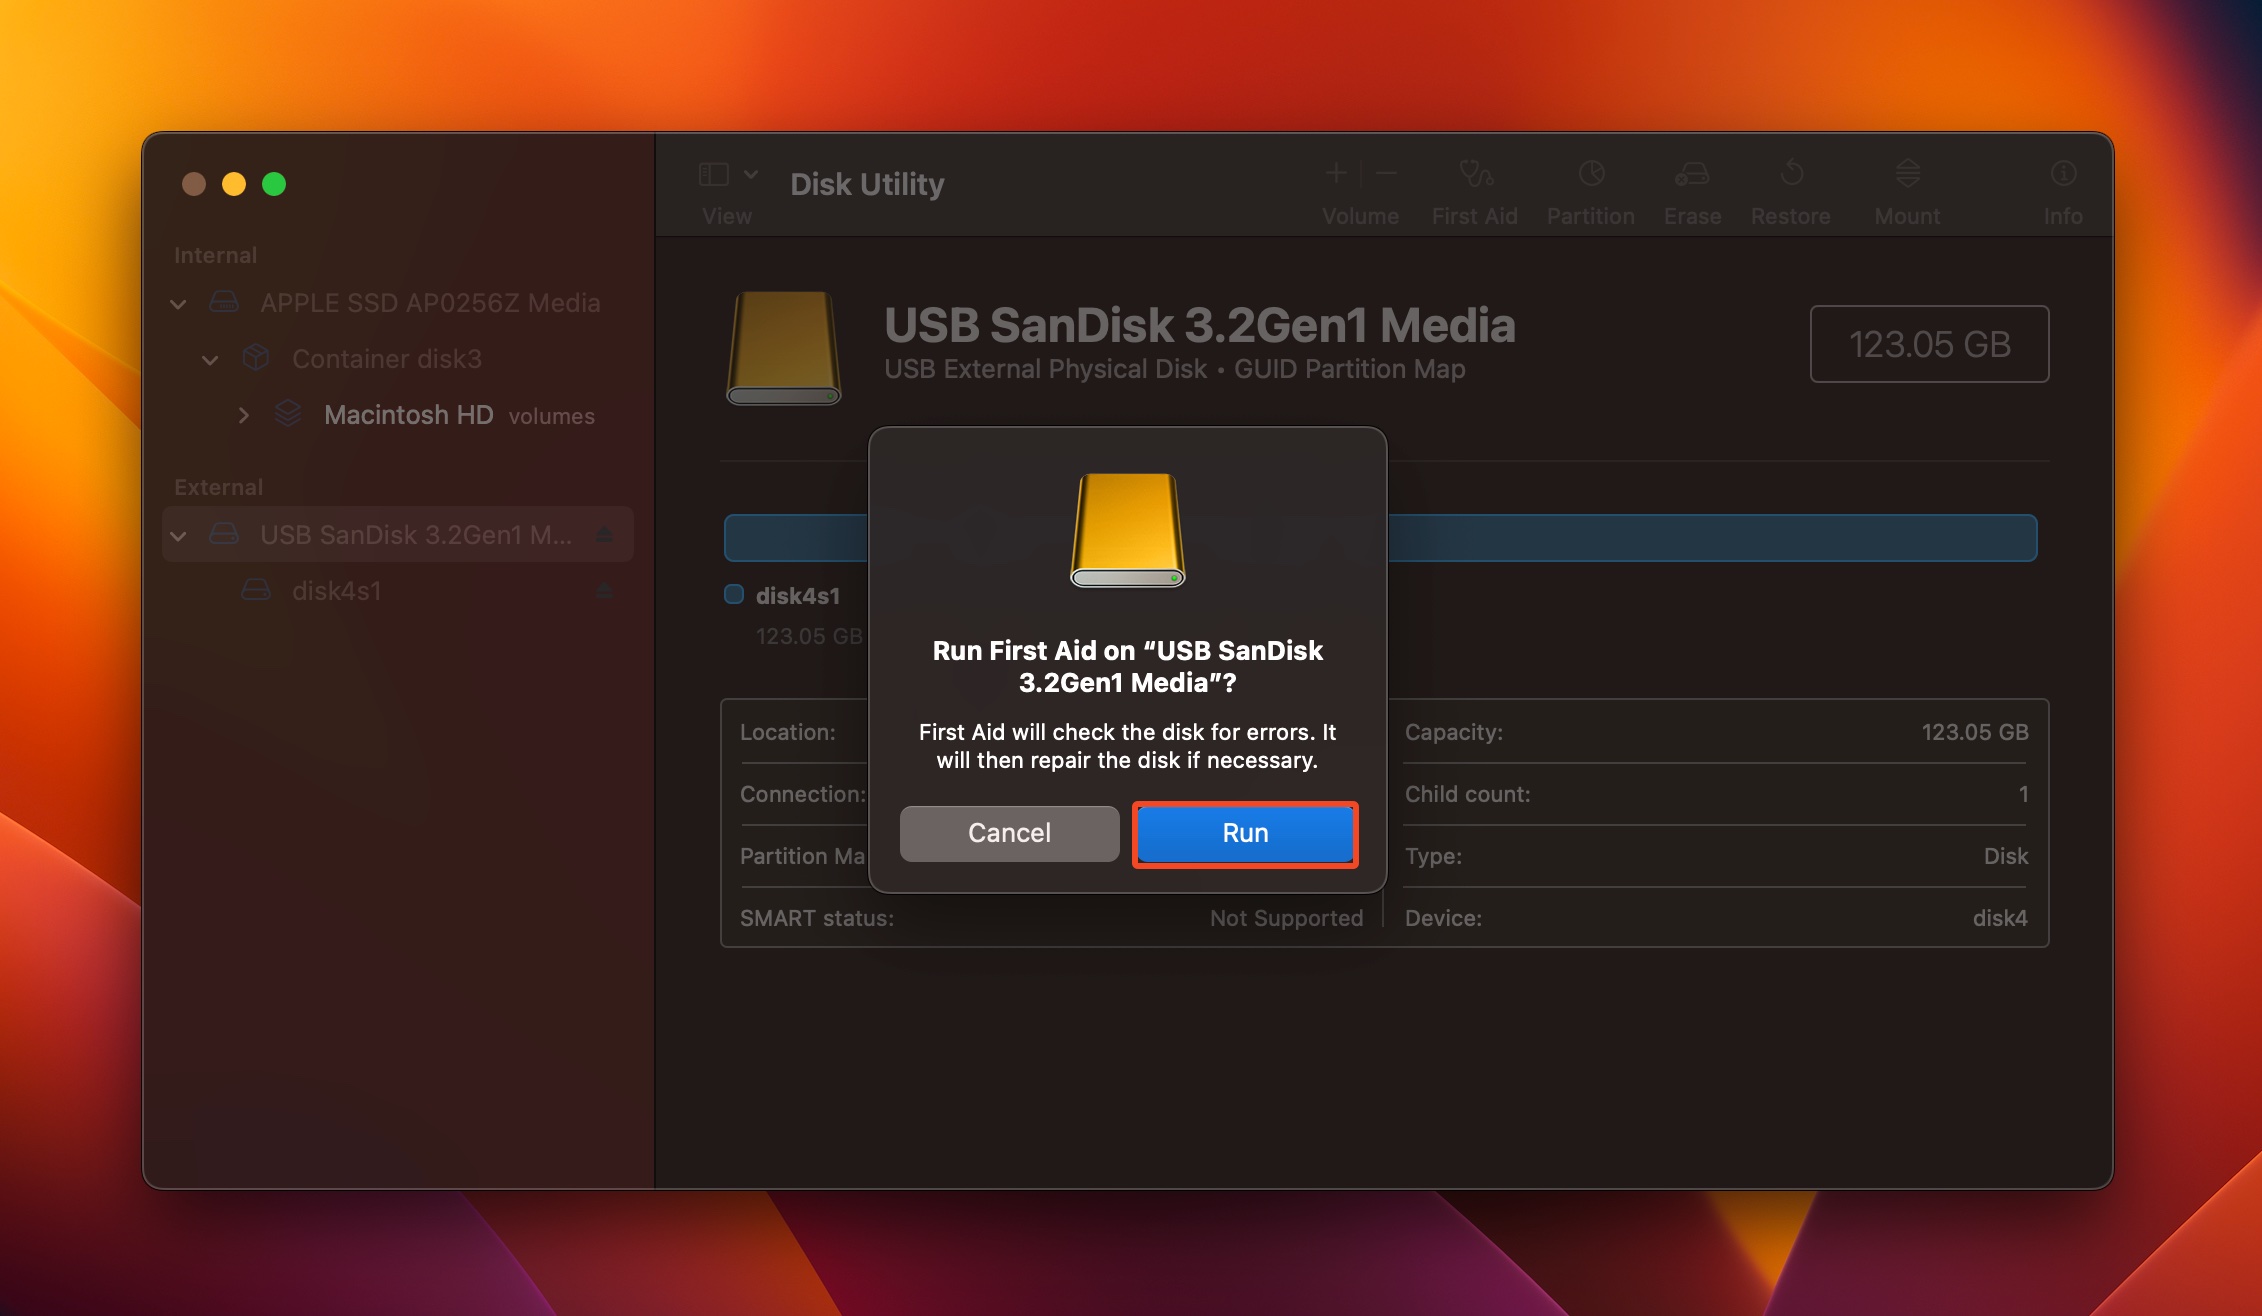
- Click on Run in the confirmation prompt.
- Follow steps 3 & 4 for all volumes on the drive. Then proceed to do the same for the Containers in the drive, and finally–select the entire drive and click First Aid.
Method 4:Repair the Drive Using Terminal
The Disk Utility isn’t the only way to repair your drive. You can use macOS’ command-line app, Terminal, to repair problematic drives. To do this, you need to start your Mac in the Single-User mode and execute the required commands in Terminal.
Depending on your Mac, you’ll use one of these ways to boot into the Single-User mode.
Once you’ve booted into Single-user mode, follow these steps to repair your drive using the Terminal utility:
- Go to Utilities > Terminal.
- In the Terminal console, type
diskutil listand press Enter. Identify the drive you wish to repair. - Type
sudo fsck -fy /dev/diskXand press Enter. Replace X with the disk number of the drive you wish to repair.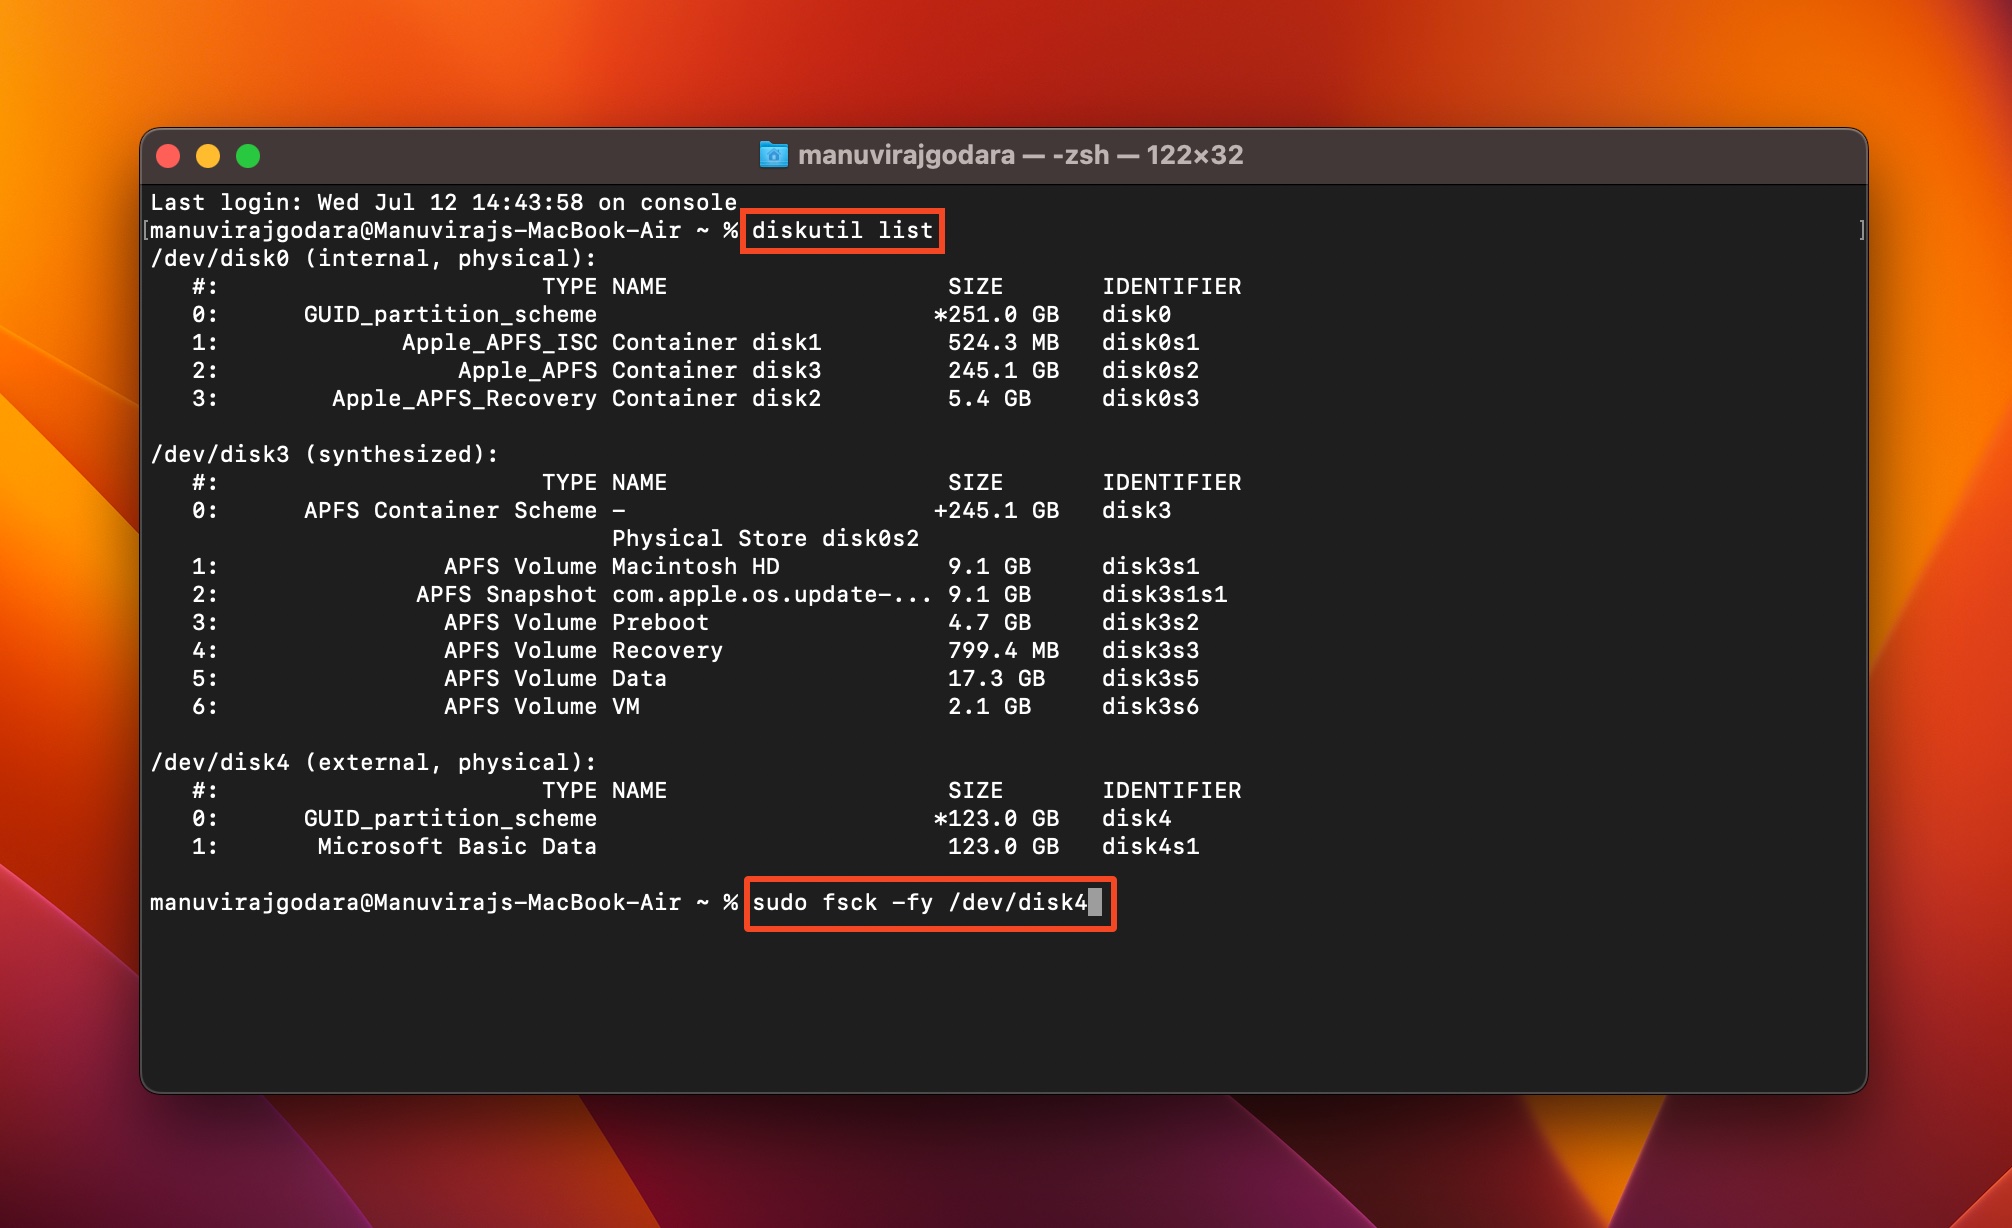
- Wait for the command to do its job. Once it’s done, type
rebootand press Enter.
Method 5:Erase the Drive
If none of the methods above helped you out, your only option is to format or Erase the drive. A format is a good way to resolve certain logical errors on your drives, but it also wipes out your data. So ensure that you recover your data before using this method.
To format your drive in macOS, follow these steps:
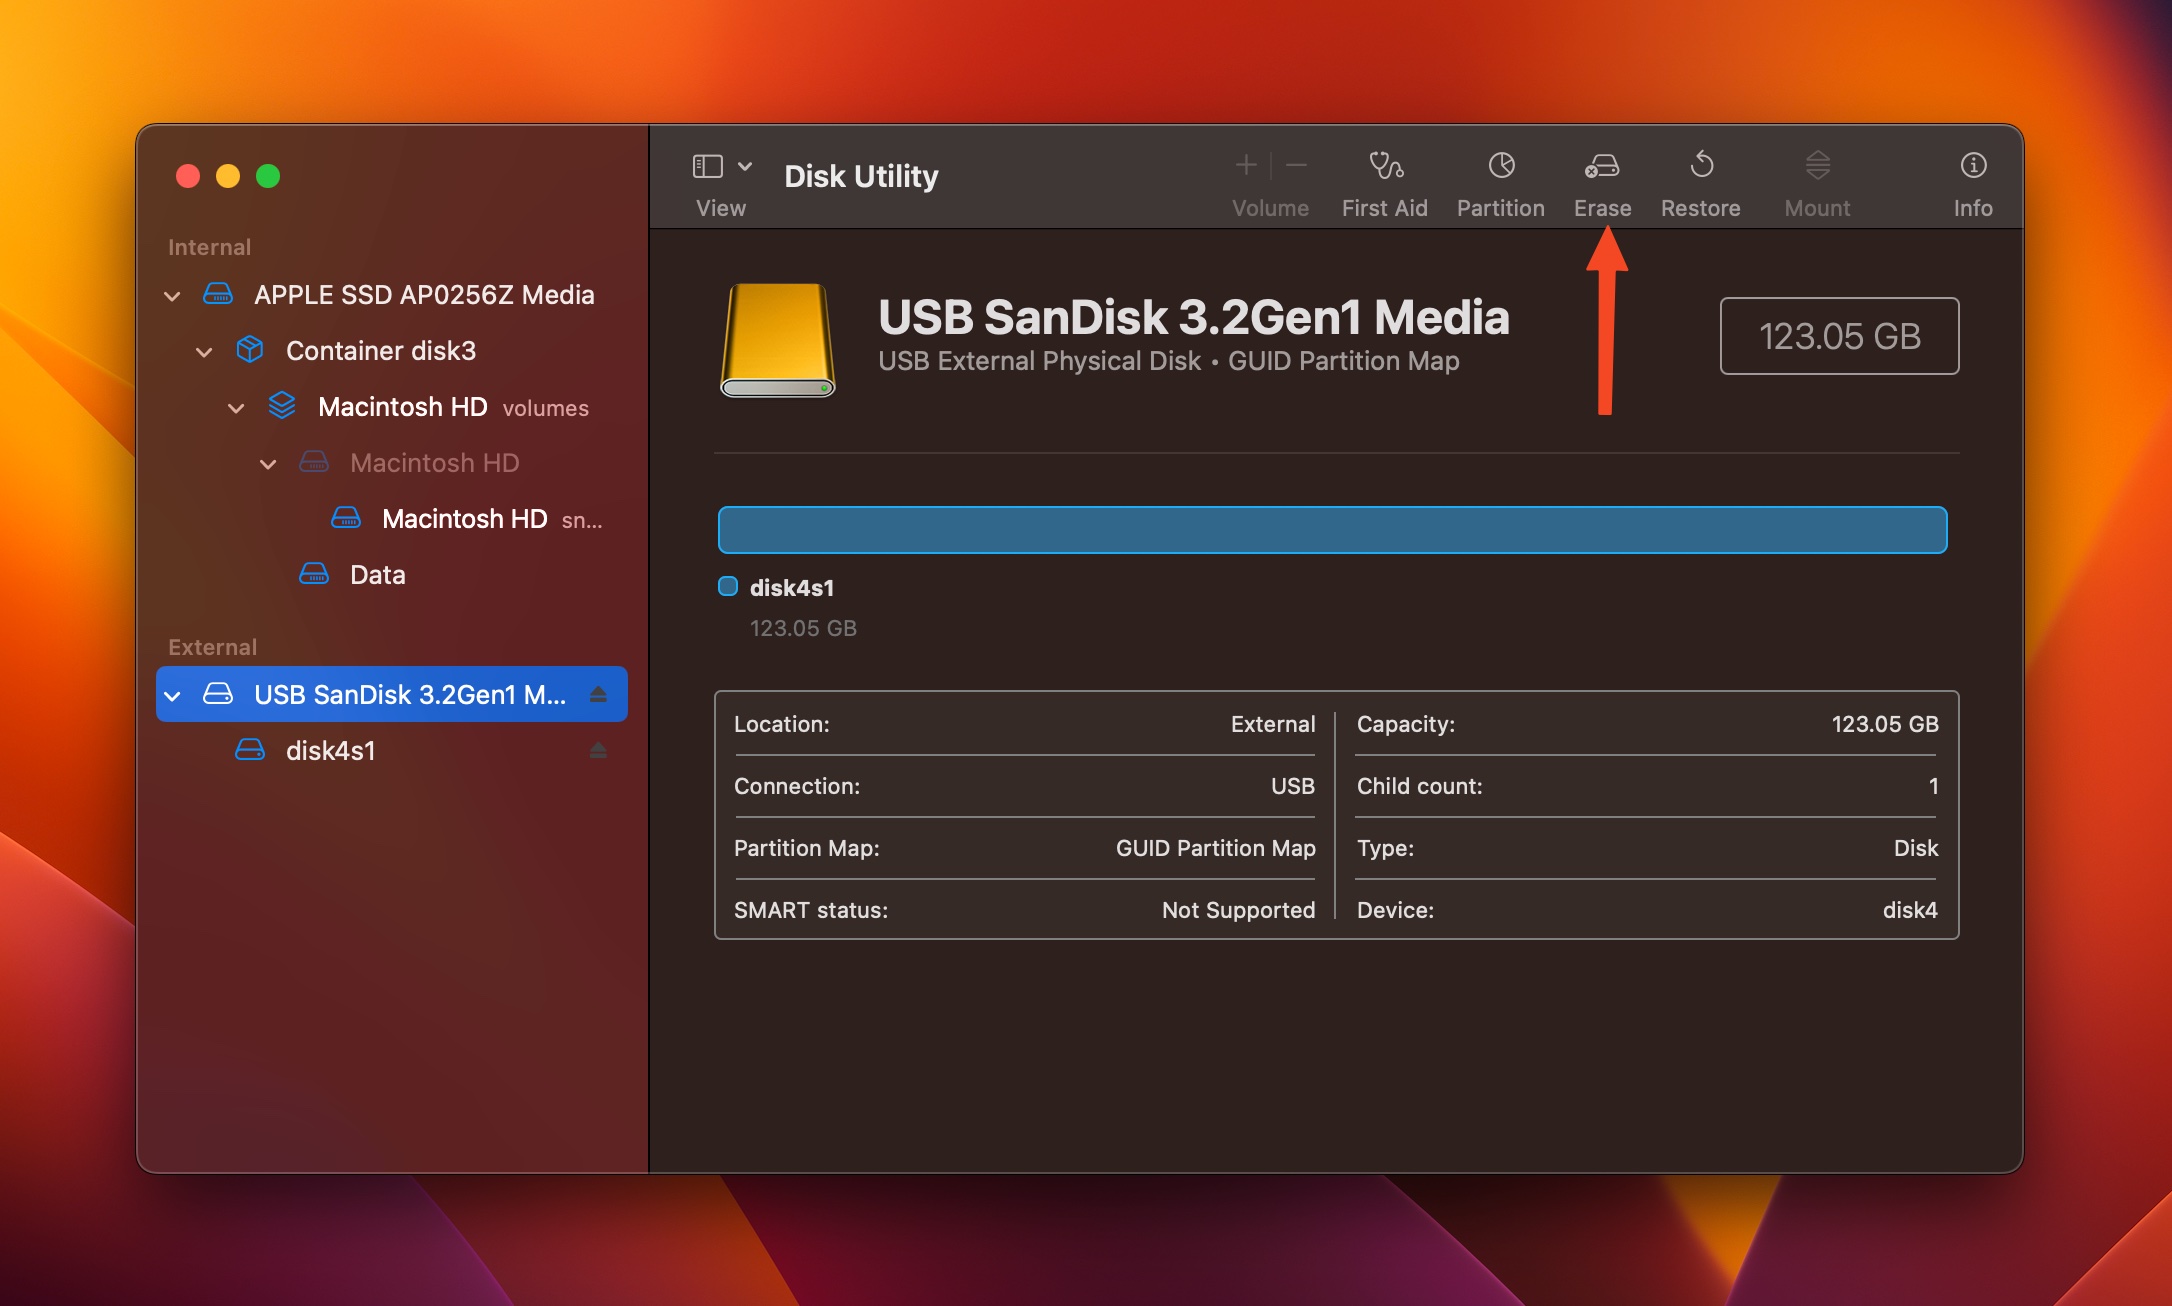
- Go to Finder > Go > Utilities > Disk Utility.
- Select the drive that Disk Utility was unable to repair, and click on Erase.
- Choose the format parameters such as the Name, Format, and Scheme. Click on Erase in the prompt.
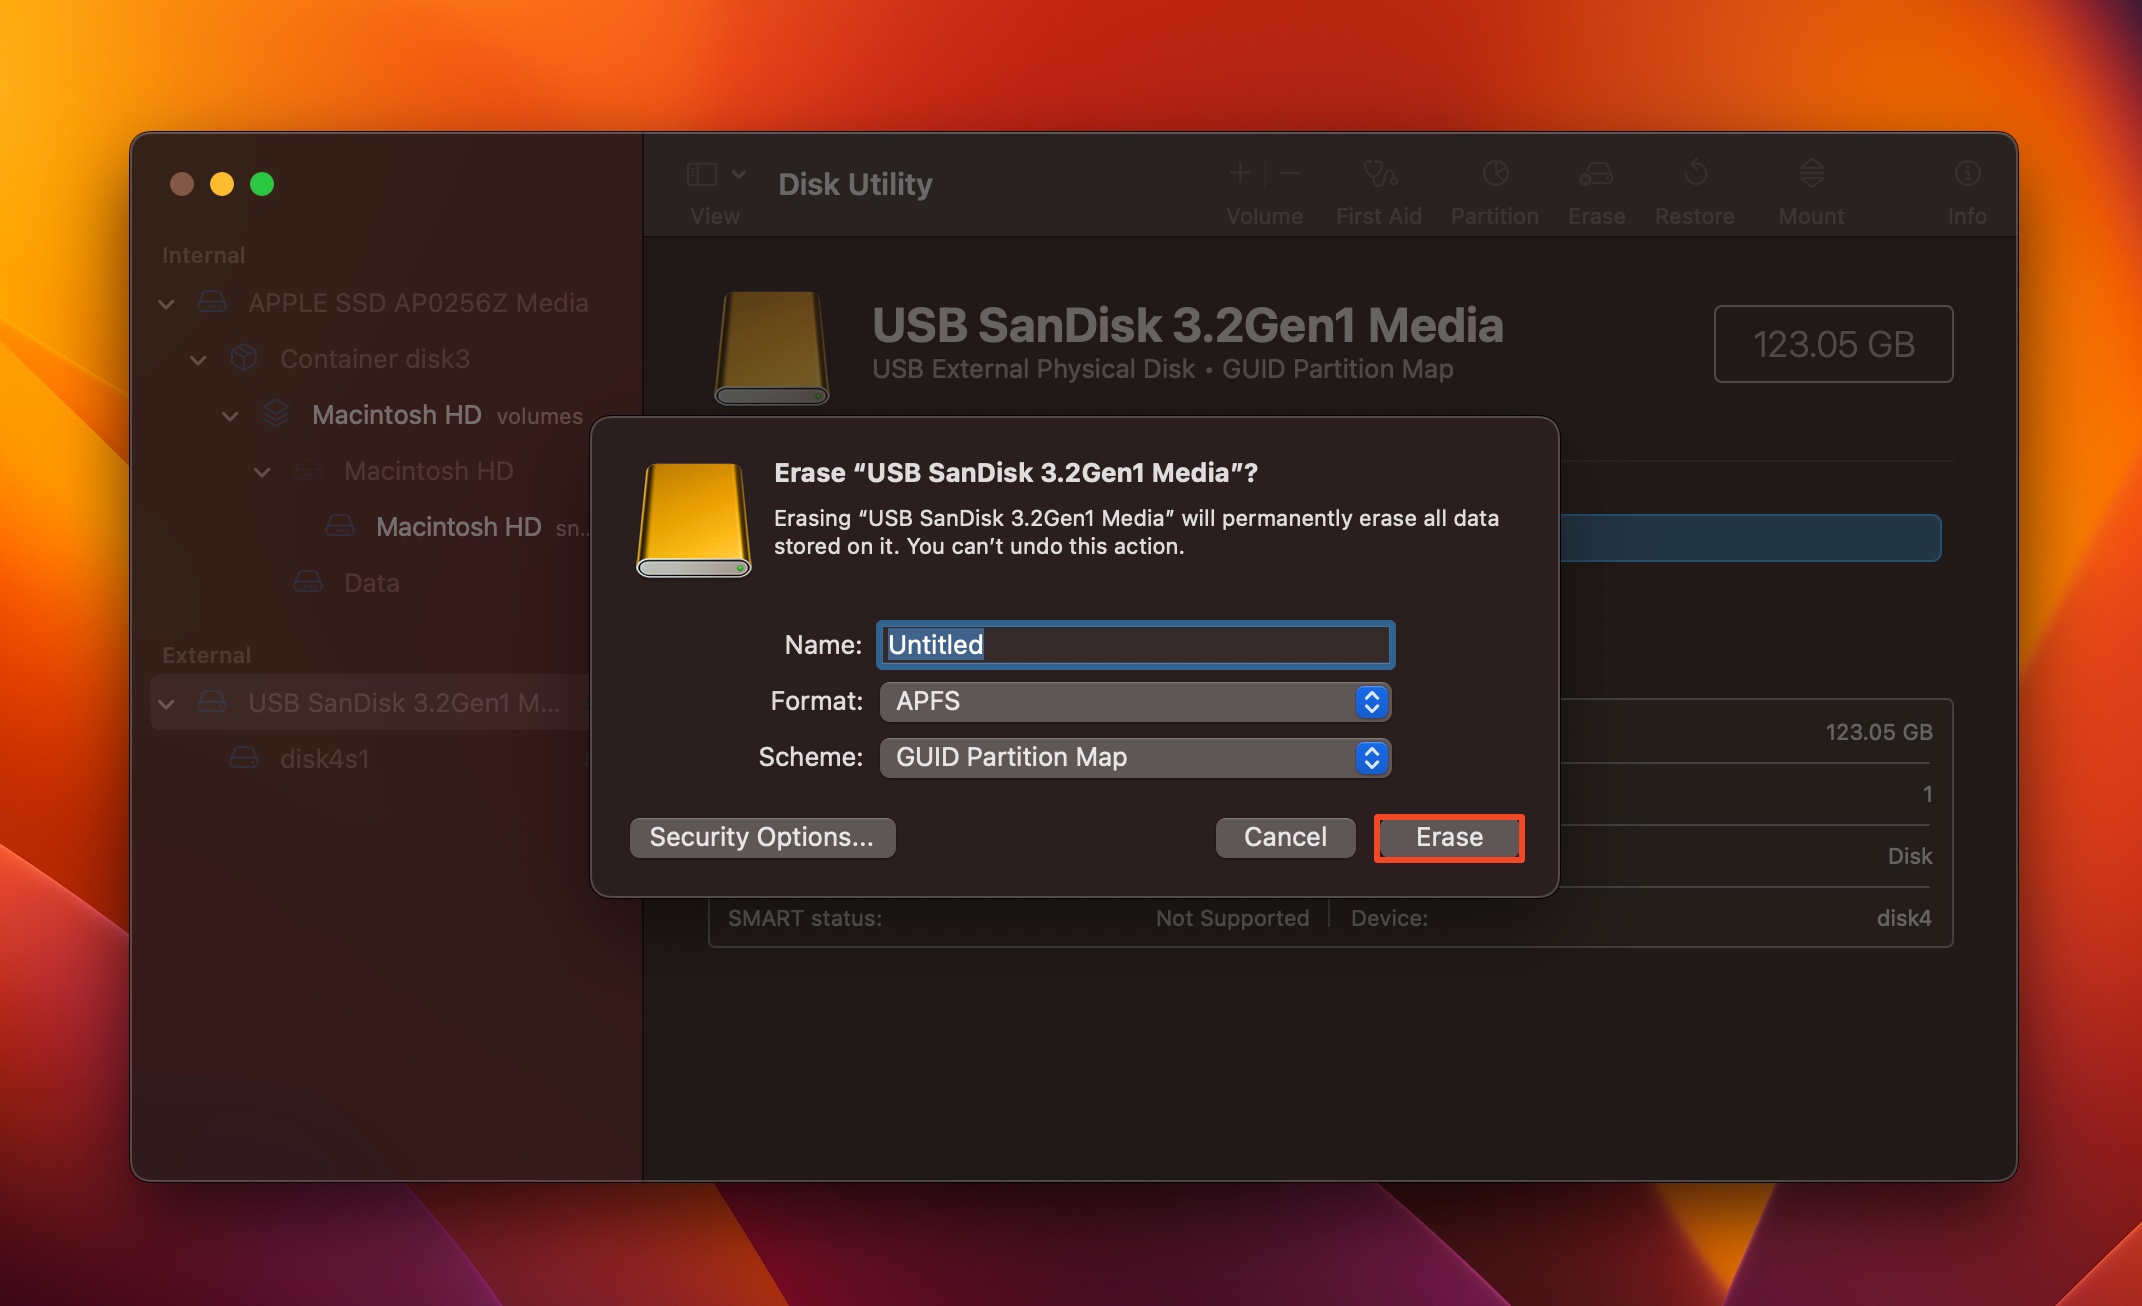
- Disk Utility will format the drive.
Conclusion
Your first plan of action–when Disk Utility can’t repair your disk–should be to recover your data. Once that’s done, you can use one of the numerous ways in our guide to fix the drive. If the error reappears, it’s a sign that your drive is failing, and you should replace it ASAP. We also discourage DIY data recovery and repair attempts if your drive is physically damaged. It’s better to contact a professional data recovery service.
FAQ
- The drive is not connected properly to the device.
- The disk has severe logical corruption.
- The drive is physically damaged.
- Download and install Disk Drill.
- Open Disk Drill, select the external hard drive and click Search for lost data.
- Click on Review found items.
- Pick the files you wish to recover and click on Recover.
- Choose a recovery destination and click Next.
- Open Disk Utility.
- Select the Mac hard drive.
- Click on the Info button in the toolbar.


