
Encountering data loss could potentially leave you at your wits’ end. Whether you permanently lose your data through an accident or conscientiously, there are several ways you can recover shift deleted files in Windows.
Table of Contents
Can You Recover Shift Deleted Files?
When you select a file on your Windows PC and hit the delete key, your files are moved to the Recycle Bin which stores your files temporarily. In contrast, when you delete a file using the shift+delete combination, your files bypass the recycle bin and become permanently deleted.
However, you still can recover shift-deleted files. Windows simply marks the storage area occupied by the file as being available for use by modifying the file table. Your files are still there on the drive, they’re just not accessible to Windows OS through traditional means.
But, you must be aware that your files will not remain in this state forever. Once the location of your files is marked as available to the operating system, new data can be written to that location, which will overwrite it. Once overwritten, files may become corrupted or gone forever.
Therefore, you must act with haste in order to restore your shift-deleted files before they’re gone for good.
5 Methods to Recover Shift Deleted Files
There are plenty of ways of recovering shift deleted files as you might already be aware. It’s recommended that in deciding to recover shift deleted files, you must avoid making changes to your drive as that can potentially render your data recovery efforts futile.
Method 1:Recover Files with Professional Data Recovery Software
Speed is of the essence – the faster we attempt to recover files, the greater chances to recover all files successfully are.
We’re using Disk Drill Data Recovery Software in this case because it has an impressive list of supported file types and file systems, this combined with easy to navigate UI and 500MB of free recovery on Windows makes it perfect in our case.
- Download Disk Drill for Windows.
- Open the downloaded file and install Disk Drill.
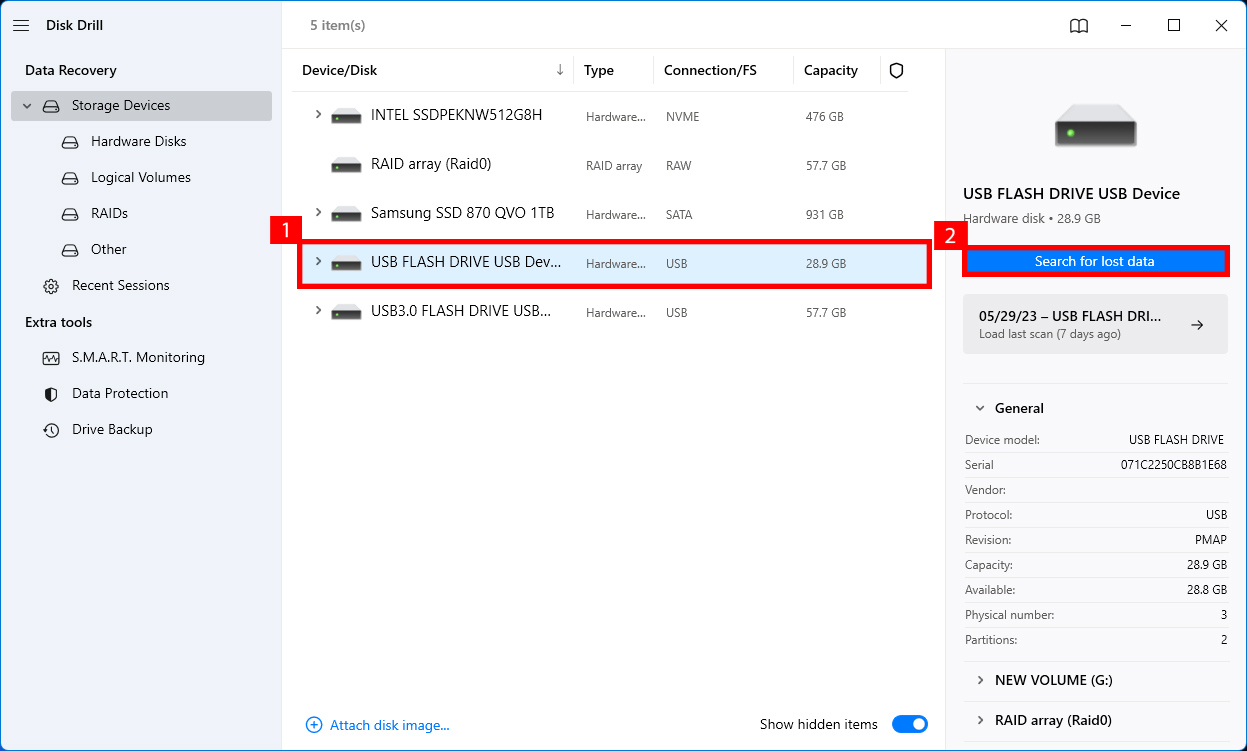
- Launch Disk Drill, select storage device from which you want to recover shift deleted files, and finally click the Search for lost data option on the right side of the app.
- Wait a few moments until Disk Drill finishes a full scan the storage device.
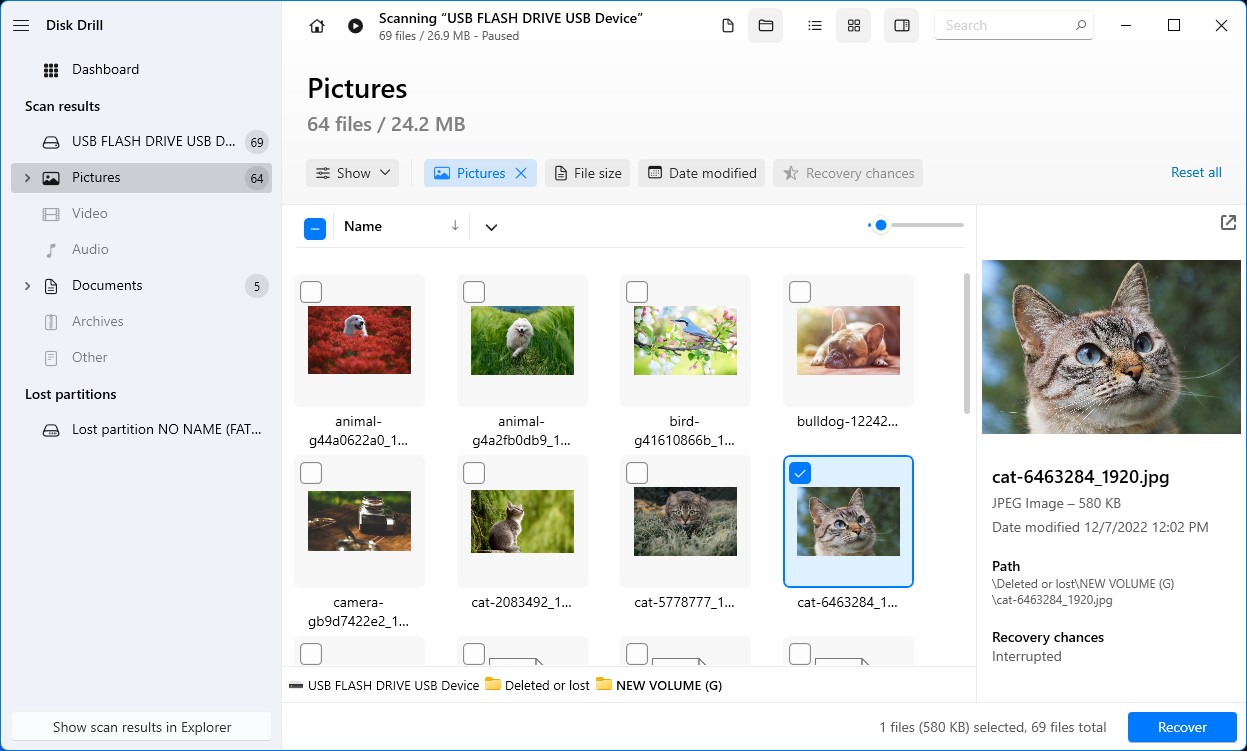
- Using the preview feature from Disk Drill, select which files you want to recover and choose your preferred recovery location.
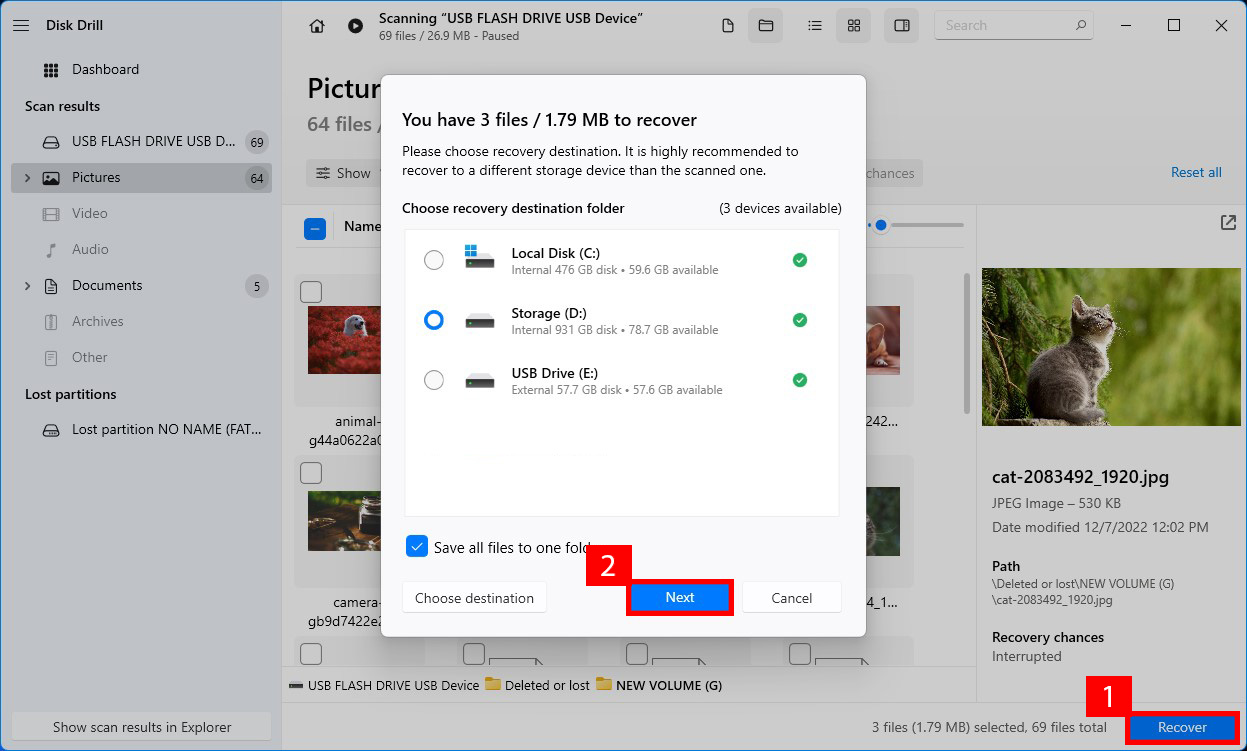
- Finally, click the Recover to gain access to your lost files. Choose reovery Destination, then click Next.
Unlike many other data recovery apps which promise to do many things but fall short of their primary objective, Disk Drill stands tall. Not only do you get to restore shift deleted files using Disk Drill, but you can also recover data from very complex situations such as drive failure and corruption. You can learn more about Disk Drill and its accompanying features.
Method 2:Restore Data Using File History
File History is a backup utility that was introduced with Windows 8. Created to be the replacement of Backup and Restore, it is designed with usability in mind so that it’s easy for users to back up their data. If you had File History configured before the files were deleted, you can quickly and easily restore a copy of them.
File History is the preferred backup method for both Windows 10 and Windows 11. But, the process of restoring files looks a little different on each version of Windows. Therefore, we’ll show you how to use File History on each.
Restore Using File History on Windows 10
- Navigate to the folder that previously housed the permanently deleted files.
- Click History (located in the Home tab at the top).
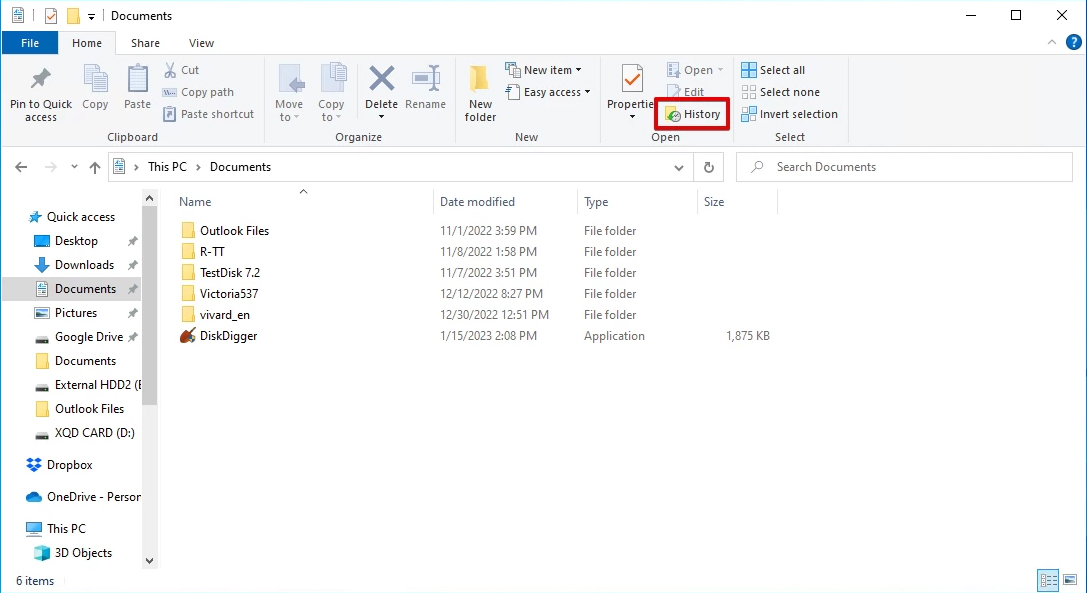
- Select the files you want to restore and click the green Restore button.
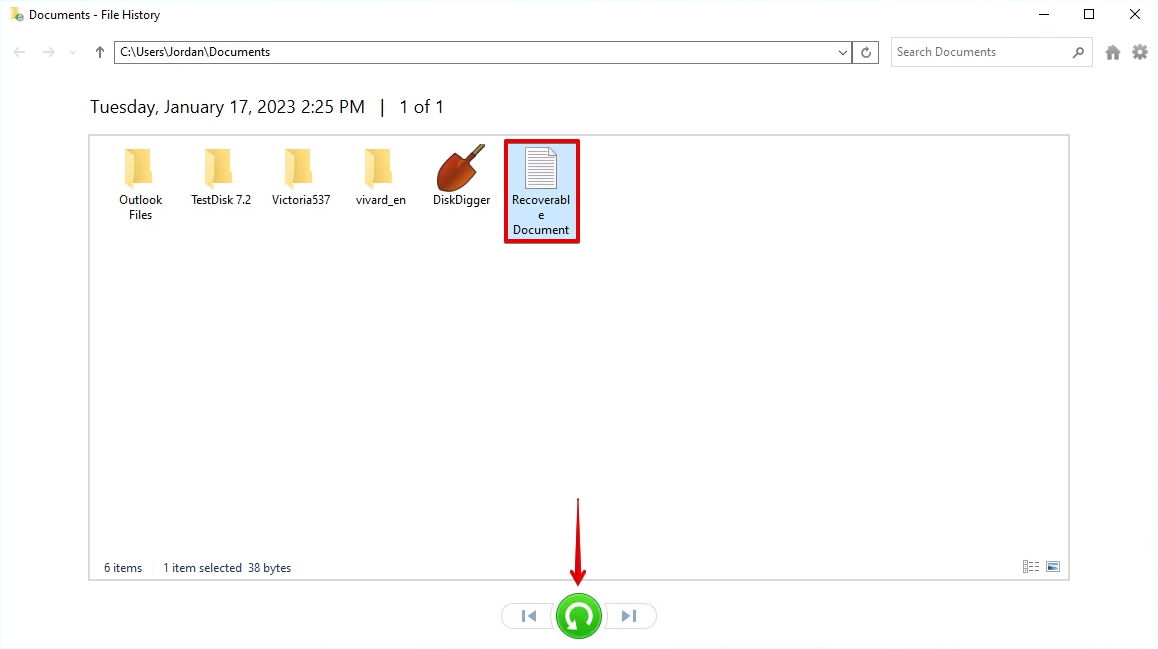
Once you click Restore, the files will return to their original location. To save the files to a new location instead, right-click the Restore button and click Restore to.
Restore Using File History on Windows 11
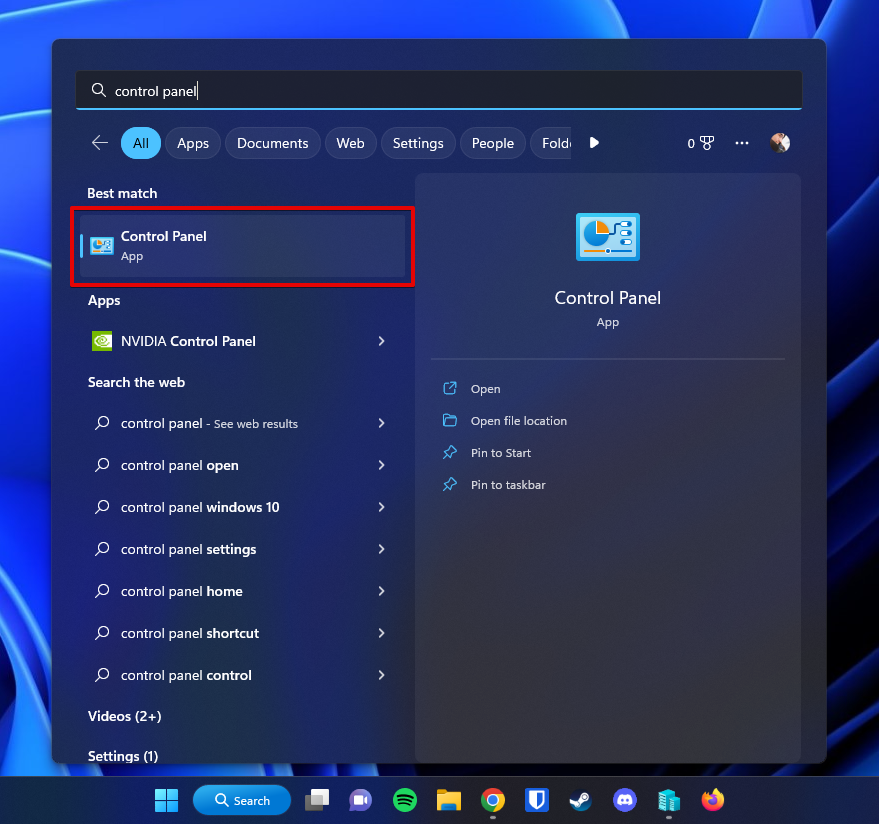
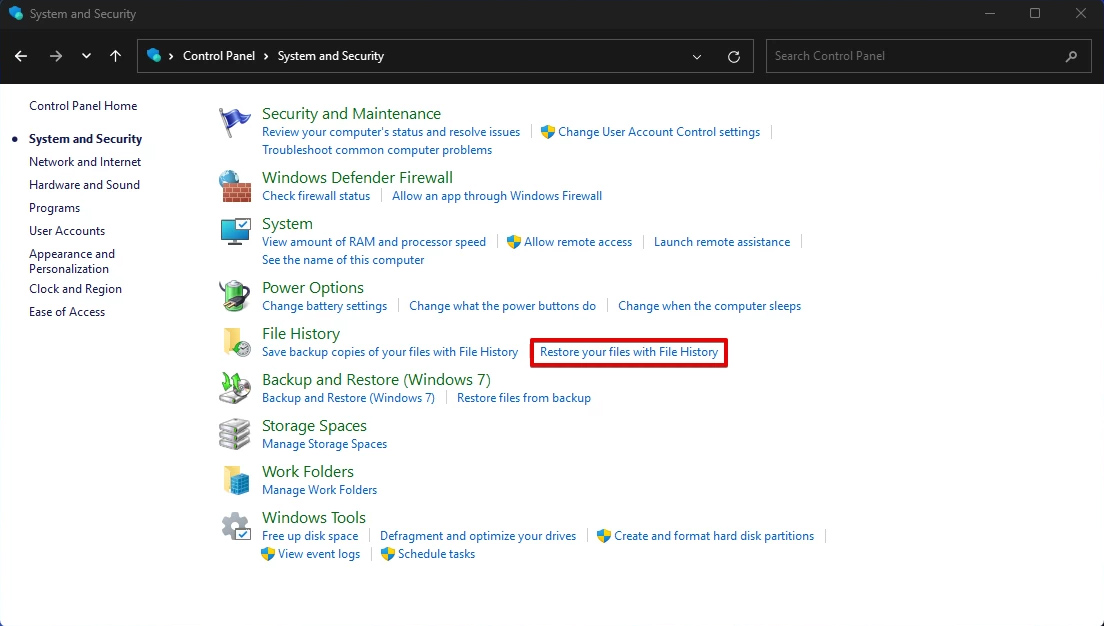
- Open Start and search Control Panel. Open the first result.
- Click System and Security.
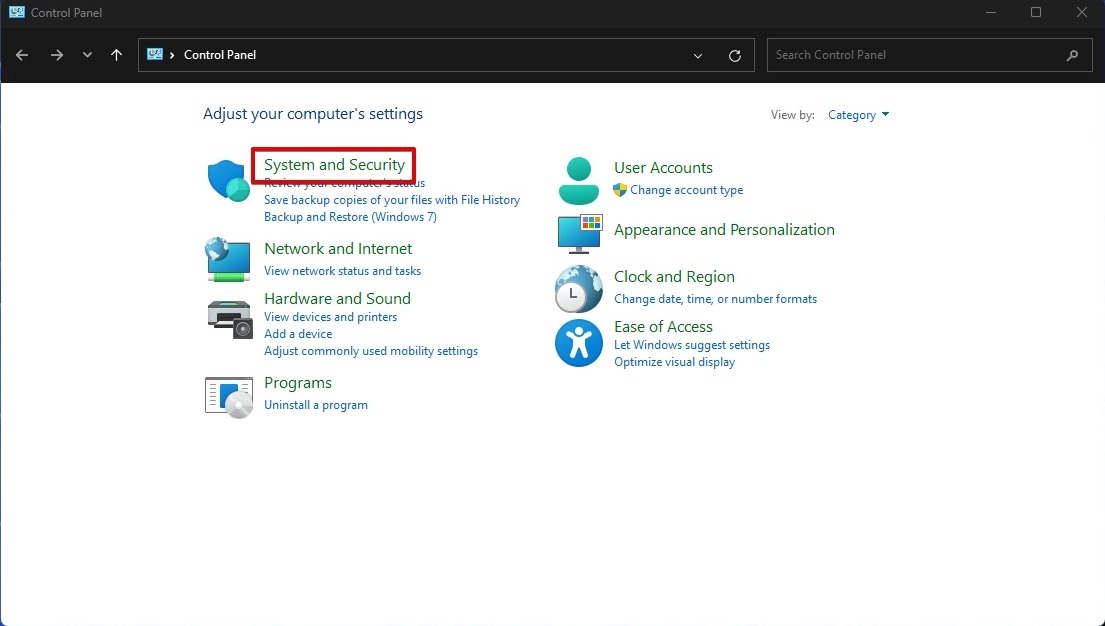
- Click Restore your files with File History.
- Select the files you want to restore, then click the green Restore button.
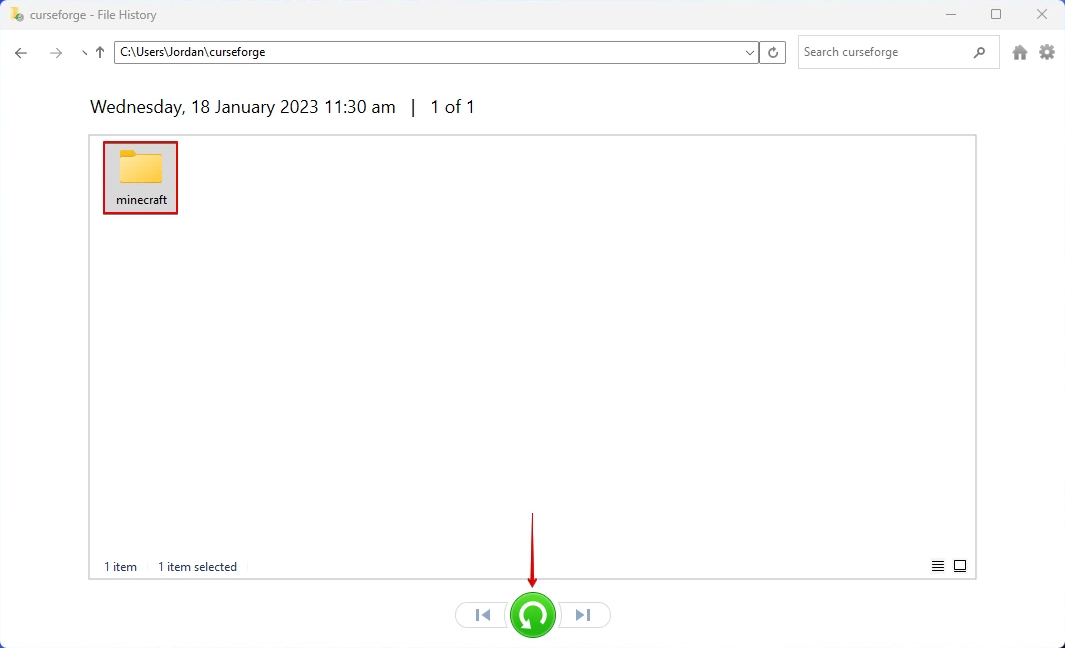
Once again, if you want to restore the files to a different location, be sure to right-click the Restore button and click Restore to.
Method 3:Restore Files Using Backup and Restore
Backup and Restore was introduced with Windows 7. Although File History is the backup solution in Windows 10, Backup and Restore is still used by many as it’s still a reliable method of backing up files. If you’ve made a backup using the Backup and Restore feature included with Windows, you can restore a copy of every file that was shift deleted straight from the backup.
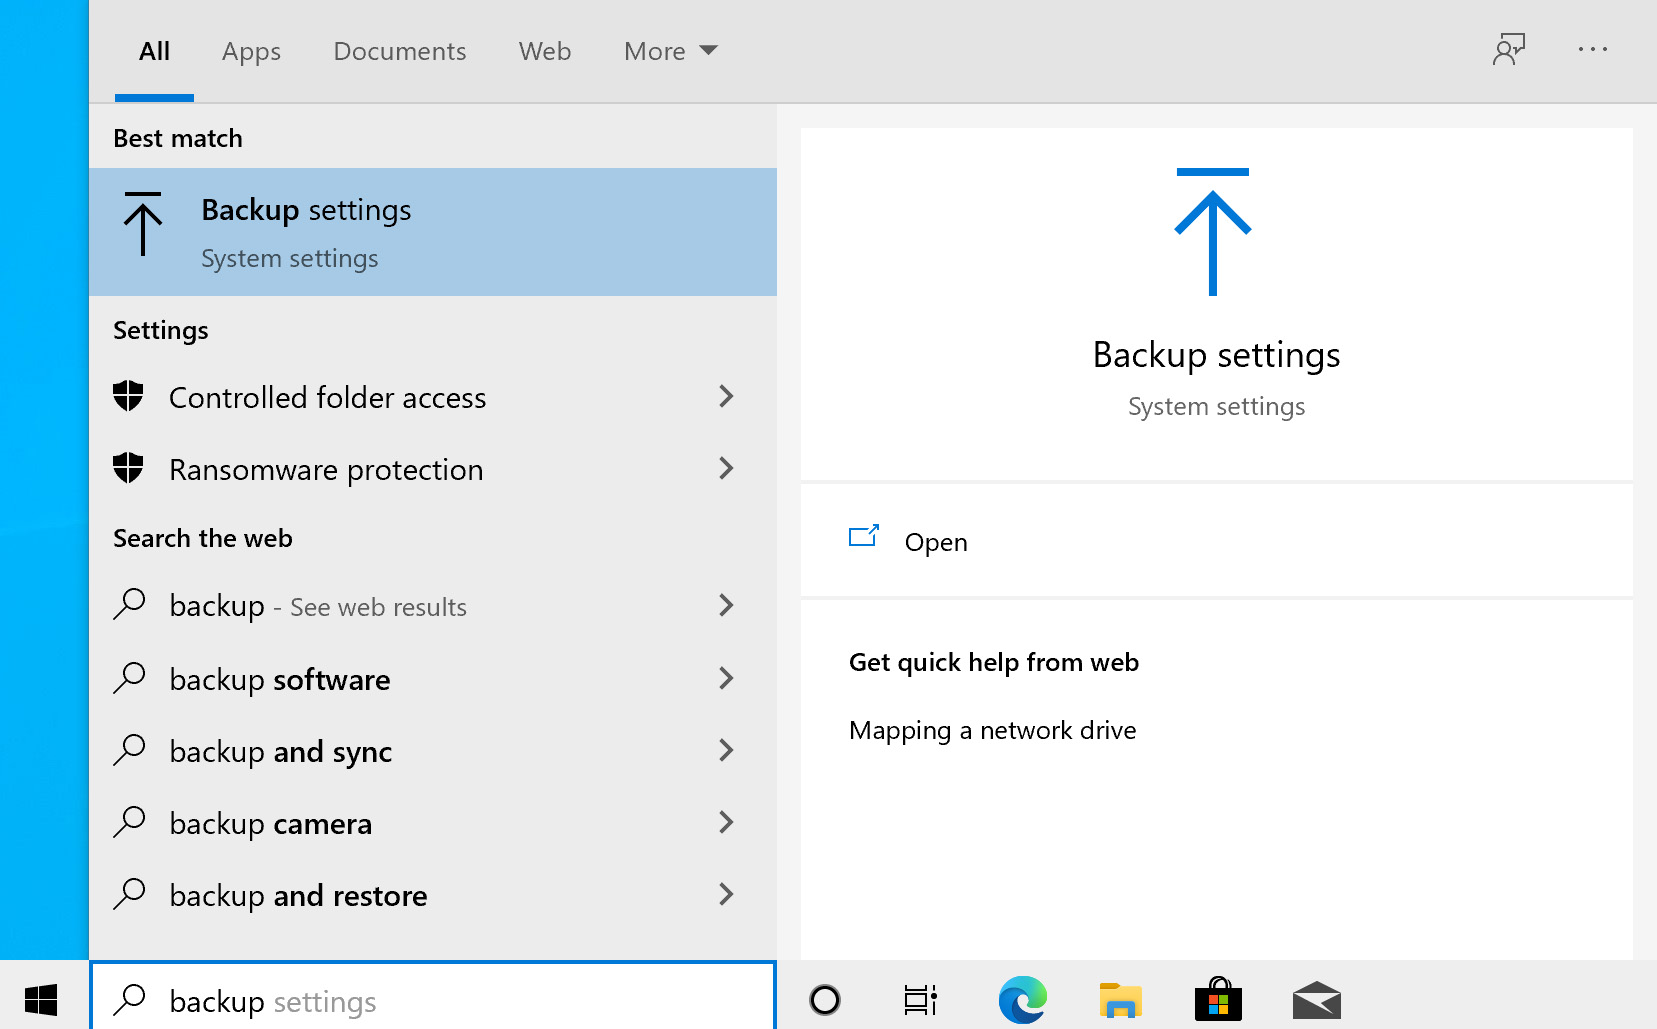
- If you’re using extrnal hard drive to store back-ups – connect it.
- Press Windows Key + S and search Backup settings. Open the first result.
(on Windows 11 you may not find them in search. In this case open Control Panel and use search window of explorer instead)
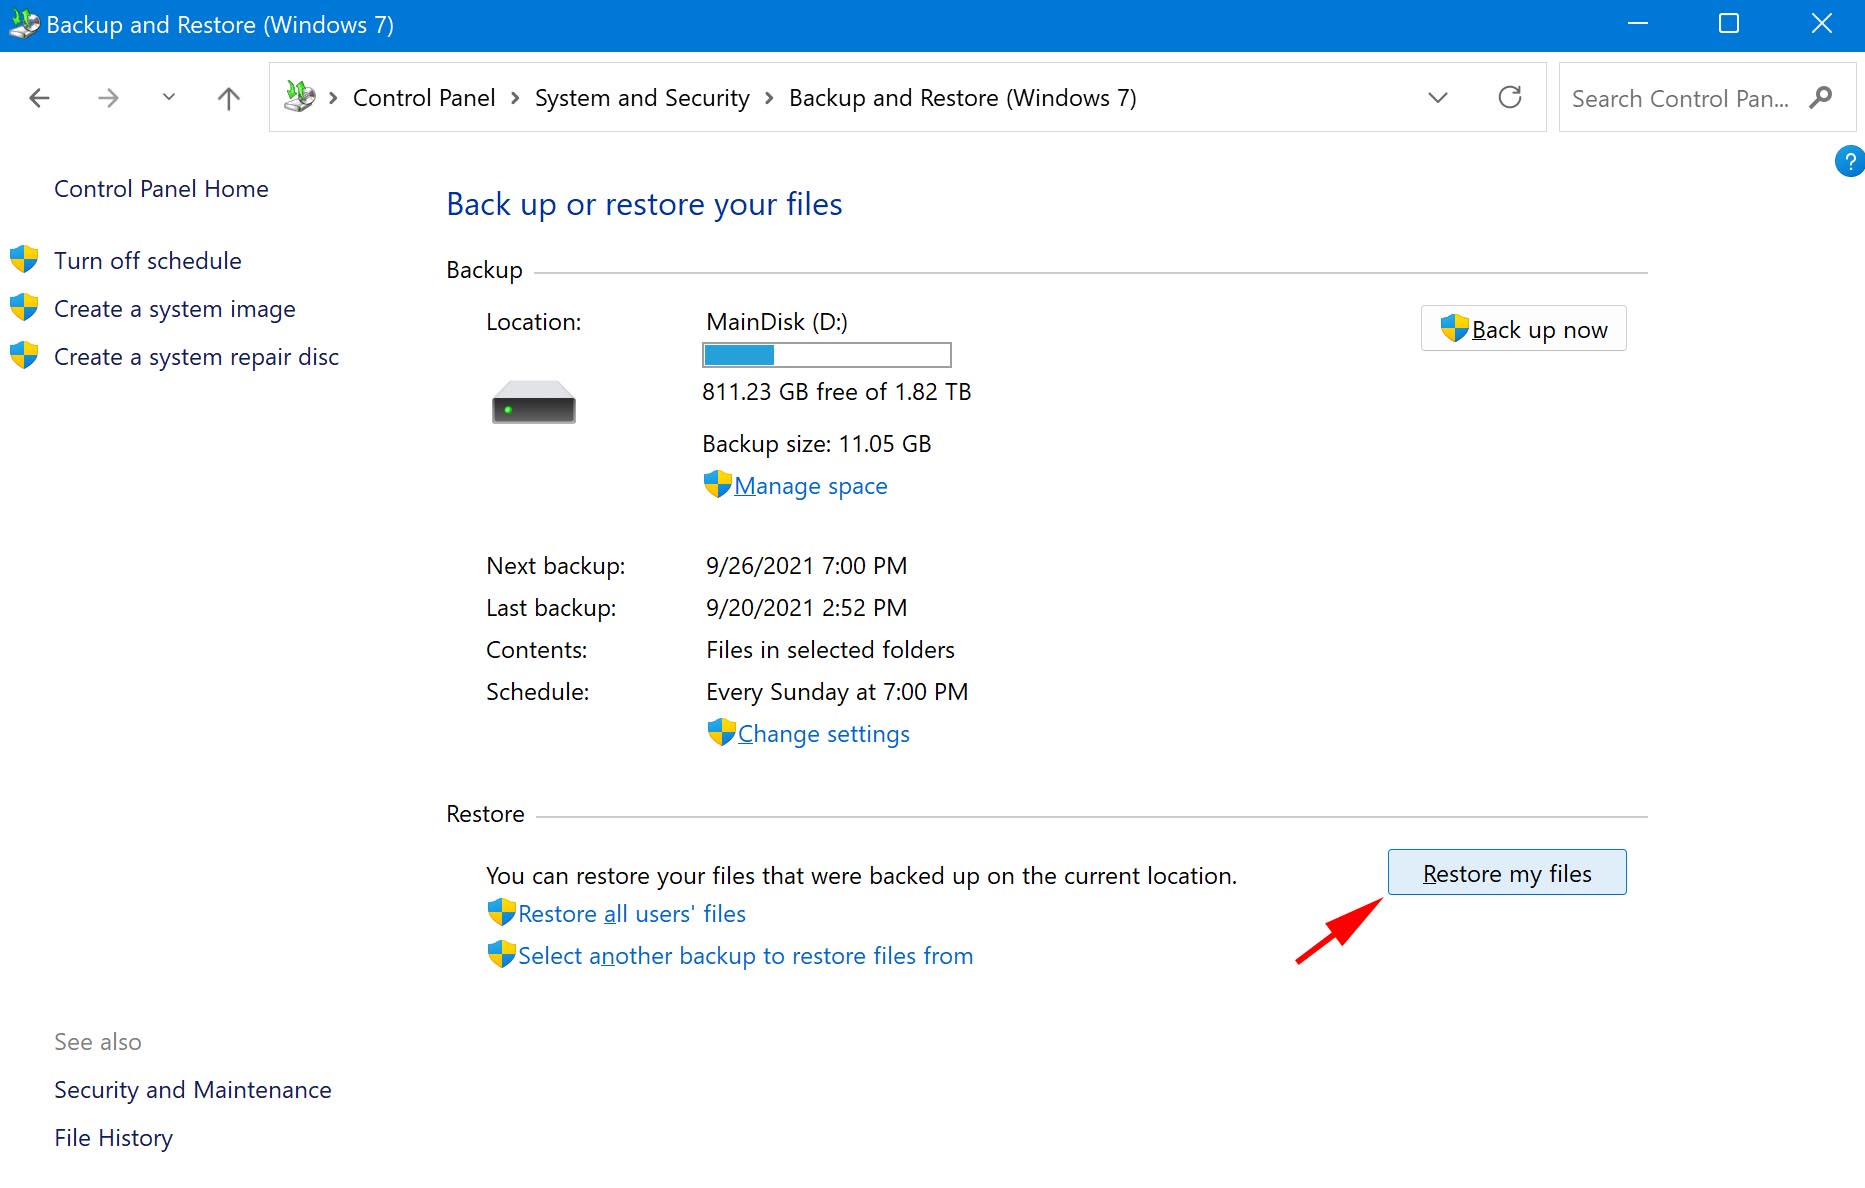
- Click Go to Backup and Restore (Windows 7).

- Click Restore my files.
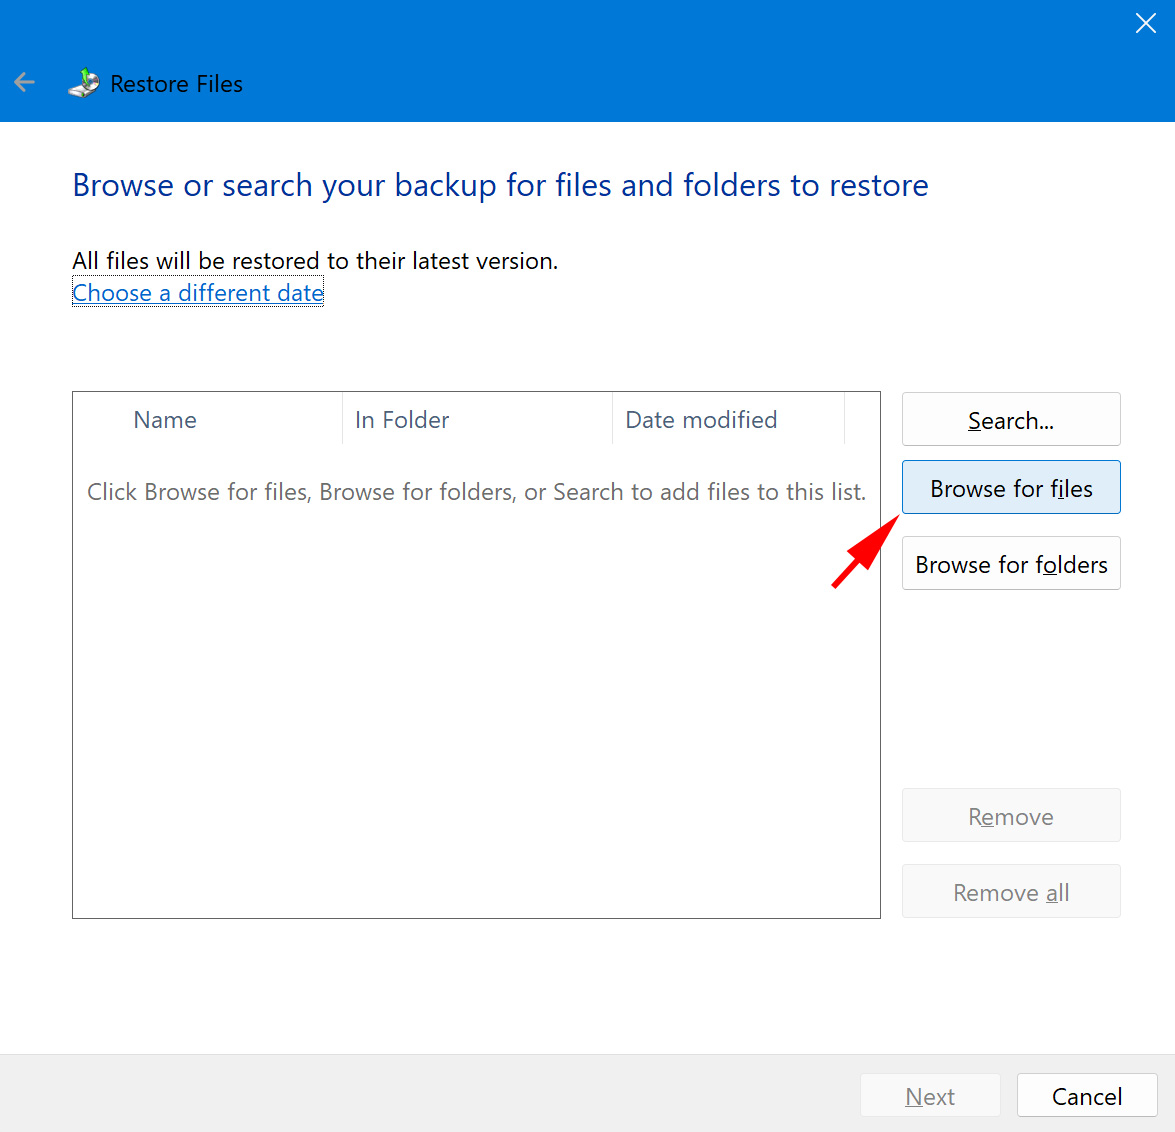
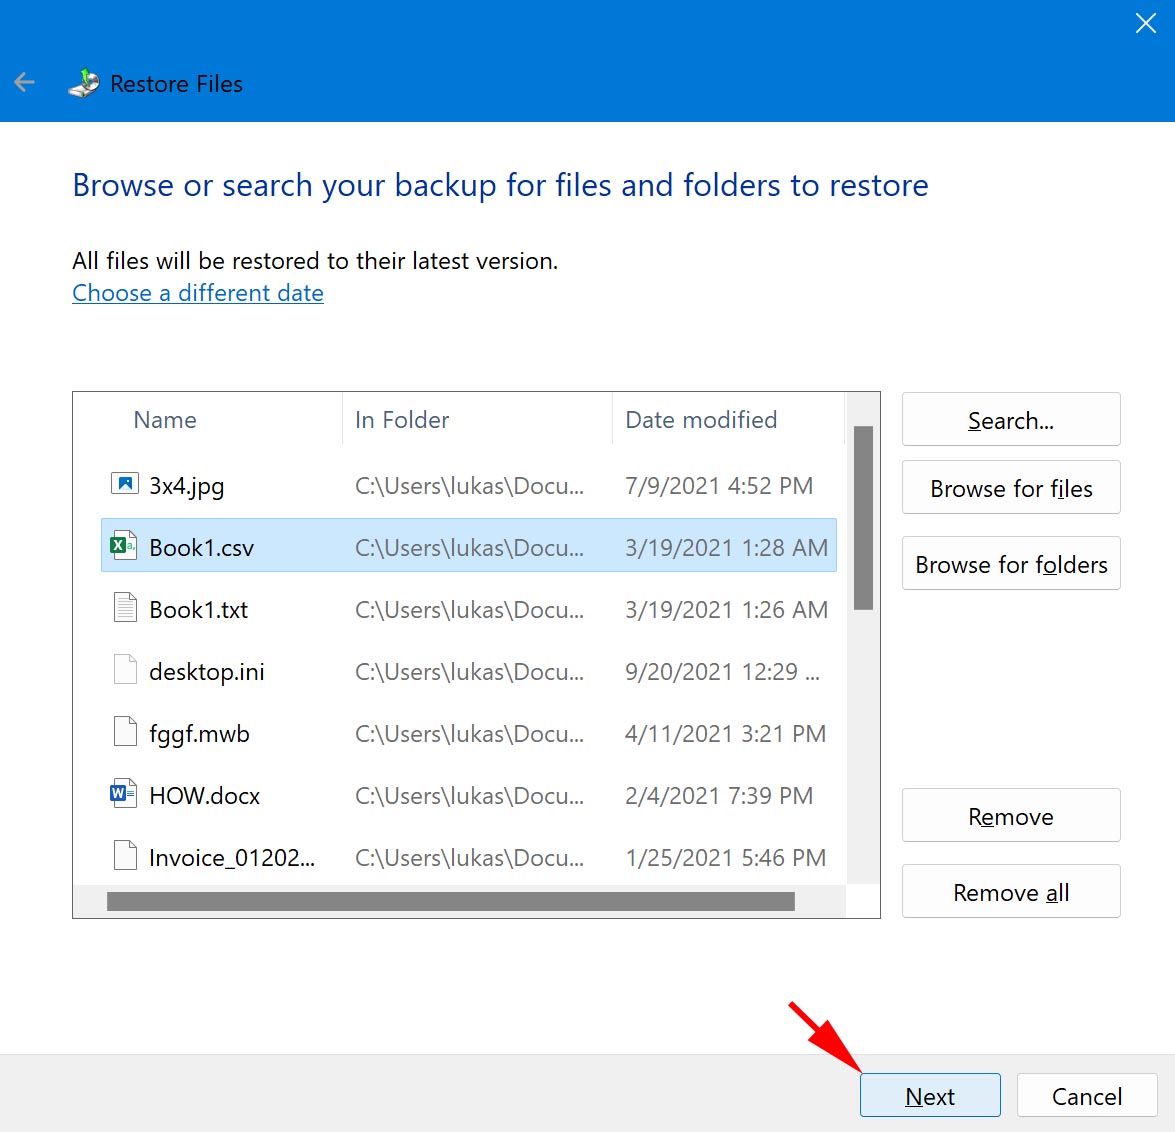
- Click Browse for files. Search for and select the shift deleted files you want to restore.
- Click Next.
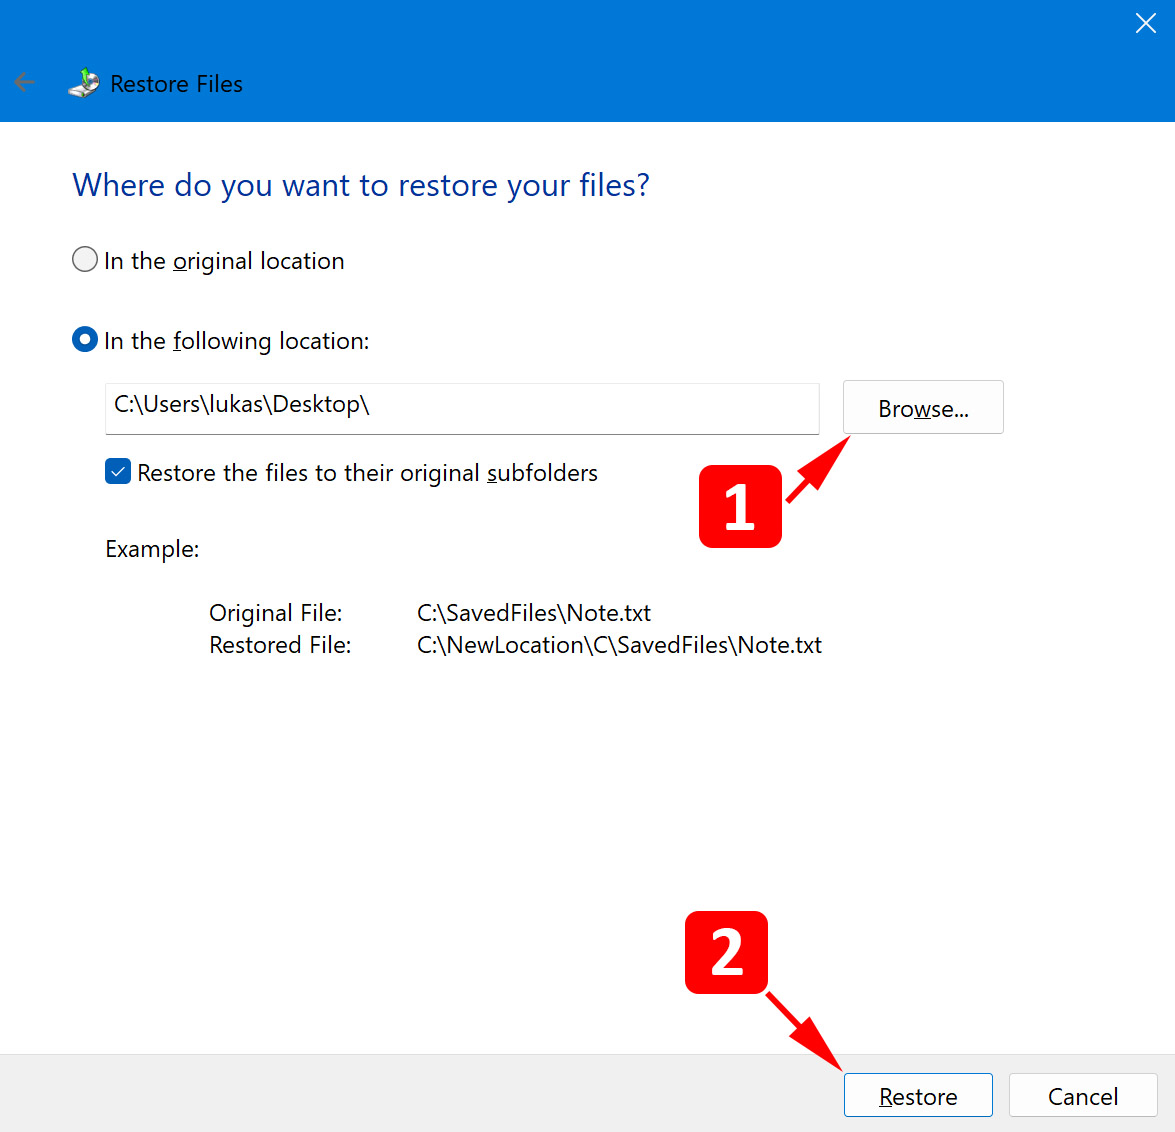
- Choose whether you want to restore the files to their original location, or to a specific folder. When done, click Restore.
Method 4:Utilize Windows File Recovery Tool
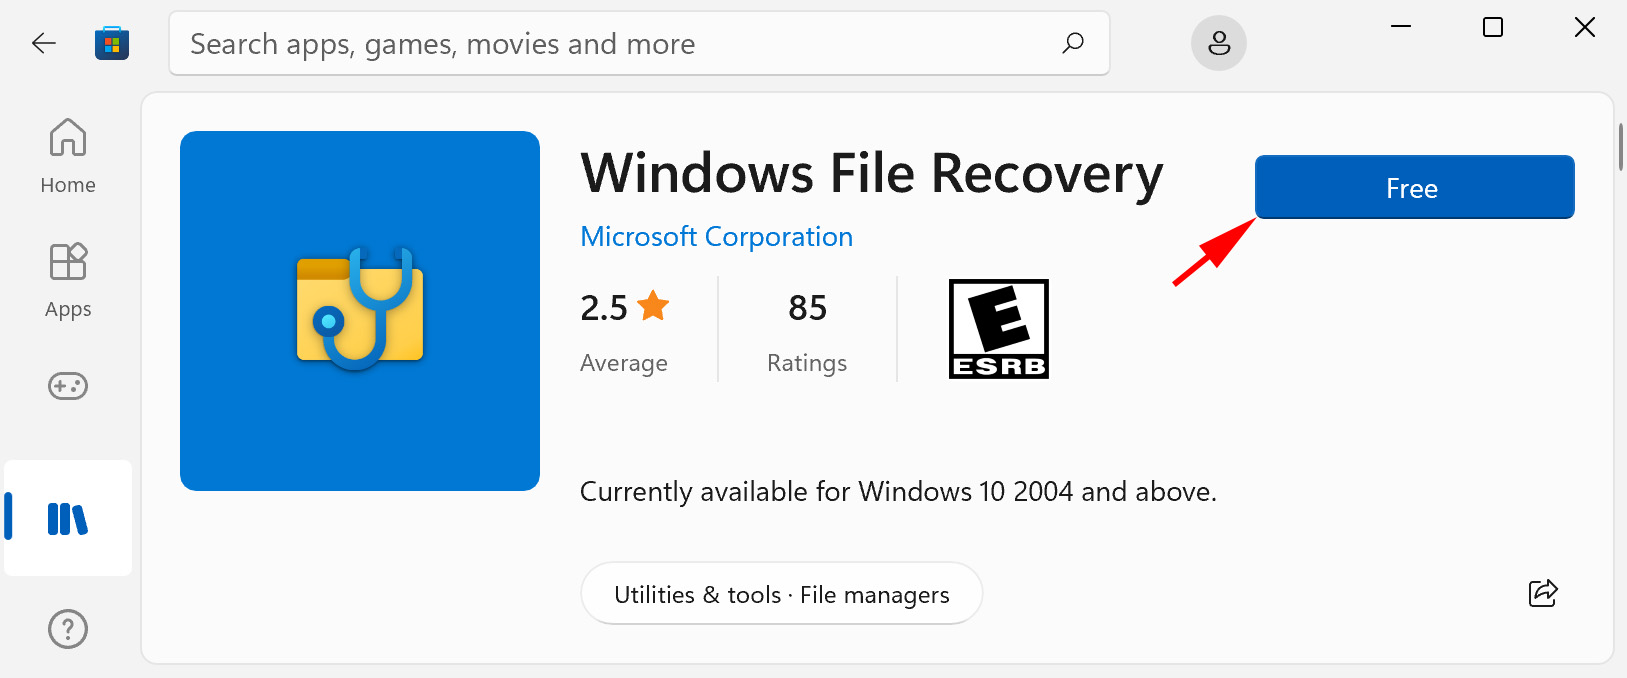
Windows File Recovery is Microsoft’s official data recovery tool that’s available on Windows 10 and 11. It is completely free. Using CMD, you are able to use various commands to customize what you want to recover. You will need another physical partition to recover the shift deleted files, as Windows File Recovery will not recover to the same partition at the risk of corrupting your data. If you don’t have one, use a USB or external drive.
- Install Windows File Recovery from the Microsoft Store by clicking Get.
- Press Windows Key + S and search Windows File Recovery. Open the first result. If prompted to allow permission, click Yes.

- Enter
winfr C: E:\DataRecovery /regular
Replace C: with the drive you want to recover from, and E:\Data Recovery with where you want the data recovered to. Press Enter. If prompted to continue, press Y to confirm. This command will recover whatever Windows Recovery Tool finds in its scan, including any shift deleted files.
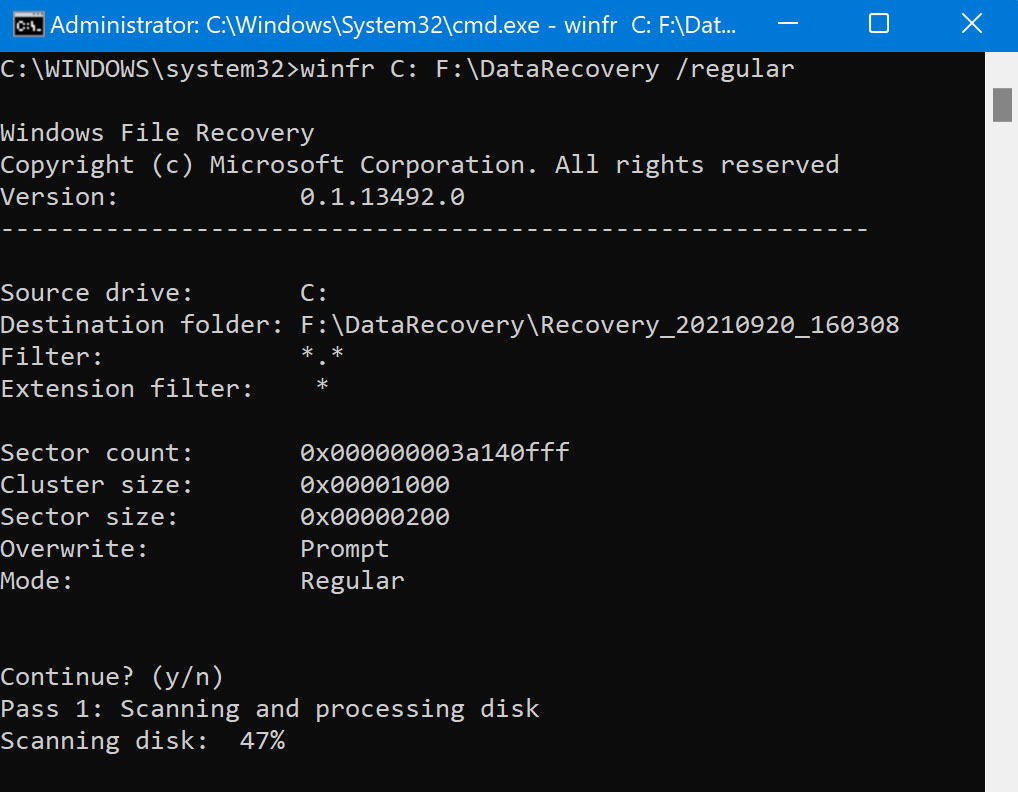
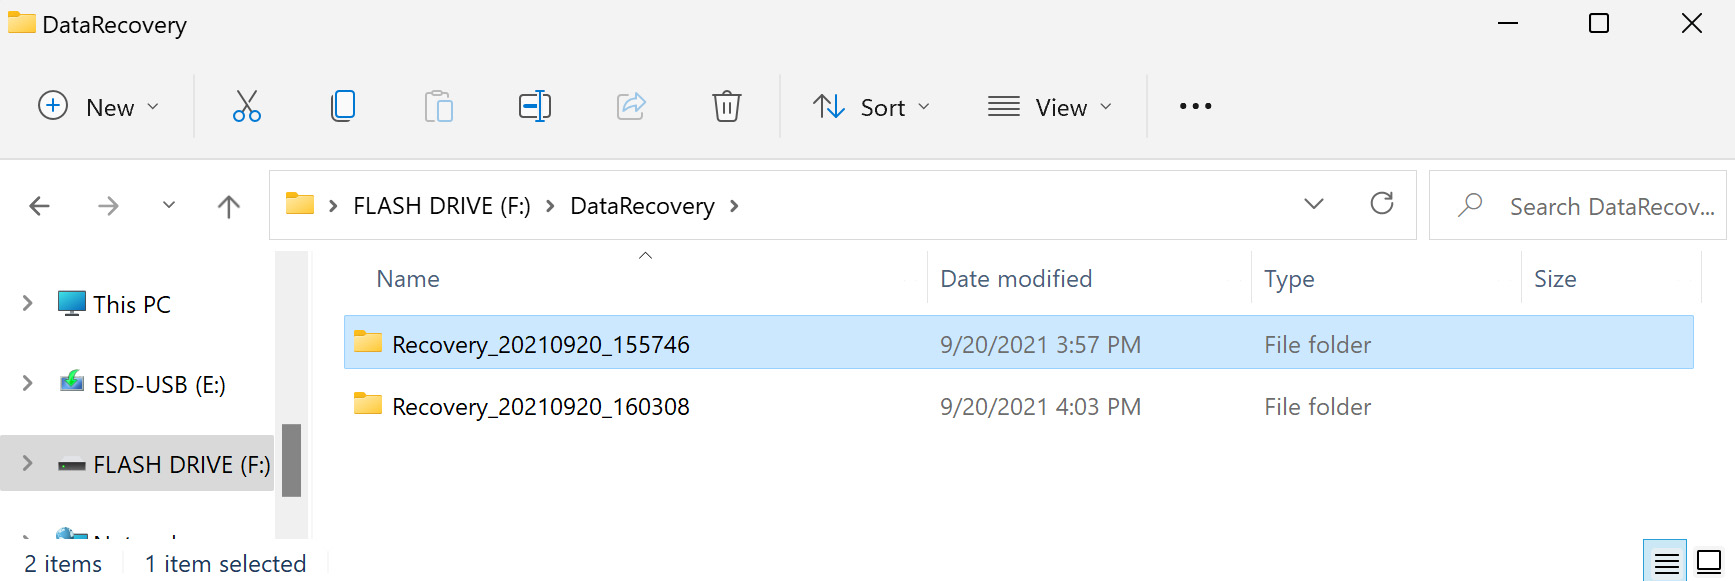
- When the scan is finished, press Y to view the recovered files.
Method 5:Turn to Professional Assistance
Data recovery software works, but there are some cases where it’s not enough to recover your shift deleted files. This doesn’t mean they’re unrecoverable, just that you may not be able to recover them yourself. In instances where your files are too important to lose, you need to enlist the services of a data recovery professional.
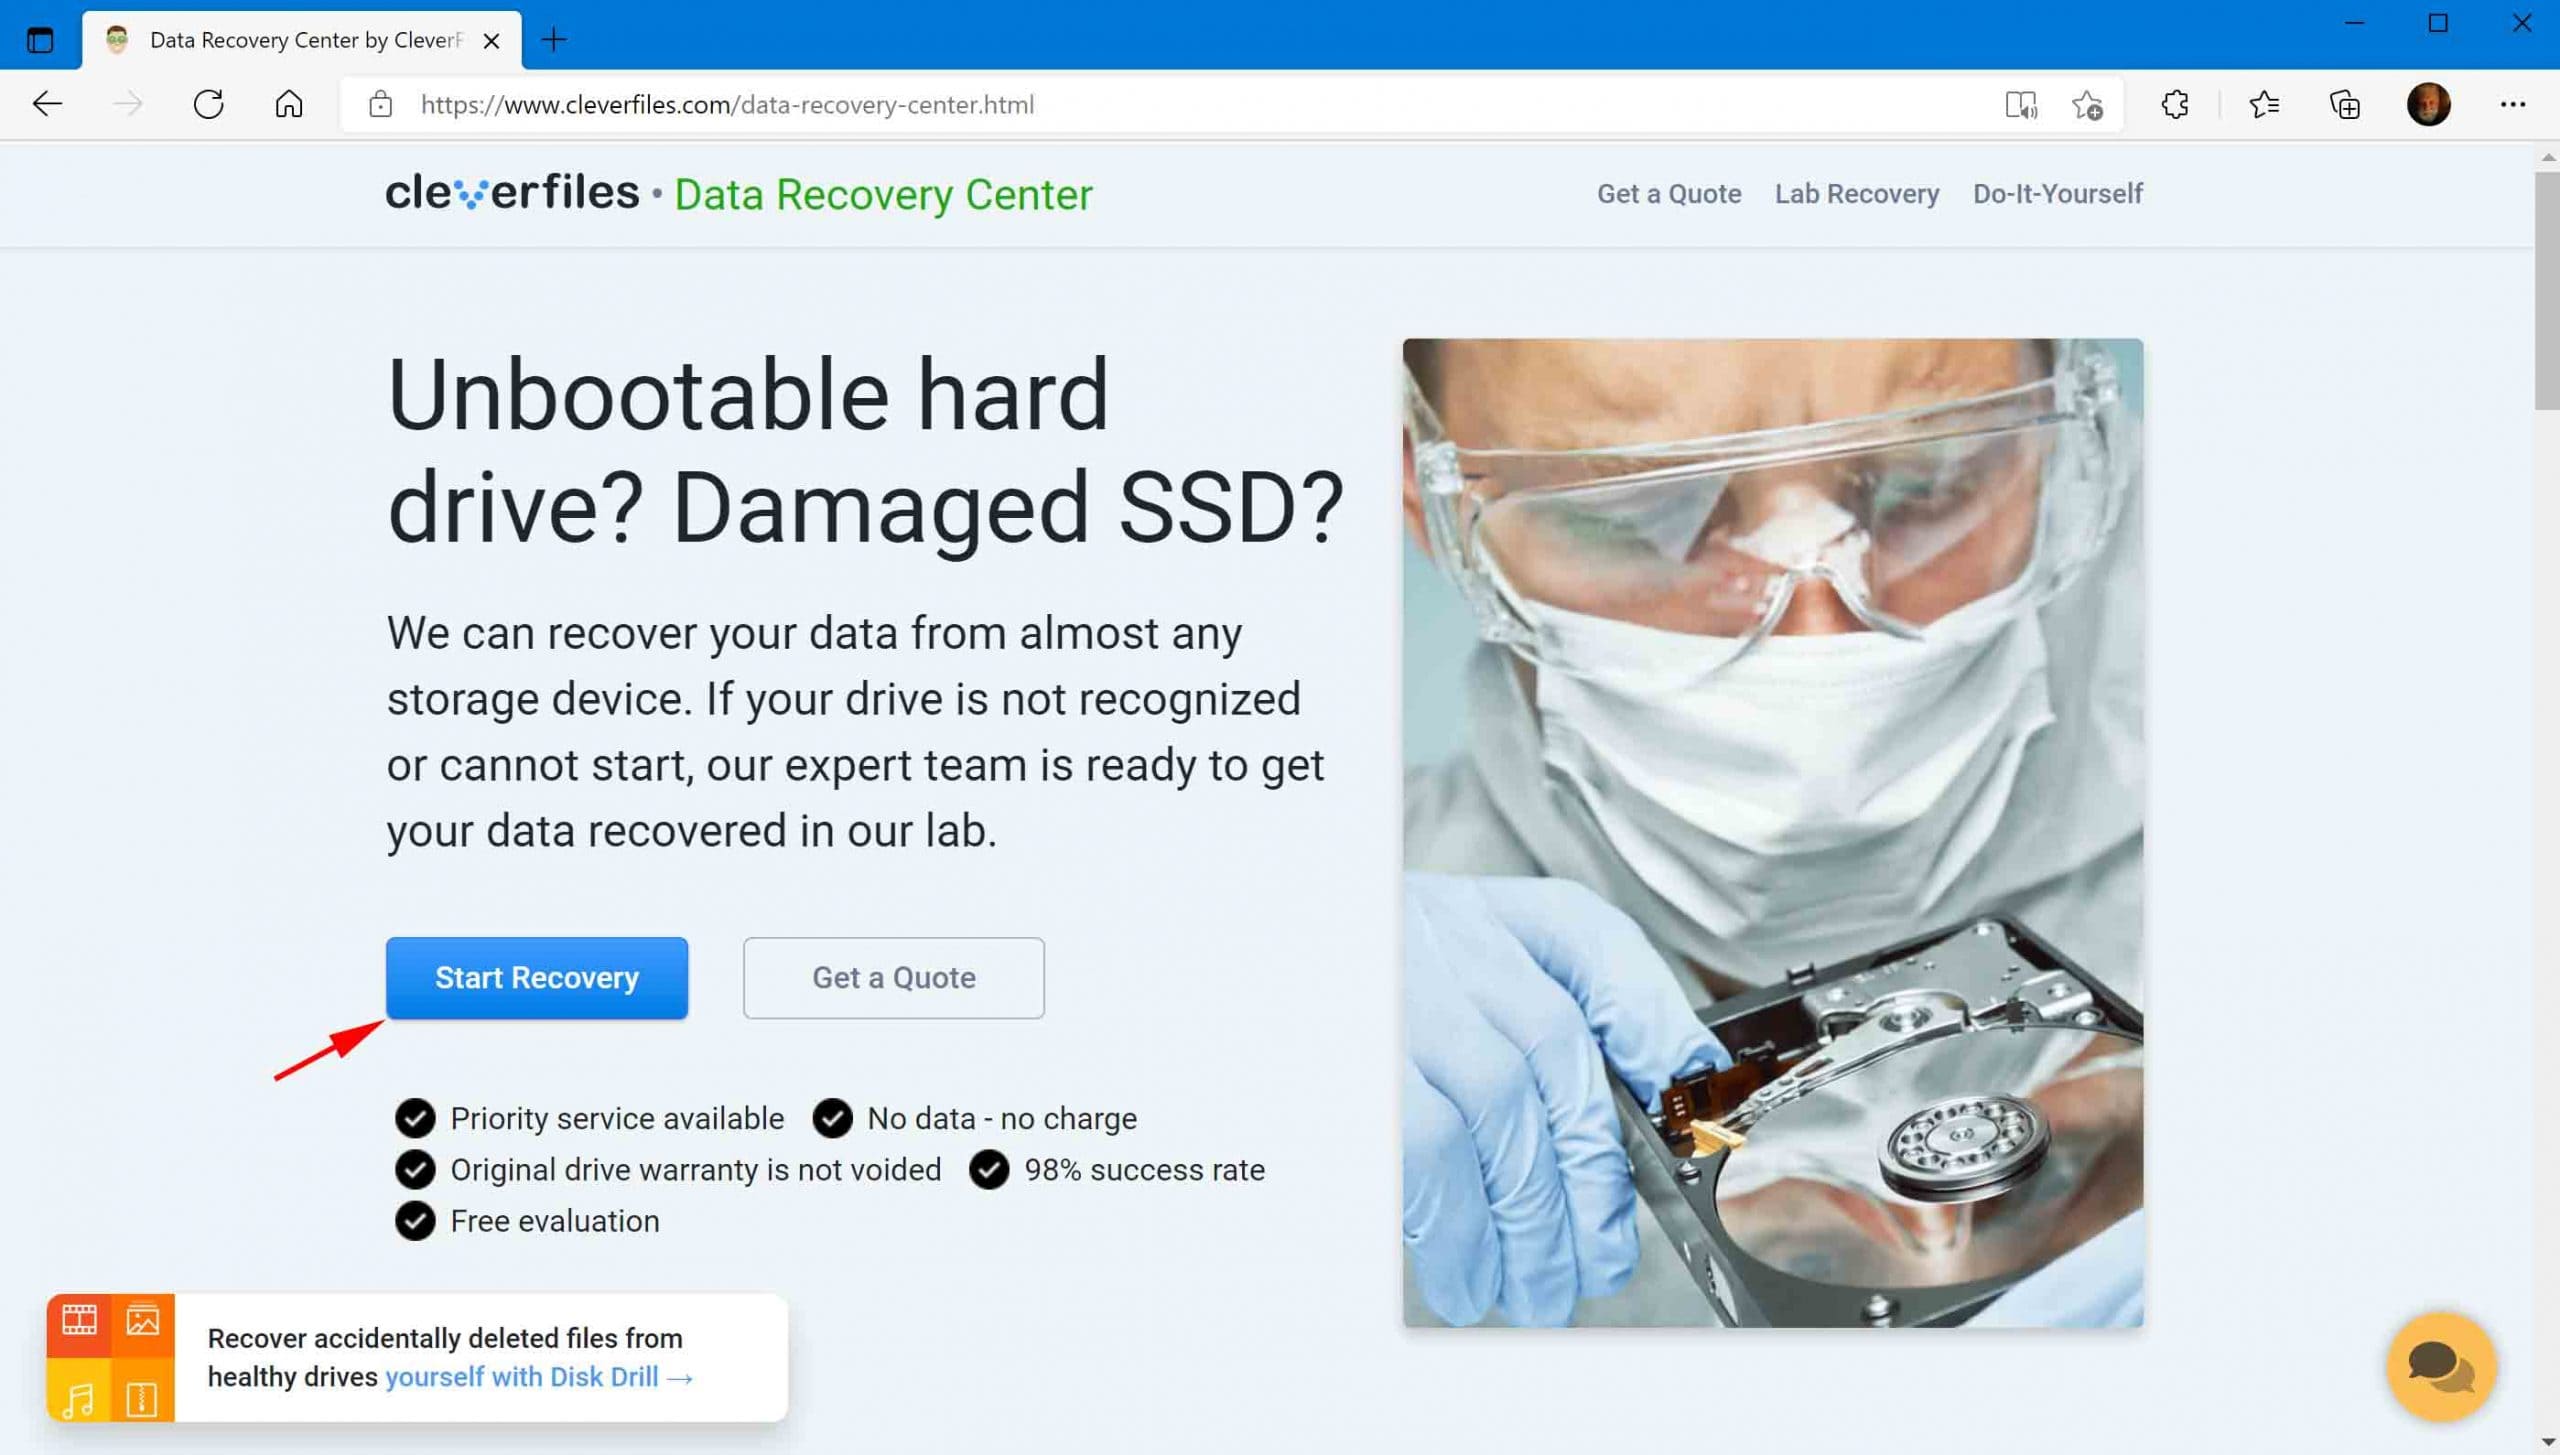
Using a professional service does come at a cost, but it’s the only viable option left if you’ve exhausted all others. A data recovery specialist can use industry-grade equipment to inspect your drive and recover its contents. One such service is the Data Recovery Center by Clever Files. Essentially, you create a work order with all the necessary information, send your device in, then wait for recovery to be done and your files returned. Let’s look at the process:
- Go to the Data Recovery Center and click Start Recovery.
- Complete the work order with all the necessary information. This will include your information, the level of service, as well as information pertaining to the device and what issues you’re facing.
- When the form is complete and you’ve reviewed the Terms and Conditions, click Complete my work order.

Conclusion
Losing access to your files can be one of the most nerve-racking experiences you can have as an individual. To prevent the hassle of trying different options to recover your lost data, it’s in your best interest that you back up your files in a separate and secure location to make access in the future easy.
FAQ:
- Download and install Disk Drill to a separate drive.
- Select the hard drive that contains the lost files and click Search for lost data.
- Click Review found items once the scan is complete.
- Mark the shift deleted files for recovery and click Recover.
- Choose a recovery location on a separate drive and click Next.


")
