 Data loss often comes as a rude surprise. Especially in cases where photos stored on your SD card seemingly vanished into thin air. What do you do in this case? Are your photos gone for good? There’s no need to panic—you can recover the disappeared photos from the SD card. How? Well, simply follow the guide below. We’ll walk you through the process of SD card photo recovery on both Windows and macOS.
Table of Contents
Why Did Pictures Disappear from My SD Card?
It’s understandably unnerving to have your photographs vanish into thin air, especially if you’re a photographer and your livelihood depends on it. However, the first step you need to take is isolating the problem that caused the photos to disappear.
| Reason | Description |
| 📋 Data Transfer | Did the power go out when you were transferring photos into the SD card? That can cause the files to become corrupt, which means they might not appear on your SD card. |
| 🗃️ Formatting | When you format an SD card, you wipe out all the data you’ve stored on it, including your photos. The missing photos may still be on the SD card’s memory, but you’ll need a data recovery tool for recovering the photos. |
| ⚠️ Corruption | A corrupt SD card is one that has undergone logical or physical damage, rendering the files stored on it unreadable. Logical damage is typically easier to fix than physical damage, which can also be fixed. |
| 🐞 Virus attack | A virus attack can tinker with your photos and other files stored on the SD card, which can lead to them disappearing from the card. |
| 📚 Faulty card reader | In some cases, this can be a hardware problem where your card isn’t reading the SD card properly. |
However, in some cases, the files might just be hidden.
Are the Pictures on Your SD Card Hidden?
Often, the pictures on your SD card aren’t missing, but simply hidden. It’s possible you accidentally hid them, or they were hidden due to other reasons. Hidden photos will be invisible in macOS Finder and Windows Explorer, unless the hidden items option is enabled.
To regain access to these pictures, you need to enable the hidden items option in Finder and Windows Explorer. You can then remove the hidden attribute from these pictures to make them visible, even if the hidden items option is disabled.
How to View Hidden Files on Windows
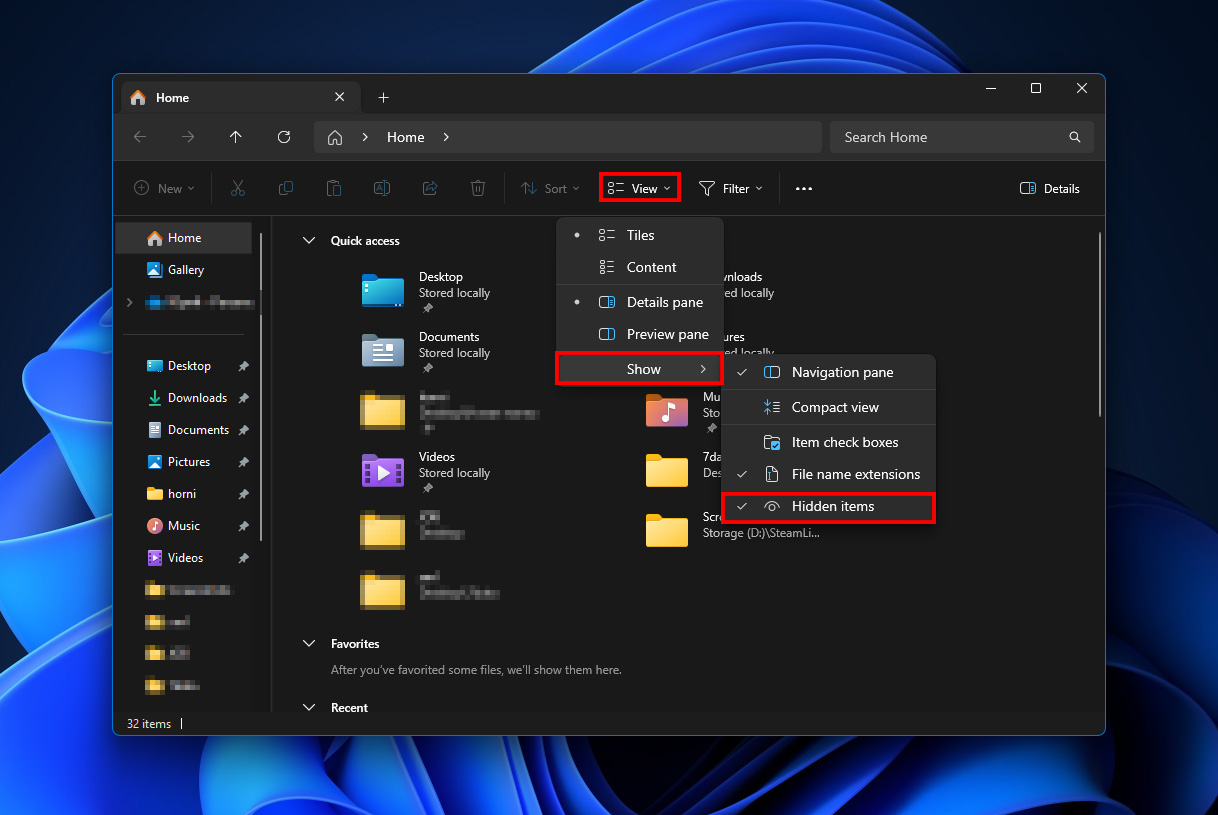
- Press Windows+E to launch Windows Explorer and navigate to the folder where you’ve saved the photos.
- Select View from the top of the Windows Explorer, and select Show > Hidden items.
Once the hidden photos are visible, you can remove their hidden attribute if it’s no longer required. To achieve this, right-click the photos, choose Properties and uncheck the Hidden checkbox.
How to View Hidden Files on Mac
If you’re running macOS, here’s how you can view hidden files on your device:
- Open Finder and navigate to the required folder.
- Press Command + Shift + .(period) to make hidden files visible. You can use the same shortcut to hide them again.
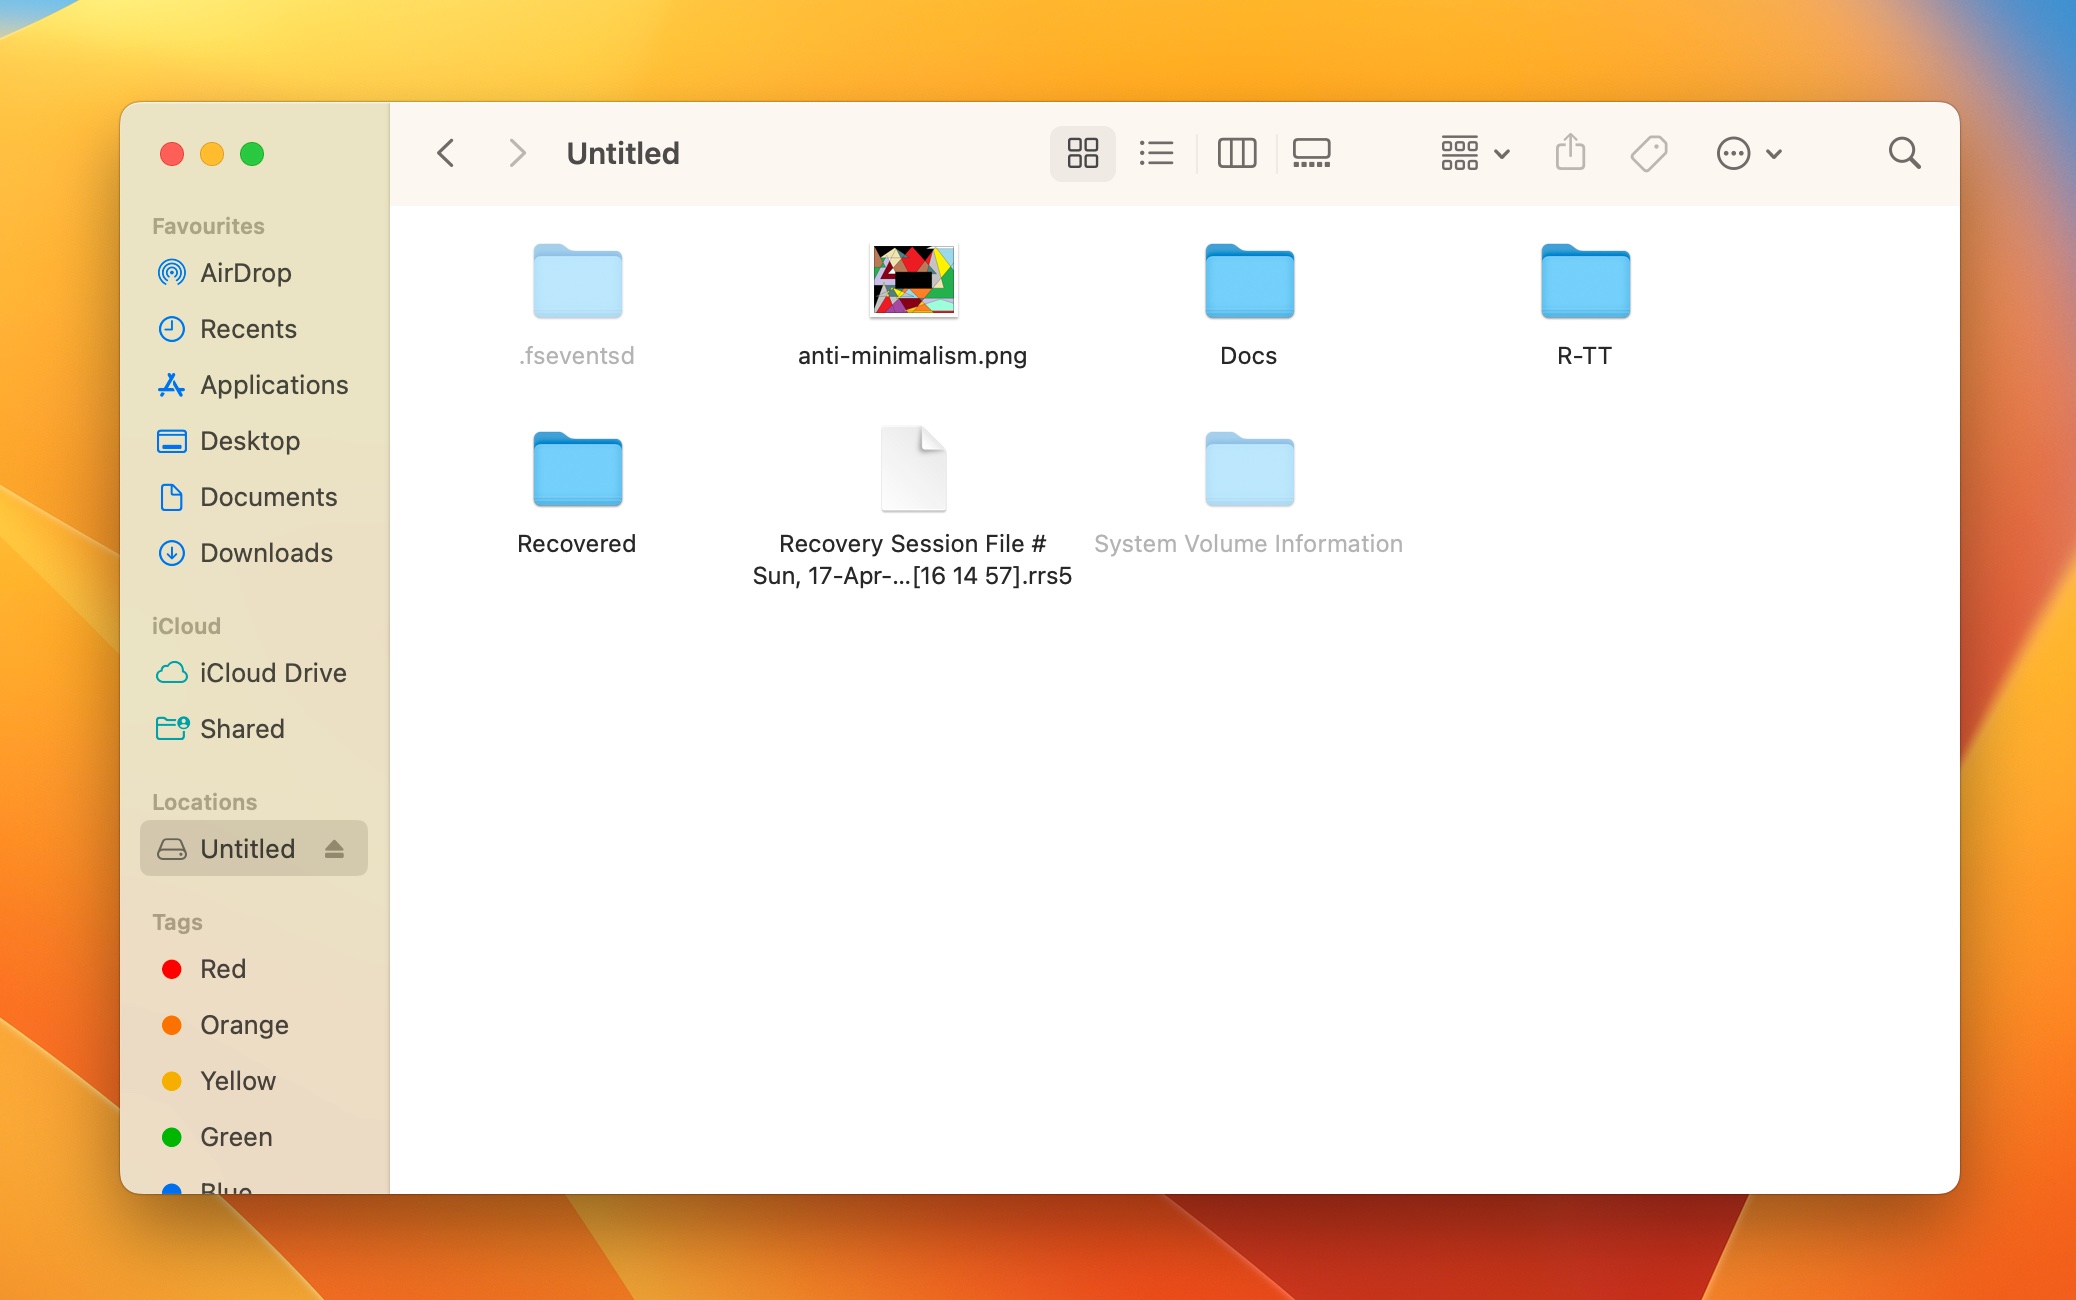
Hidden files in macOS will have a dot (.) before their filename. You can remove this dot to remove the hidden attribute from them.
How to Recover Photos Disappeared from an SD Card
Photos still missing even after enabling the hidden items option? It’s likely they were deleted. If you don’t have an existing backup, you have two primary options to recover these deleted photos from your SD card—use a data recovery tool, or contact a professional data recovery company.
Data recovery programs are much cheaper and more convenient than a using a professional data recovery service. However, in case of physical damage, or if the photos must be recovered at any cost, it’s better to contact a professional data recovery service.
The data recovery programs used for the tutorials below are available for both Windows and macOS.
Method 1: Use a Professional Data Recovery Program
It’s important to do your research when choosing a data recovery program. Not all of them are created equal, and some could even exacerbate the data loss.
For our tutorial, we decided to use Disk Drill—a cutting edge, easy-to-use data recovery tool that also makes an appearance on our list of the best data recovery programs. The program lets you create and scan disk images (a crucial step in data recovery), preview photos before recovery, and supports all major storage drives and file systems. It can also scan RAW drives, i.e., drives with a corrupt or missing file system.
Disk Drill is available for Windows and macOS. Windows users can take advantage of Disk Drill’s free trial that allows for free recovery of up to 500 MB of data.
Let’s take a look at how to recover disappeared photos from your SD card, using Disk Drill:
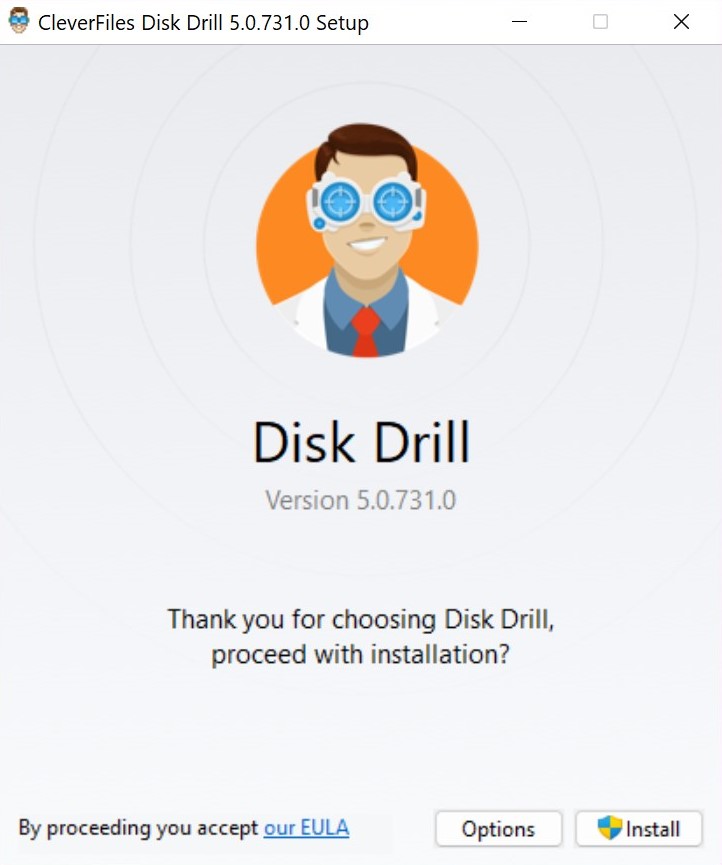
- Download Disk Drill and install it on your PC.
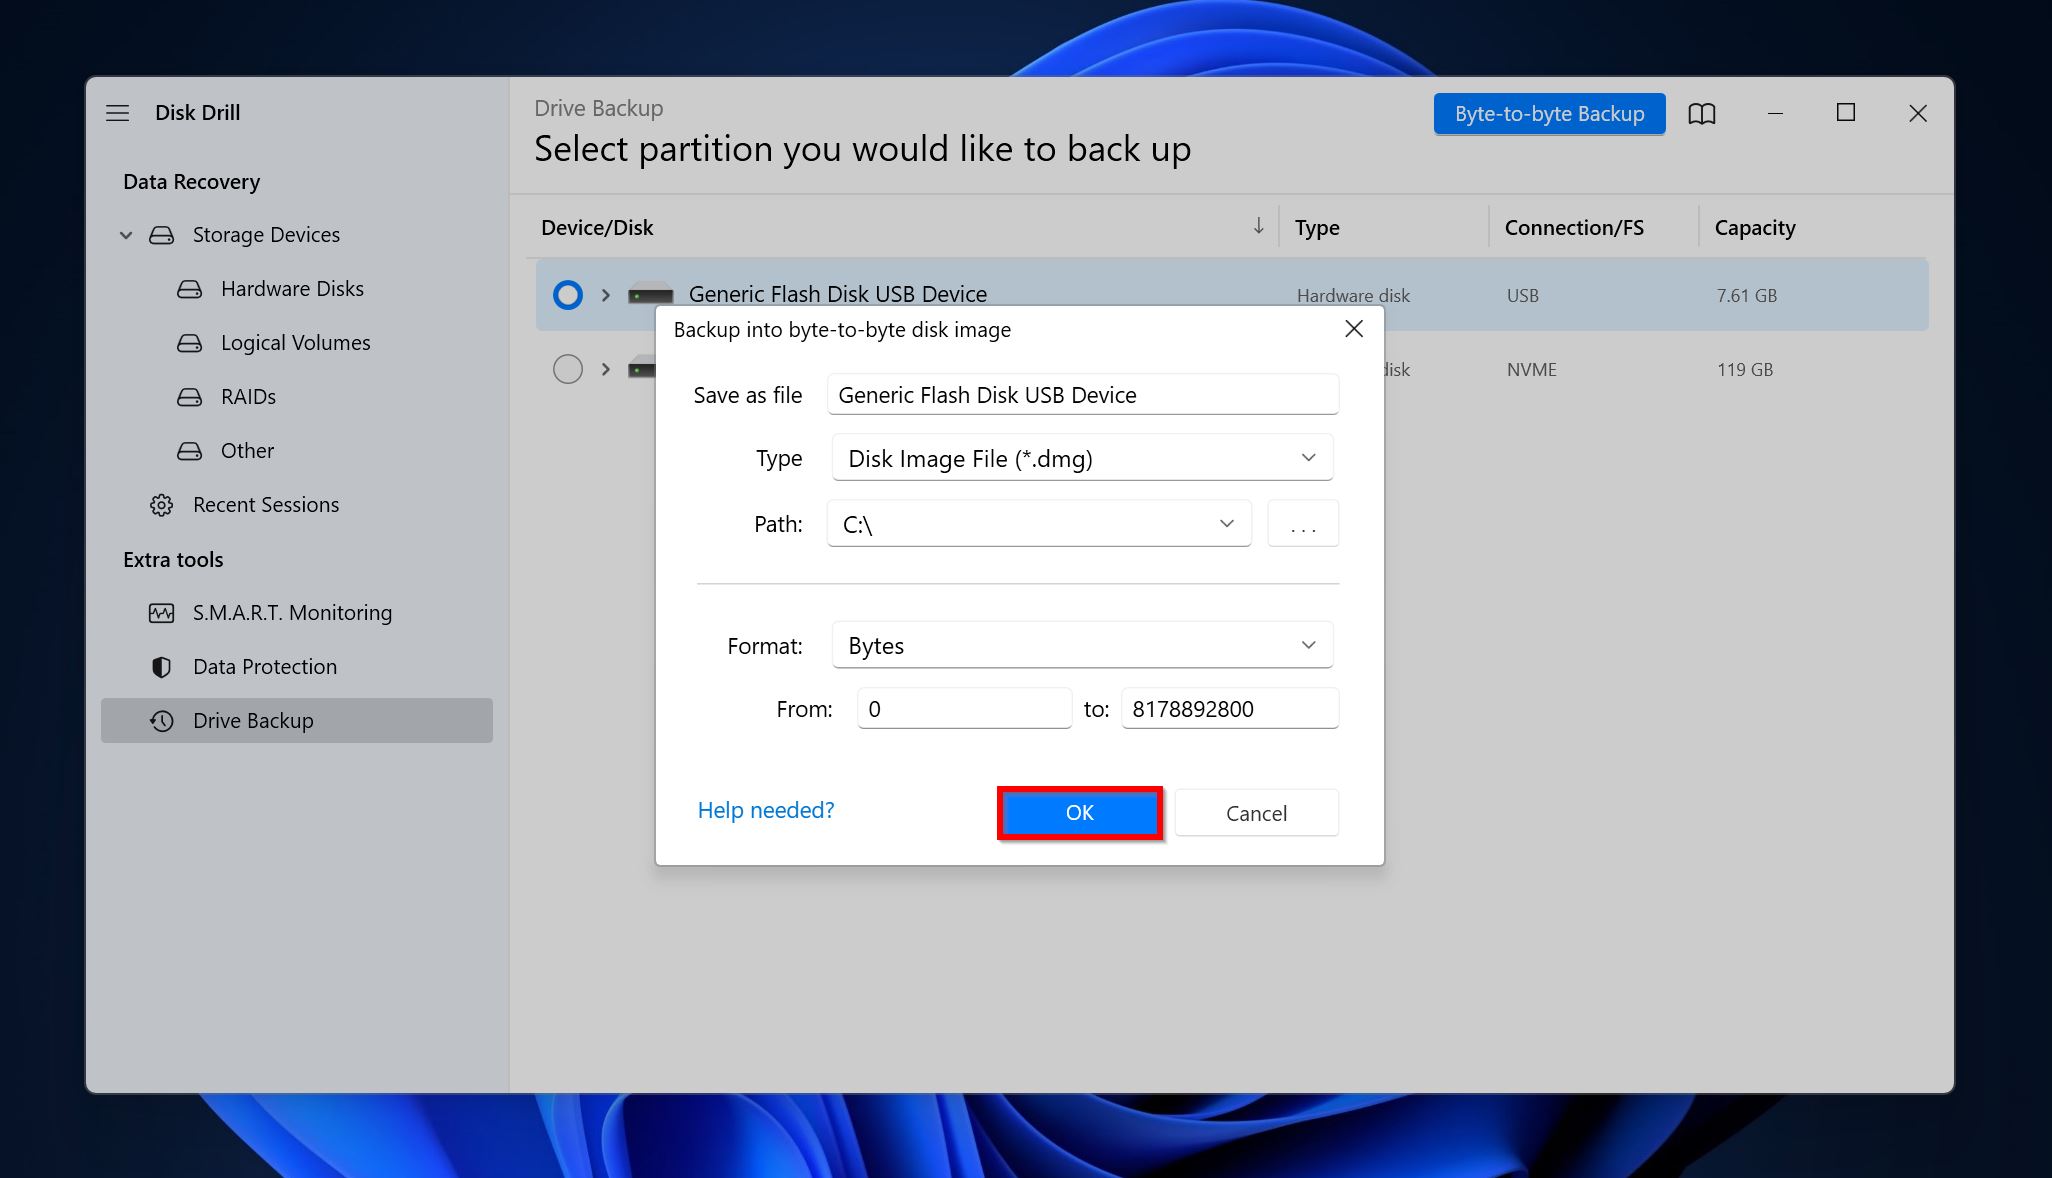
- Launch Disk Drill and select Drive Backup from the left sidebar. Click on the Byte-to-Byte Backup button at the top-right and enter a file name, the location where you want to save the file, and click OK to start creating the image.
 Go back to the Data Recovery section from the left sidebar and click on Attach disk image. Select the image from the location where you saved the image file and select Open.
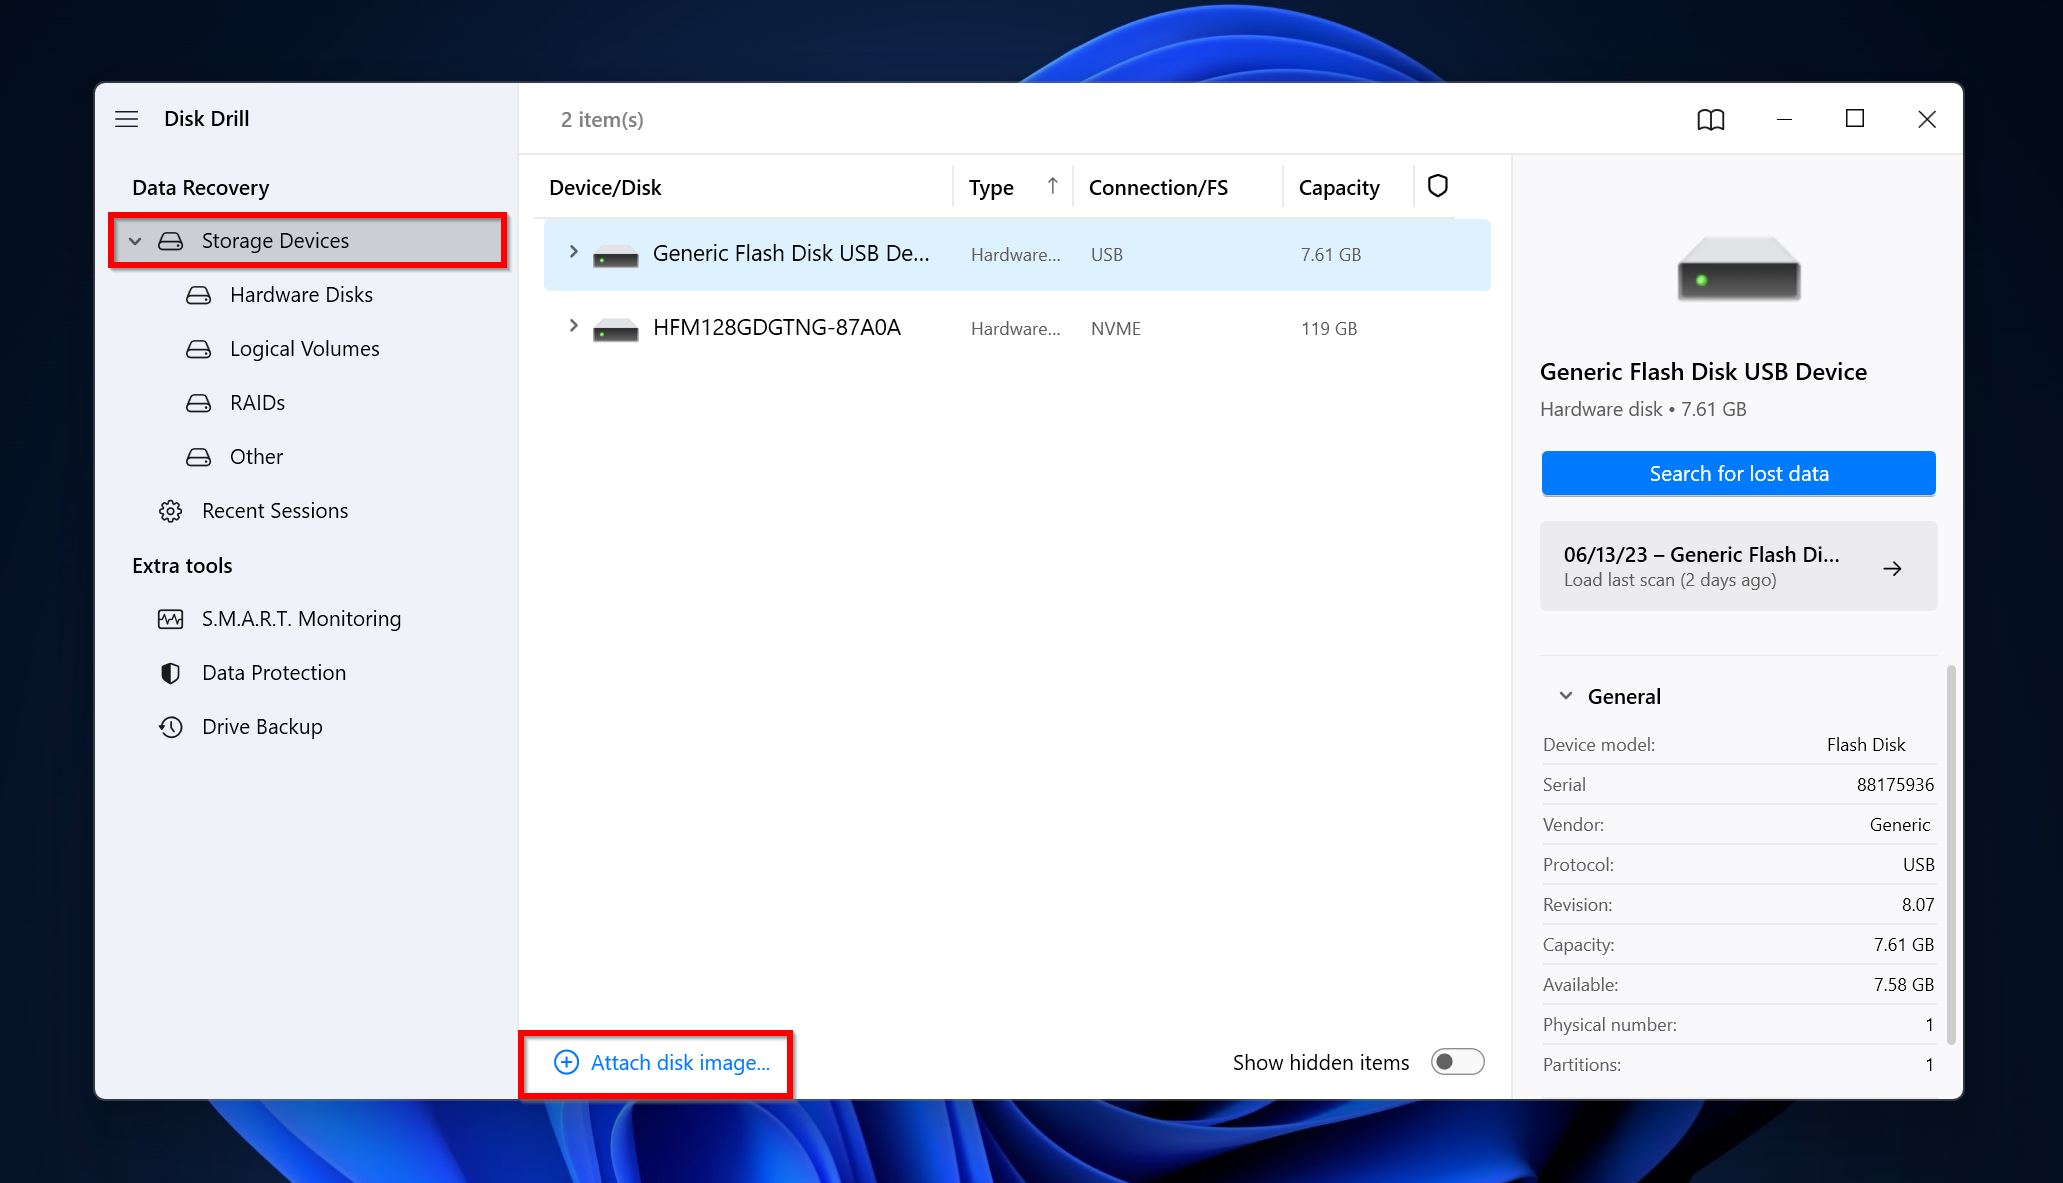 Select the mounted disk image and click Search for lost data.
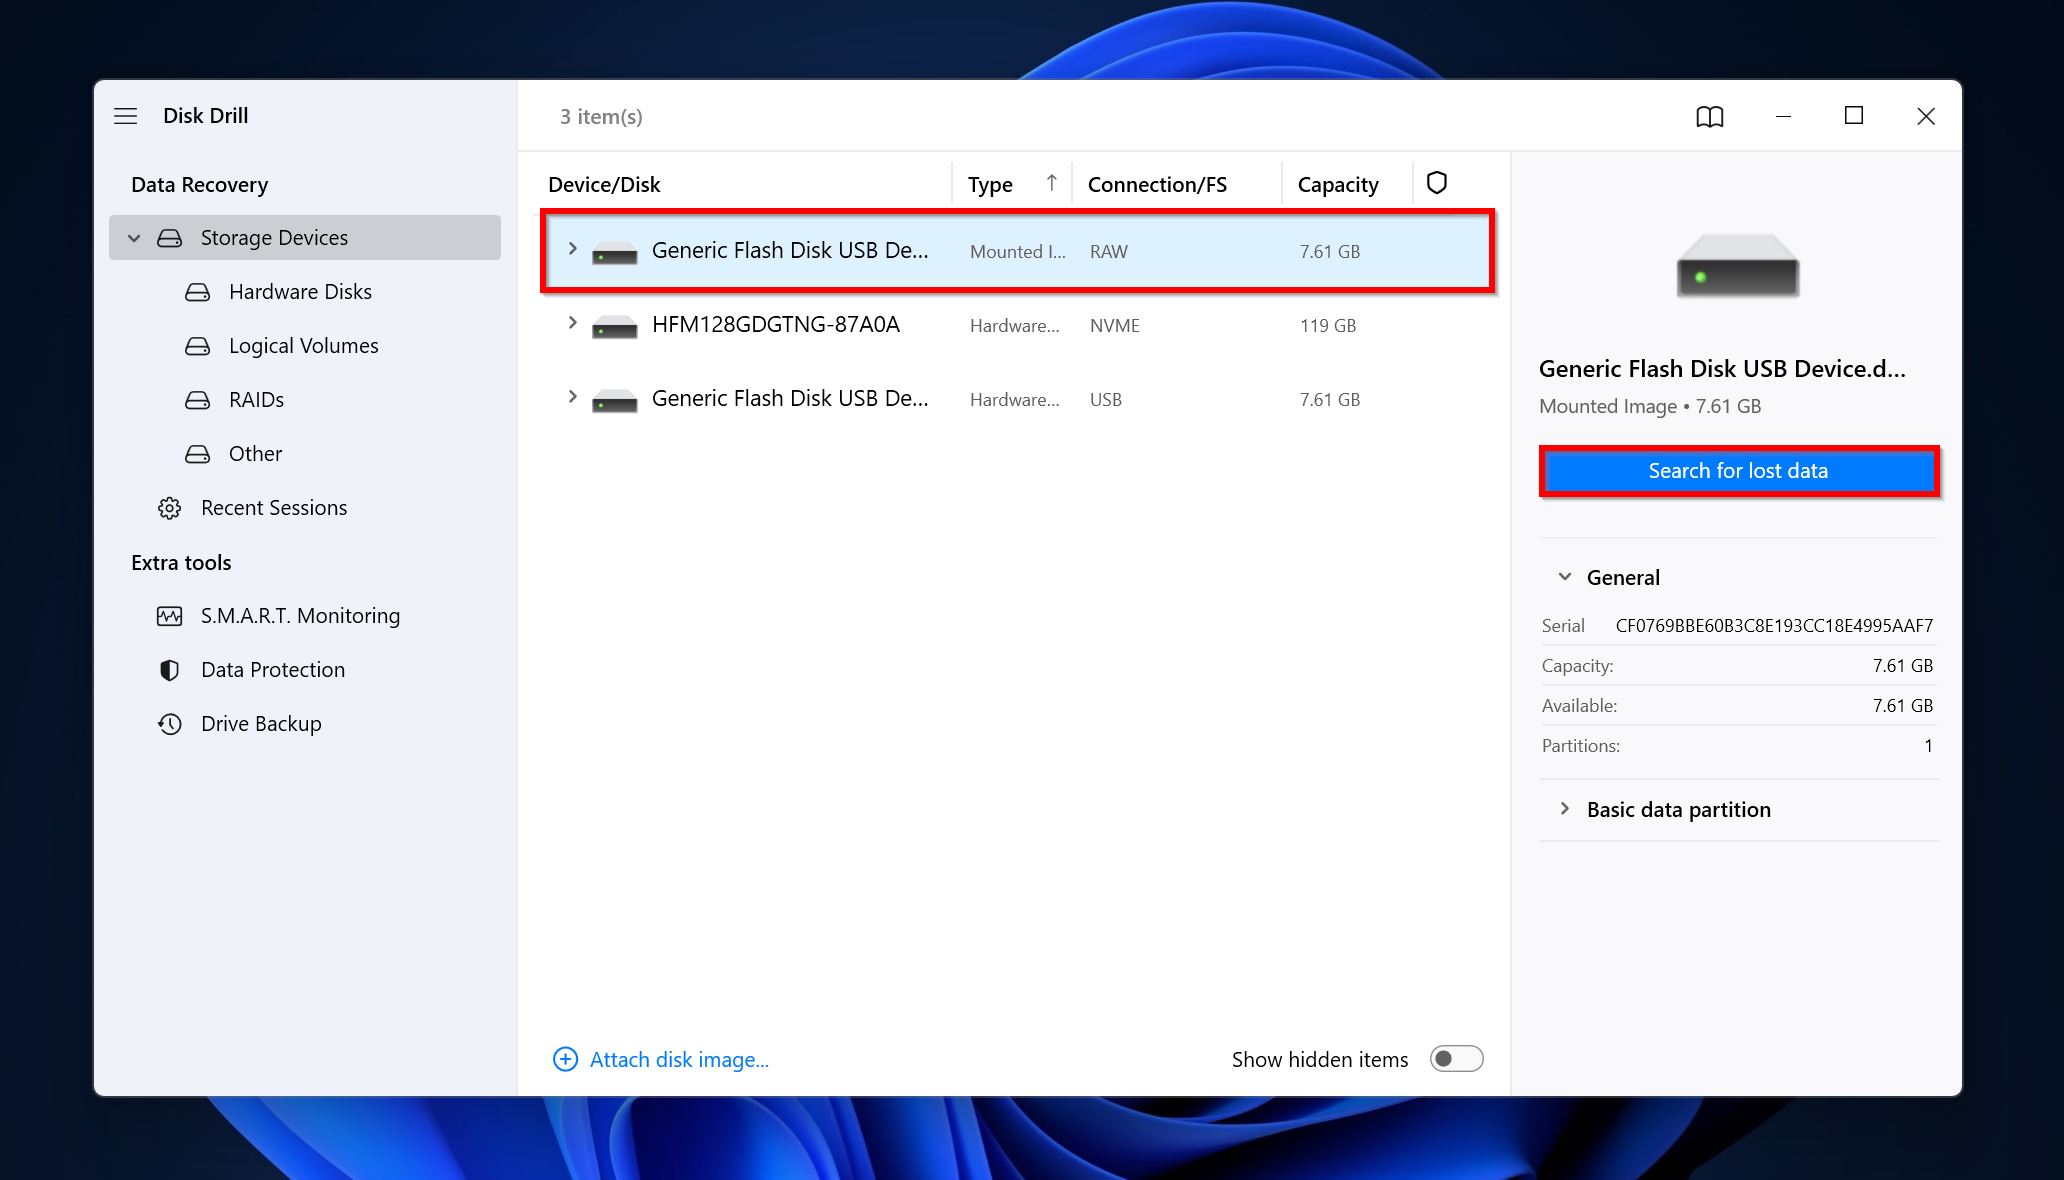 Click on the Pictures option. This will prompt Disk Drill to only display recoverable images. If you wish to see all types of recoverable files, click on Review found items instead.
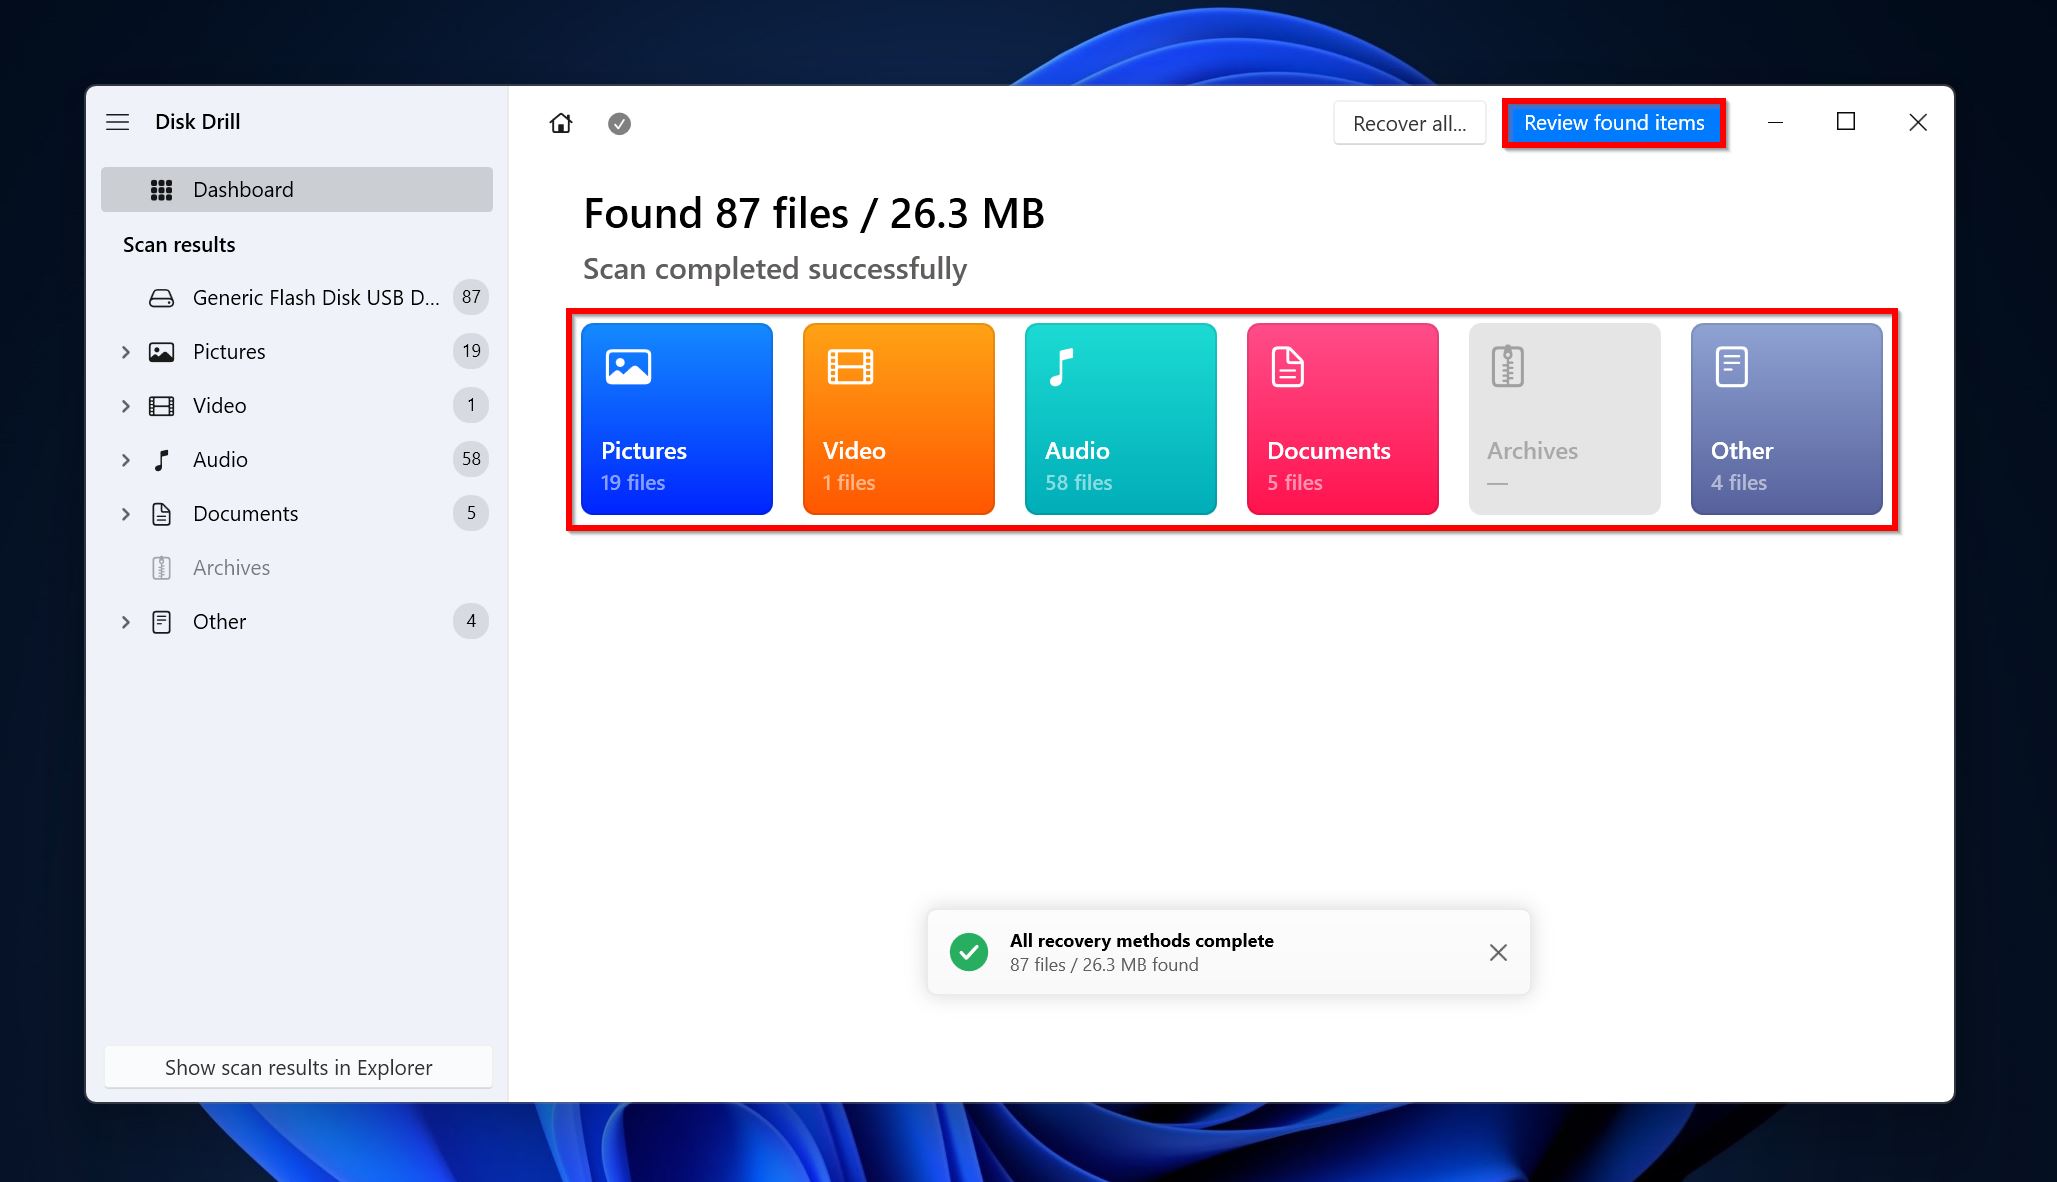
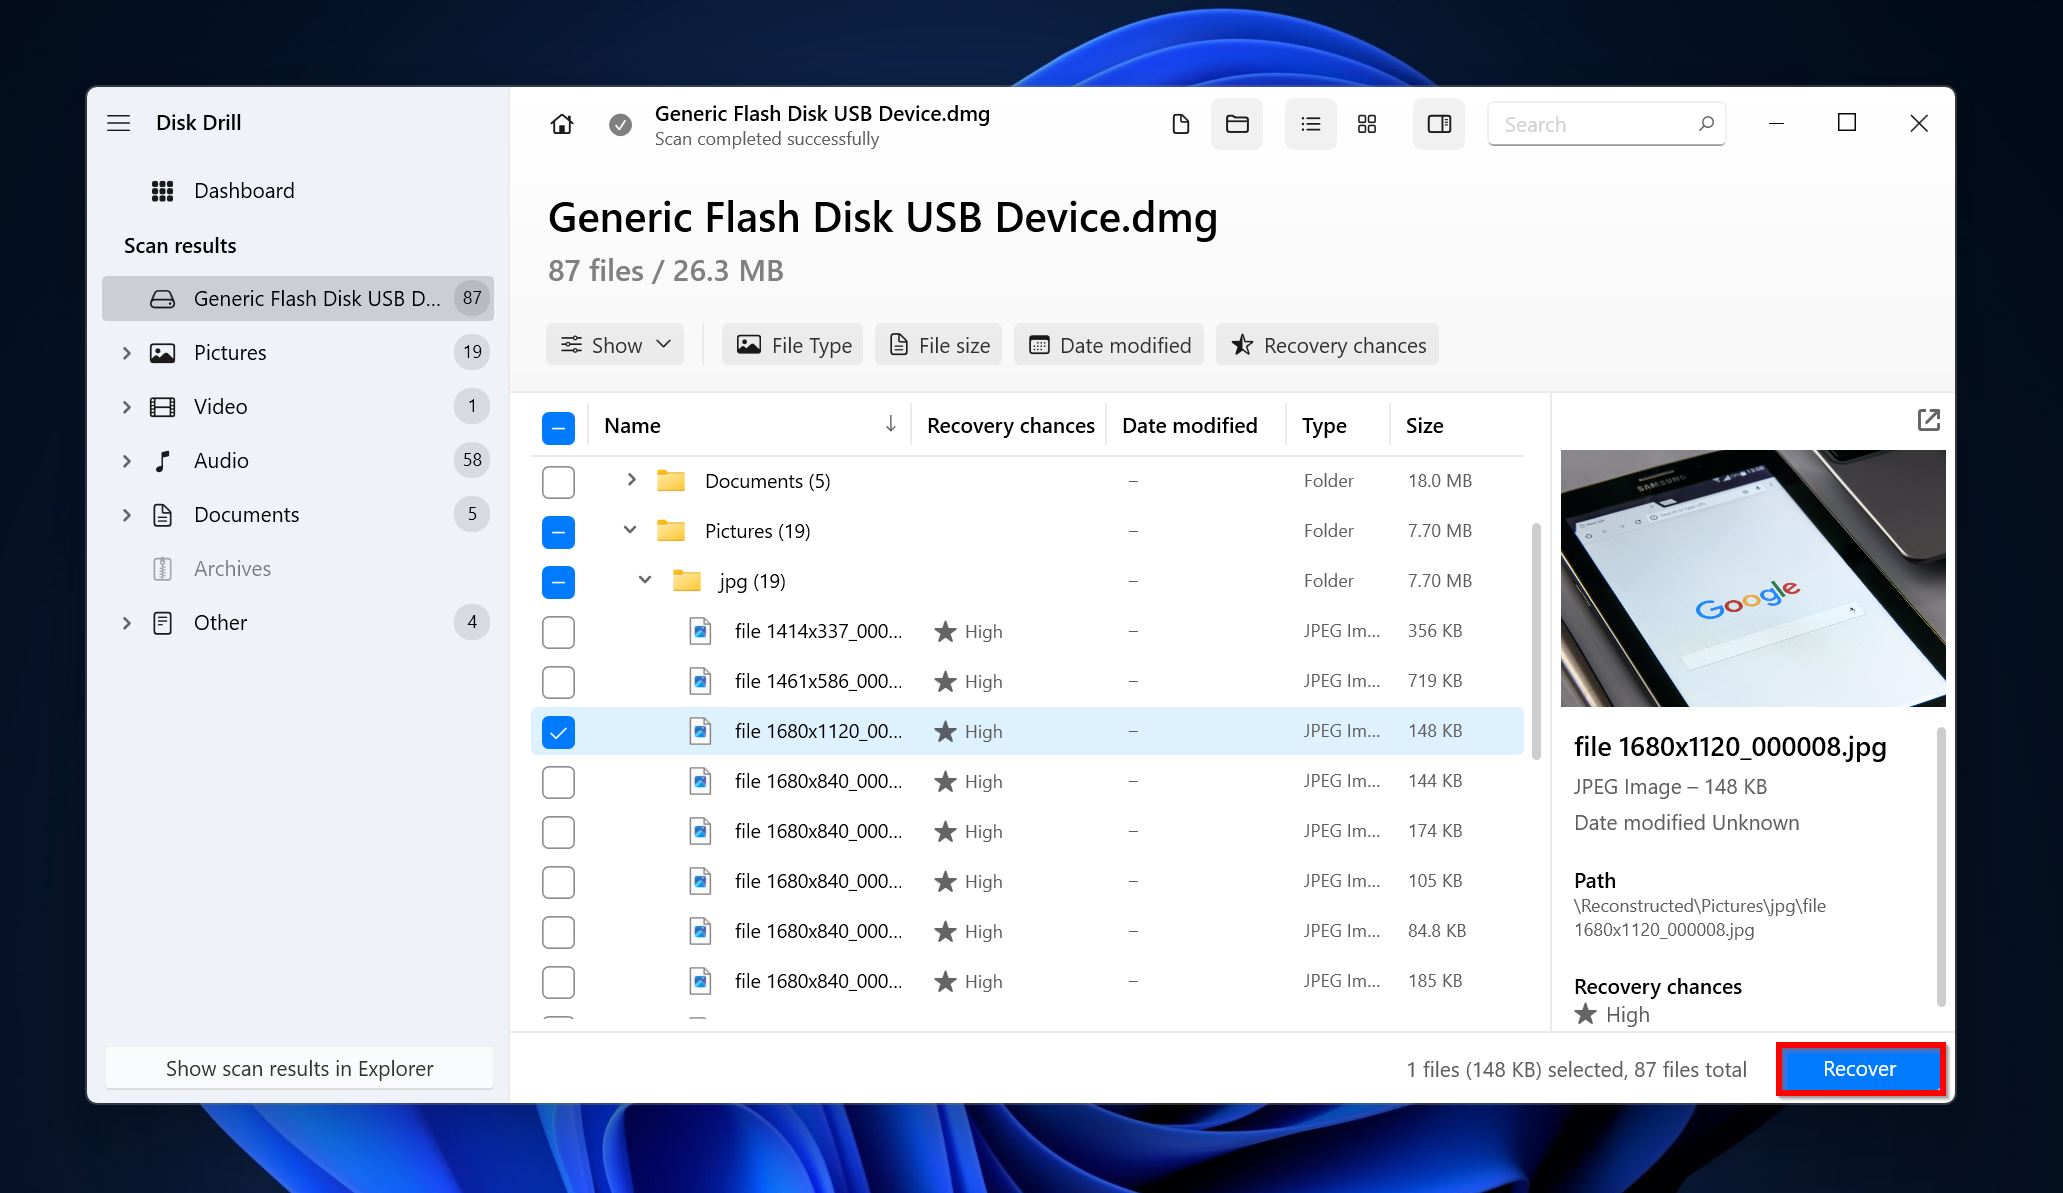
- Select the photos you wish to recover. Disk Drill displays a preview of the currently selected photo, but you can manually preview any other photo by clicking the eye icon next to its filename. Click on Recover after confirming your selection.
- Choose a recovery destination for the photos and click Next. It’s best to recover them to a destination other than the SD card.
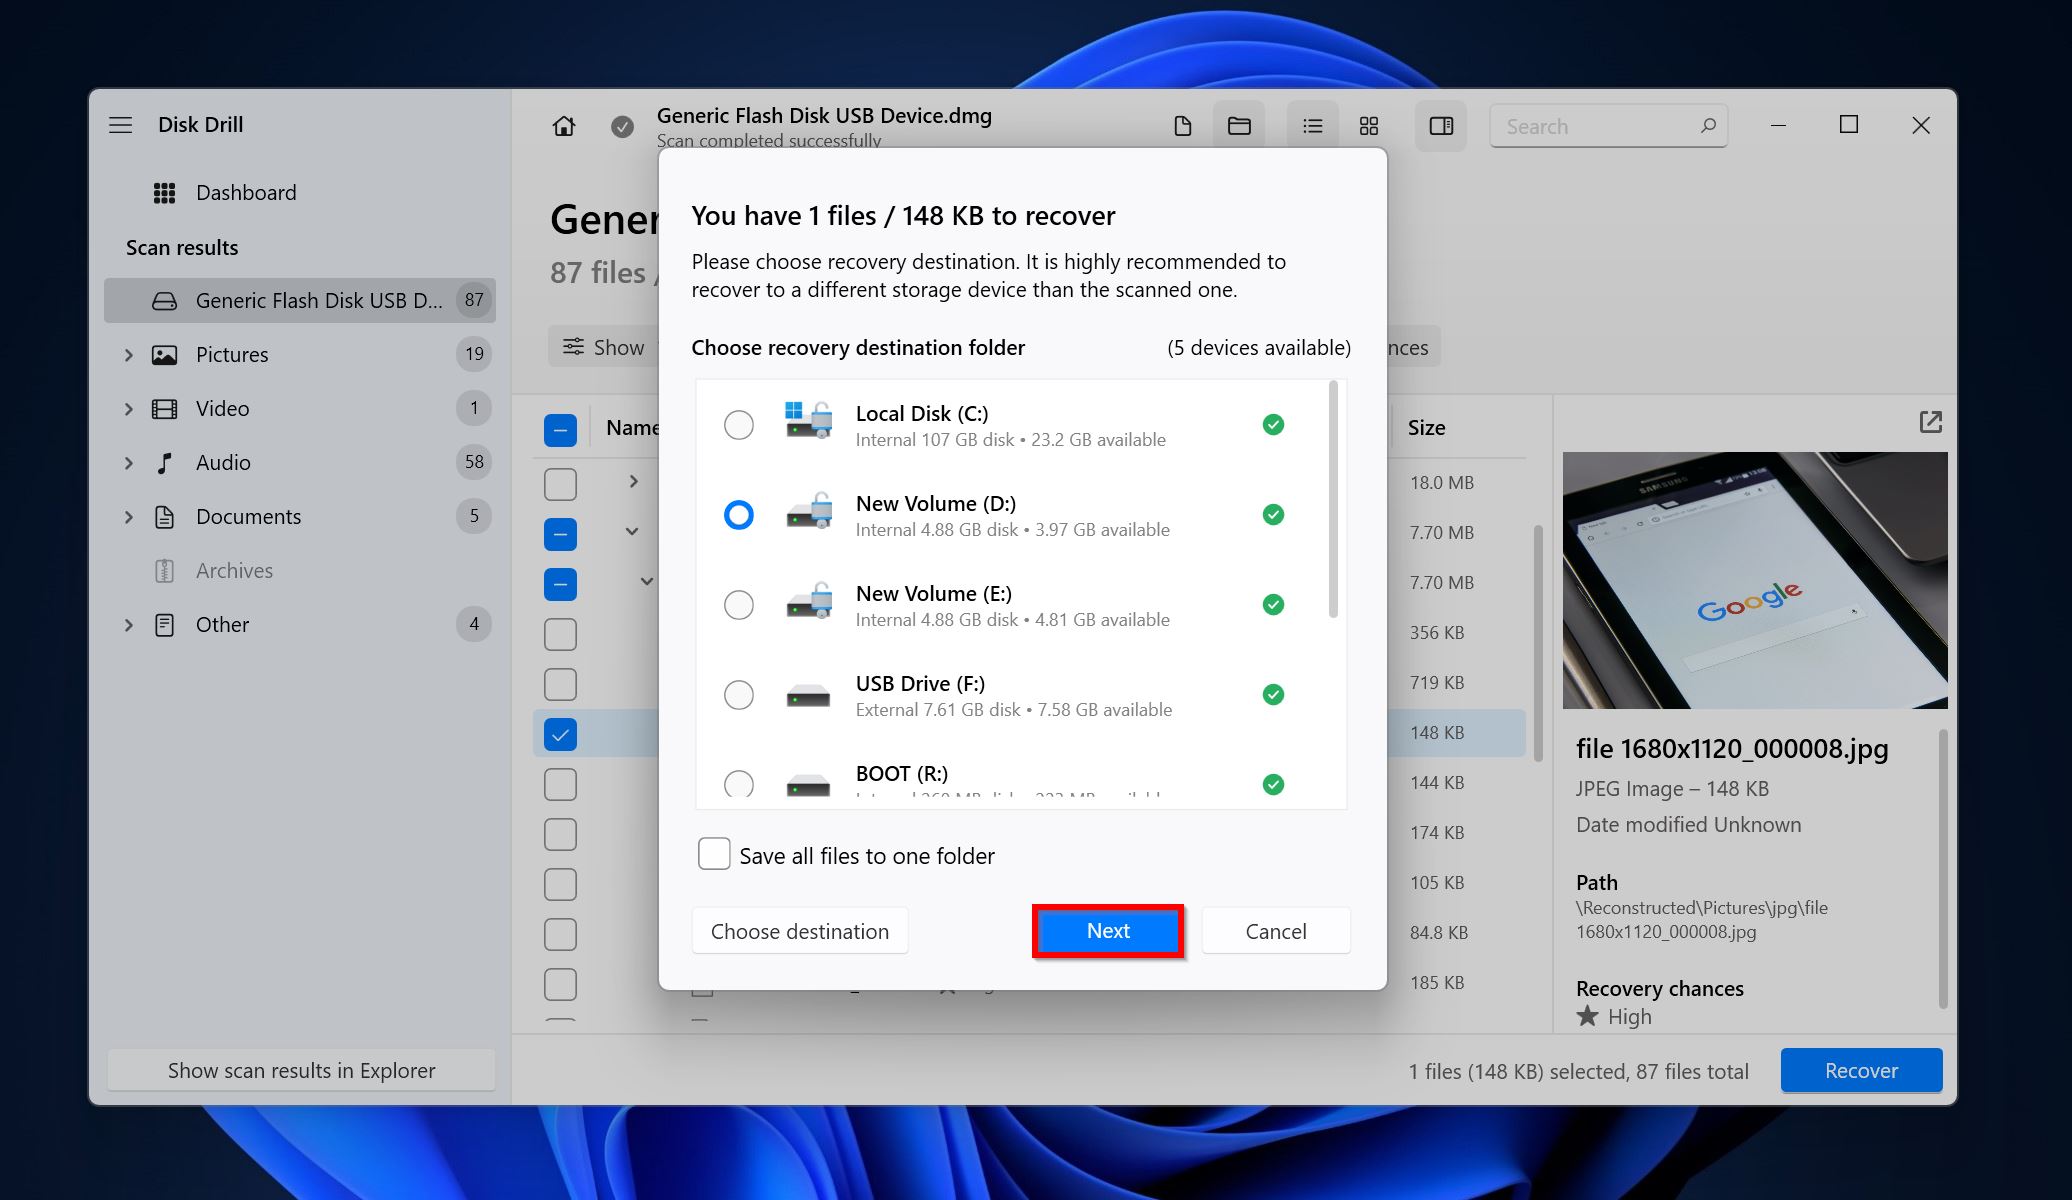
- Disk Drill will recover the photos.
Method 2: Use a Freeware Data Recovery Program
If you can’t afford to spend a single penny on data recovery, you can opt for freeware data recovery programs. However, these tools are typically not as effective and user-friendly as their paid counterparts.
PhotoRec is one of the better, completely free to use photo recovery tools. It’s excellent for more experienced users who don’t mind the lack of a GUI, but want to recover deleted photos without spending a penny. PhotoRec is available for Windows and macOS.
Here’s how to use PhotoRec to retrieve deleted photos from your SD card:
- Download the TestDisk and PhotoRec package from the download page. It will display, “Download TestDisk,” but don’t worry, the TestDisk archive contains PhotoRec as well. Extract the archive.
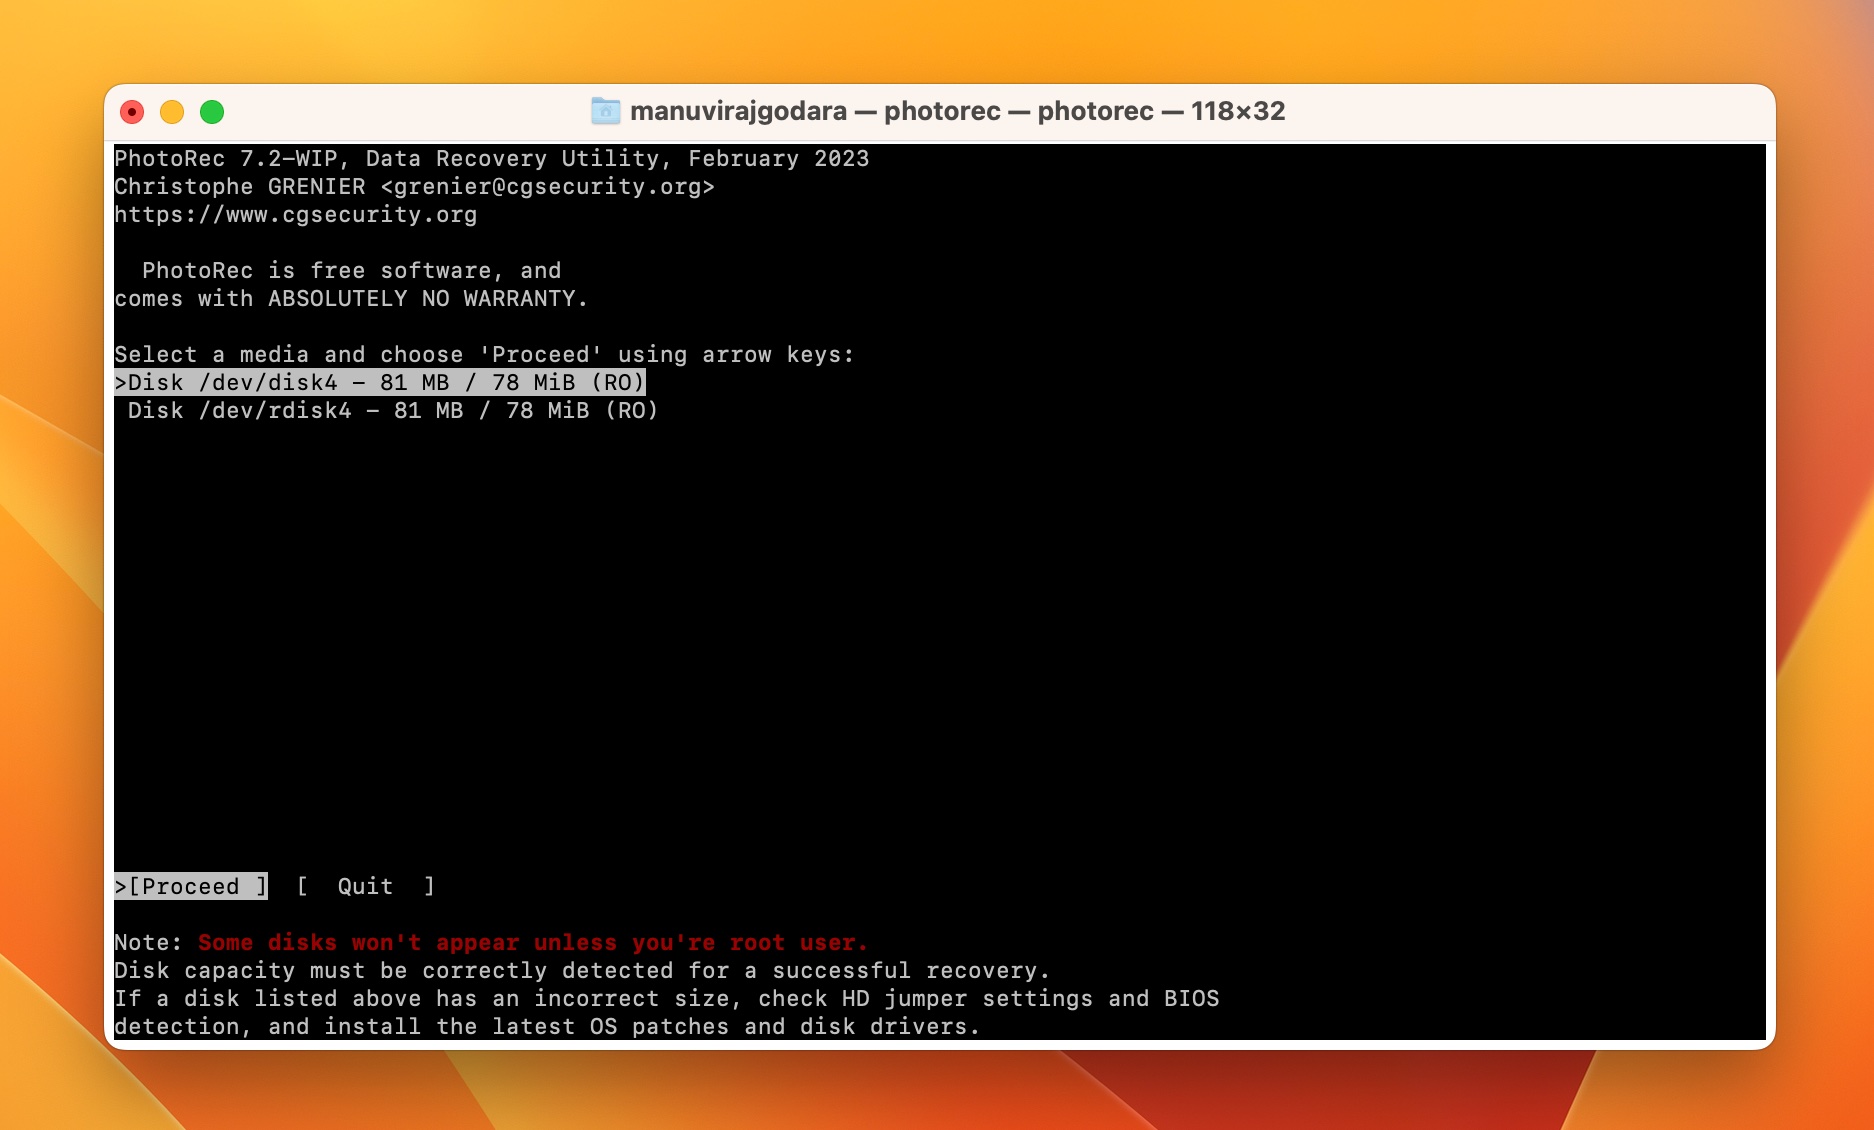
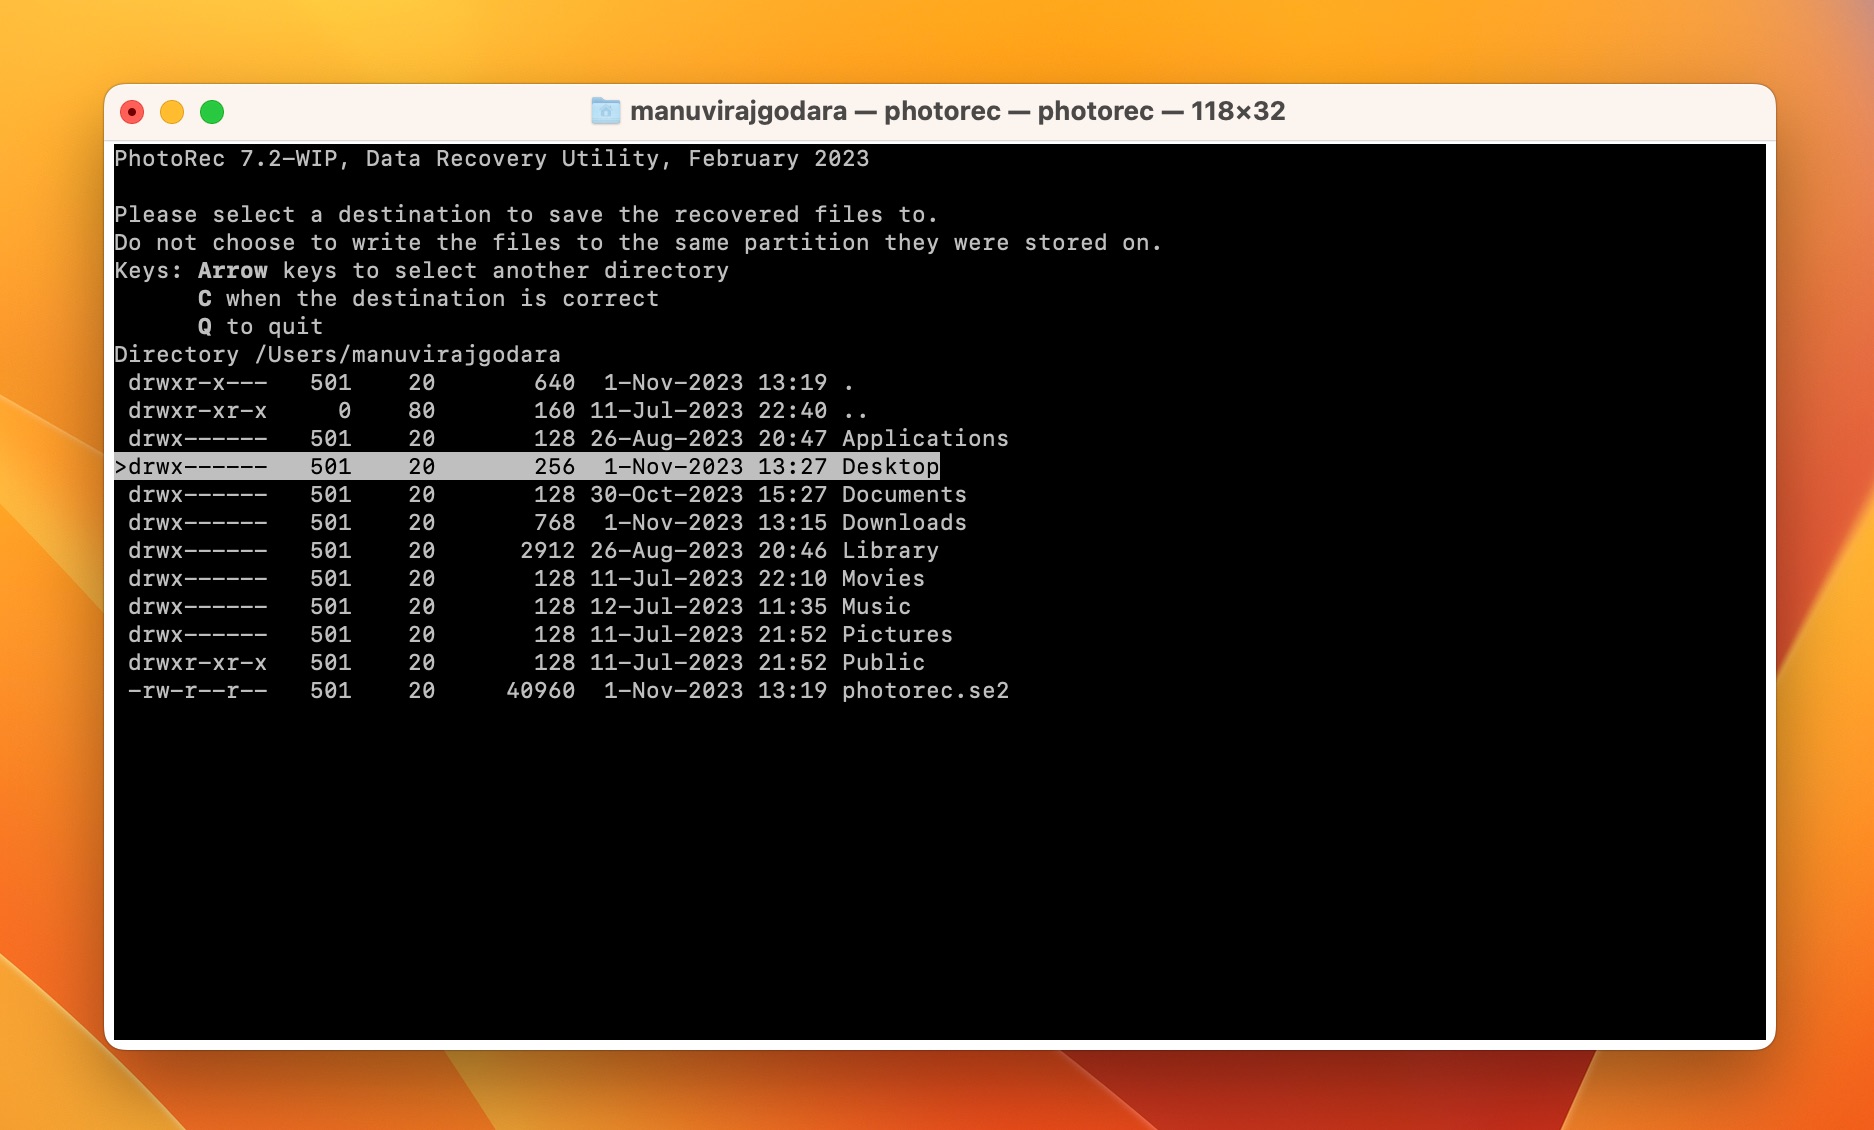
- Navigate to the TestDisk folder and open the PhotoRec executable. You need to use the arrow keys to navigate around PhotoRec and the Enter key to select an option.
- Select the SD card from the list of drives and press Enter.
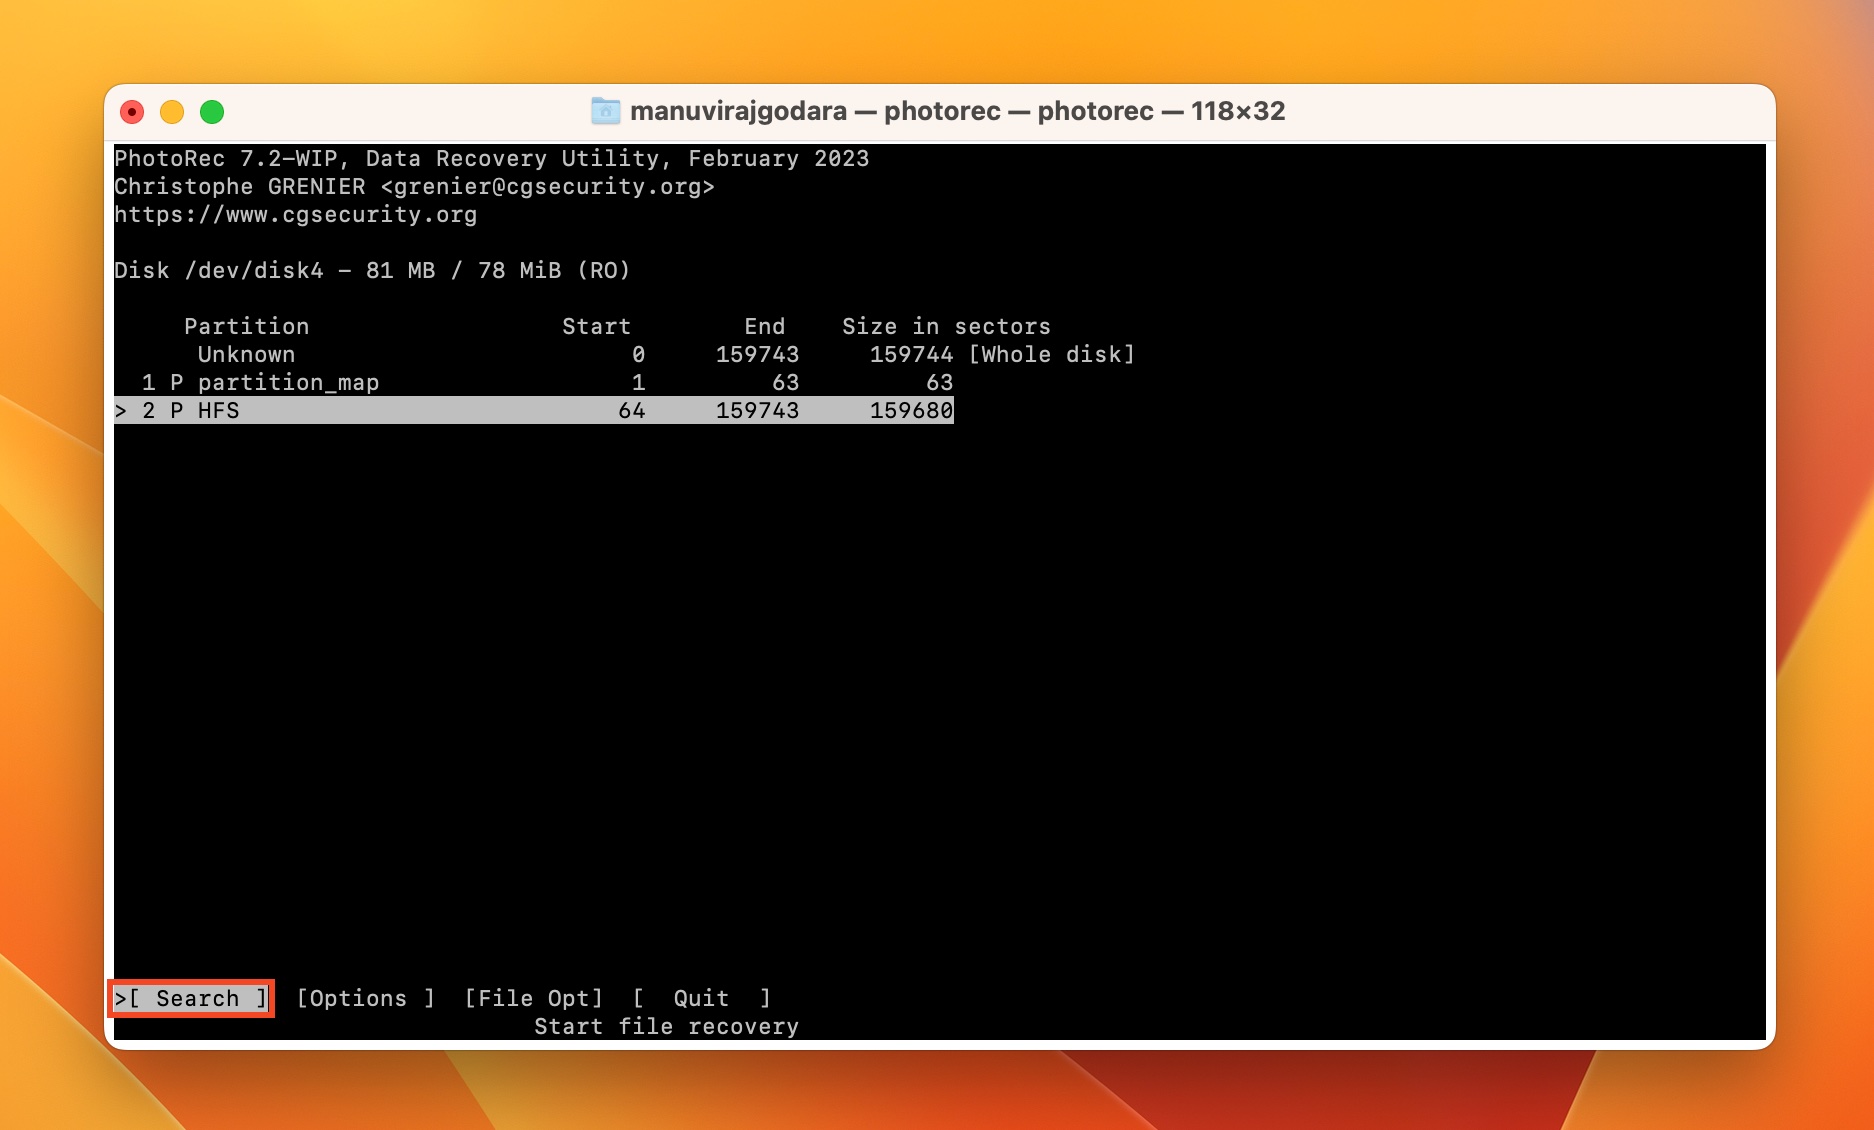
- Select the partition you wish to scan and press Enter.
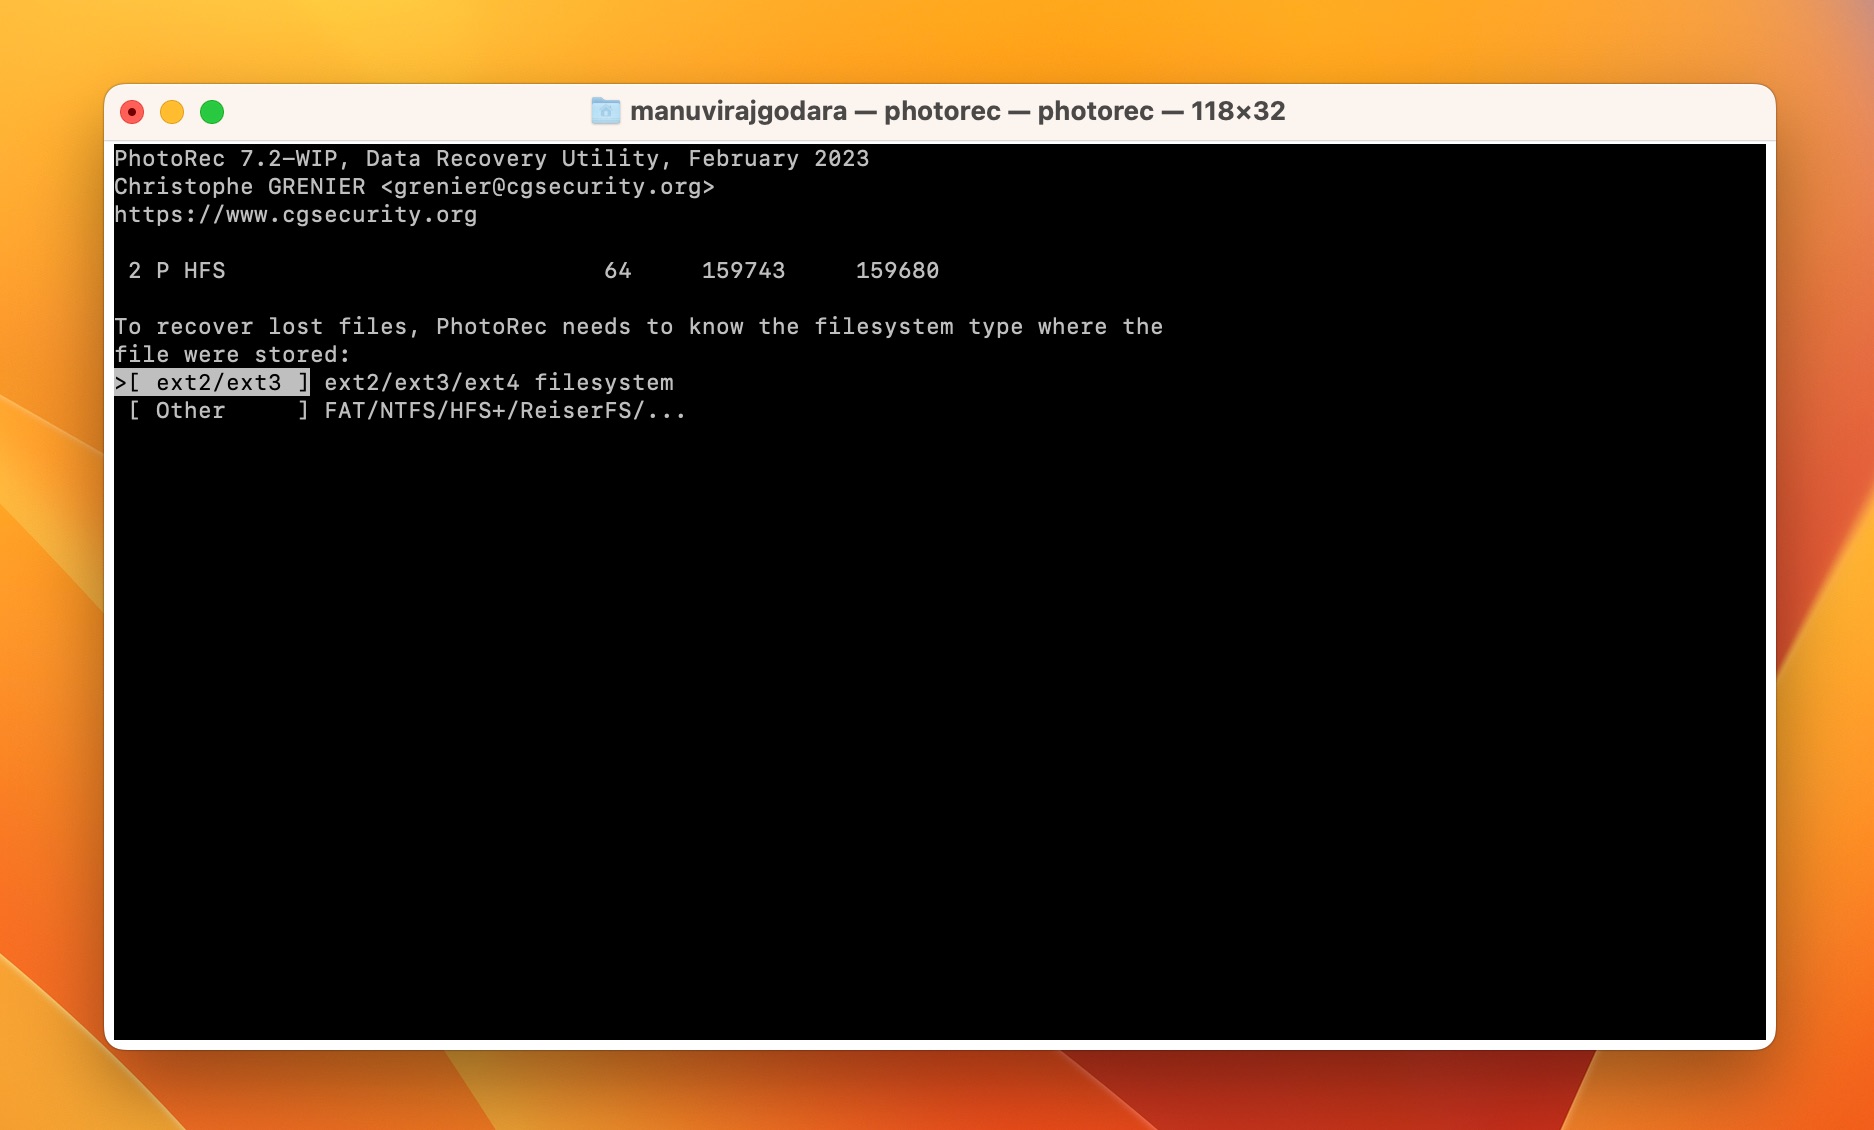
- Select the file system of your SD card and press Enter.
- Pick a recovery destination for the files and press C.
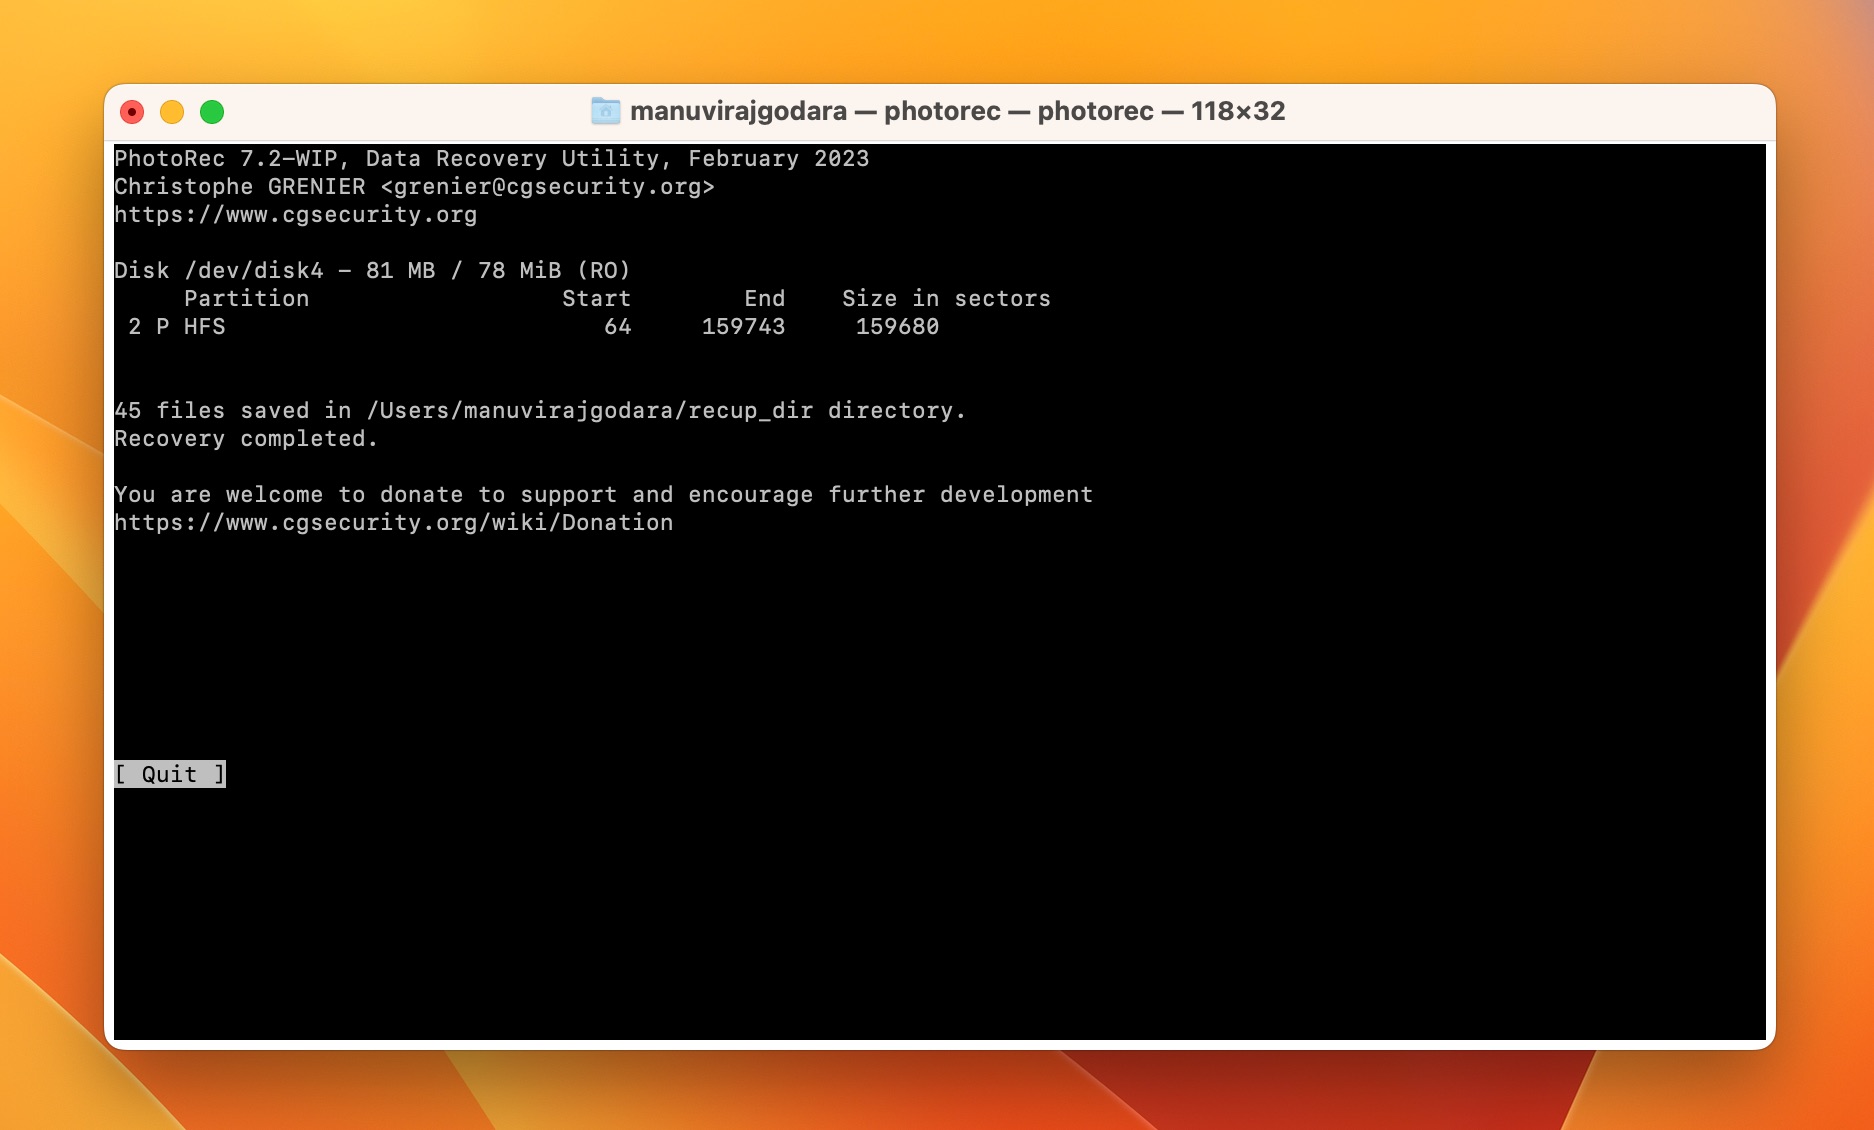
- PhotoRec will recover any photos to the selected destination.
Method 3: Contact a Professional Data Recovery Service
In case your SD card is physically damaged, or undetectable by your PC and camera, it’s best to contact a professional data recovery service, instead of attempting DIY data recovery. Data recovery services offer the highest possible chances of data recovery, but it does come at a significantly higher cost.
Here’s an overview of what to expect when contacting a professional data recovery service:
- Submit a data recovery request on the data recovery service’s website or hotline.
- Explain your data loss scenario. Be as detailed as possible.
- Ship the SD card to the data recovery company.
- The company will analyze the SD card and determine the amount of data that can be recovered. They will get back to you with a quote.
- You can then choose whether to proceed with data recovery or not.
Conclusion
There can be several reasons why your photos disappeared from an SD card, ranging from accidental deletion, to full-fledged physical damage. In most cases, you can recover these photos using a professional data recovery tool like Disk Drill, or by contacting a professional data recovery service. If you can’t afford to shell out any money for data recovery, you can also opt for free data recovery tools such as PhotoRec.

")


