 There are many reasons why you might want to reinstall Windows. Perhaps it’s to clear out unnecessary junk files that are slowing down your computer. Or, perhaps it’s necessary to fix an issue that can’t be resolved any other way. Oftentimes the primary concern you have is what will happen to your data in the process.
Thankfully, reinstalling Windows doesn’t mean you need to wave goodbye to all of your important files. We’re going to show you how to reinstall Windows without losing data.
Table of Contents
Can I Reinstall Windows Without Losing Files?
It depends on the method you use, but in most cases, you have the option to keep files that you don’t want to lose during the reinstall. For instance, if you’re reinstalling Windows using an ISO file or the Media Creation Tool, it gives you the option to reinstall Windows without losing files.
However, there are some methods that do not give you the option to keep your files. These methods will perform a clean install, which deletes your data in the process. Bear this in mind, as you may not always have the opportunity to use a method that allows you to keep your data.
I had to reinstall Windows because my computer stopped booting today & now I gotta download my entire Dropbox and get back all the programs & games I use one-by-one pic.twitter.com/gLFVbBC6rD
— Polyhex (@tylermcbride) November 11, 2018
Even if you need to perform a clean install, there’s a chance that you’ll be able to recover some of your data using data recovery software (which we’ll touch on later).
How to Create a Backup of Drive
Even if you choose the option of reinstalling Windows without losing files, it’s always a good idea to back up your data. Backing up your data ensures it’s safe in case something goes wrong and allows you to quickly recover files after a factory reset of Windows.
To back up your data, we recommend using Backup and Restore. Follow these steps to create a backup:
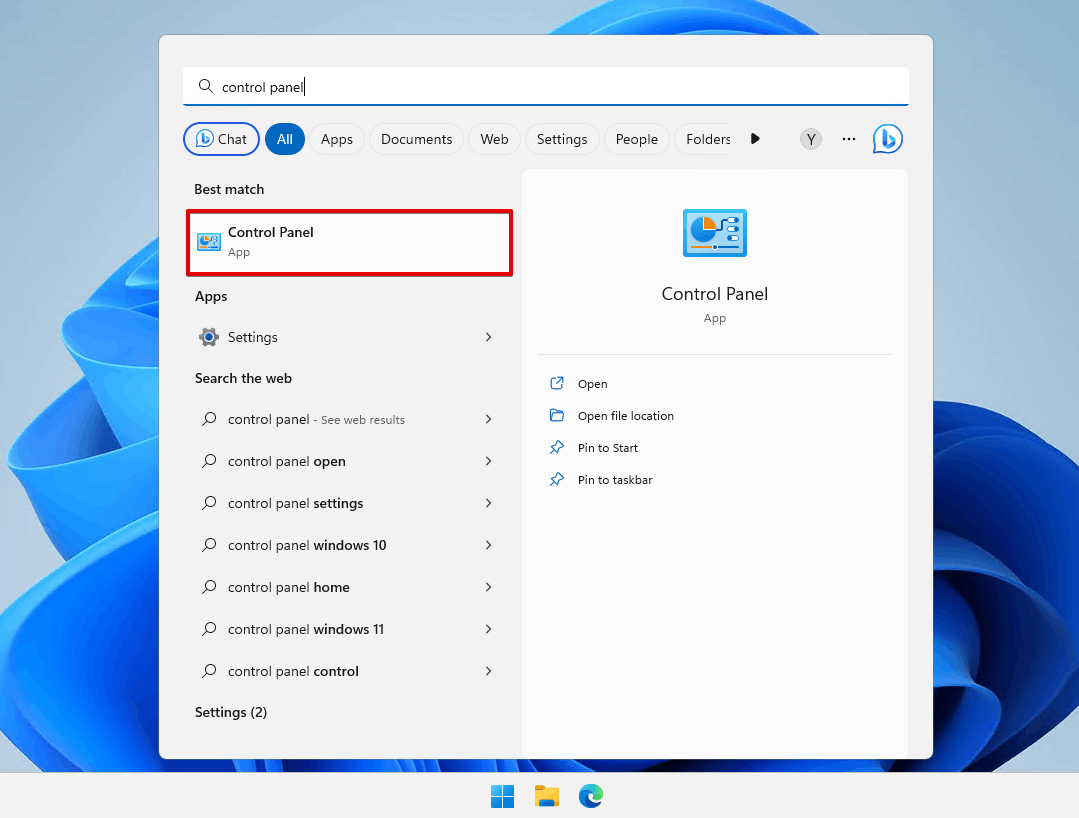
- Press Win + S on your keyboard and search “Control Panel”. Open the first result.
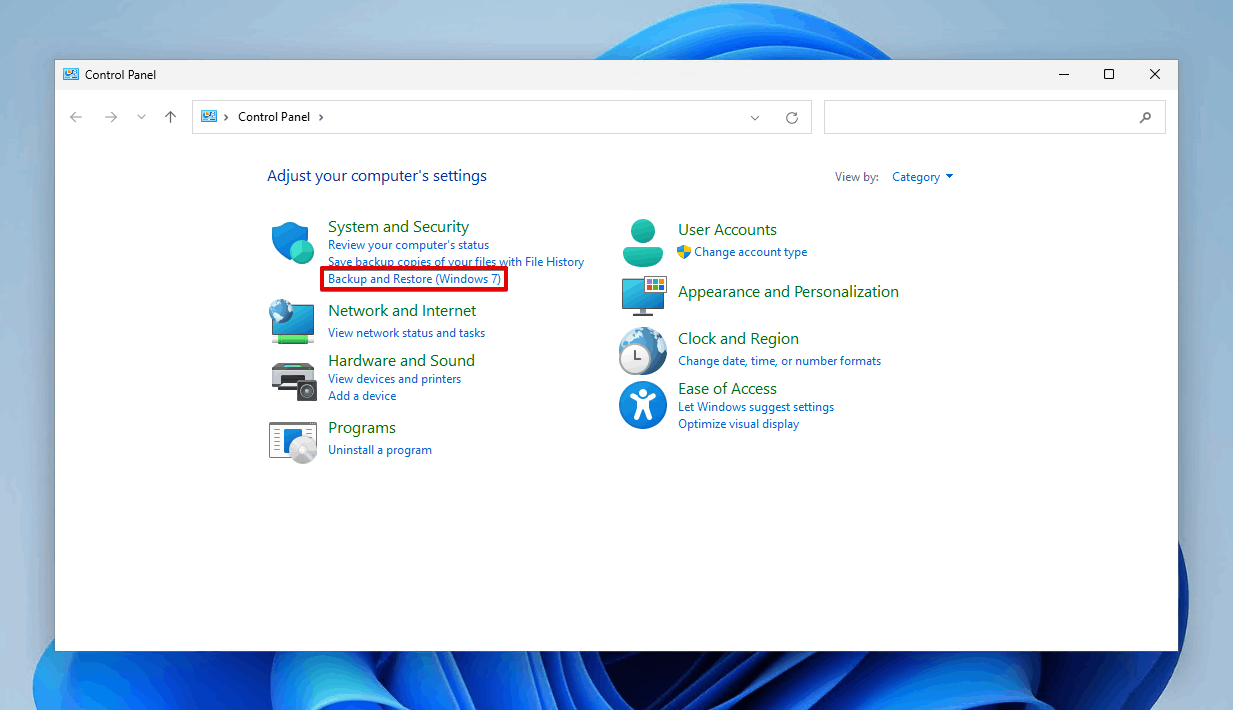
- Click Backup and Restore (Windows 7).
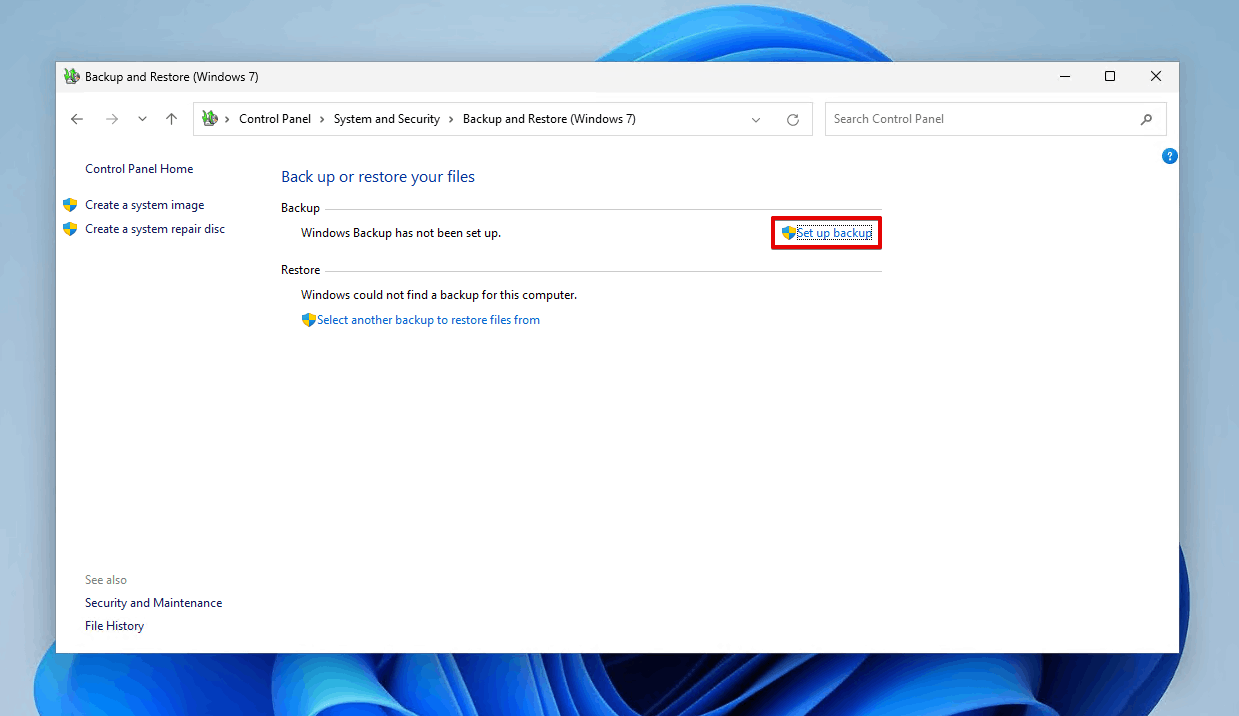
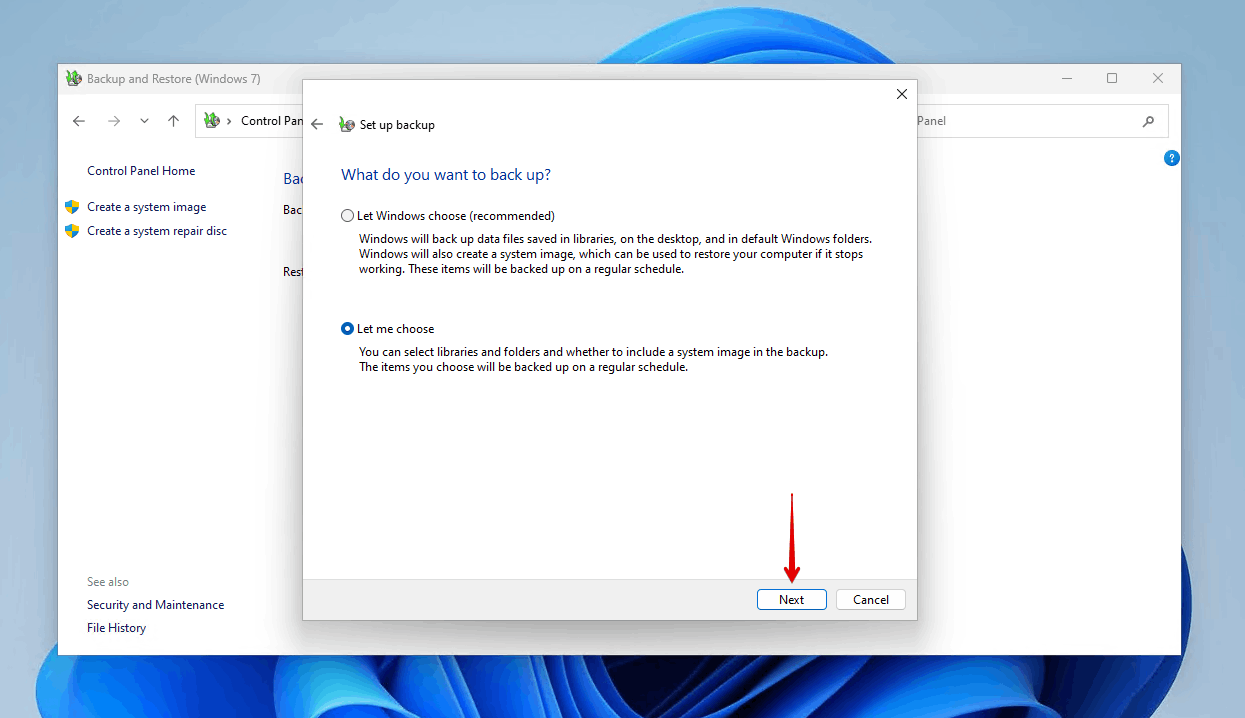
- Click Set up backup.
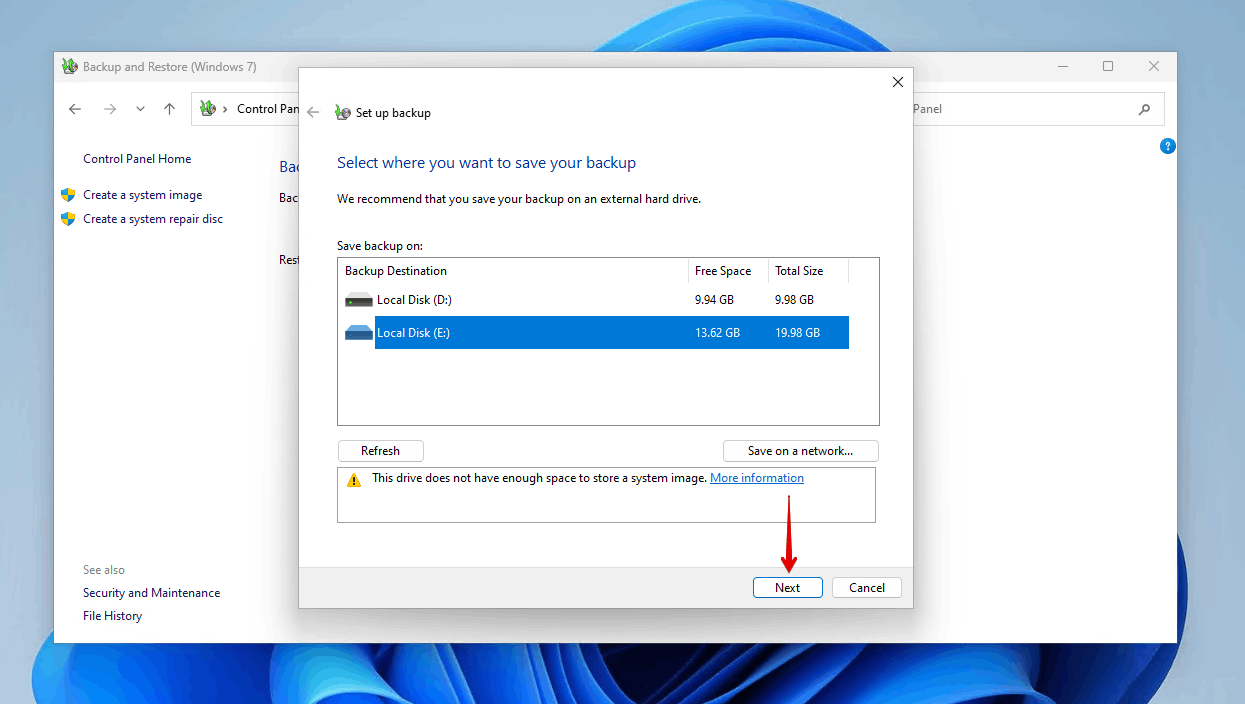
- Select where you want to store the backup and click Next.
- Click Let me choose, then click Next.
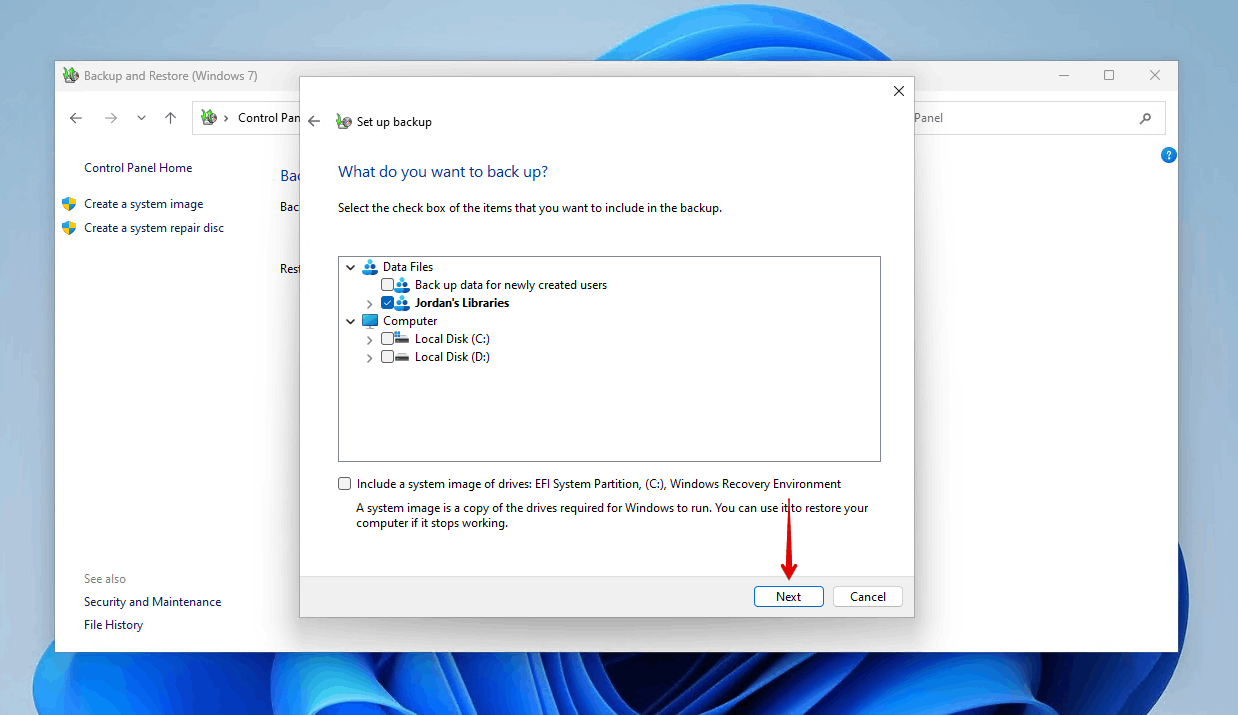
- Select what data you’d like to back up, then click Next.
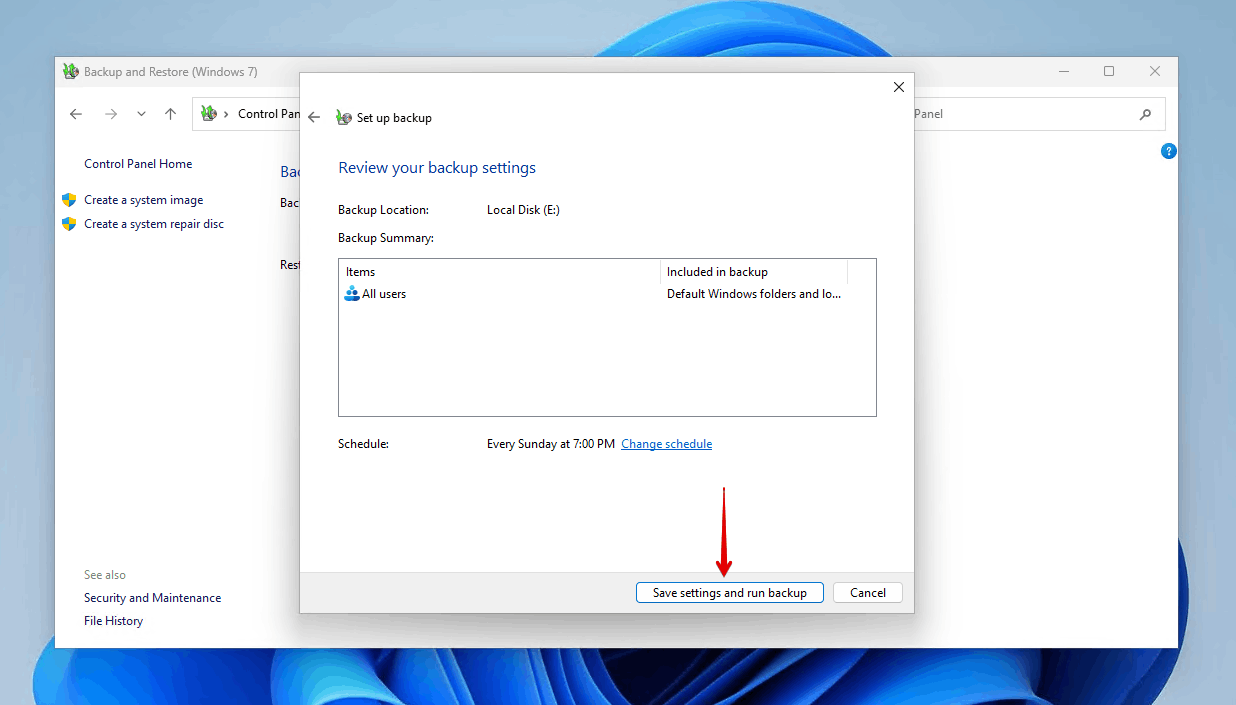
- Click Save settings and run backup.
6 Methods to Reinstall Windows
After creating a backup, you can reinstall Windows knowing that your data is safe. We’ve included instructions for reinstalling Windows using various methods to give you a range of options.
A quick reminder that some of these methods will require a clean install. Therefore, if you haven’t backed up your data yet, we recommend doing so before continuing.
Method 1: Using the ‘Reset PC’ Option
The Reset PC option is by far the easiest way to reinstall Windows. You don’t need any additional storage devices to use it and it can be accessed from your Settings or the Windows Recovery Environment (WinRE). It gives you two options:
- Keep my files – The personal data stored in the Users folder (including subfolders Desktop, Downloads, Documents, Pictures, Music, and Videos) is preserved, allowing you to reinstall the operating system without losing data. Any apps that you installed, as well as data stored outside of the aforementioned folders, are removed.
- Remove everything – All of your data is deleted, along with any apps that you installed.
In order to use this option, your computer must have sufficient storage space. If it doesn’t, you will be advised to clear up some space before proceeding with the reset.
Follow these steps to reset your computer using the Reset PC option:
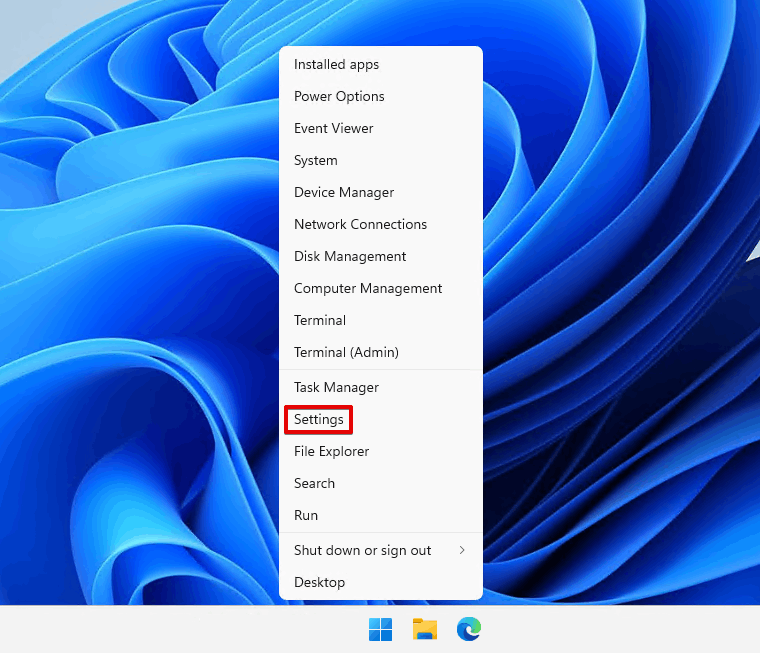
- Right-click Start and click Settings.
- Click Recovery.
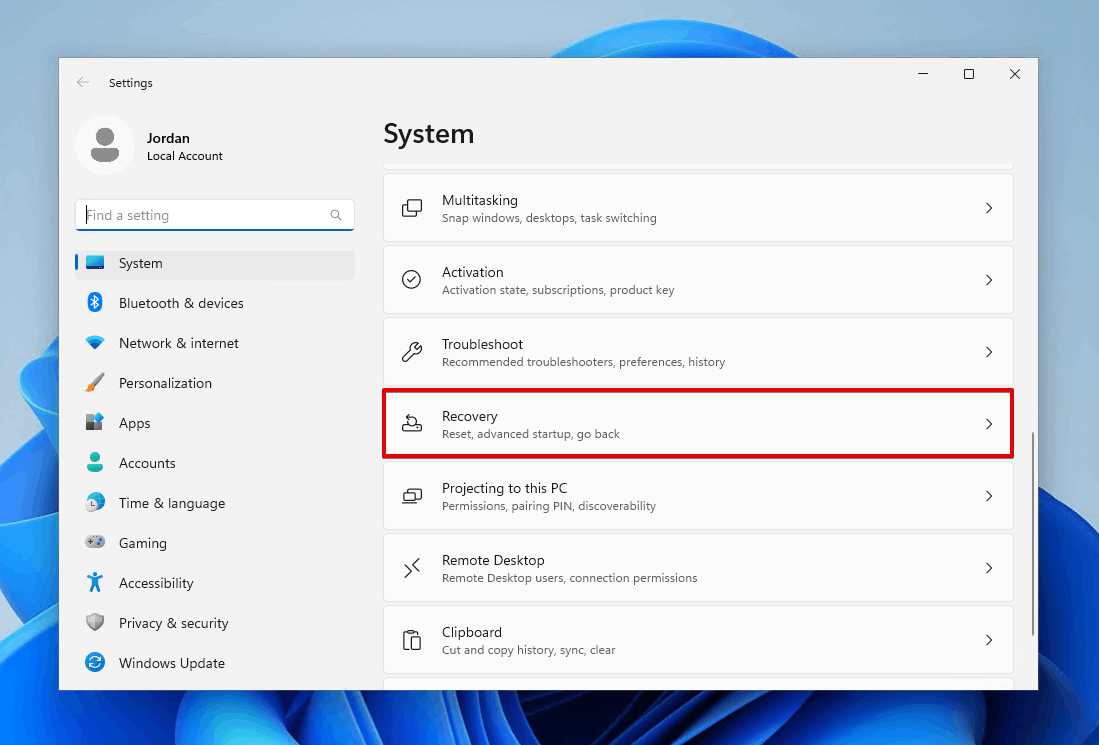
- Click Reset PC.
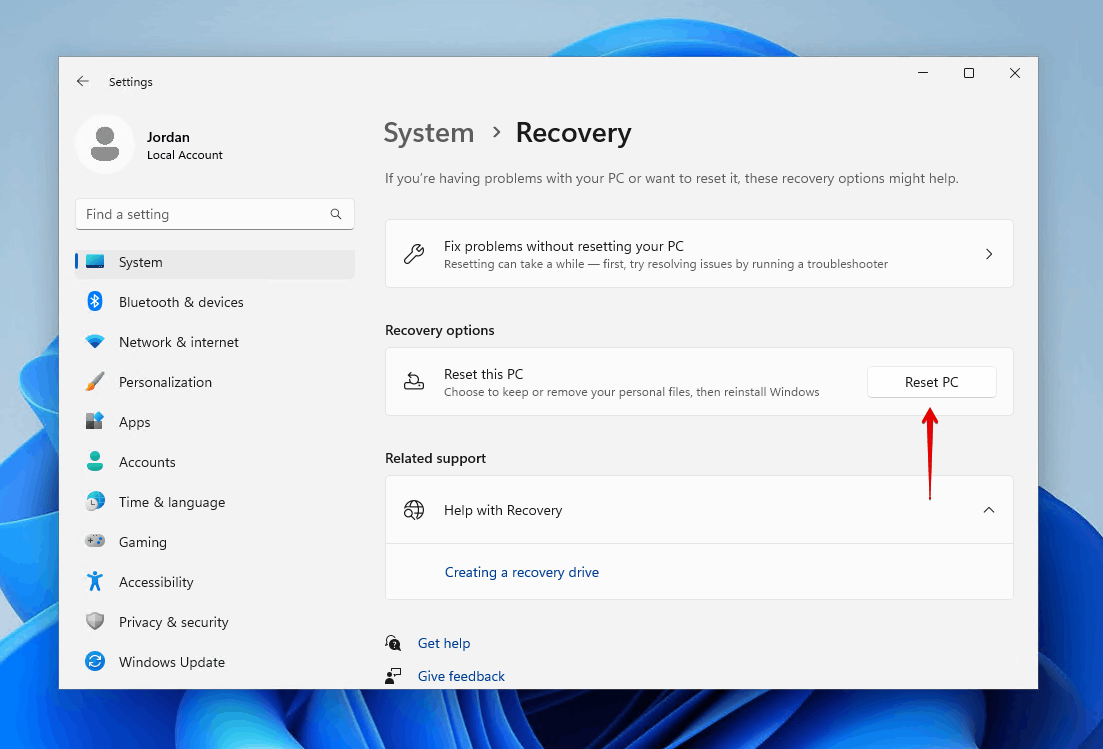
- Select Keep my files.

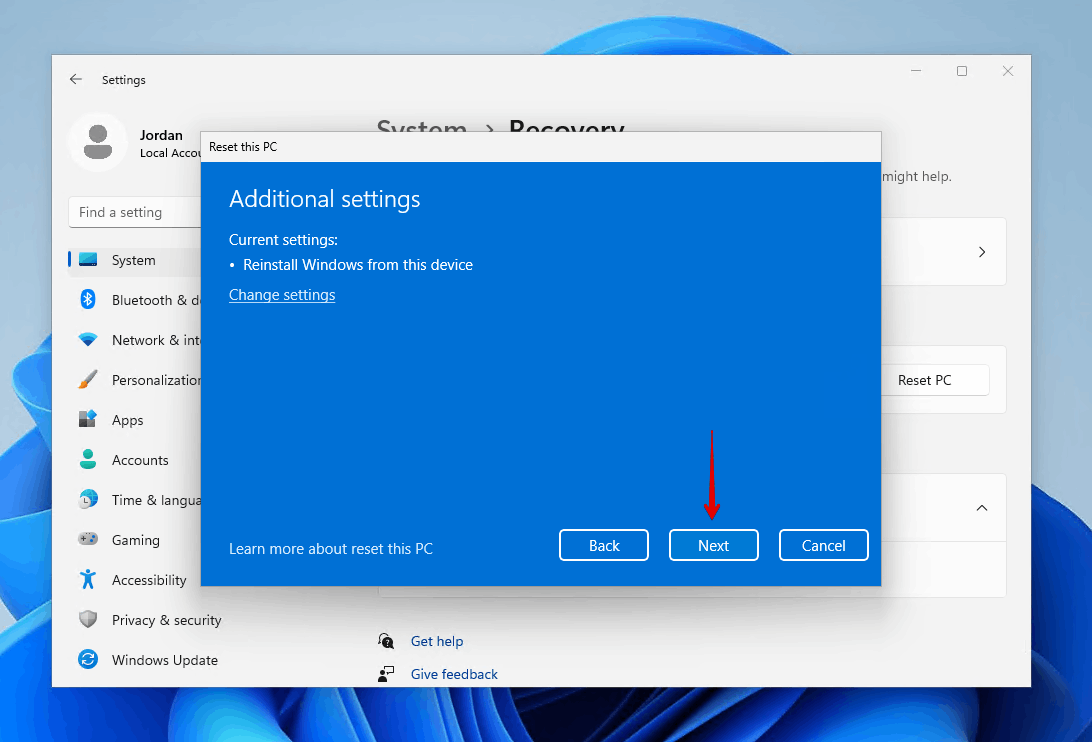
- Select Local reinstall.

- Click Next.
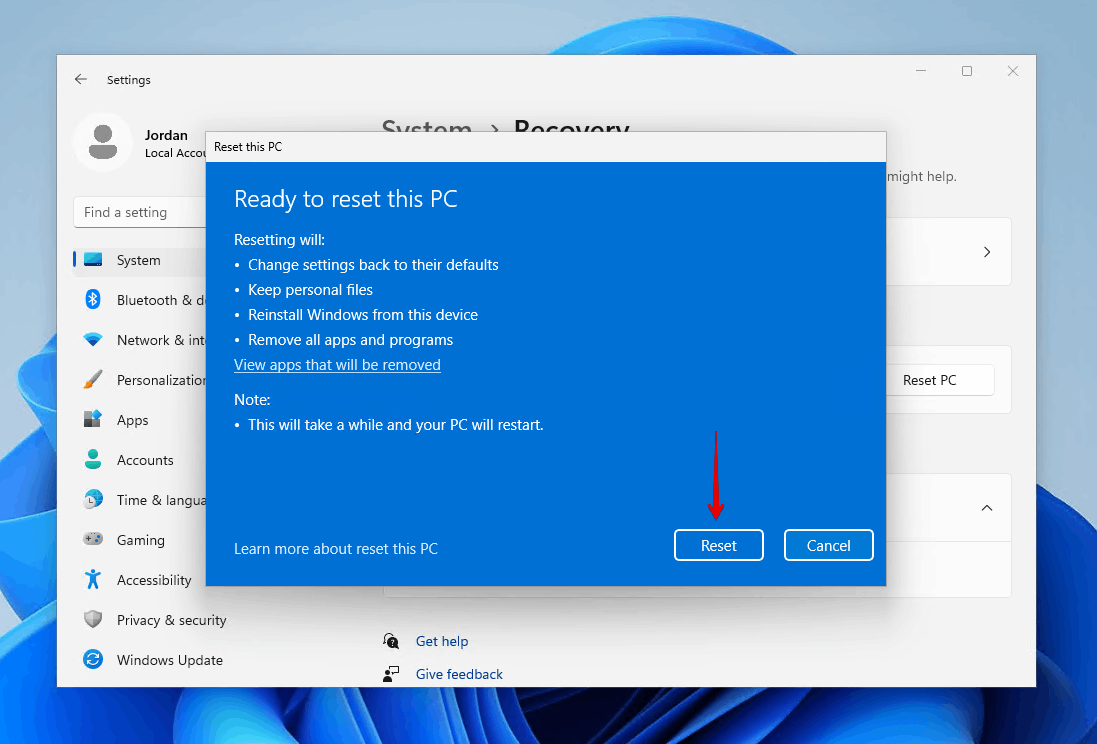
- Click Reset.
Method 2: Using the Windows Recovery Environment
When your computer is facing some issues, booting into WinRE gives you options that can help diagnose and fix problems that are preventing your computer from starting up. Here, you can also choose to reset the PC without losing some of your files, much like using the Reset PC option we used in the last method.
Using the Keep my files method here will only preserve the data in your Desktop, Downloads, Documents, Pictures, Music, and Videos folders.
This is how you reset your Windows 10/11 computer from WinRE:
- Press Windows Key + L.
- Click the power icon, then shift-click Restart (left-click it while holding down Shift).
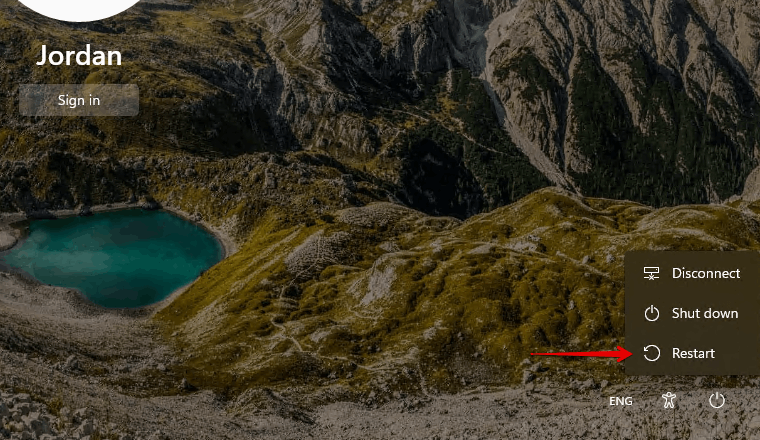
- Click Troubleshoot.
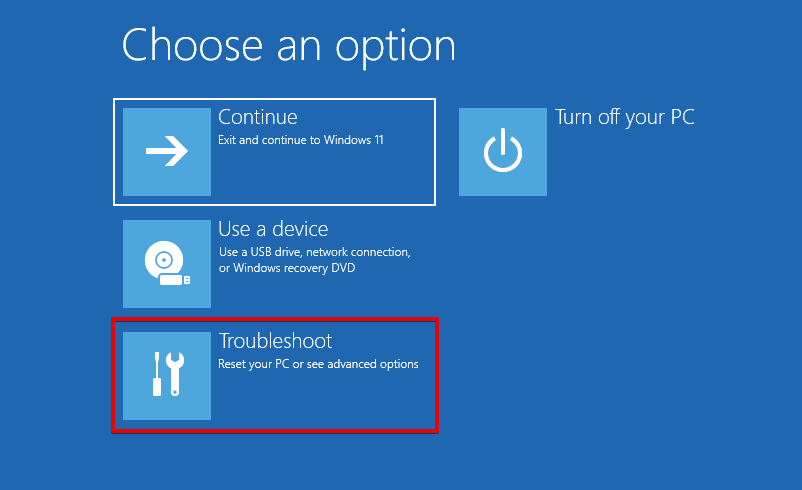
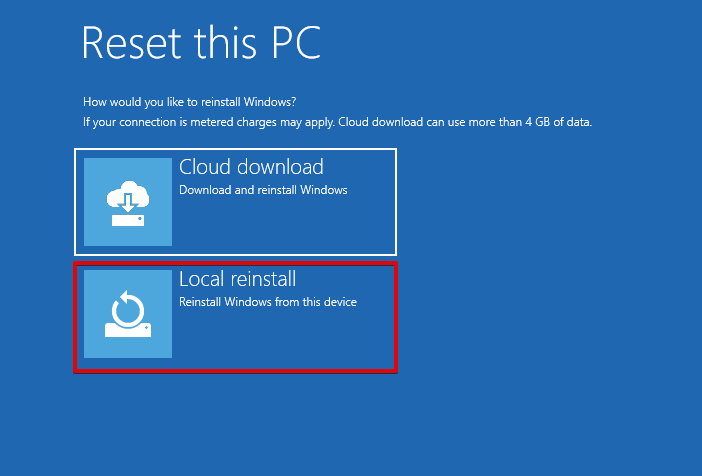
- Click Reset this PC.
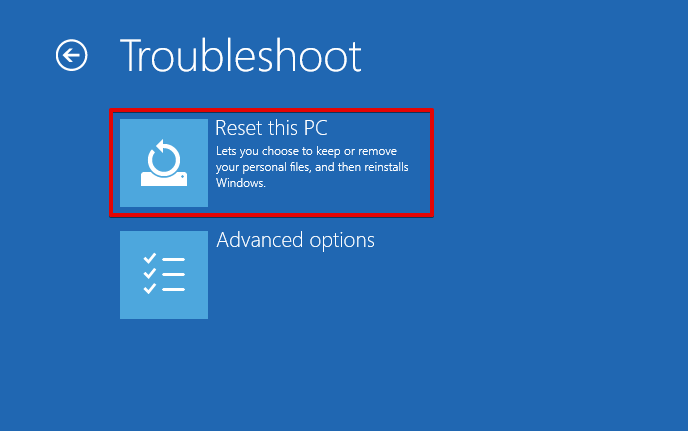
- Click Keep my files.
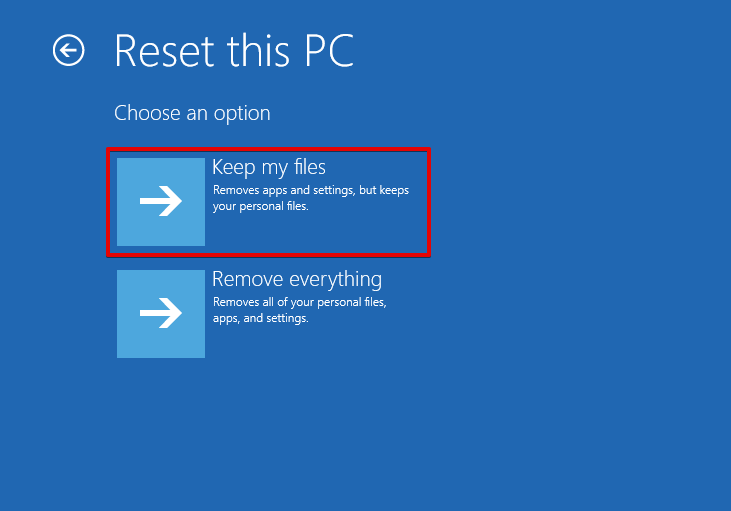
- Click Local reinstall.
- Click Reset.
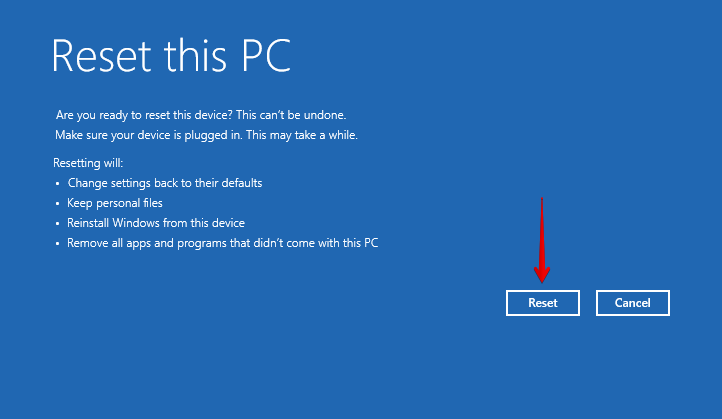
- Follow the rest of the prompts to configure Windows.
Method 3: Using Media Creation Tool
The Windows Media Creation Tool can be used to reinstall Windows. A copy of Windows will be downloaded from the cloud and you will be given the option to keep your personal files and apps.
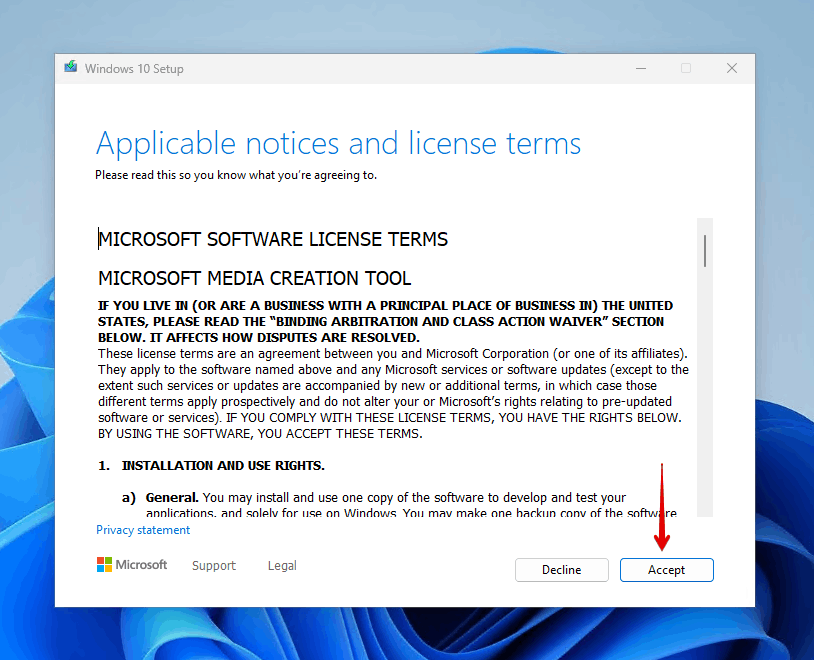
- Download and open the Windows Media Creation Tool.
- Click Accept.
- Select Upgrade this PC now and click Next.
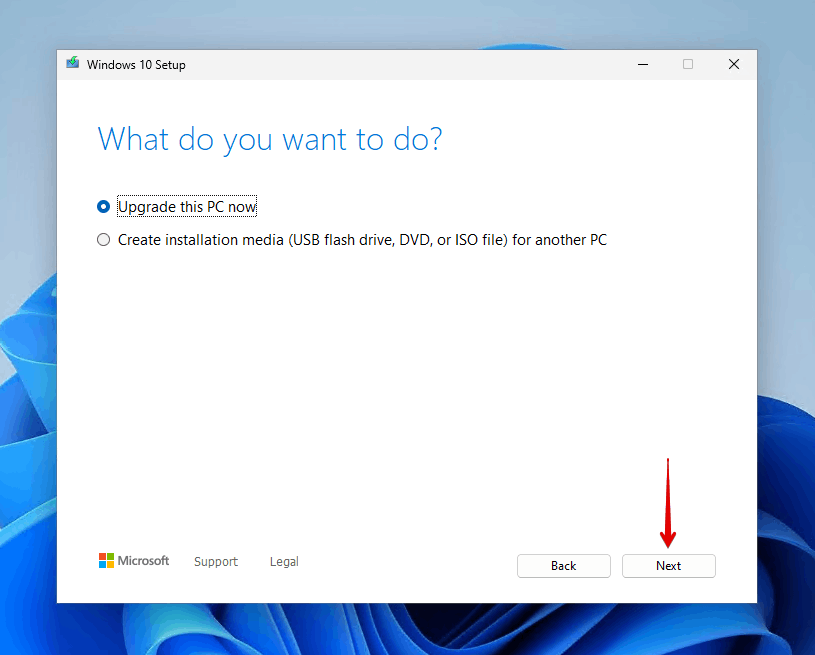
- Click Install.
Method 4: Using a USB or DVD
You can reinstall Windows using installation media. For this, you will need a USB or DVD, a copy of the Windows version you’d like to install, and a program called Rufus.
While you can create a bootable USB using the Media Creation Tool, we’ll be showing you using Rufus to give you an alternative option.
Be sure to back everything up on the installation media you will be using, as it will be deleted in the process.
This method will give you two options:
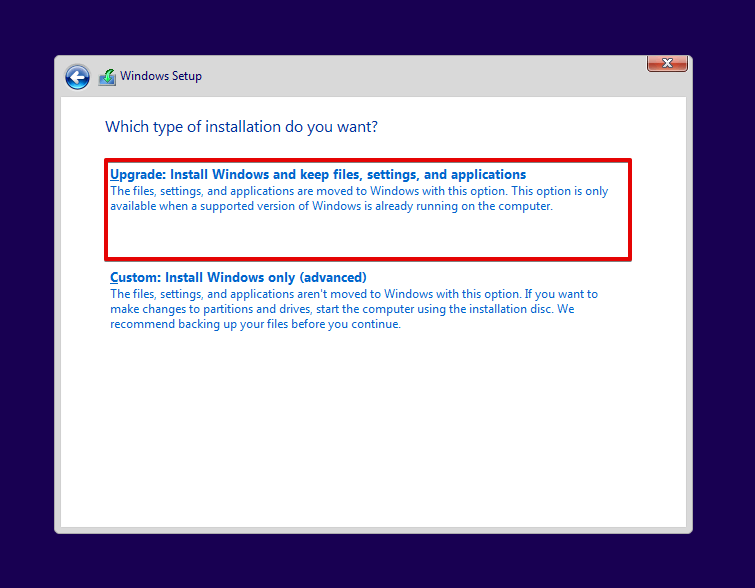
- Upgrade: Install Windows and keep files, settings, and applications – This option will preserve your personal data, apps, and settings. Use this option to reinstall Windows without losing files and programs.
- Custom: Install Windows only (advanced)– All your personal data, settings, and apps will be deleted.
We will demonstrate how to reinstall Windows 10 from a USB.
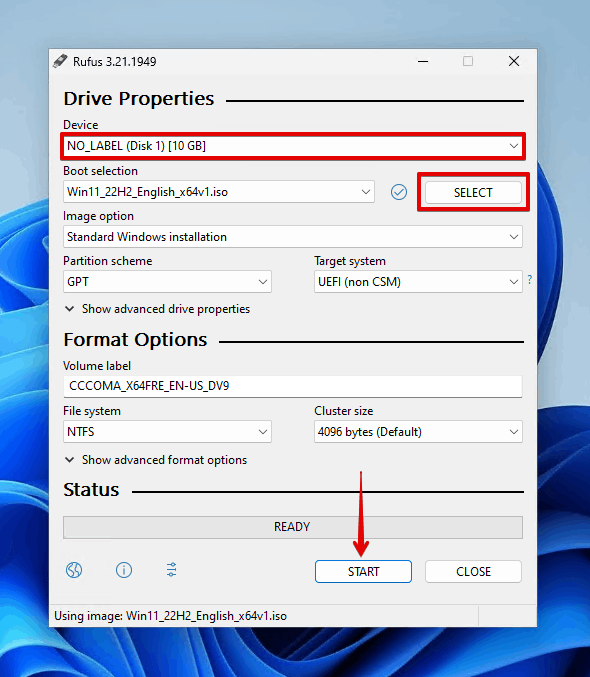
- Download and open Rufus.
- Connect the USB to your computer and select it from the Device dropdown list. Then, click Select and select the Windows image file. When ready, click Start.
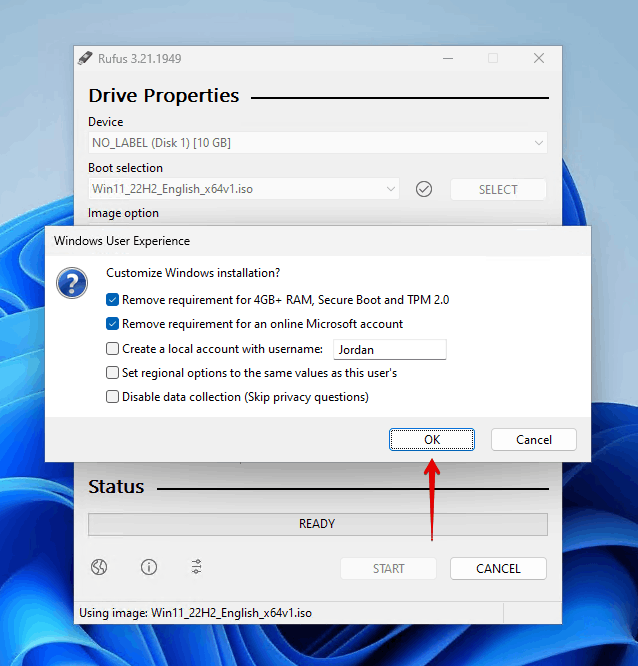
- Click OK. Click OK again if asked to confirm.
- Connect the USB drive to the target computer.
- Boot to your BIOS and modify the boot order so your computer boots to the USB. Every BIOS or UEFI is different, so check the website of your motherboard’s manufacturer for detailed instructions.
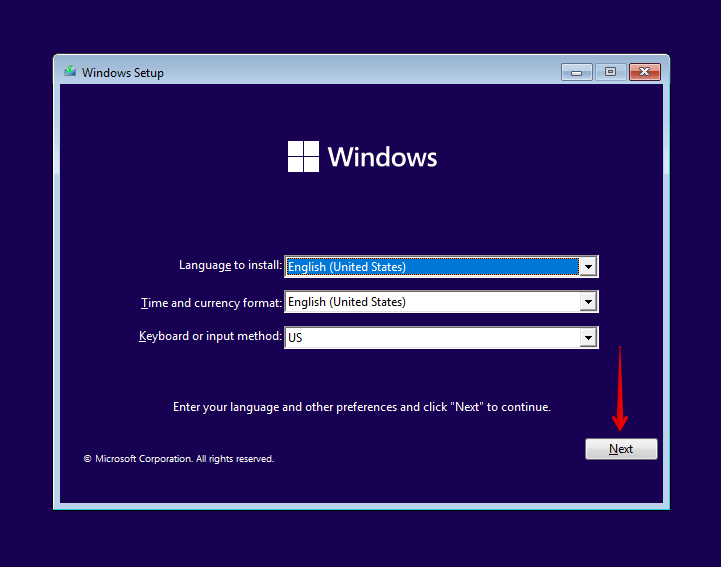
- Choose a language and time and currency format. Click Next.
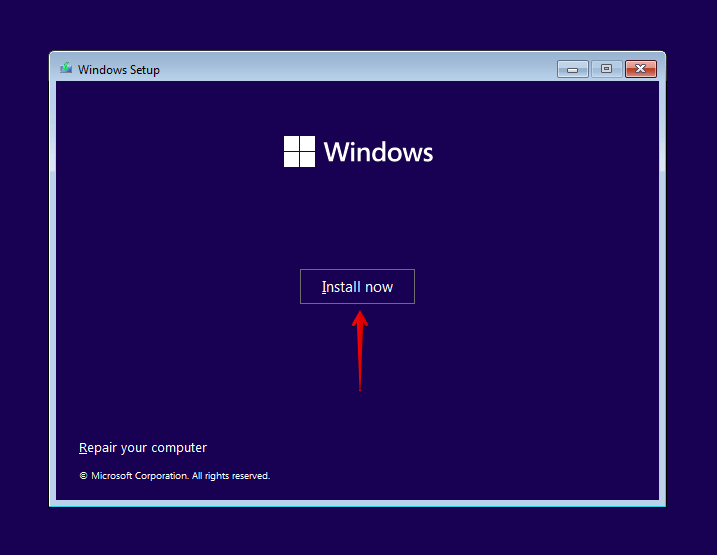
- Click Install now.
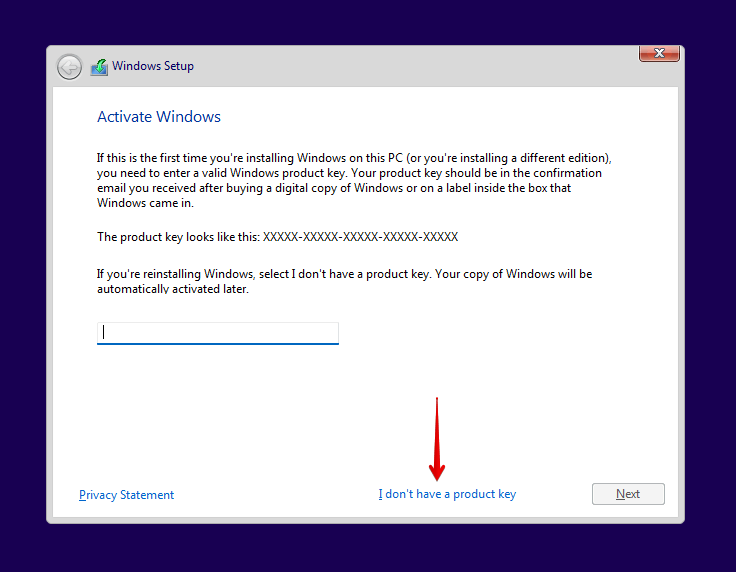
- Enter your product key or press I don’t have a product key.
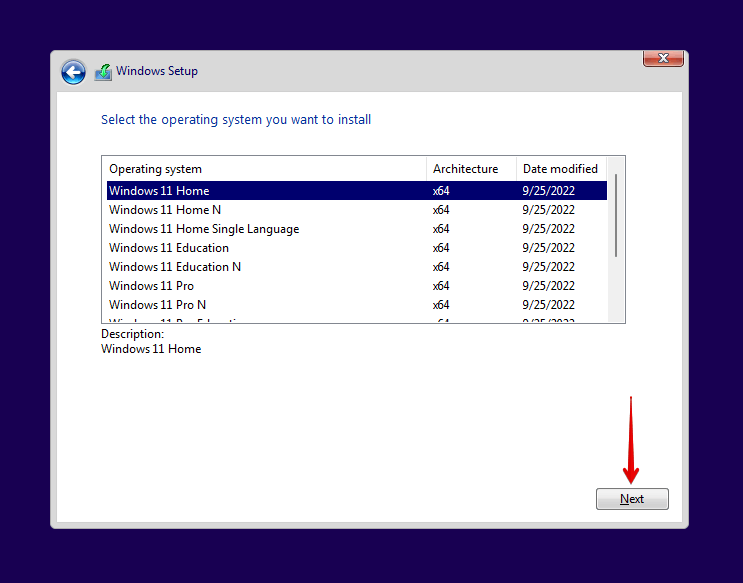
- Select your Windows version (if needed). Click Next.
- Accept the terms and click Next.
- Click the Upgrade option to avoid losing files and apps.
- Follow the rest of the instructions.
Method 5: Using an ISO File
You can reinstall Windows simply by using the Windows ISO file. This is a great option if you don’t have a DVD or USB device to create a bootable device. It also allows you to choose whether you want to keep some of your data or perform a clean install and creates a windows.old folder with the previous version of Windows you had.
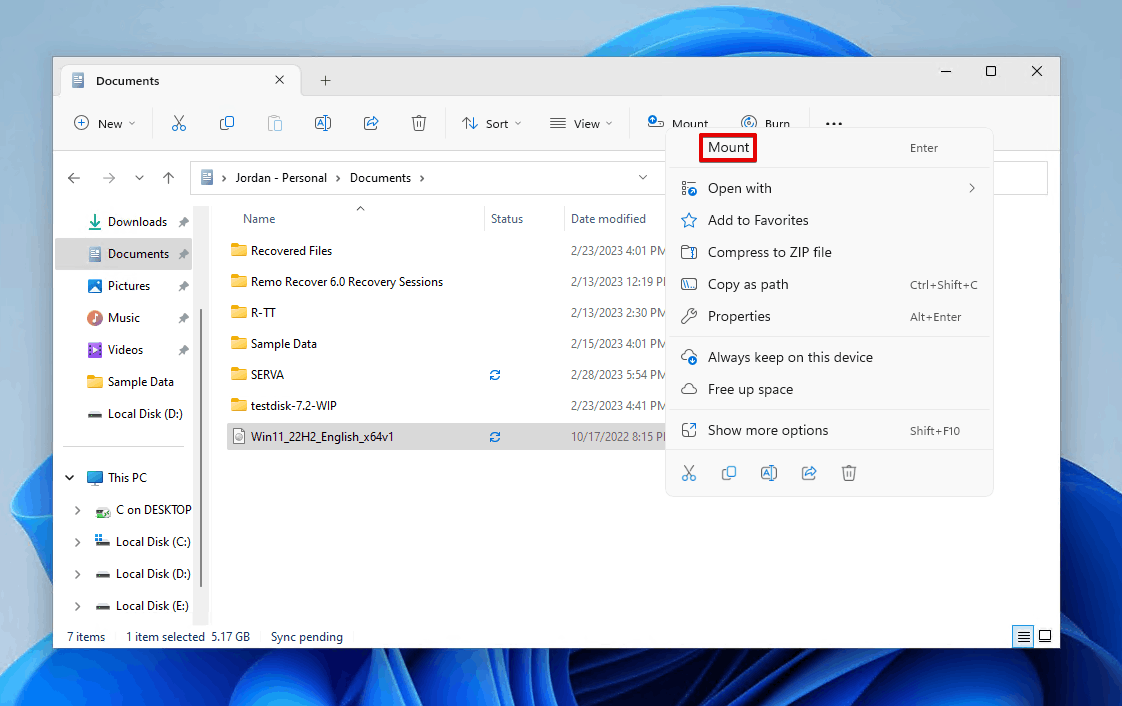
- Right-click the Windows ISO file and click Mount.
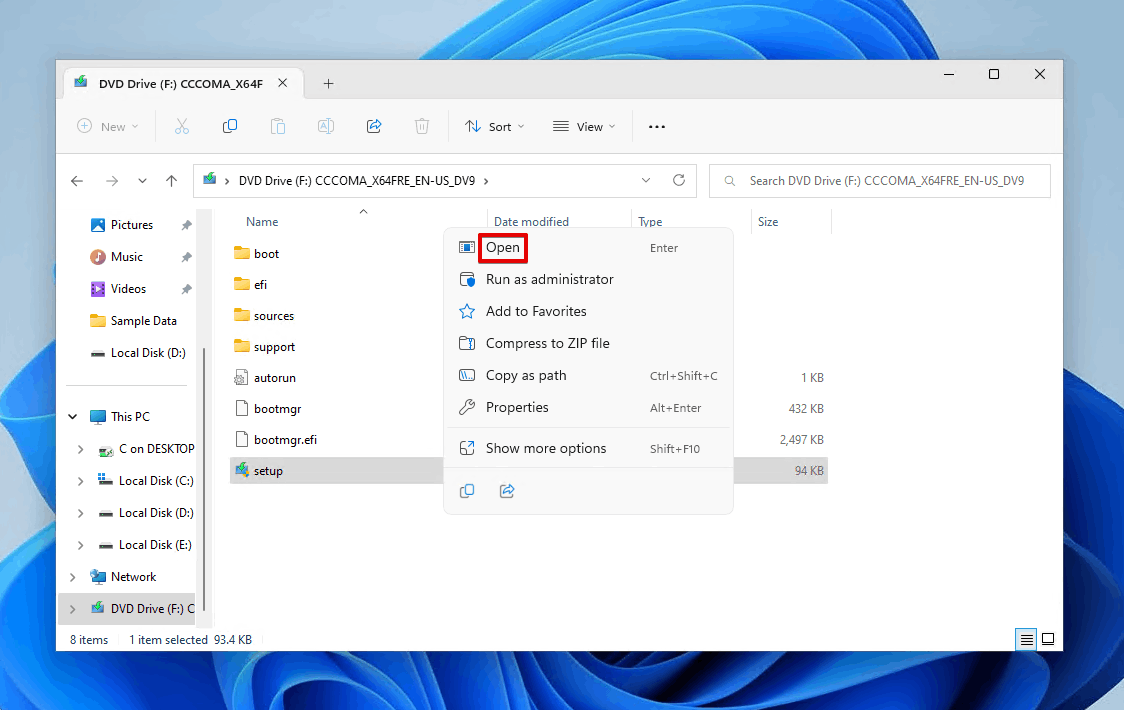
- Open setup.exe.
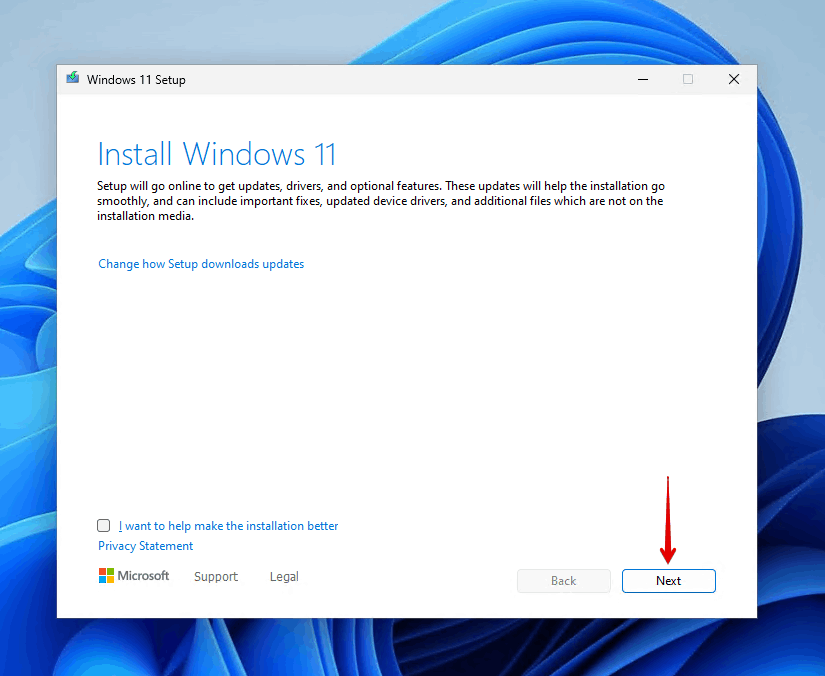
- Click Next.
- Click Accept.

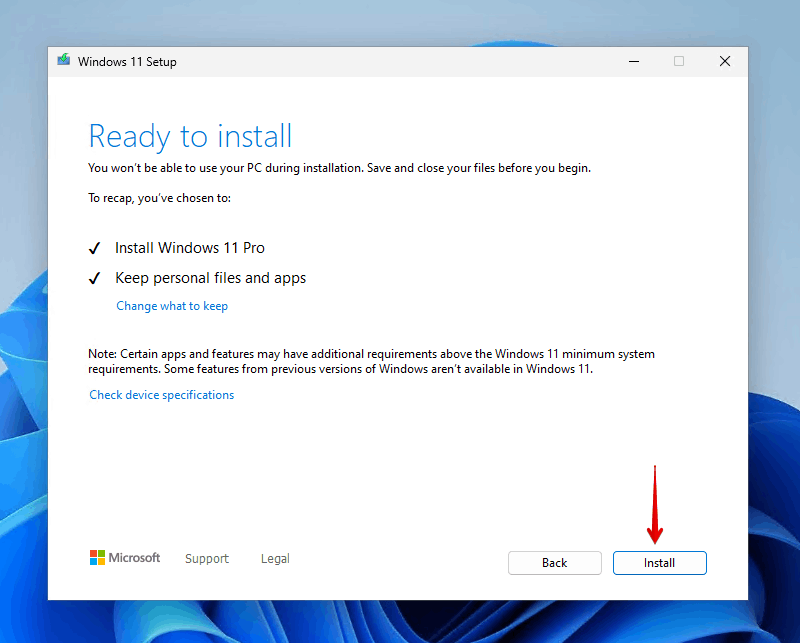
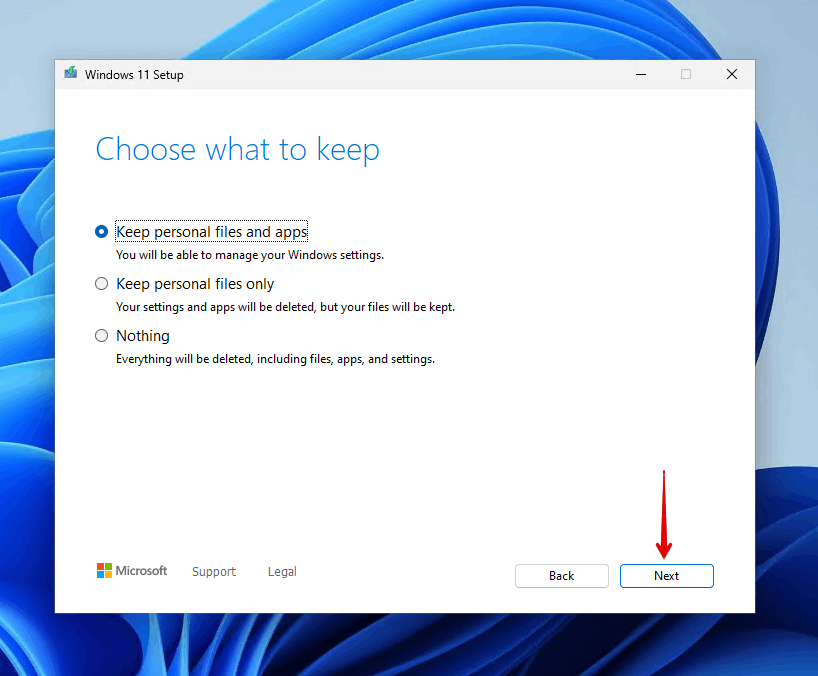
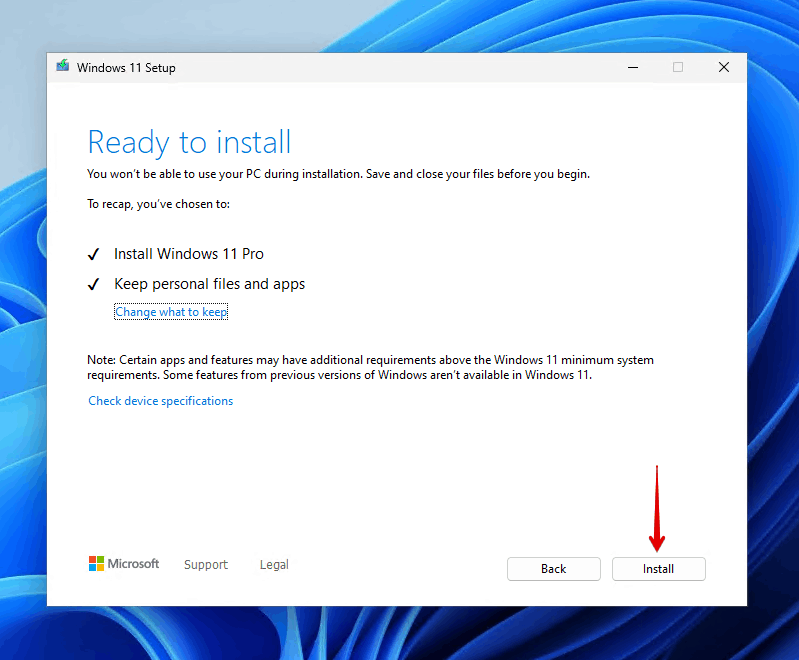
- Choose what you want to keep and click Next.
- Click Install.
Method 6: Over the Network
A more technical method of reinstalling Windows is doing it over the network. You can do this using a third-party tool called SERVA. This method will require both computers to be connected to the same network.
Step 1: Finding Your IP Address
Before we start, we will need to find the IP address assigned to your computer. This can be done using Command Prompt, Windows PowerShell, or Terminal:
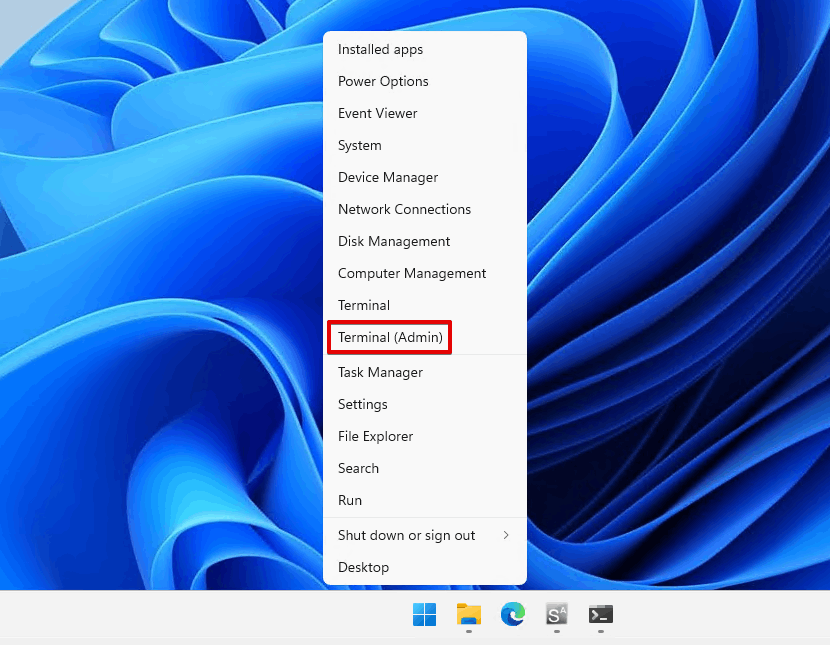
- Right-click Start and click Terminal (Admin).
- Type
ipconfigand press Enter. Make note of the IPv4 address for later.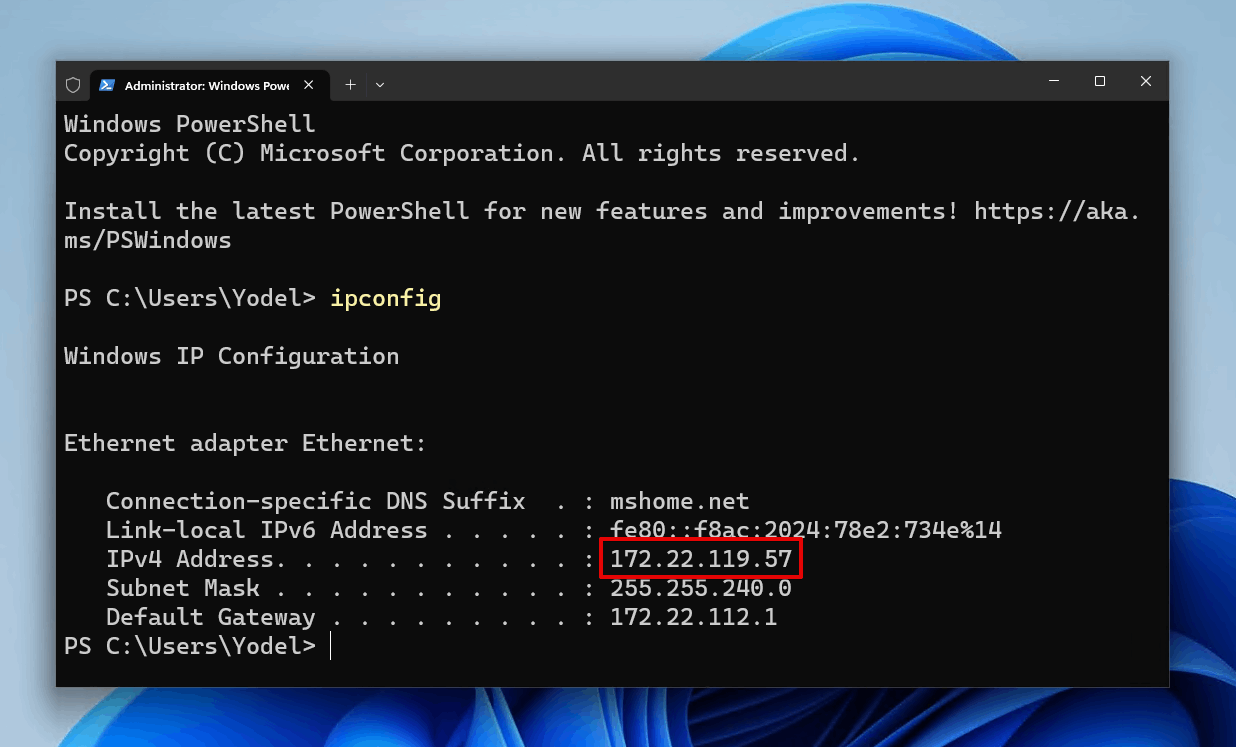
Step 2: Setting Up SERVA
Once you have your IP address ready, let’s proceed with setting up SERVA and installing Windows:
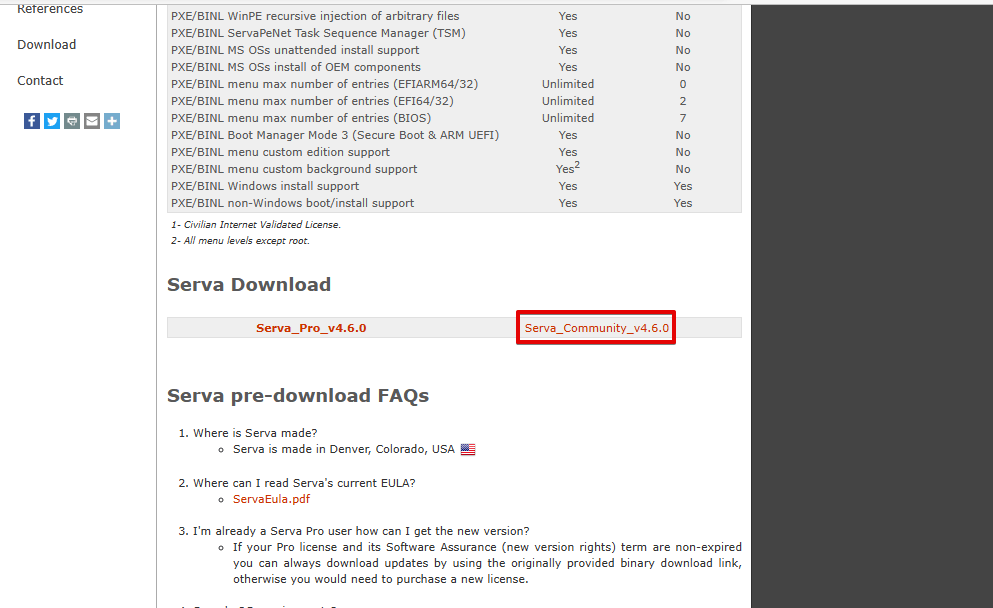
- Download SERVA Community and extract its contents. Open Serva64 (or Serva32 if you’re using a 32-bit version of Windows).
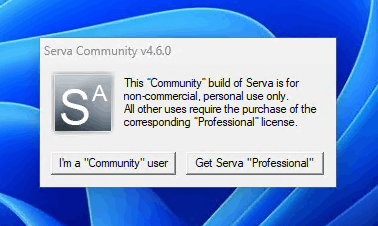
- Click I’m a “Community” user.
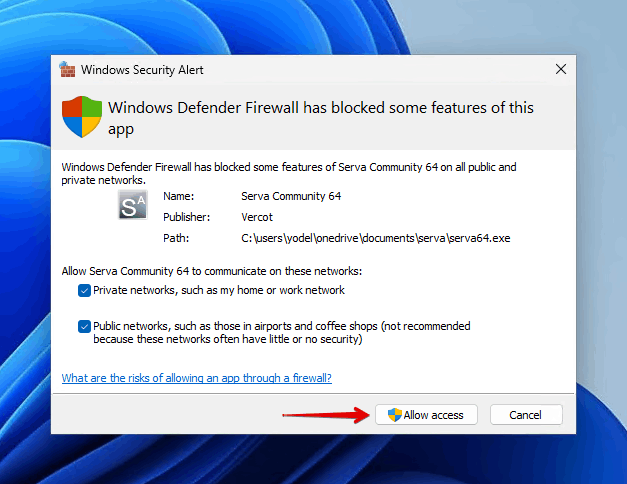
- Make sure you allow SERVA to work on your private network.
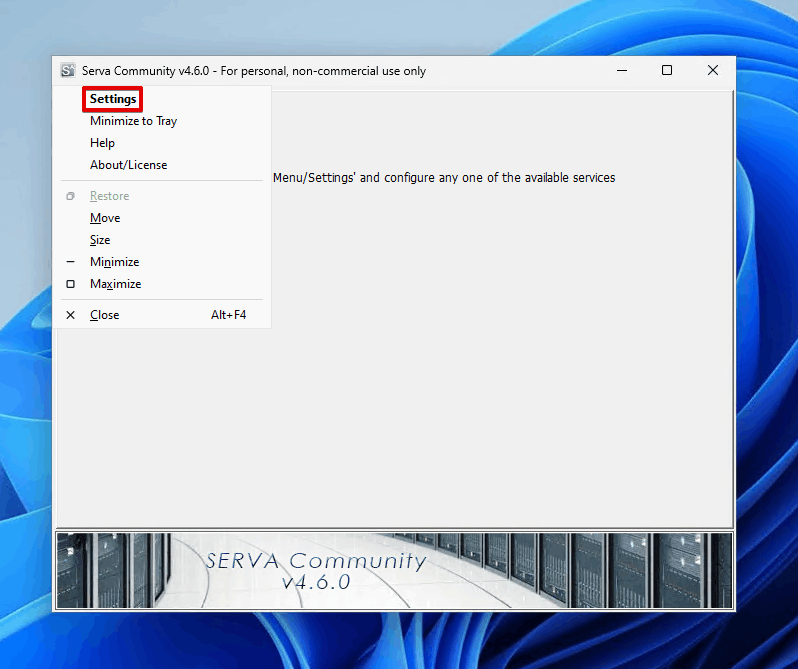
- Click the SERVA icon at the top-left and click Settings.
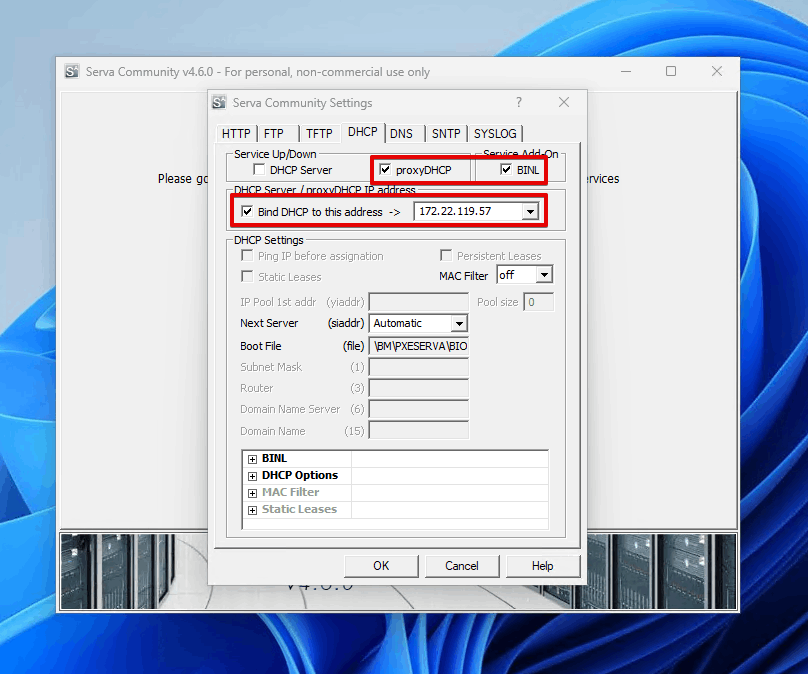
- Click the DHCP tab.
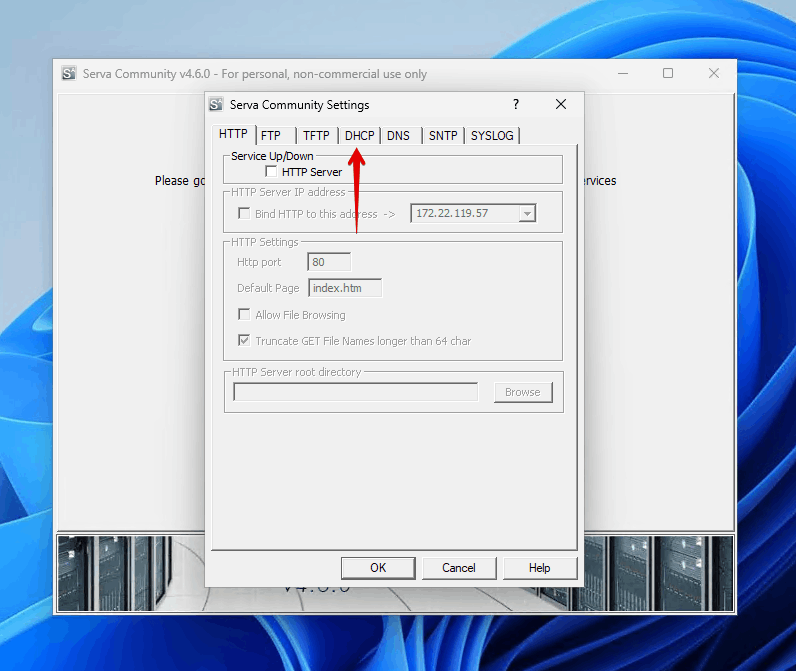
- Tick the checkboxes next to proxyDHCP, BINL, and Bind DHCP to this address. From the dropdown, you will need to select your IP address.
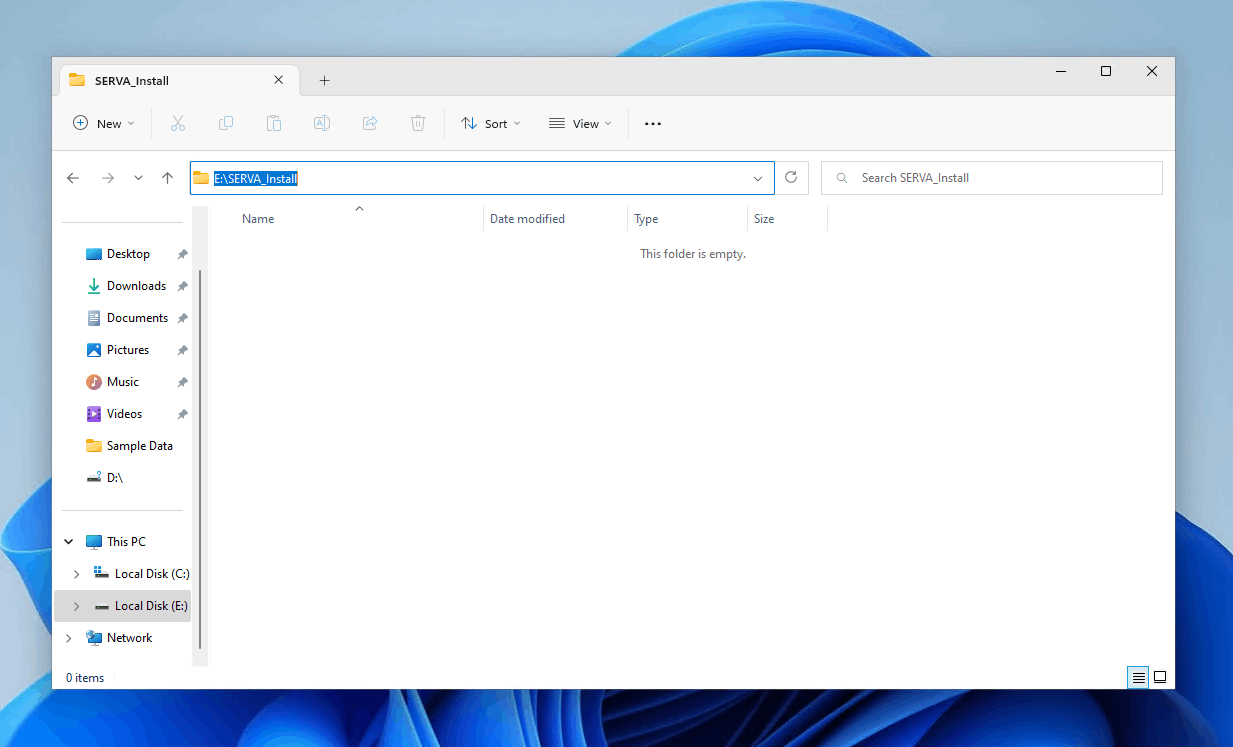
- Open File Explorer and create a folder that will serve as the TFTP Server root directory. I called mine SERVA_Install.
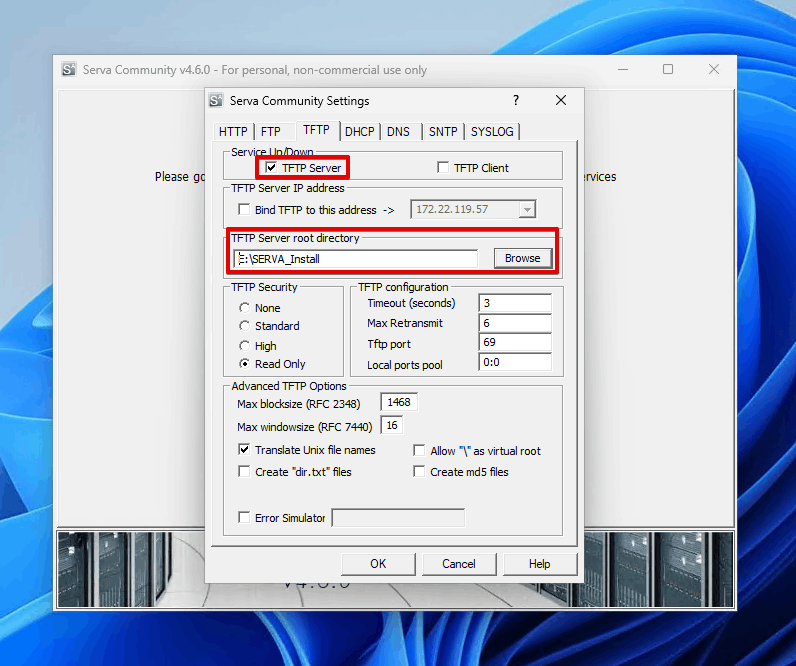
- Click the TFTP tab. Tick the checkbox next to TFTP Server, then select the SERVA_Install folder. Click OK then close and reopen SERVA. Once you open SERVA again, you’ll notice some new folders inside the SERVA_Install folder.
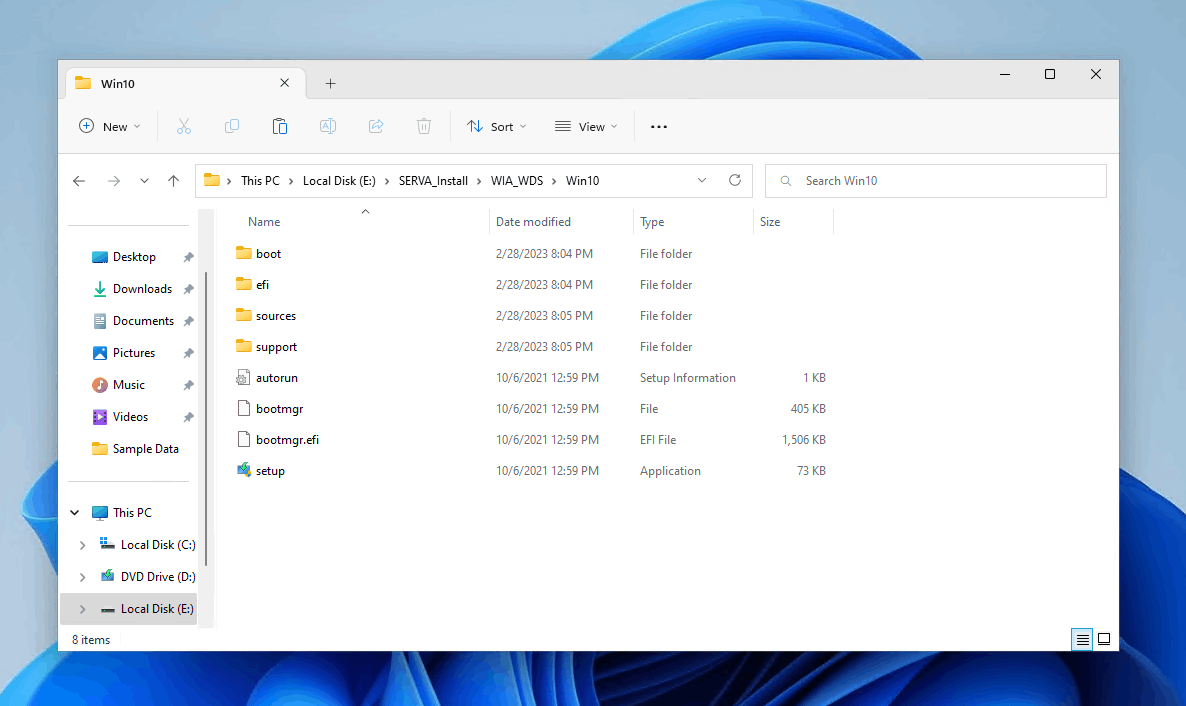
- Create a new folder in WIA_WDS and name it Win10 (or Win11, depending on the operating system you’re installing).
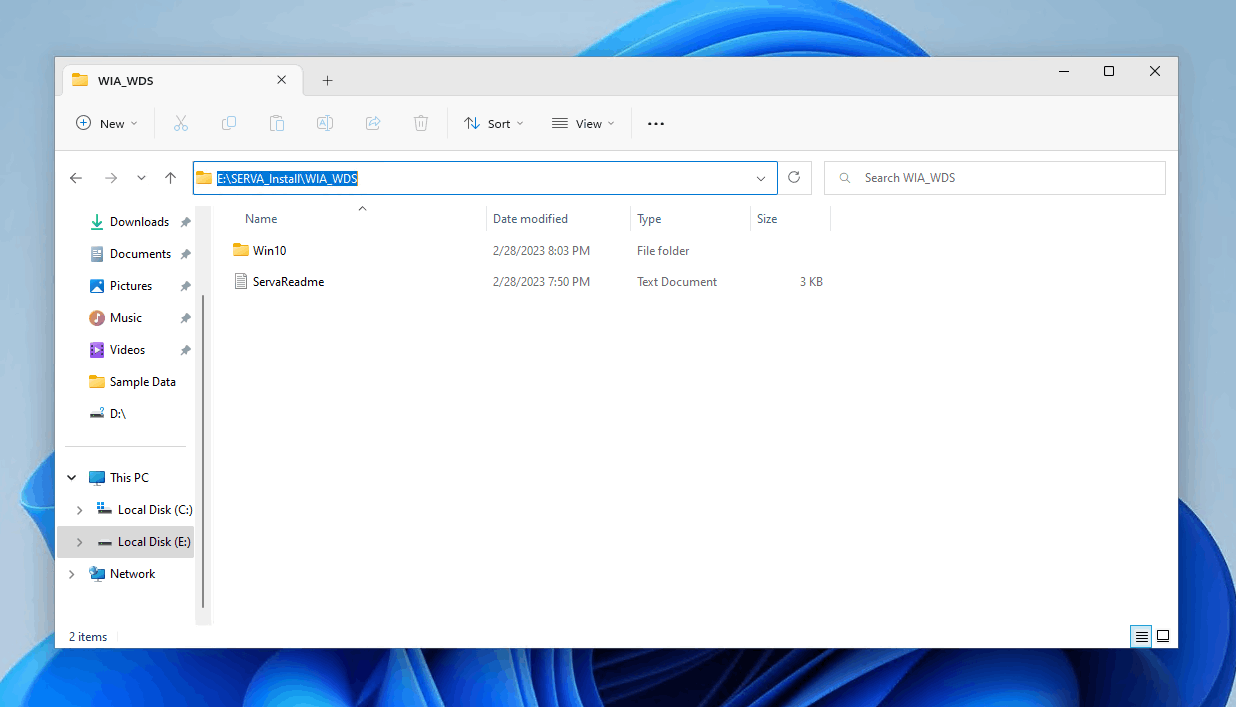
- Copy the contents of your Windows 10 (or Windows 11) image into the folder you just created.
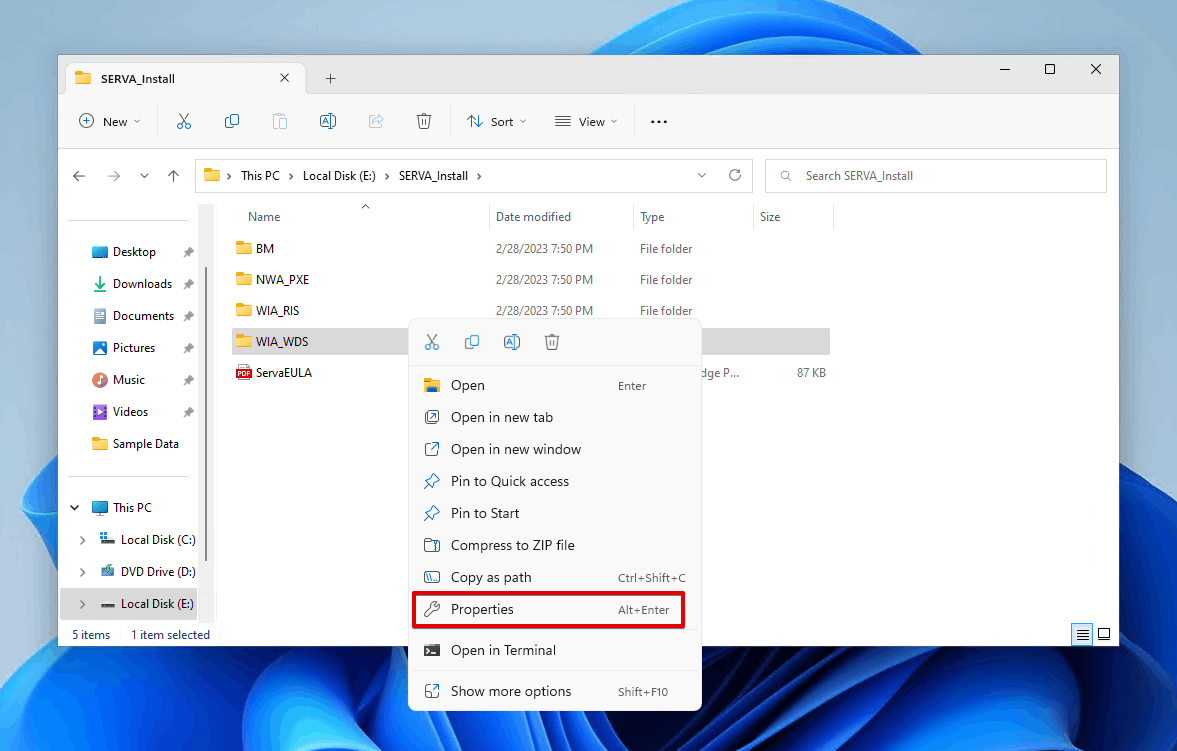
- Right-click the WIA_WDS folder and click Properties.
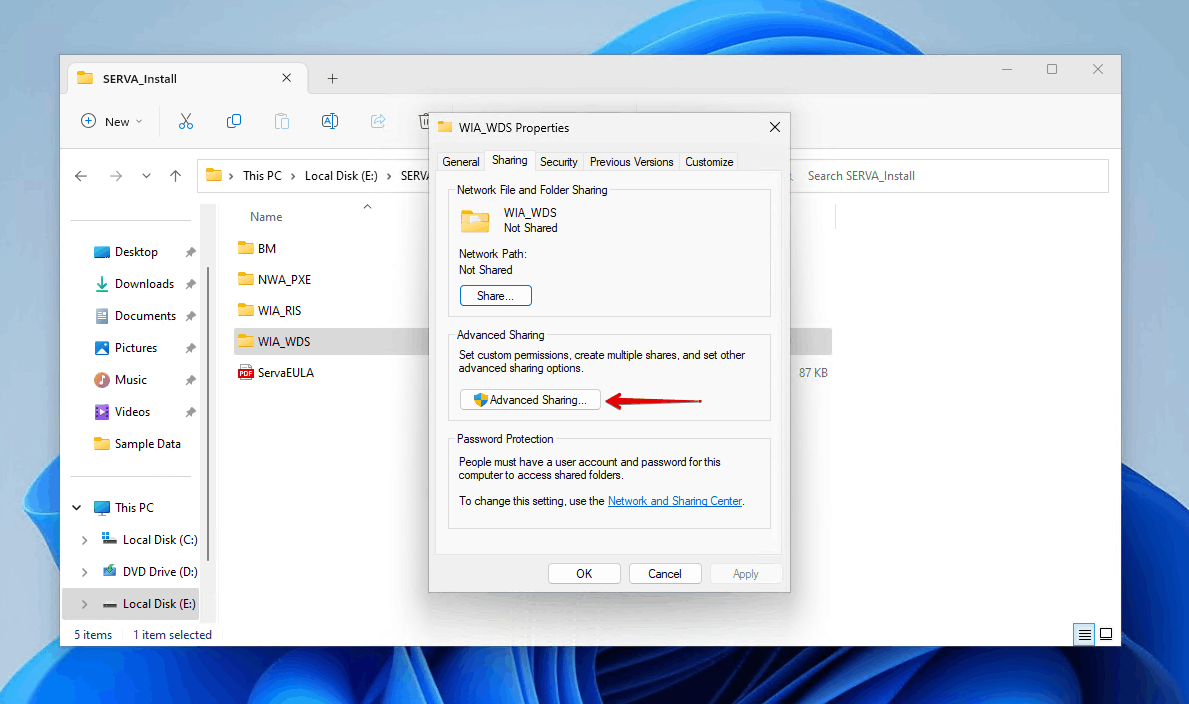
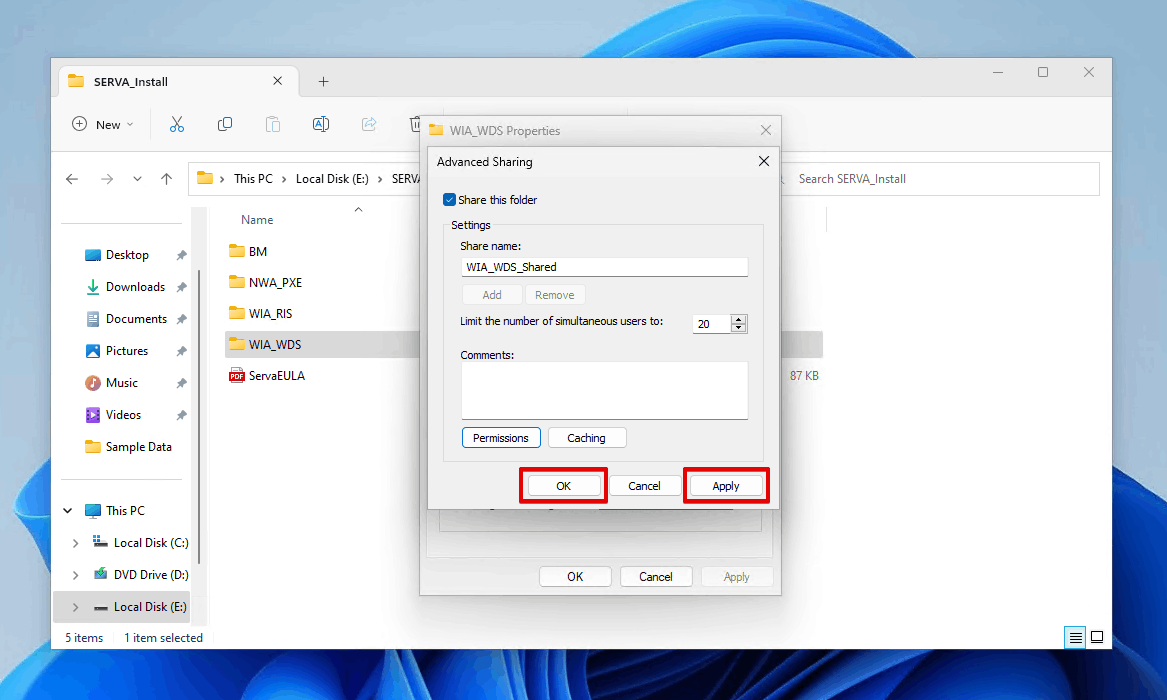
- Click the Sharing tab, then click Advanced Sharing.
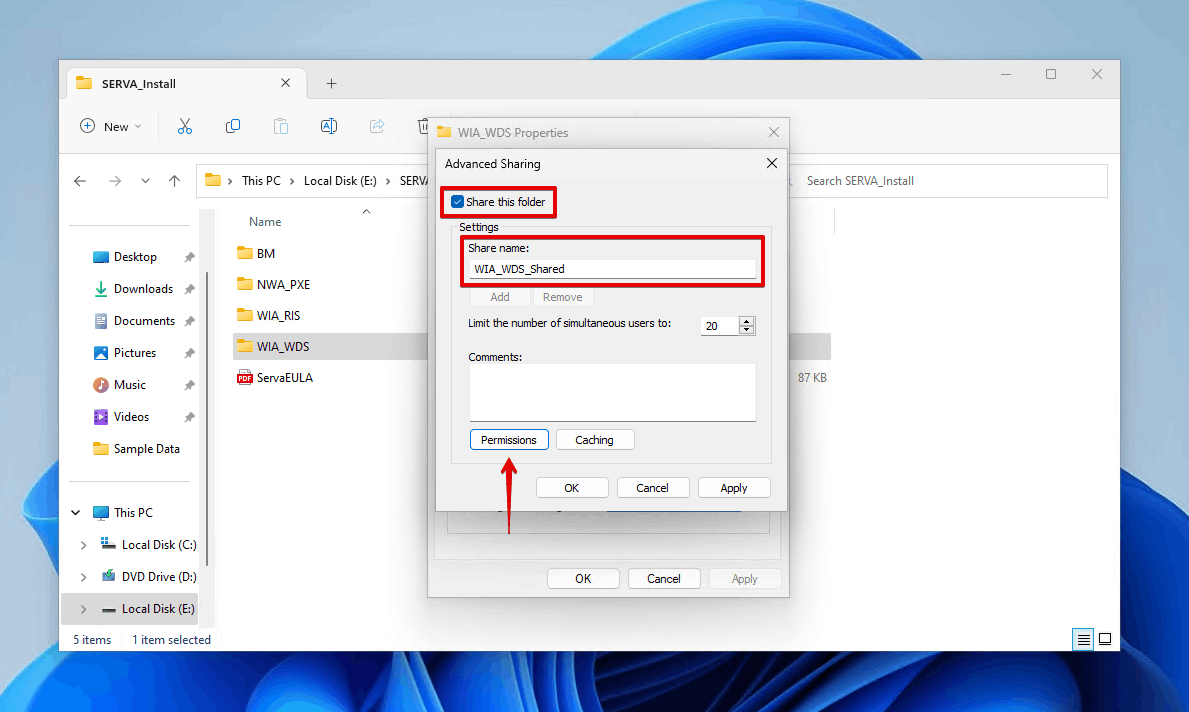
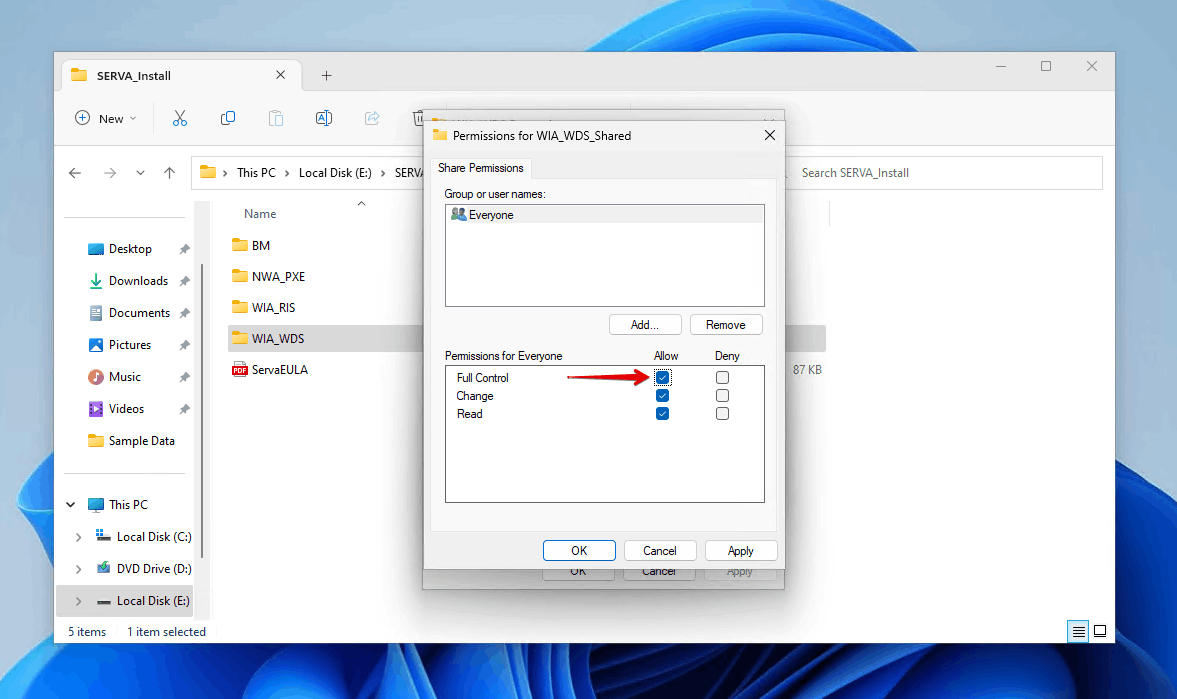
- Tick Share this folder. For the Share name, use WIA_WDS_Share. Click Permissions.
- Give Full Control to Everyone. Click Apply then OK.
- Click Apply then OK.
- Click the Security tab, then click Edit.
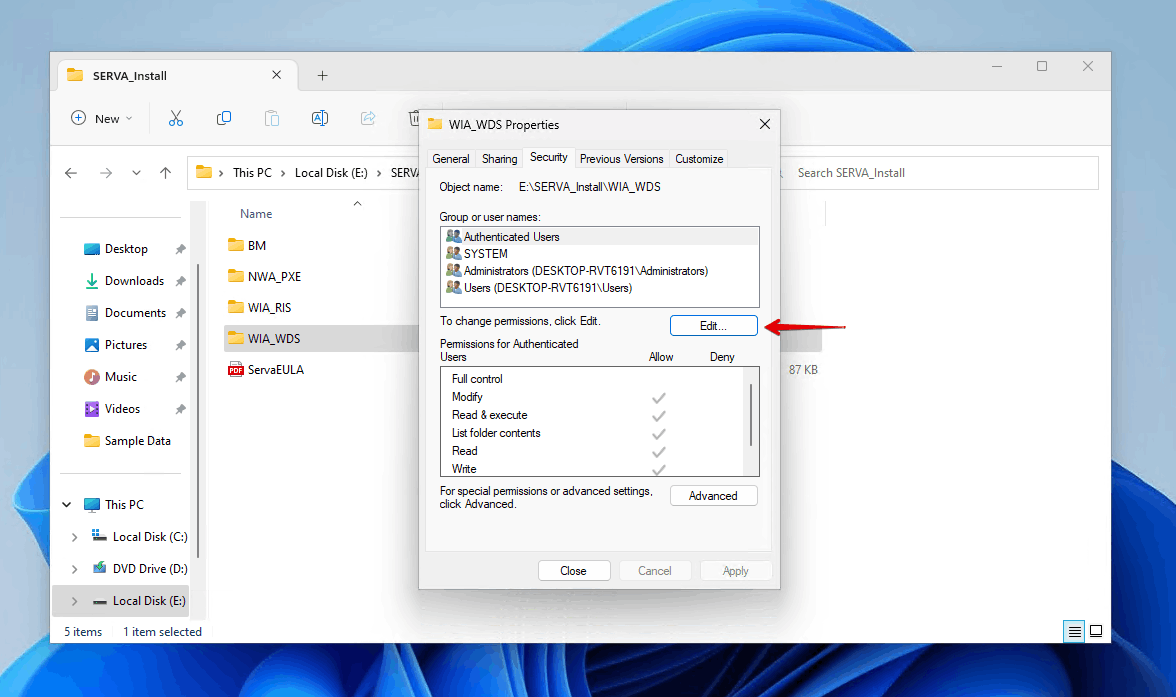
- Click Add.
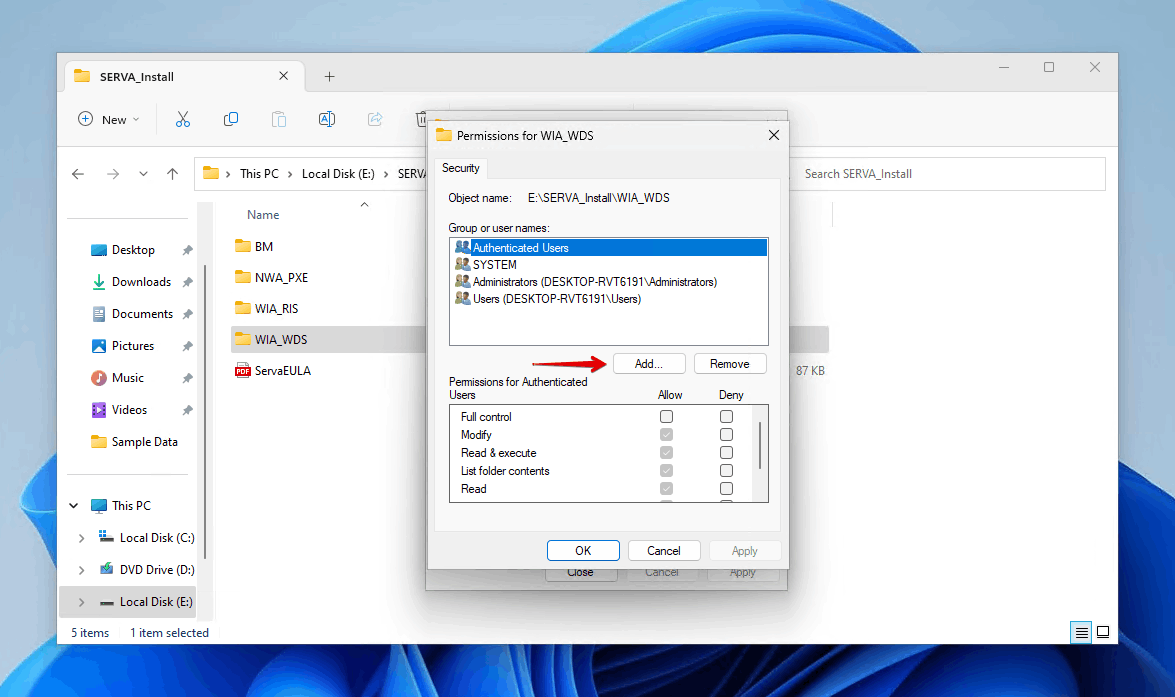
- Type Everyone then click OK.
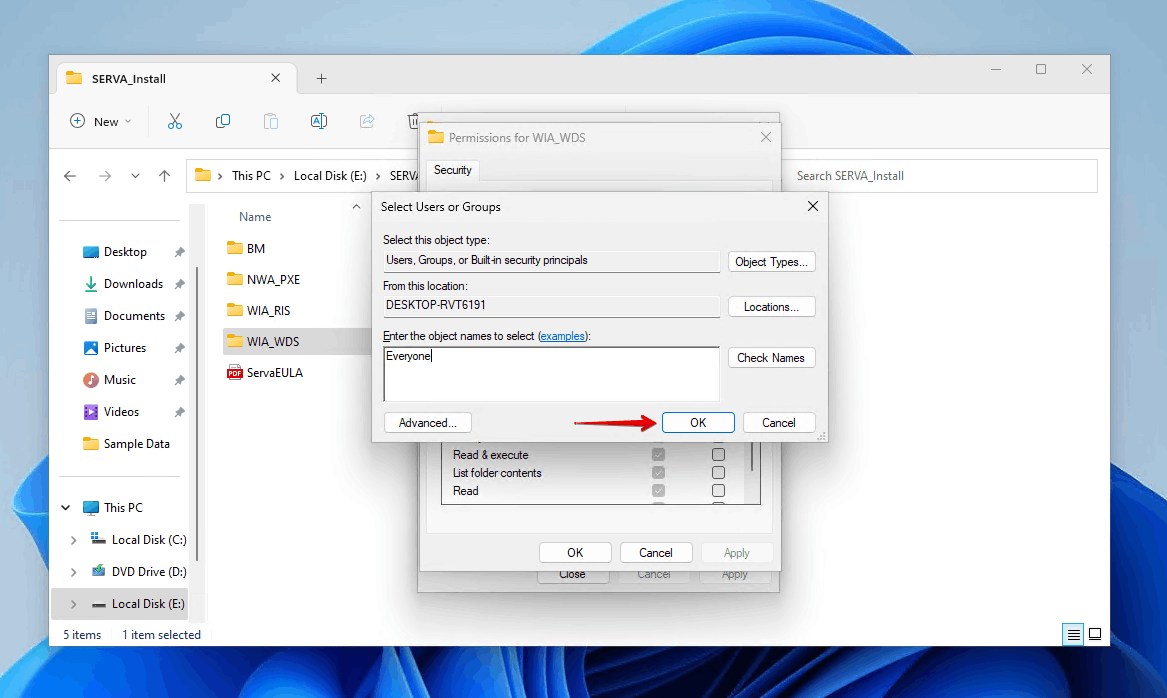
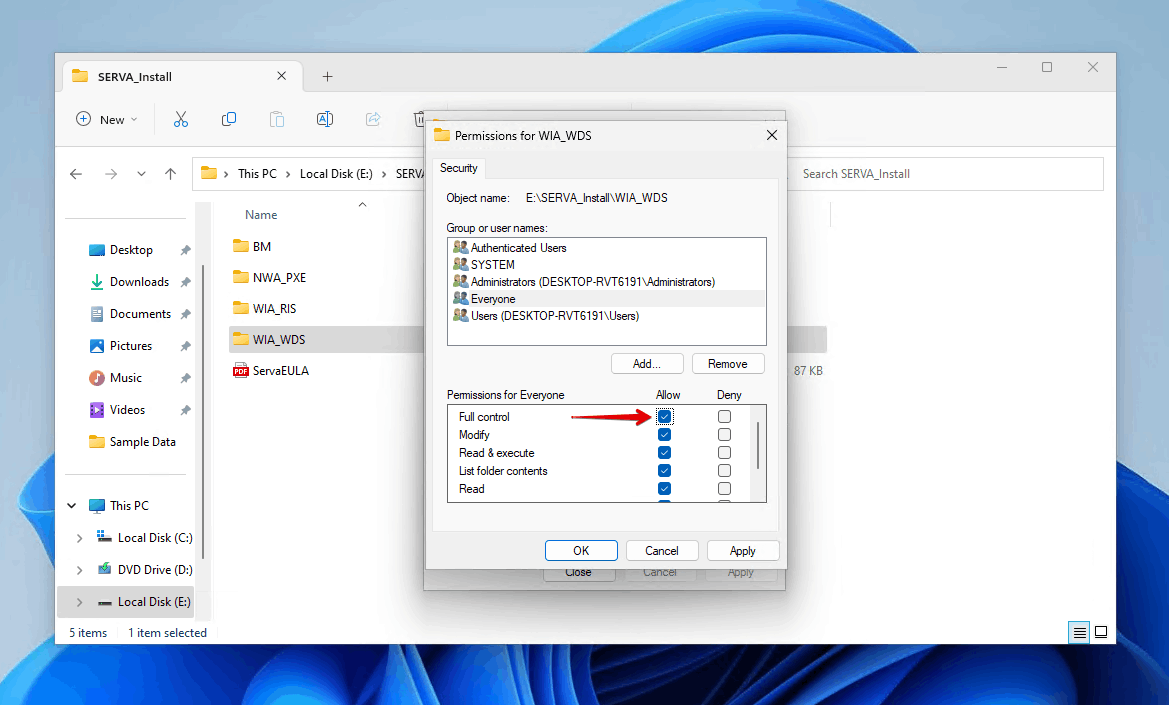
- Give Full Control to Everyone. Click Apply then OK.
- Close and reopen SERVA.
Step 3: Installing Windows with SERVA
Finally, once SERVA is configured, you can install Windows over the network. Before you start, you must ensure the target computer is configured to boot into PXE mode. This can be done in your BIOS.
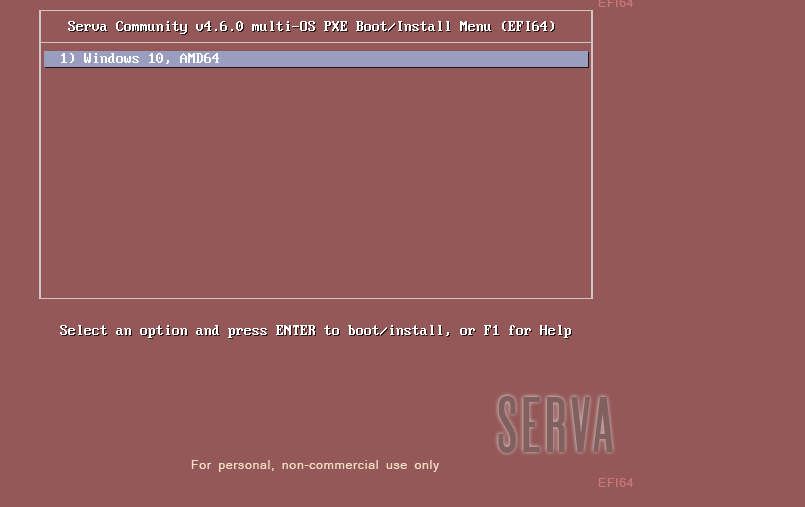
- Boot into PXE mode.
- Select the Windows version you want to install.
- Enter Everyone as the username then click Connect.
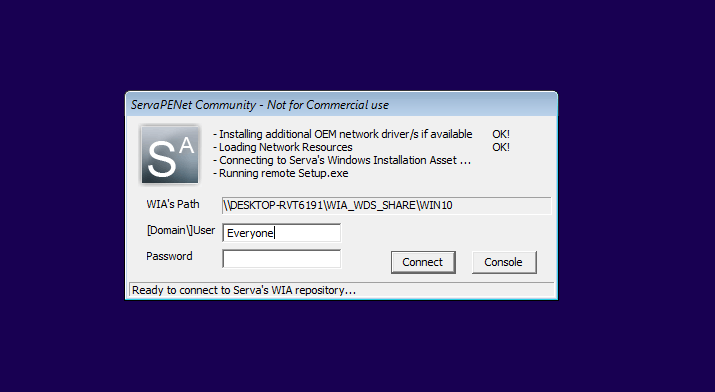
- Follow the standard instructions to complete the reinstall.
How to Recover Files Lost During Windows Reinstall
If you performed a clean install, or if something went wrong during the reinstall of your Windows operating system, you can use data recovery software to recover lost data. Disk Drill is the data recovery tool we’ll be using. It uses an advanced algorithm to scan your hard drive and lets you hand-pick the recoverable data you want to restore.
Here’s how you can recover files that were lost during a Windows reinstall using Disk Drill:
- Download and install Disk Drill to a separate drive.
- Select the drive on which Windows was reinstalled. Click Search for lost data.

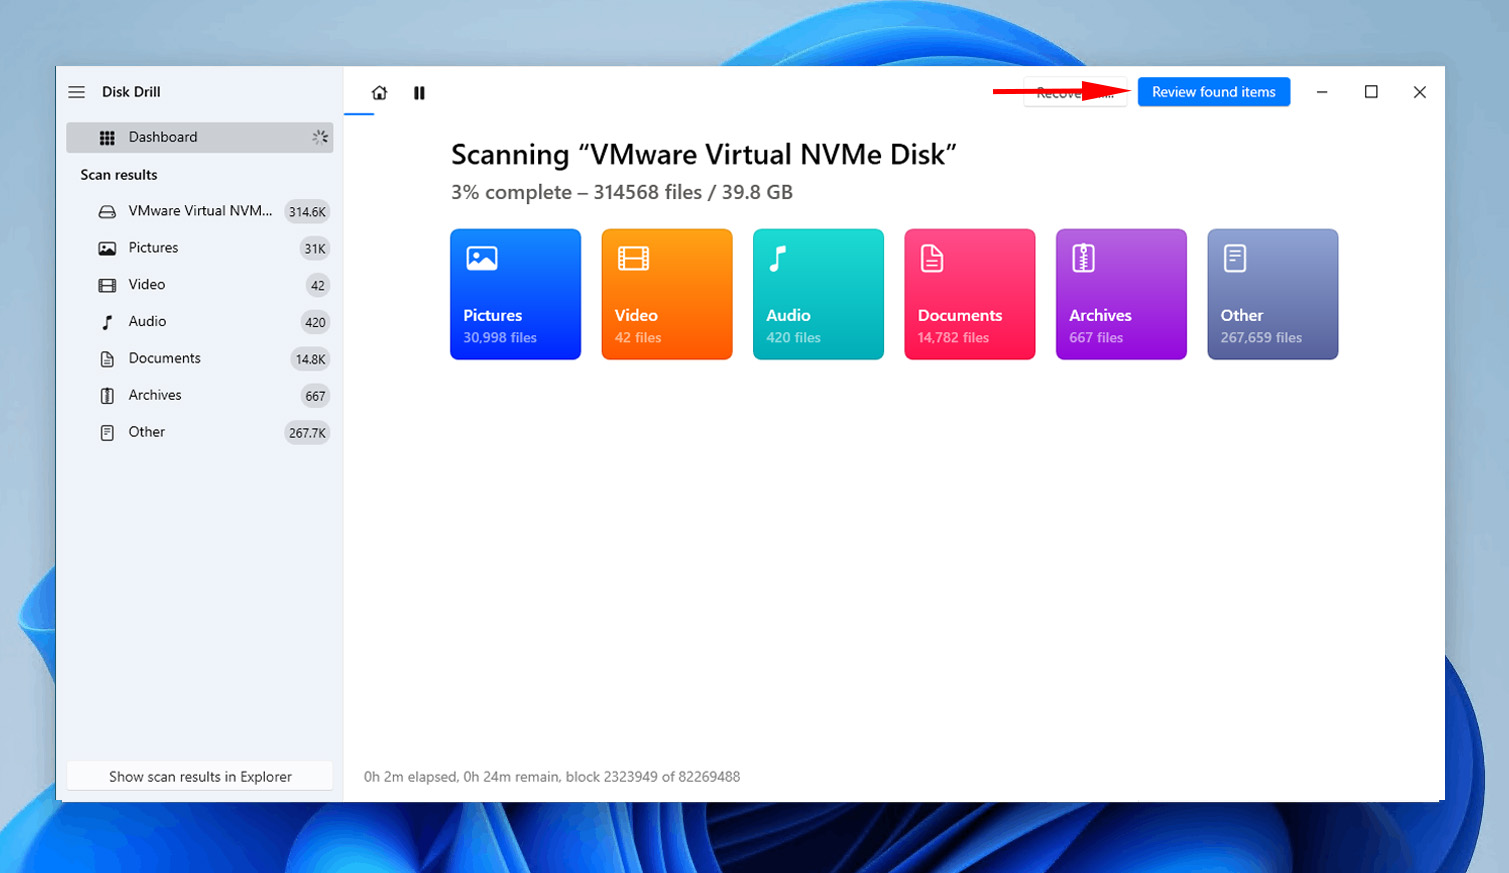
- Click Review found items. If you want to recover as much data as possible, you can instead click Recover all.
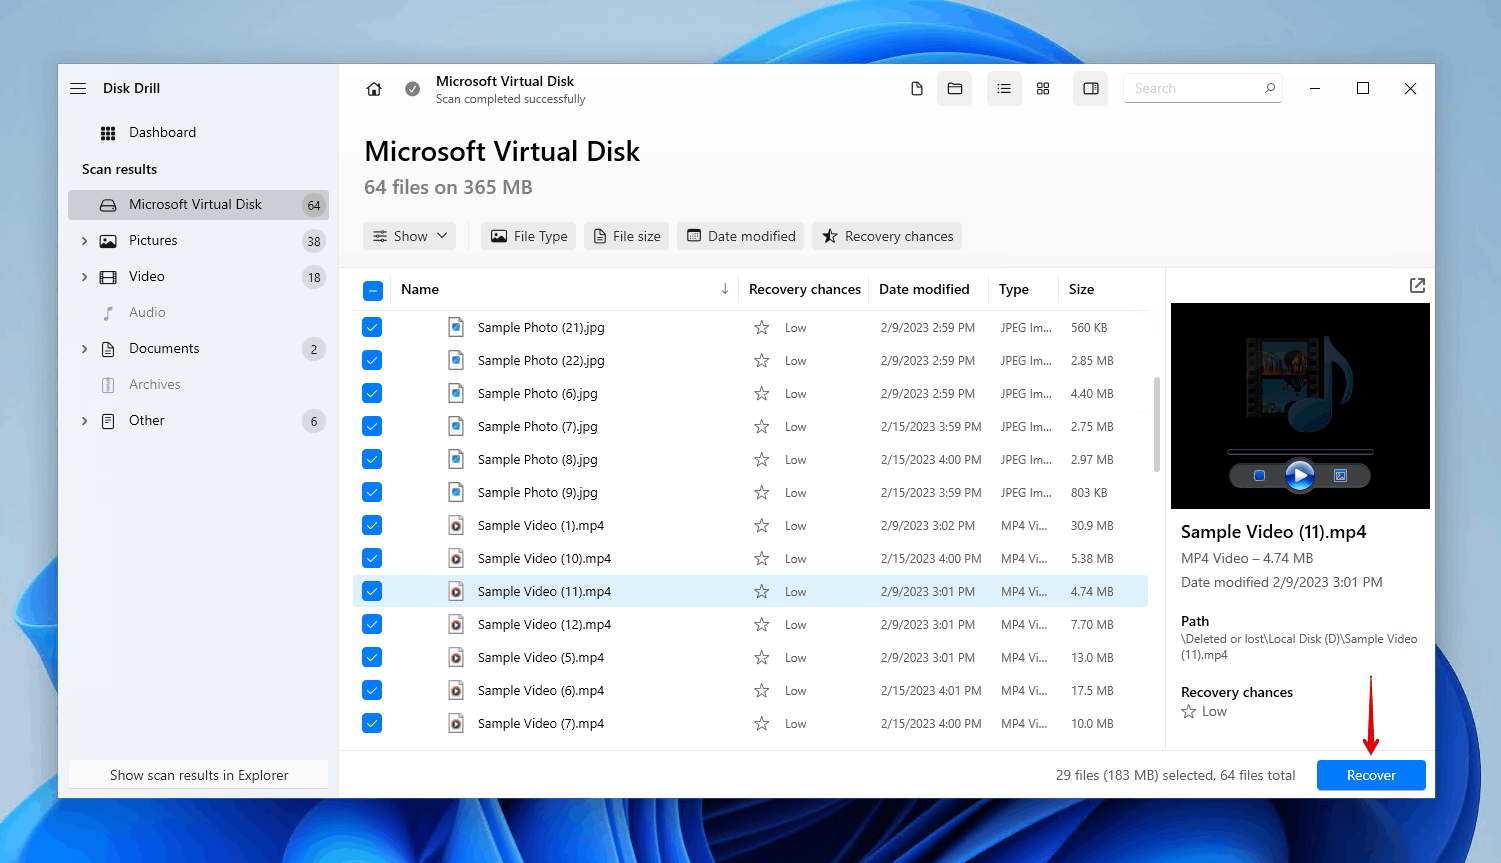
- Select the data you want to recover. Use the recovery chances column and preview panel to identify which data is in a healthy state for recovery. When you’re finished selecting all of the files you want to recover, click Recover.
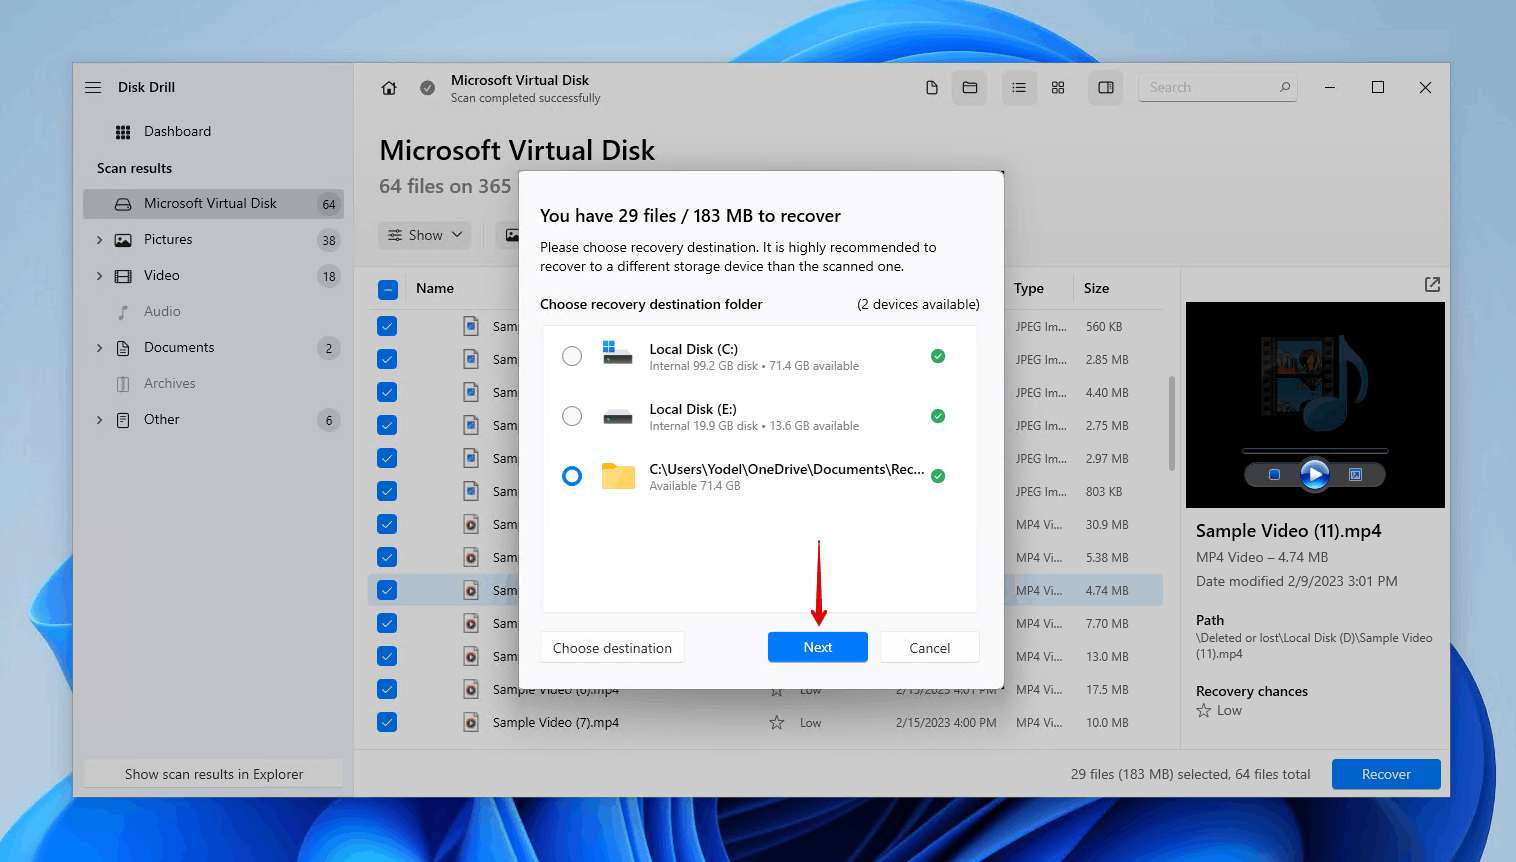
- Select an appropriate recovery location. Make sure you don’t recover the data to the same drive you’re recovering it from. Click Next.
Conclusion
There are times when it’s necessary to reinstall Windows. There are multiple ways to achieve this. Most methods allow you to keep your data so it’s not deleted in the process. However, there are some methods that may require you to perform a clean install.
Probably the easiest way to reinstall Windows is using the Reset PC option. You can accomplish this in the Settings menu or by booting into WinRE. Otherwise, you can also do it through the Media Creation Tool, creating a bootable USB or DVD, using the ISO file, or over the network.
Make sure you back up your data beforehand. If you were unable to create a backup and lost some of your data in the process, be sure to recover it using a data recovery tool such as Disk Drill.
FAQ
- Right-click Start and click Settings.
- Click Update & Security.
- Click Recovery.
- Click Get started (under Reset this PC).
- Choose whether you want to keep your files or perform a clean install.
- Follow the provided instructions to complete the reinstall.
- Upgrade - Keeps your files, settings, and applications.
- Custom - Deletes your files, settings, and applications.
- Open Settings.
- Click System.
- Click Recovery.
- Click Go back.
- Choose a reason why you’re going back and click Next.
- Click No, thanks.
- Click Next.
- Click Next.
- Click Go back to Windows 10.


")