 A read-only external hard drive allows you to access its contents, but you can’t write any new files to the drive. If you’re facing this issue on macOS, fret not, the issue is usually easy to fix. But, you do need to be careful with the existing files on the drive. To help you out, we’ve created an easy guide on how to fix a Mac external hard drive that has become read only.
Table of Contents
What Causes a Mac Hard Drive to Become Read Only
It’s important to know why your external hard drive is showing up as read-only on your Mac so that you can choose the best solution to the problem.
Here’s a table that lists the possible reasons behind a Mac external hard drive becoming read-only:
| Reason | Description | Solution |
| 👤 Soft permission settings | The permission settings on macOS determine the level of access users have to a drive or folder. If the permission privileges are set to Read only for a user, they won’t be able to write anything to the drive. | Change the permission privileges to Read & Write. |
| 💥 Hard drive corruption | Improper usage, malware, regular wear and tear can all cause logical issues with your drive, resulting in corruption. Unexplained hard drive corruption usually indicates the drive is about to fail. In some cases, the drive may even refuse to mount. | Create a disk image of the drive and recover data from it. Then, use First Aid to fix the drive. |
| 🔗 File system compatibility | If you were previously using the external hard drive on a Windows PC, it’s likely the drive is formatted to the NTFS file system. On macOS, you can only read NTFS drives, not write to them. | Format the drive to an Apple-specific file system if you plan to use the drive on macOS only. For cross-platform usage, use the exFAT file system.
Remember to recover your data before formatting the drive. |
Note: Some external hard drives have a physical write-protection switch that prevents users from writing data to the drive. Ensure the switch is set to the OFF position. Additionally, if you hear clicking, whirring, and beeping sounds from the drive, it indicates physical damage, and you’re better off contacting a professional instead of attempting DIY fixes.
How to Avoid Losing Data From a Read-Only Hard Drive
Fixing a read-only drive can sometimes entail data loss–both because of the reason that led to it becoming read-only (such as corruption), and the solutions themselves (like formatting). Fortunately, there are plenty of third-party data recovery tools that can help you recover data from an external hard drive beforehand.
For our tutorial, we’ll use Disk Drill. It’s easy-to-use, works with all types of storage drives across a range of file systems, and saves your scans so you can resume from where you left off. It also lets you create and mount disk images for data recovery, which comes in handy, especially when dealing with a corrupt drive. Disk Drill is available for macOS and Windows.
Let’s take a look at the data recovery process on a read-only hard drive.
Step 1: Create a Disk Image (Optional)
Ideally, you should create a disk image and scan it for recoverable data, instead of directly scanning the physical drive, but you can skip this step if your drive is working fine, and you don’t suspect that the read-only issue is being caused by corruption.
Here’s how to create a disk image using Disk Drill:
- Download Disk Drill and install it.
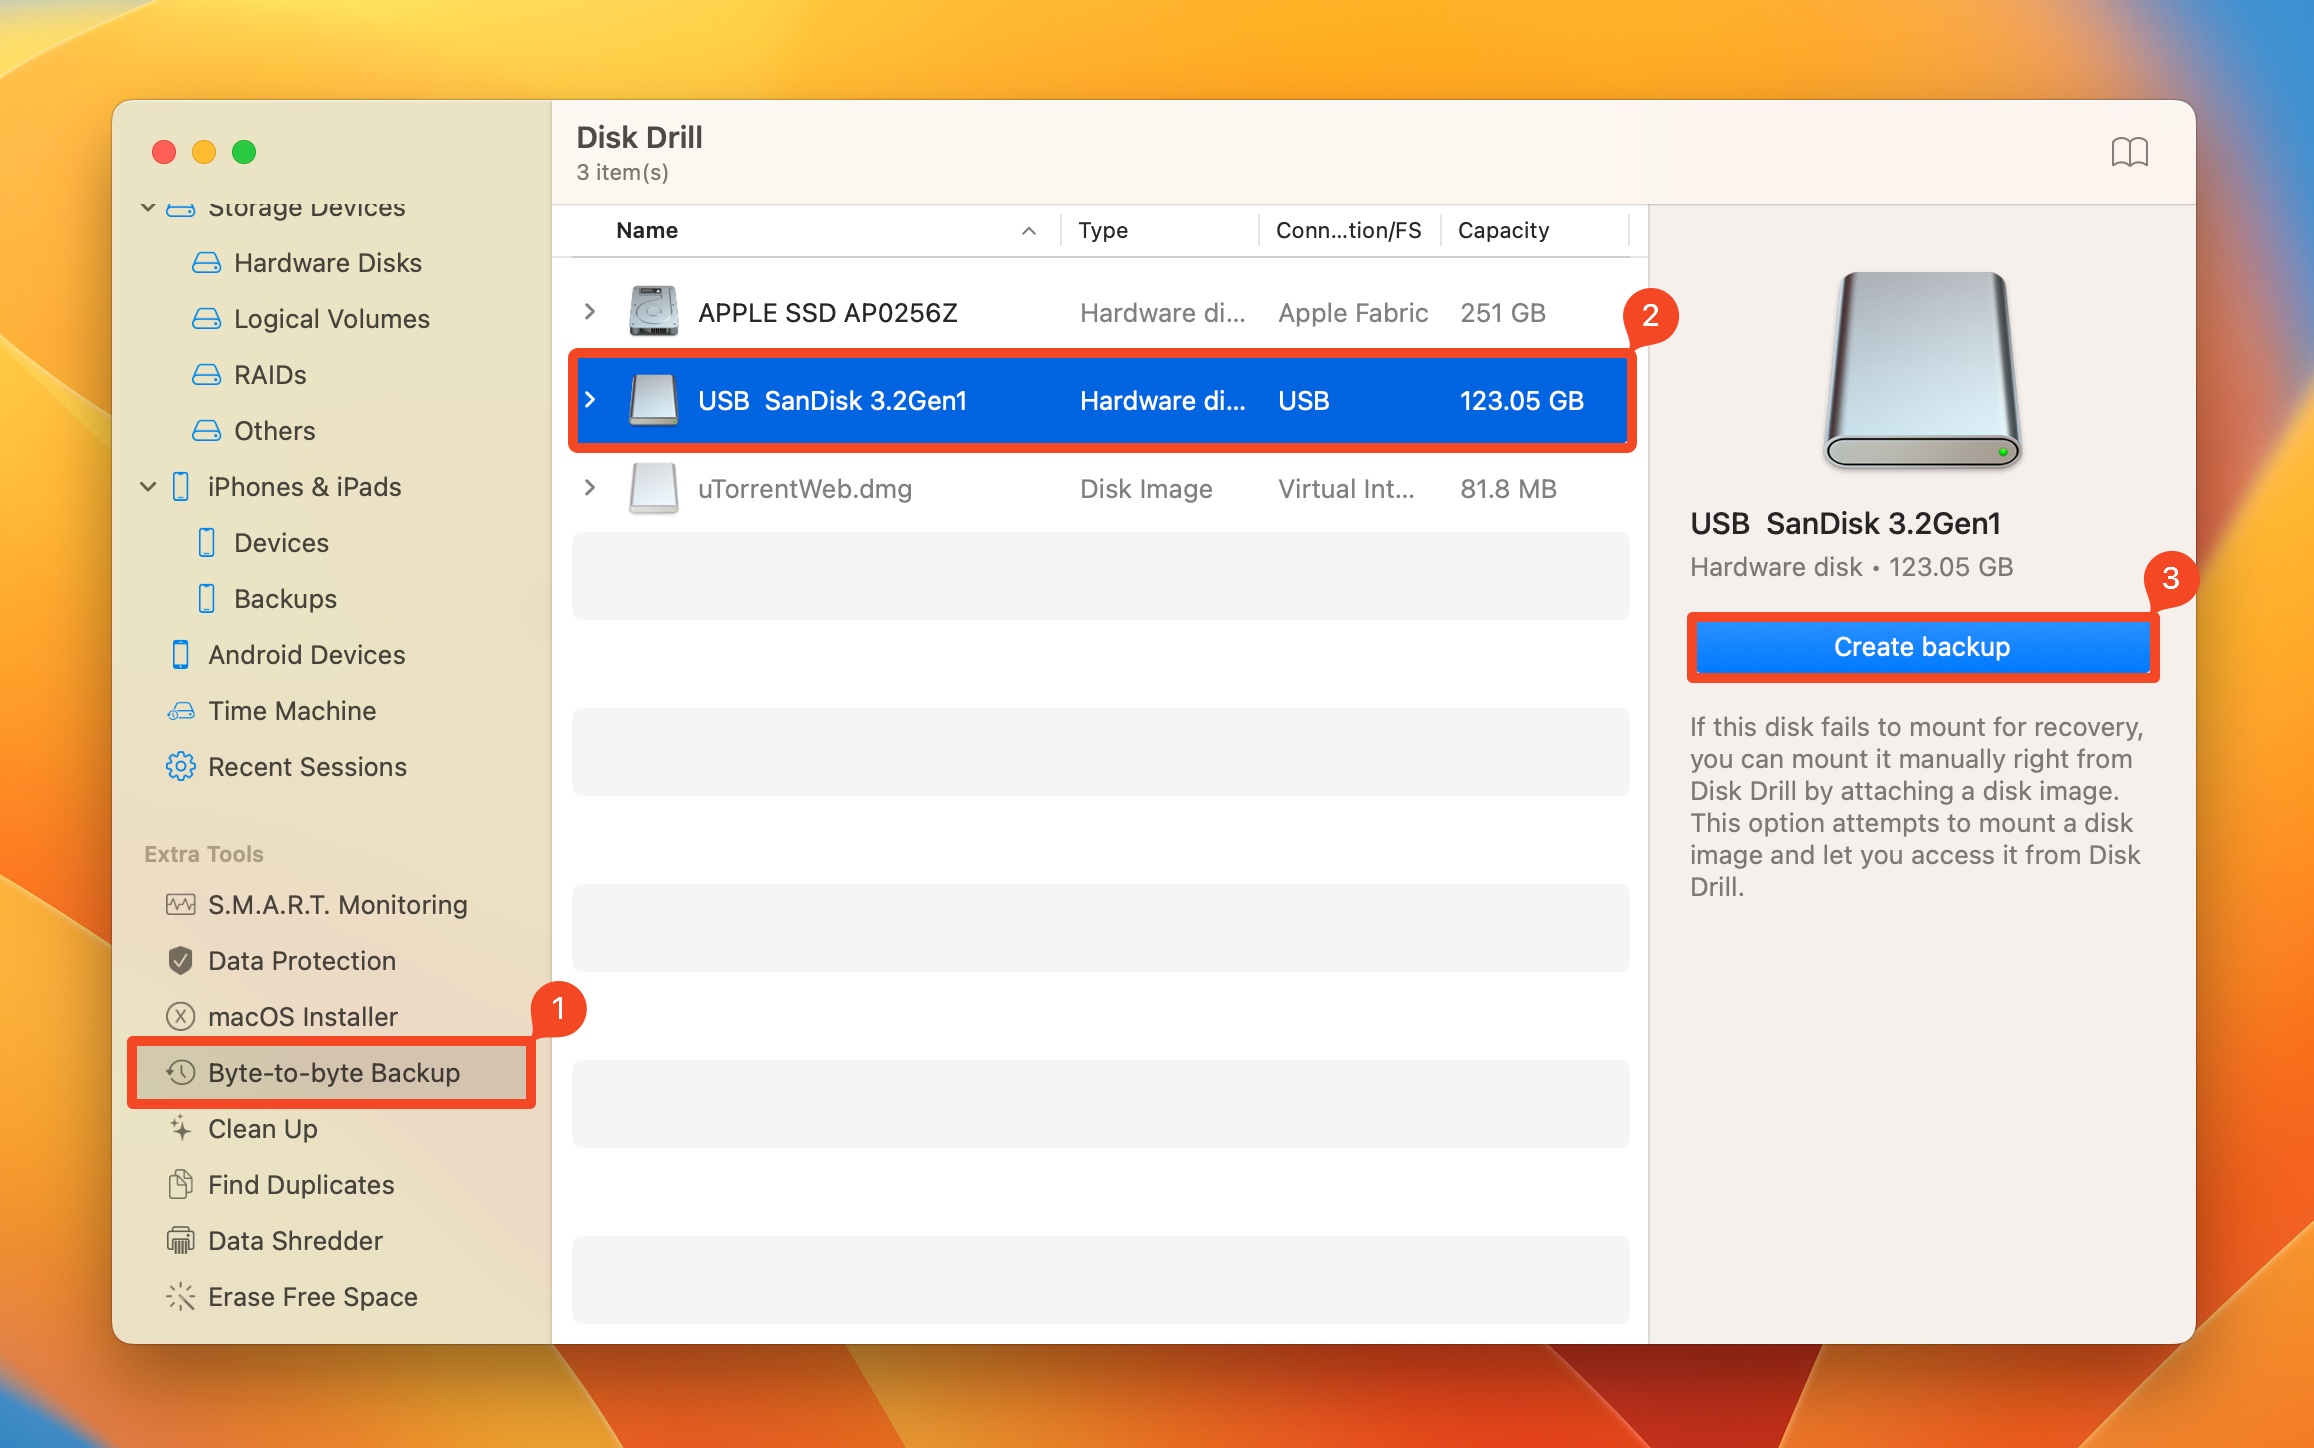
- Open Disk Drill, and click on the Byte-to-byte Backup option under Extra Tools. You can find this in the left navigation bar.
- Select the read-only external hard drive and choose Create backup.
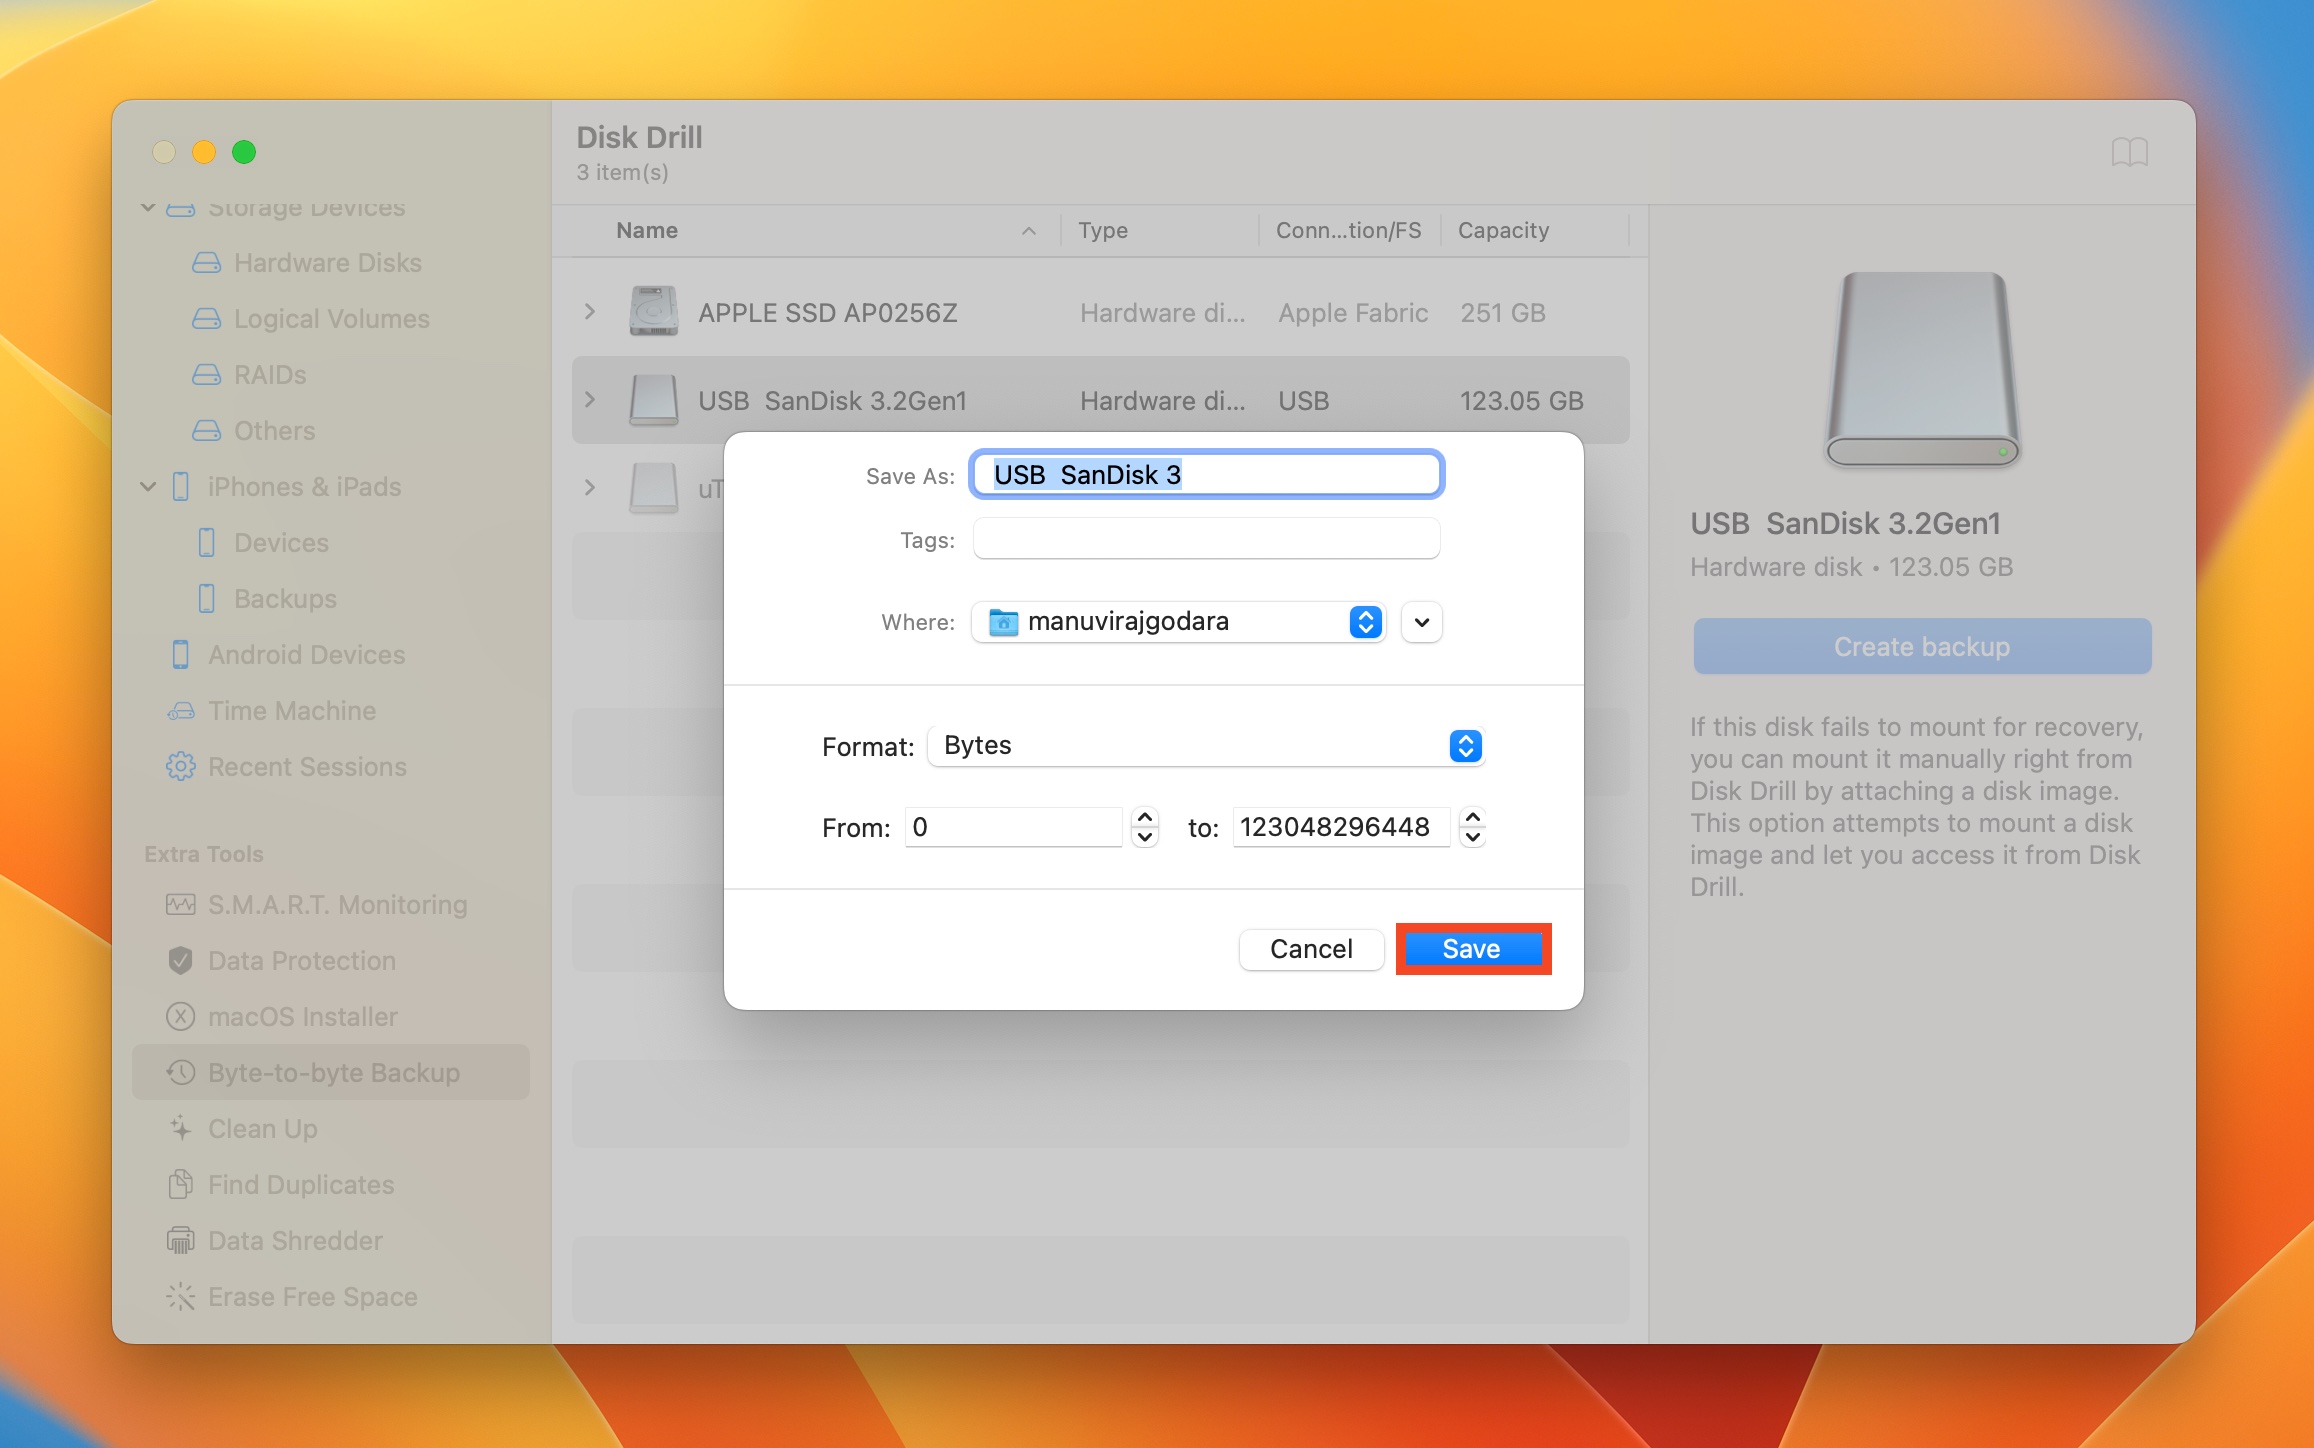
- Choose where you want to save the disk image. The destination should have enough free space to store the entire external hard drive. Click Save.
Step 2: Scan the Drive/Disk Image for Recoverable Data (Required)
Data recovery in Disk Drill is simple–select the drive, scan it, and choose the files you wish to recover. Here are step-by-step instructions to recover data from an external hard drive using Disk Drill:
- Download Disk Drill and install it if you haven’t already.
- Open Disk Drill and ensure you’re on the Storage Devices screen under Data Recovery.
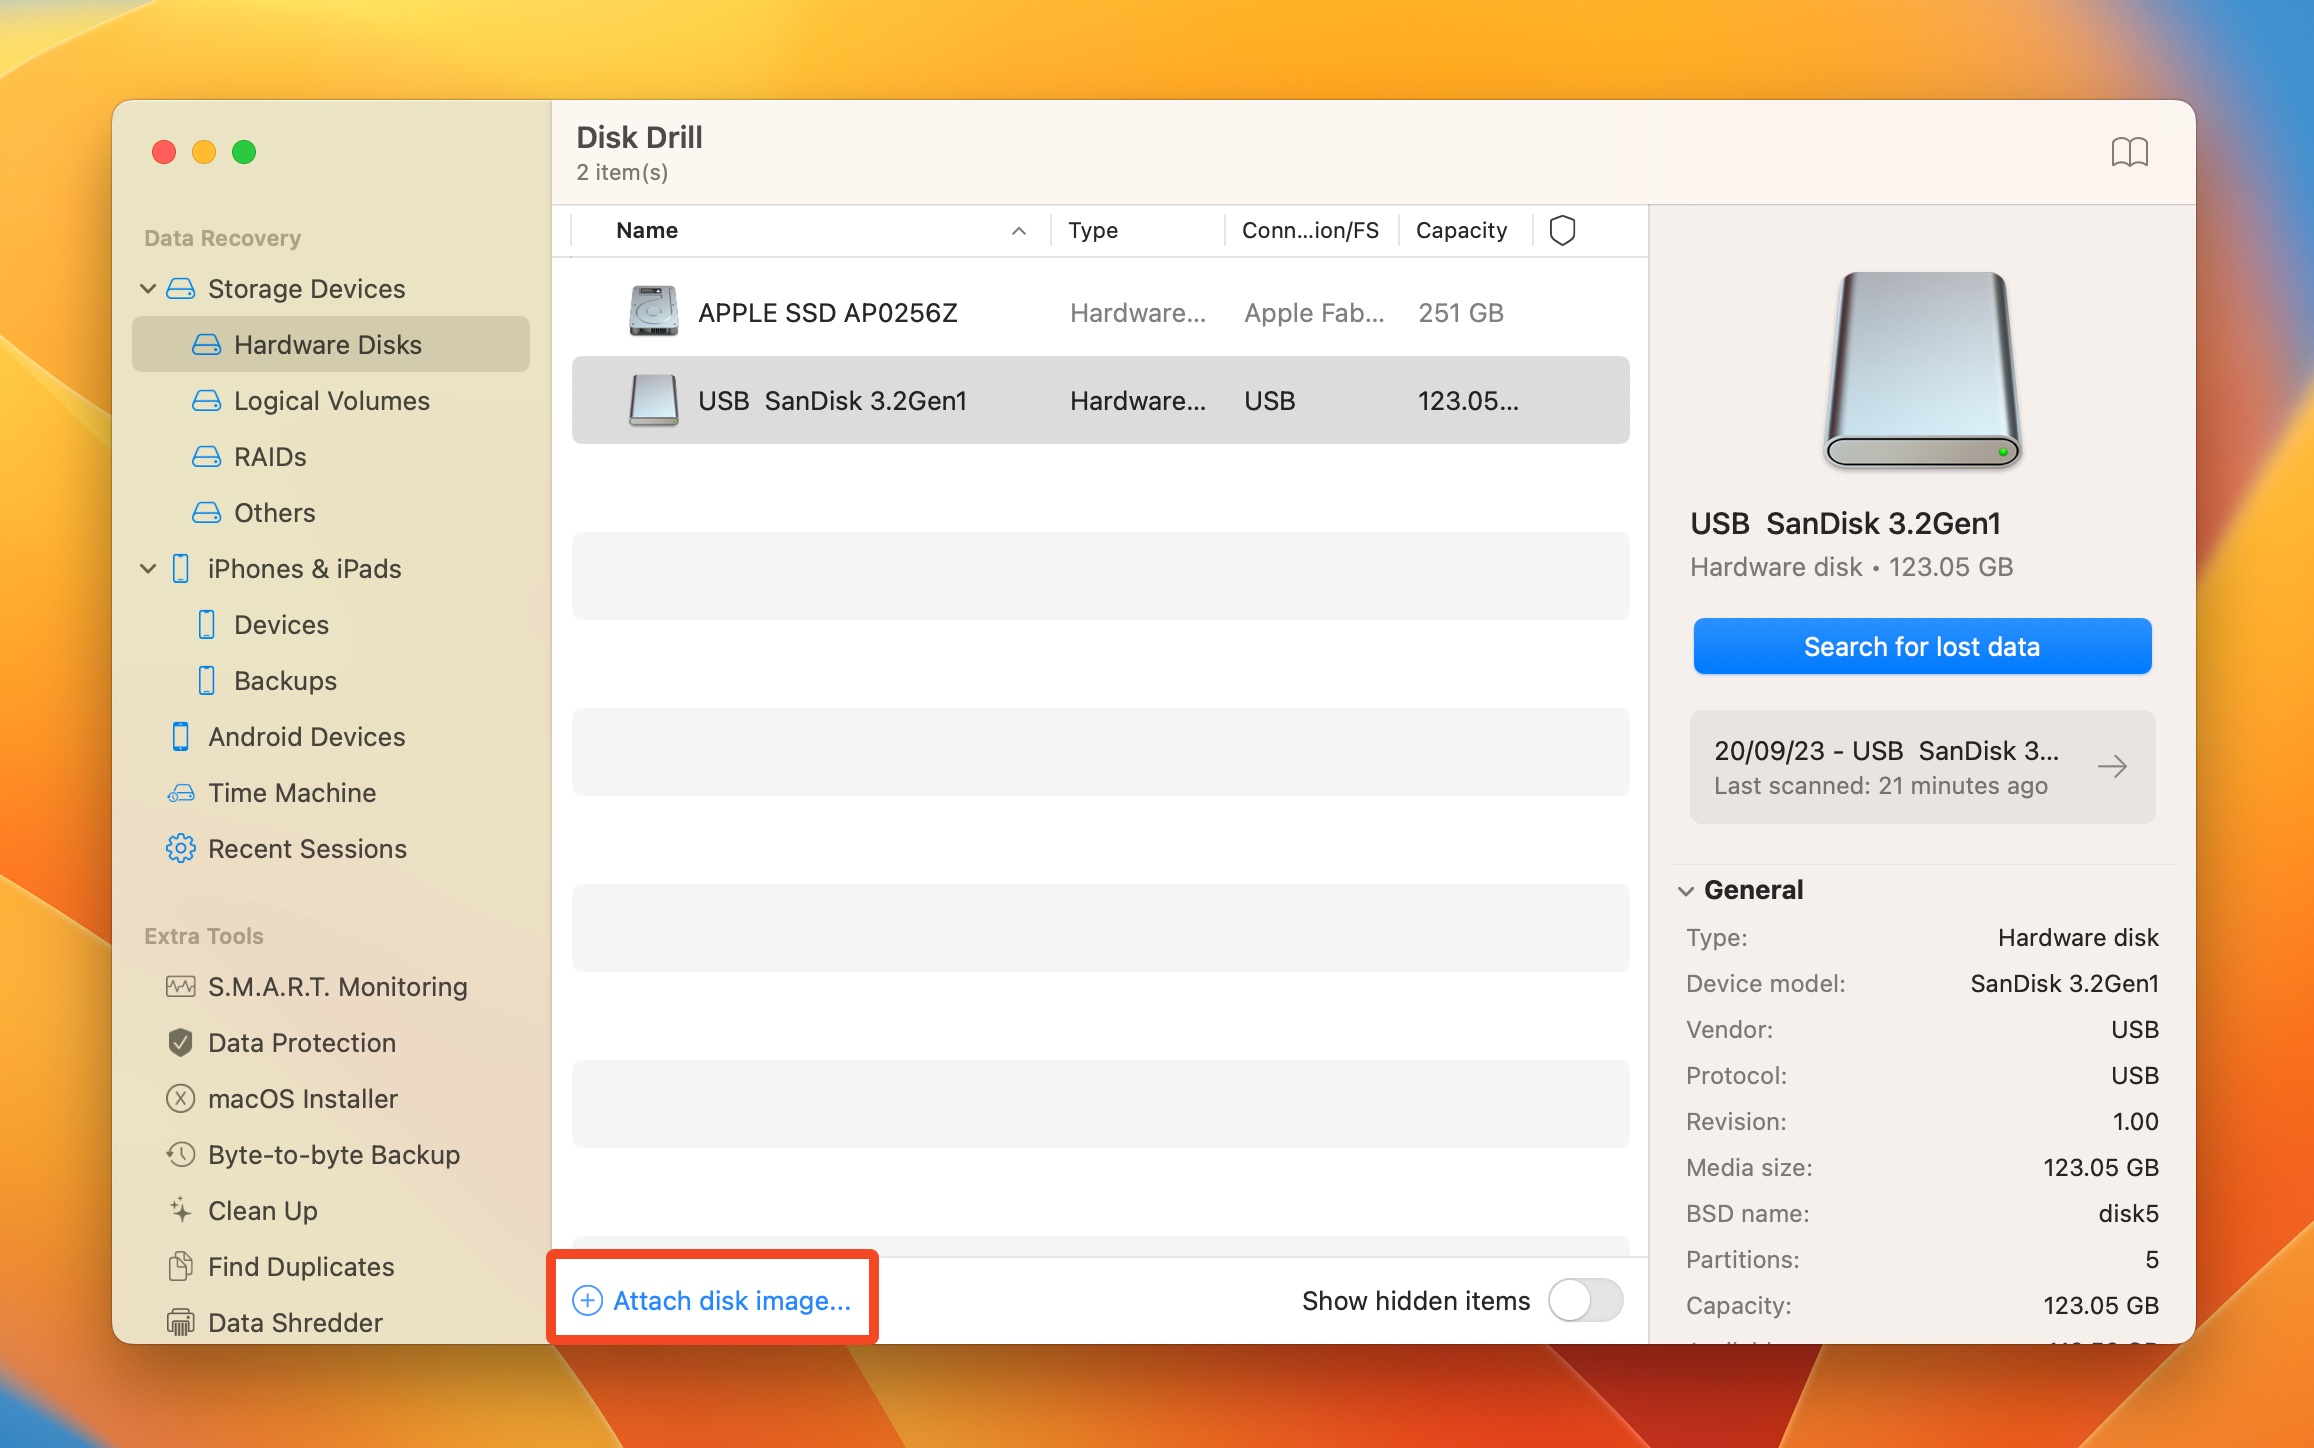
- If you created a disk image, click on Attach disk image, browse for the disk image and double-click on it. The disk image will show up as a mounted storage drive in Disk Drill.
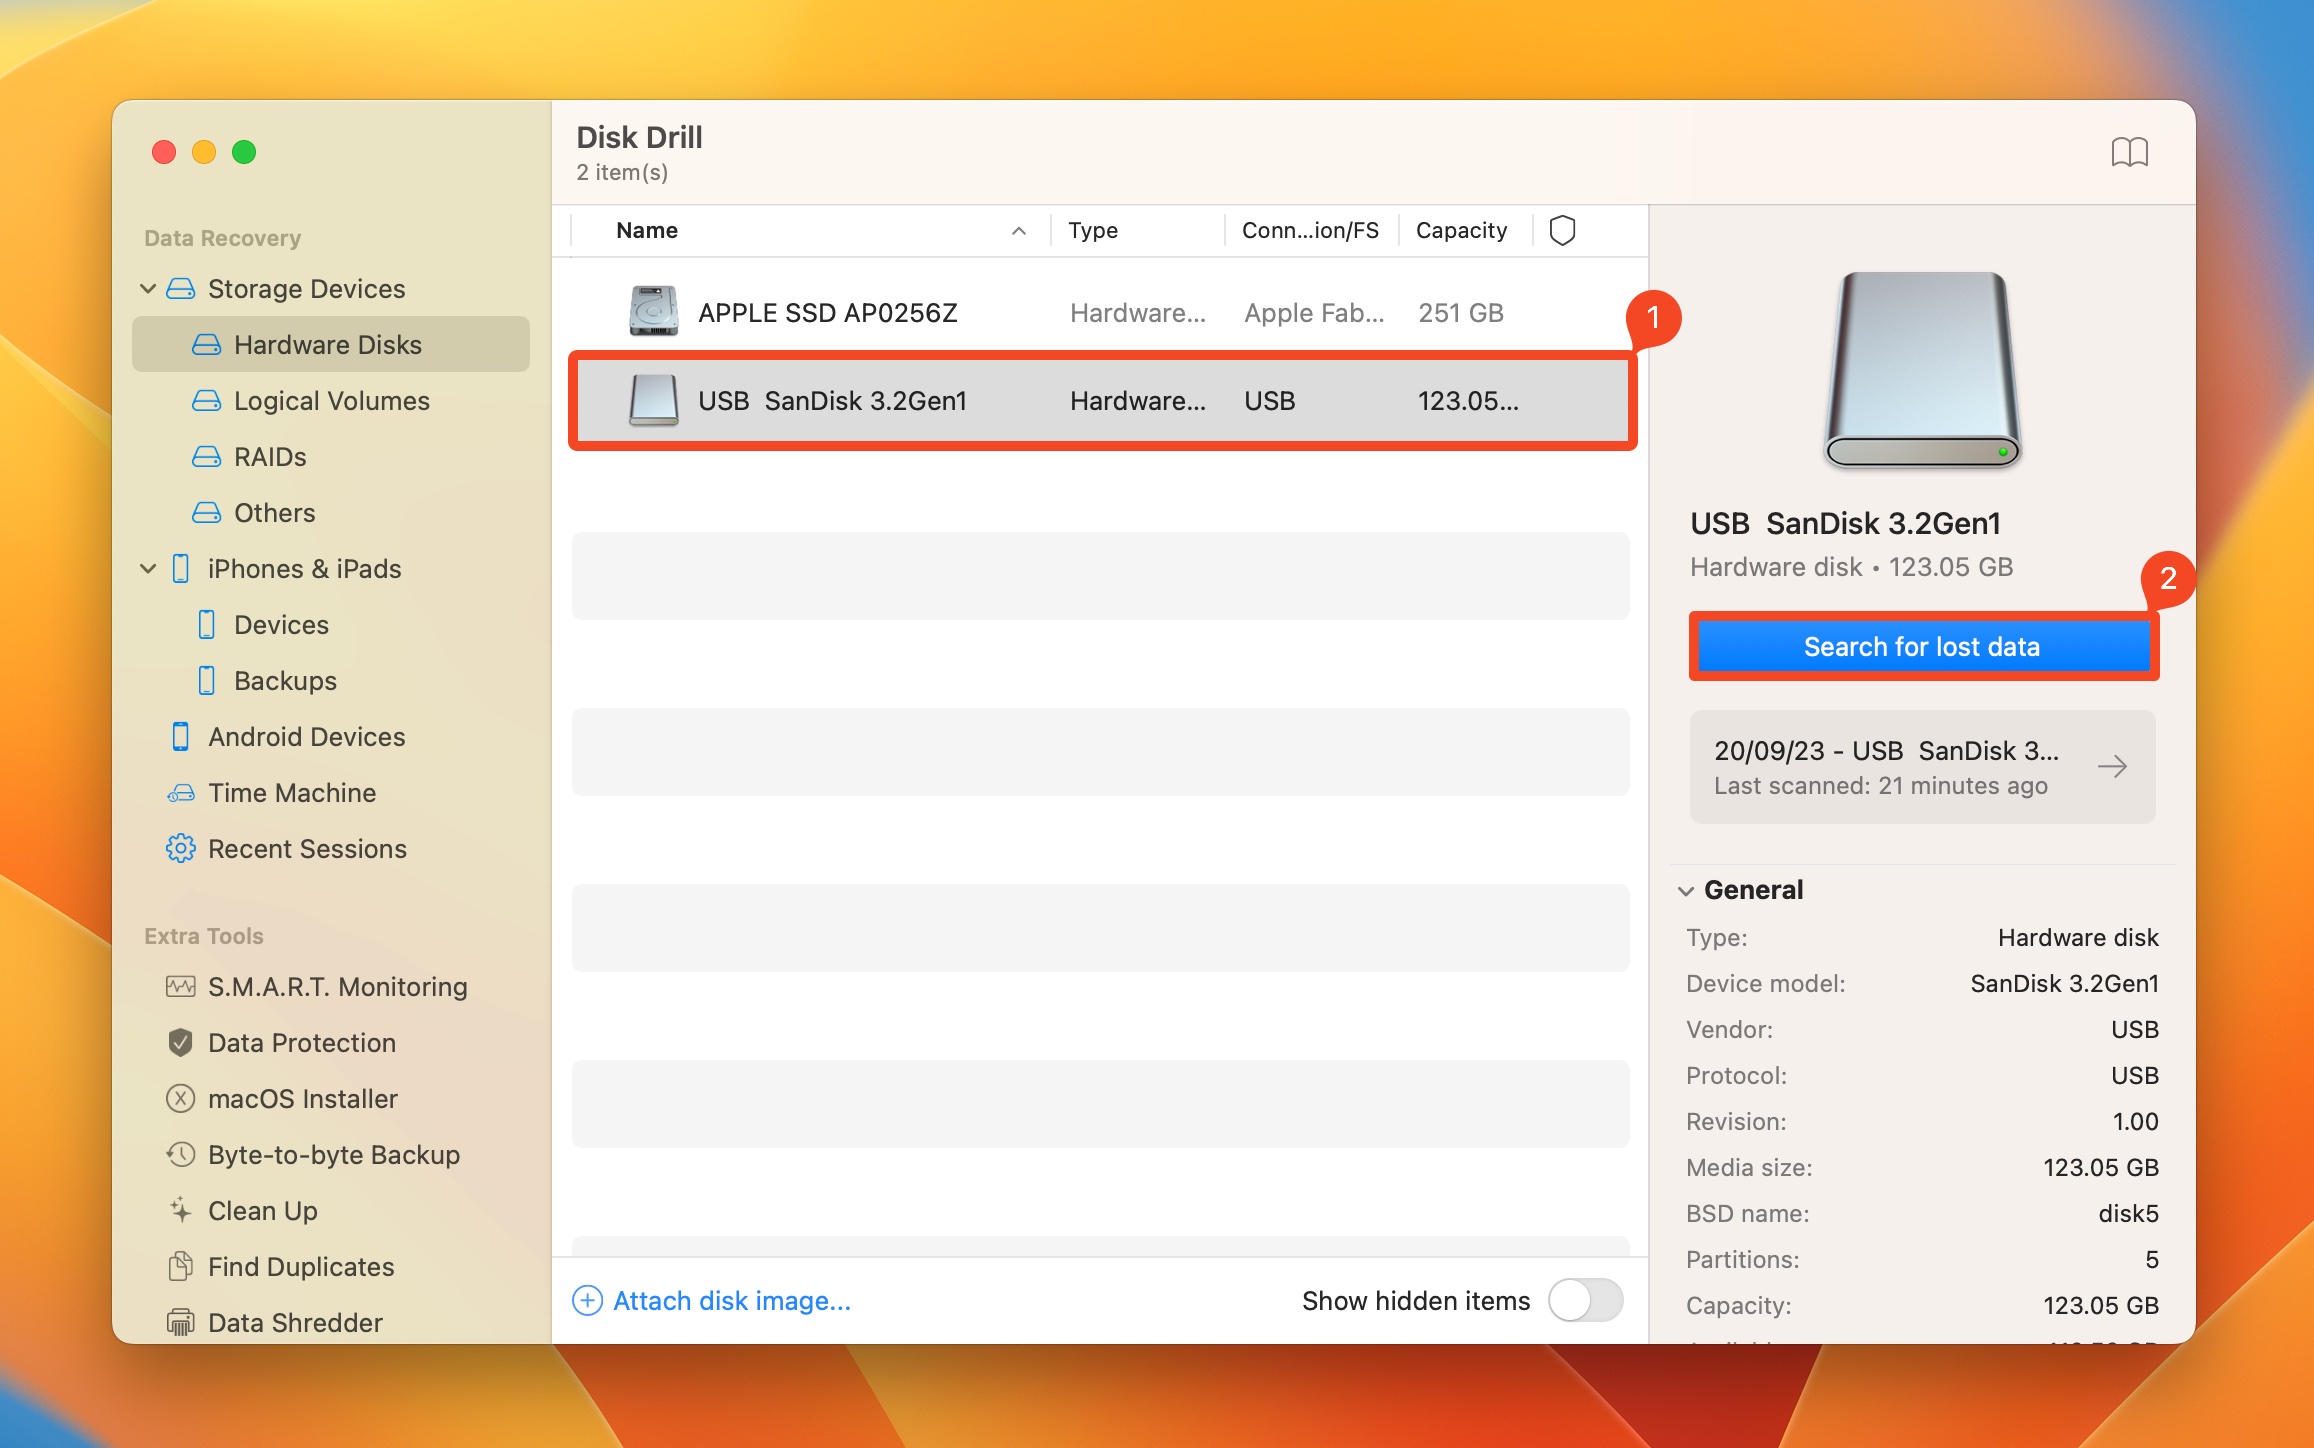
- Select the drive or the disk image and click on Search for lost data.
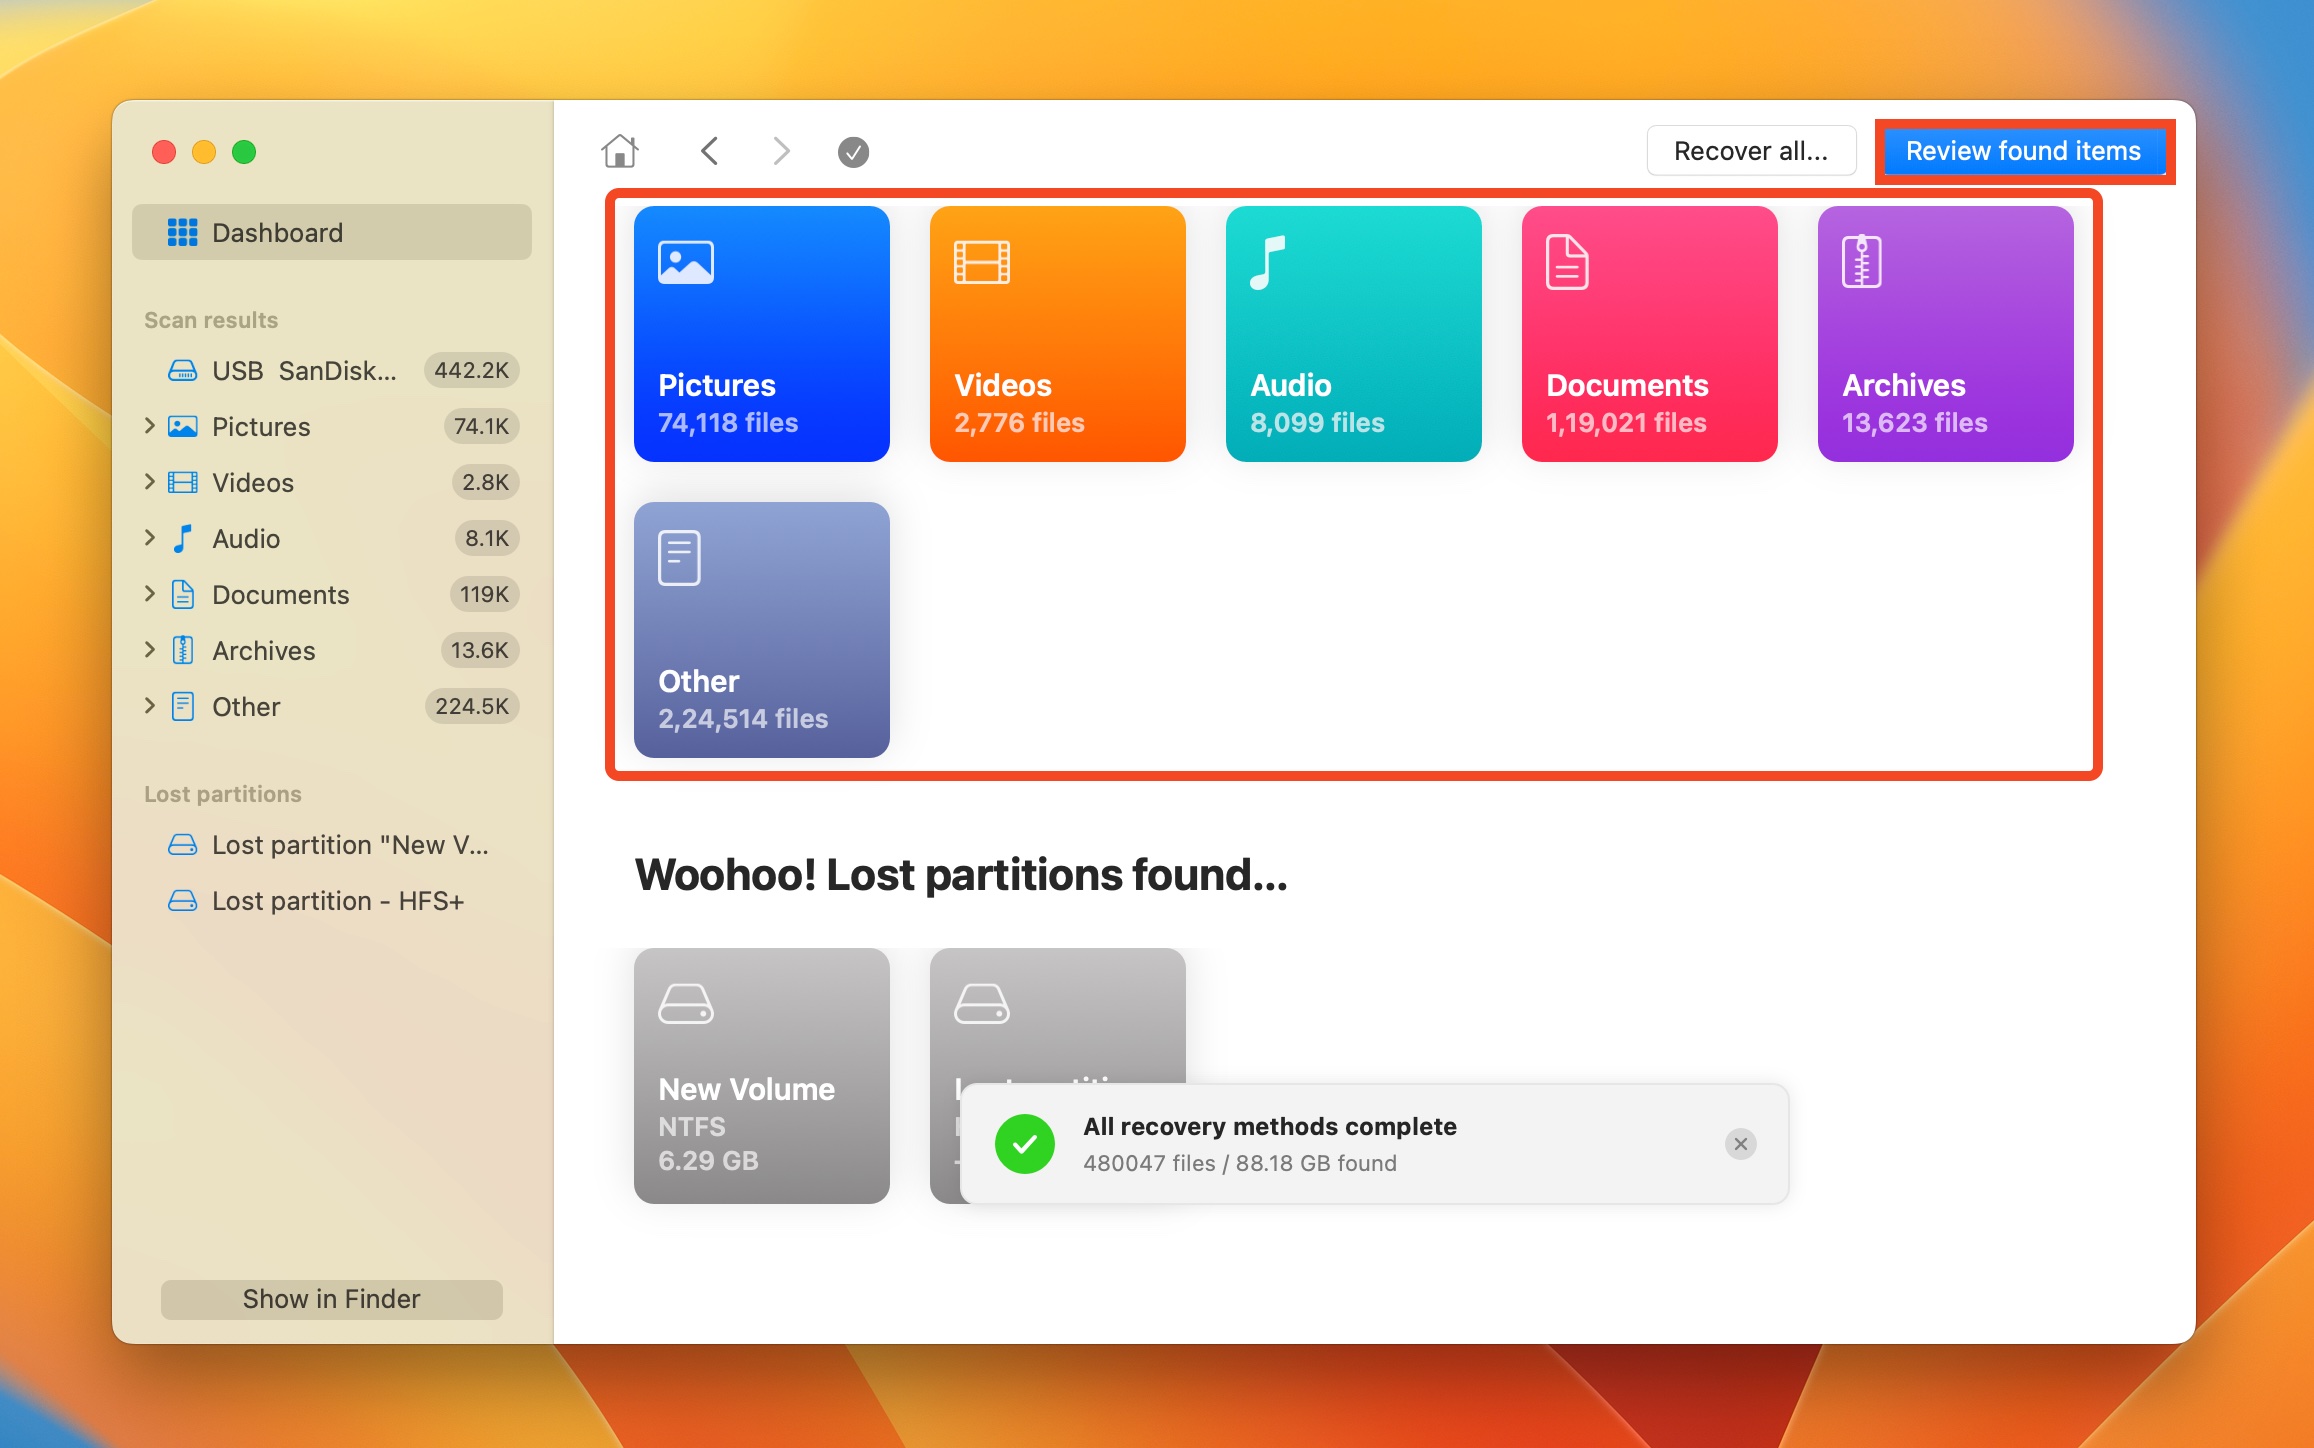
- Click on Review found items to view all recoverable files. If you wish to only view certain file types, click on the relevant filetype tile instead (Pictures, Video, Audio, Documents, Archives, and Other).
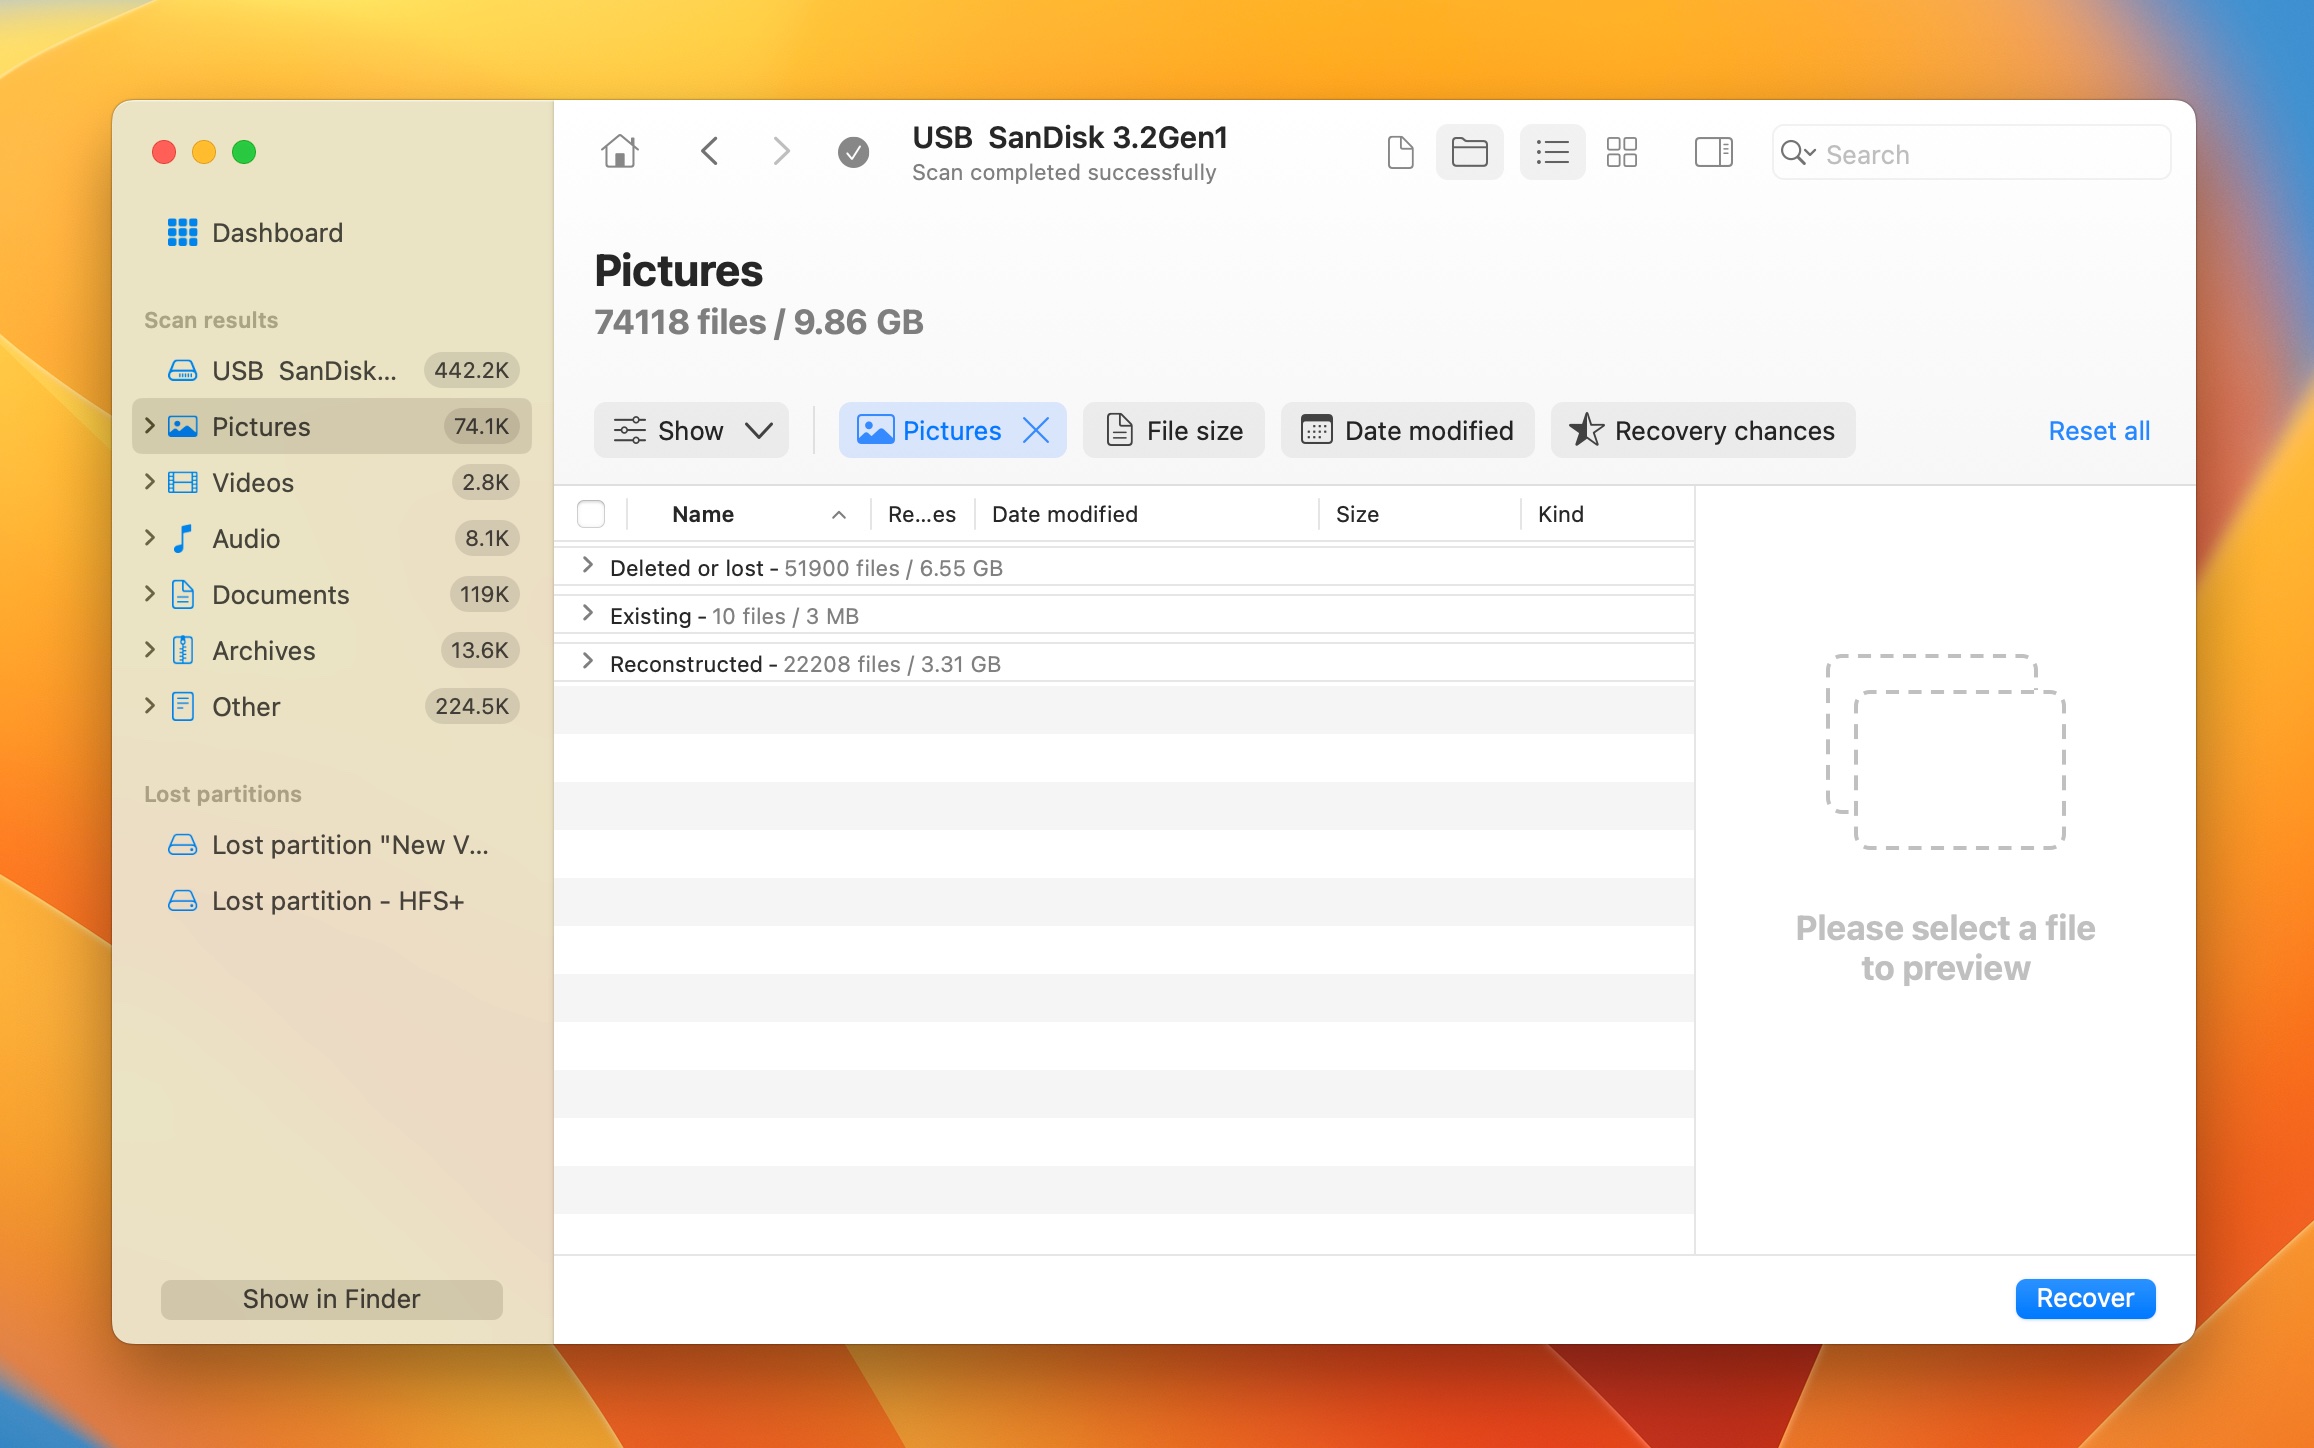
- Expand the Existing section to view the currently stored files on the disk. To view deleted files that are recoverable, expand the Deleted or lost and Reconstructed sections.
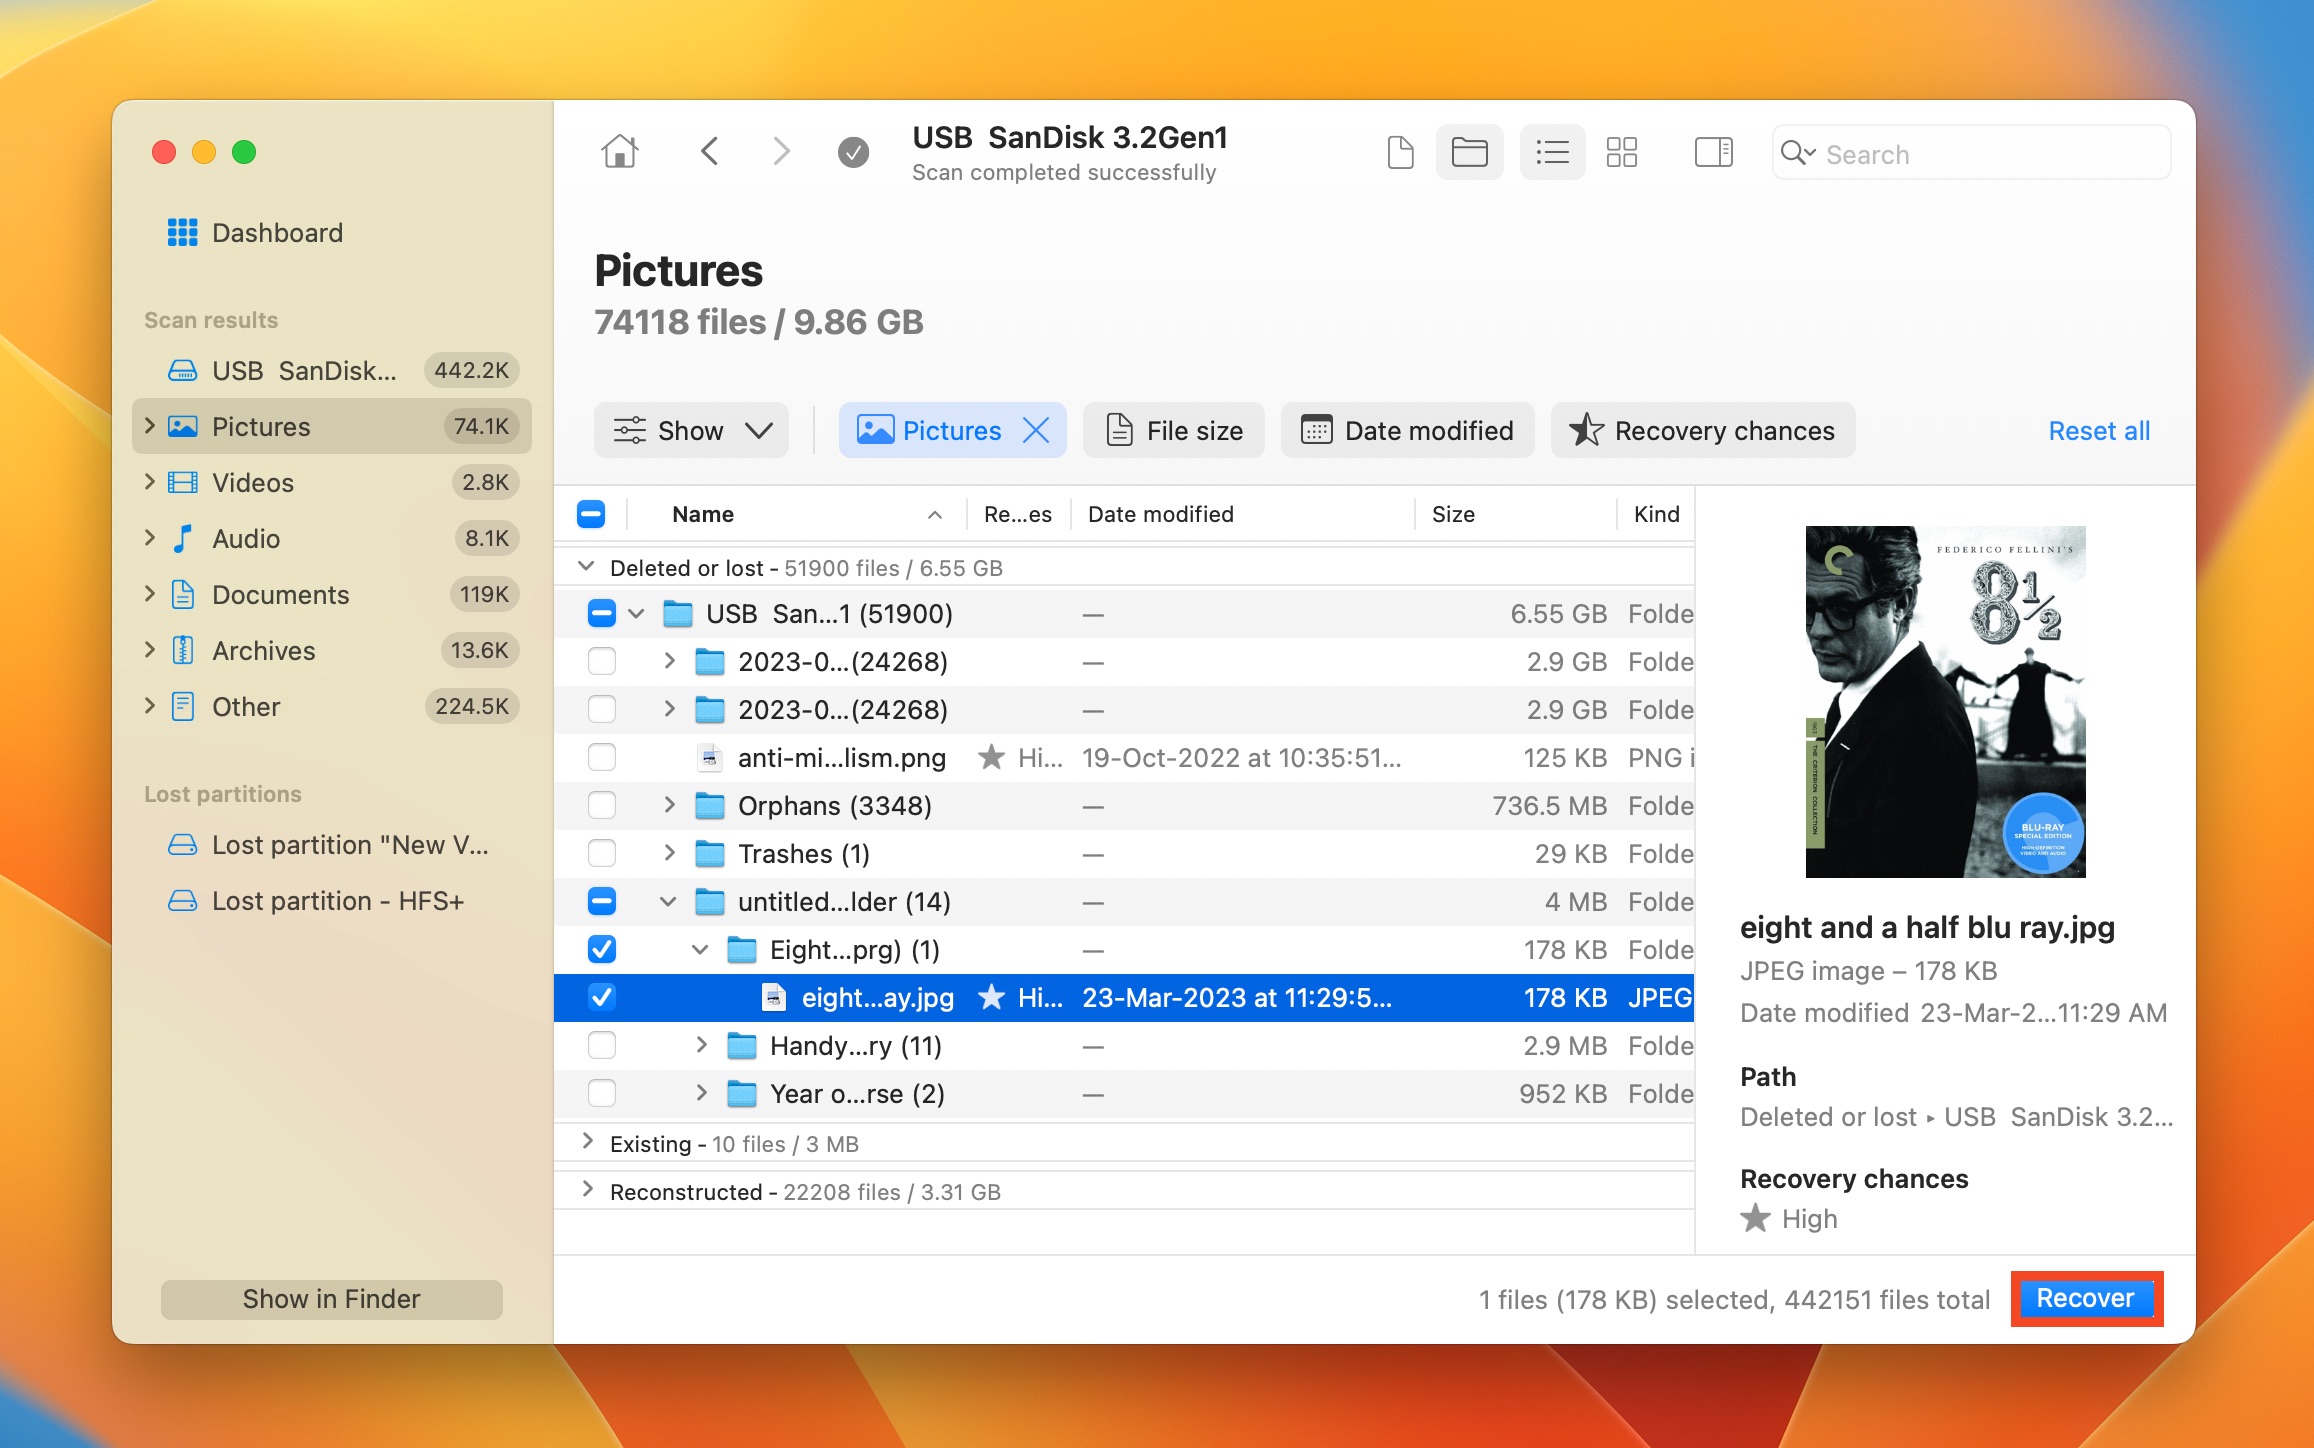
- Select the files you wish to recover. Disk Drill will display a preview of the currently selected file, but you can manually preview any file by clicking on the eye icon next to its filename. Click on Recover once you’ve confirmed the selection.
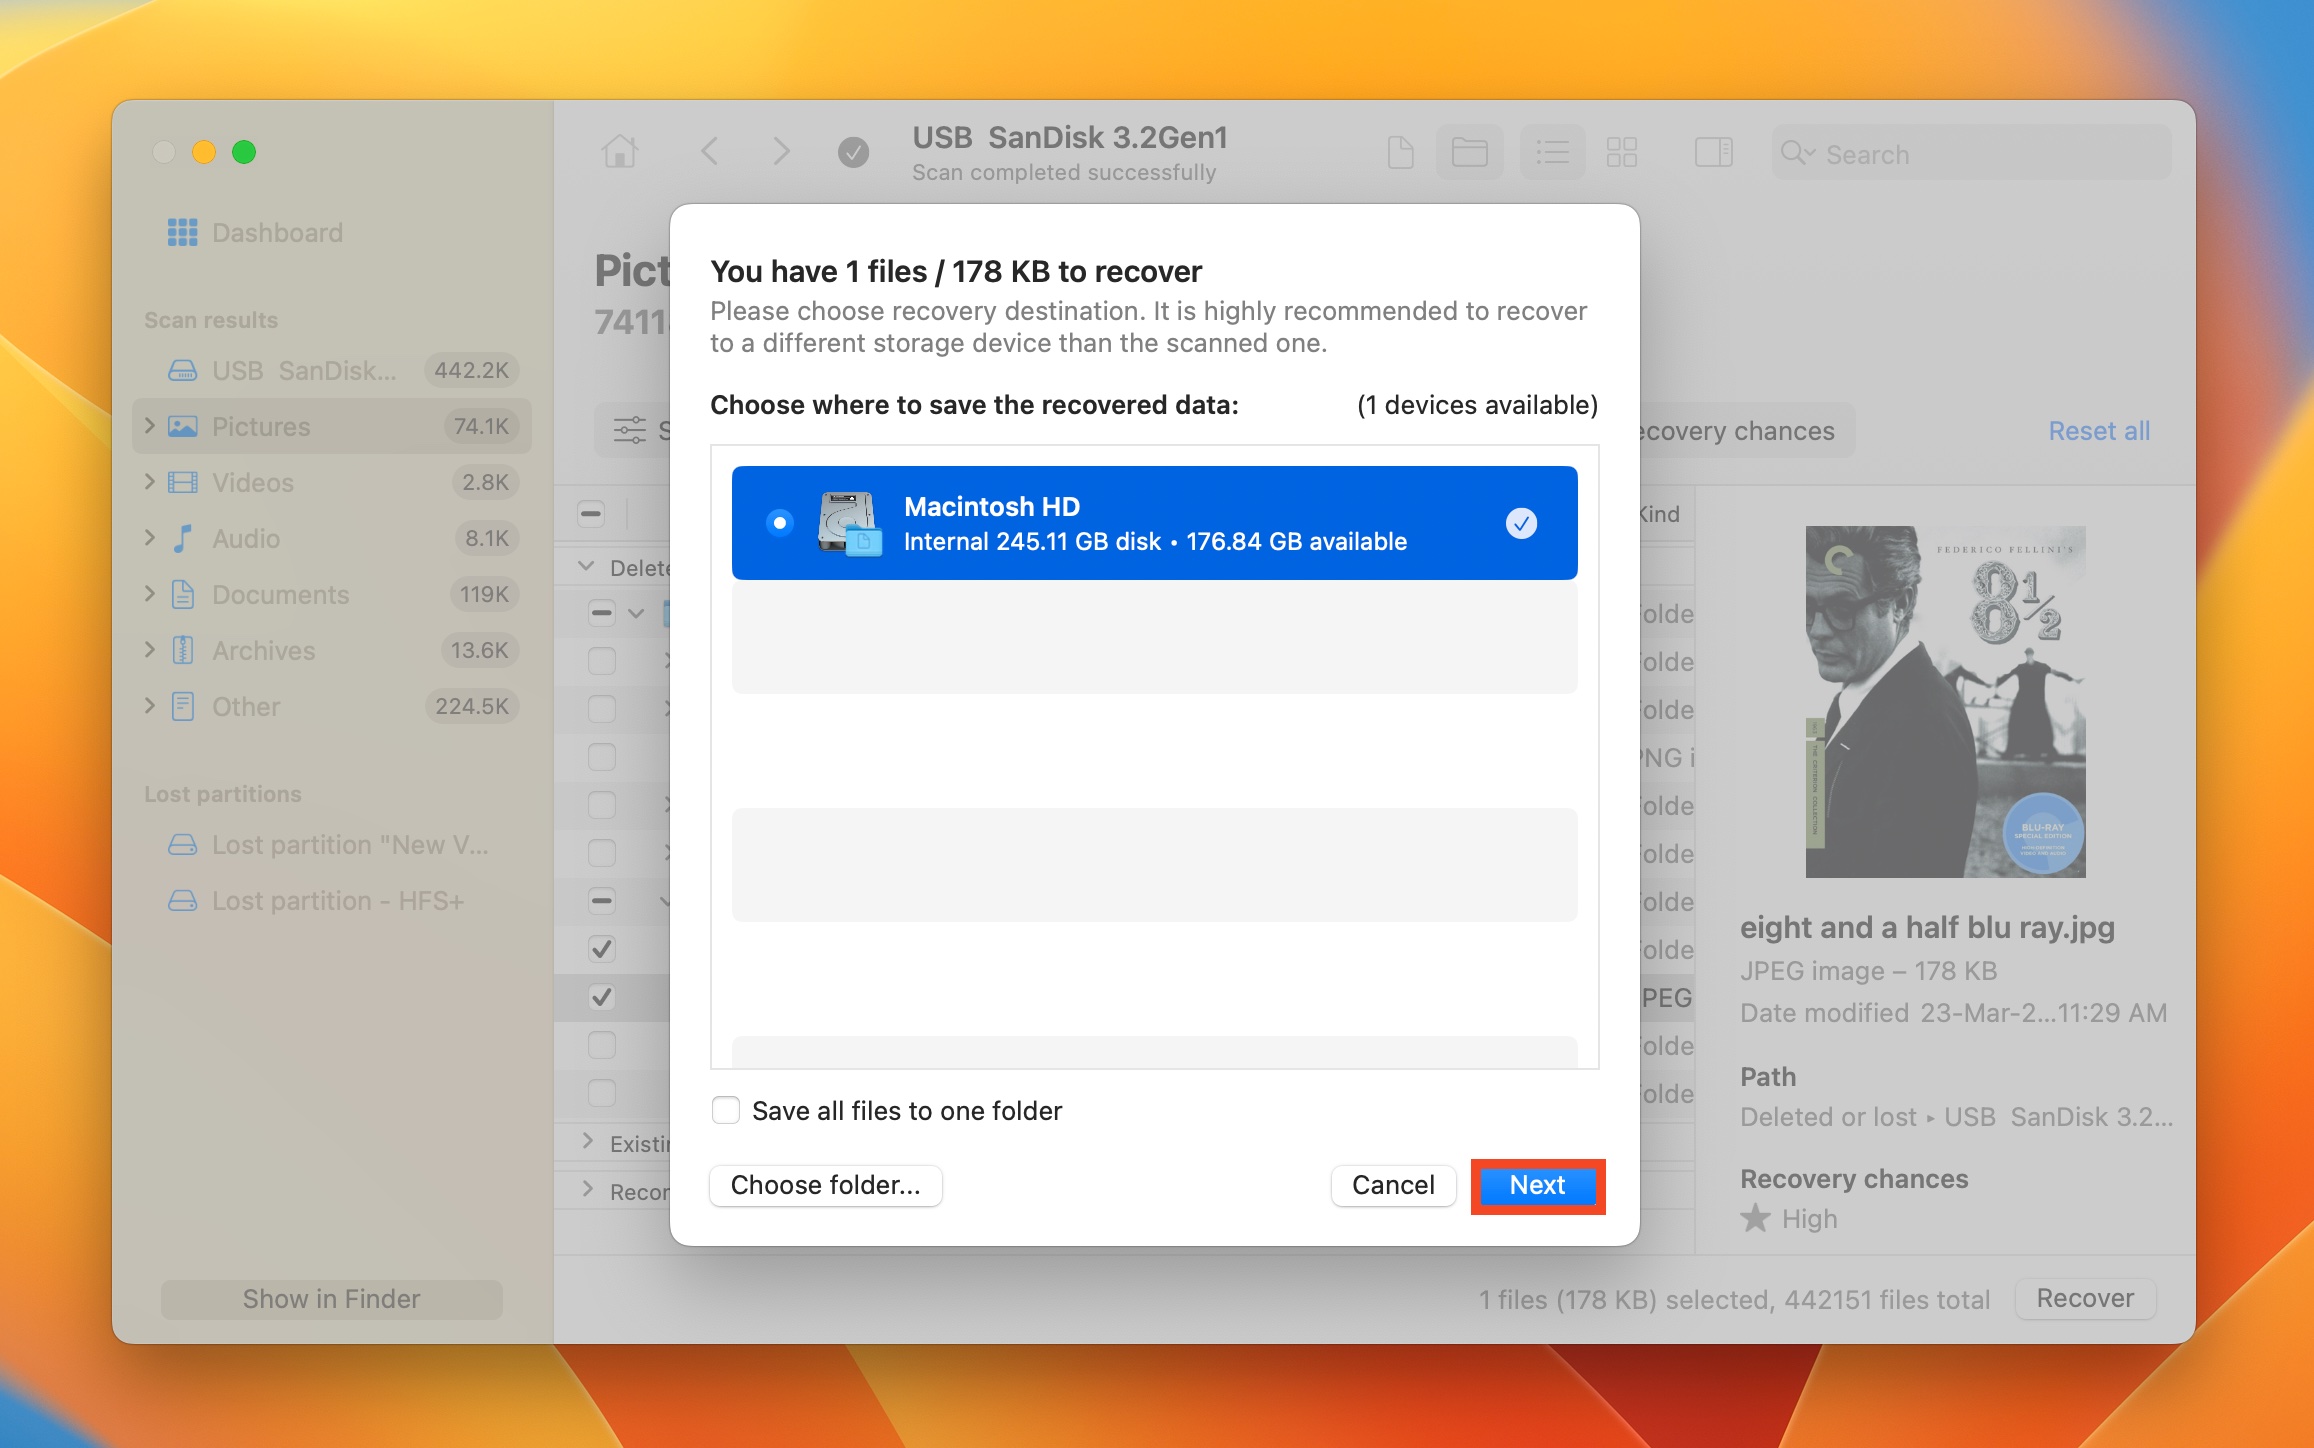
- Choose a recovery destination for the files and click Next.
- Disk Drill will recover the selected files. You will need to purchase Disk Drill Pro to proceed with recovery, since Disk Drill for macOS doesn’t come with a free trial.
3 Ways to Fix the Read-Only Status for an External Drive on Mac
Using the in-built tools on a Mac, you can easily fix an external hard drive that’s read-only. If none of these methods bear any fruit, it’s better to use the services of your local computer store or data recovery company.
Let’s take a look at the fixes:
Method 1: Manually Change the Drive Permissions
It’s quite possible that the drive has been configured to be read-only in macOS’ sharing and permission settings. Your drive may be perfectly fine otherwise, but you won’t be able to write data to it, until the permission privileges are set to Read & Write.
Here’s how to change the permissions on an external hard drive on macOS:
- Connect the external hard drive to your Mac.
- Open Finder, right-click on the external hard drive and choose Get Info.
- Expand the Sharing & Permissions menu.
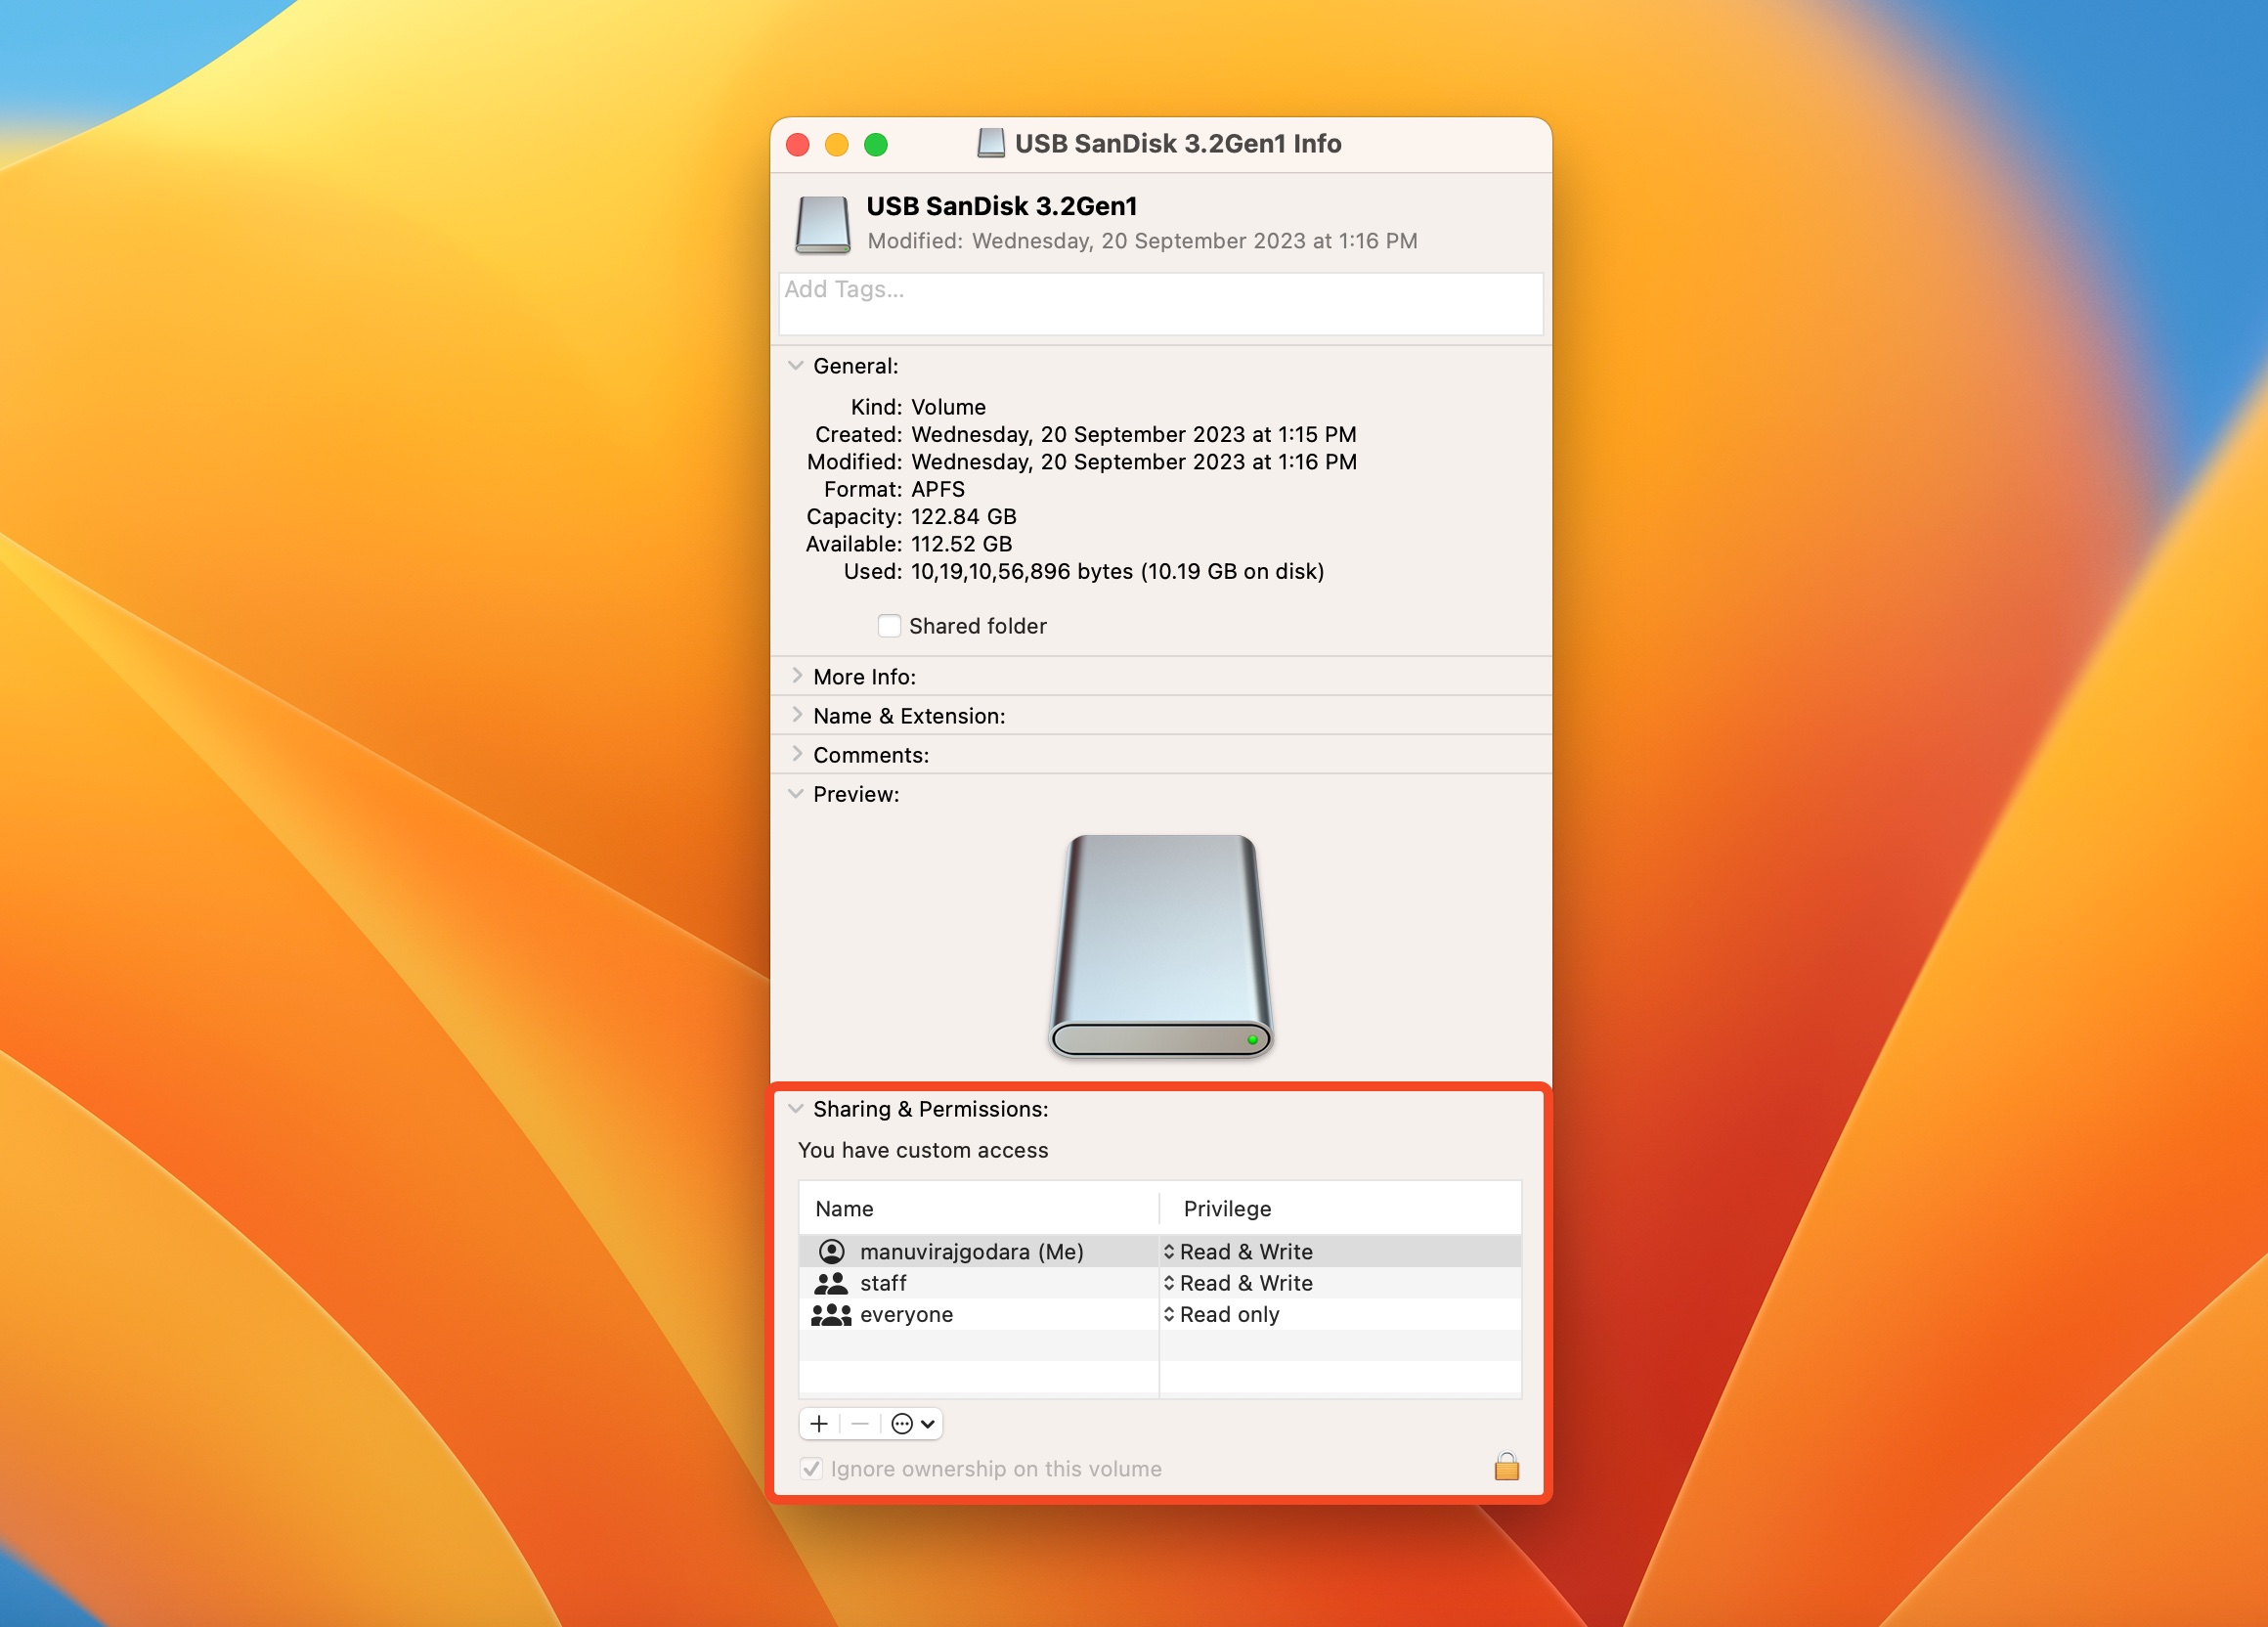
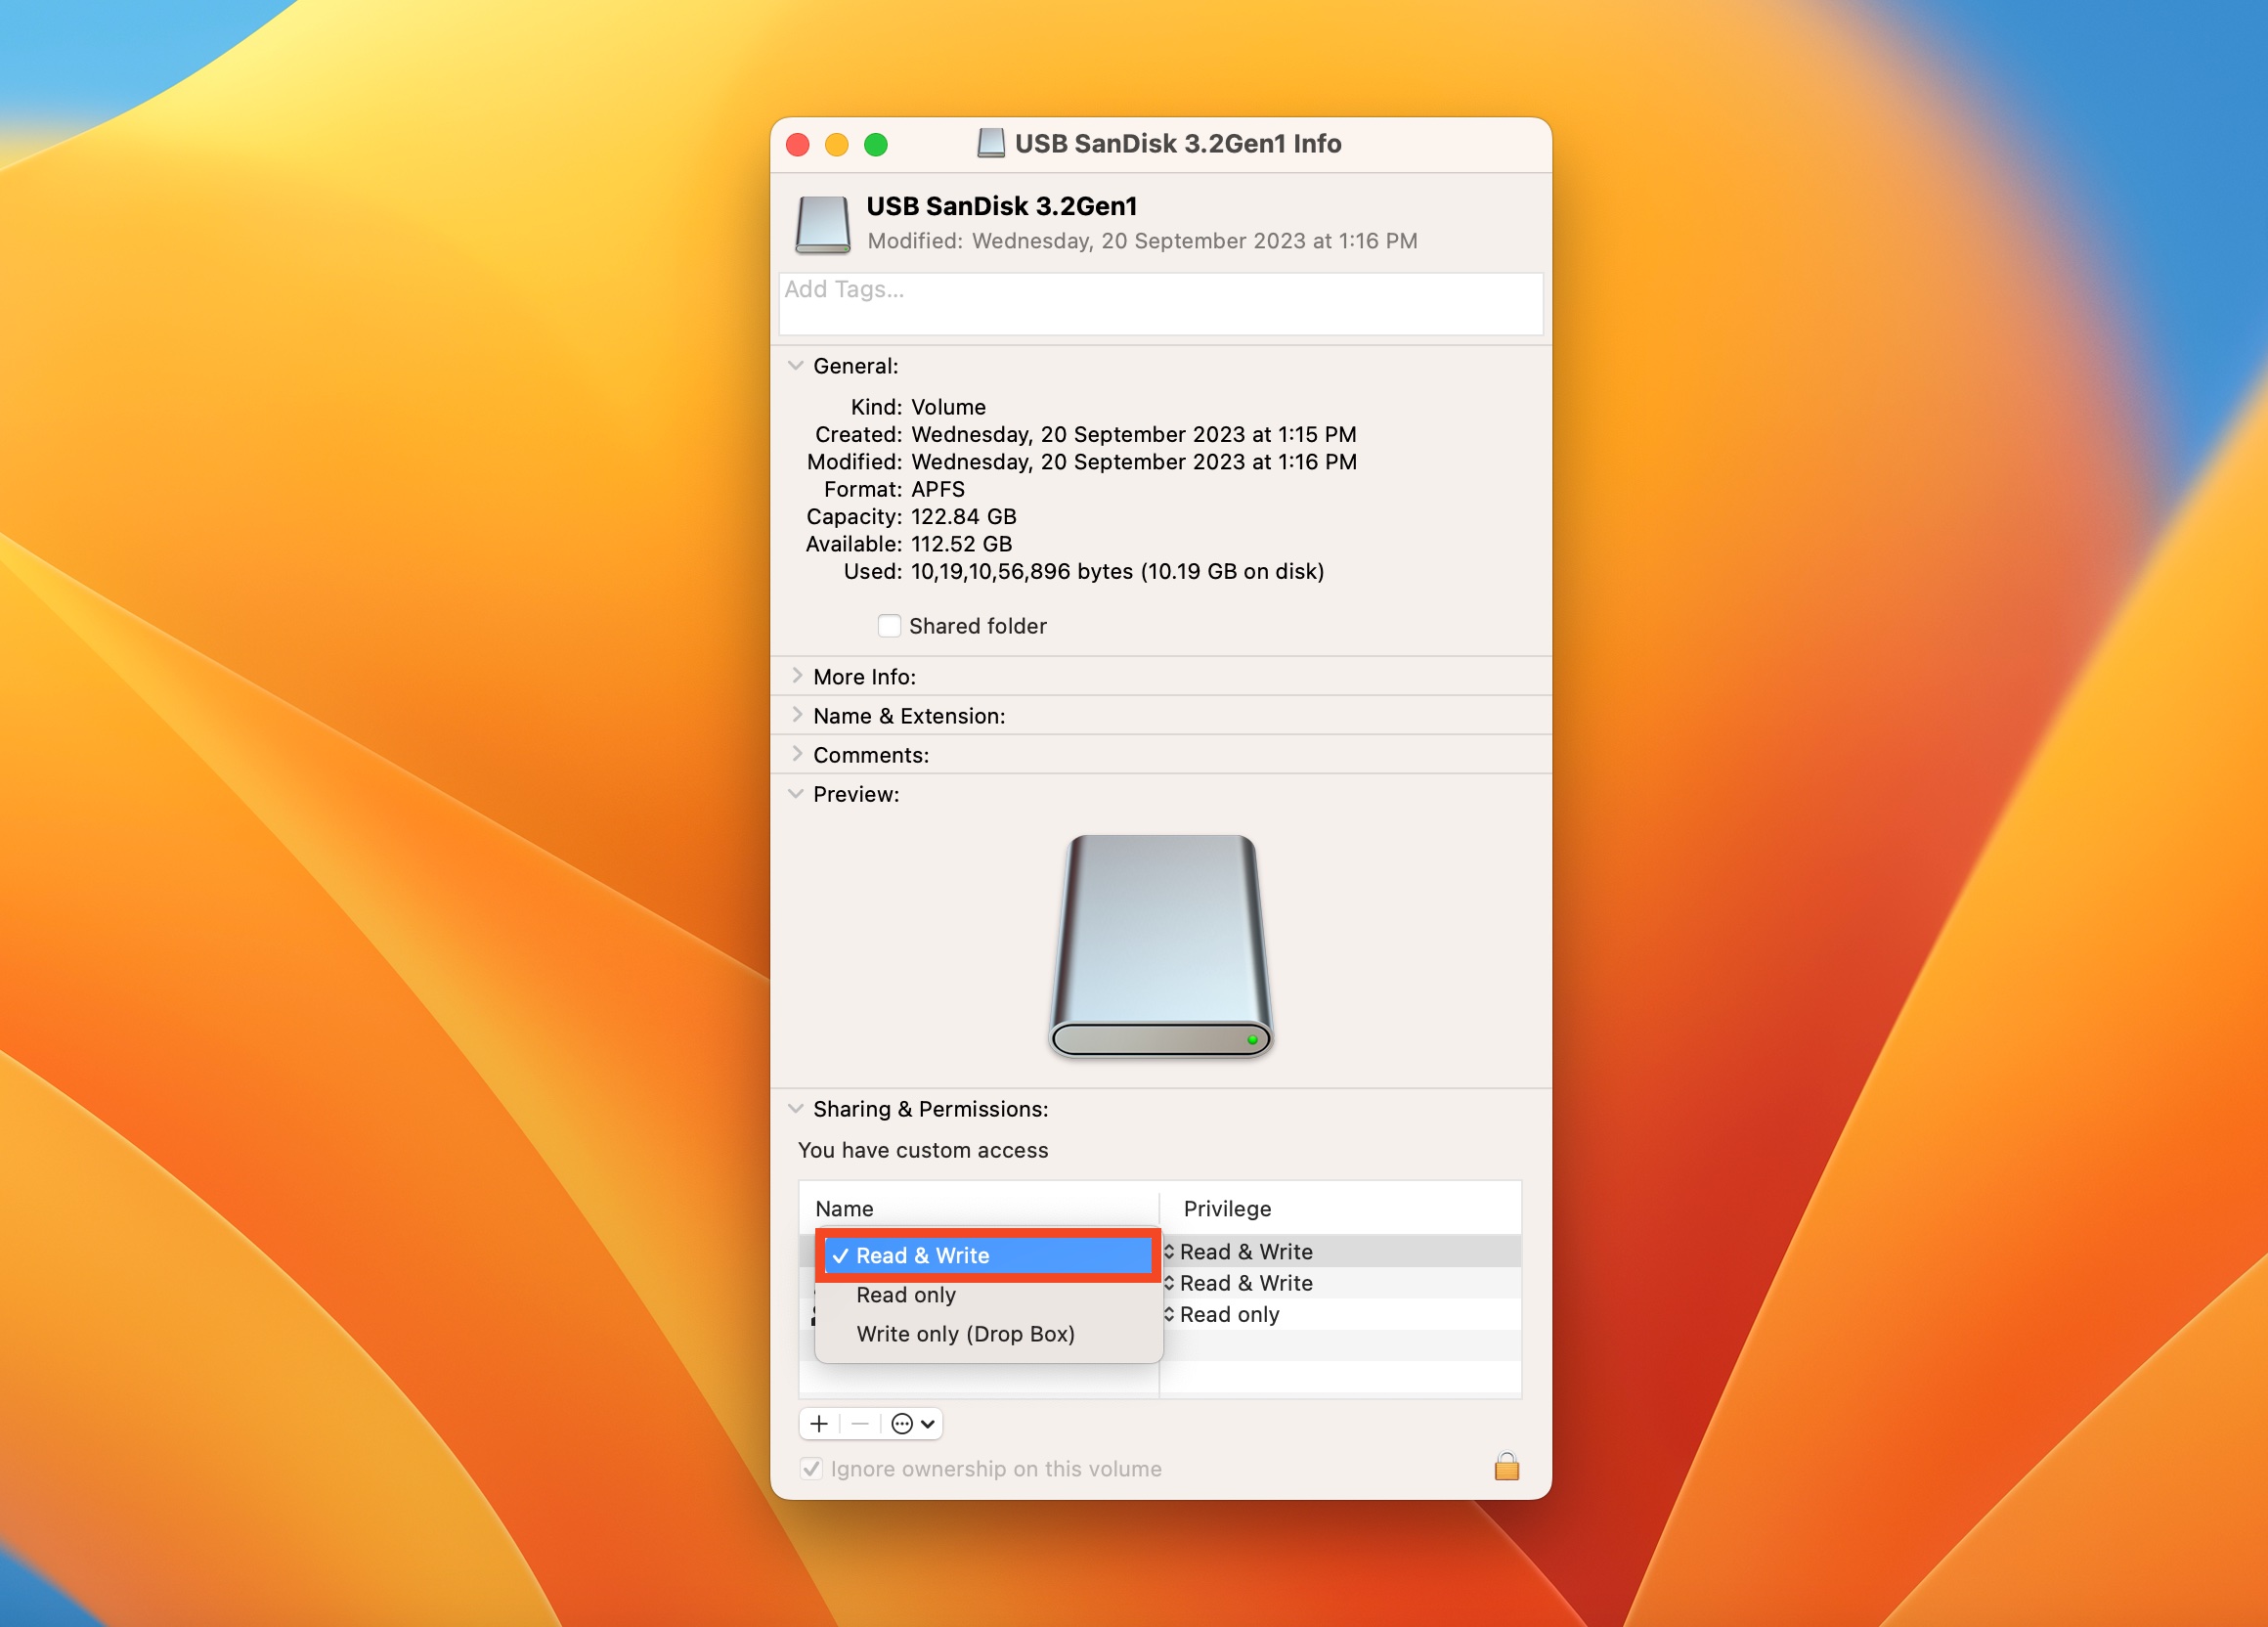
- Click on the permission status under the Privilege column, next to your username. Set it to Read & Write.
- Close the window and see if you can write to the drive.
Method 2: Use the First Aid Utility
Your Mac has an in-built feature, called First Aid, that can detect and fix common logical issues on your hard drive. It’s advisable to use this feature if you suspect that your drive is corrupted. Some common symptoms of logical corruption include–slow performance, random disappearance of data, frequent crashes, and, of course, the drive suddenly becoming read-only.
Here’s how to use First Aid in macOS and potentially fix an external hard drive that’s become read-only:
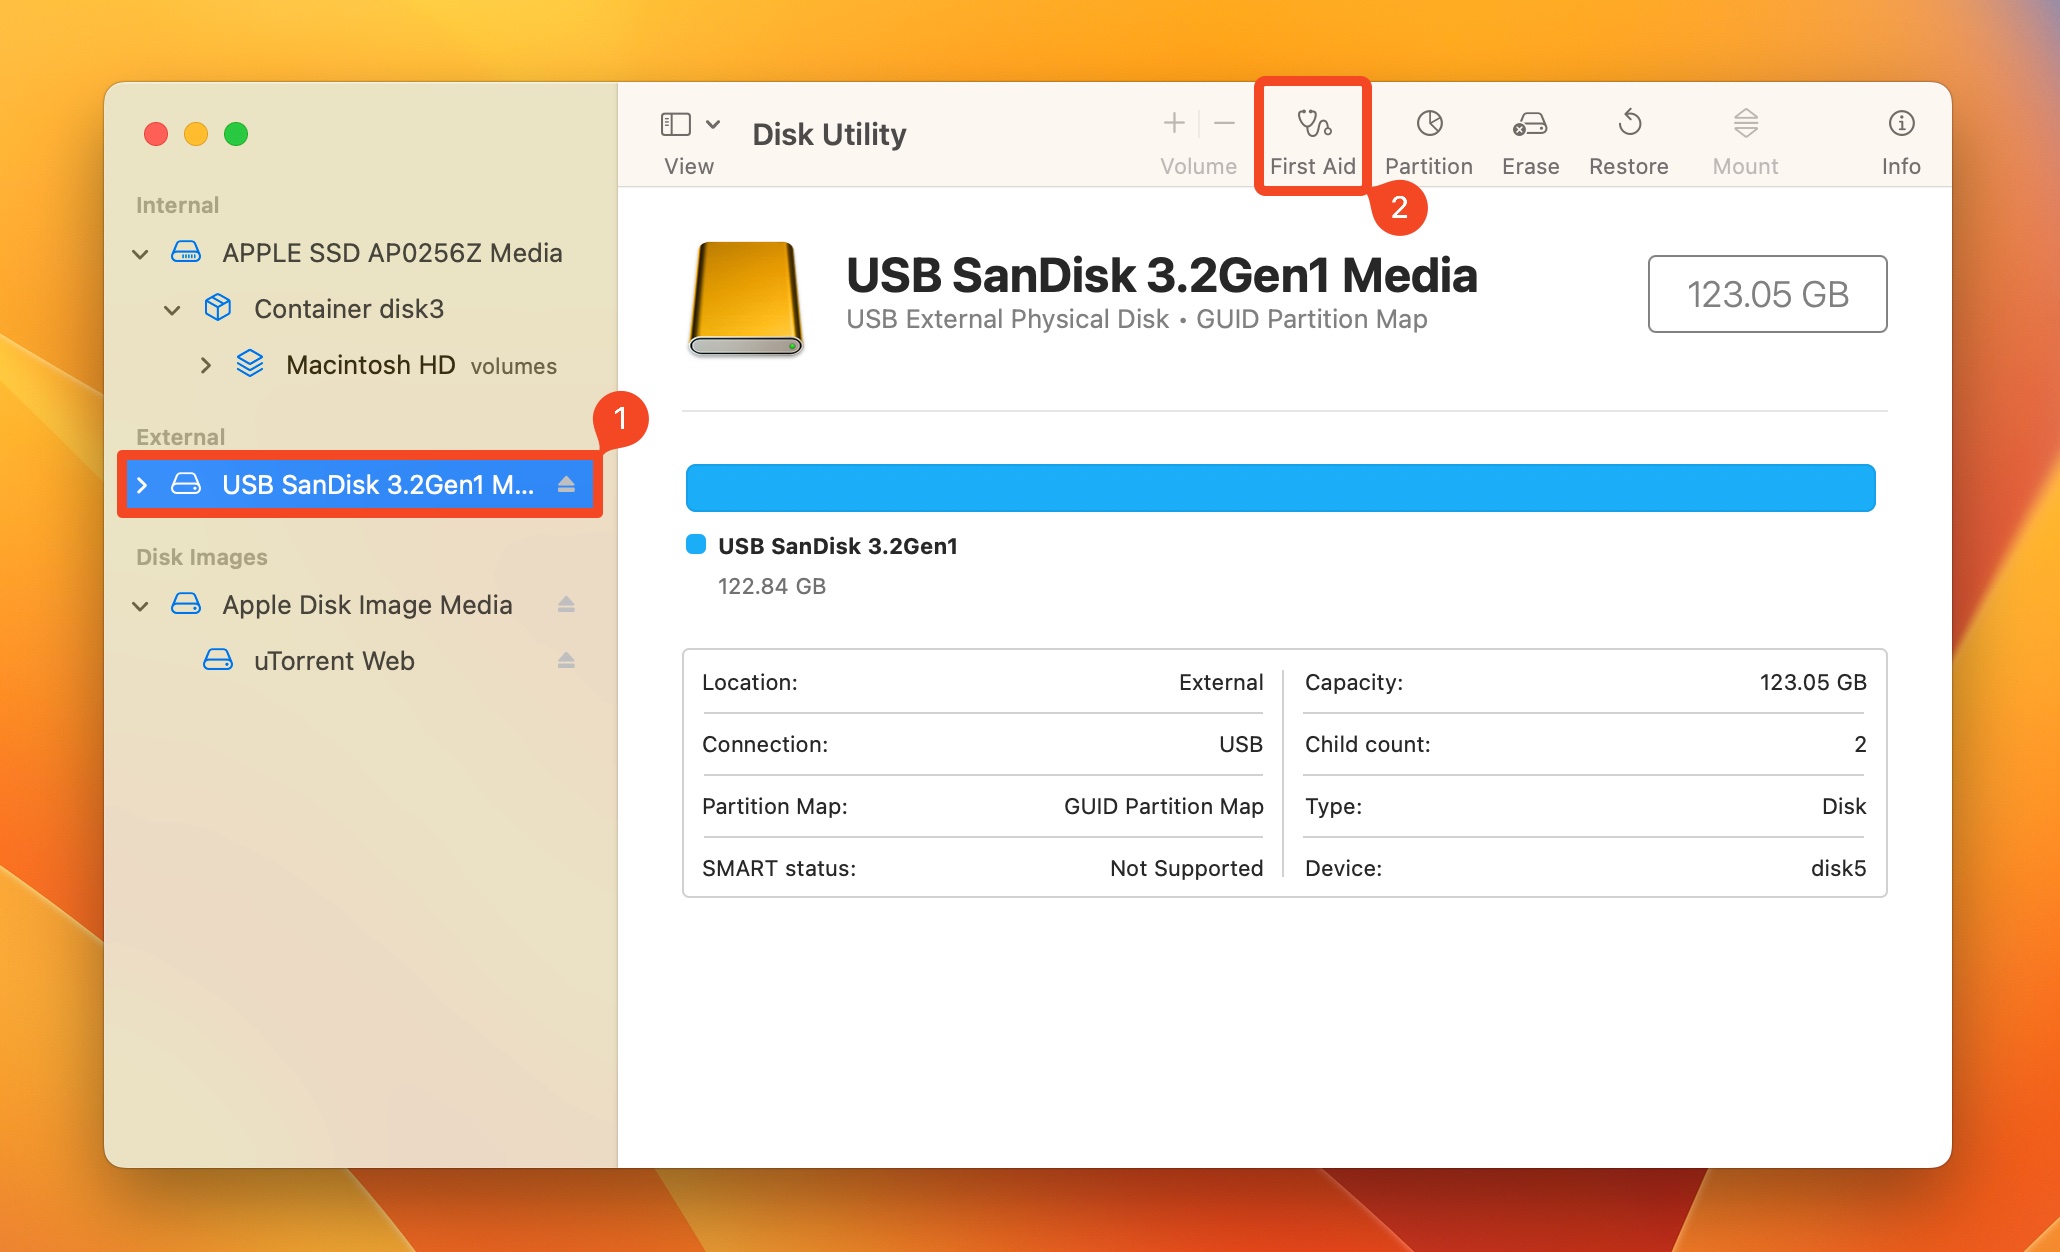
- Search for “disk utility” in Spotlight Search (Command + Space) and open the Disk Utility app.
- Select the external hard drive from the sidebar and click on the First Aid button.
- Click Run on the First Aid prompt.
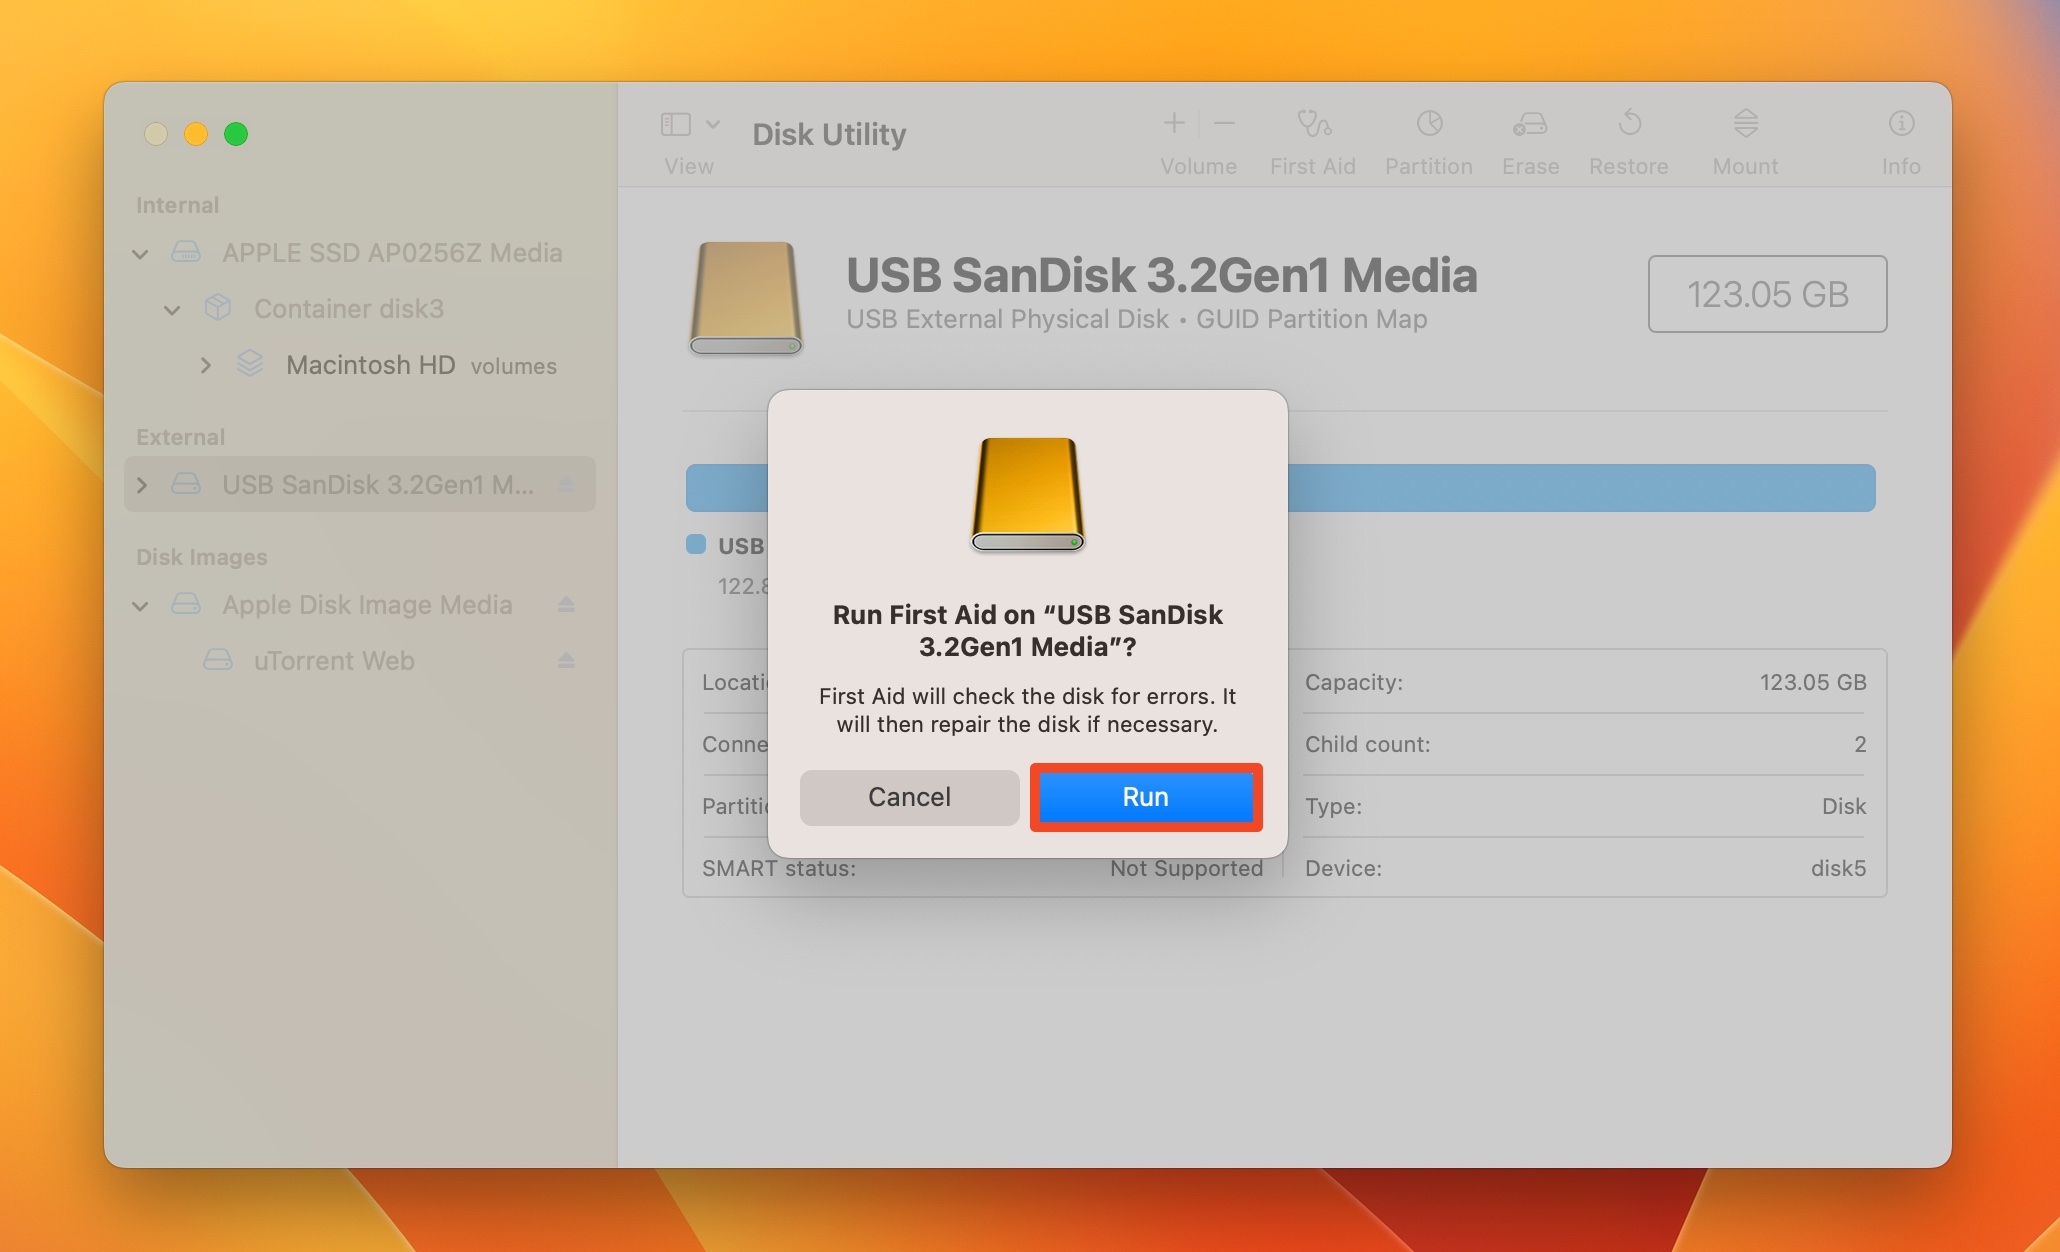
- Mac will detect and address any issues on the drive.
Method 3: Format the Drive
If the external hard drive has been formatted to the NTFS file system, macOS will allow you to view the drive’s files, but you can’t write any new data to it. To fix this, you need to format the hard drive to a Mac supported file system like HFS+, APFS, or exFAT. Be sure to recover your data beforehand because formatting deletes all files from the drive.
Here’s how to do this and fix an external hard drive that’s read only on Mac:
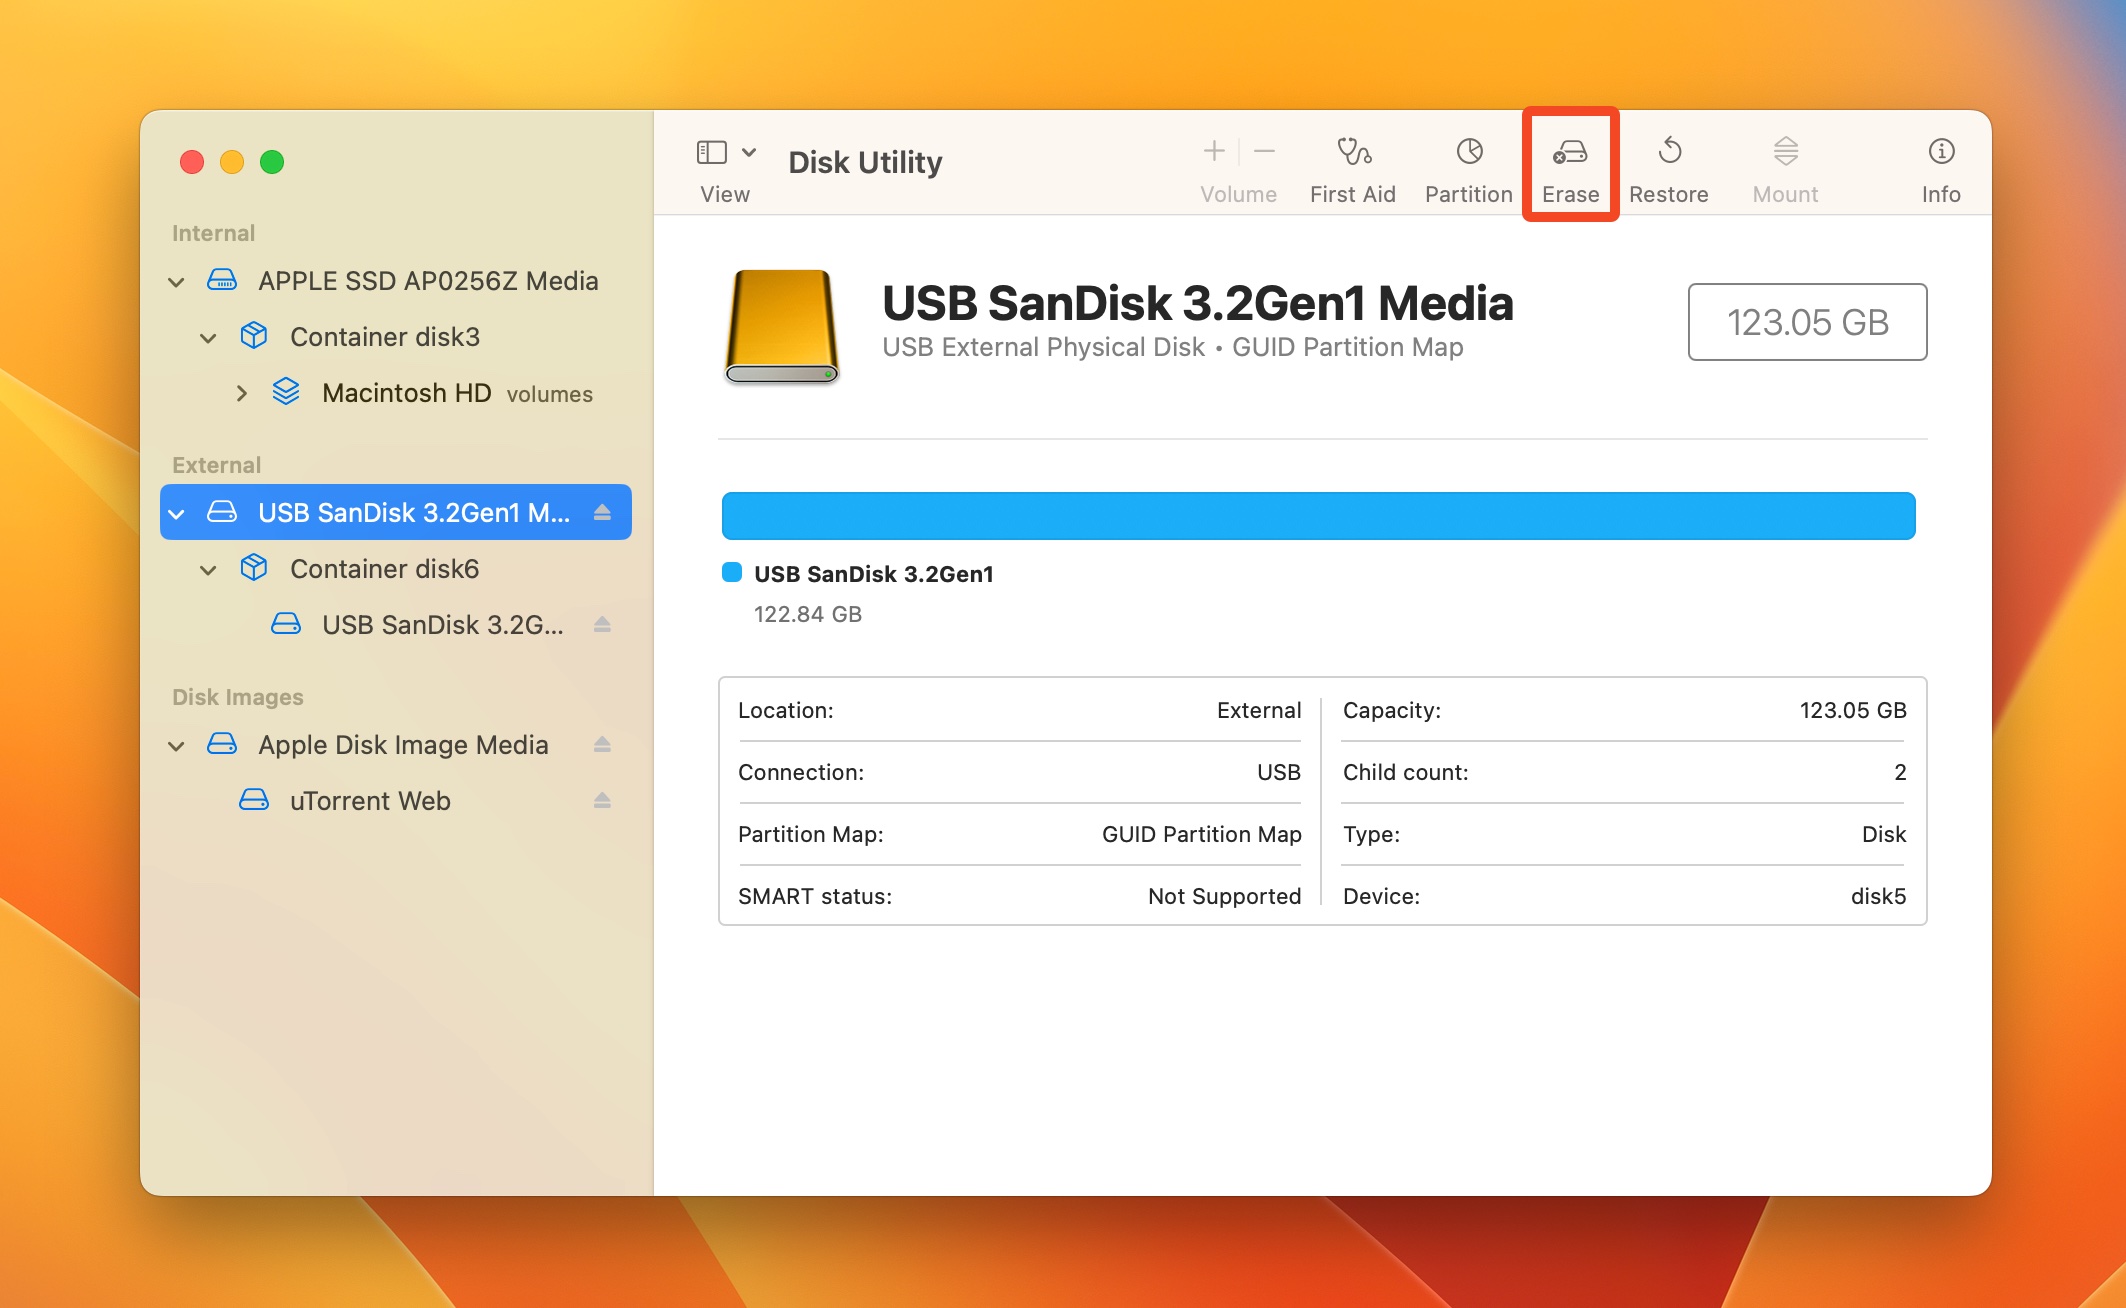
- Search for “disk utility” in Spotlight Search (Command + Space) and open the Disk Utility application.
- Select the external hard drive from the sidebar and choose Erase.
- Choose a name for the drive, and select APFS or MacOS Journaled if you intend to use the drive exclusively on macOS. If you wish to use it on Windows, and Mac, choose exFAT. Let the scheme be as it is and click on Erase.
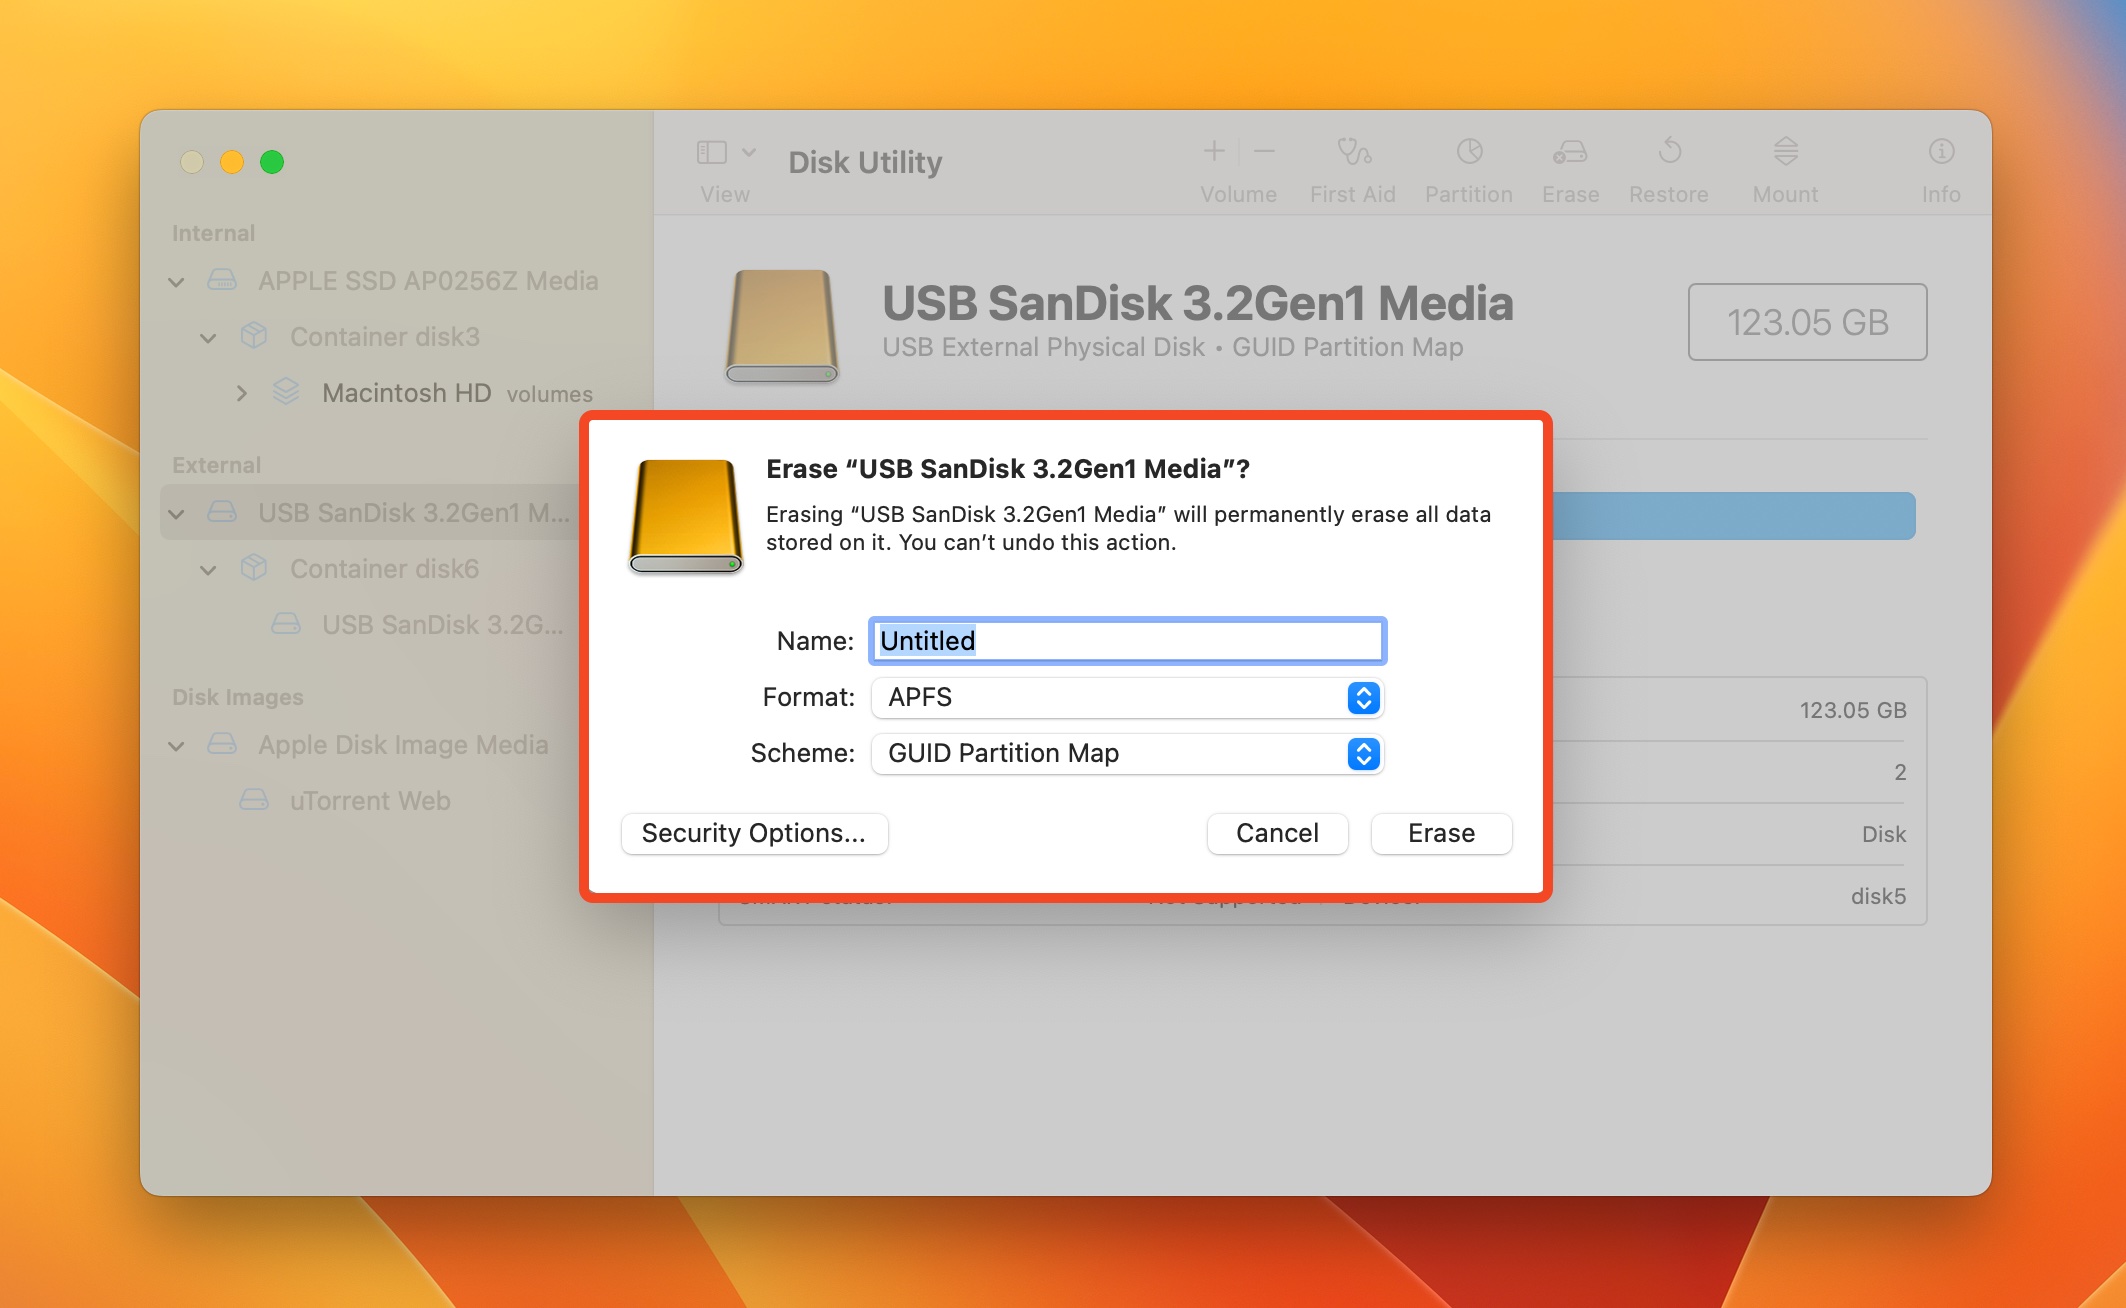
- Wait for macOS to format the drive.
Conclusion
Fixing an external hard drive that’s become read-only on a Mac, is quite simple in most cases. The first thing you should do is determine what caused the issue, and prioritize saving your data. Once that’s dealt with, doing one of the following should resolve the read-only issue–changing the permission settings, using First Aid, and formatting the drive.
FAQ
- Open Finder.
- Right-click on the drive and choose Get Info.
- Expand the Sharing and Permissions sections.
- Click on the permission status next to your username, under the Privilege column.
- Choose the required permission settings.
- Change the Sharing & Permissions settings to Read & Write.
- Use the First Aid feature in macOS’ Disk Utility to fix any logical issues on the drive.
- Ensure the physical write-protection switch on your external hard drive is set to the OFF position.


")