 Cut, copy and paste are basic but essential functions when it comes to file management. Without these simple commands, moving files from one place to another would be a lot different.
If you cut a file and your computer crashes before you can paste it in a new location, there’s a chance that the file was lost. Don’t worry, there are ways you can get that file back. Below we’re going to cover a few ways you can recover cut files on your Windows computer.
Table of Contents
What Does Cut Do in Windows?
Cut is a command used to move data from one location on your computer to another. Rather than creating a copy, the cut command actually removes the data from its original location and temporarily stores it in the clipboard. The data is then moved to a permanent location when the paste command is used.
If your computer shuts down unexpectedly after you cut something, it will be lost due to the temporary nature of the clipboard. Unless you’re using a clipboard manager that retains cut files, the files will need to be restored from a backup or through the use of data recovery software.
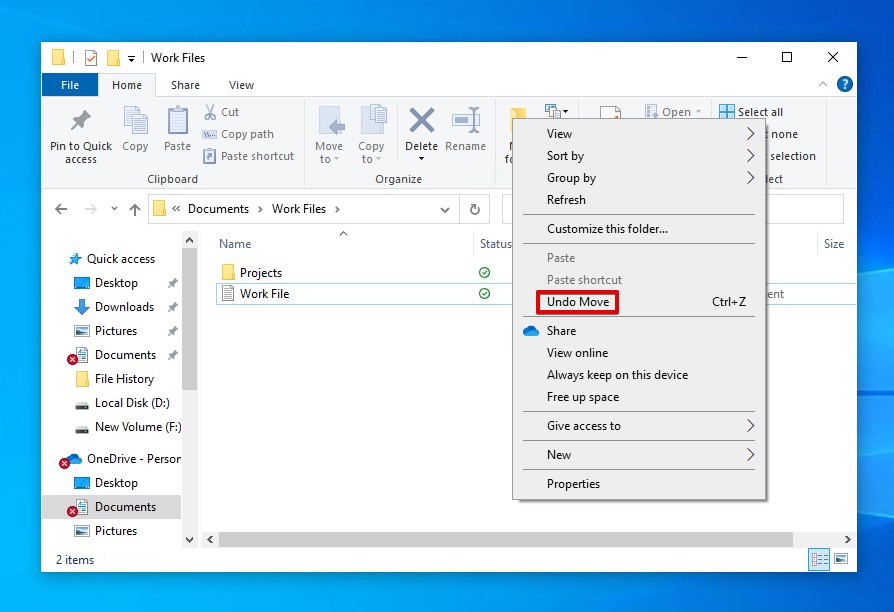
How to Undo Cut and Paste in Windows 10
Reversing a Cut and Paste action on Windows 10 is super easy and can be done in seconds. All you need to do is press CTRL + Z on your keyboard to undo the most recent action. Doing so after cutting and pasting a file will move it back to its original location.
Alternatively, you can undo the Cut and Paste using the right-click menu:
- Right-click an empty space in Windows Explorer.
- Click Undo Move. The file will be moved back to its original folder.
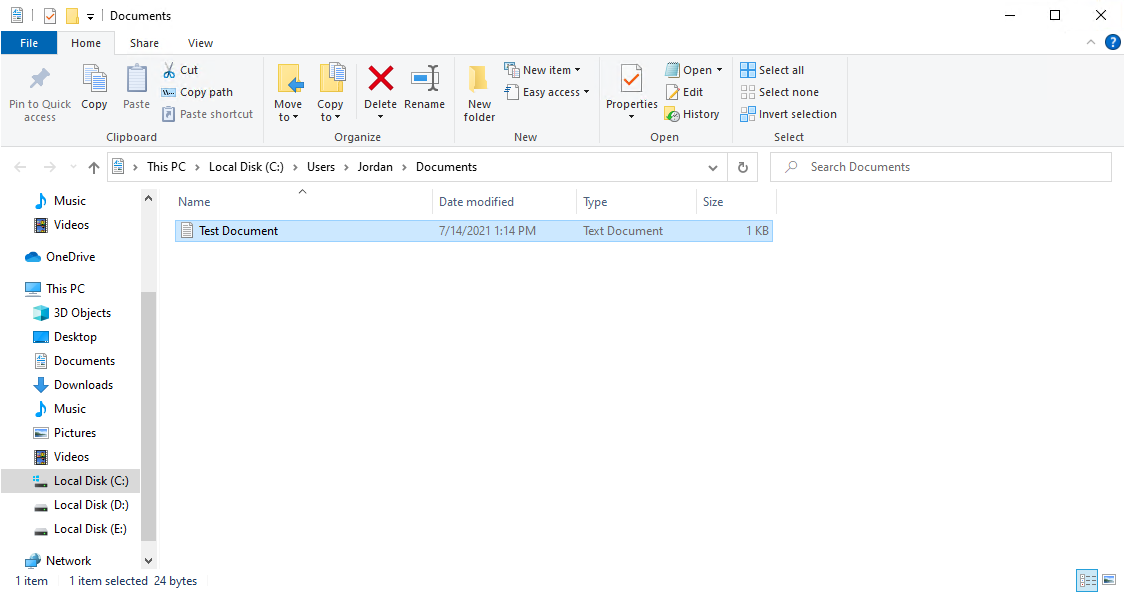
How to Recover Cut Files from Computer
Now that you’re informed on how the cut command functions, let’s take a look at how to recover files lost during cut and paste.
Method 1:Restore Cut Files with Data Recovery Software
When you delete a file, the data that made up that file still resides on the drive for a time. The physical location where that data resides is marked as available to the operating system. This means that new data can be saved to that location, overwriting what was there before.
If new data hasn’t overwritten your deleted file, this is our chance to recover cut and paste files. This software is designed to restore deleted data before it’s lost permanently. We recommend Disk Drill because it has powerful recovery capabilities, an easy to use interface, and it has a proven track record of successful recoveries.
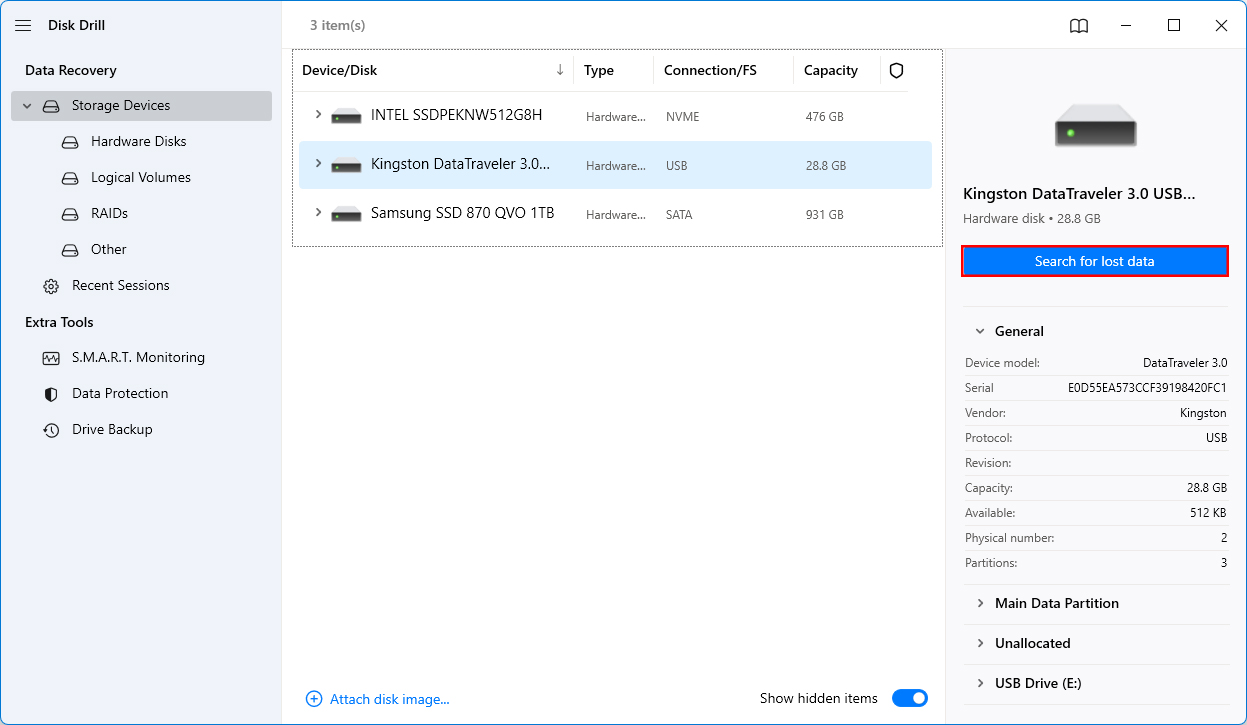
In the below test, I lost two images during a cut and paste operation. I’m going to use Disk Drill to recover them. Here’s how to recover cut files from computer:
- Download and install Disk Drill. Once installed, open it.
- Select the drive where the file was stored before deletion. Click Search for lost data. This will begin the scanning process to discover recoverable files.
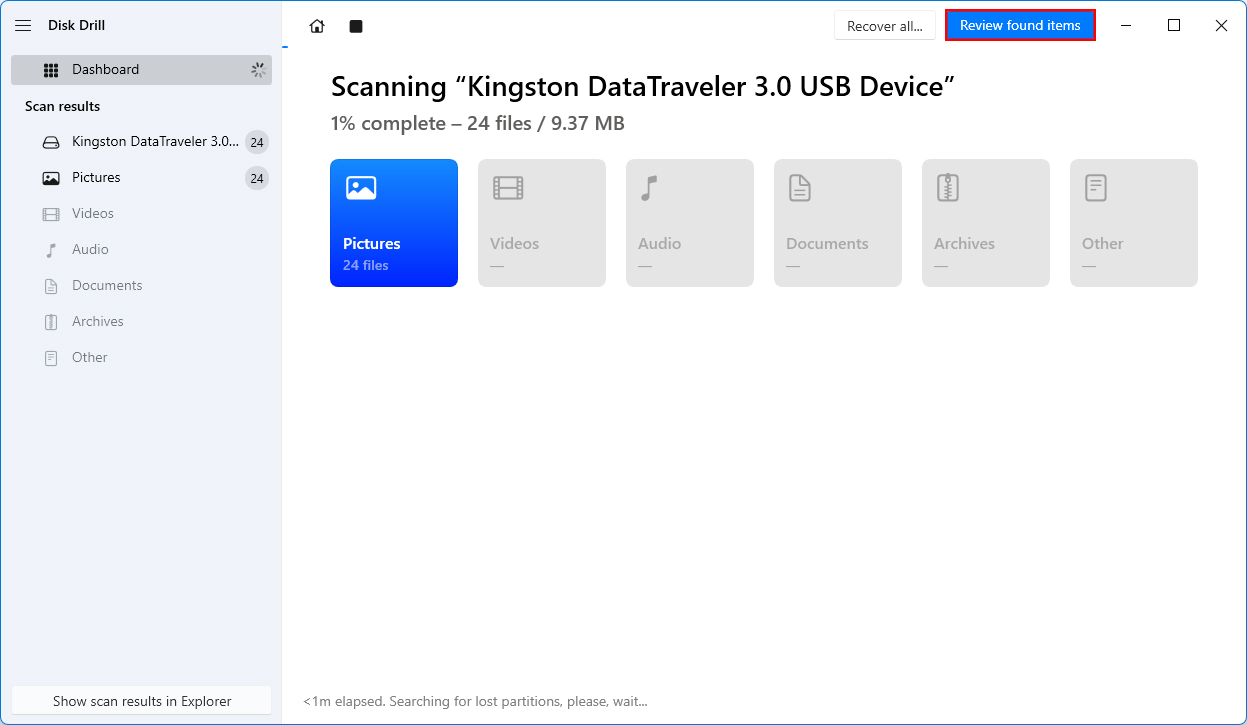
- When the scan has finished, you can click Review found items to review what Disk Drill has found.
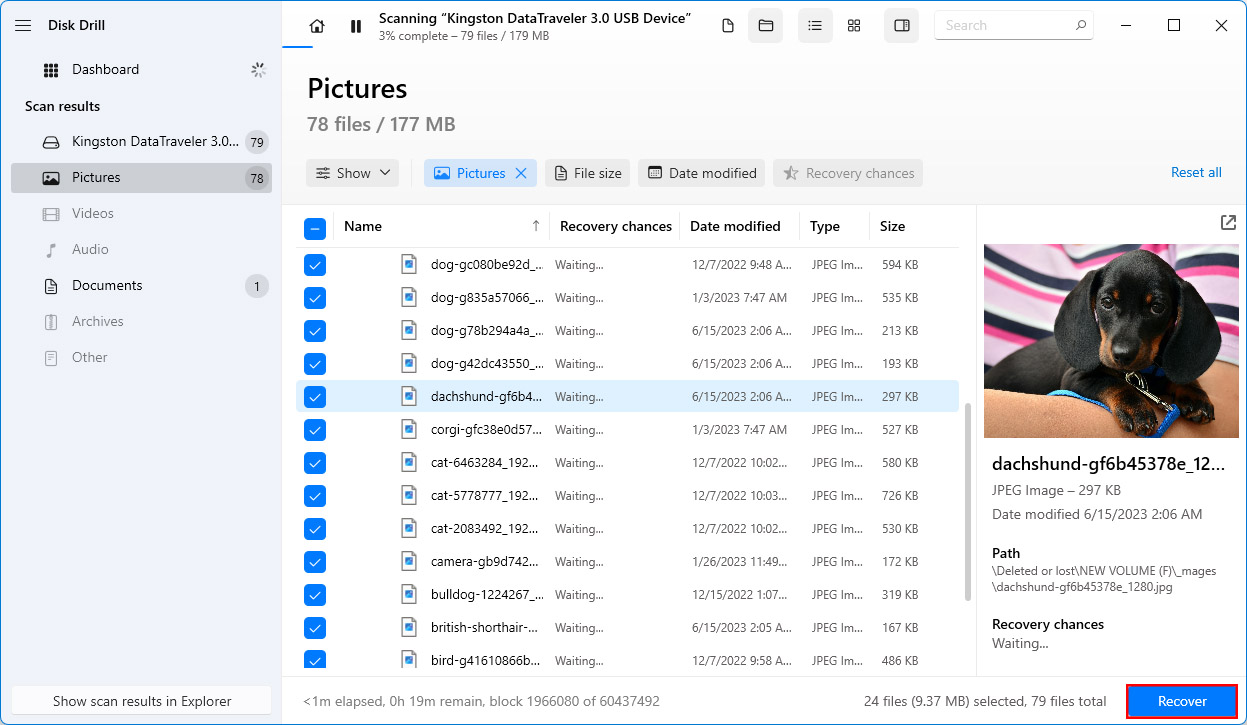
- Select the files you want to recover by ticking their checkbox. When ready, click Recover.
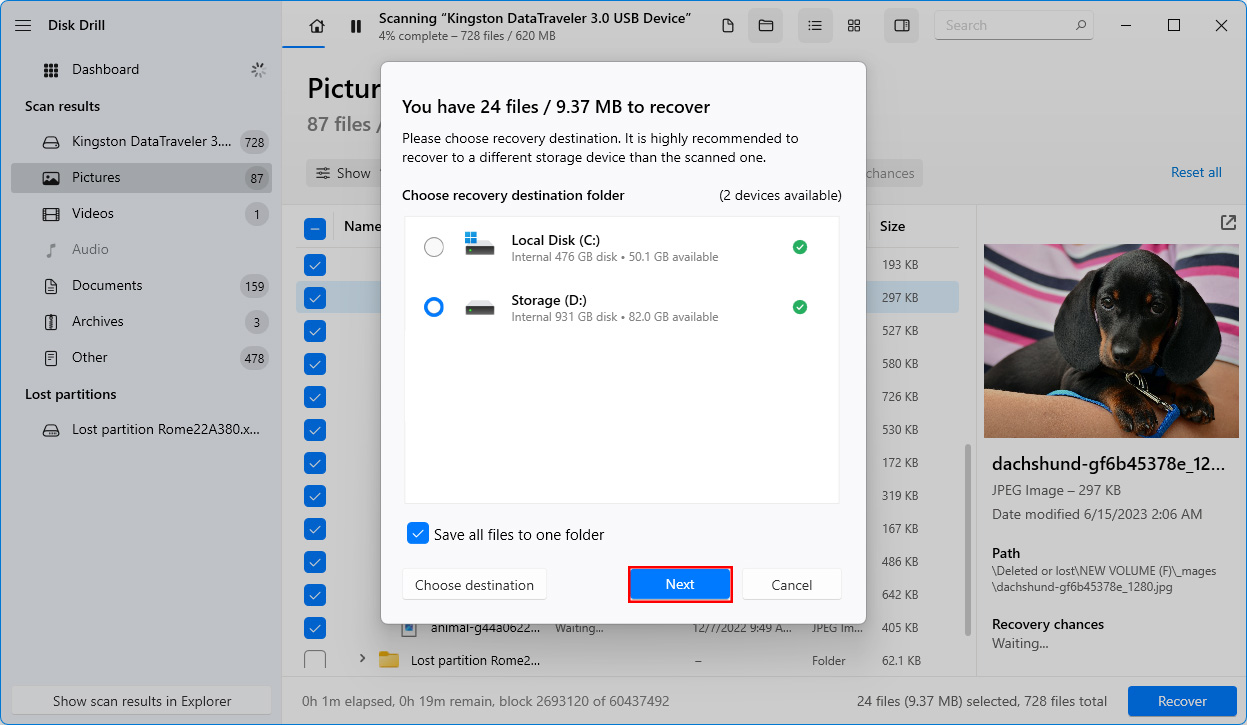
- On the next screen, specify the location you want the files recovered to. Finally, click Next.
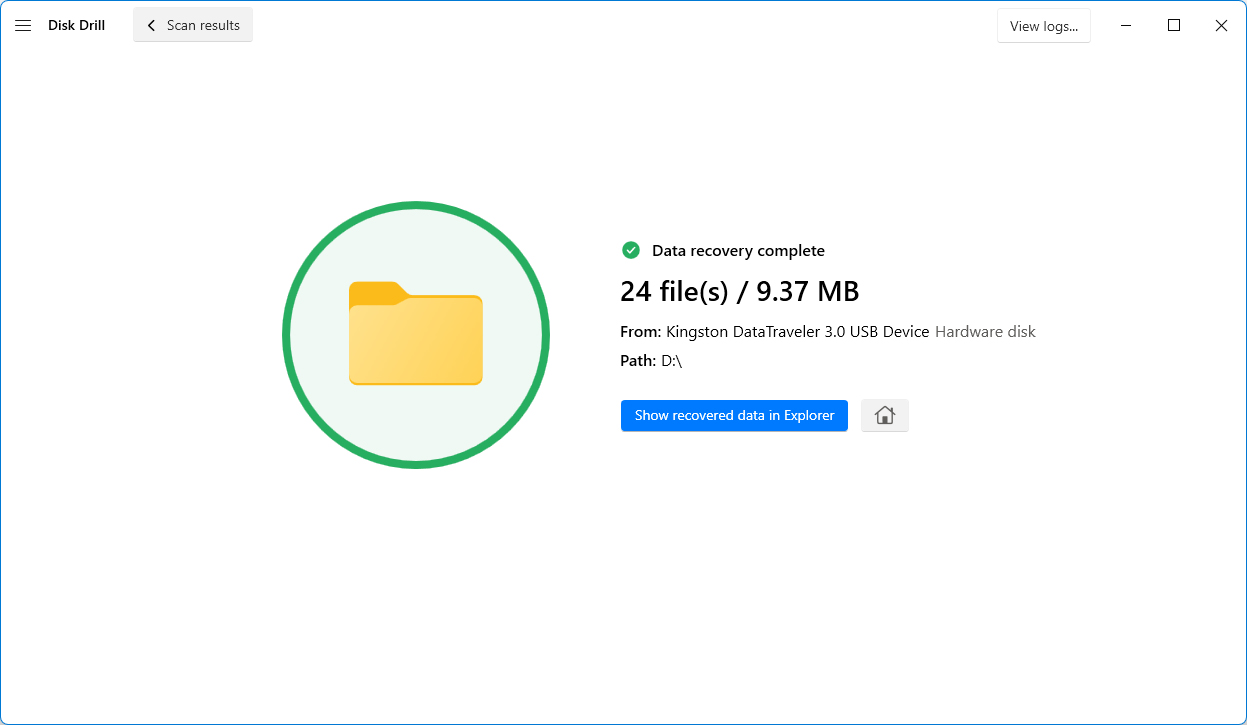
- When complete, Disk Drill will present you with a completion screen.
Method 2:Recover Cut Files Using File History
Windows includes a way to recover deleted or previous file versions using File History. For files that can’t be recovered from the Recycle Bin, File History is the next best thing when it comes to native recovery options. File History creates regular backups of specified files so you can restore them if they’re lost.
In order to use File History, you need a separate drive that can be used for backups. This could be an external drive like a USB, or it can be a second internal drive. Alternatively, you can use a network storage location if you’re using network-attached storage. Once configured, it will periodically back up the specified folders in the background.
File History isn’t enabled by default. If File History wasn’t configured before the file was deleted, this option will not work for you.
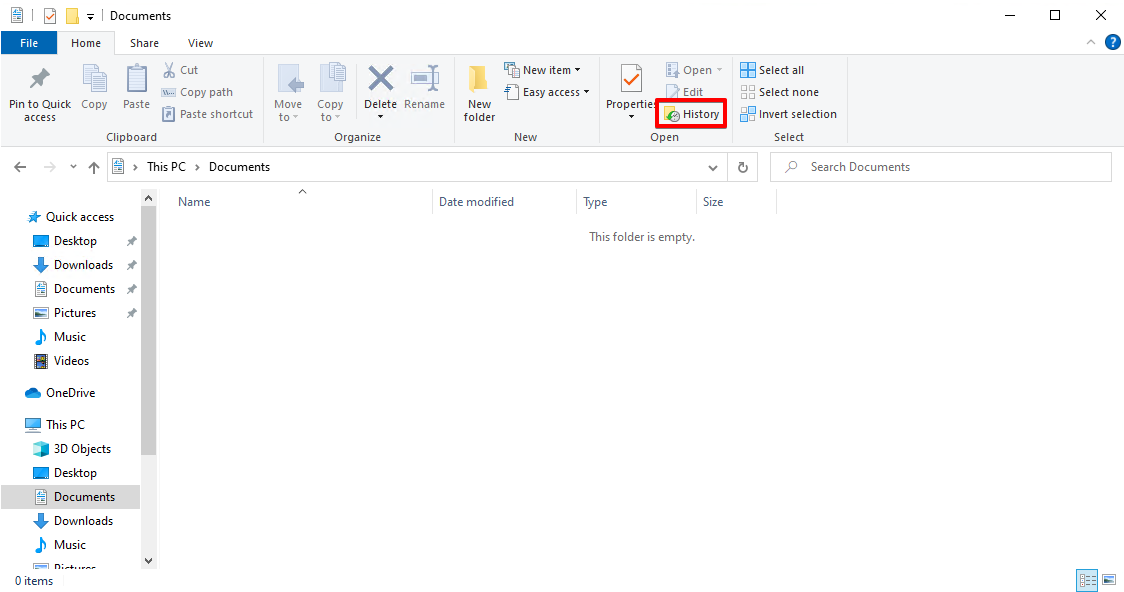
- Navigate to the folder that you cut the file from.
- Click on the Home tab at the top of Windows Explorer, then select History.
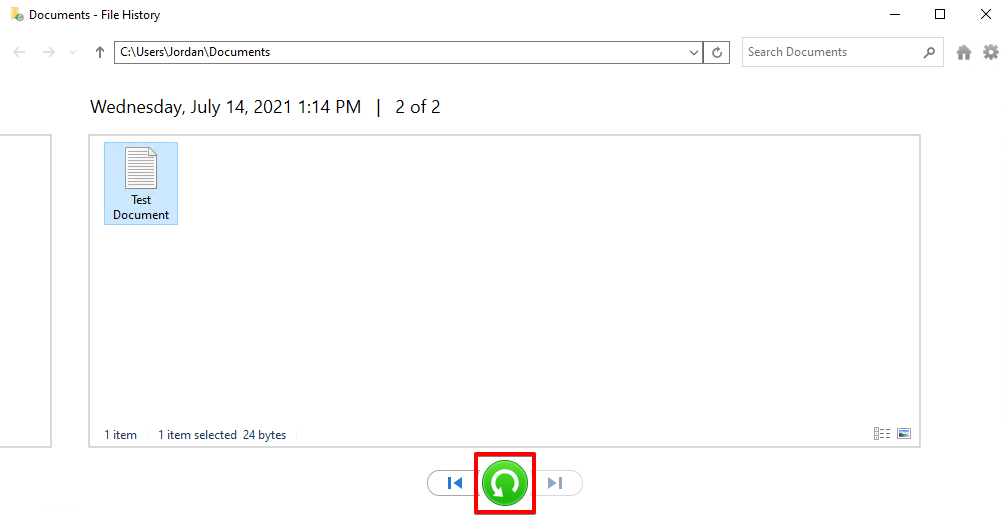
- Use the left and right navigation buttons to see the various versions of your file. When ready, select the version you want to restore and click the green restore button with an encircling arrow.
- Once restored, the file will be in its original location.
How to Recover Cut Files from Android
While there is an option to Copy and Paste a file to a new location on Android, there is no built-in Cut function. The only options available are Copy and Move. Instead, you must either install a third-party file manager app like Total Commander to implement Cut functionality, or perform the Cut action from a Windows computer while your device is connected.
If you have done one of the above two, you can recover your files using the methods below.
Method 1:Recover Cut Files with Disk Drill for Mac
Disk Drill for Mac allows recovery from iOS and Android devices. The good thing about Android devices is that deleted data isn’t truly lost until it has been overwritten. Until then, you can attempt to recover it with Disk Drill.
- Download and open Disk Drill for Mac.
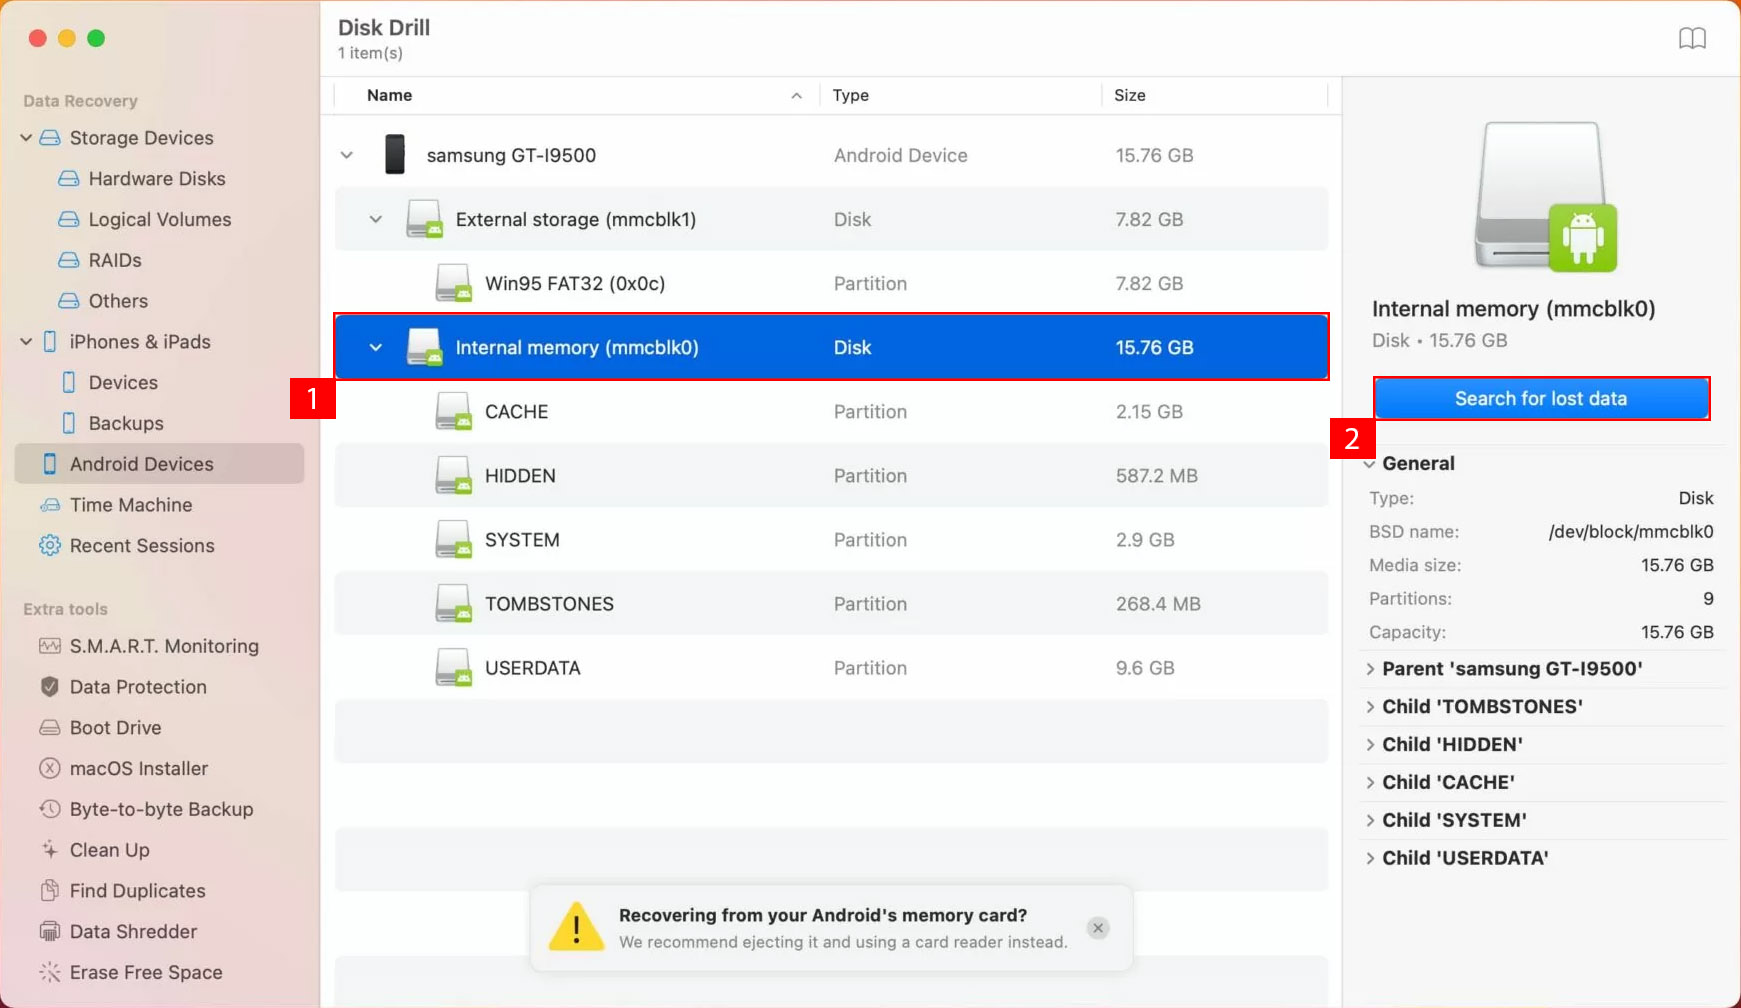
- Connect your Android device and select it from the device list, then click Search for lost data.
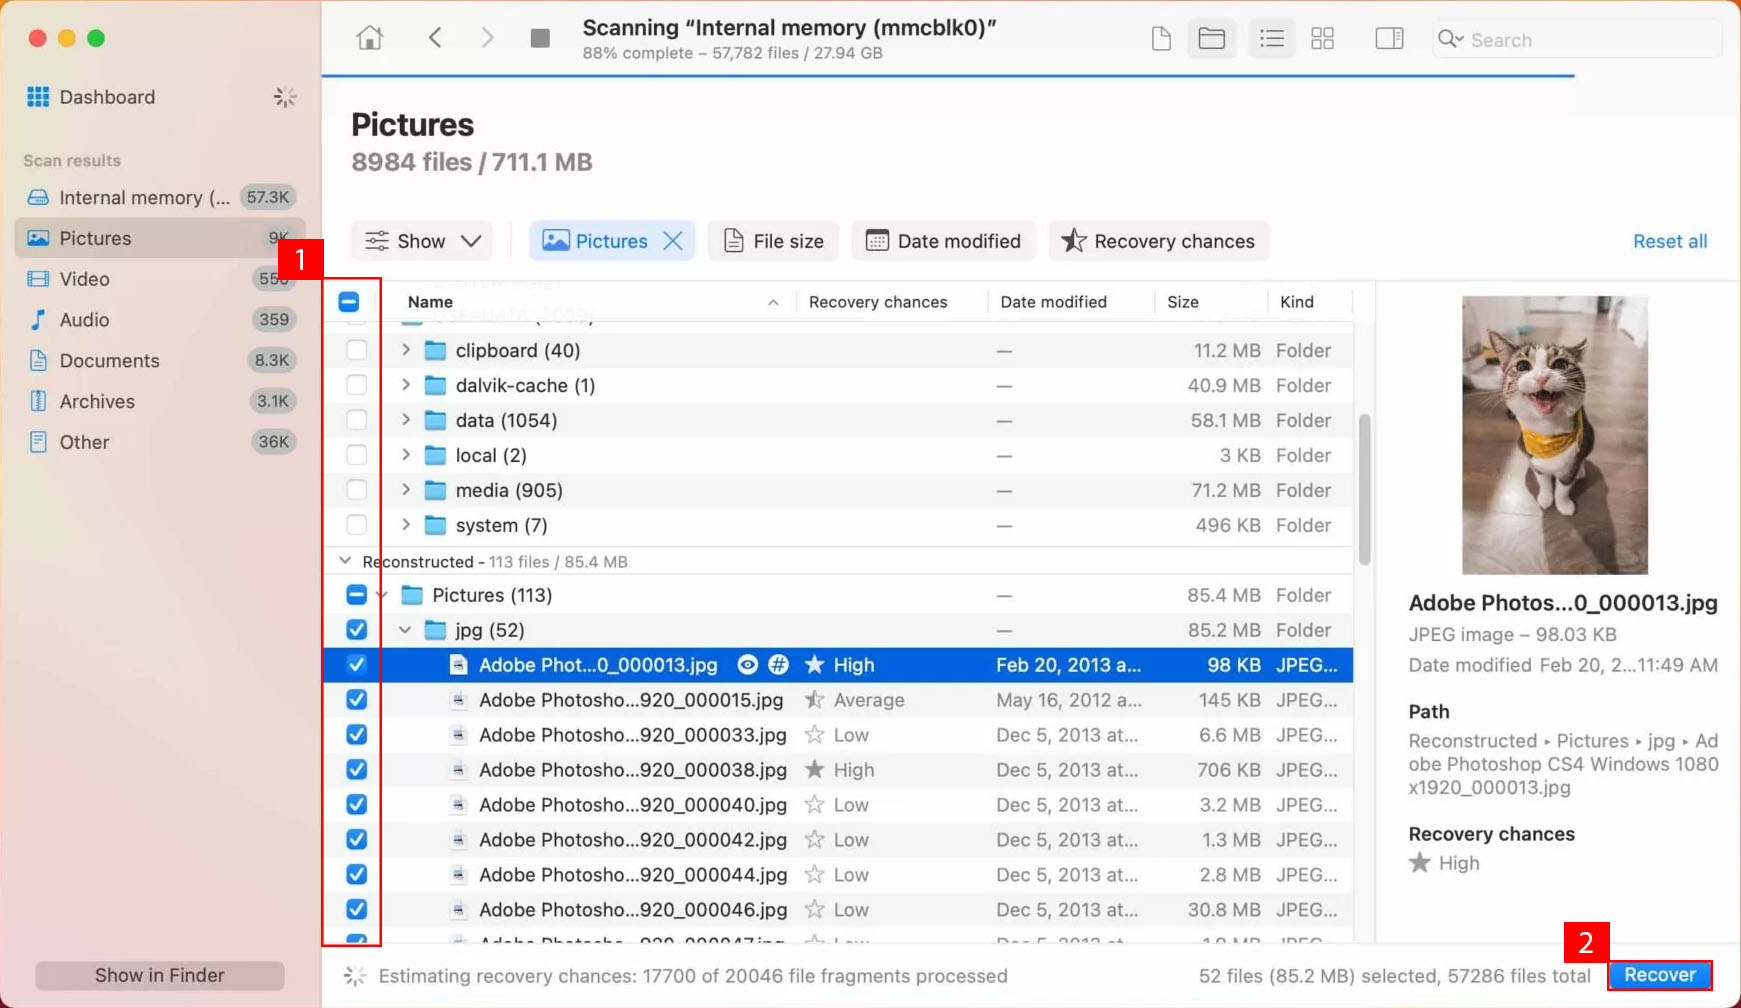
- Review the recoverable data and mark the files you want to recover. When you’re ready, click Recover.
- Choose where you want to store the recovered files. Make sure you’re not writing them straight back to your Android device.
Method 2:Recover Cut Files from a Backup
It’s common for Android devices to come with some form of automatic backup. For instance, Samsung devices come with Samsung Cloud which periodically makes backups of certain directories on your device. If you don’t have Samsung Cloud, you may have Google Drive or Dropbox.
The below instructions will show you how to restore from a Samsung Cloud backup as an example:
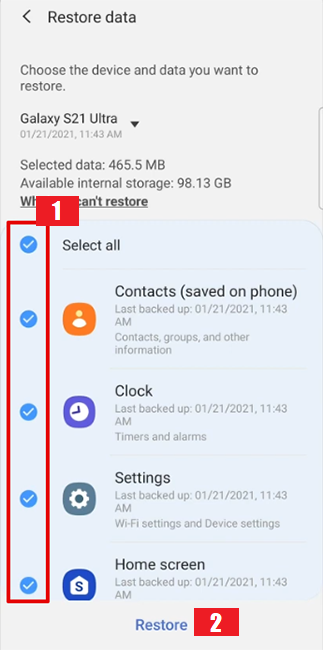
- Go to Settings, then Accounts and backup.

- Tap Restore data.

- Select your device.
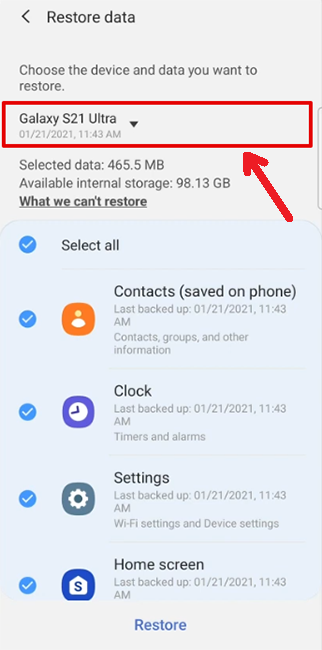
- Choose what you want to restore and tap Restore.
Whenever you want to move files, do so by copying and pasting the file first before deleting the original. Cut moves the files from the original location and Move copies the files to the new location while deleting the originals at the same time. Both of these functions have room for error if the device or app decides to crash.
Conclusion
Losing a file in any instance is frustrating and always happens at the most inopportune times. Thankfully, using the methods outlined in this article, you can recover your lost cut and paste files in a few clicks of your mouse.
FAQ:
- Open the folder that contained the file before it was lost.
- Click the Home tab, then click History.
- Use the right and left buttons to find a version of the file you want to restore.
- When ready, click on the file you want to restore, then click the green restore button to complete recovery.


This blog provides excellent tips on recovering files lost during a cut-and-paste operation. I have used Stellar Data Recovery in the past, and it was really helpful in recovering the lost file. It’s also great to see methods for recovering files on Android. Overall, this is this is a very useful guide for anyone dealing with accidental data loss!