
Losing or deleting a whole partition by mistake can be quite overwhelming, especially if you have no idea how to recover it or the data stored there. But don’t panic just yet. Luckily, there are quick and simple ways to recover partitions on Mac. So even if you’re not a tech-savvy person, you should be able to successfully retrieve all of your lost data.
Here’s everything you should know about Mac partitioning, including step-by-step instructions on recovering deleted partitions.
Table of Contents
Can You Recover a Deleted Partition on a Mac?
Yes, you can recover a deleted partition on a Mac. Two possible ways of partition recovery are:
- Recover data from the deleted partition using a data recovery tool. Then, create a new partition and copy the recovered data back to it.
- Attempt partition table repair using specialized software. This method restores the partition to its original state with the preexisting data intact.
Regardless of the method you use, we recommend recovering your data beforehand if the partition disappeared unexpectedly. Unexplained partition deletion can often indicate serious logical issues on your drive, and it may be on the verge of failure. Create a disk image of the drive, and scan the disk image using a data recovery tool (we recommend you use Disk Drill for creating and scanning disk images).
Several factors influence the extent of data recovery. To maximize your data recovery chances, keep these tips in mind:
- Stop using the drive until you perform data recovery. Continued drive usage increases chances of the missing files being overwritten by system-created, and user-created files.
- Use disk cloning tools to create a byte-level disk image of the drive. This shields you against further data loss.
- Scan the drive using a trustworthy data recovery tool. The first data recovery scan is typically the most successful.
- Contact a professional data recovery service if the data loss by caused due to physical damage. Attempting DIY data recovery will do more harm than good when dealing with physical damage.
How to Recover Data From a Deleted Partition on Mac
To recover a partition on Mac, you need to use specialized third-party software. There are many excellent applications to choose from, but after testing some of those apps, we recommend you to try out Disk Drill.
Disk Drill has a user-friendly interface, making it very straightforward to use compared to other partition recovery Mac software. If you want to recover only some specific files from the deleted Mac partition, this app should handle it perfectly. And this app supports all disk partition types and file formats.
If you’ve never used Disk Drill before, you need to download and install the app before moving further. Head to the official Disk Drill page and click Download. Then follow the on-screen instructions to complete the installation process.
Now you can move on to the main part. Follow these steps to recover deleted partition data on your Mac using Disk Drill:
- If you want to recover data from a deleted partition from an external hard drive on your Mac, then connect the drive to your computer. Skip this step if you’re trying to recover data from an internal HDD partition.
- Launch Disk Drill.
- From the sidebar, click Storage devices. Look for your external (internal) hard drive on the list and click it. Click Recover at the bottom-right corner.
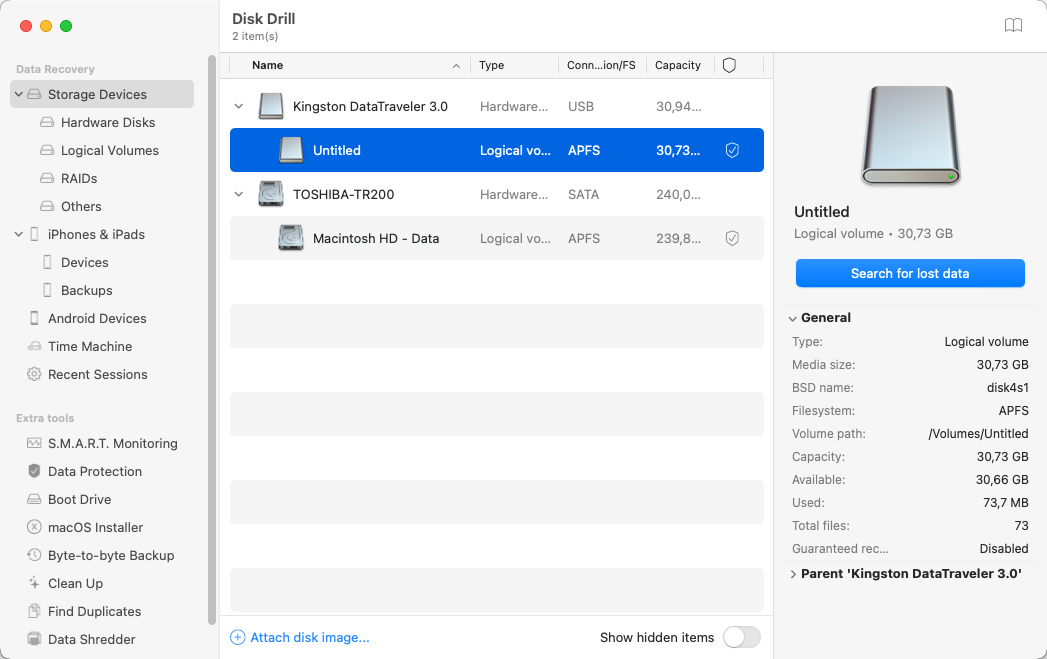
- If you want to scan the unpartitioned disk space for lost data, then click it instead. It should be titled as Unallocated or something similar. Then click Search for lost data.
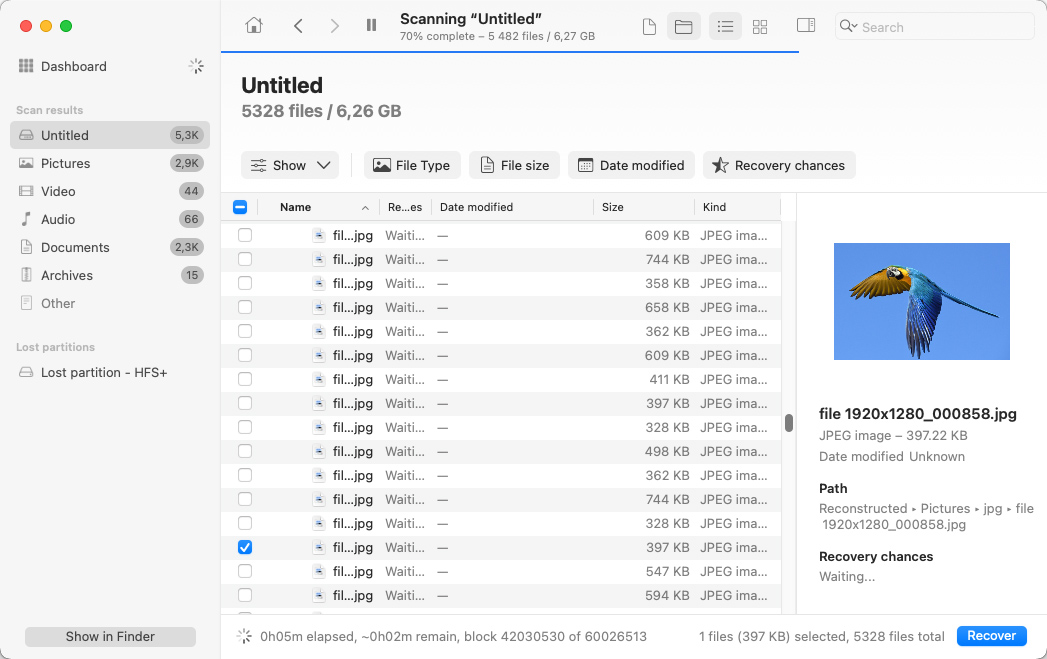
- Wait for the scan to finish. You can preview the found files by clicking the eye icon next to it. Place a checkmark near the files that you wish to restore, and when ready, click Recover to recover deleted partition files on Mac.
How to Repair Corrupted Partition
You can use third-party apps, and in-built Mac utilities, to repair a corrupted partition. We recommend using macOS’ in-built utilities, before moving to a third-party program.
Here are the step-by-step instructions for these methods:
Option 1: Repair the Partition Map Using Disk Utility
Since Disk Utility is the main partitioning tool for Mac, you can use it to fix a corrupted partition directly on your computer. So if your partition isn’t working properly because of a damaged partition map, this tool should be able to take care of it.
Here’s what you should do:
- Head to Launchpad and click Disk Utility to launch the app. If you are trying to repair a partition that’s located on your startup disk, it is best to boot into Recovery mode and only then launch Disk Utility.
- From the sidebar, look for the needed partition and click it.
- From the top menu, click First Aid.

- A popup will appear asking you whether you want to run this tool on your hard drive. Click Run to confirm.
Once the repair process is finished, you’ll get another popup notifying you about it. Just click Done, and you’re all set.
Option 2: Format the Hard Drive Partition
If nothing helps and your partition still isn’t functioning properly, you can try to fix it by formatting the partition.
But before you do it, it is recommended to make a backup of your partition (of course, if you store important files there). When you format your partition, all of the data located there will get erased. So, once you have a backup of your files and are sure that there’s nothing important stored on that partition, you can safely format it.
Here’s how to format the partition on Mac:
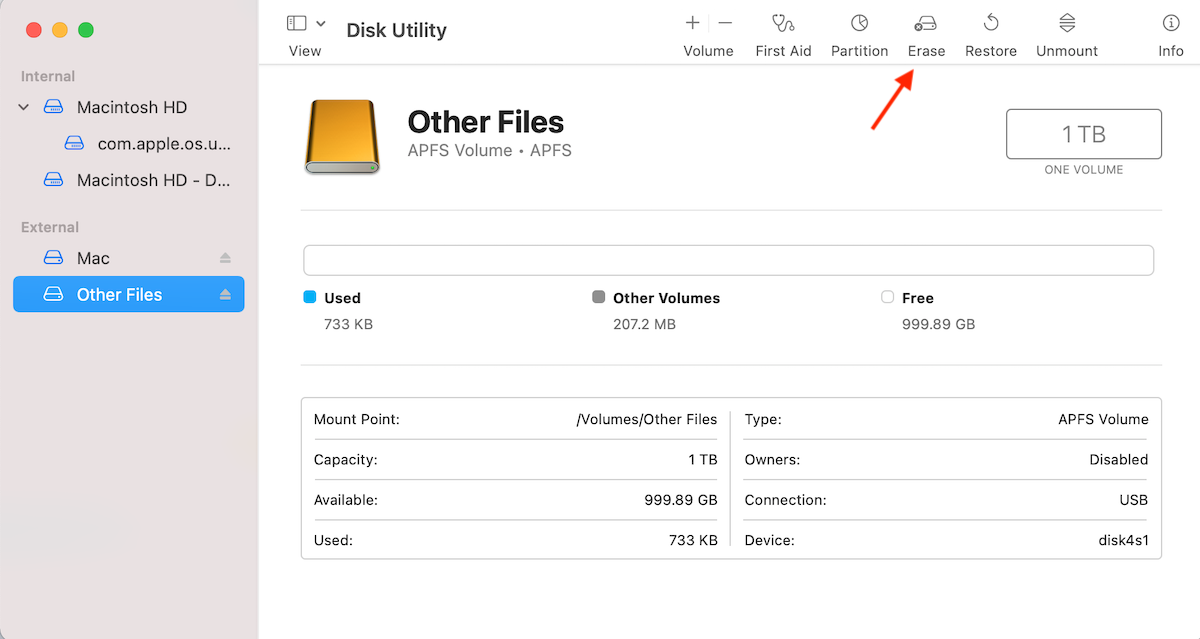
- Head to Launchpad and launch Disk Utility.
- Click the needed partition on the sidebar.
- Click Erase from the top menu.
- Type in a new name for your partition and choose the needed format. Click Erase to confirm.
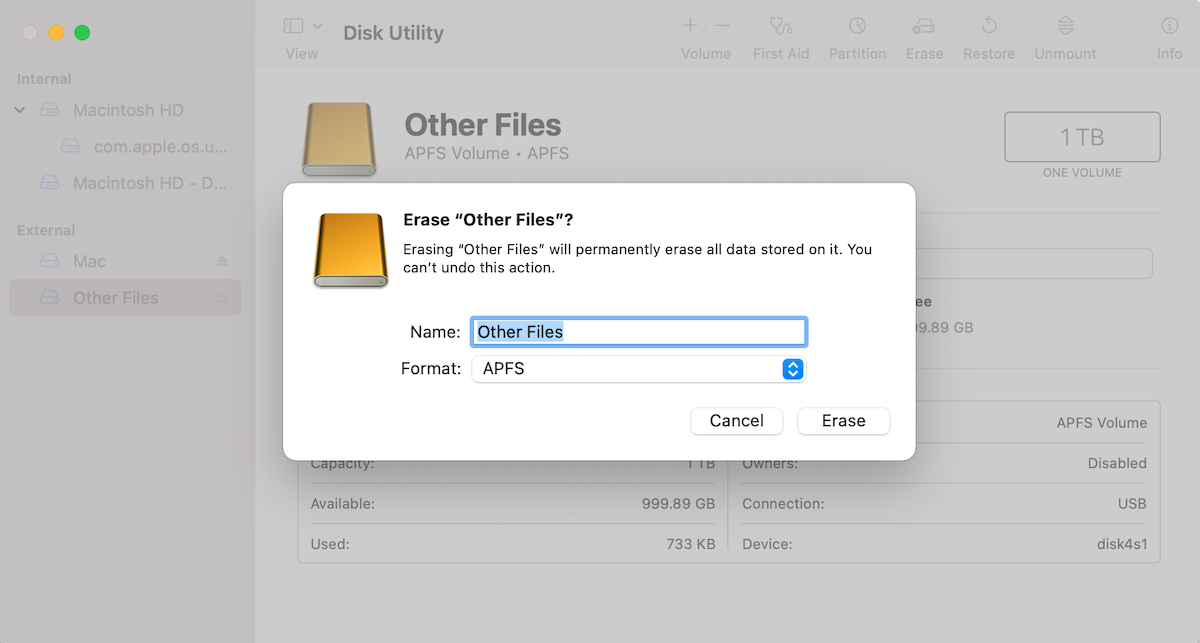
- Once the process is finished, clickDone.
Option 3: Repair the Corrupted Partition Using TestDisk
TestDisk is an effective partition repair and recovery tool. Whether you deleted the partition, or its partition table got corrupted, TestDisk should be of help. The program’s only drawback is its lack of a GUI (Graphical User Interface), which makes navigating the program more complex than it has to be. However, you shouldn’t have much trouble getting around the tool if you carefully follow the TestDisk partition recovery guide below.
Here’s how to restore a partition on Mac, using TestDisk:
- Install TestDisk on your Mac. You’ll be able to do it only after you install Homebrew (a software package management system). To do it, launch Terminal and copy-paste this command:
/bin/bash -c "$(curl -fsSL https://raw.githubusercontent.com/Homebrew/install/HEAD/install.sh)"
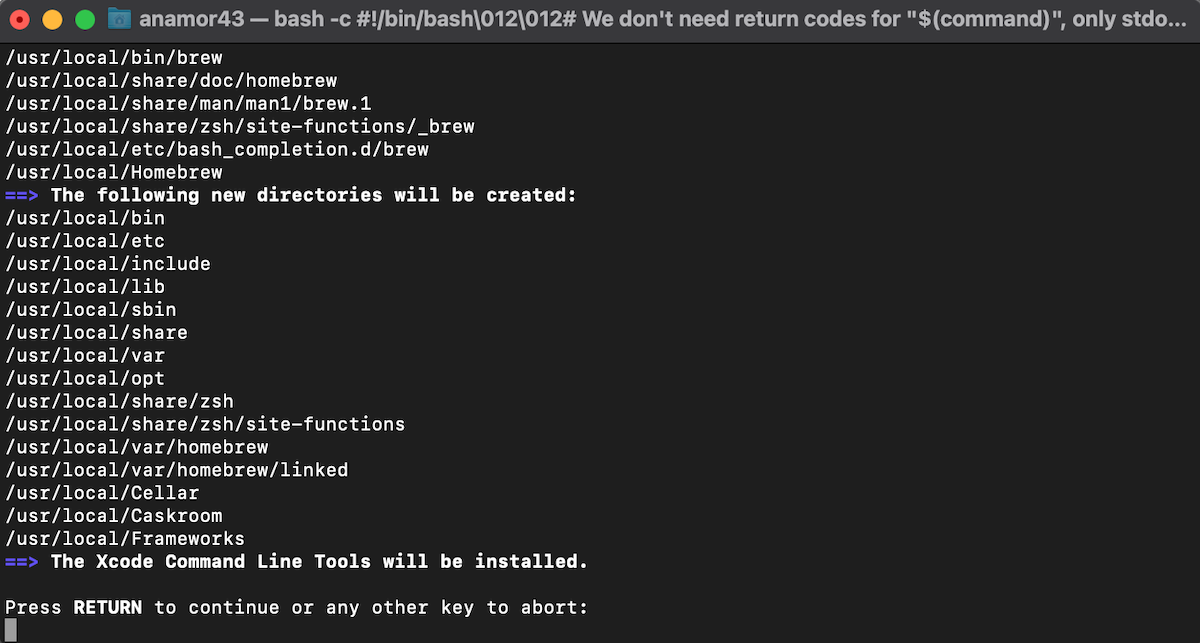
- Hit Return and type in your user password when prompted. Then hit Return once again to finish the installation process. Once Terminal says that the tool is installed, copy-paste this command to install TestDisk on your Mac and hit Return:
brew install testdisk
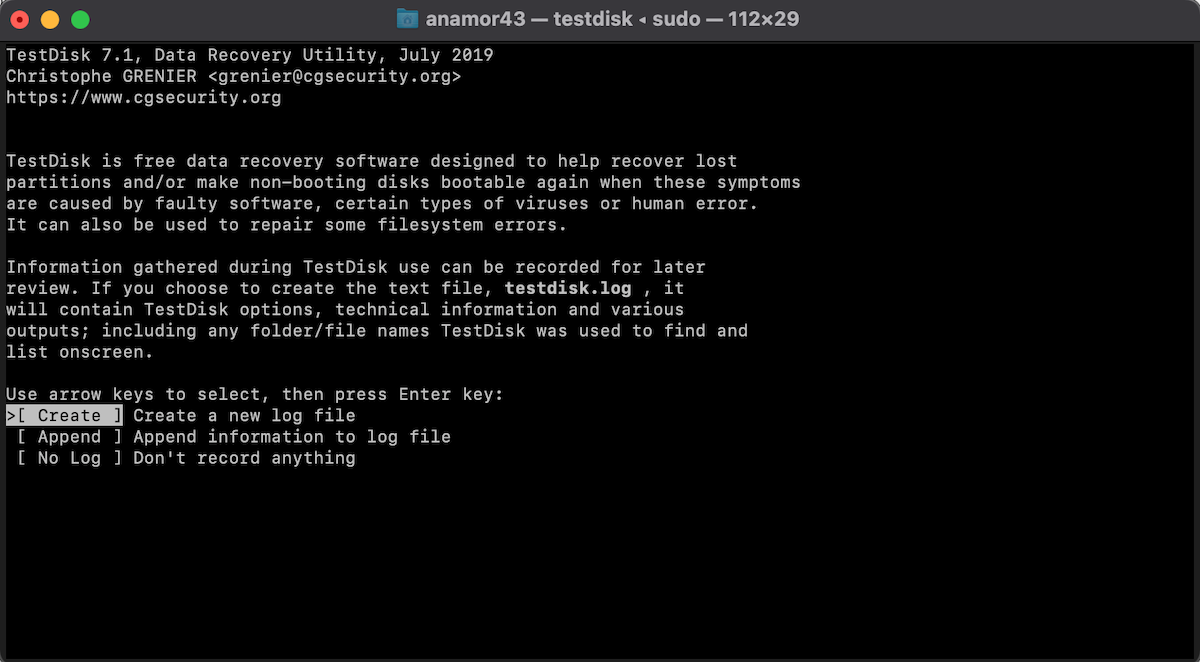
- Run TestDisk via Terminal. To do it, simply enter this command:
sudo testdisk - You’ll be asked to choose whether to create a new log file or not. The first option s is recommended since it’ll let you view all the tasks that are being completed by the tool, but it’s up to you to choose.
- Choose the drive you wish to scan and select the partition table type. Then choose the Analyse function (analyze current partition structure and search for lost partitions).
- Begin the Quick Search.
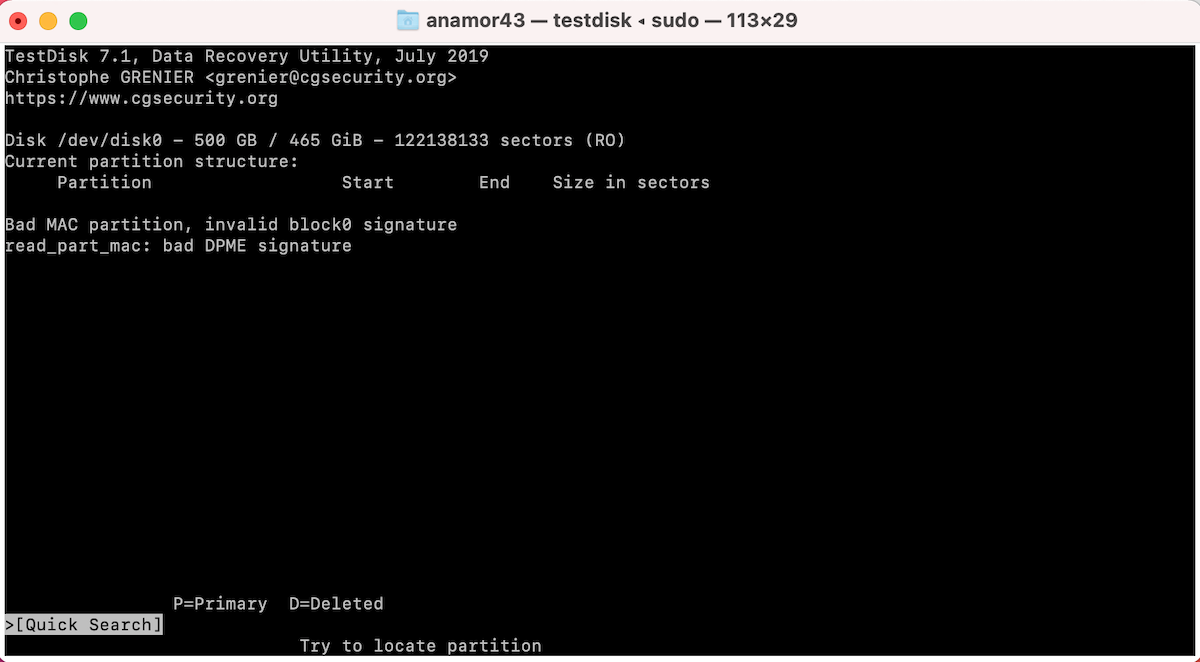
- Once the scan is finished, you’ll see a list of all recoverable partitions. If you’ve found the needed one, select it, and hit Return to start the Mac partition recovery process. Then choose Write to save the partition structure.
- If the tool hasn’t spotted your lost partition, try doing a Deeper Search. There is a chance that a deeper scan is needed to reveal the partition.
How to Prevent Partition Loss on a Mac Hard Drive?
It’s always best to prevent data loss from happening in the first place. Sometimes, data recovery can be subpar, or simply not possible due to factors beyond your control. Fortunately, preventing partition loss on a Mac hard drive is simpler than you may think.
Keep these tips in mind, and you will greatly reduce your chances of data loss because of a deleted/damaged partition:
- Back up your data: Always keep multiple backups of important data. Hard drives can fail without warning. Additionally, DIY data recovery from physically damaged drives, or severely logically damaged drives, is difficult (and not recommended). Your only option is to contact professional data recovery companies who charge a pretty penny. In such cases, a backup can save you thousands of dollars. We recommend you use iCloud Backup and Time Machine on macOS to keep your data backed up.
- Keep your Mac updated: Keep an eye out for macOS updates—download and install them ASAP. In addition to bug fixes, these updates often contain security patches that protect your Mac from malware.
- Keep an eye on disk health: Use macOS’ Disk Utility to check the hard drive’s health. Open Disk Utility, select your Mac hard drive, and click on the info (i) button in the top-right corner to see the drive’s health. Highlighted red error messages indicate issues on the drive. Use Disk Utility’s First Aid feature to repair any minor issues with the Mac hard drive.
Conclusion
You can go about recovering a deleted/corrupt Mac partition, either by recovering your data and then creating a new partition, or repairing the entire partition using a third-party program. If you opt for the first option, use Disk Drill to recover your files and then create a new partition using Disk Utility. In case of minor logical damage, you can repair, i.e., restore the partition to its original state using the First Aid feature, or a third-party tool, TestDisk. Sometimes, formatting the partition is the only way of repairing it.
FAQ:
- Avoid writing new files to the drive. It’s best to stop using it.
- Use a data recovery tool like Disk Drill to create a disk image of the drive and recover data from it.
- Attempt to recover the deleted partition using TestDisk.
- If partition recovery is unsuccessful, you’ll likely need to create a new partition.


