 Did you mistakenly delete a file from your Mac and are pretty sure that it’s gone forever? Well, you might be wrong. Even if you think that you’ve permanently deleted data on your computer, it might still be possible to bring it back.
In this article, you’ll find out how to recover permanently deleted files on a Mac and learn about the ways to increase your chances of successful data recovery.
Table of Contents
Make Sure That Files are Deleted Permanently
Before attempting a recovery, it’s best to make sure that you actually permanently deleted the files that you are looking for and not just moved or hid them by mistake or due to a bug. For optimum results, try all of the options below, one after the other.
Option 1:Search in Finder
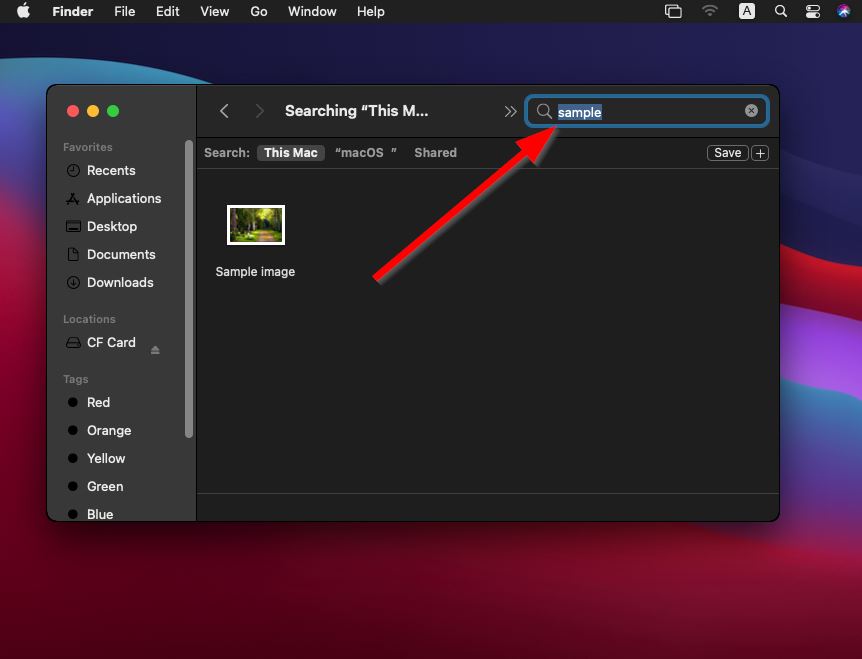
Since Finder is the native search tool on Macs, you can use it to make an attempt at locating the missing file. Here’s how to use Finder to search for a lost file on your Mac:
- Launch Finder on your MacBook (click the first icon from the left on the Dock).
- If you remember in which folder exactly the file was located, click Go from the top menu and choose Go to Folder. Then type in the folder’s name and click Go.
- To search for the file using its name, click the search icon at the top-right of the screen and type in the name. If you’re not sure about the file name, you can type its date (e.g., January 2022) or the file’s extension (e.g., .pages) in the search field to narrow down the options.
Option 2:Check Trash Bin
It’s possible that a file went missing on your Mac because you’ve accidentally deleted it. But the good thing is that if not much time has passed since, that file should still be on your computer but only in a special folder called the Trash.
There are two ways to access the Trash folder on your MacBook: using GUI (you can open Trash from the Dock by clicking the trash bin icon) or by using Terminal.
Note: While you can’t recover permanently deleted files using either of these options, Terminal is still a great tool for moving deleted files from the Trash folder once you get used to it.
Since the second option is more complex, here’s an explanation of how to open the Trash folder using Terminal and transfer a file back to its previous location:
- Launch Terminal (go to Launchpad and type Terminal in the search field at the top).
- Enter
cd .Trashto navigate to the Trash folder. - Type in
ls -al ~/.Trashto view the content of the Trash folder. - Type in
mv filename ../to move a specific file to your home folder (replace filename with the name of the file you want to recover).
Option 3:Check Hidden Files
It’s possible that you’ve hidden a file on your MacBook by yourself and, because of that, are having a hard time finding it. If that’s the case, there are two ways to unhide a file on a Mac:
- By using a special key combination (simply open the folder where the missing file was located and press Command+Shift+. (period))
- With the help of a special Terminal command
If you want to permanently show the hidden files on your Mac, then you should use Terminal. Here’s how to unhide files on your computer using the Terminal app:
- Open the Terminal application (go to Launchpad and type Terminal in the search field at the top).
- Copy-paste the following command:
defaults write com.apple.Finder AppleShowAllFiles true
- Press the Return key.
- Type in
killall Finderand hit the Return key again.
Note: To hide back the files on your Mac, you can use the same command that you used to unhide them, only replace true in the command with false.
How to Recover Permanently Deleted Files on Mac
If you’ve realized that you’ve permanently deleted the wrong folder or file by mistake, the methods described below should help you get back the deleted files on your Mac.
Method 1:Use Data Recovery Software
Probably the easiest and quickest way to recover permanently deleted files on a MacBook is with the help of a specialized data recovery tool. While there aren’t many options to choose from, it’s still possible to find a few effective data recovery applications on the market, one of them being Disk Drill.
This tool is pretty versatile since it’s compatible with macOS and Windows-based computers, supports various drives and devices (digital cameras, external HDD, flash drives, SD cards, etc.), and can recover almost any file format. Moreover, there’s both a Disk Drill free trial version and a paid one.
Here’s how to restore permanently deleted files on a Mac via Disk Drill:
- Download Disk Drill and follow the onscreen instructions to install it.
- Launch the application.
- Select the Storage devices tab from the sidebar on the left, and then click the drive that you wish to recover from.
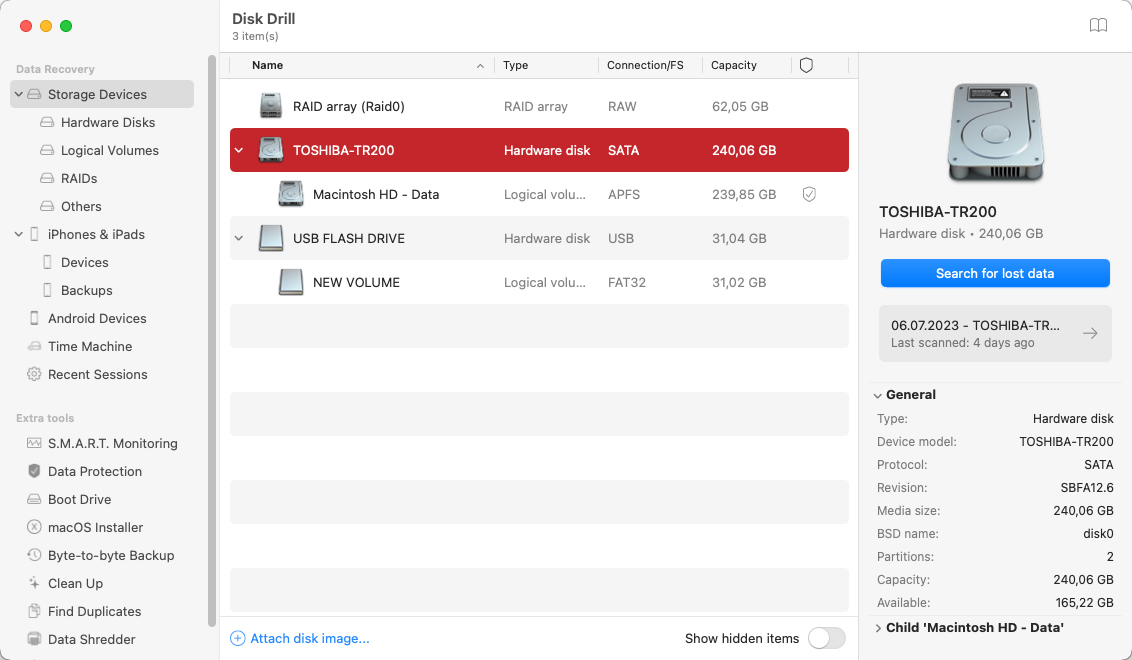
- Initiate a scan by clicking the Search for lost data button on the bottom-right of the screen.
- Once the app finishes scanning your device, click Review found items.
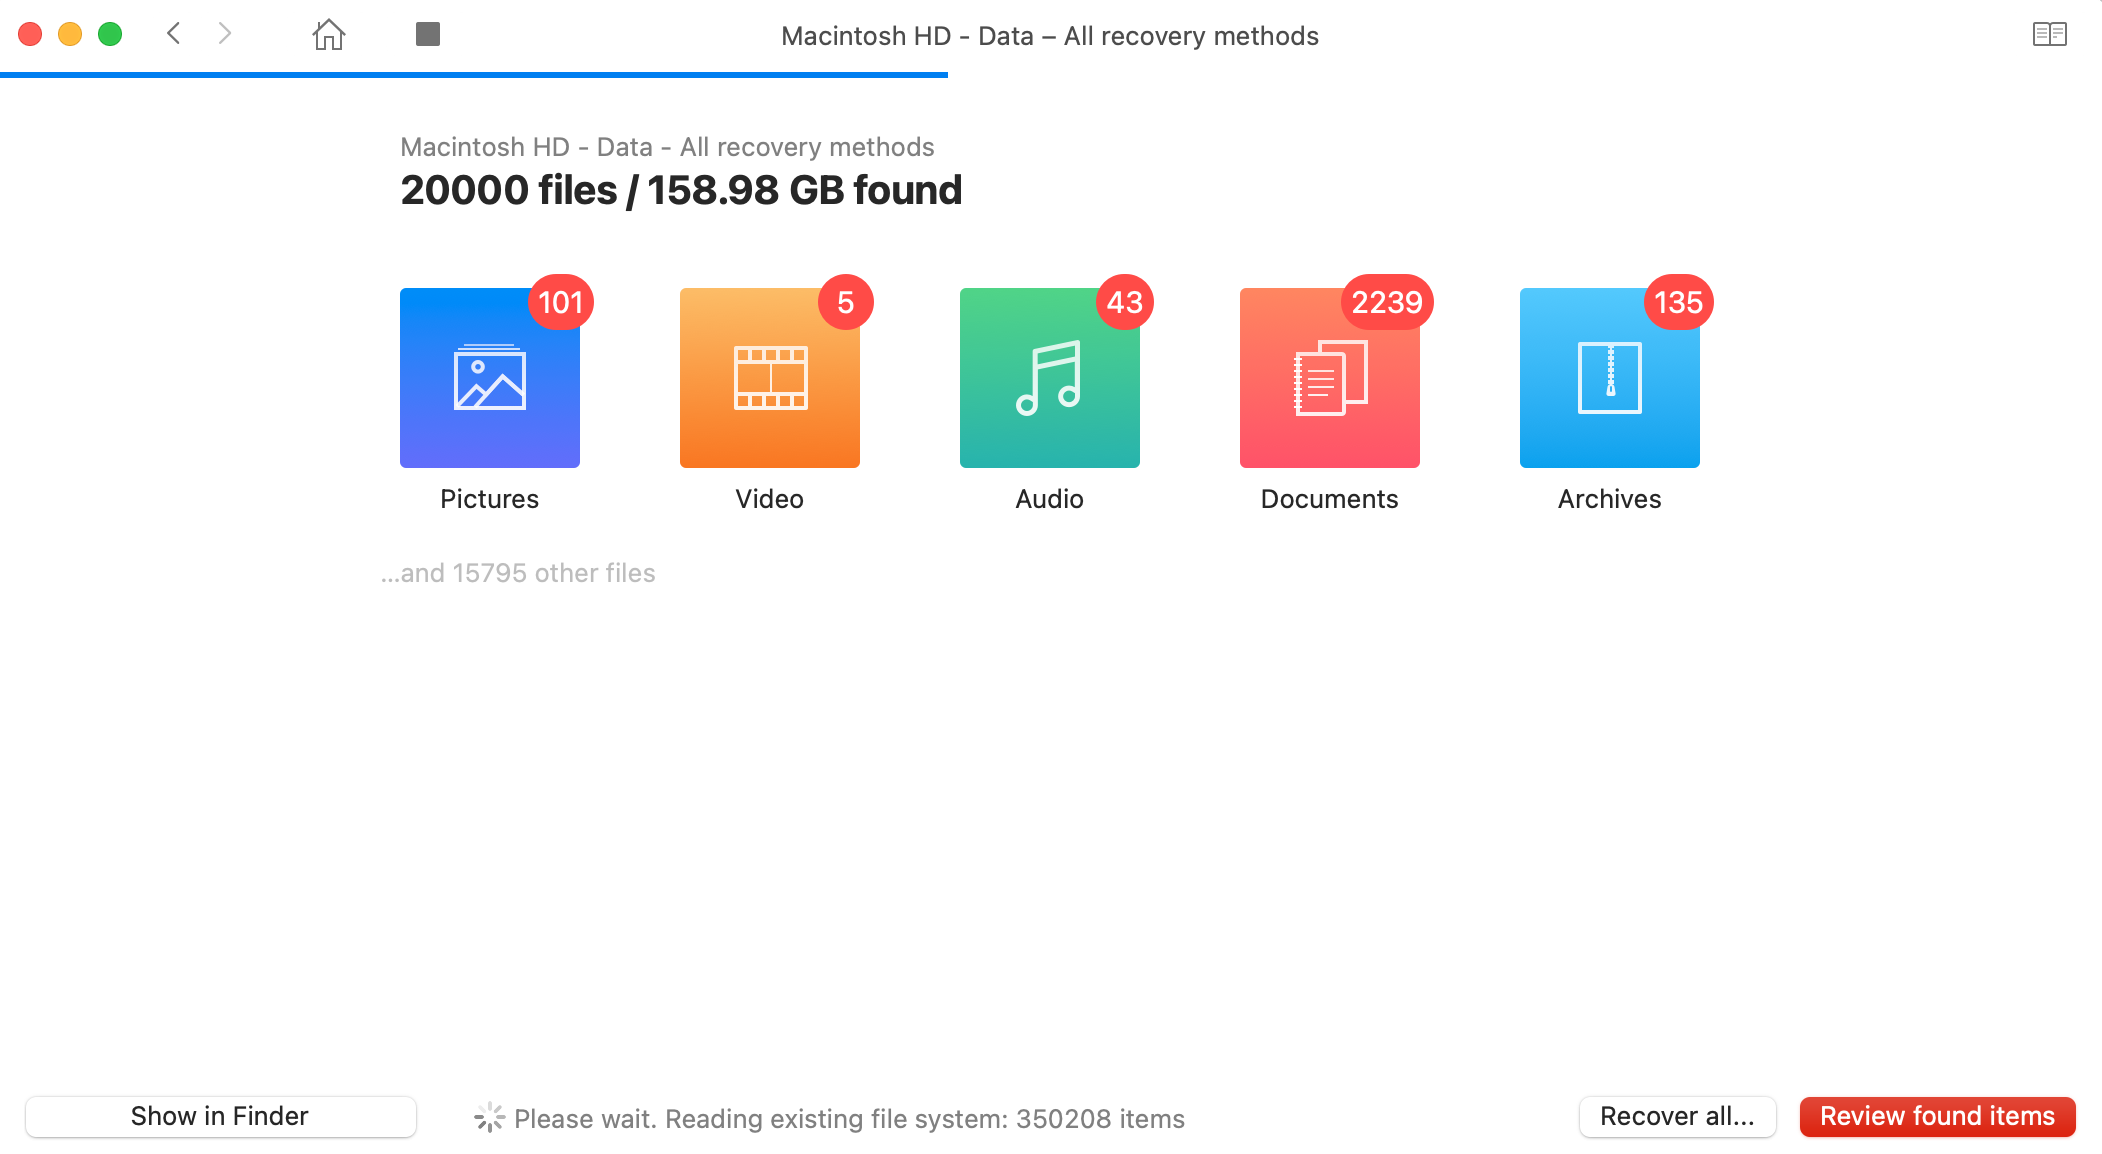
- To navigate to the needed data quicker, choose a tab corresponding to the file type from the sidebar on the left. Or if you know the exact file extension or the name of the deleted file, type it in the search field on the top-right of the screen.
- Click the eye icon near a file to preview it and ensure that it’s the one that you were looking for.
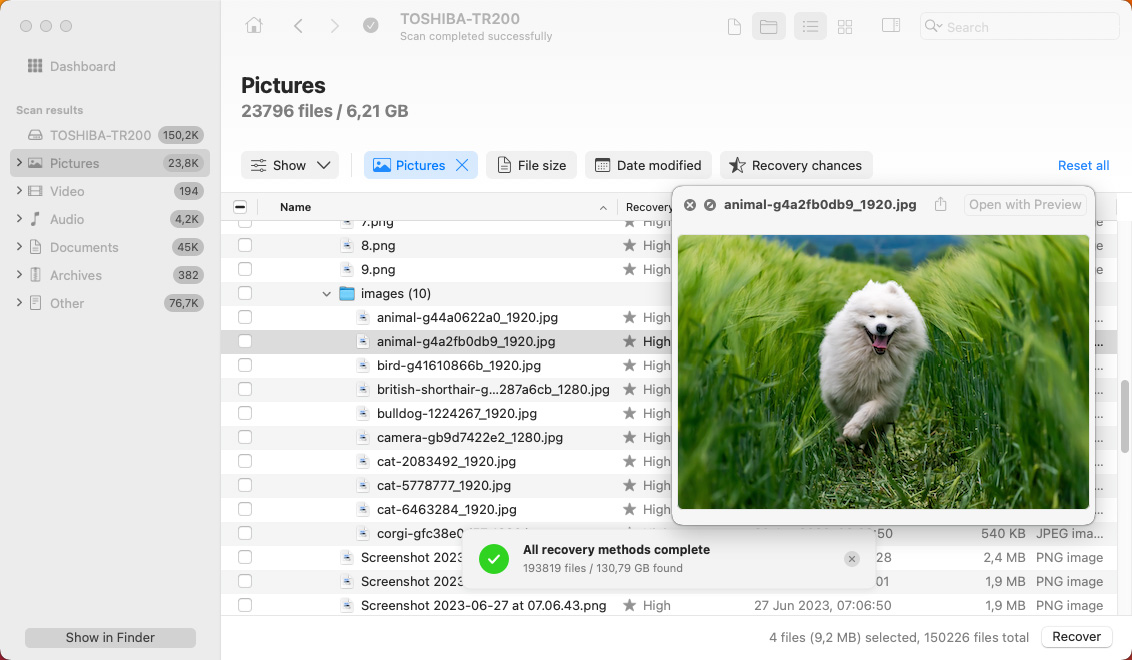
- Click the box on the left side of the file that you wish to restore to select it, and then click the Recover button.
- Choose a destination folder for the recovered file and click Next to confirm.
A pop-up window will appear saying that you’ve successfully recovered your file. Once that happens, quit the Disk Drill app. Then all you need to do to access the recovered data is go to the previously chosen location.
Method 2:Restore From a Time Machine Backup
Another effective solution is to restore the permanently deleted file from a Time Machine backup. Using this app is easy, and recovering files with it won’t take up much of your time.
However, this method has one huge limitation: you will be able to recover an accidentally deleted file on your Mac with Time Machine only if you’ve used this tool to backup your computer prior to losing the files.
Here’s how to retrieve permanently deleted files on your Mac with Time Machine:
- Connect the drive containing your Time Machine backups to your computer. Skip this step if you used an internal drive to create the backups.
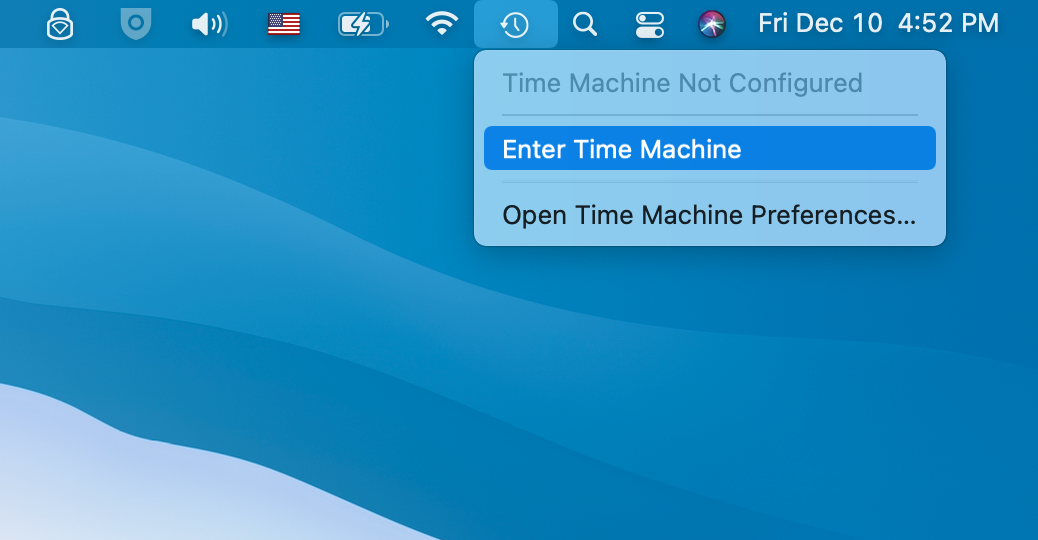
- Launch Time Machine (go to Launchpad > Time Machine or open the app from the menu bar at the top of your screen).
- Navigate to the folder where the deleted file used to be located or if you remember the name of the file, type it in the search field.
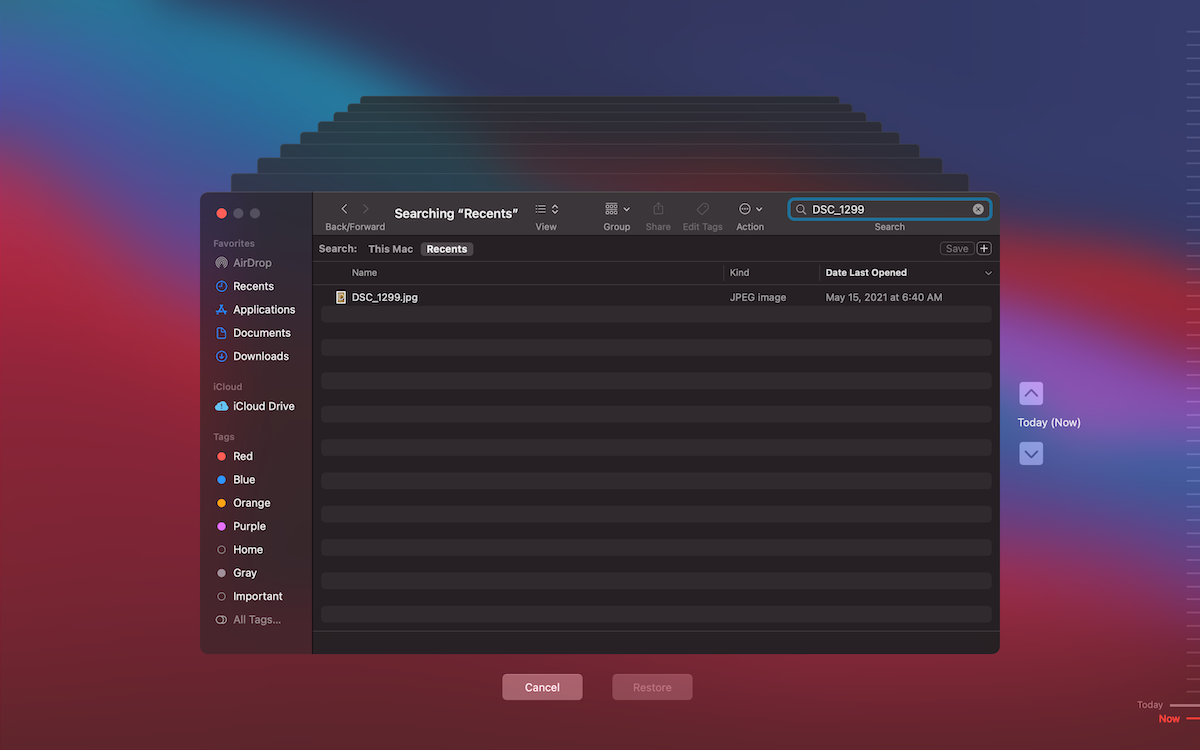
- Use the timeline on the right to choose the needed backup version.
- Choose the file or files that you wish to recover and click the Restore button.
The file will be returned back to its original location. So to open the recovered file, navigate to the folder where the file used to be stored before deletion.
Method 3:Resort for Help From a Data Recovery Service
If the previous methods didn’t work in your situation and you’re searching for a way to recover deleted files on a Mac without software, the only other option that you have left is to let data recovery professionals take care of the issue. A data recovery center like CleverFiles is capable of restoring single files or data in bulk and retrieving data from damaged drives.
And even though the results depend on whether the deleted file was already overwritten with new data or not, this method still offers a high chance of successful data recovery.
Here’s how to recover a permanently deleted file with the help of a data recovery service:
- Find a reliable data recovery center and contact them to go over the details of your issue.
- Ship the device containing the deleted data to the center.
- Wait for the experts to inspect your device and provide you with a price quote.
- If the recovery price is acceptable to you, the professional will start working on restoring the lost data.
As soon as the data recovery center finishes the job, the recovered data and your drive will be returned to you.
How to Increase Chances for Successful Data Recovery
Unfortunately, no data recovery method can guarantee a 100 percent successful outcome. But the good news is that there are ways to maximize the chances of effectively retrieving lost data:
| Method | Description |
| ✍🏻 Don’t let your computer overwrite the data | You can never know for sure how long it might take your Mac to overwrite the deleted file with new data. So to prevent that from happening, it’s best to stop using your device as soon as you notice that a file is missing. |
| 📁 Use a new destination for the recovered file | Never restore a deleted file to the same drive where it used to be located before deletion. This will also keep it from getting overwritten. |
| 💾 Regularly back up your Mac | It’s impossible to emphasize enough the importance of backing up your files. The more often you create backups, the more chances you’ll have for quick and effective data recovery. |
| ⚙️ Be careful when choosing data recovery software | Sometimes, you have only one chance of successfully recovering a deleted file, which is why it’s important to choose a reliable tool. |
Conclusion
We hope this article has helped you locate or recover the missing files on your Mac since having to deal with such an issue can put a lot of pressure on anyone. Keep in mind, the best way to protect yourself from this happening again is by regularly backing up your computer. This way, even if you lose or delete a file from your Mac again, you’ll have an easy and effective solution.
FAQ:
- Download and install Disk Drill on your Mac.
- Launch the application.
- Choose Storage devices from the left and click your Mac’s drive from the list of devices.
- Click the Search for lost data button to initiate the scan.
- Wait for the scan to finish and click Pictures to view the discovered photos.
- Click the eye icon near a file to preview it.
- Choose the photos you wish to recover and click Recover.
- Click the Trash bin icon on the Dock to open the folder.
- Locate the deleted file and right-click it.
- Choose Put Back from the drop-down menu to move the file back to its original folder.


