 The “dynamic disk invalid” error is a fairly common issue normally faced by Windows users who recently performed an operating system upgrade to a different version. Essentially, people facing this problem will find that they’re unable to access data on the affected storage device, despite it being recognized by Windows.
This, of course, can be a major headache, especially if you have important files saved on the disk. The good news is that there are multiple ways you can repair invalid dynamics disks, allowing you to get them fully functional once more.
Table of Contents
What is a Dynamic Disk
A dynamic disk is a form of hard drive configuration with enhanced features that first surfaced alongside Windows 2000. It functions by utilizing a database to track info regarding dynamic volumes in a drive, and it’s generally implemented by experienced users or for software that requires it. However, dynamic disks are not as widely used as basic disks, especially for the layman user, and are supported by the following versions of Windows:
- Windows 2000 Professional/Server
- Windows Server 2003
- Windows Server 2008
- Windows XP Professional
- Windows Vista Business/Enterprise/Ultimate
- Windows 7 Professional/Enterprise/Ultimate
- Windows 8 Professional/Enterprise
- Windows 10 Professional/Enterprise
- Windows 11 Professional/Enterprise
Why is Dynamic Disk Showing as Invalid?
There are a few reasons why a dynamic disk status is invalid. You may have recently upgraded your Windows to an unsupported version or moved a dynamic disk hard drive to another computer. Another cause could be that the database of the dynamic disk was corrupted due to a bad sector, a virus or malware attack, or a Windows crash. You cannot read data from invalid dynamic disks, nor can you write to them.
How to Fix an Invalid Dynamic Disk
There are various ways to solve the dynamic disk invalid issue, ranging from changing your Windows version to converting your disk. Below is a list of the most effective methods to alleviate the problem, along with some step-by-step guides for you to follow.
Fix 1: Check your Windows Edition
As previously mentioned, dynamic disks aren’t supported by all versions of Windows. For Windows XP and above, the “Home” editions are all unsupported. That being said, you may have installed a version of Windows that simply doesn’t work with dynamic disks. So you should start by checking which version of Windows you’re currently running. Here’s how:
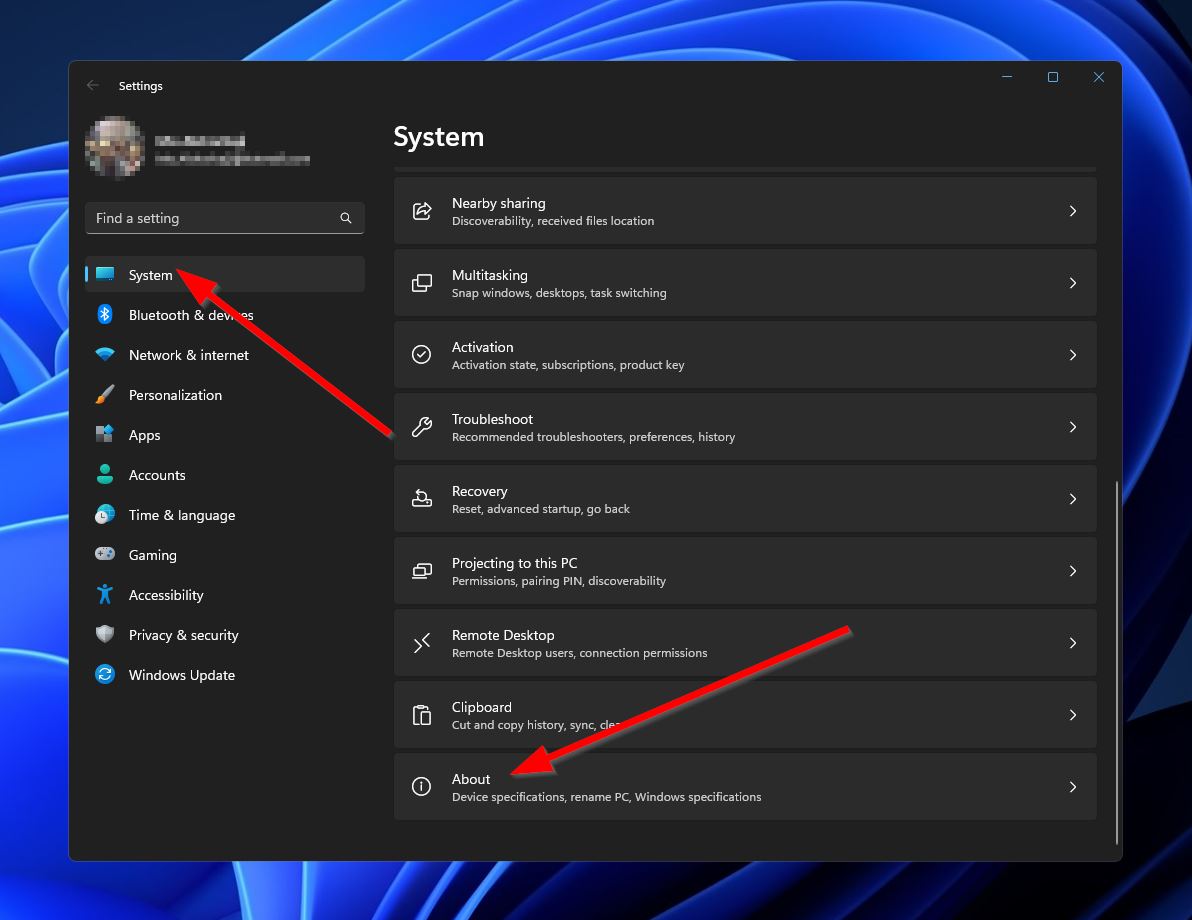
- To get started, click the start button and head to “Settings” > “System” > “About.”
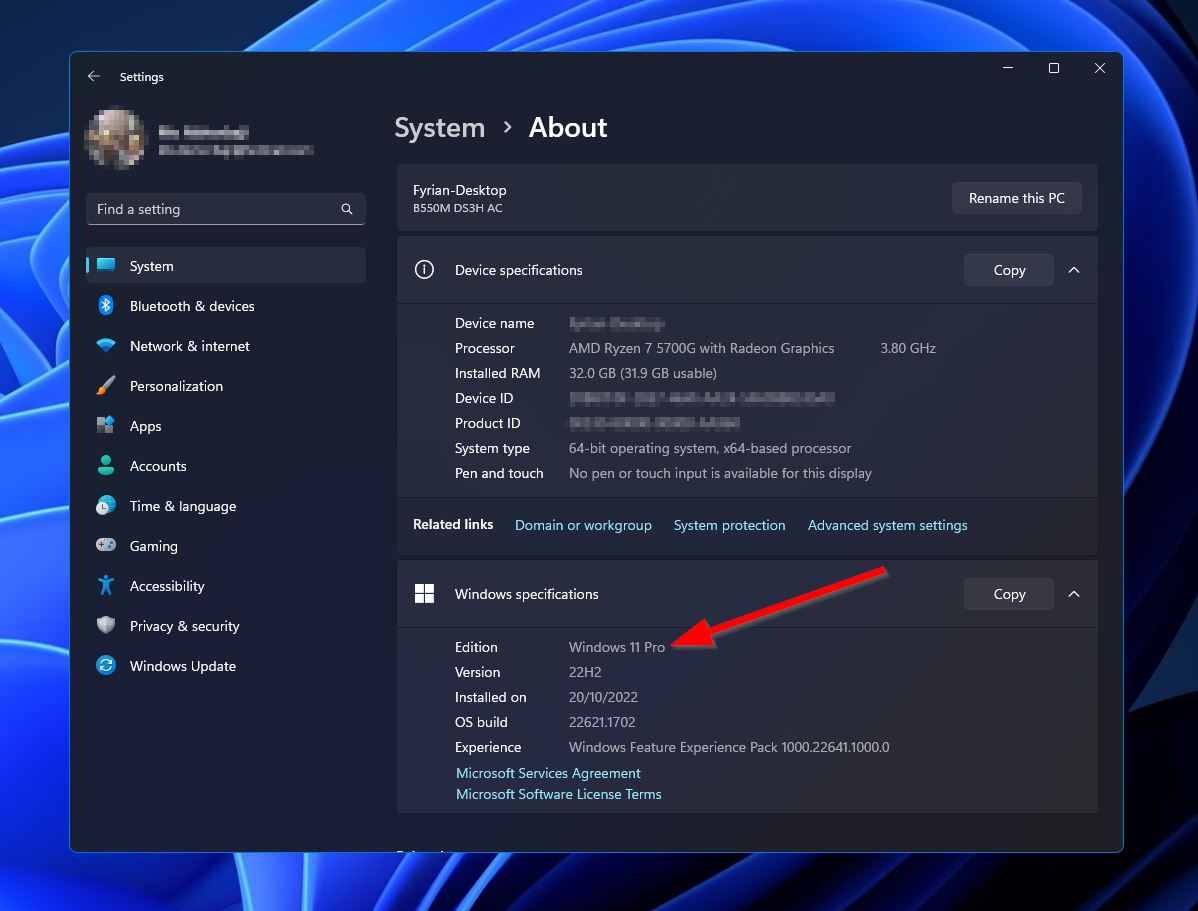
- After that, turn your attention to the “Windows specifications” section, and you’ll see your Windows version next to the “Edition” label. If it’s not a part of the list of supported editions listed earlier in this article, then that’s what’s causing your dynamic hard disk problem.
If you have a Windows version that doesn’t support dynamic disks, the only remedy is to install a different version that does. For more recent Windows variants, you’ll need the “Professional” edition or higher.
Fix 2: Reactivate Disk through Disk Manager
If your Windows version isn’t causing the issue, then the next dynamic hard disk problem solution you should try is to reactivate the disk in Disk Management. Follow the steps below to accomplish this:
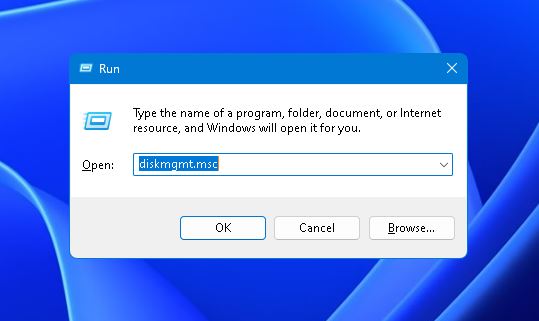
- First, press the Windows + R keys simultaneously to bring up the “Run” command, then type in “diskmgmt.msc” and hit Enter. This will bring up Disk Management.
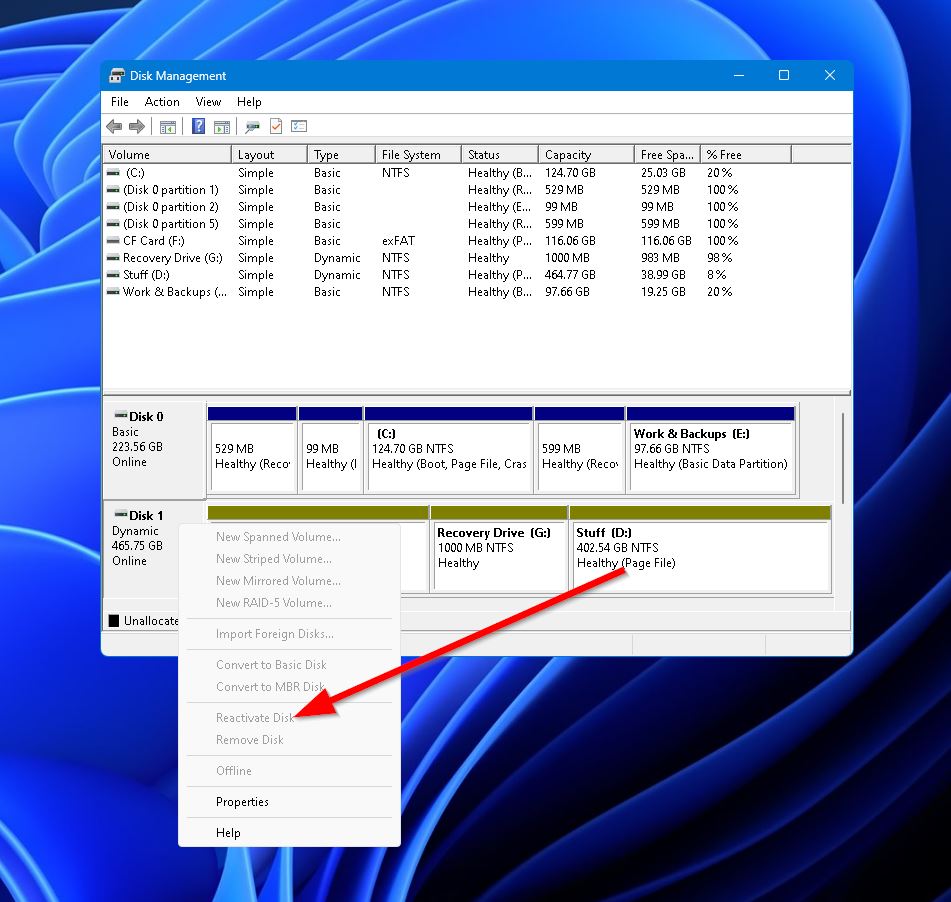
- Next, in the bottom half of the window, locate the disk that’s encountering the “dynamic disk is invalid” issue, then right-click it and select “Reactivate Disk.” If the option is greyed out, then your hard disk is not in need of reactivation.
Fix 3: Reactivate the Invalid Dynamic Disk with DiskPart
An alternative to using the Management to reactivate your invalid dynamic disk is to use the DiskPart tool instead.
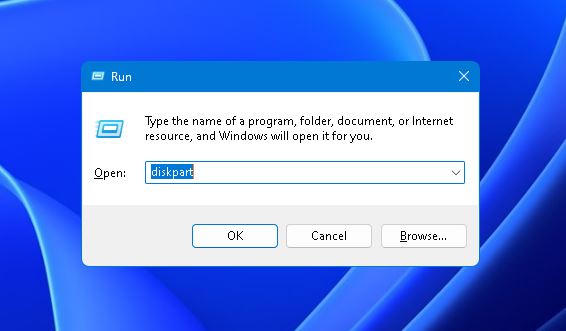
- Press the Windows + R keys simultaneously to bring up the “Run” command, then type in “diskpart” and hit Enter. This will launch diskpart.exe.
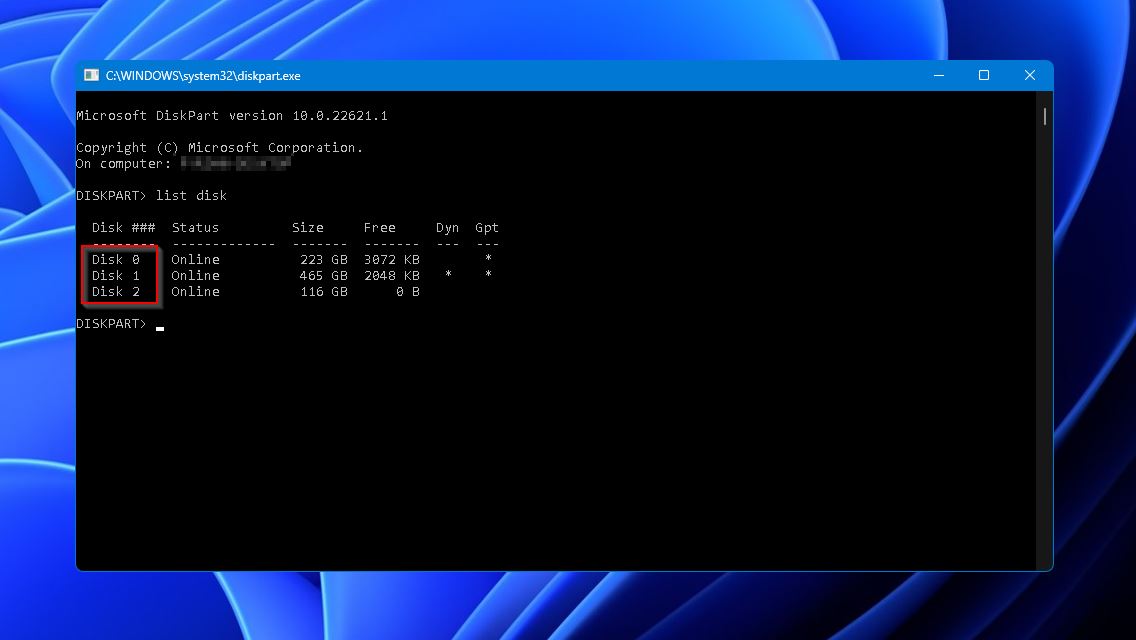
- Next, type in “list disk” and hit Enter. You’ll see a list of the available disks connected to your computer. Locate the one with the invalid problem and take note of the disk number on the left. You should be able to differentiate between disks by taking a look at their sizes.
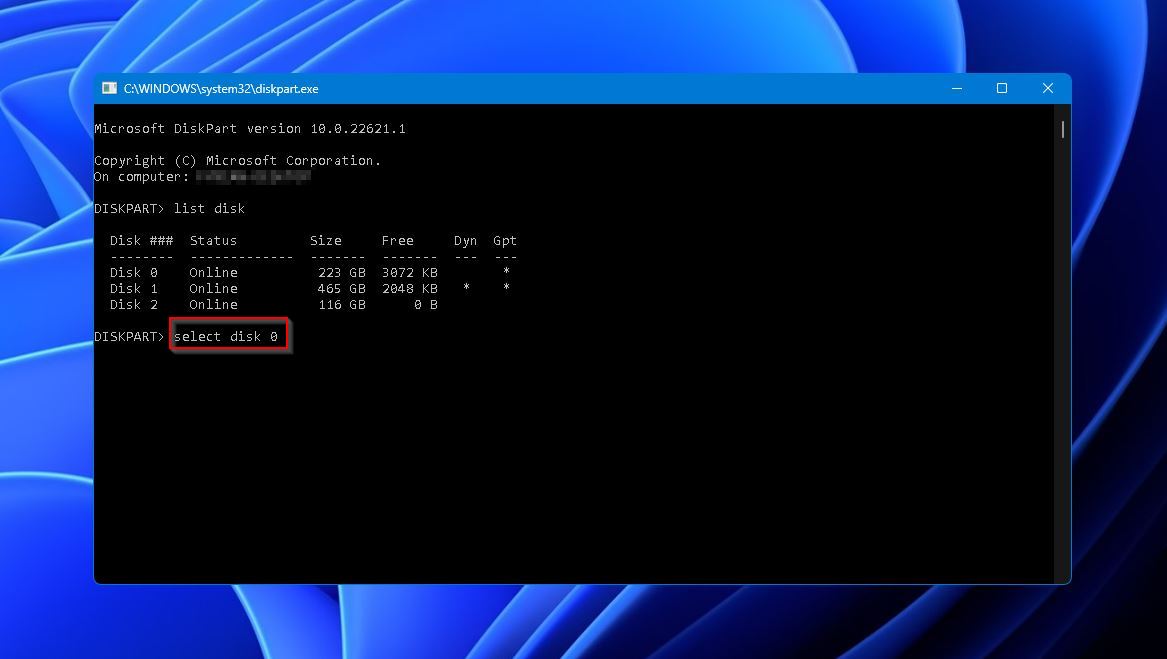
- After that, type “select disk” followed by a space and the number of the affected disk. A sample string would be “select disk 0”. Hit Enter when ready.
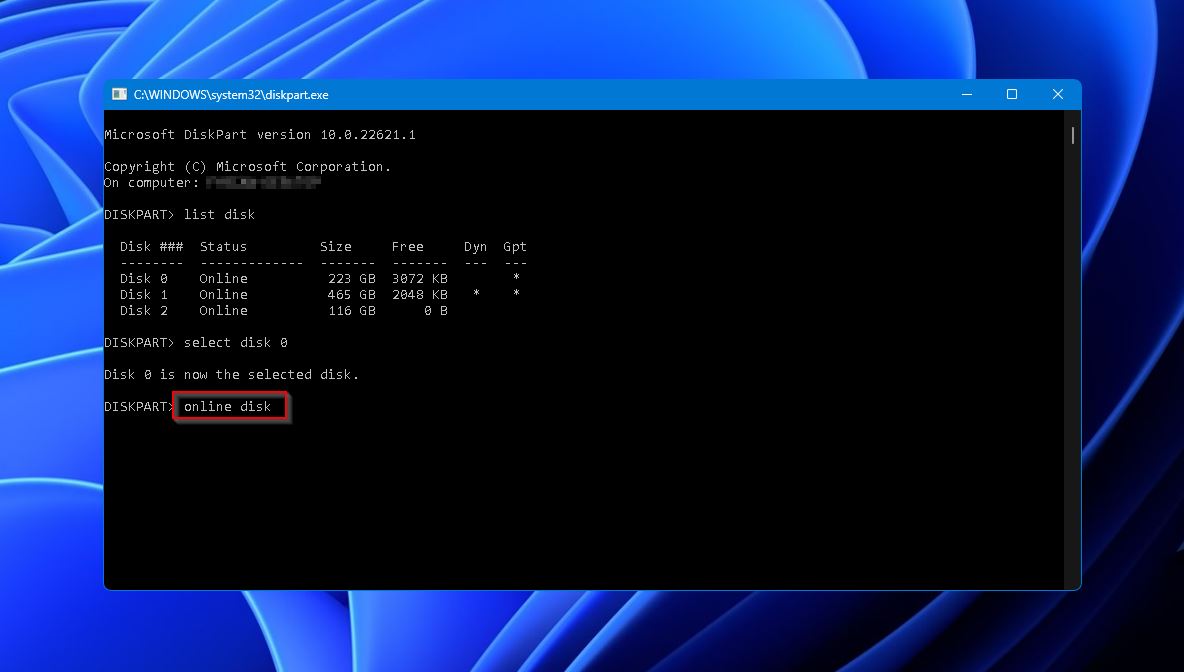
- Finally, type “online disk” to complete the reactivation process.
Fix 4: Manually Mark Disk as Basic via Hex Editor
If the dynamic disk failed to reactivate and showed the “this operation is not allowed on the invalid disk pack” error, you can use a hex editor program to manually mark the disk as basic and solve the problem without data loss. Below are the steps on how to do this:
- To get started, download and install a good free hex editor, like HxD.
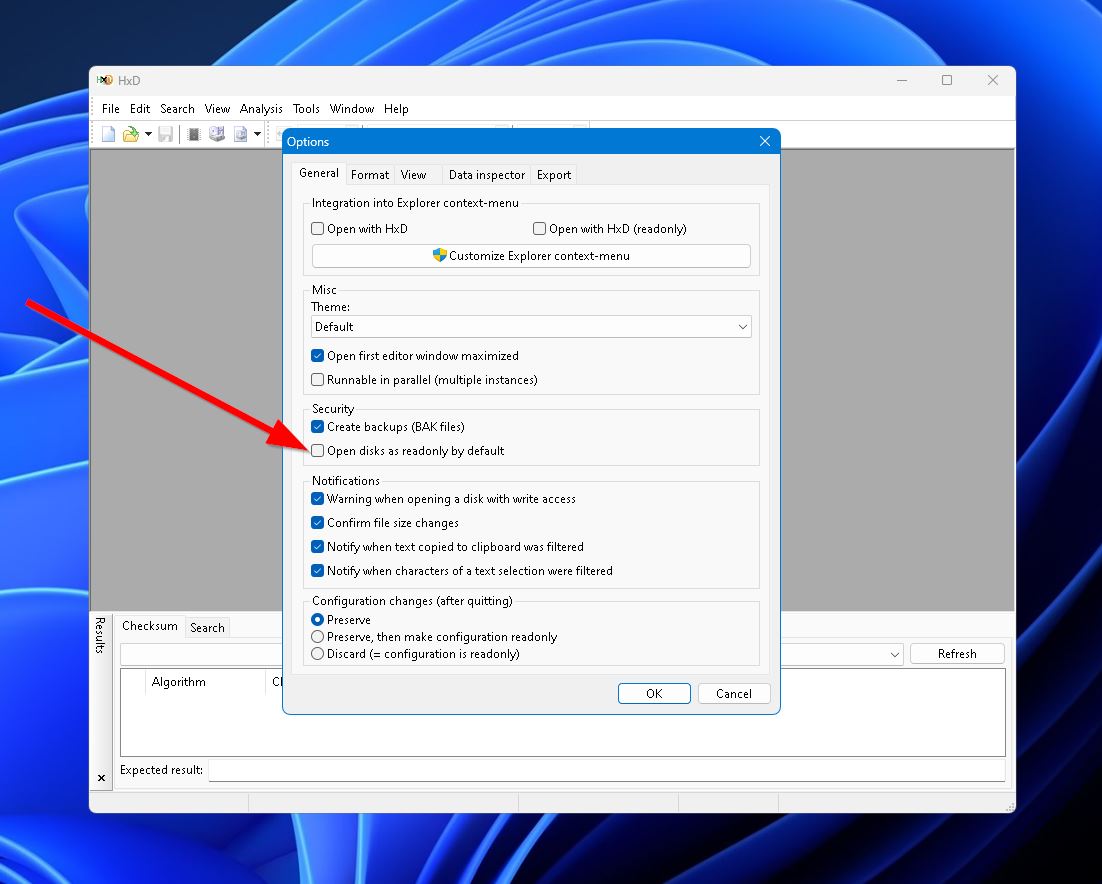
- Launch HXD with administrator privileges, then head to “Tools” > “Options” and untick the “Open disks as readonly by default” option. Click “OK” to confirm and head back to the home screen.”
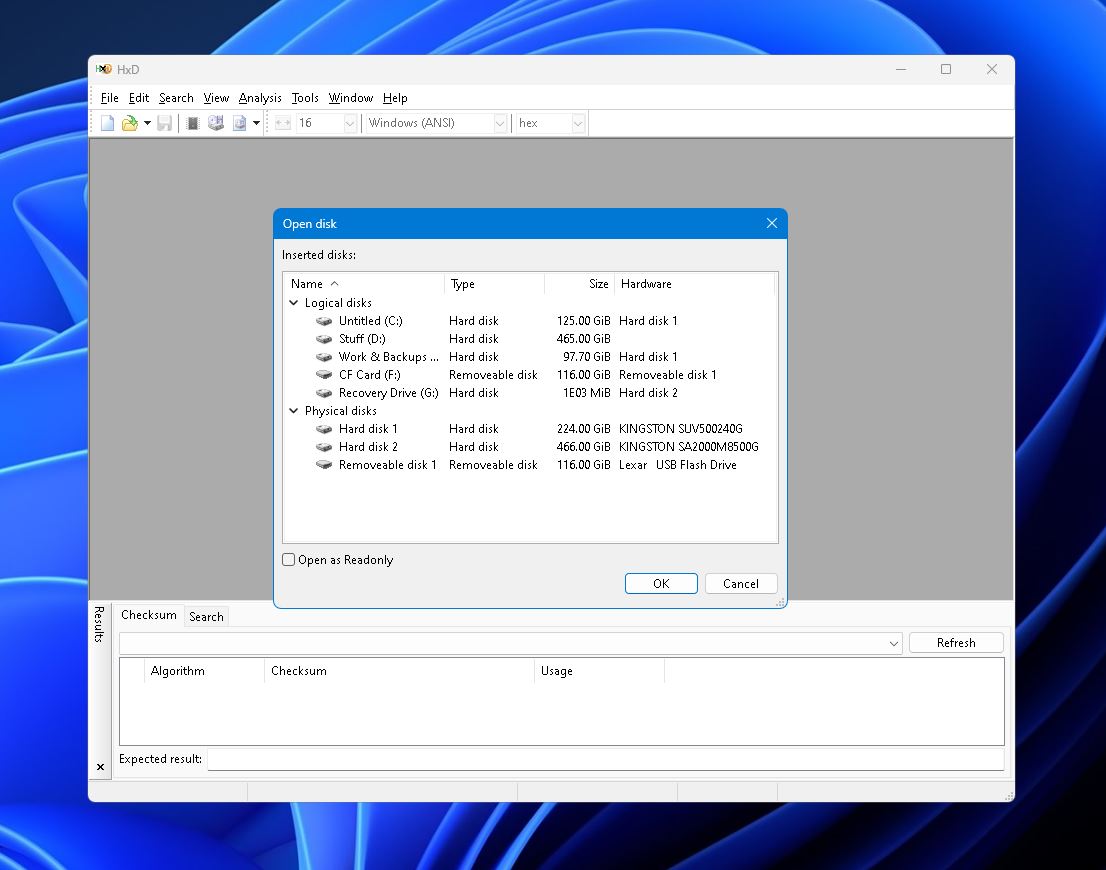
- Next, press the Ctrl + Shift + D keys simultaneously to bring up the “Open disk” command and double-click the invalid dynamic disk.
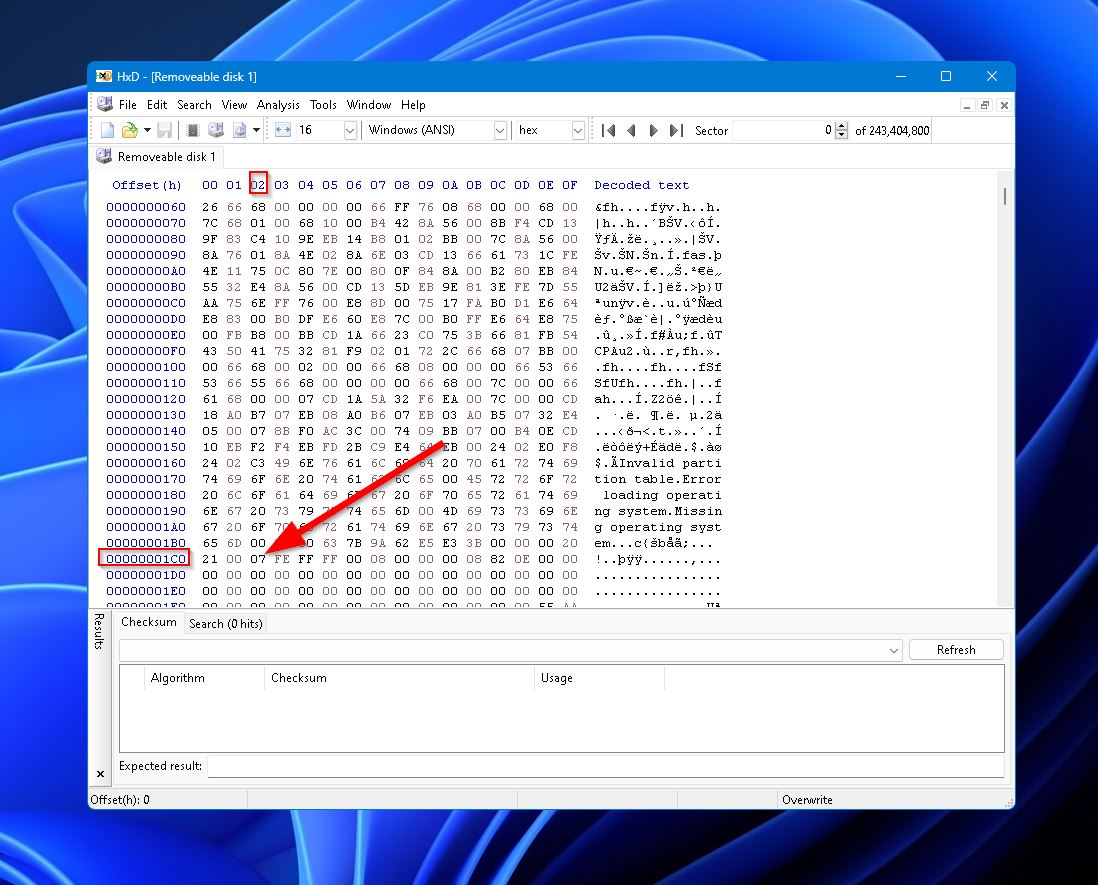
- After that, scroll down to sector “00000001C0” and take a look at column “02”. It should show “42,” which denotes a dynamic disk. Change it to “07,” which is for basic disks.
- Press Ctrl + S to save the changes, then go ahead and reboot your PC.
Note: It may take a few reboots for conversion to be successful. If you still don’t have access to your hard drive after the third reboot, just undo the changes to your disk by editing the “07” back to “42”.
Fix 5: Convert to Basic Disk Using Disk Manager
If your disk is invalid in disk management, the tool offers an easy way to convert it from dynamic to basic. This should effectively solve your issue. The problem is, doing so will delete all the volumes on your disk, wiping out all your data in the process. A good idea would be to use a data recovery program to retrieve your files before you pull the trigger on the disk conversion.
Recover Data Using Disk Drill:
Disk Drill is a superb PC data recovery app known for its quick scans, accessible UI, and top-notch recovery rate. It’s also compatible with pretty much all storage devices and file formats. Plus, there’s a trial version available for free that lets you test out all of the program’s features and rescue up to 500MB worth of data.
Here are the instructions on how to recover invalid dynamic disk data using Disk Drill:
- Download Disk Drill from the Cleverfiles website and install it on your computer to get started.
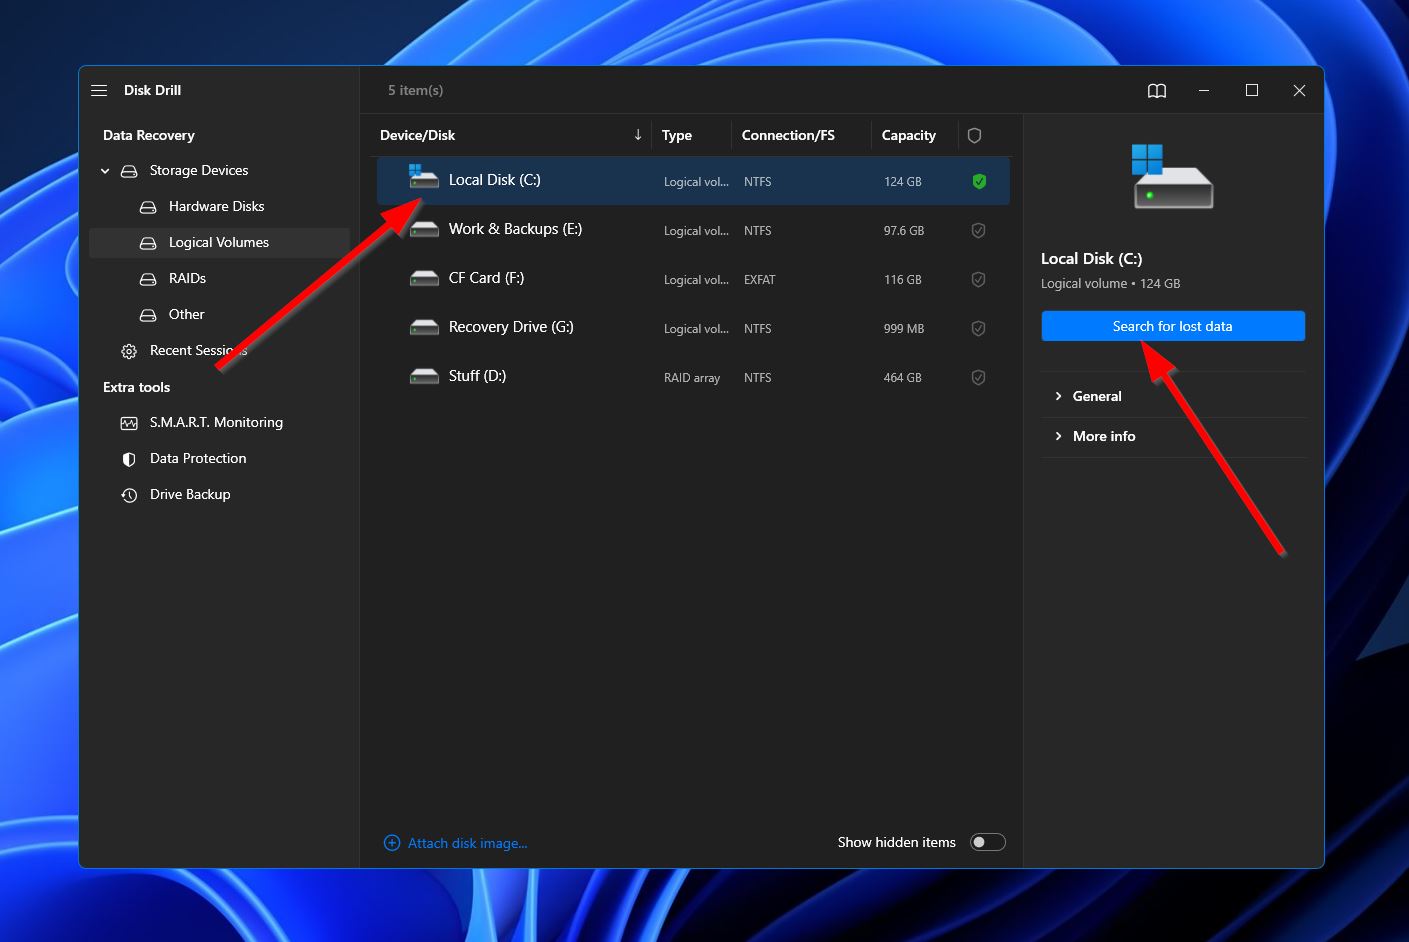
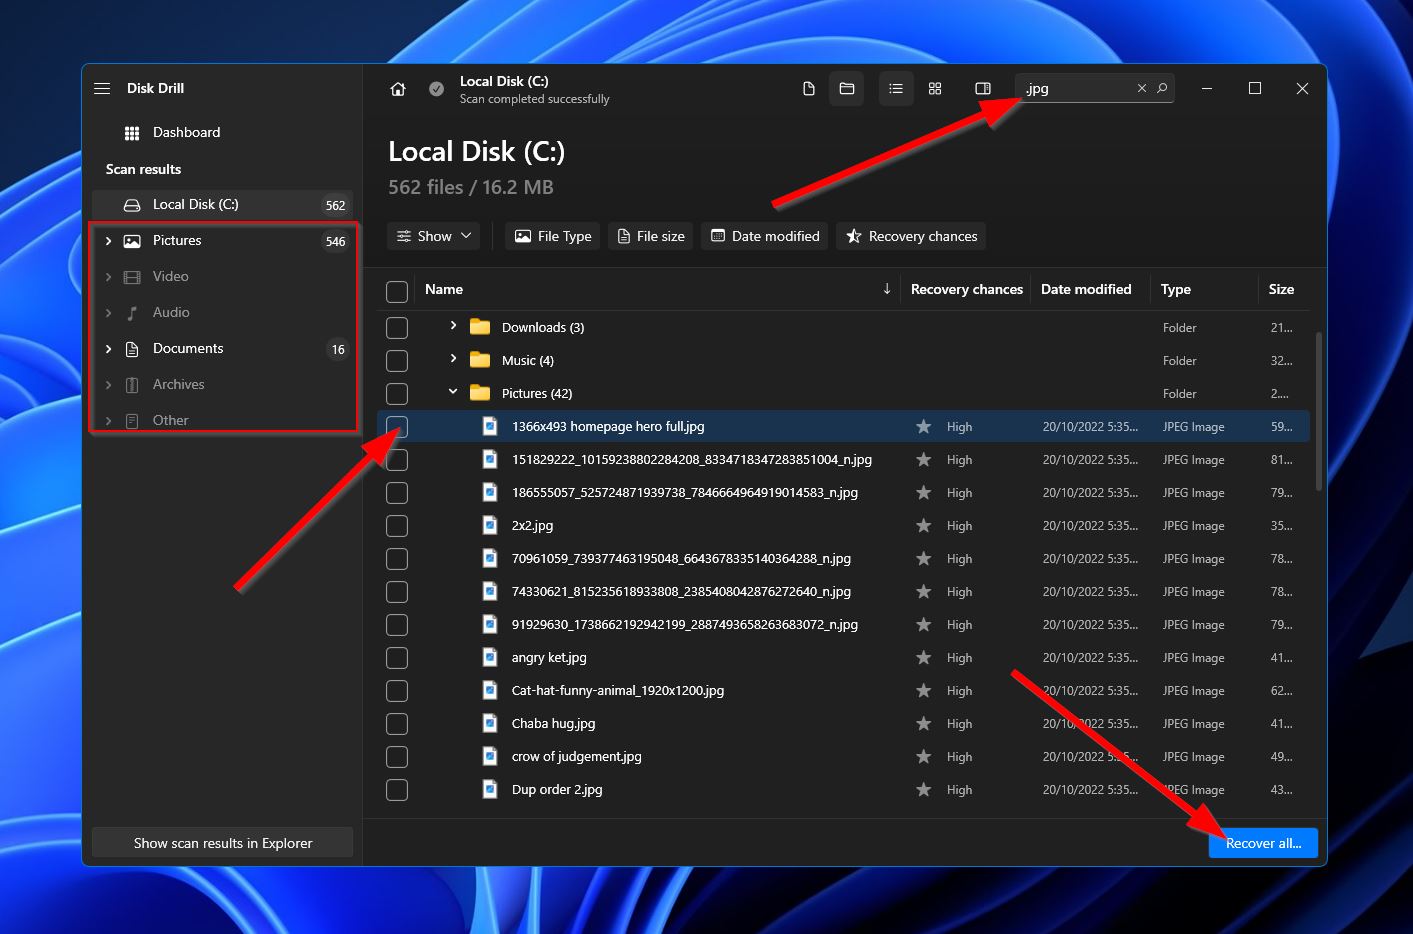
- Launch the program, then select the storage device affected by the dynamic hard disk problem and click “Search for lost data.”
- Upon clicking, Disk Drill will start scanning your drive for all recoverable files. You can click the “Review found items” button at the top-right corner to move to the results page while the scan continues. Alternatively, you can wait for the scan to finish first, then click the same button to continue to the next step.

- When you get to the results screen, search for the files you want to recover and highlight them by ticking the checkbox next to their file names. You can also narrow down your search by using the category filters on the left and the search bar at the top right. Once you’re ready, click the “Recover” button.
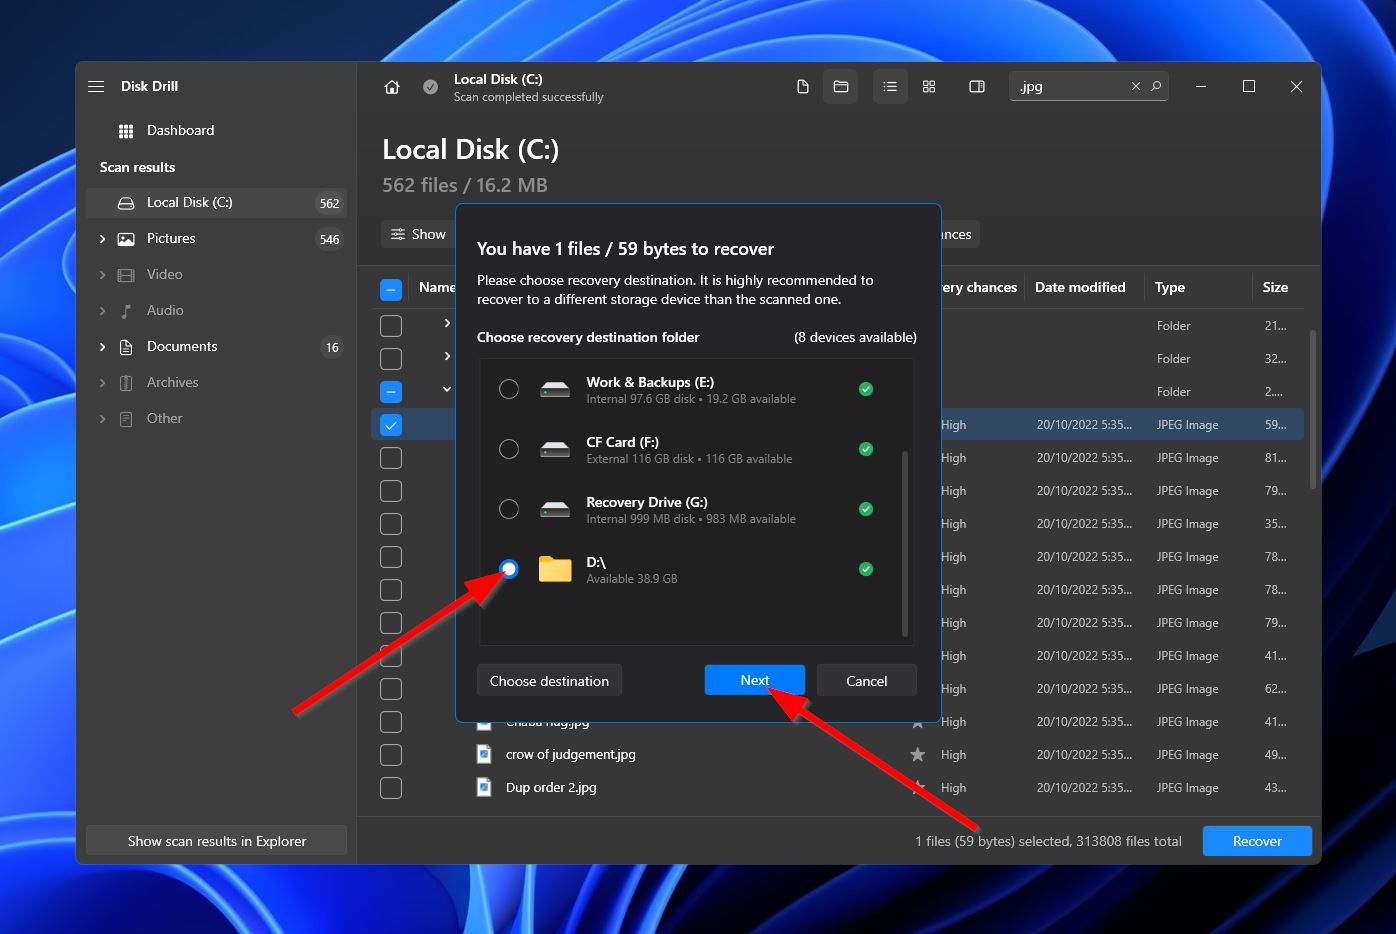
- After that, a small pop-up will appear where you’ll have to choose the storage location of your recovered files. Of course, this has to be on a different drive than the one you’re recovering from. Click “Recover” when you’re ready.
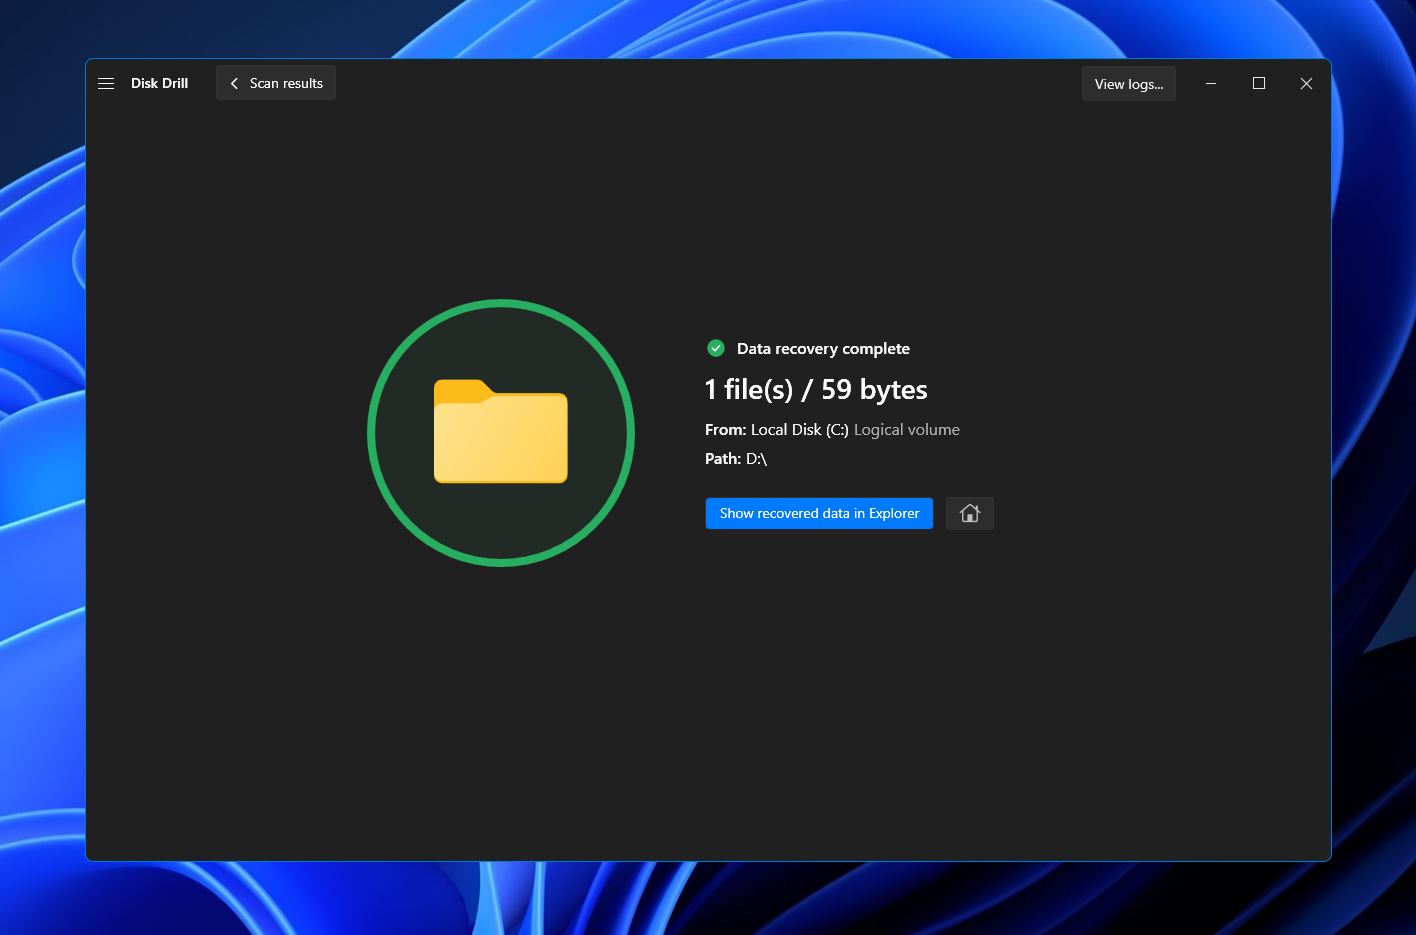
- Disk Drill will now start recovering your lost files. Once done, you’ll receive a completion message, along with a button labeled “Show recovered data in Explorer,” which you can click to open the folder containing your retrieved files.
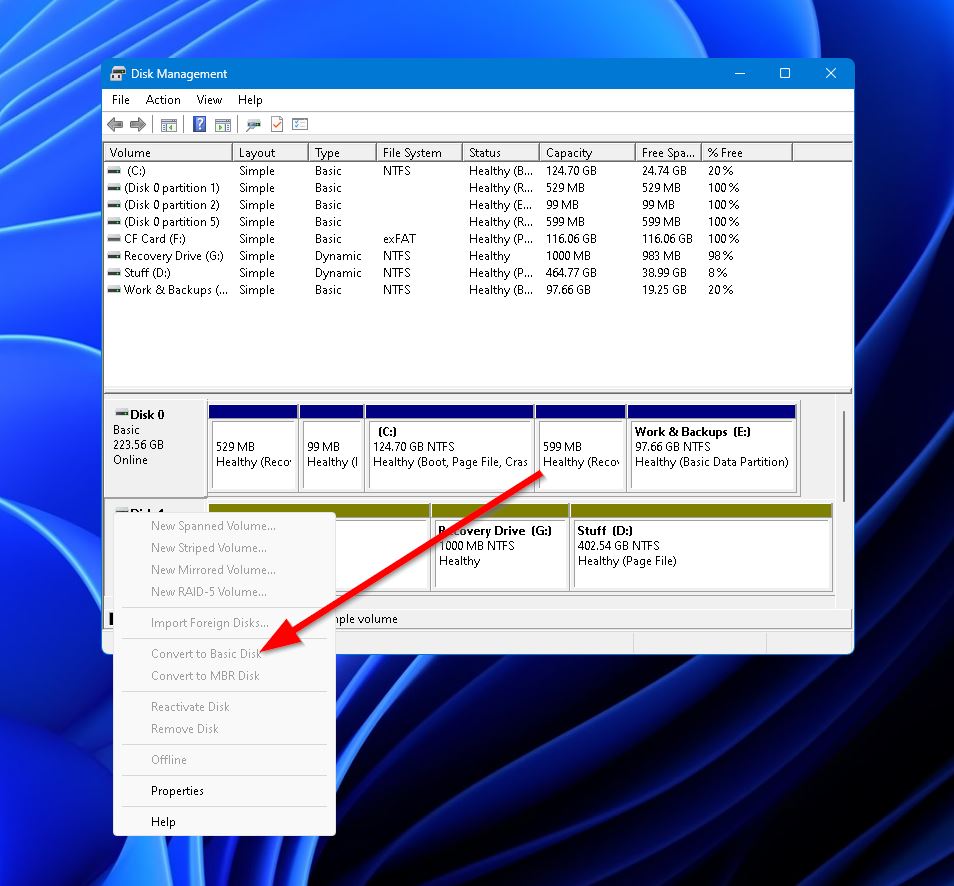
Convert Disk Using Disk Management tool:
- Press the Windows + R keys simultaneously to bring up the “Run” command, then type in “diskmgmt.msc” and hit Enter. This will bring up Disk Management.
- In the bottom half of the window, locate the dynamic disk that’s invalid in disk management, then right-click it and select “Convert to Basic Disk.”
Conclusion
The “dynamic disk invalid” error is a serious issue that prevents users from accessing the contents of an entire hard drive. It generally occurs if you’ve upgraded to an unsupported version of Windows or moved your hard drive to another PC, though it can also be caused by device corruption. Fortunately, it isn’t a difficult problem to fix. Just follow the methods we’ve outlined above, and your drive should be running normally in no time.


