 SSDs are exponentially faster than traditional hard disk drives (HDDs). You’ve made the transition to using them, but what to do after installing a new SSD? We’re here to help you out. Our easy-to-follow guide will show you how to set up your new SSD, transfer your old files to it, and what you can do in case the data transfer process doesn’t pan out as it should.
Table of Contents
How to Initialize a New SSD
A brand-new SSD needs to be initialized and then formatted before it’s ready to store data. In case you’re using the new SSD as the primary system drive, initialization will automatically be done during the Windows installation process. But, if you’re using it as a secondary drive, you’ll need to manually initialize it using the Disk Management feature.
Before initializing a secondary disk, double-check that it is connected properly, and visible in the BIOS settings. Additionally, if you’re installing a new SSD in your laptop, it’s best to get it done by an expert because manually unscrewing your laptop’s back cover can void its warranty.
To manually initialize a new SSD on Windows, follow these steps:
- Press Windows Key + R to open the Run application.
- Type diskmgmt.msc in the text box and press Enter. This will launch the Disk Management utility.
- The new SSD will show up as “Not initialized” towards the bottom of the screen. Right-click on the SSD and choose Initialize.
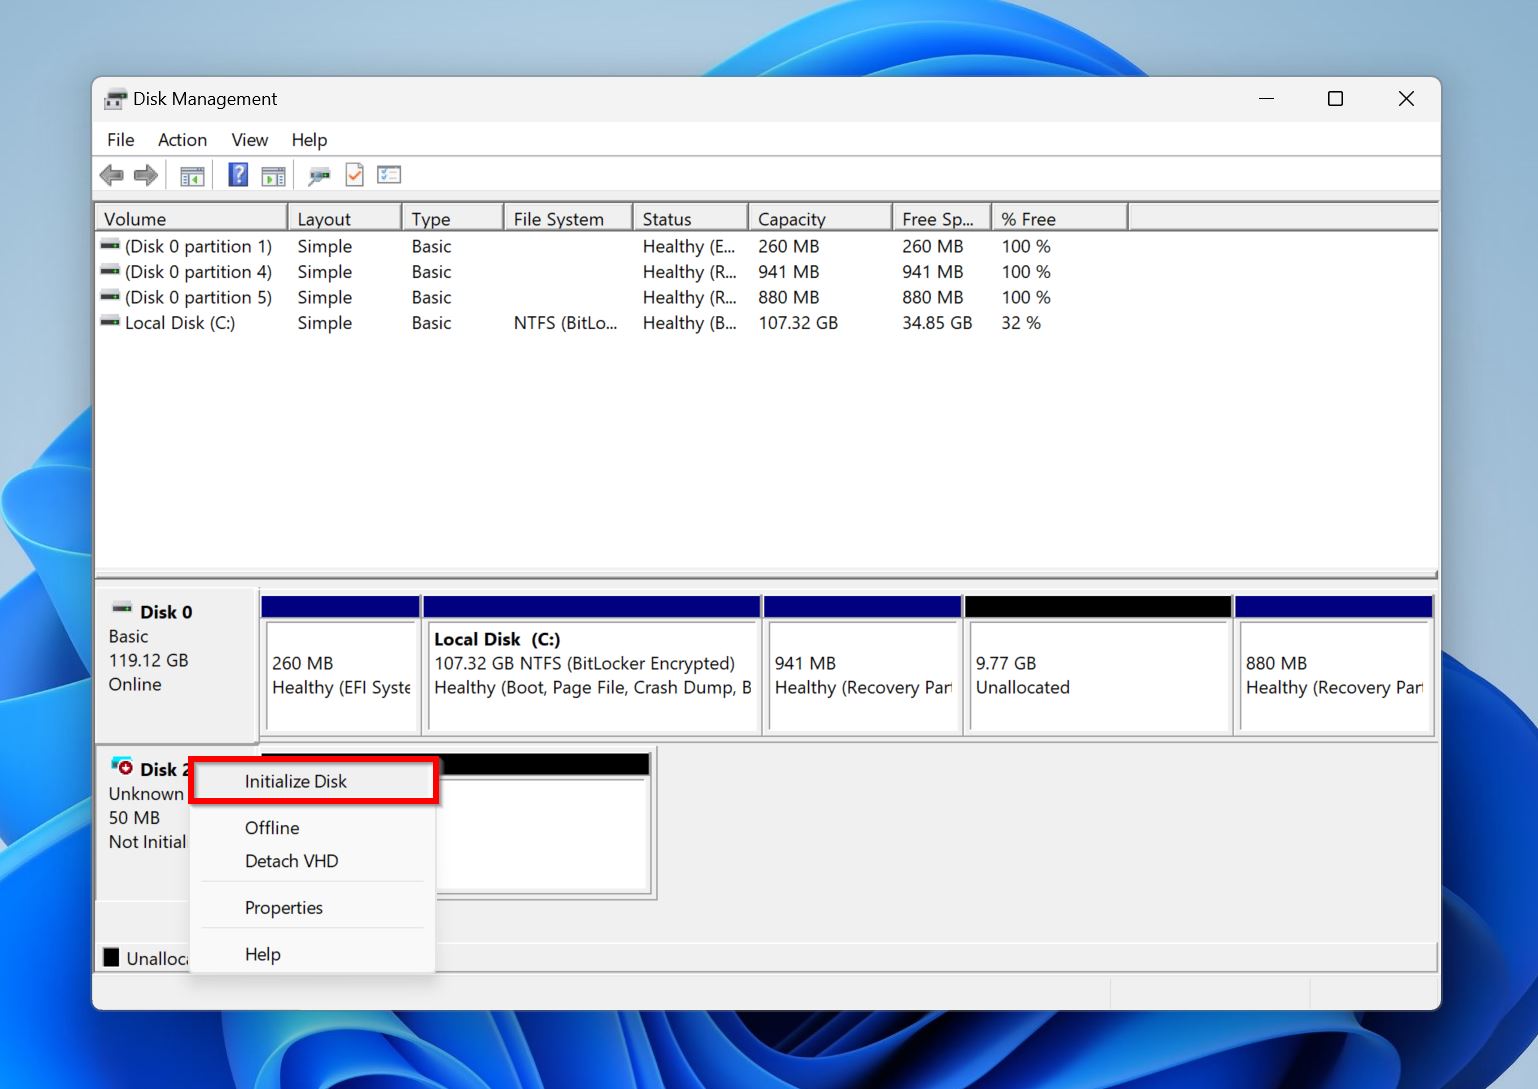
- Choose the partition table type and click OK. It’s best to leave the options as they were and simply click OK.
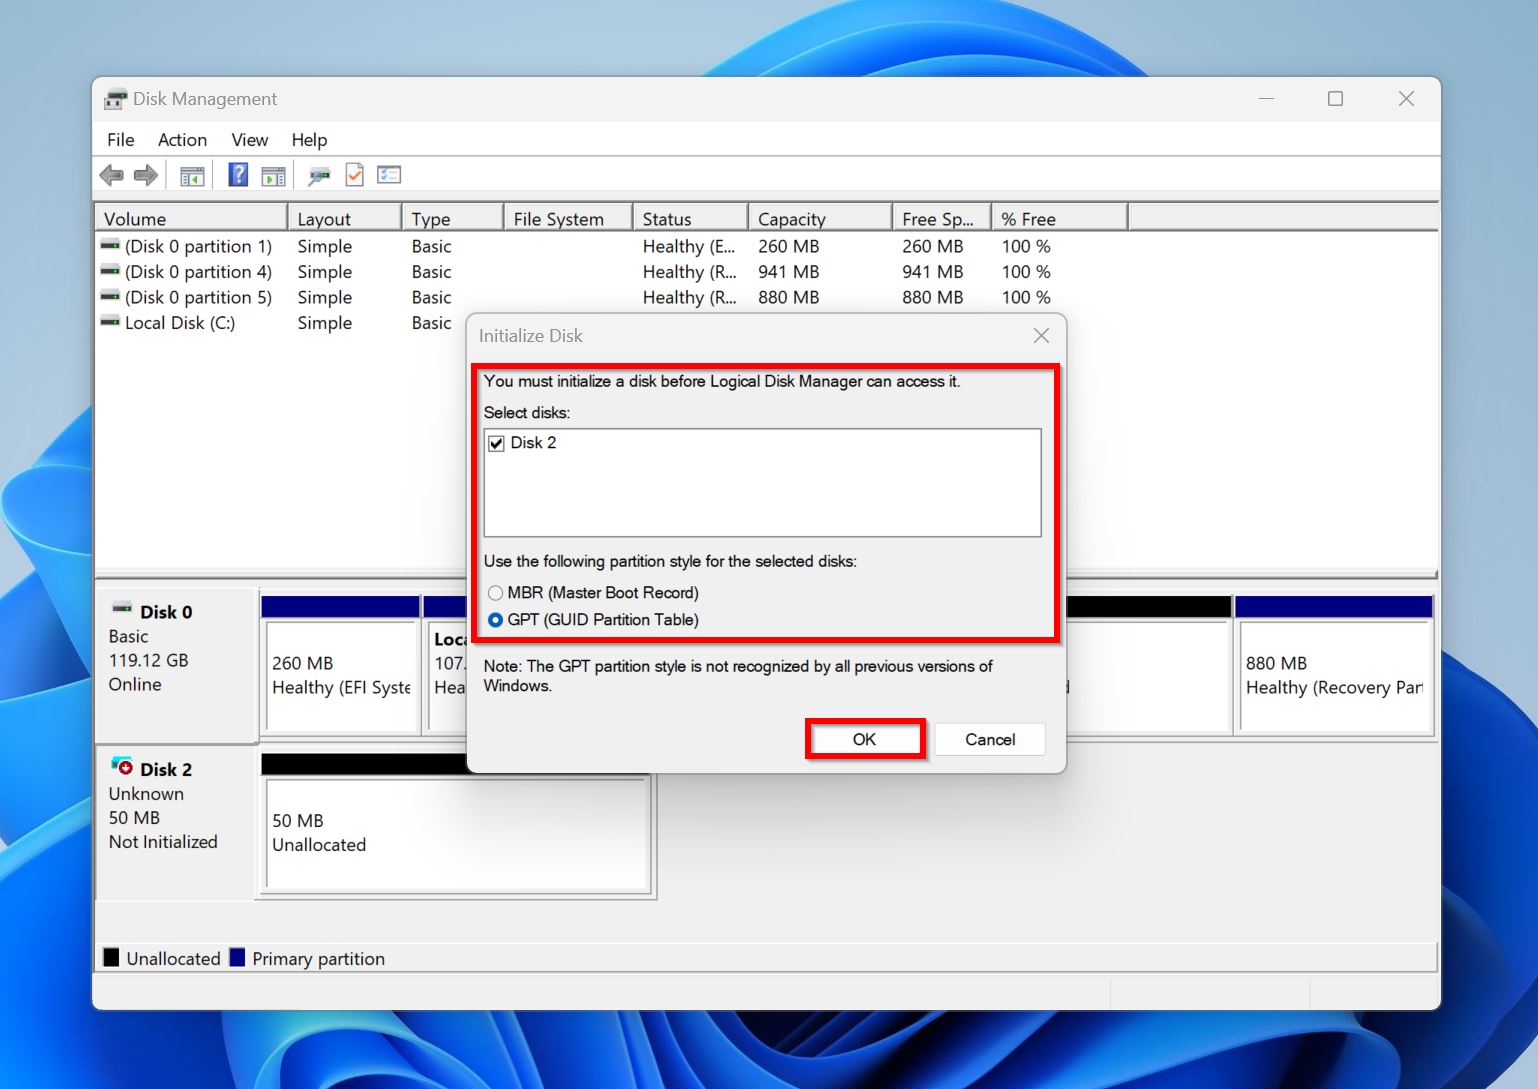
- Windows will initialize the disk.
After initialization, the disk space will show up as “Unallocated,” and you’ll need to format it before you can begin storing data on it. You can format the disk using the Disk Management utility itself.
How to Transfer Data to Your New SSD
Transferring old data to your new SSD is usually a simple affair. There are two primary ways to do this–create a system image and restore it, or manually select and transfer your files. We’ll take a look at both methods below.
Method 1: Clone the Old Drive
If you’re planning to install Windows on your new SSD, creating a system image of the currently installed version of Windows is a convenient way to transfer all your data (including the OS) to the new drive. Using this method, you can simultaneously restore your installed copy of Windows, your settings, and all your data to the new drive.
To store the system image, you’ll need another drive temporarily.
Here’s how to clone your old drive and move your data to an SSD you just installed:
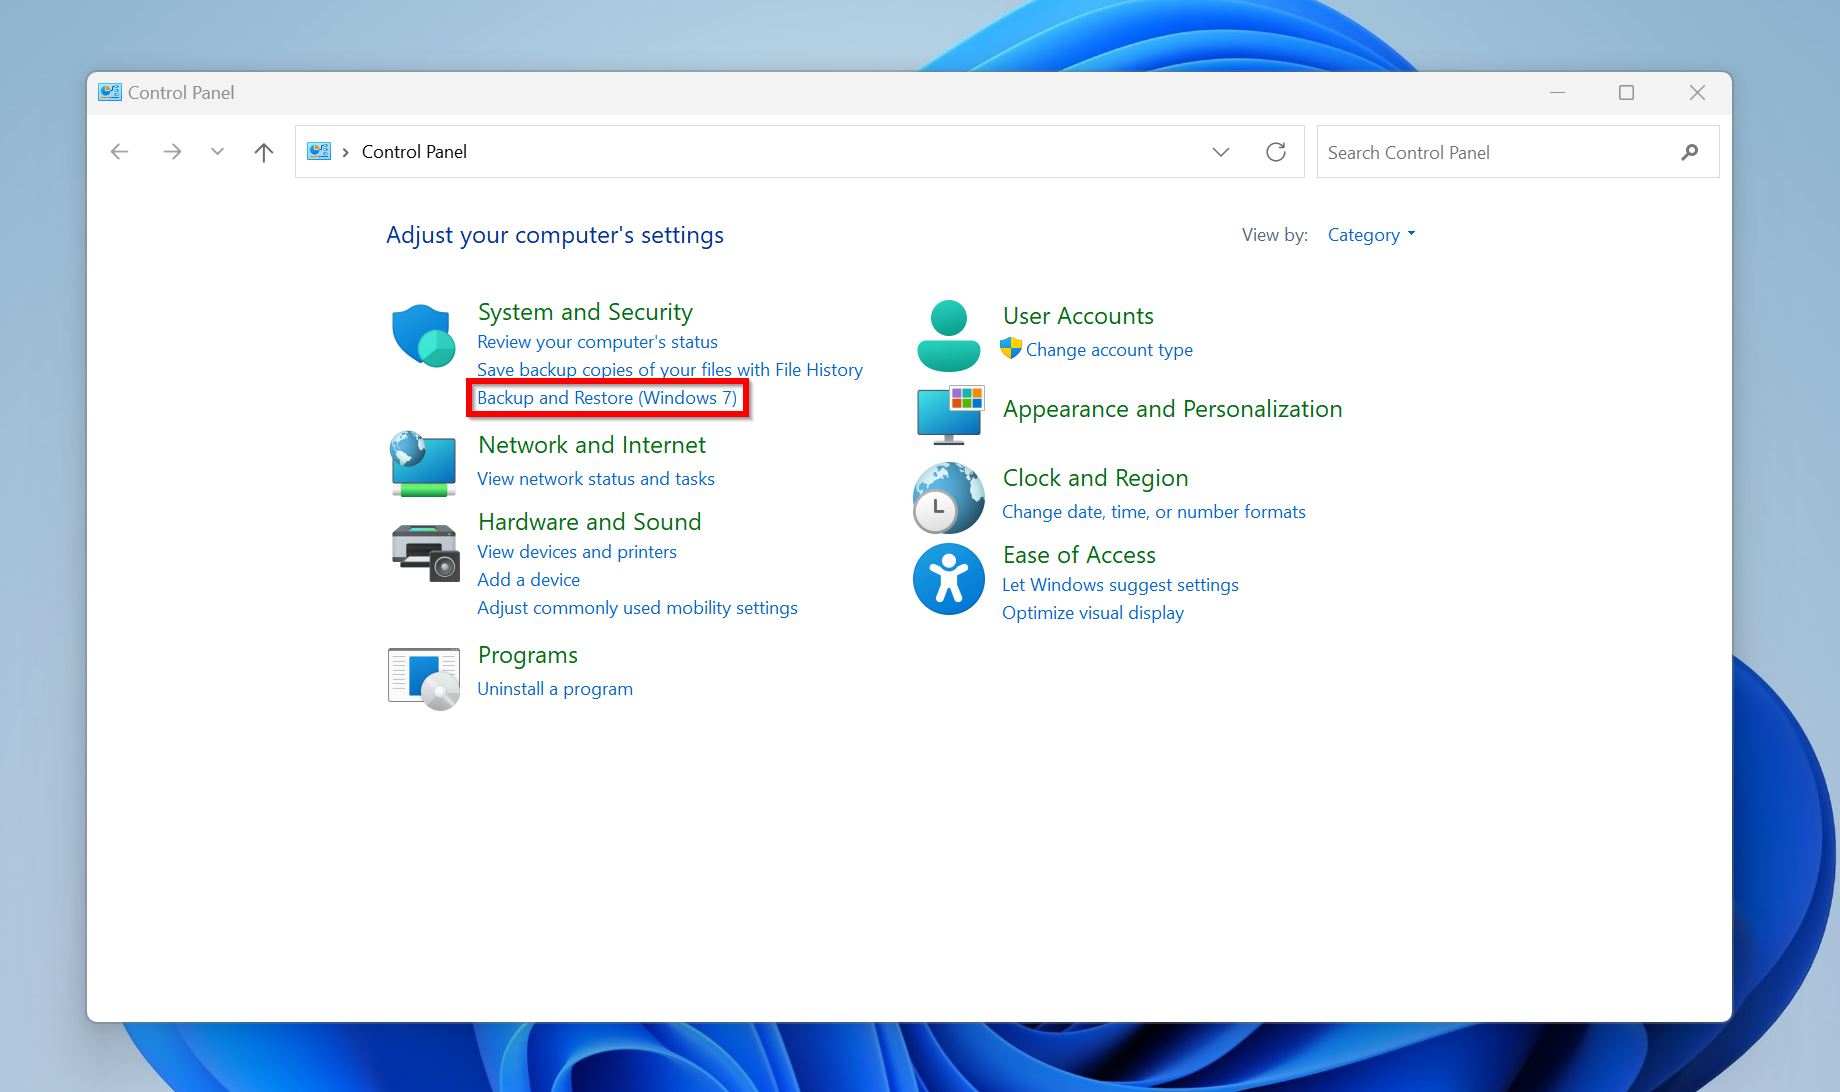
- Search for “control panel” in Windows Search (Windows Key + S) and open it.
- Ensure the View by: option is set to Category.
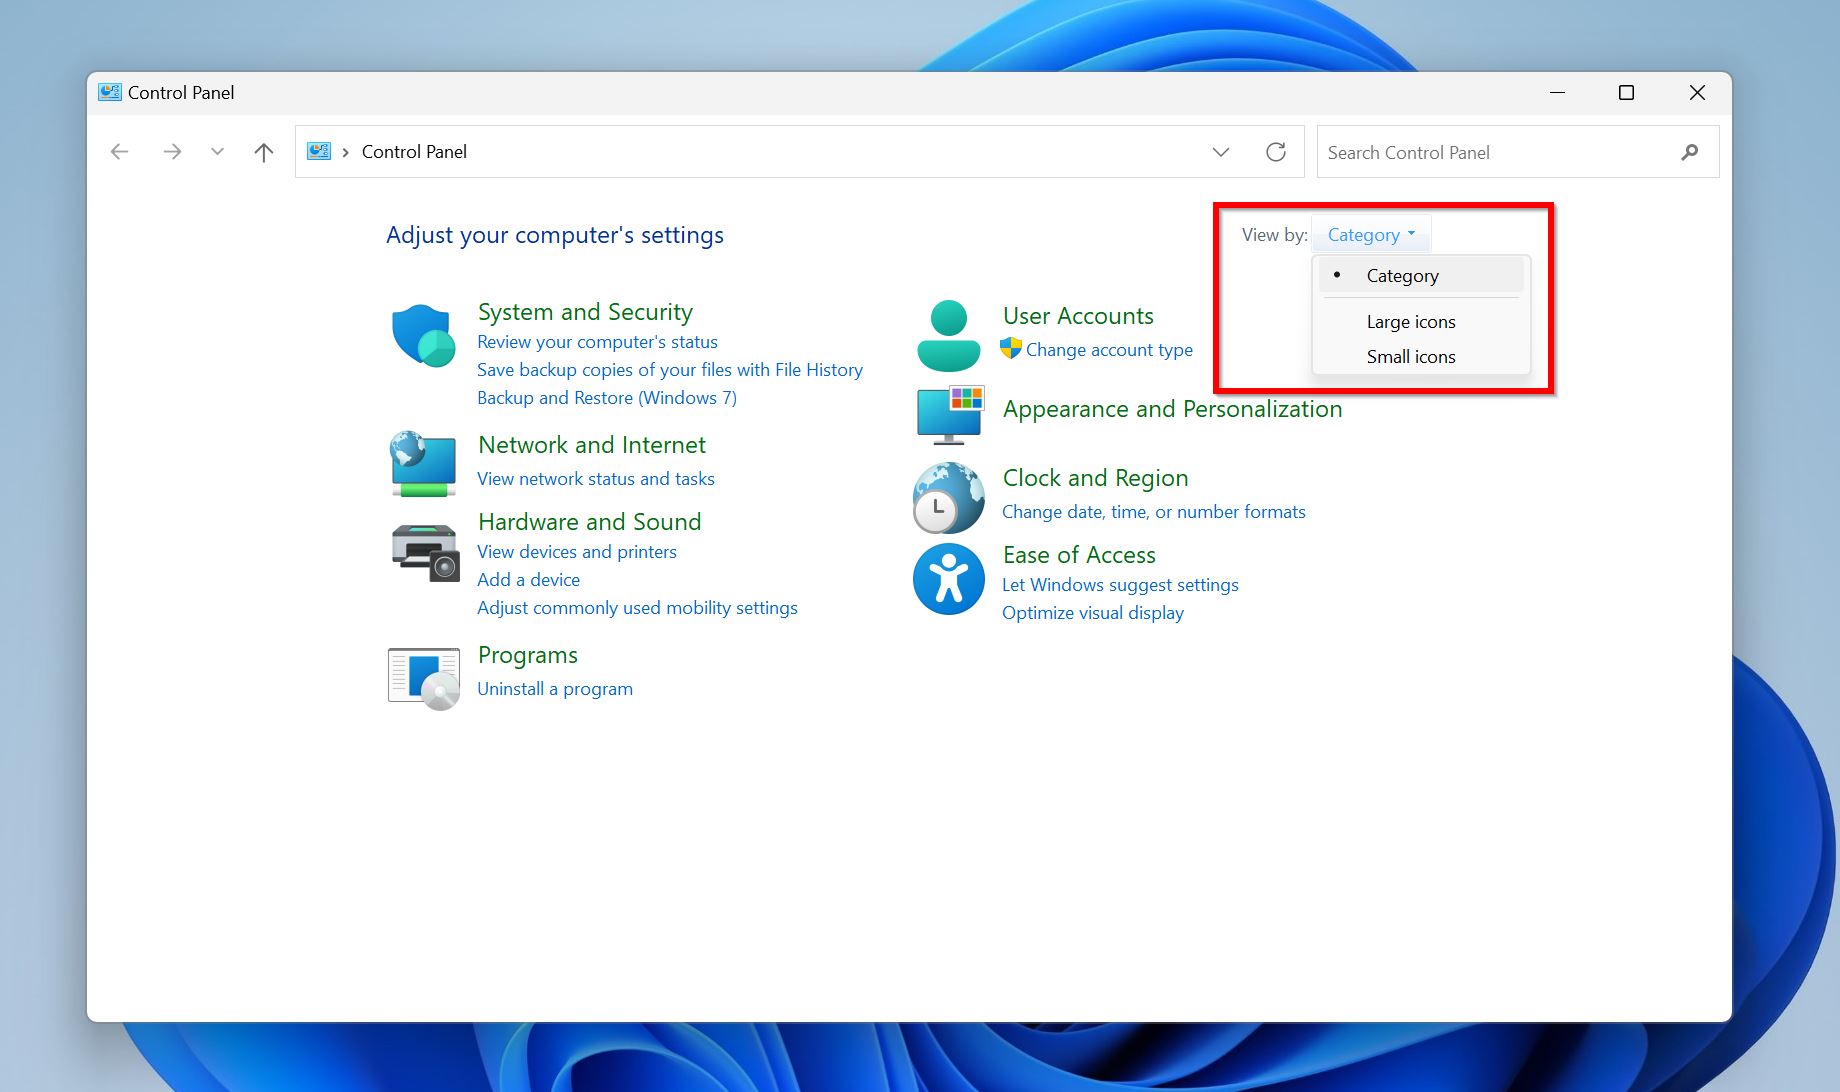
- Click on Backup and Restore (Windows 7) under the System and Security category. This option will be available in Windows 10 and 11 as well.
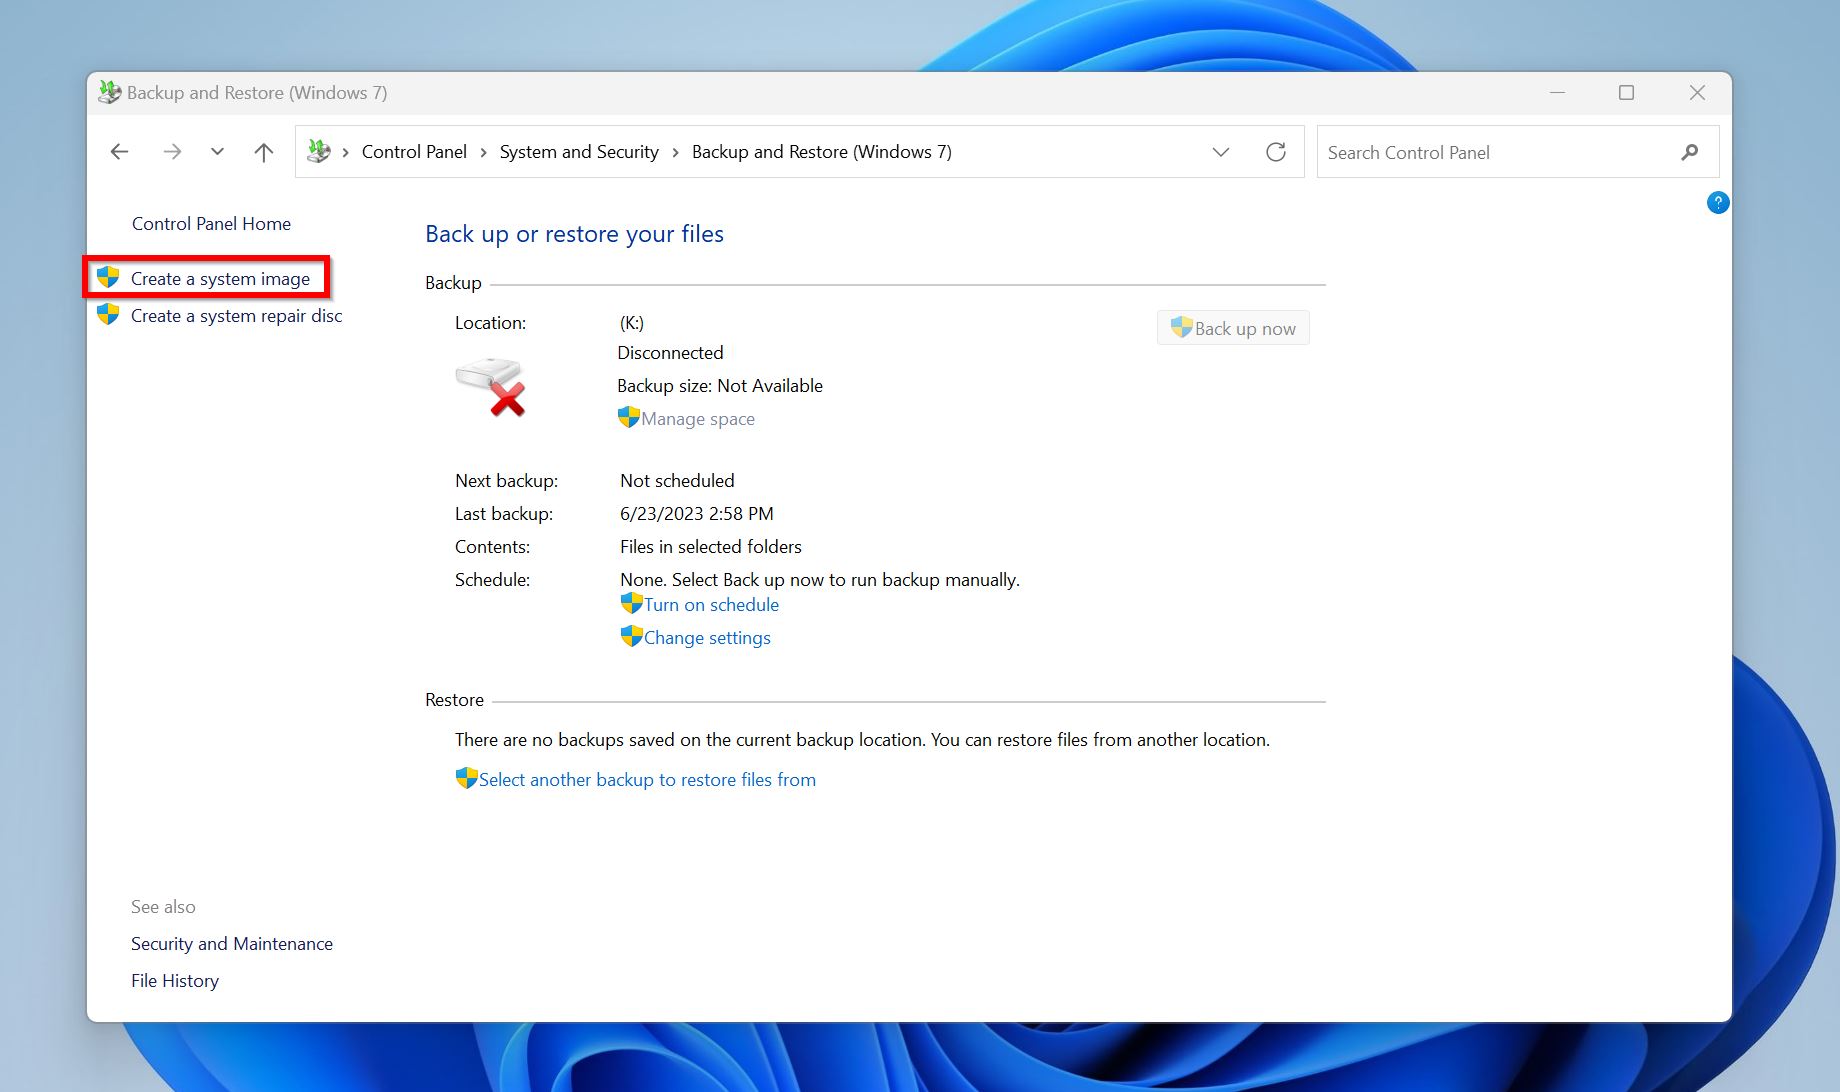
- Click on the Create a system image option towards the left.
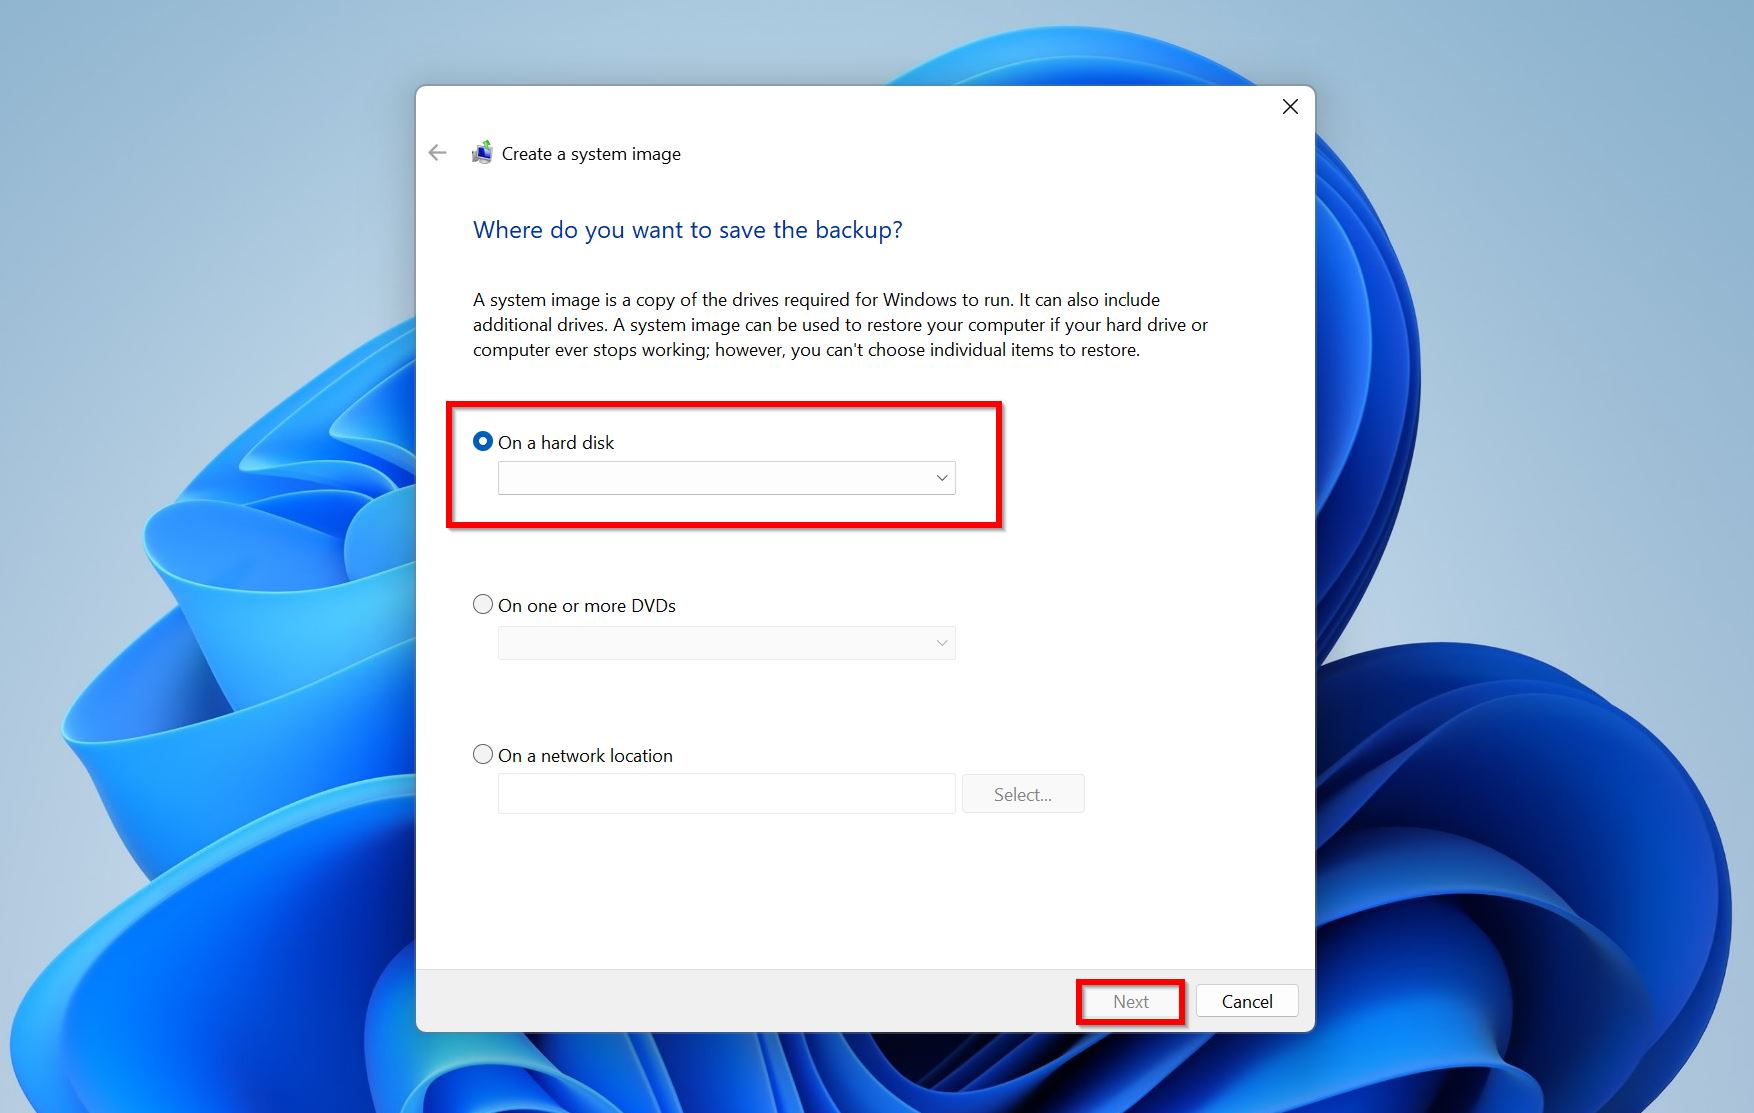
- Choose where you wish to save the system image–pick the On a hard disk option and select the storage drive you’re using to store the system image. Click on Next.
- Select the drives you wish to back up, click Next, and then click on Start backup.
- Wait while Windows creates a system image.
- Click on No when you’re prompted to create a System Repair Disc.
- Safely eject the drive.
Once you’ve created the system image, you’ll need to create installation media for Windows. Here is a video that’ll guide you on how to go about creating Windows installation media.
After creating the Windows installation media drive, simply insert your new SSD on your computer, connect the installation media, and start your PC. You’ll be booted into the Install Windows screen. On it, go to Repair your computer > Troubleshooting > Advanced Options > System Image Recovery. Follow the steps in the wizard and your personal data will be restored.
Method 2: Manual Data Transfer
If you don’t want to go through the hassle of creating a system image, creating Windows Installation Media, and restoring the system image, you can opt to copy your files manually from your old drive to the new SSD.
The time taken to copy your files will depend on the amount and the size of the files you intend to copy. Additionally, don’t cut and paste your files because you can lose them if the transfer process is interrupted due to any reason whatsoever. It’s best to copy your files first and then delete them from the old drive if you are going to discard it.
What to Do If Your Data Was Lost During Transfer
There are several reasons why you may lose some of your data while it’s being transferred to your new SSD–power cuts, copying errors, or an interruption of the cut-and-paste process. Fortunately, you can still recover these files. How? Using a good data recovery tool.
There are plenty of data recovery programs on the web, each with its unique features and drawbacks. For our tutorial, we opted to use Disk Drill, mainly because of how easy it is to use, and its proven track record of successful data recoveries. Additionally, it supports all common Windows file systems (NTFS, FAT32, exFAT, and more), eliminating the need to double-check for compatibility.
Here’s how to use Disk Drill to recover any files that were lost while transferring your data:
- Download Disk Drill and install it.
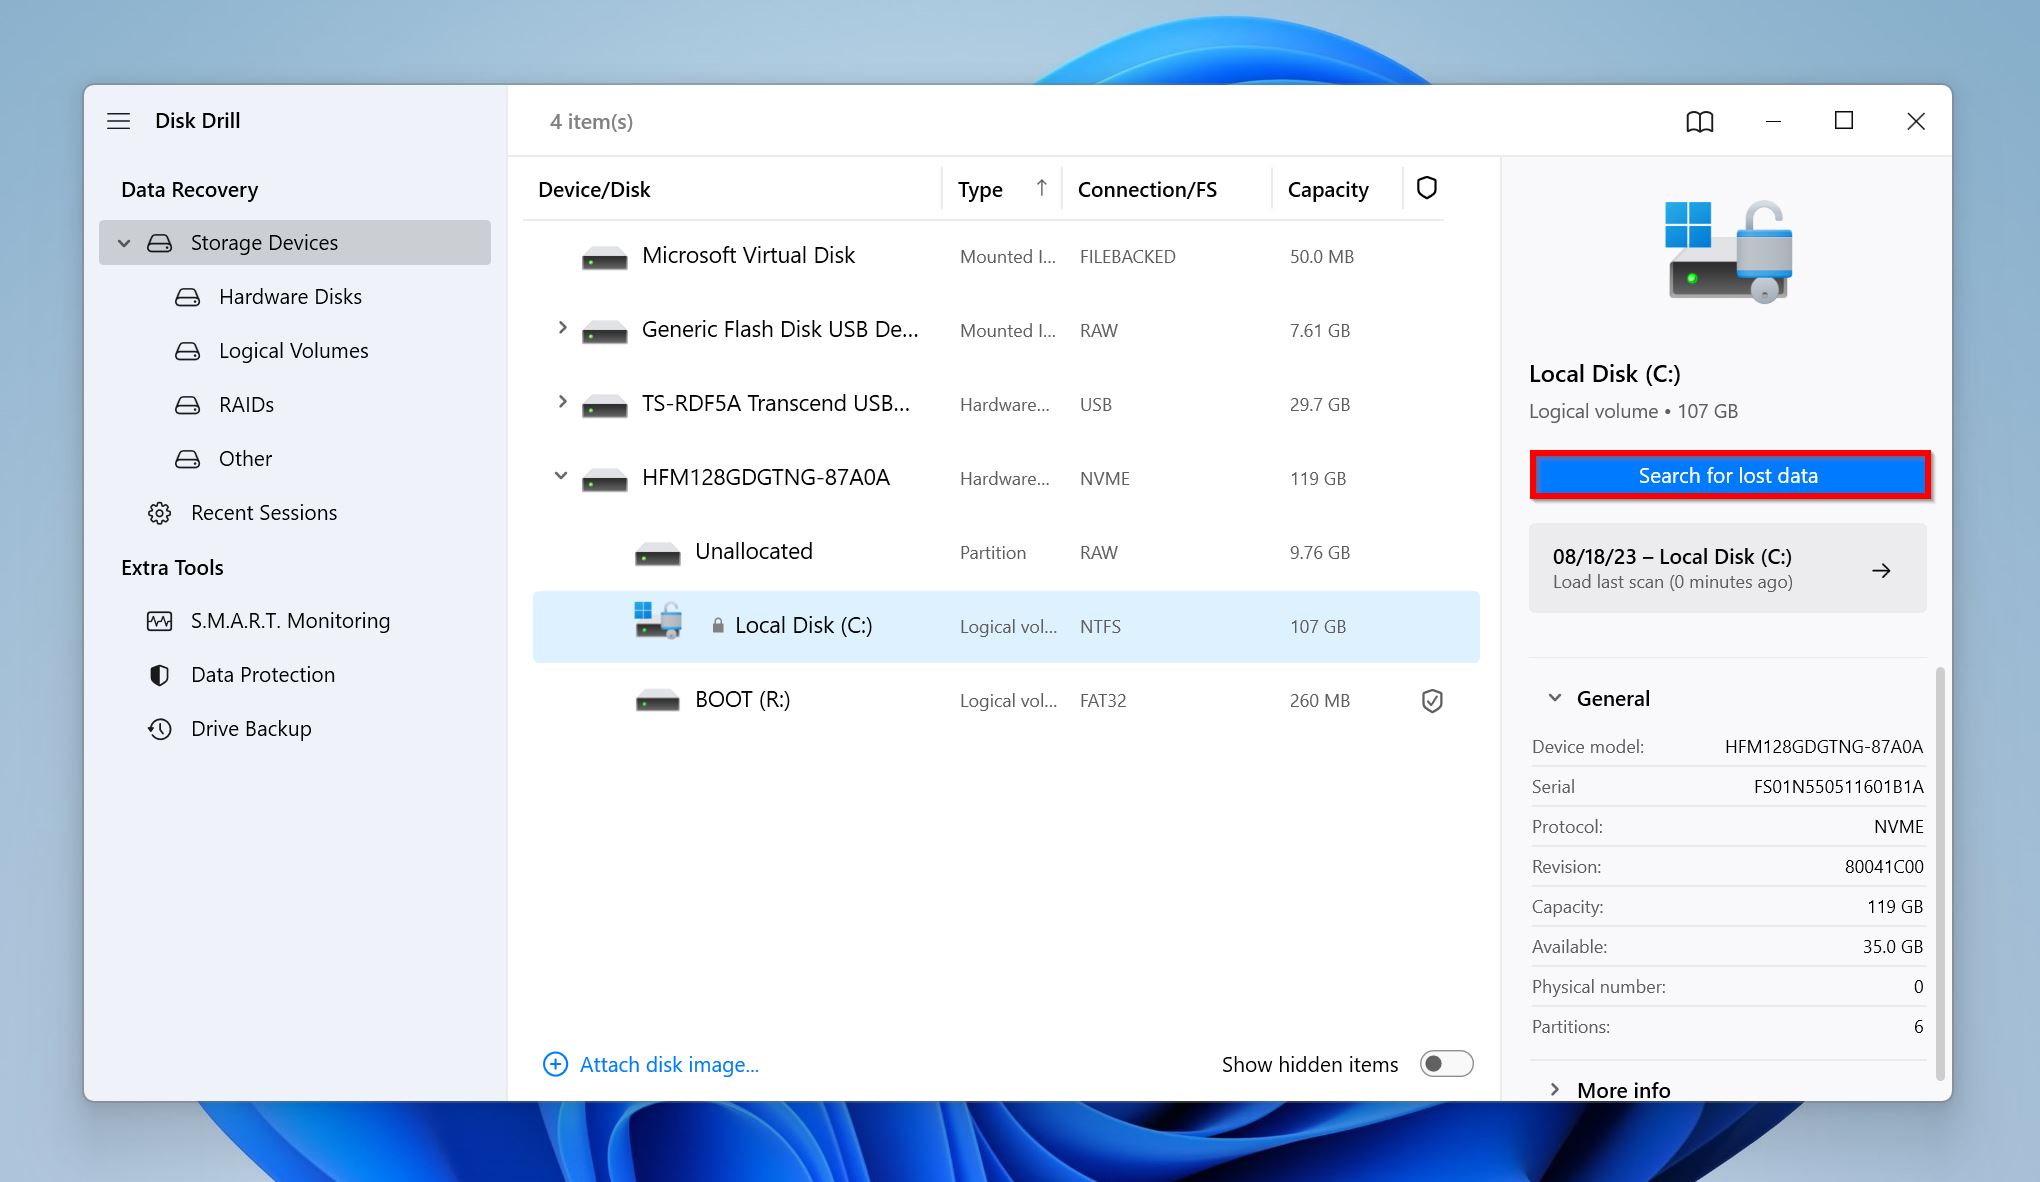
- Open Disk Drill, select your old drive, and click on Search for lost data.
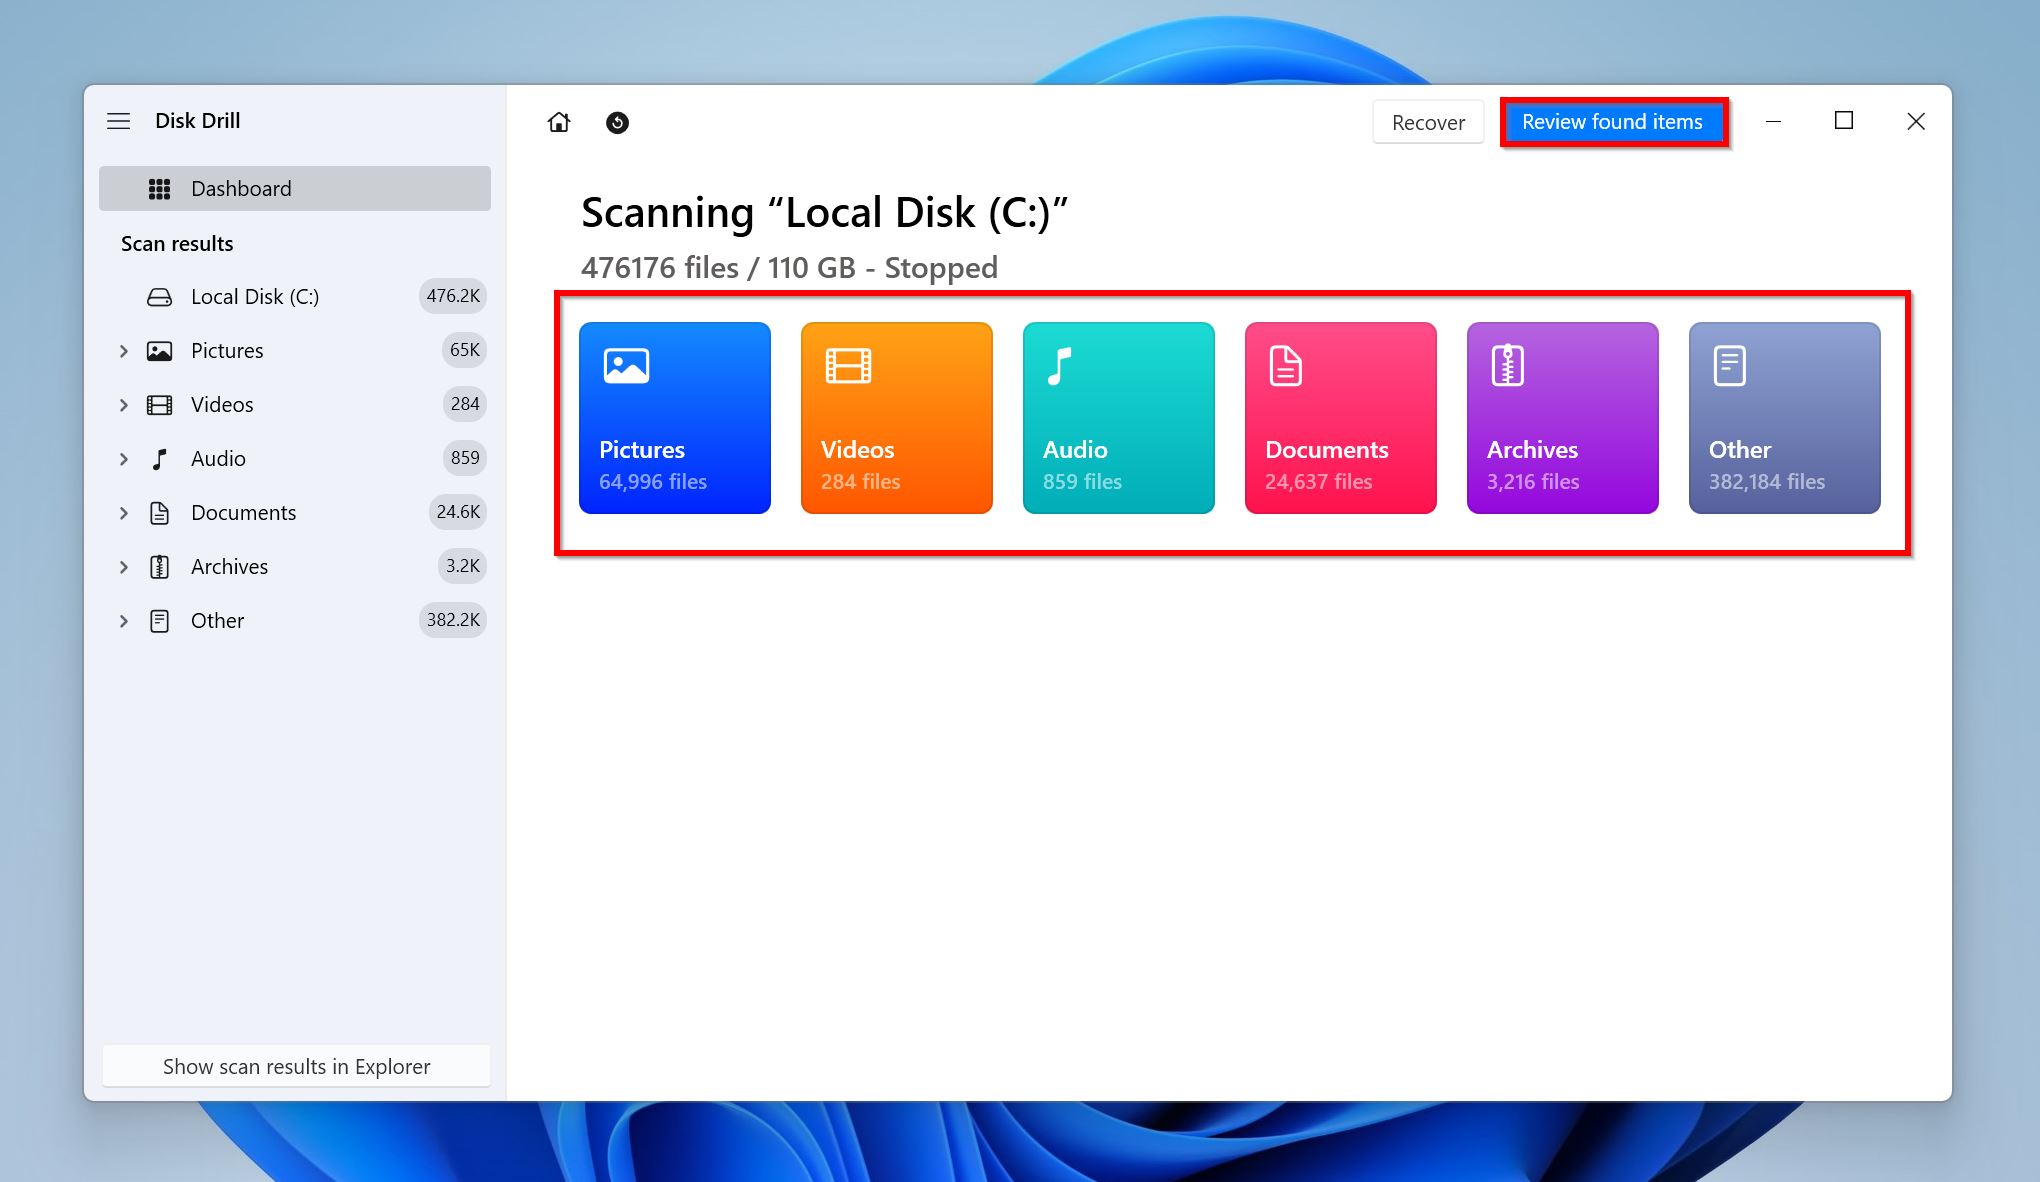
- Click on Review found items once the scan is complete. If you wish to filter out the results beforehand, you can click on the relevant option directly (Pictures, Video, Audio, Documents, Archives, and Other).
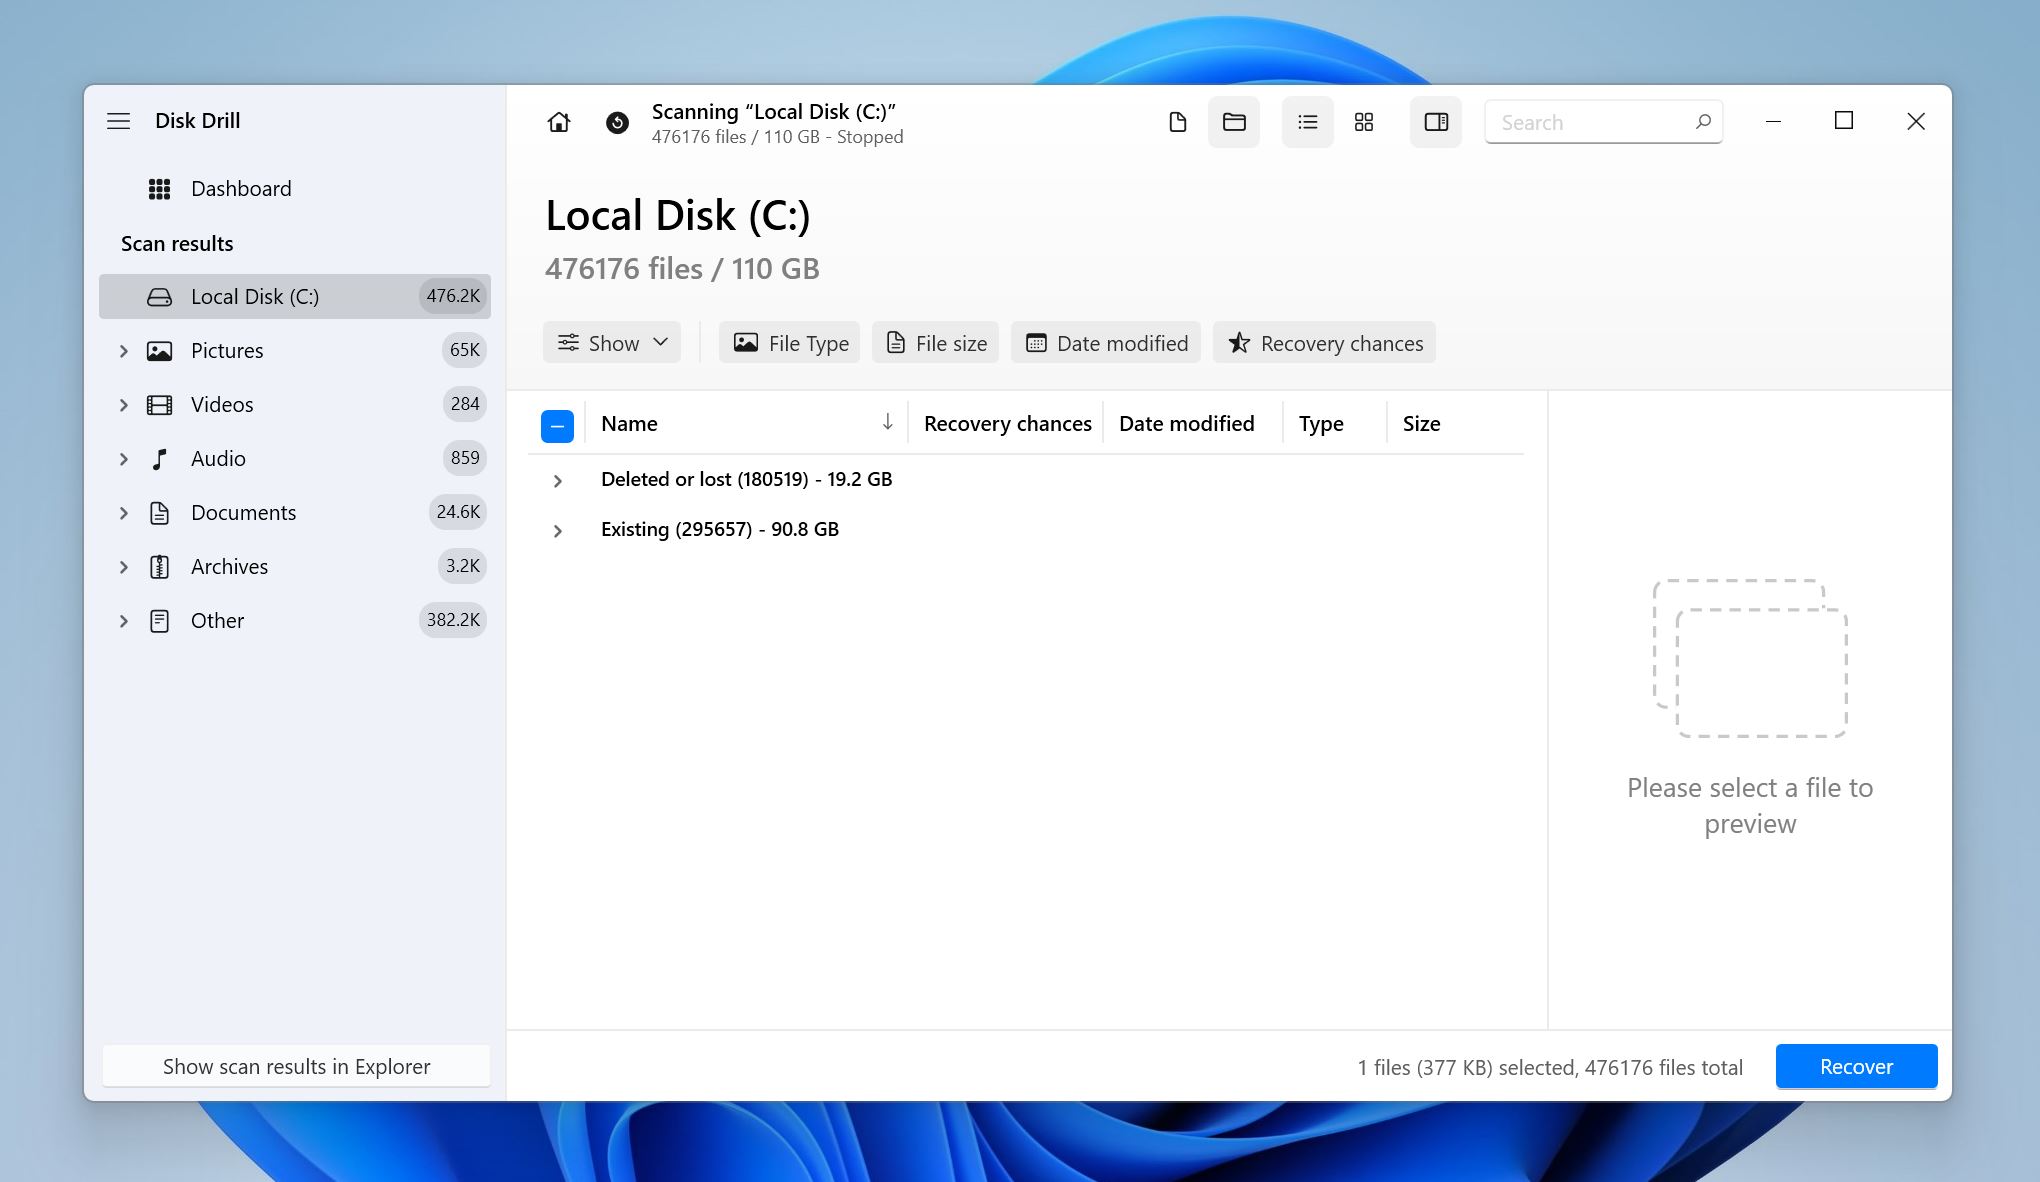
- Expand the Deleted or lost and Reconstructed sections to view deleted files that are recoverable.
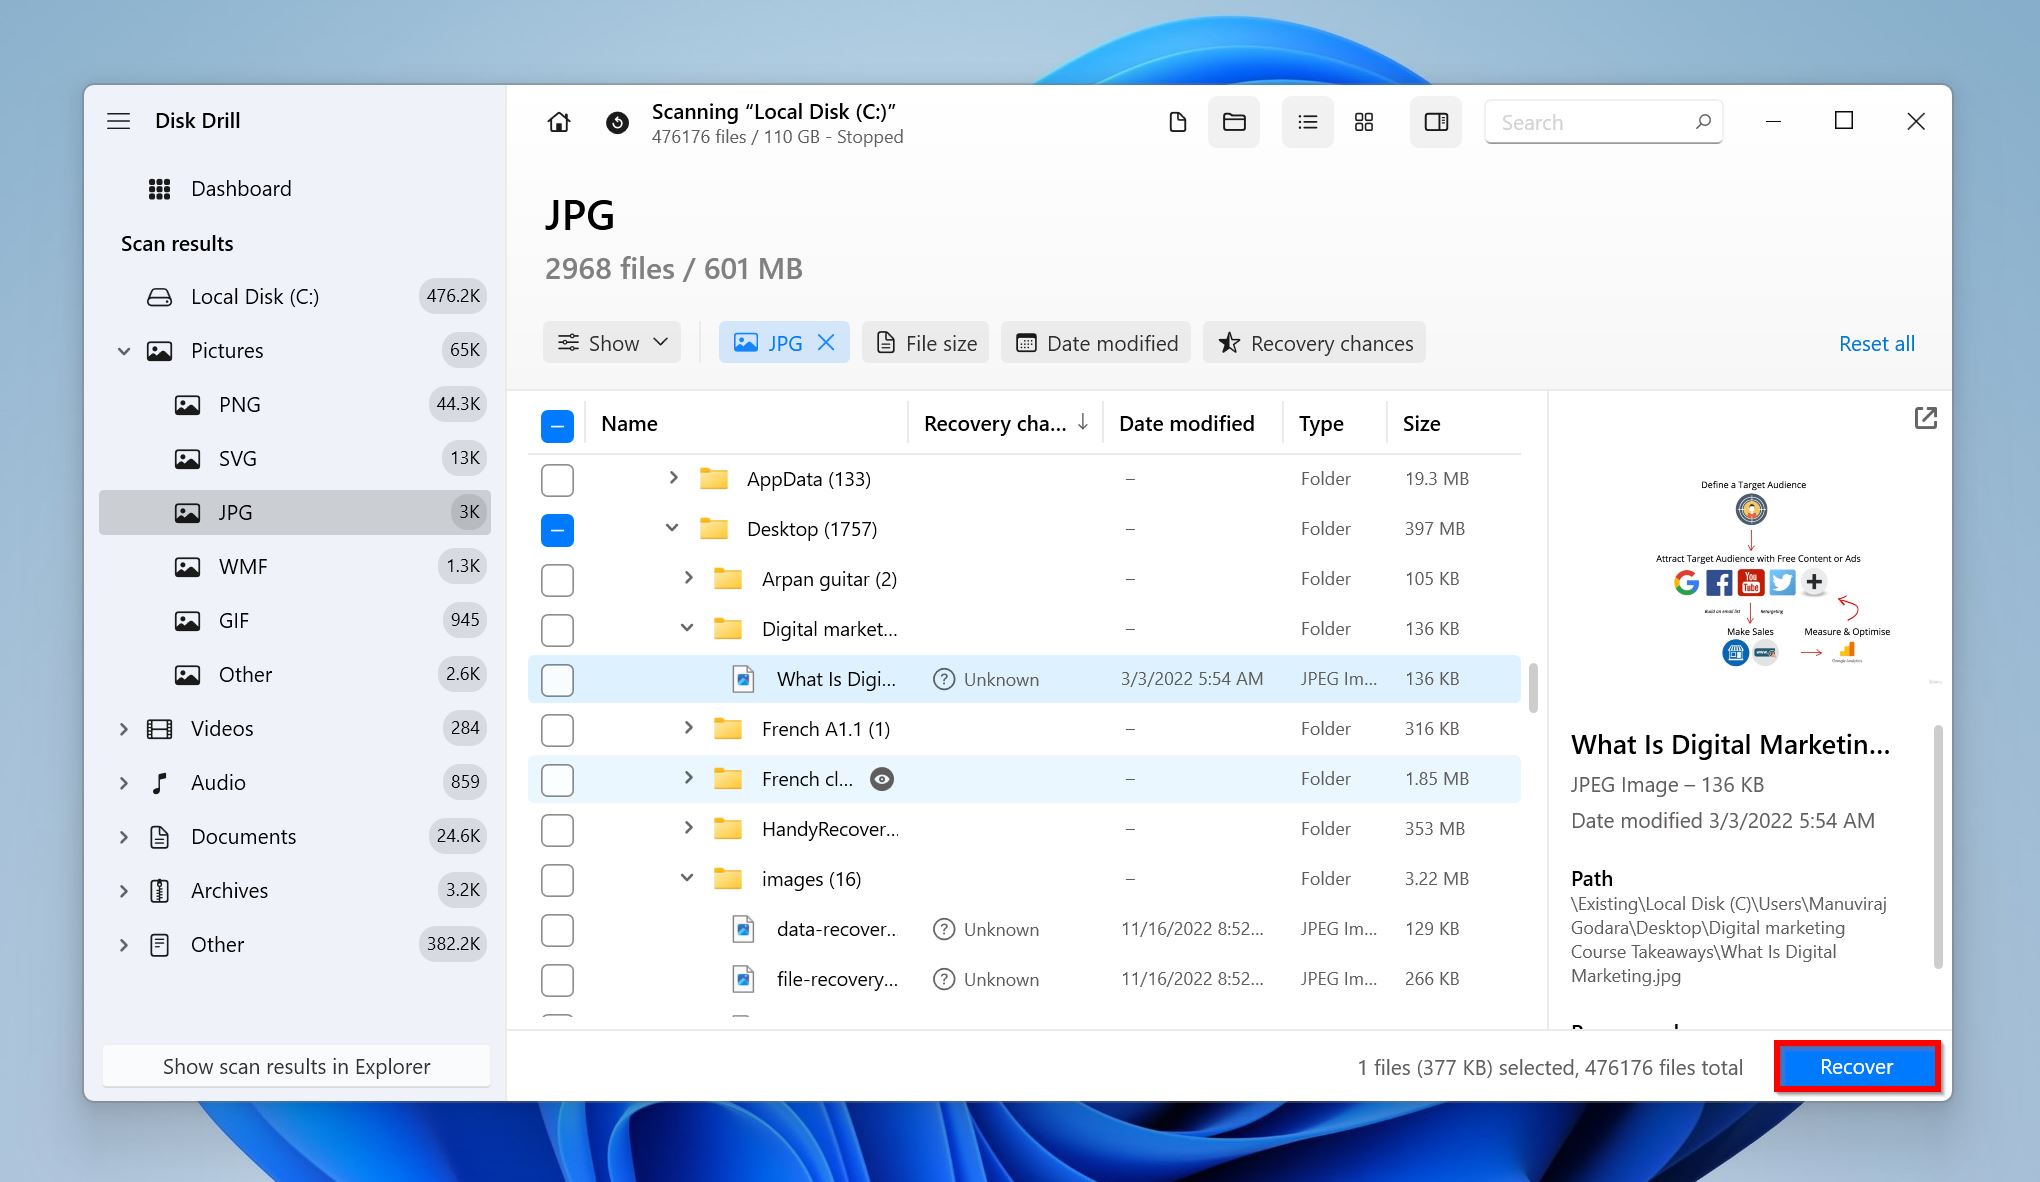
- Select the files you wish to recover. Disk Drill will display a preview of the currently selected file. To manually preview any other file, simply hover your cursor near the filename and click on the eye icon that appears. Click on Recover once you’ve confirmed your selection.
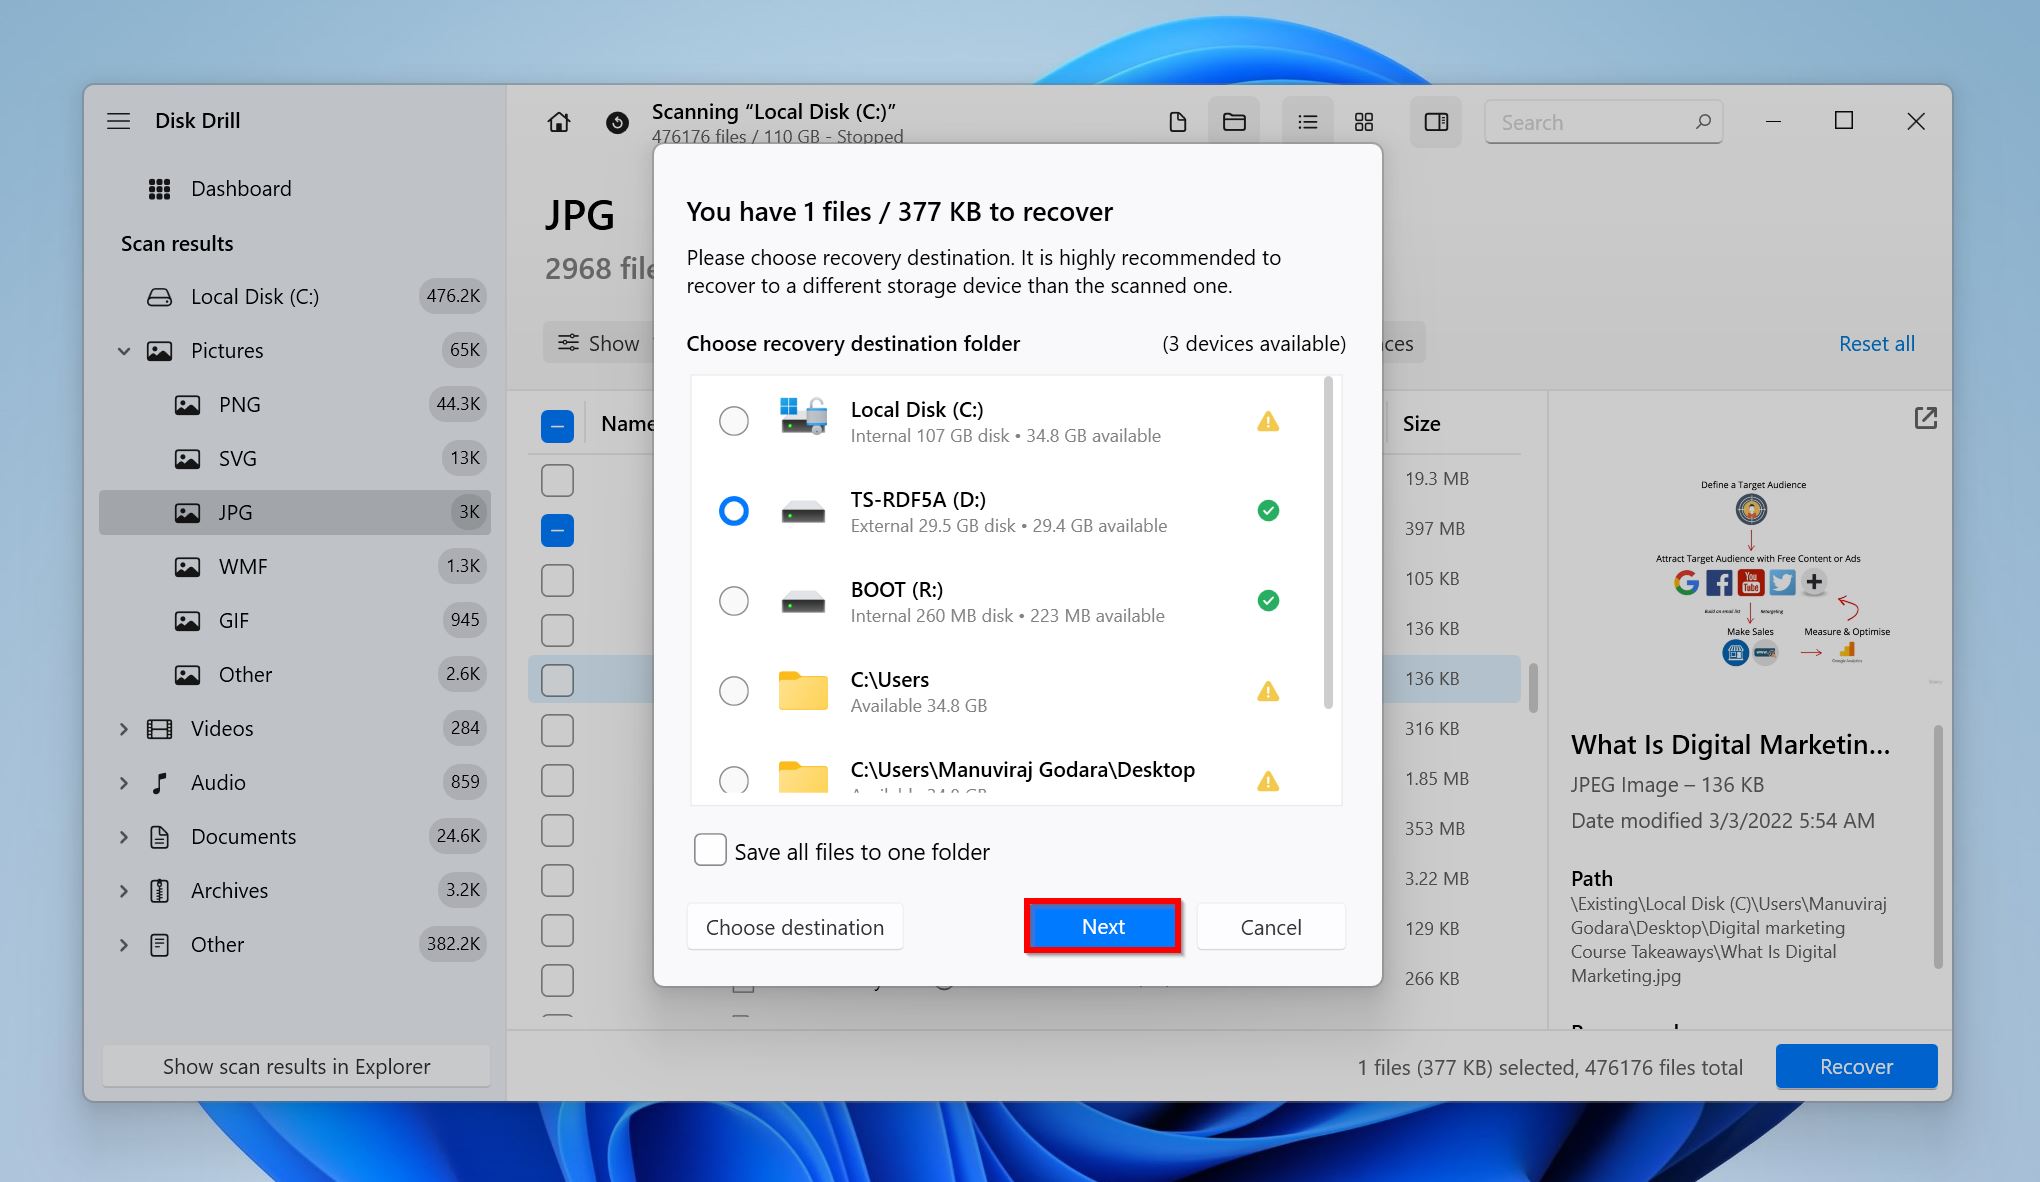
- Choose a recovery destination for the files and click Next. It’s best to recover the files directly to the new drive.
- Disk Drill will recover the selected files.
Note: If you’re trying to recover data from an SSD, you need to be aware of the TRIM feature, which cleans out unused data blocks at regular intervals. Essentially, data recovery becomes nigh impossible after the TRIM command has been executed. The TRIM command is typically executed during startup, so ensure you recover your files as soon as you notice data loss, for higher chances of data recovery.
Conclusion
The answer to the question, “What to do after installing a new SSD?” doesn’t have to be complex. There are two things you need to do–initialize the new SSD so that it’s ready to store data, and transfer the required files from your old drive to the new SSD. If there’s a mishap during the data transfer process, you can always use a good data recovery tool to get back your lost files.
FAQ
- Ensure it’s properly connected and shows up in the BIOS settings.
- Initialize the SSD and format it using Disk Management.


")
