 One of the more common issues plaguing computer users is when the file system of a particular storage device suddenly becomes RAW. This makes it incompatible with any operating system, rendering it effectively unusable until successfully formatted into a supported file system.
The good news is that there are multiple ways to go about remedying this problem, allowing you to utilize your storage device once more. In this guide, we’ll tackle the different ways to convert RAW file systems to FAT32 on Windows PCs without losing data in the process.
Table of Contents
Reasons that May Lead to File System Becoming RAW
There are various reasons that could lead to the file system of a storage device becoming RAW. Below is a list of some of the most common causes faced by computer users:
| Reason | Description |
| 🦠 Virus infection | Viruses can create all sorts of problems for your storage device, including issues with its file system. For example, certain viruses take aim at a storage medium’s partition table, damaging it and making the file system unreadable to your computer’s operating system. This could cause the device to appear as RAW. |
| 🛑 Format failure | Formatting your storage device is one of the primary methods of changing its file system, but there are instances when the formatting process may fail. When this happens, the device may end up with a RAW file system. |
| 💻 Accidental shutdown during the writing process | Many users have experienced the unforeseen shutdown of their PC while data was being written to a certain storage device. This could be due to a power spike, OS failure, etc. Instances like these could cause the storage device file system to go RAW. |
| 🗃️ Unrecognizable file system | Your storage medium may have been formatted into a file system that’s unrecognized by your OS, making it appear as though it’s RAW. This can happen when connecting it to another device that requires a particular format for its storage media. |
How to Avoid Data Loss When Converting RAW Partition
When you convert RAW to FAT32, you’re bound to lose data in the process. The most foolproof way to avoid this is to recover the data before you proceed with the conversion. There’s no shortage of data recovery programs on the market, but not all of them support RAW file systems. Disk Drill not only supports RAW partitions but also boasts exceptional recovery prowess and an intuitive interface that caters to both newbies and advanced users alike.
Moreover, it features a trial version that lets you test out all the app’s features and retrieve up to 500 MB free of charge. That way, you can rest easy knowing that your data will be restored for sure. The program is compatible with Windows 7/10/11, though versions 7 and below will require an older version of the app.
Here’s a quick step-by-step guide on how to recover files from a storage device using Disk Drill:
- To get started, download the newest version of Disk Drill. Once done, run the setup file and install it on your PC.
- Next, make sure the RAW storage device is connected to your computer. From there, launch the app, select the RAW device from the list of available storage media, and click “Search for lost data.”
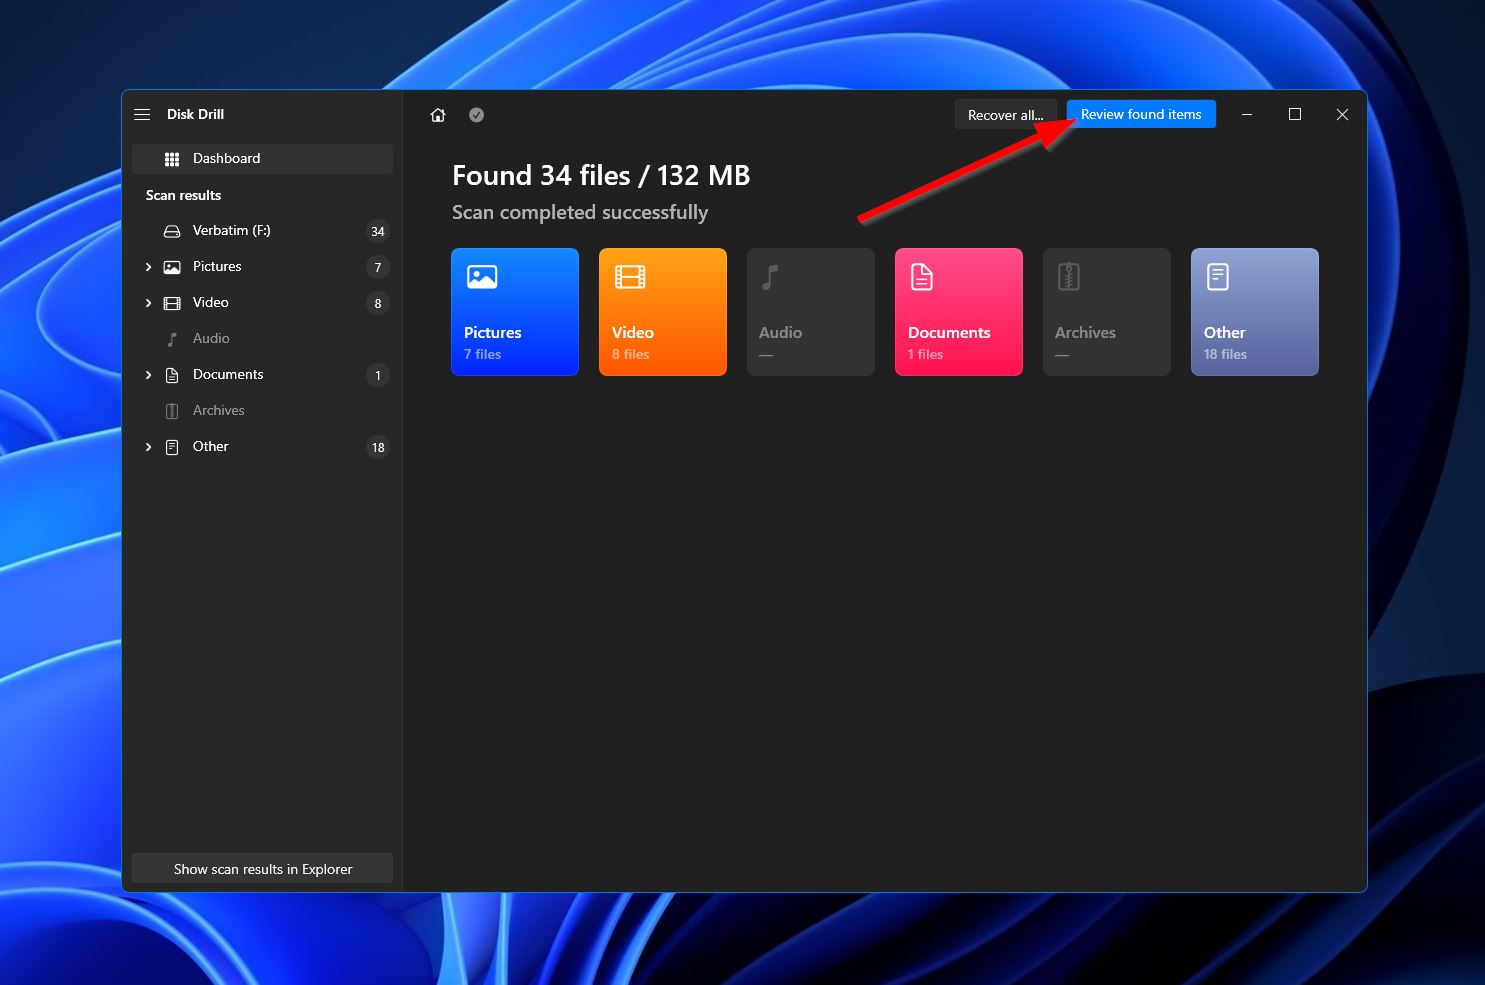
- After that, Disk Drill will start scanning the RAW partition. You can wait for the scan to complete first or go ahead and click the “Review found items” button at the top-right corner to proceed to the results screen as the scan progresses.
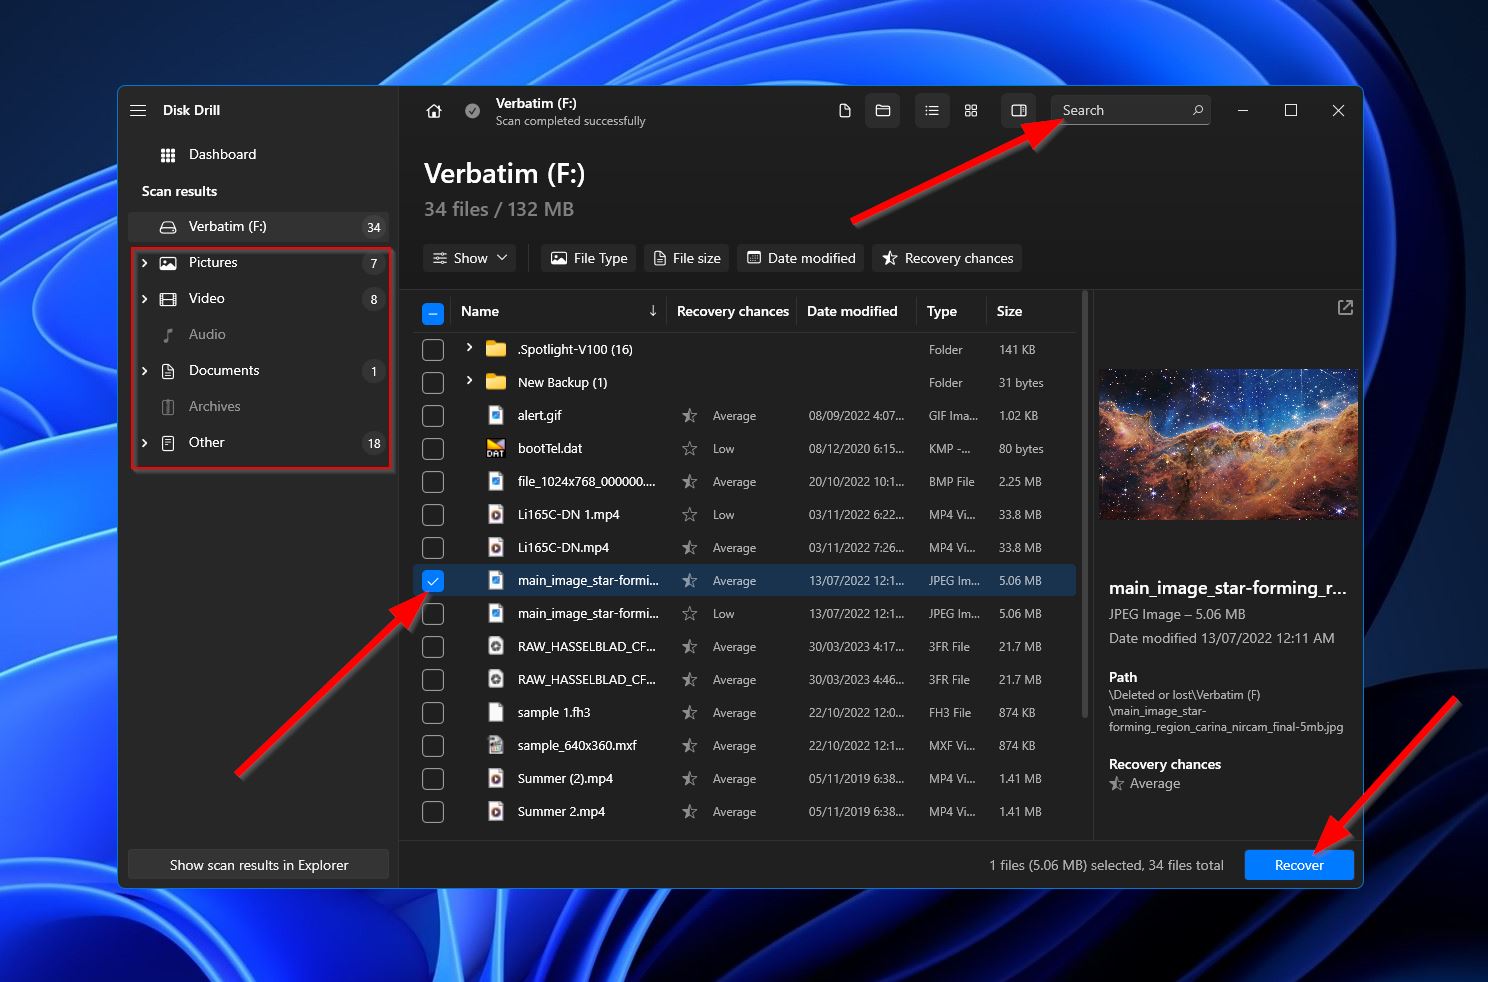
- When you’re in the results section, you can narrow down the list of found items by clicking one of the categories on the left or by using the search bar at the top right. The search function accepts both file names and file types. Once you find the files you want to restore, tick the checkboxes next to their file names to highlight them, then click the “Recover” button.
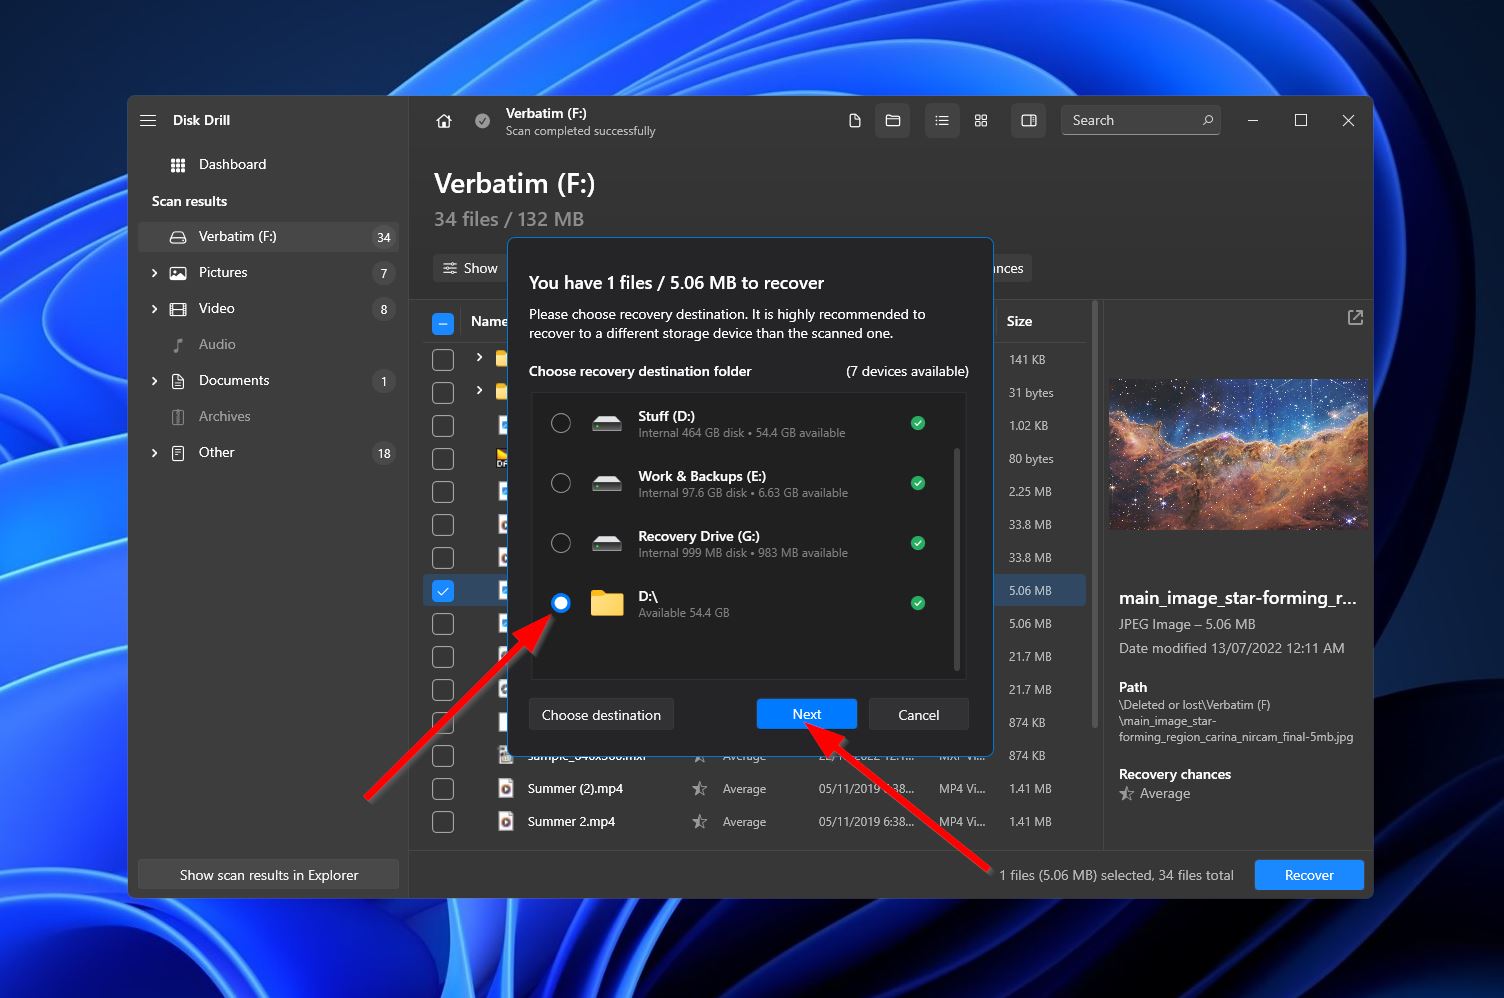
- You’ll now need to select a destination for your recovered files. Once you’ve decided, click “Next.”
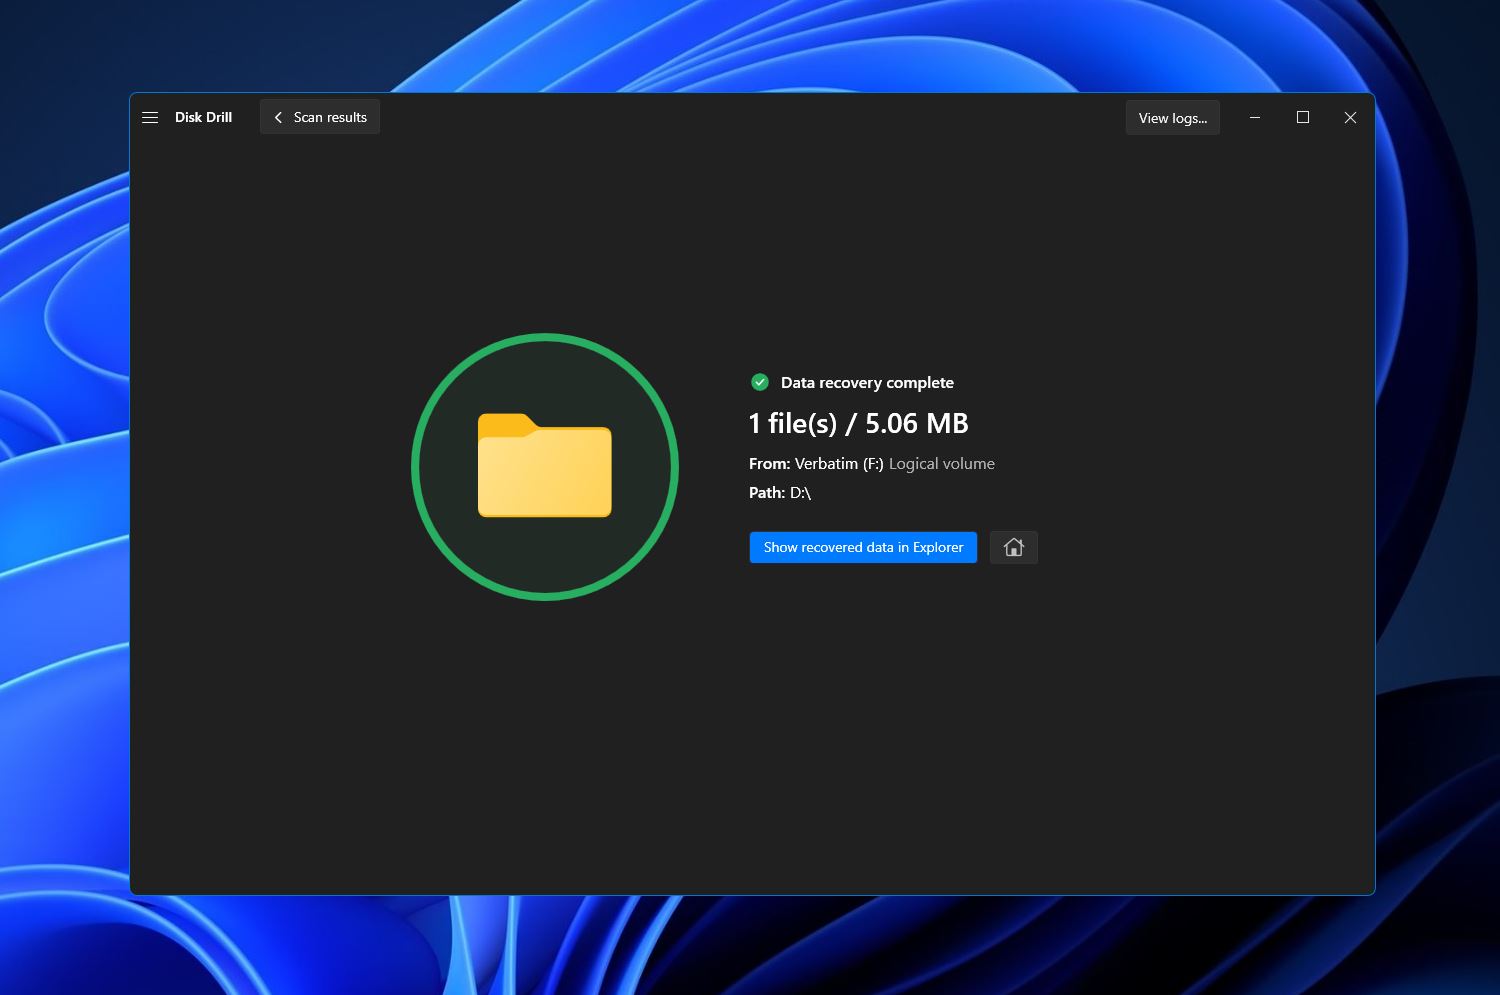
- Upon clicking, Disk Drill will now try to retrieve your chosen files. You’ll see a completion message if successful, along with a button labeled “Show recovered data in Explorer” that you can click to open the folder where your files will be located.
How to Change RAW File System to FAT32
The most surefire way to fix the RAW file system issue plaguing your storage device is to format it. There are numerous Windows tools and features that can perform this, and we’ve outlined them below.
Using Windows Explorer
The first and easiest way to format your storage device is directly through Windows Explorer. To do so, follow these steps:
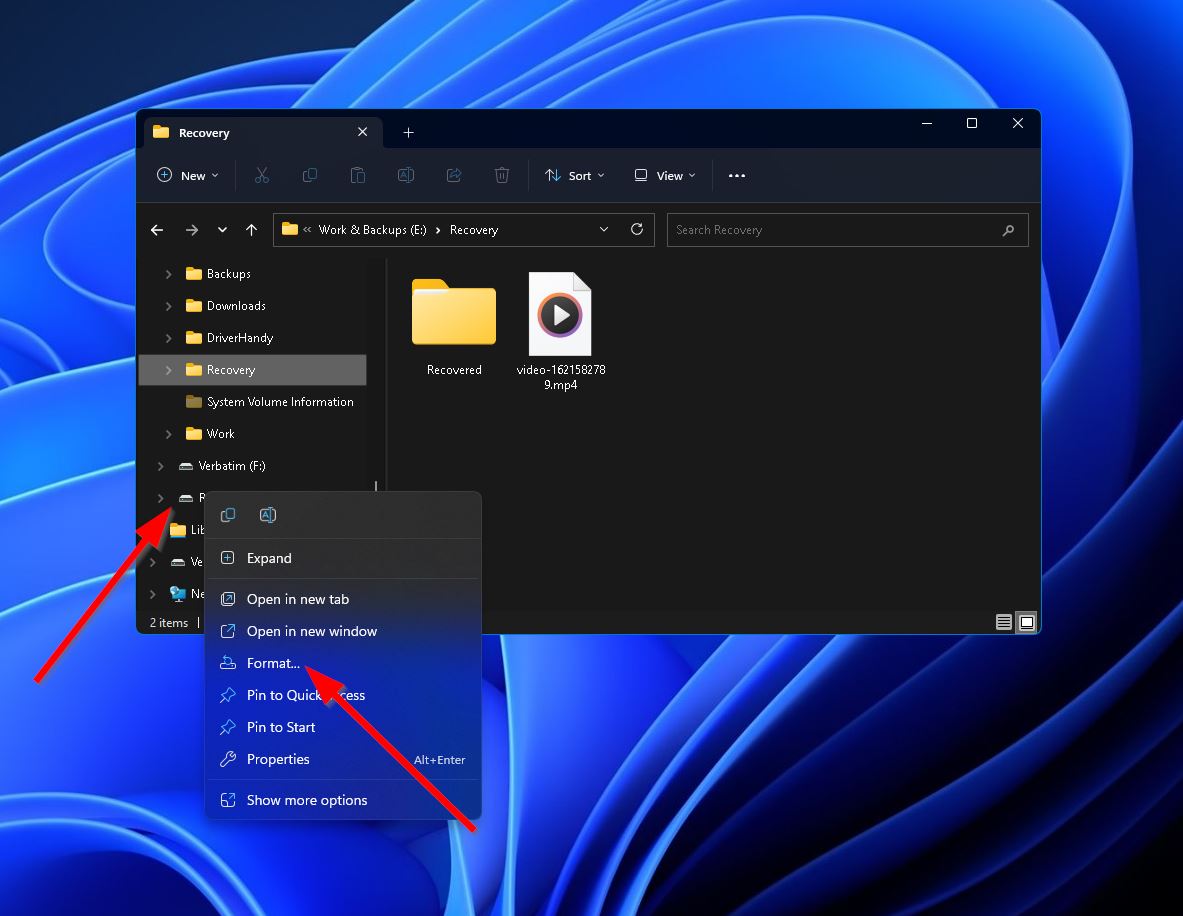
- Press Windows + E to bring up an instance of Windows Explorer.
- Locate your device from the panel on the left, then right-click it and select “Format.”
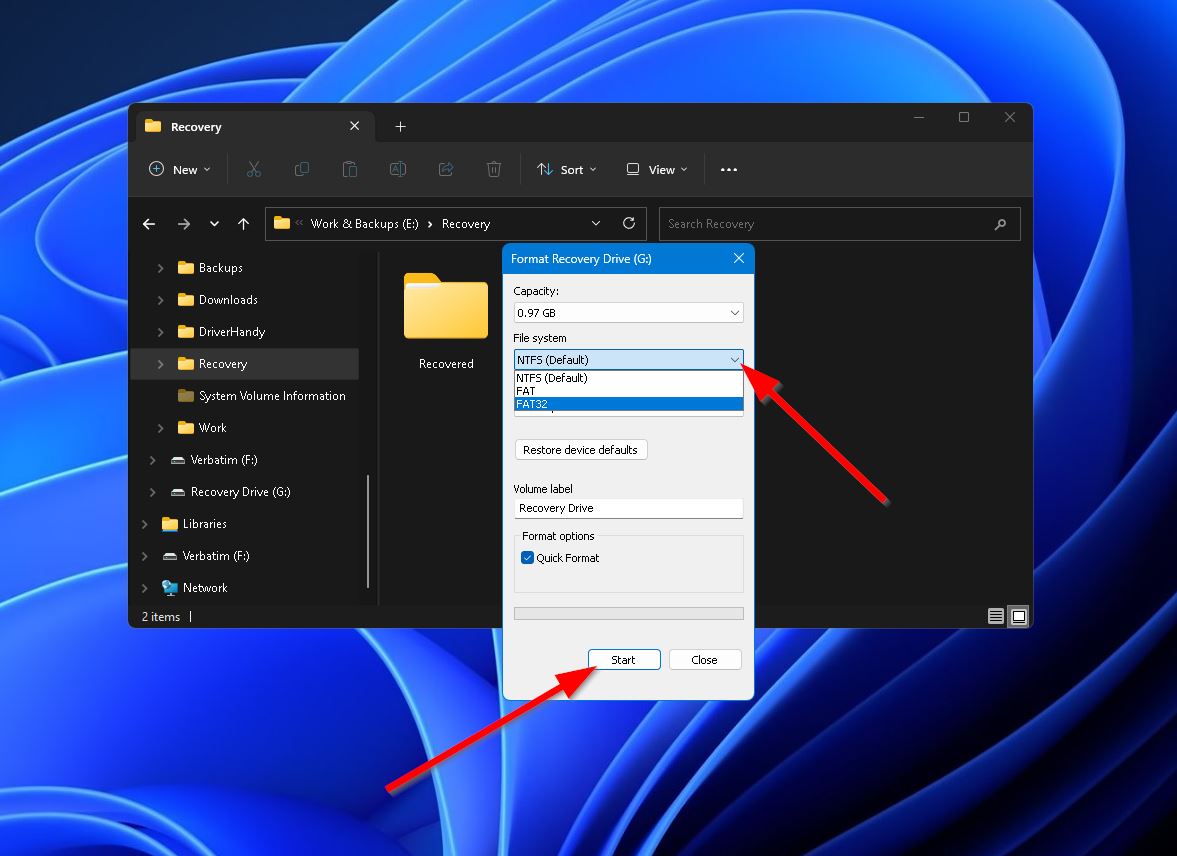
- Next, select “FAT 32” from the “File system” dropdown and edit any other options you like. Click “Start” when you’re ready to proceed with the format.
Using Disk Management
Disk Management is a Windows utility that allows you to configure various storage device properties and operations. Its formatting capability can be used as a file system converter.
To use Disk Management to fix the RAW file system issue, simply follow the steps outlined below:
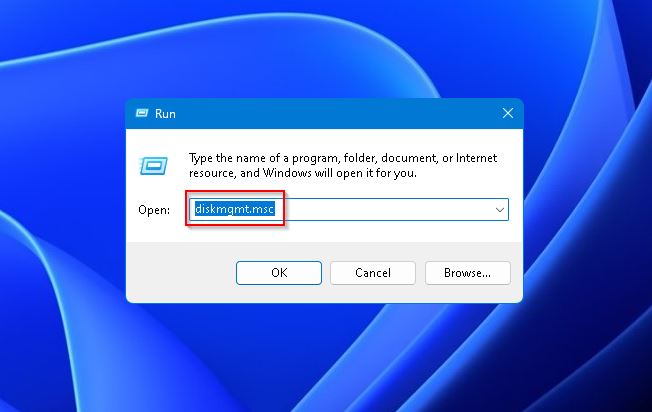
- First, press Windows + R to bring up the “Run” command, then type in
diskmgmt.mscand hit Enter.
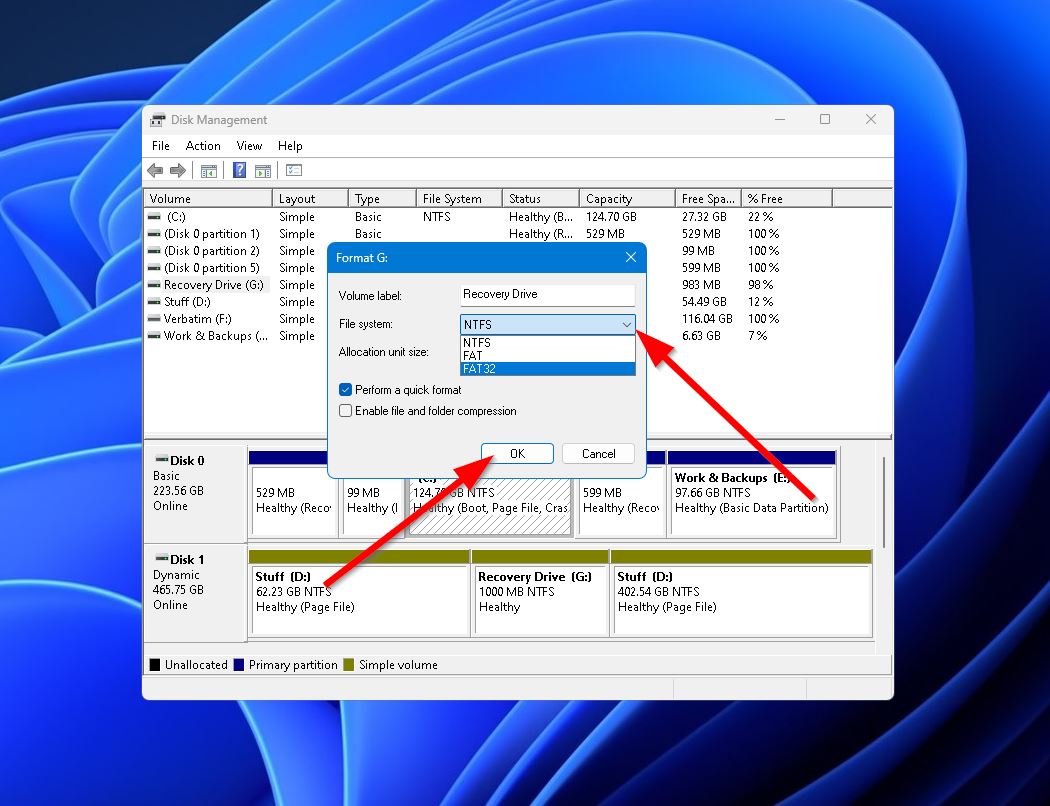
- Next, right-click the RAW volume and select “Format.”
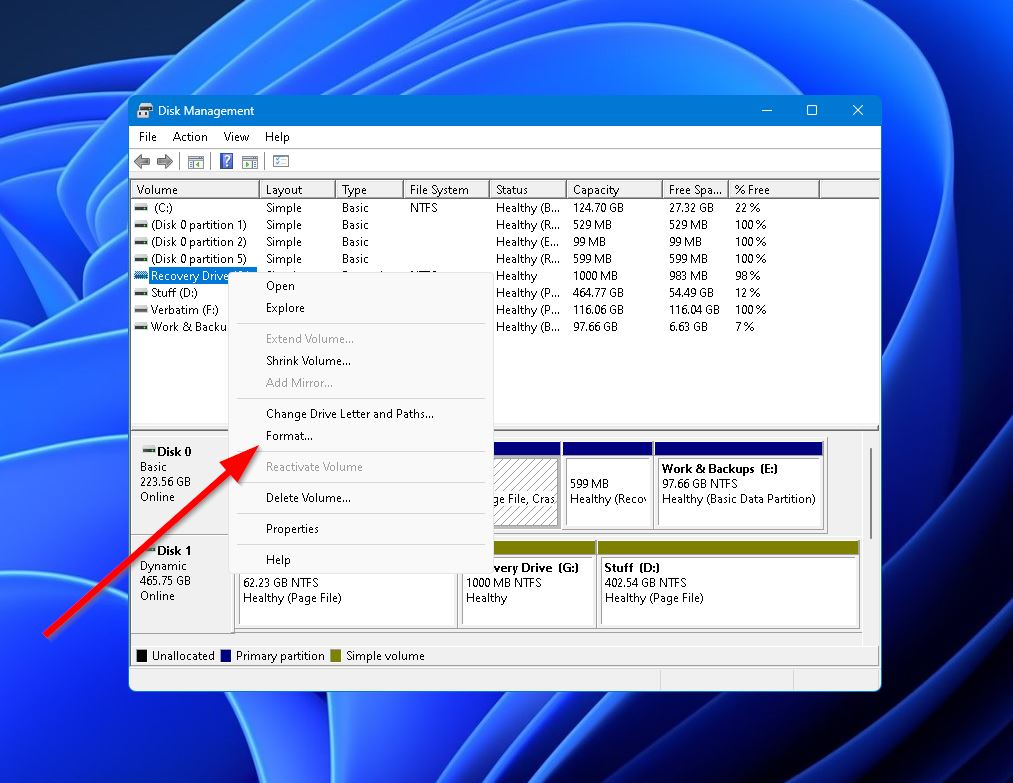
- Select “FAT 32” from the “File system” dropdown and edit any other options you’d like. When you’re ready, hit “OK” to finalize the process.
Using Command Prompt
Another way to perform a storage device format is through the Windows Command Prompt feature. Here’s how to do it:
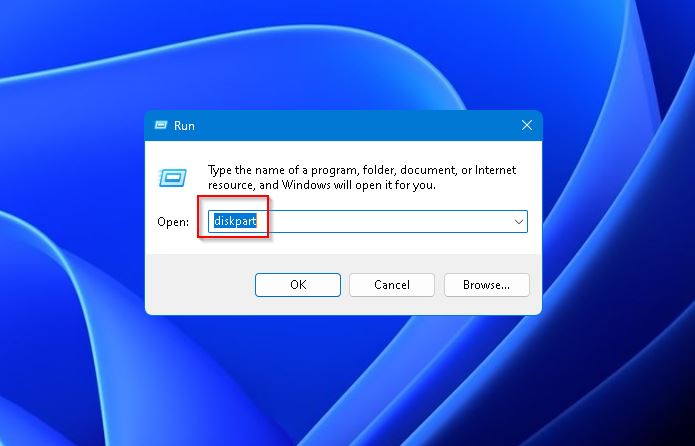
- To get started, press Windows + R to bring up the “Run” command, then type in
diskpartand hit Enter.
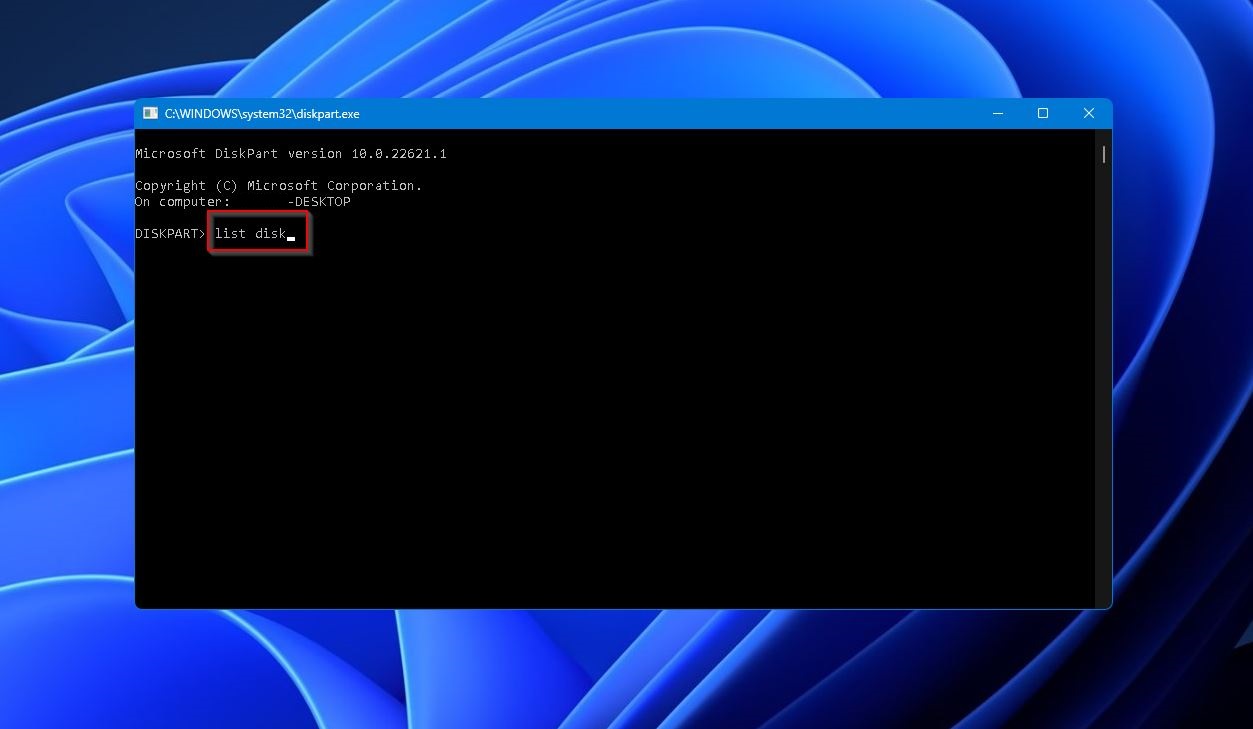
- Next, type
list diskand hit Enter.
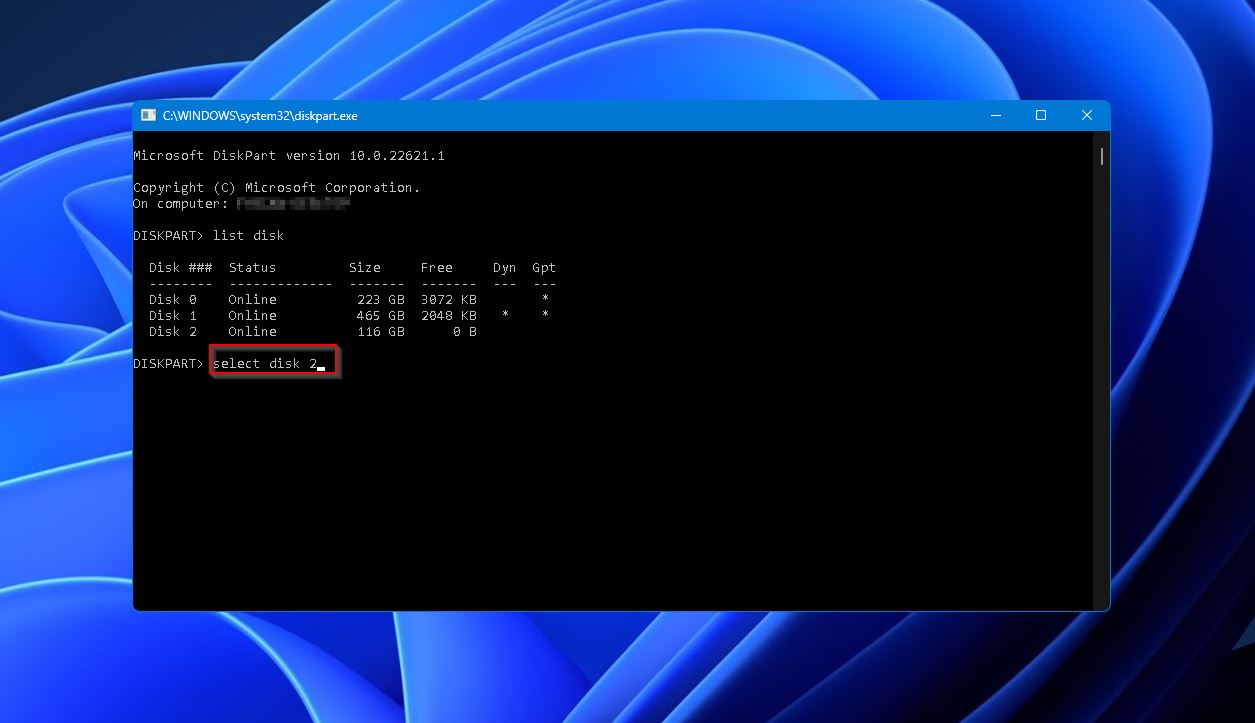
- You should see all the disks currently connected to your computer. Take note of the disk number of your RAW device. From there, type
select diskfollowed by a space, and the disk number. Press Enter to continue.
- After that, type
cleanand hit Enter to wipe all files on the device.

- Type
format fs=fat32and press Enter to finalize the conversion. After that, typeassignand press Enter to assign a drive letter to your newly formatted device.

In addition to the ones described above, there are many third-party programs that can help you format and convert your storage device. But recommending any of those apps would prove difficult without knowing your exact situation, so we stuck with more tried and tested methods.
Conclusion
Suddenly encountering a RAW file system on your storage medium can be an incredibly frustrating affair. Fortunately, fixing the problem is pretty straightforward, and many of the tools are already available on your Windows PC. All you have to do is use one of them to convert RAW file systems to FAT32, and you should be good to go. Just remember to recover your files before you do so in order to avoid data loss.
FAQ:
- diskpart
- list disk
- select disk (disk number)
- clean
- format fs=fat32
- assign


