 After turning on your computer, you find that your hard drive is reading 0 bytes. This problem can also occur for flash drives and files or folders. When trying to open something with 0 bytes, Windows won’t let you, and instead, will display an error message saying it cannot be opened.
Worry not, as this problem has been encountered and fixed many times before. If your hard drive shows 0 bytes, read this article in full to figure out why this occurs and how you can fix it.
Table of Contents
What Does 0 Bytes Mean?
Bytes are a unit of measurement that tells you how large any given file is or how much space has been taken up on a drive. When something reads 0 bytes, it means there is no data there. For a file, this means the file is empty. For a drive, this means the drive is empty.
However, just because it says 0 bytes doesn’t mean the file, folder, or disk is actually empty. It could be an incorrect reading due to a problem with the drive. For instance, if a folder is showing 0 bytes even when you know there is data inside, it means there’s an issue somewhere.
Common Reasons Why a Hard Drive Displays 0 Bytes
There are numerous reasons why a hard drive will display 0 bytes. Here are the most common ones:
| Reason | Description |
| 🦠 Malware | In this case, a 0 byte virus could have infected your computer, leading your files, folders and/or disk to read 0 bytes. This can typically be resolved by scanning your computer with an antivirus program. |
| 💾 Corrupted file system | When a file system becomes corrupted, it can prevent your computer from booting and cause your partition to read as 0 bytes. |
| 🔌 Improper shutdown | If your computer is shut down before it can finish performing an important action, this could lead to corruption of both your data and file system. |
| ❌ Bad sectors | A few bad sectors is normal for a hard drive, but a sudden increase in bad sectors could point towards an underlying issue with your hard drive that’s causing the 0 bytes problem. |
| 🚫 No space | Of course, your disk can read as 0 bytes remaining because there is not enough storage space to store any additional data. In which case, simply deleting unneeded data or upgrading your storage will suffice. |
How to Recover Data From a Drive That Shows 0 Bytes
Before you fix the hard drive that shows 0 bytes, you should first recover any data currently on it if the drive is appearing in Disk Management with the correct size. This keeps it safe in the event that one of the fixes goes wrong and your hard drive is wiped. To do this, we’re going to use Disk Drill, as it allows you to create a byte-to-byte backup of the drive to recover from.
These steps will guide you through how to recover data from a drive that shows 0 bytes with Disk Drill:
- Download and install Disk Drill. Make sure you don’t install it to the same drive facing the 0 bytes problem.
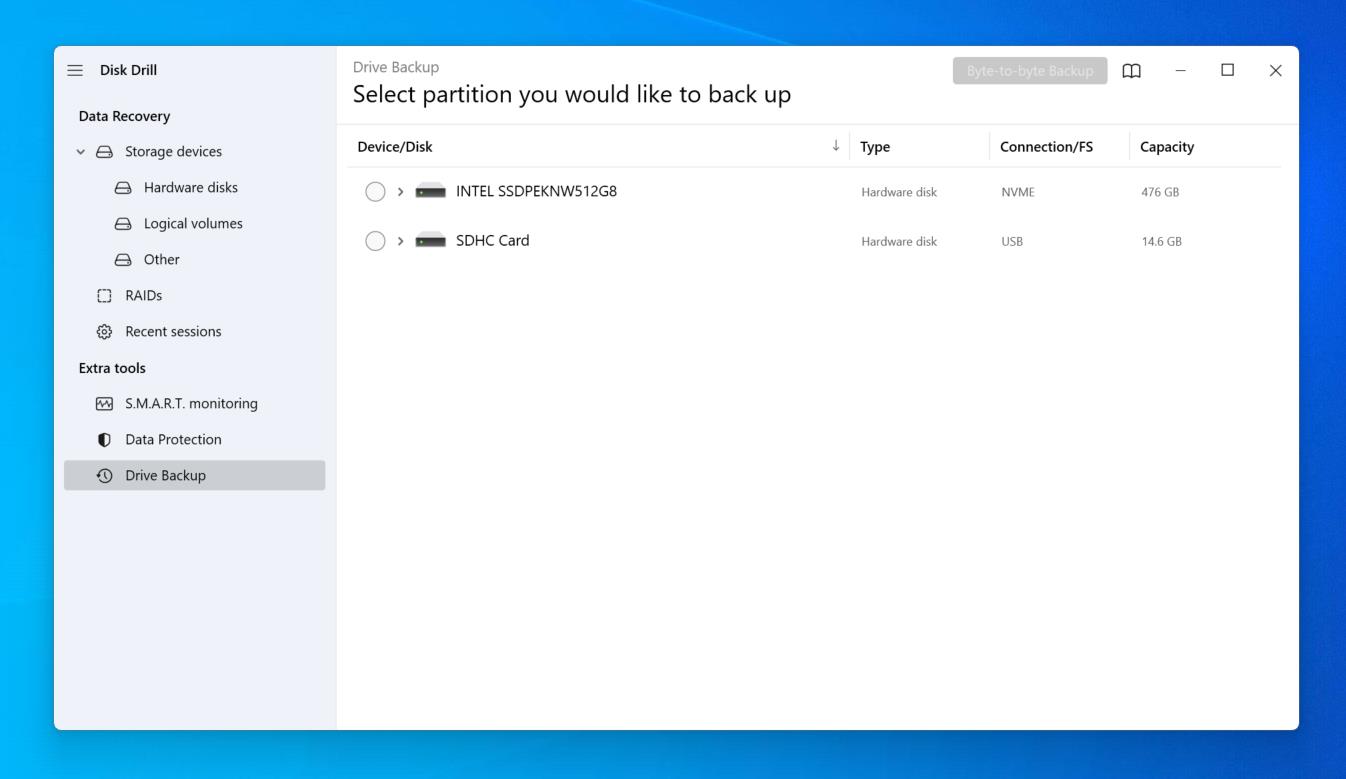
- Click Drive Backup.
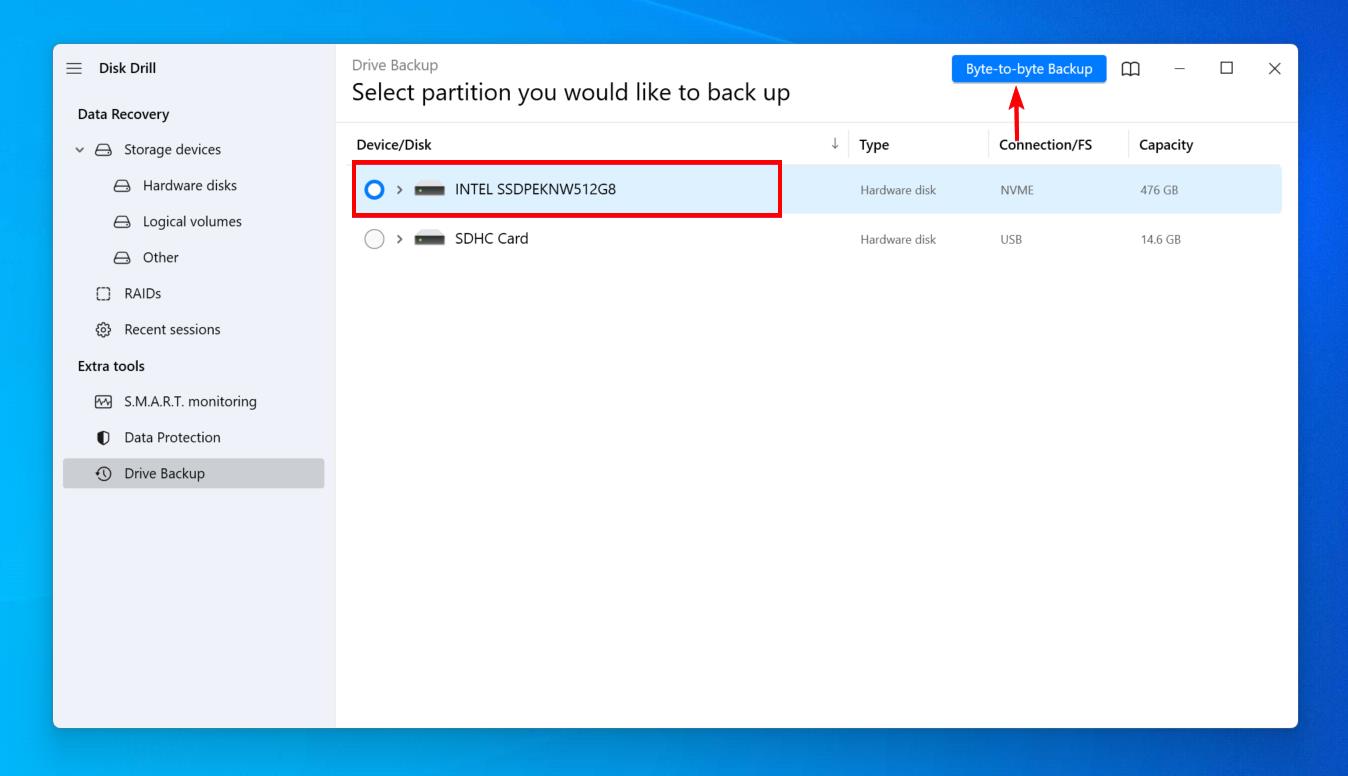
- Select the drive and click Byte-to-byte Backup.
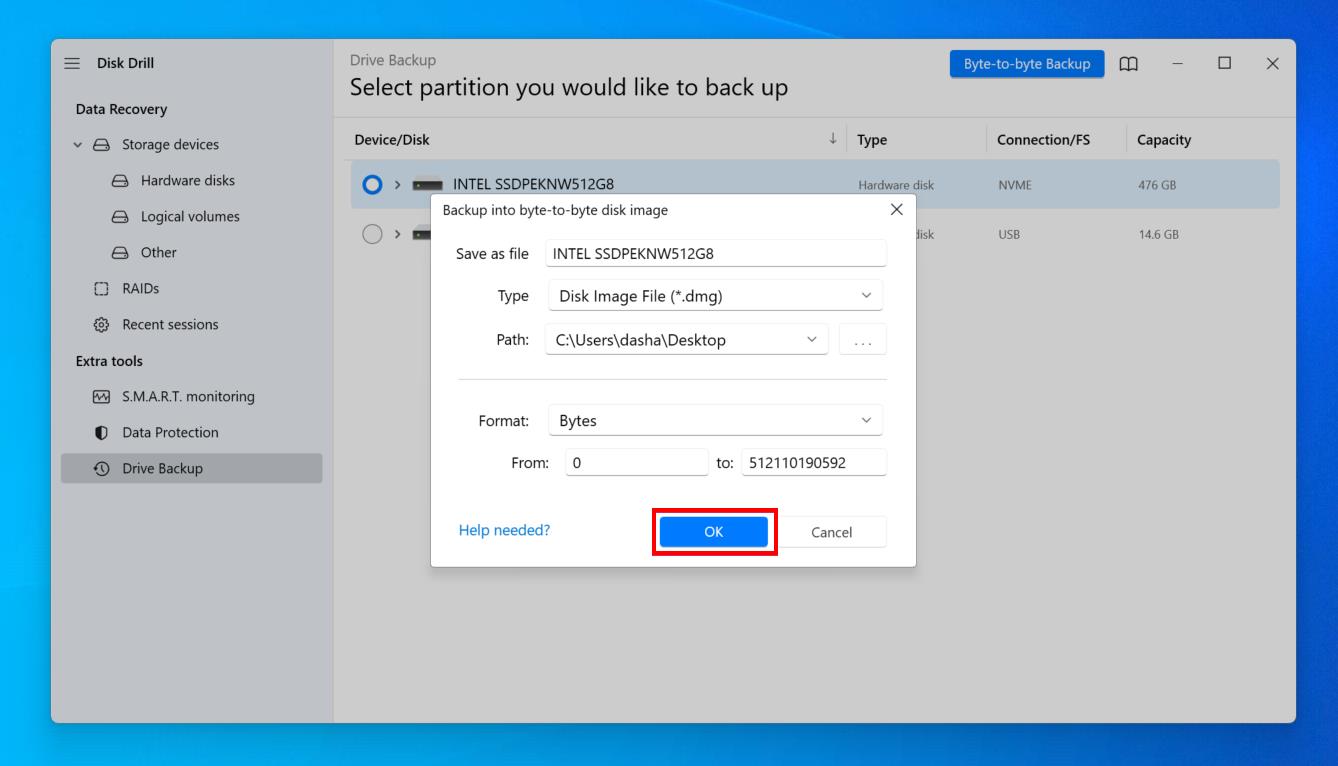
- Give the backup a name and specify an output location on a separate physical partition. Click OK. Click Done when it’s finished.
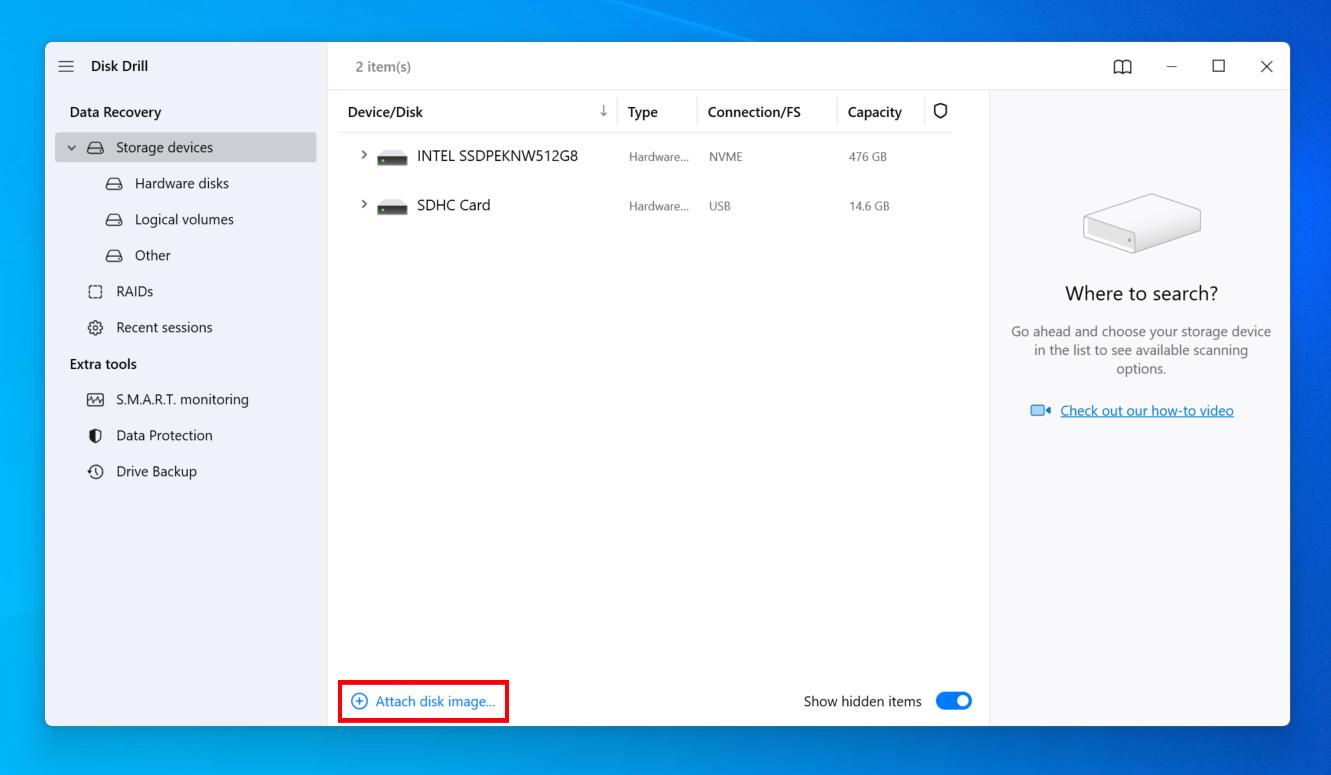
- Go back to the Storage devices section, then click Attach disk image. Attach the image you just created.
- Select the backup image, then click Search for lost data.

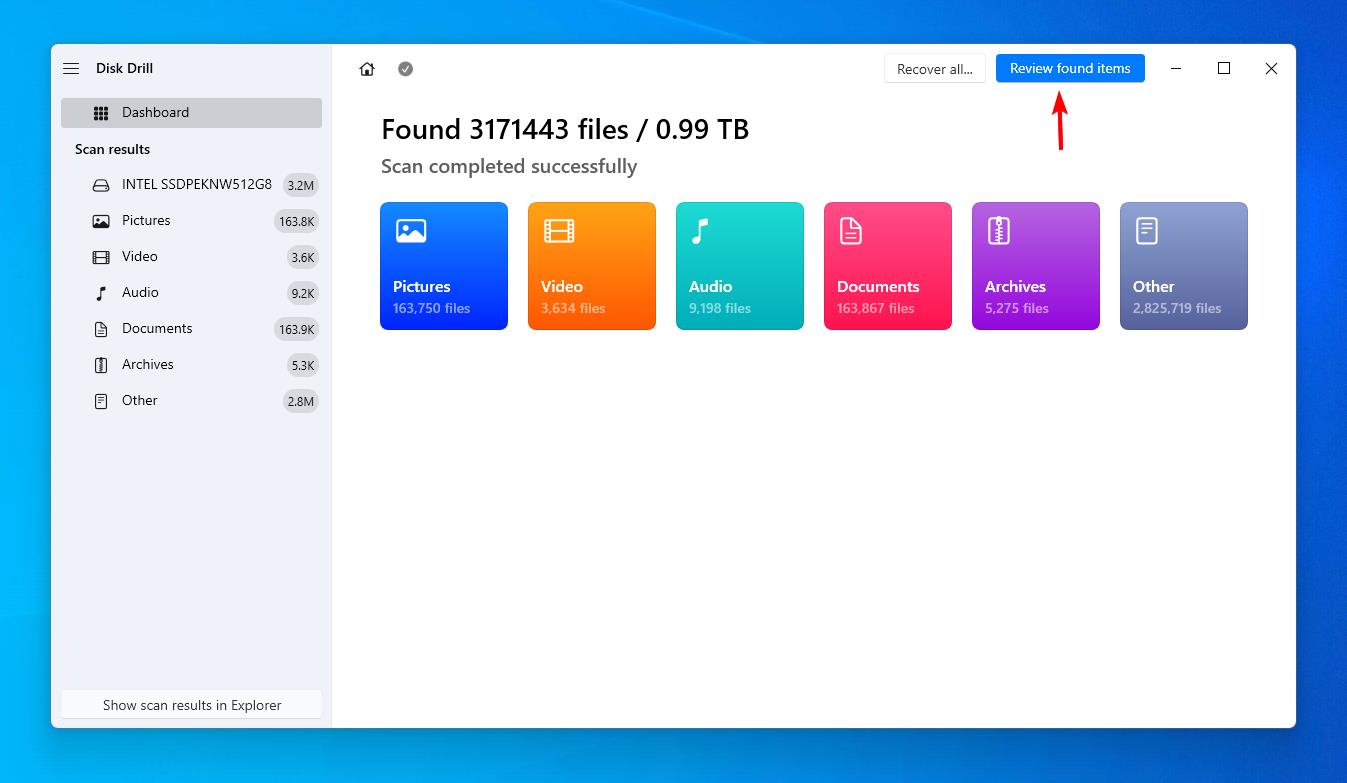
- Click Review found items when the scan finishes.
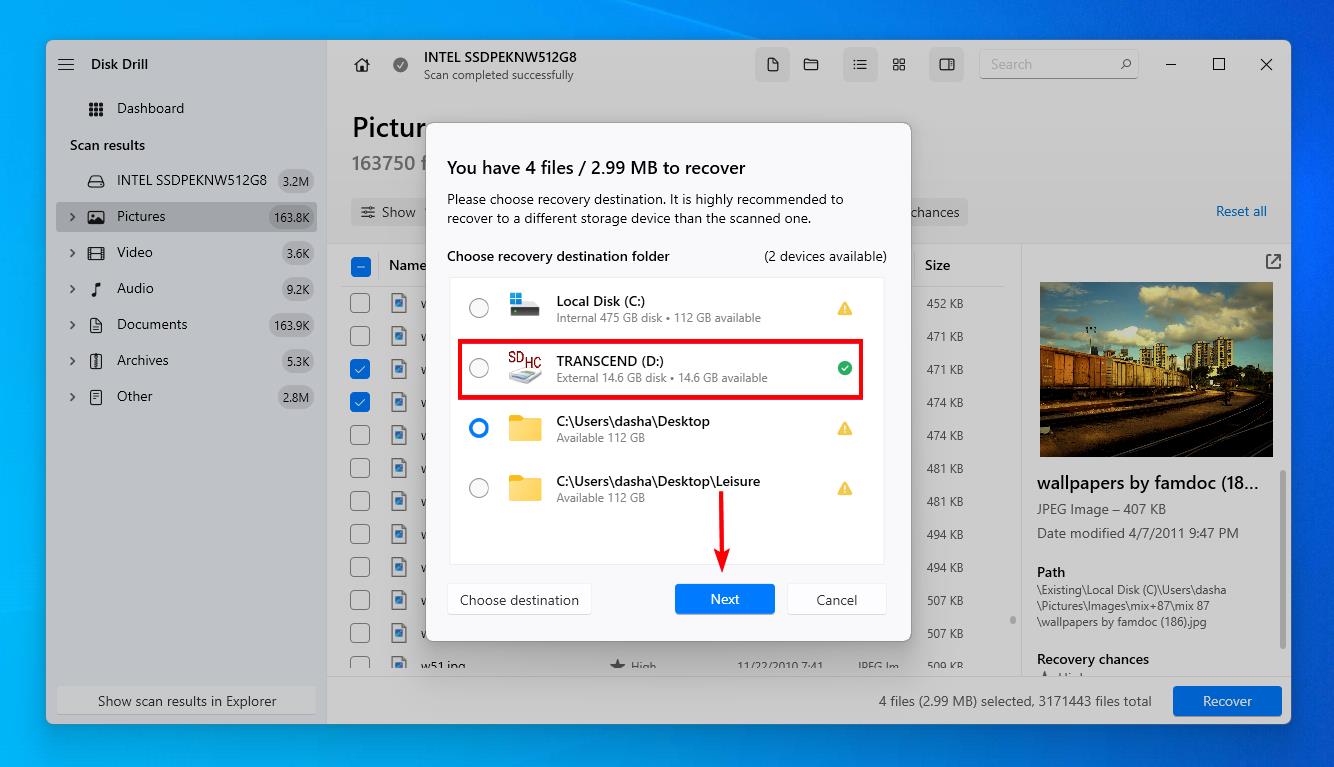
- Select the files you want to recover and click Recover. Make note of the Recovery chances column to see your chances of recovering each file.

- Select an output location that’s not on the same problem disk. Click Next.
How to Fix the 0 Bytes Issue
Now that your data is safe, let’s take a look at various ways you can fix the 0 bytes issue.
Method 1:Try Another Port or Computer
First things first, you should isolate where the issue resides. It’s definitely possible for this problem to be caused by the hardware of your computer, such as a faulty hard drive power connector.
To ensure the problem is localized to your hard drive, consider removing the hard drive and connecting it to another machine for testing. If the problem persists, then you can comfortably say the problem is with the hard drive.
Method 2:Repair Drive with CheckDisk
If one of your folders says Size on disk: 0 bytes, it could be related to your file system. CheckDisk is a Windows repair tool that can scan your drive for file system-related errors and resolve them. Even if it can’t repair your particular issue, it may be able to give you more information about what’s causing it.
Follow these steps to repair a drive using CheckDisk:
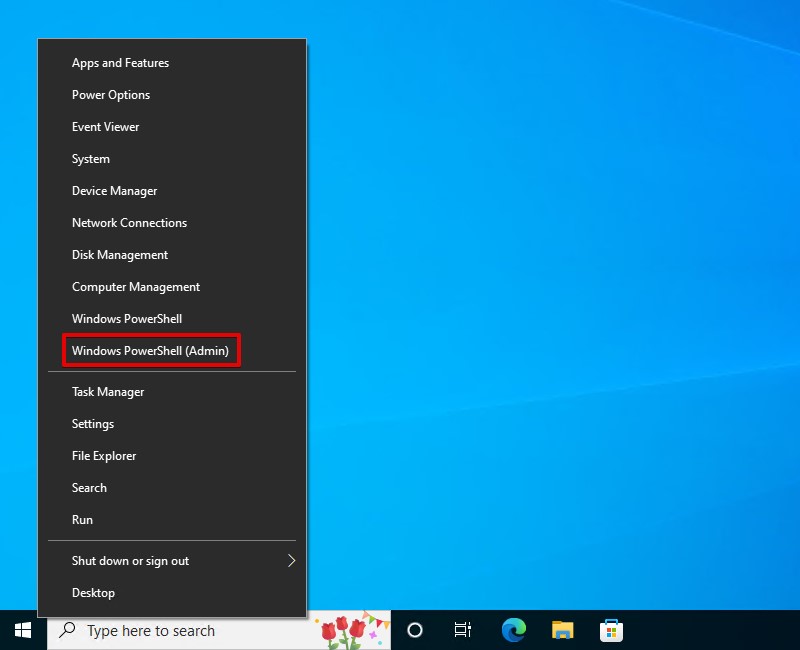
- Right-click Start and select Windows PowerShell (Admin).
- Type
chkdsk F: /f /r. Replace F: with your own drive letter. Press Enter.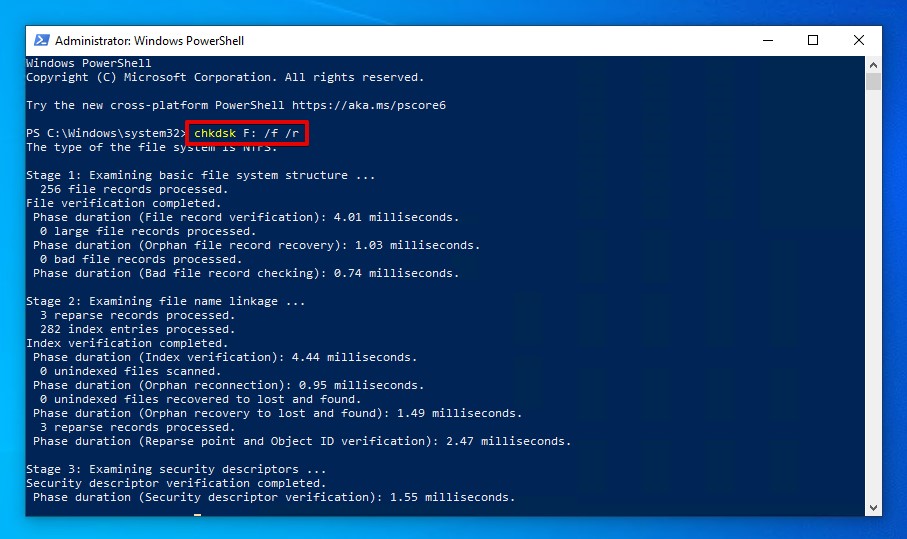
Method 3:Repair with TestDisk
If your partition says 0 bytes, confirm that diskpart shows 0 too. If it does, it could be that the partition has become corrupted. Thankfully, using TestDisk, we can recover the entire partition to how it once was.
These steps will guide you through using TestDisk to recover a lost or corrupted partition:
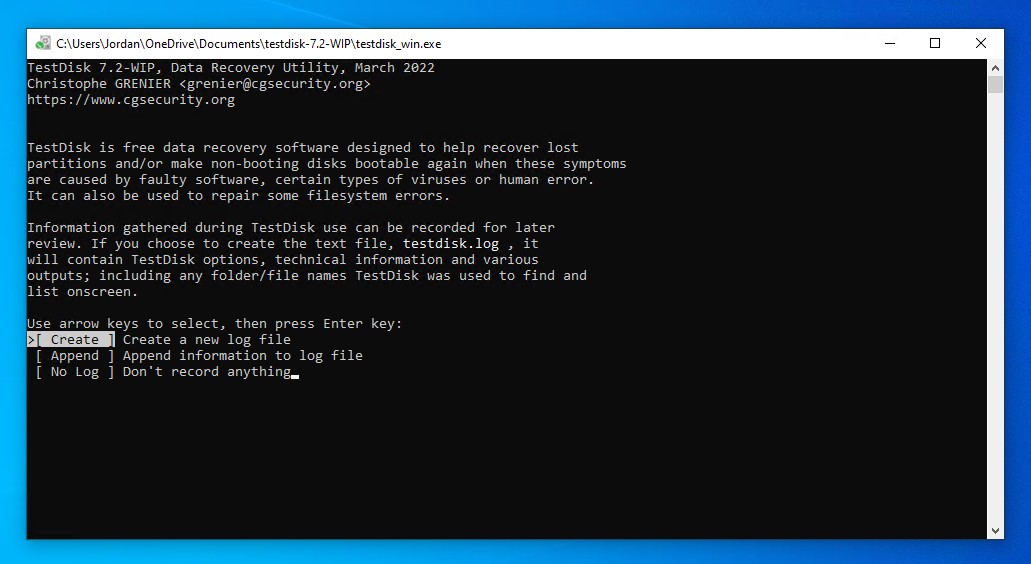
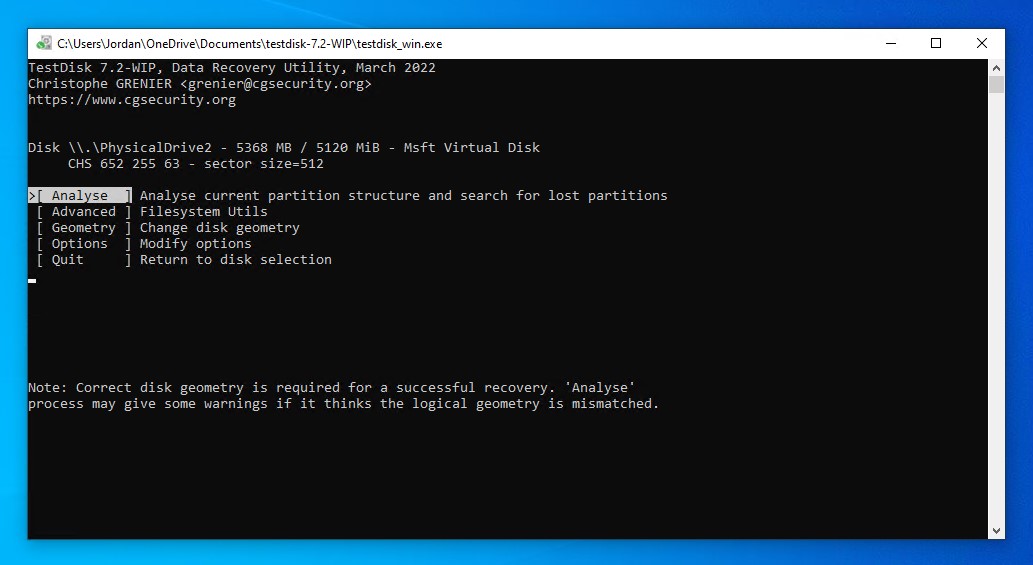
- Download and unzip the contents of the TestDisk file. Open testdisk_win.
- Press Enter on the Create option.
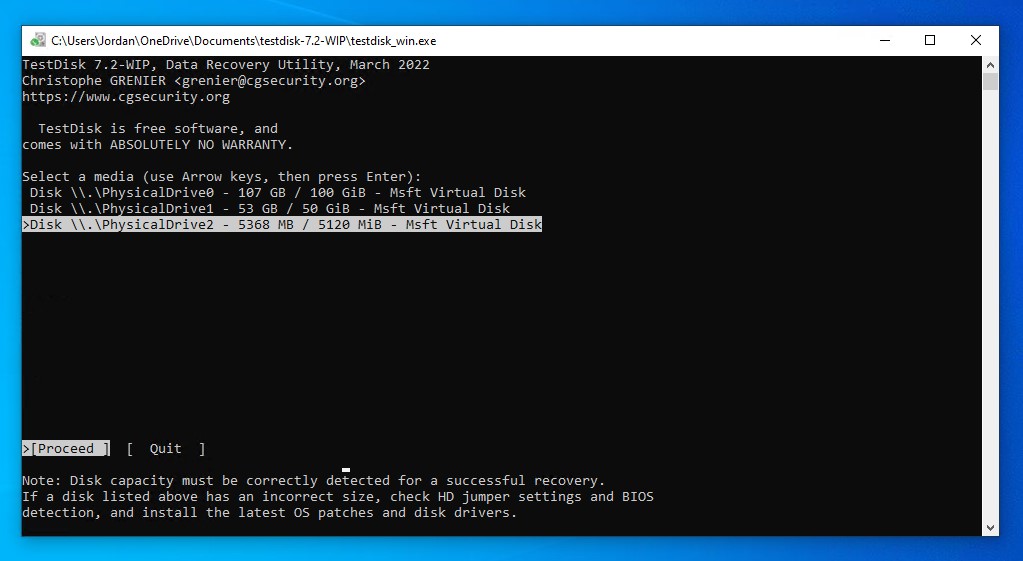
- Highlight the disk you want to recover the partition of, then press Enter to proceed.
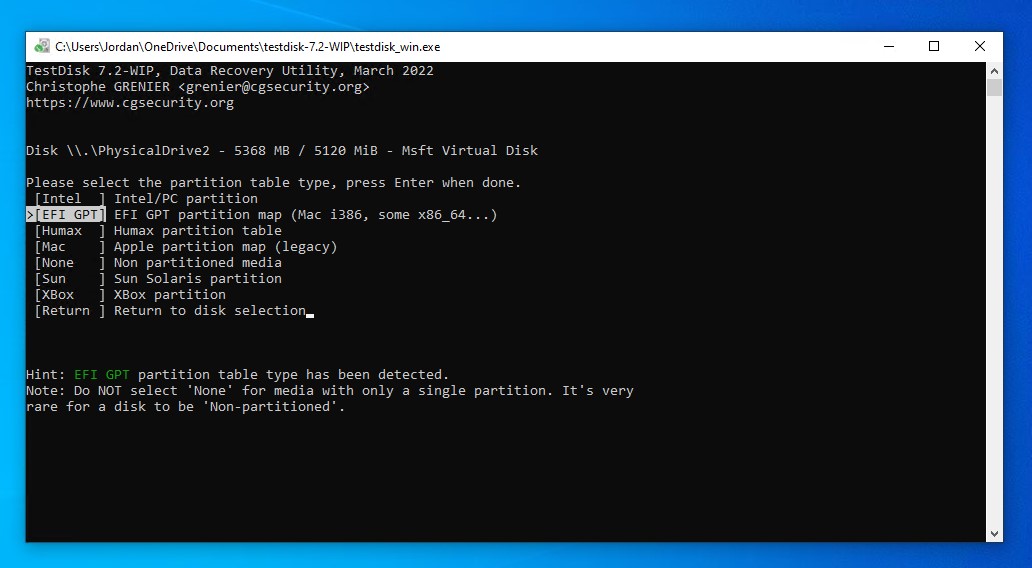
- Select your partition table type. TestDisk often detects this automatically.
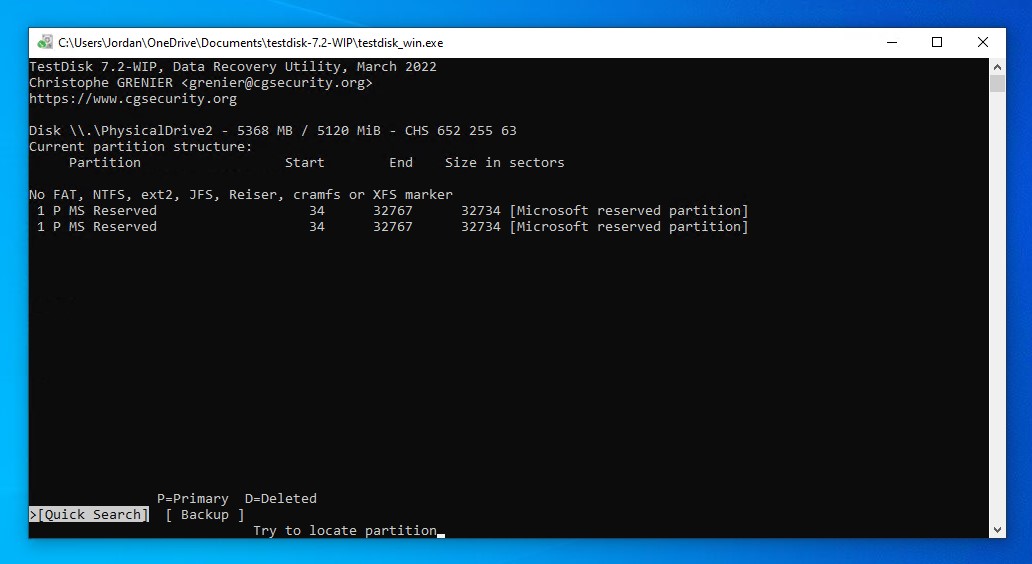
- Press Enter on the Analyse option.
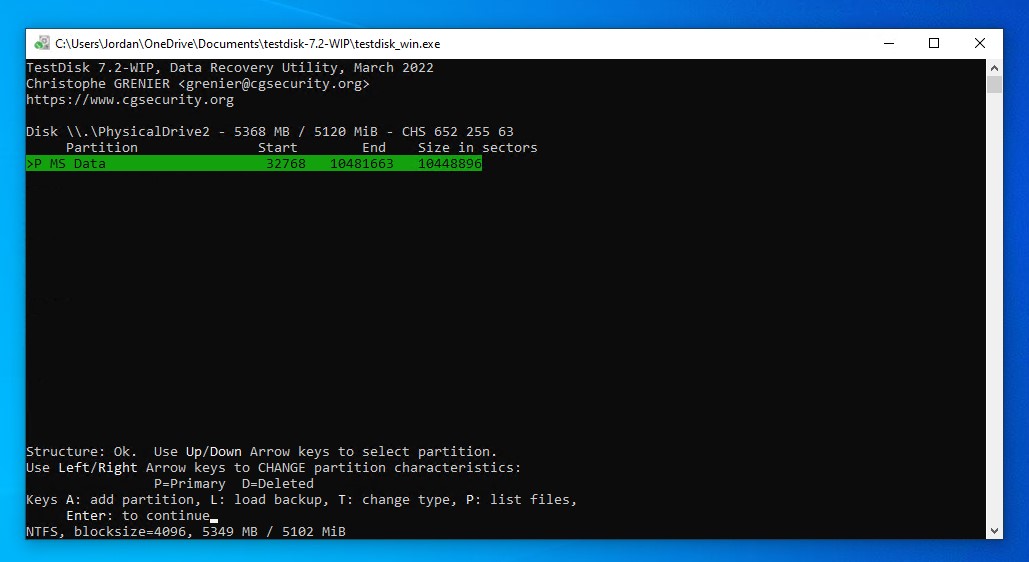
- Press Enter again to begin the quick search.
- Press Enter on the discovered partition.
- Move to the Write option, then press Enter.
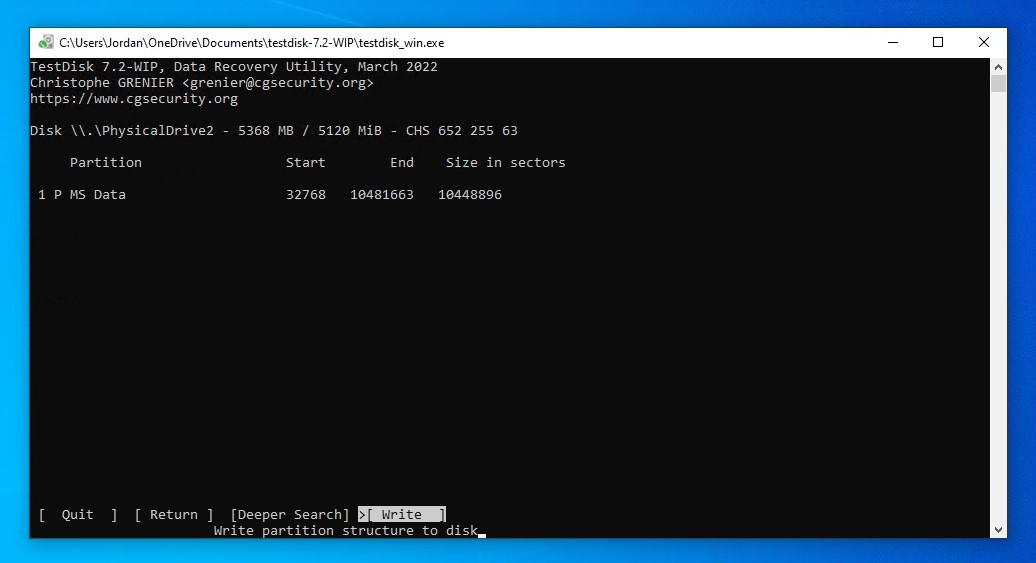
- Press Y to confirm.
Method 4:Repair Damaged MBR
A damaged MBR (Master Boot Record) may be the reason why your hard drive space isn’t displaying correctly. Repairing it will ensure the boot record has all the correct information pertaining to your drive.
To repair a damaged MBR, you will need either a Windows installation DVD or a bootable recovery USB. Follow these steps to repair a damaged MBR:
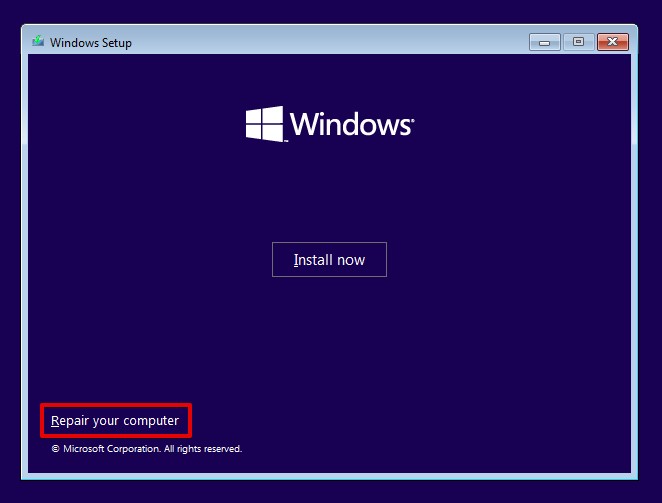
- Boot into the Windows installation environment.
- Click Repair your computer.
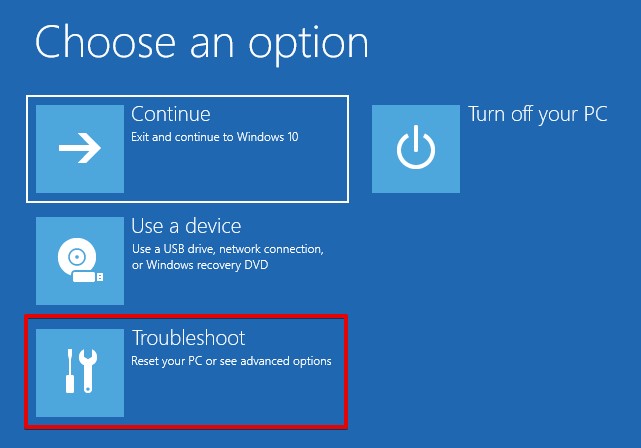
- Click Troubleshoot.
- Click Command Prompt.

- Type
bootrec /FixMbrand press Enter.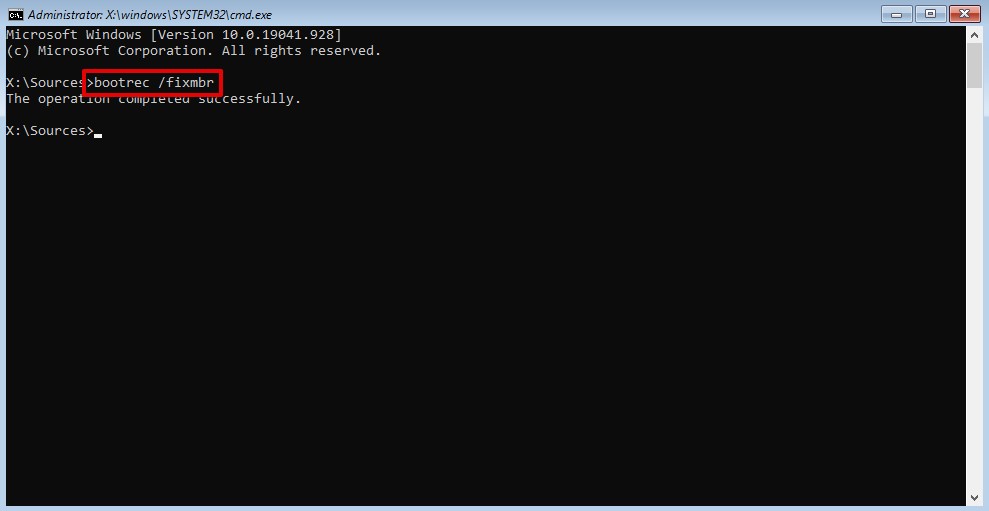
- Type
bootrec /FixBootand press Enter.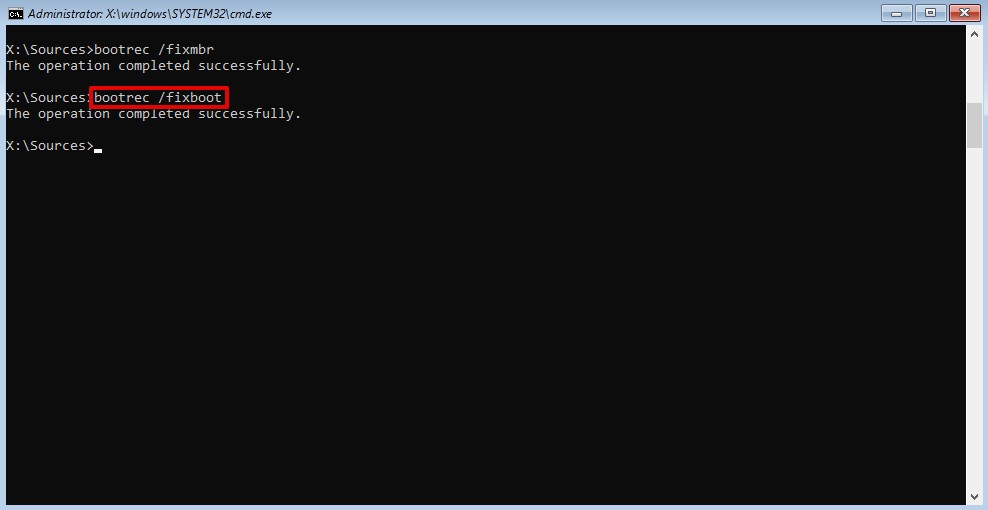
- Type
bootrec /ScanOsand press Enter.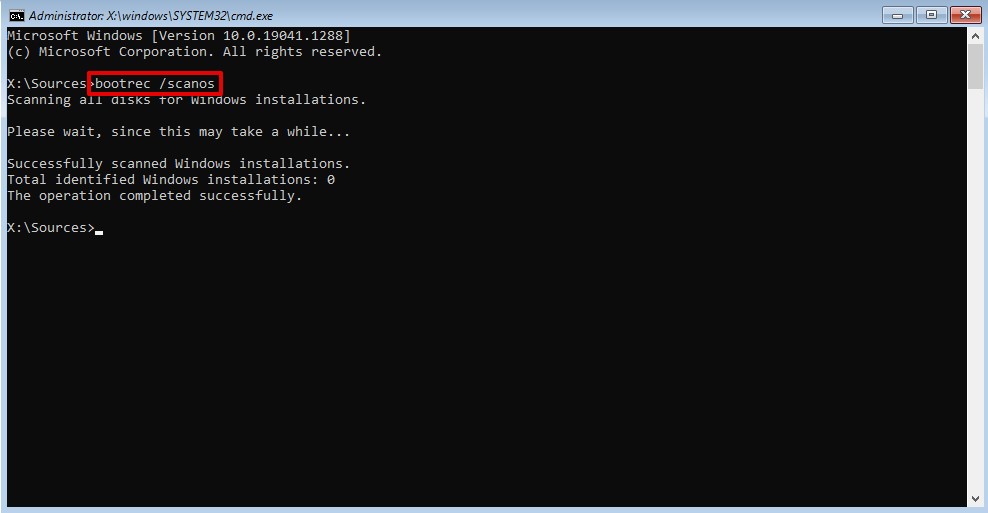
- Type
bootrec /RebuildBcdand press Enter.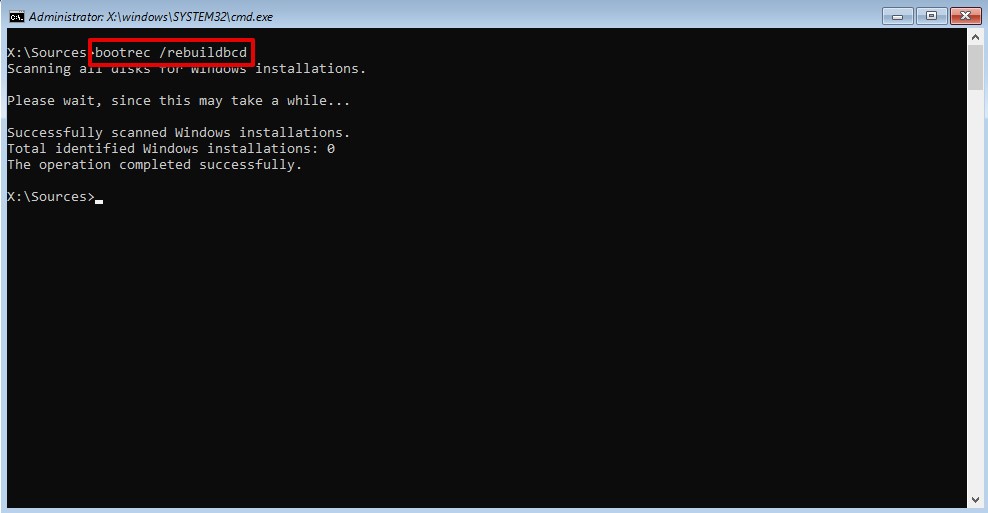
- Restart your computer normally and check to see if the disk still reads 0 bytes.
Method 5:Resolve with Format
Formatting your drive is akin to performing a factory reset. It’s a common method for fixing failed hard drives. Formatting the drive will delete all data presently on it, but it also resolves any issues relating to the file system that’s currently on it.
The below instructions will guide you through formatting your drive:
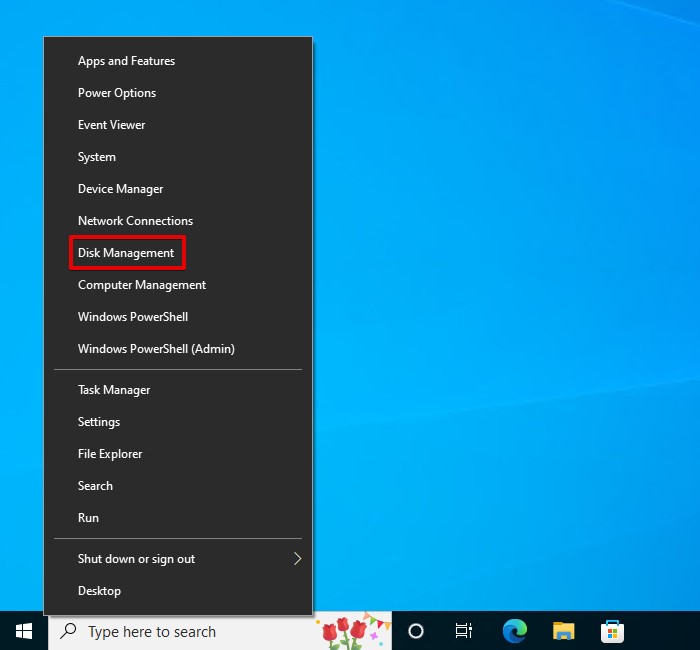
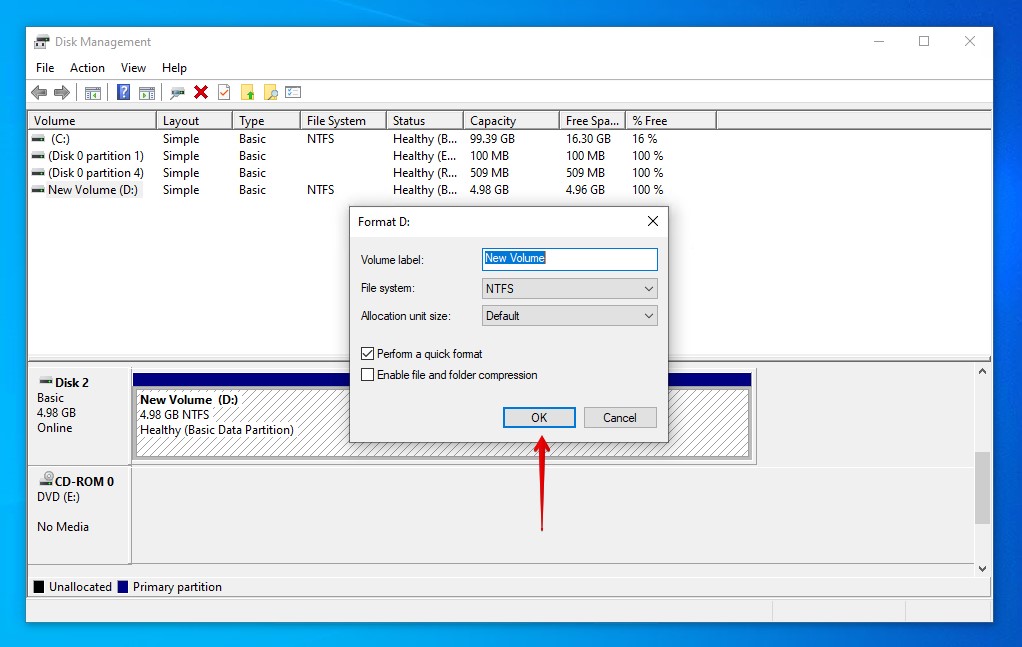
- Right-click Start and select Disk Management.
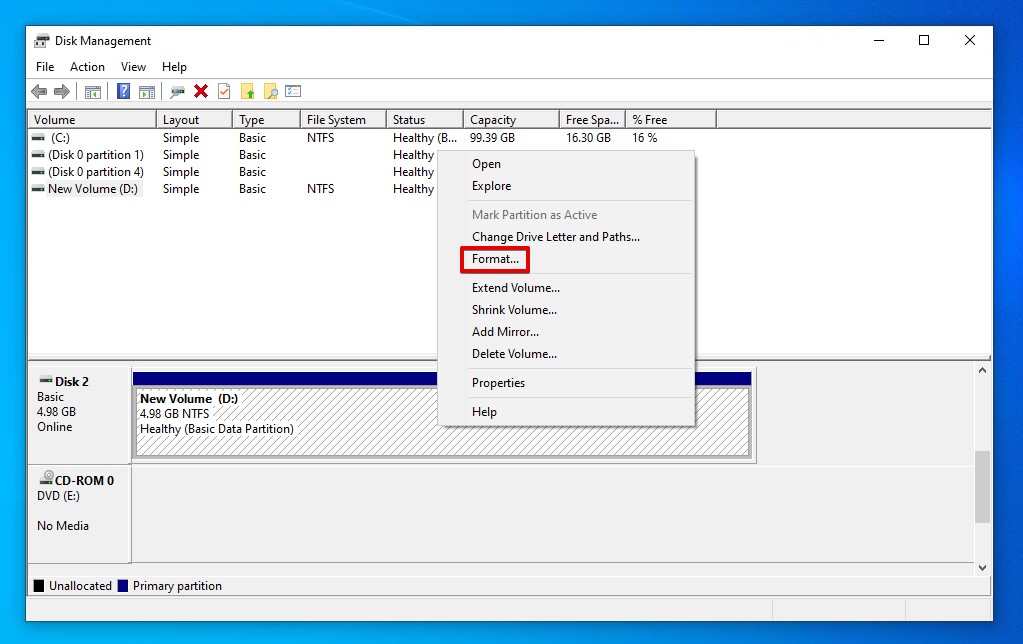
- Right-click the partition on the drive that reads 0 bytes and click Format.
- Provide a name and file system. Ensure Perform a quick format is selected, then click OK.
- Click OK again to confirm.


