 Hard drives don’t live as long as humans. Like all electronic devices, they’ll die at some point. Your hard drive’s demise is inevitable, but when it happens unexpectedly, it could take your important files with it.
Before you attempt any hard drive failure recovery methods, you’d want to recover the data to ensure it doesn’t get written over. There’s also always the chance that the hard disk may undergo further damage and render data irrecoverable.
In this guide, we’ll help you with the entire process: figuring out the cause of hard disk failure, recovering data, and hard disk failure recovery.
Table of Contents
What Can Cause a Hard Drive to Fail
Understanding the failure’s cause is the first step toward fixing your hard drive. It’s also important to note that some factors outside your control can also cause failure. For example, the annualized failure rate (AFR) for some Seagate hard drives is significantly higher than hard drives from other popular manufacturers. Age is another vital factor — an average hard drive lasts 1,051 days (or two years and 10 months) before failing.
With that in mind, here are some common causes of hard drive failure:
- Physical damage: Mechanical or physical damage occurs due to various factors like abrupt power surges, dropping the hard drive, and wear and tear of components that occurs as you use the drive regularly.
- Logical damage: Improper shutdown or startup procedures, abrupt power outages, viruses or malware, and various other factors can lead to logical errors like file system corruption.
You’ll be able to recover data from the hard drive as long as it’s still readable. If the hard drive is completely unusable, you can’t recover data.
How to Recover Data from a Failed Hard Drive
There are two methods for hard drive failure recovery: data recovery software and a data recovery service.
Method 1:Data Recovery Software
You can use a smart data recovery solution like Disk Drill for recovering data from an external or internal hard drive when it fails.
Step 1. Download and Install Disk Drill
Start by downloading Disk Drill and installing it on your PC. The free version allows recovering up to 500MB of data.
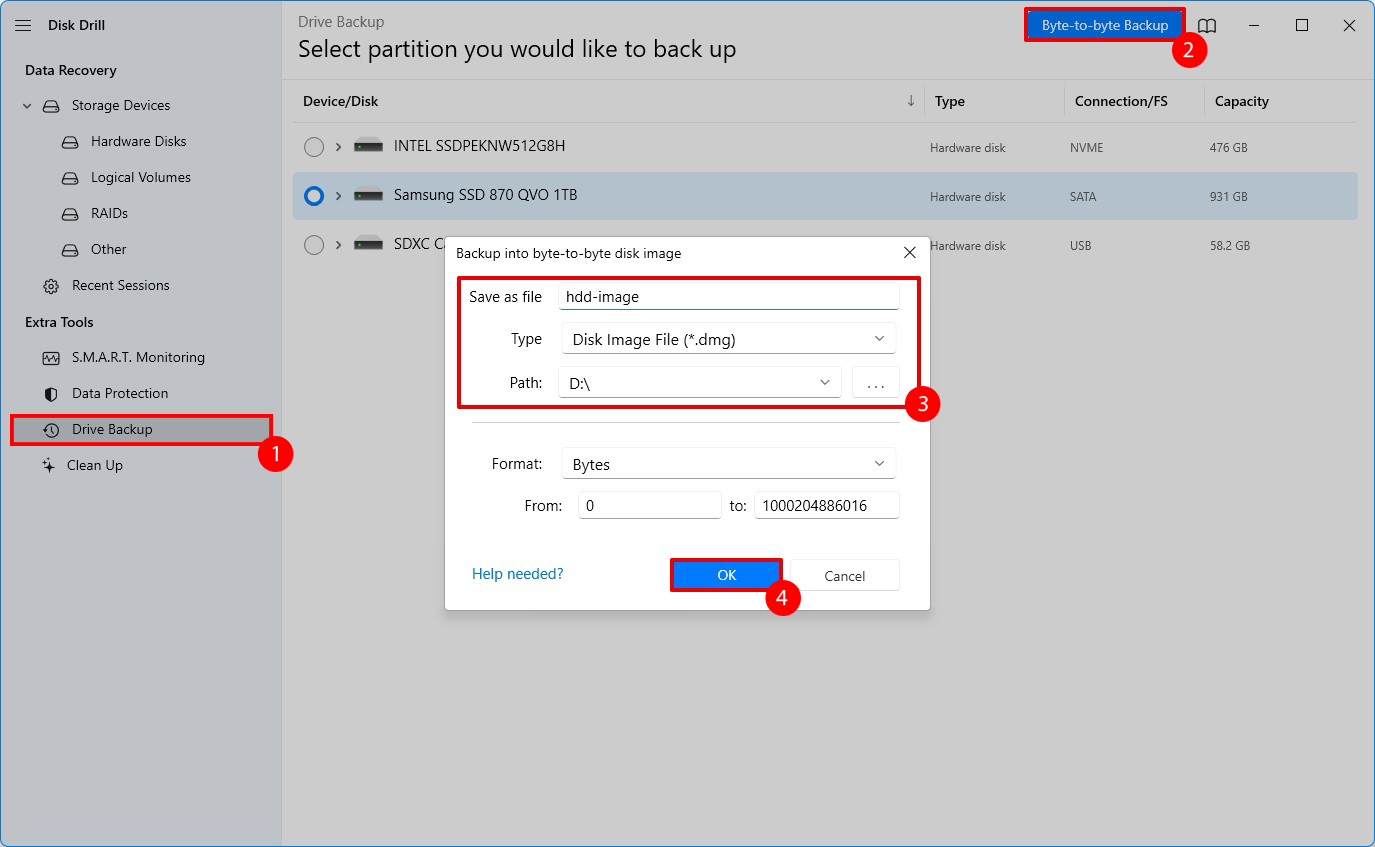
Step 2. Create an Image of the Hard Drive
Launch Disk Drill after installation and head over to the Data Backup tab from the left sidebar. Select the hard drive and click on Byte-to-Byte backup. Name the backup file and select the path where you want to save it. When done, click OK.
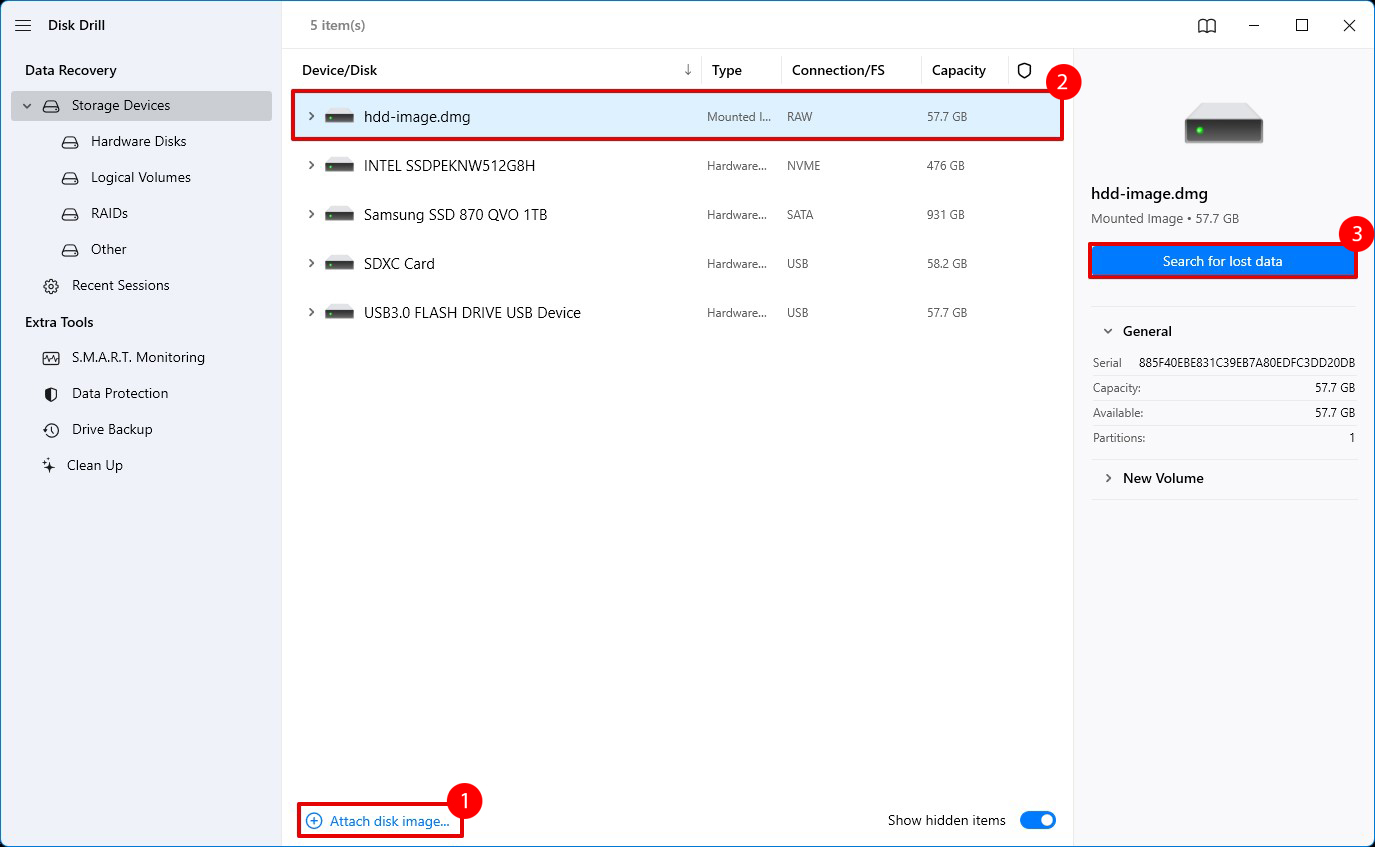
Step 3. Scan the Image
Once you’ve created the image, return to the Data Recovery tab from the left sidebar. Click on Attach disk image and select the image file using the explorer. You should now see the image listed as a disk. Select it and click the Search for lost data button to start the scan.
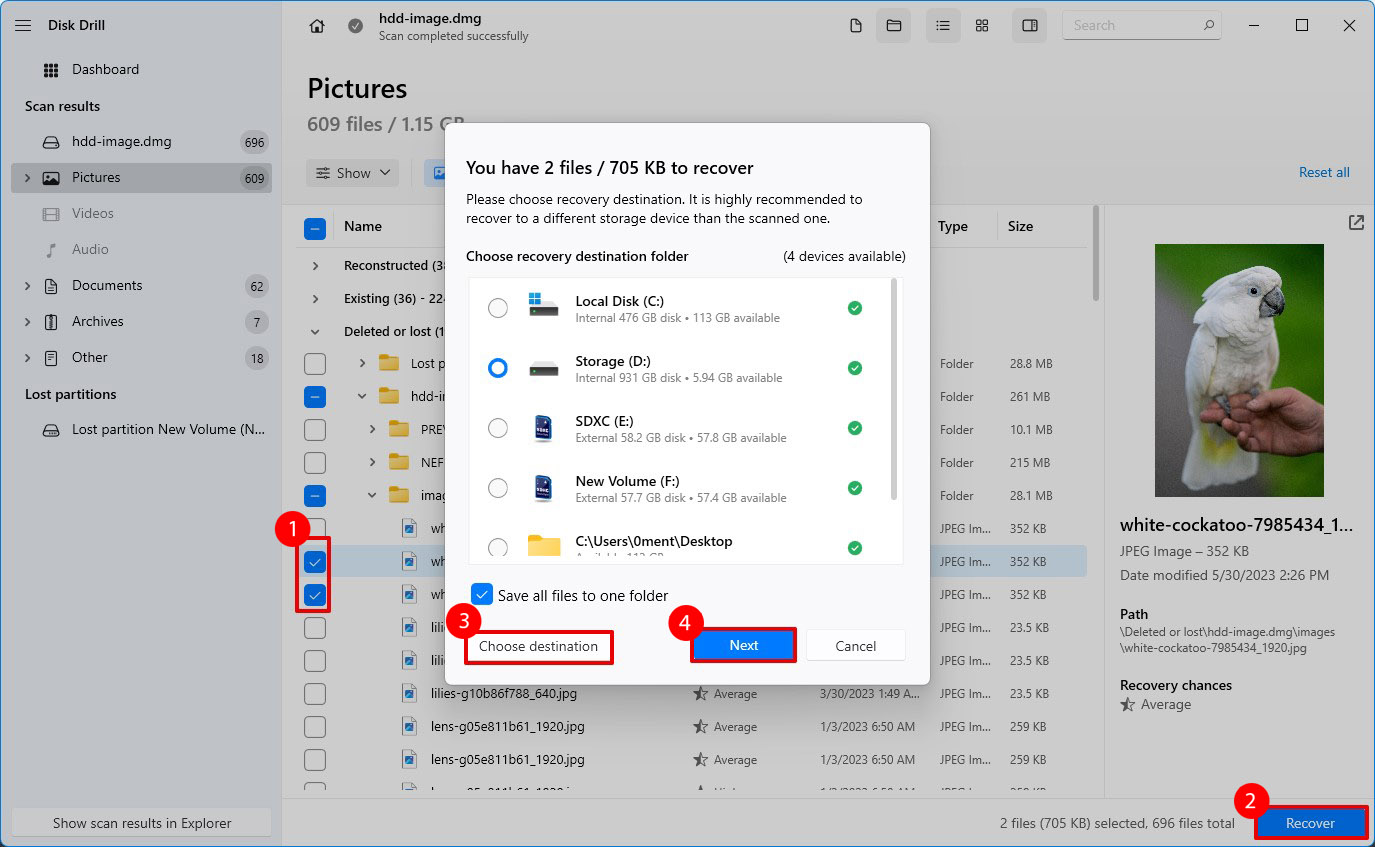
Step 4. Recover the Files
Once the scan completes, you’ll see the list of files Disk Drill found during the scan. Select the files you want to recover and click the Recover button at the bottom. Select a location where you want to save the files you’re recovering and click Next. Note that you shouldn’t recover files in the source drive to avoid overwriting existing data.
Note: Scanning is an intense activity. If your hard drive is already in bad shape, scanning it could push it over the edge. You can avoid this by creating an image of the drive. Imaging isn’t intense so you won’t cause further damage to the drive. Disk Drill offers a built-in option (Byte-to-Byte Backup) to create and scan images.
Method 2:Data Recovery Service
In some cases, failed hard drive data recovery may not be possible using a data recovery tool. If that’s true in your case, you can seek help from a reliable data recovery service. Your hard drive will be taken to a lab where a technician will retrieve data from your hard drive and then send the data and the hard drive back to you.
How to Fix a Hard Drive Failure
Hard disk failure recovery is possible in cases where it hasn’t been damaged severely. The solution depends on the cause of the damage, but the fixes are mostly for logical damage. Repairing physical damage, except for bad sectors, requires a technician’s help.
Method 1: Use Check Disk
CheckDisk (ChkDsk) is a built-in utility on Windows that checks a disk for errors and bad sectors. If ChkDsk finds either errors or bad sectors, it will try to fix them automatically.
To use ChkDsk:
- Press Win + R, type cmd, and press Ctrl + Shift + Enter.
- Type the following command and press Enter:
chkdsk F: /r /x
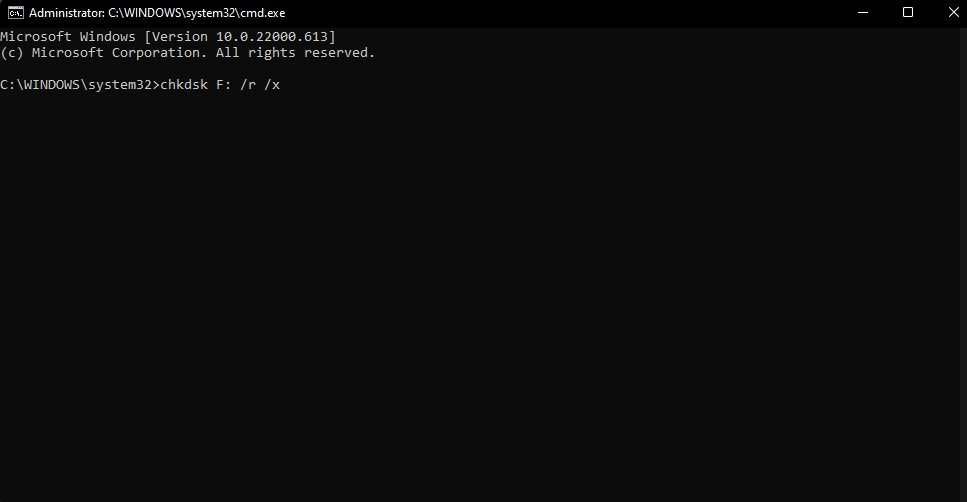
- Let the utility scan your hard drive. Once it finishes, exit the Command Prompt.
At this point, Check Disk should have fixed (or at least tried to fix) any errors or bad sectors, if it found any. If it did, you should be able to use your hard drive normally again.
Method 2: Run an Antivirus Scan
When malware is causing your hard drive to malfunction, you’ll need to remove malware using an antivirus program. The process for scanning differs depending on which antivirus program you use. However, it should be fairly easy regardless of which antivirus you use.
We’ll use Microsoft Defender to illustrate the steps.
- Search the Start Menu for Virus and threat protection and select the Best Match.
- Select Scan options.
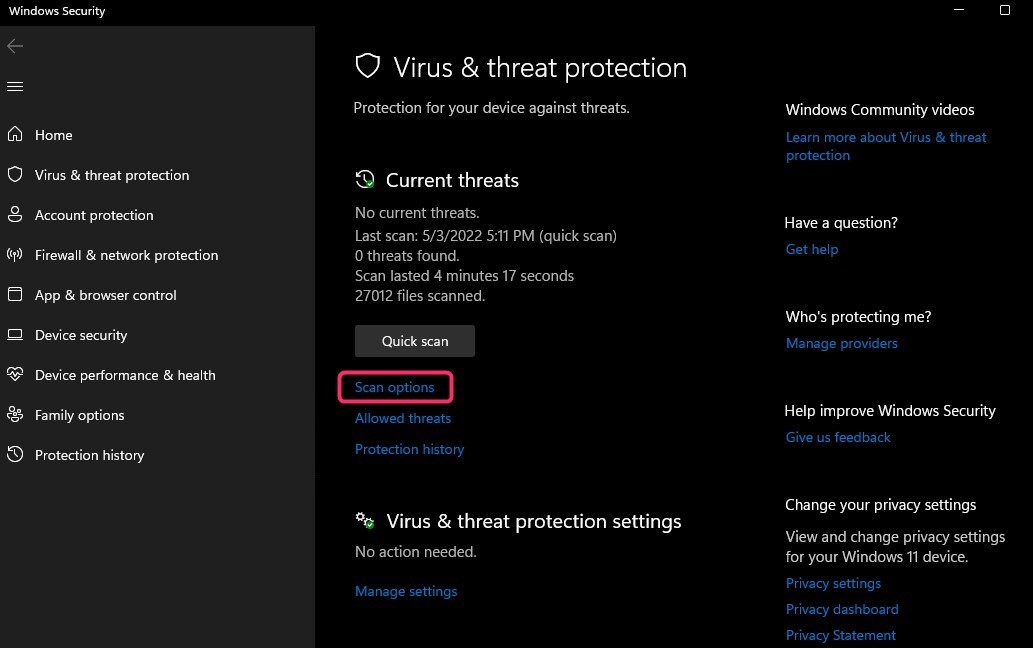
- Perform a scan based on your preference. When you want to scan a specific hard drive, you can use the Custom scan option. Select Scan now once you’ve chosen.

When the scan completes, Defender will show you if it found any virus or malware and the action it took. Once you know Defender has cleaned your hard drive, you can start using it normally again.
Method 3: Formatting
Formatting a hard drive wipes your drive clean. Formatting solves almost all logical errors on a hard drive and gives it a fresh start.
Once you’ve already recovered important files with Disk Drill, you can format the hard disk without having to worry about losing data. Here’s how you can format your hard drive:
- Search for Create and format hard disk partitions in the Start Menu. Selecting the Best Match will launch the Disk Management Console.
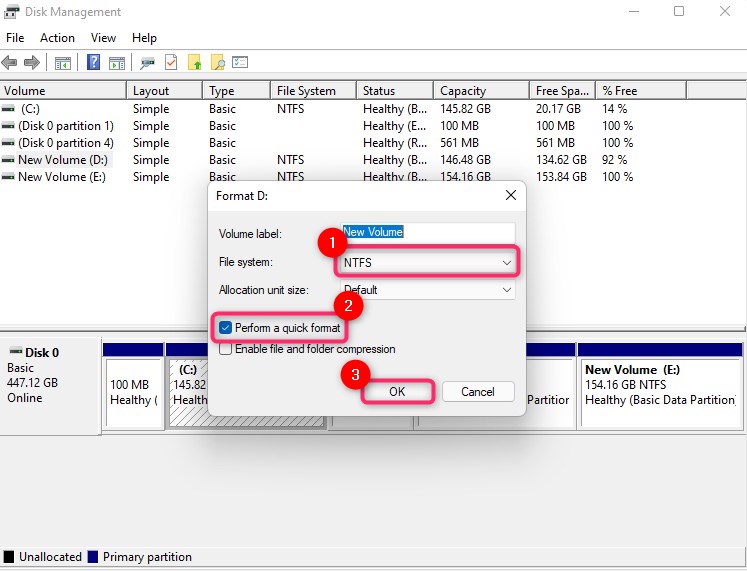
- Find the drive you want to format, right-click on it, and select Format.
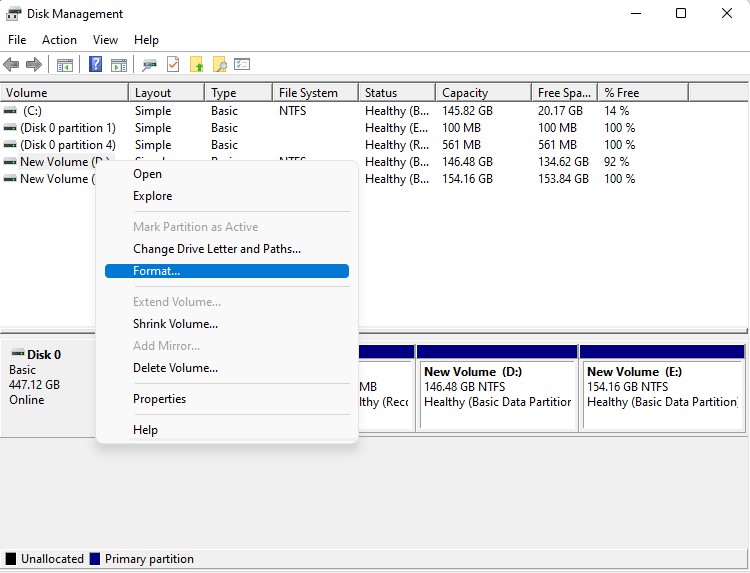
- Select a file system (or leave it to NTFS if you’ll only use it on Windows devices), check the box next to Perform a quick format, and select OK.
Once the process completes, you’ll have an empty hard drive. Hopefully, you’ll have recovered your hard drive by now.
Method 4: Rebuild Corrupted Partition Using TestDisk
TestDisk is a free Command Prompt utility that helps you fix various errors associated with storage media. It can also help fix hard drives that aren’t working because of a corrupted partition. Here’s how you can use TestDisk:
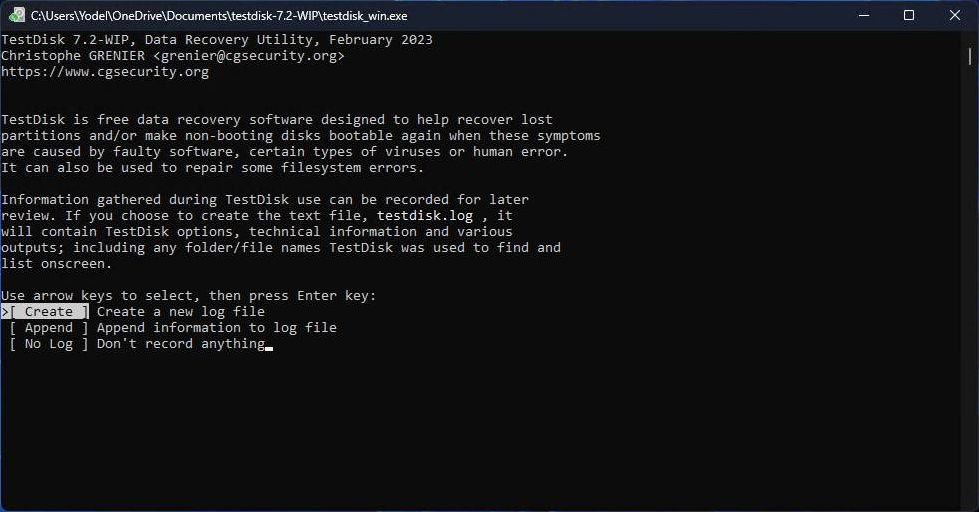
- Download Test Disk and run testdisk_win.exe.
- Select [Create] to create a new log file.
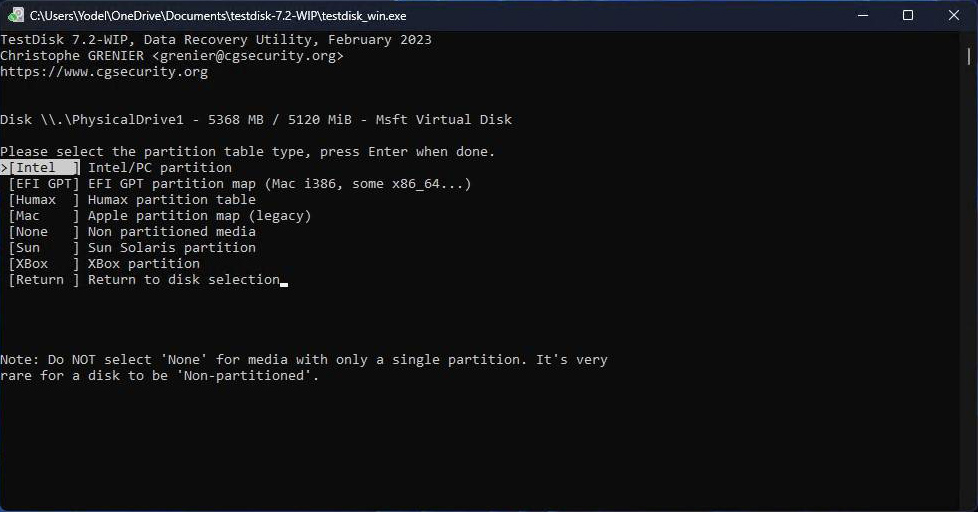
- Select the disk with the corrupted partition and on the next screen, select the partition table type.
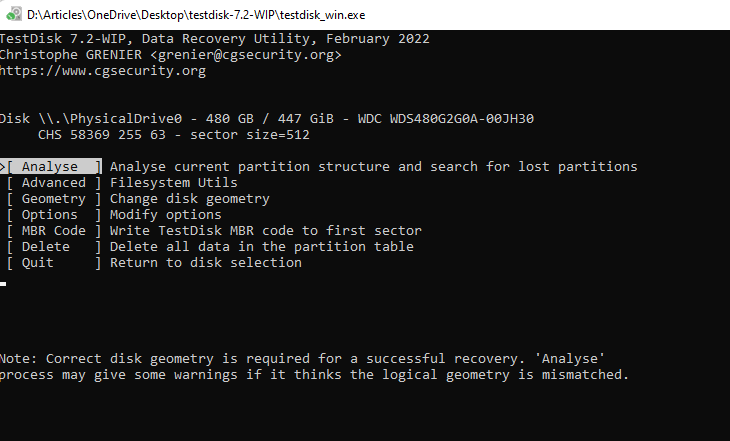
- On the next screen, select [Analyse]. This prompts TestDisk to analyze the current partition structure and search for lost partitions.
- Select [Quick Search] on the next screen.
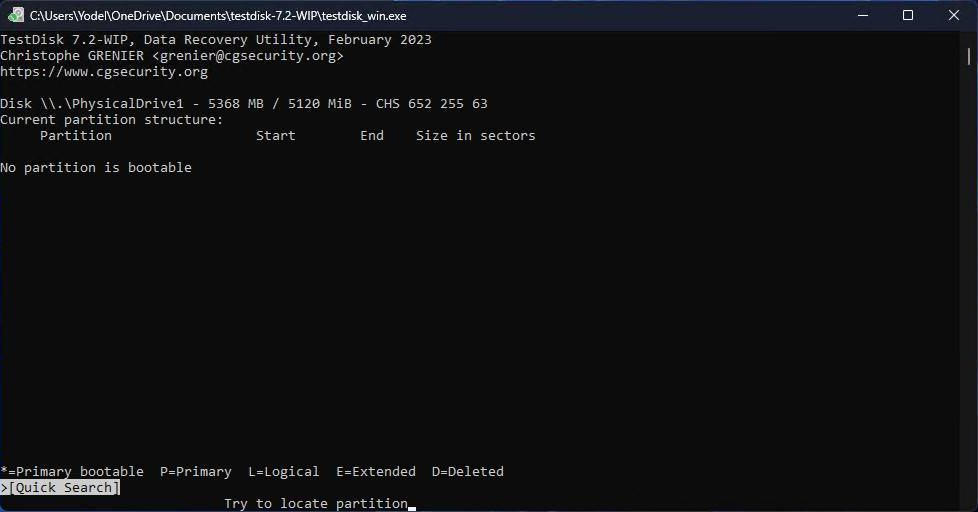
- Once the Quick Search process completes, you’ll see a list of partitions on your disk. You can also use the [Deeper Search] option to run a more thorough scan of a specific partition.

- Each partition in the list will have a prefix. Look for partitions with “P” as their prefix (P stands for Primary). Select the corrupted partition and select [Write].
Once the process completes, reboot your PC.
Signs of Hard Drive Failure
Sometimes, even though your hard drive’s working, you’ll see signs of it heading towards failure. Recognizing these signs early on can save you a lot of pain if the hard drive does fail.
Following are the hard disk failure signs to watch out for:
- Slow performance: If your computer seems to be performing slower than usual, it might be a sign of hard disk failure.
- Blue screen of death (BSOD): If you’re experience frequent BSODs (not a one-off) on Windows, your hard disk may be failing.
- Overheating: If your hard drive seems to be overheating, it could mean its headed towards failure.
- Strange sounds: Your hard drive might make strange sounds if one or more of its physical parts aren’t working as they should. It could be a strong sign that your hard drive’s about to fail.
There are several other signs of hard drive failure, but these are the most common ones. If you notice these, immediately backup your data to avoid losing it.
Use a Safety-First Policy When Fixing Failing Drives
In conclusion: a safety-first policy is a smart move when dealing with failing drives. One mistake, and you could end up losing all your data. We recommend always starting with data recovery and then moving on to fixing your drive.
We’ve explained the exact steps you can take to recover your data and fix a hard drive that might be about to fail. Hopefully, this guide answered your questions about your failing hard drive.


