 Running the clean command in diskpart is a recommended step if you want a fresh start on your drive and want to create new partitions and reformat the drive. But what if you run the command on the wrong disk. Is your data irreversibly lost? The answer is no. Use our guide and find out how you can recover data lost by the diskpart clean command.
Table of Contents
What is a diskpart Command
Windows offers two ways to manage the storage disks connected to your PC–Windows Disk Management, and diskpart. While the first one has a GUI, diskpart is a command-line based utility. It’s more challenging to use, but diskpart offers far more functionality and options for disk modification and management.
The clean command removes the partition information from the selected drive. The space that the partition occupied will become unallocated, i.e., it will be available for creating a new partition. This means you won’t be able to access or modify files that were located in the partition. However, the files themselves are not deleted, until you create a new volume using the unallocated space.
A similar command, clean all, is destructive. Not only does it remove the partition information and unallocate the space, but it also wipes your data completely. It does this by writing zeroes to each sector of the disk. As a result, the previous data is practically irrecoverable. The command also takes much longer to run–about an hour per 320 GB of storage size.
Only use the clean all command if you want to securely erase all data on your drive.
Is It Possible to Undo the diskpart Clean Command?
No, you cannot undo the diskpart clean command. Creating a new partition using the unallocated space and formatting it will not get back your data. Instead, it’ll make recovering the cleaned partition even more difficult.
If you accidentally executed the clean command, don’t execute any more commands. Your data can be recovered from the unallocated space using data recovery software. In most cases, you can even restore the entire partition from an accidentally cleaned disk.
How to Recover Data after diskpart Clean with Data Recovery Software
Modern data recovery solutions can access and recover data from unallocated space on your drive. But, there are plenty of such programs available on the internet, and it can be overwhelming to choose from so many options.
We recommend you opt for Disk Drill, as it makes data recovery extremely accessible. It essentially eliminates the hassle of double-checking for compatibility between the data recovery program and your particular data recovery situation. How? Well, it works with both GPT and MBR drives, recognizes over 400 file formats, and is available for both Windows and macOS. In fact, as a Windows user, you can take advantage of Disk Drill’s free trial and recover up to 500 MB of data at zero cost.
Here’s how you can use Disk Drill to recover data, lost by running the diskpart clean command:
- Download Disk Drill and install it.
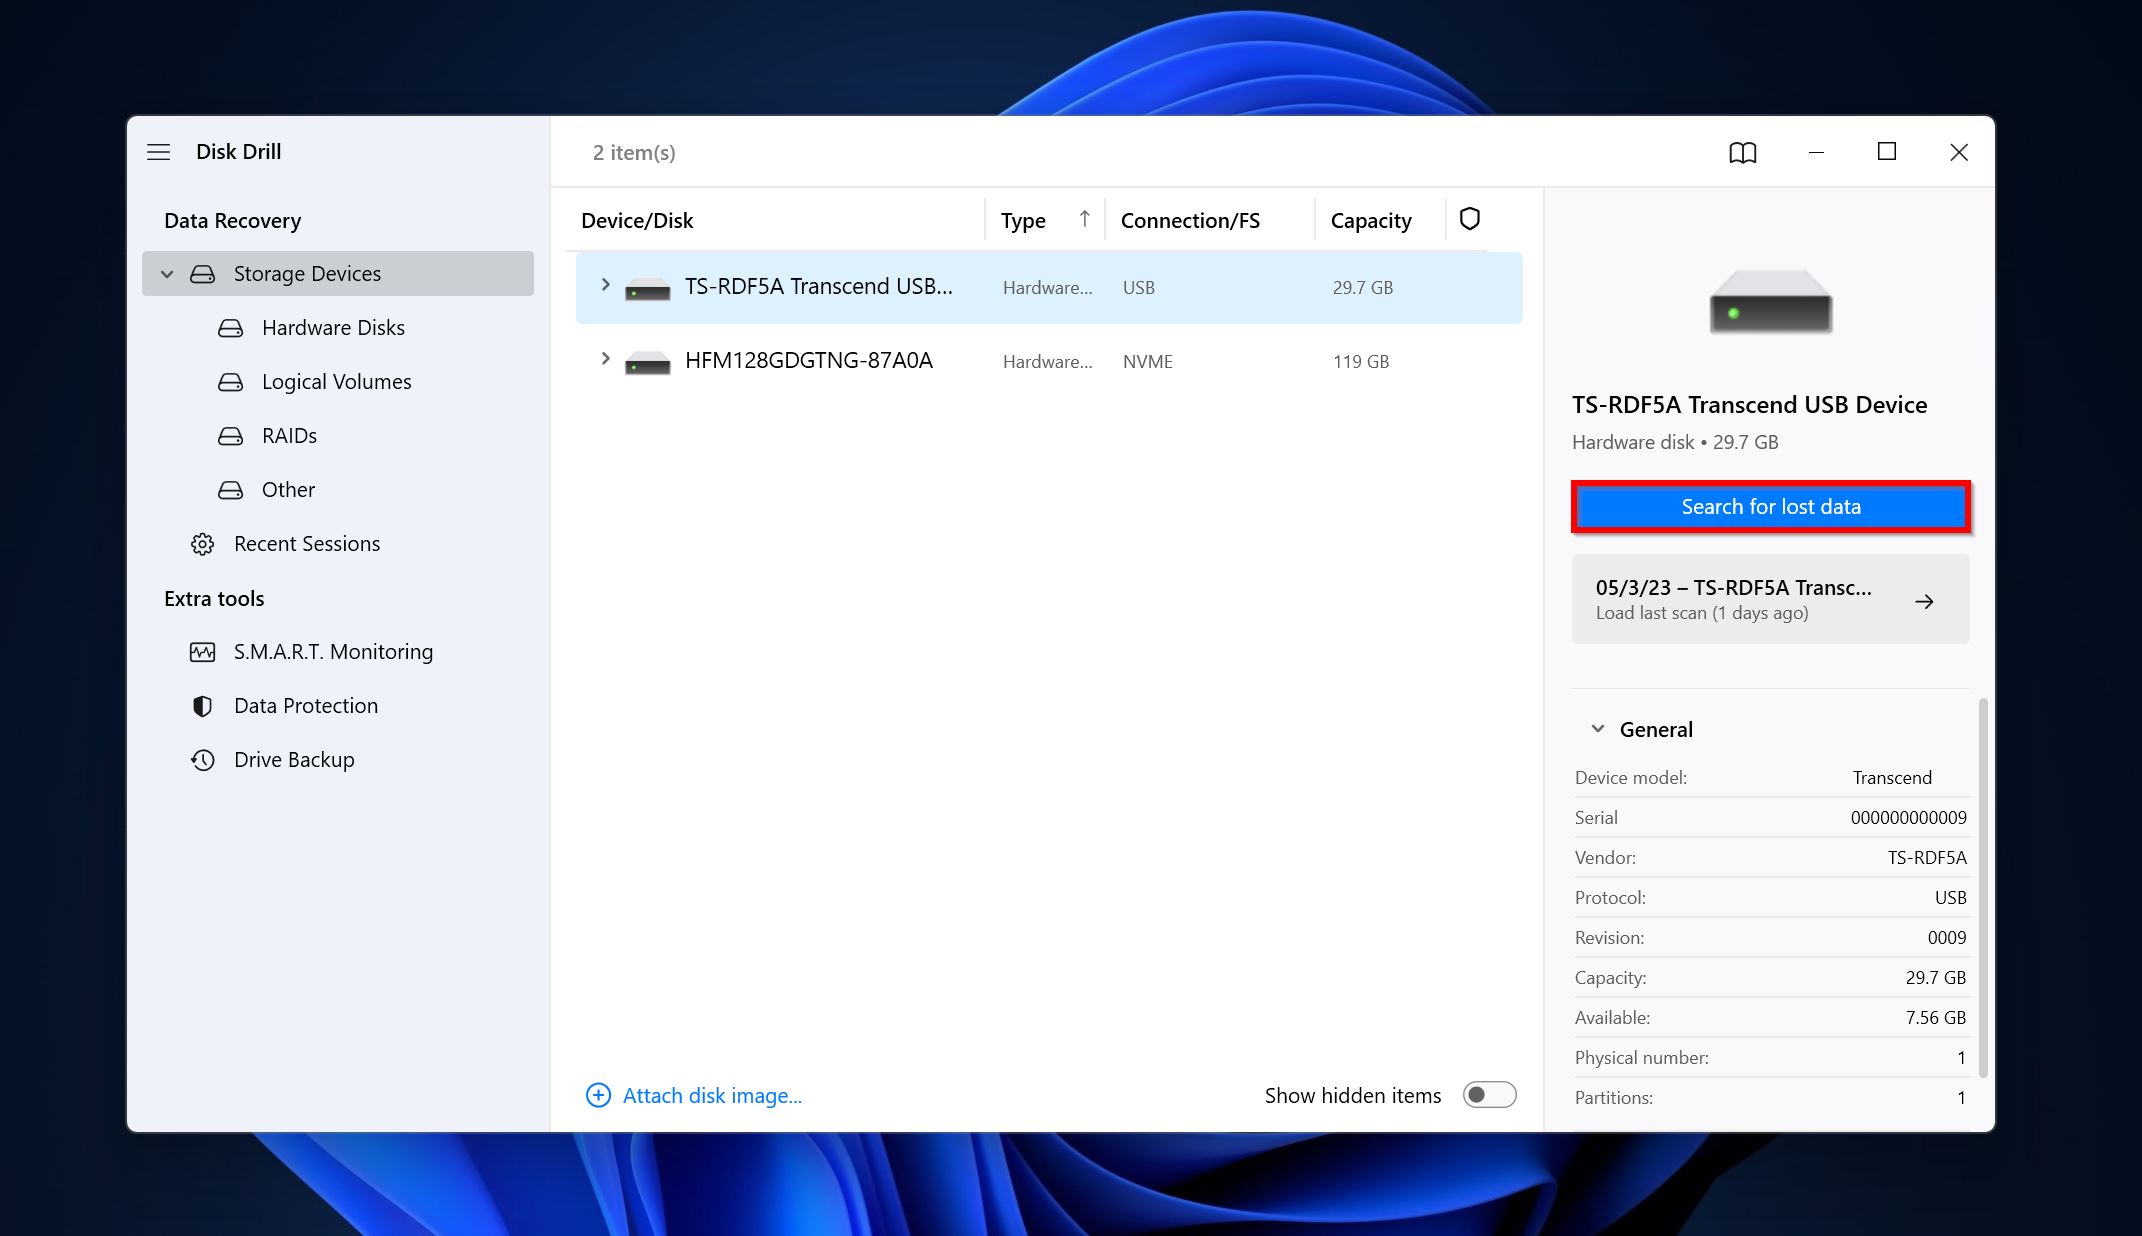
- Open Disk Drill, select the drive that you accidentally cleaned and click on Search for lost data.
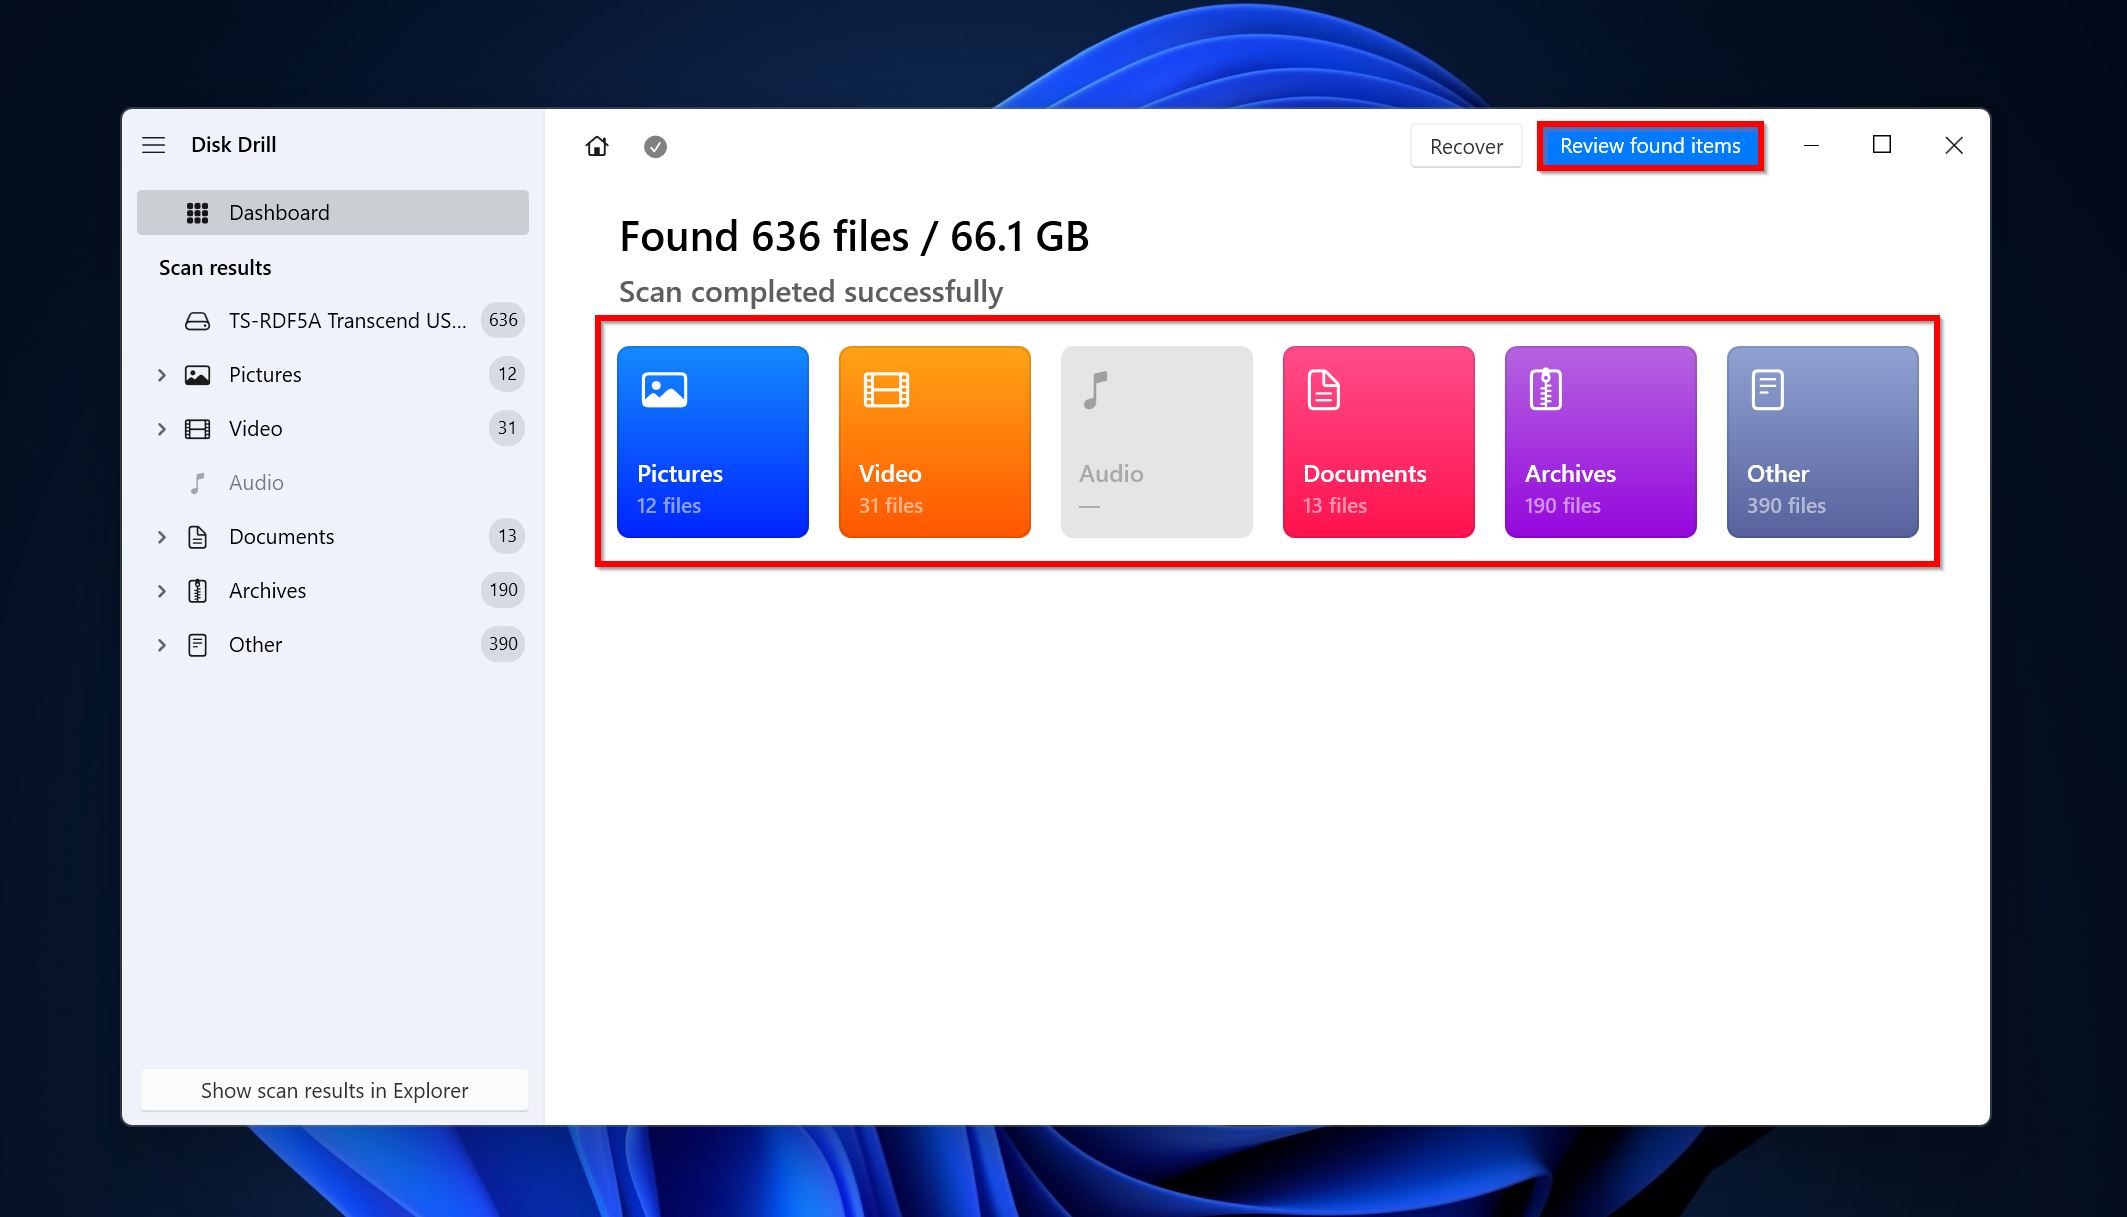
- Click on Review found items to view the recoverable files on your disk. You can directly click on the relevant file type to filter out the results (Pictures, Videos, Audio, Documents, Archives, and Other).
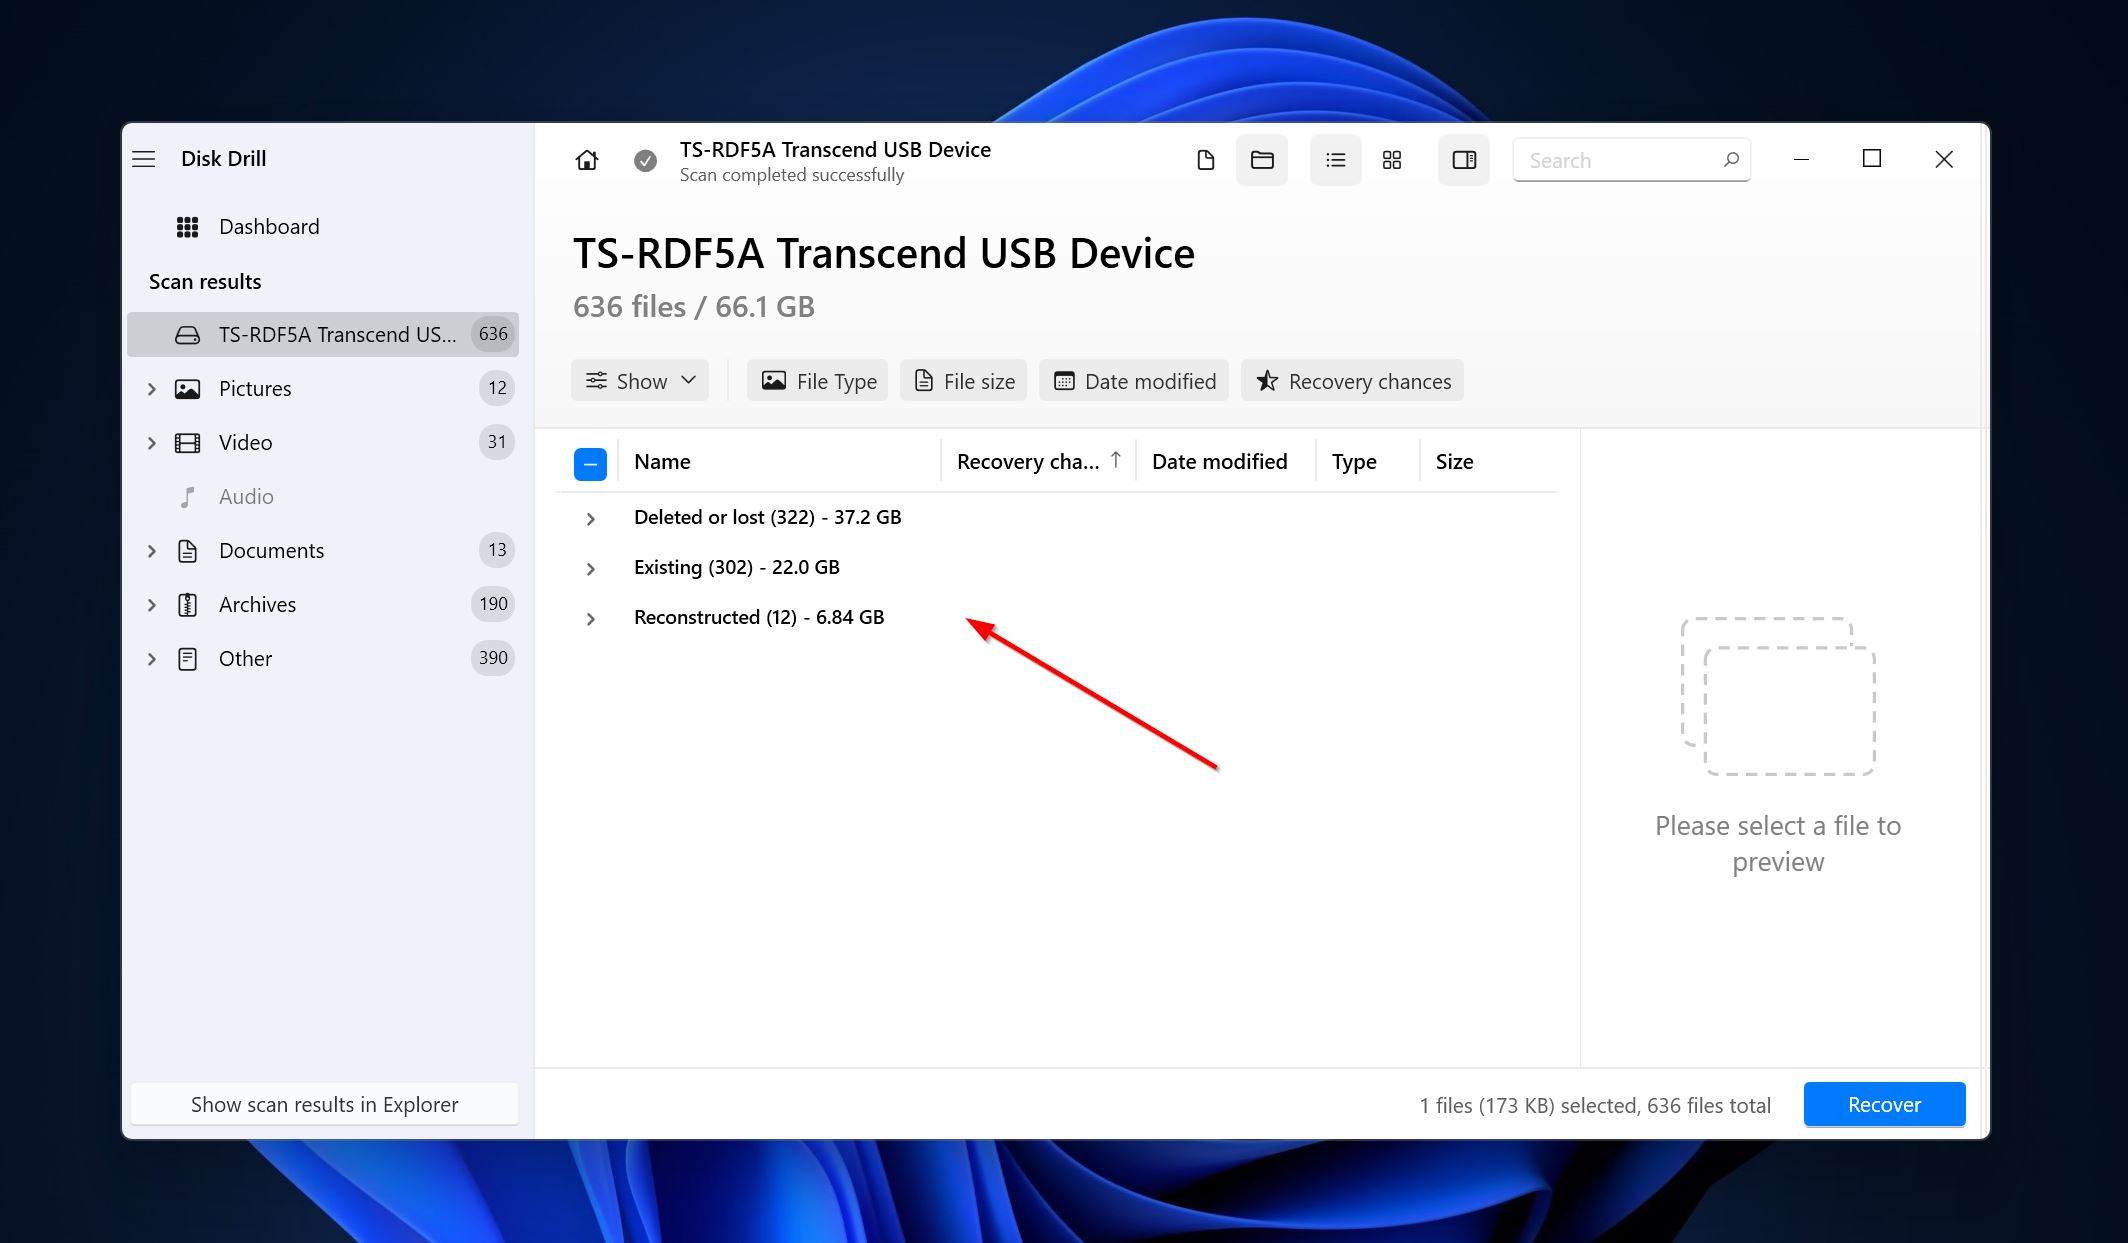
- Expand the Existing section to view files that are there on the cleaned disk. You can also expand the Deleted or lost section to view files that you accidentally deleted earlier.
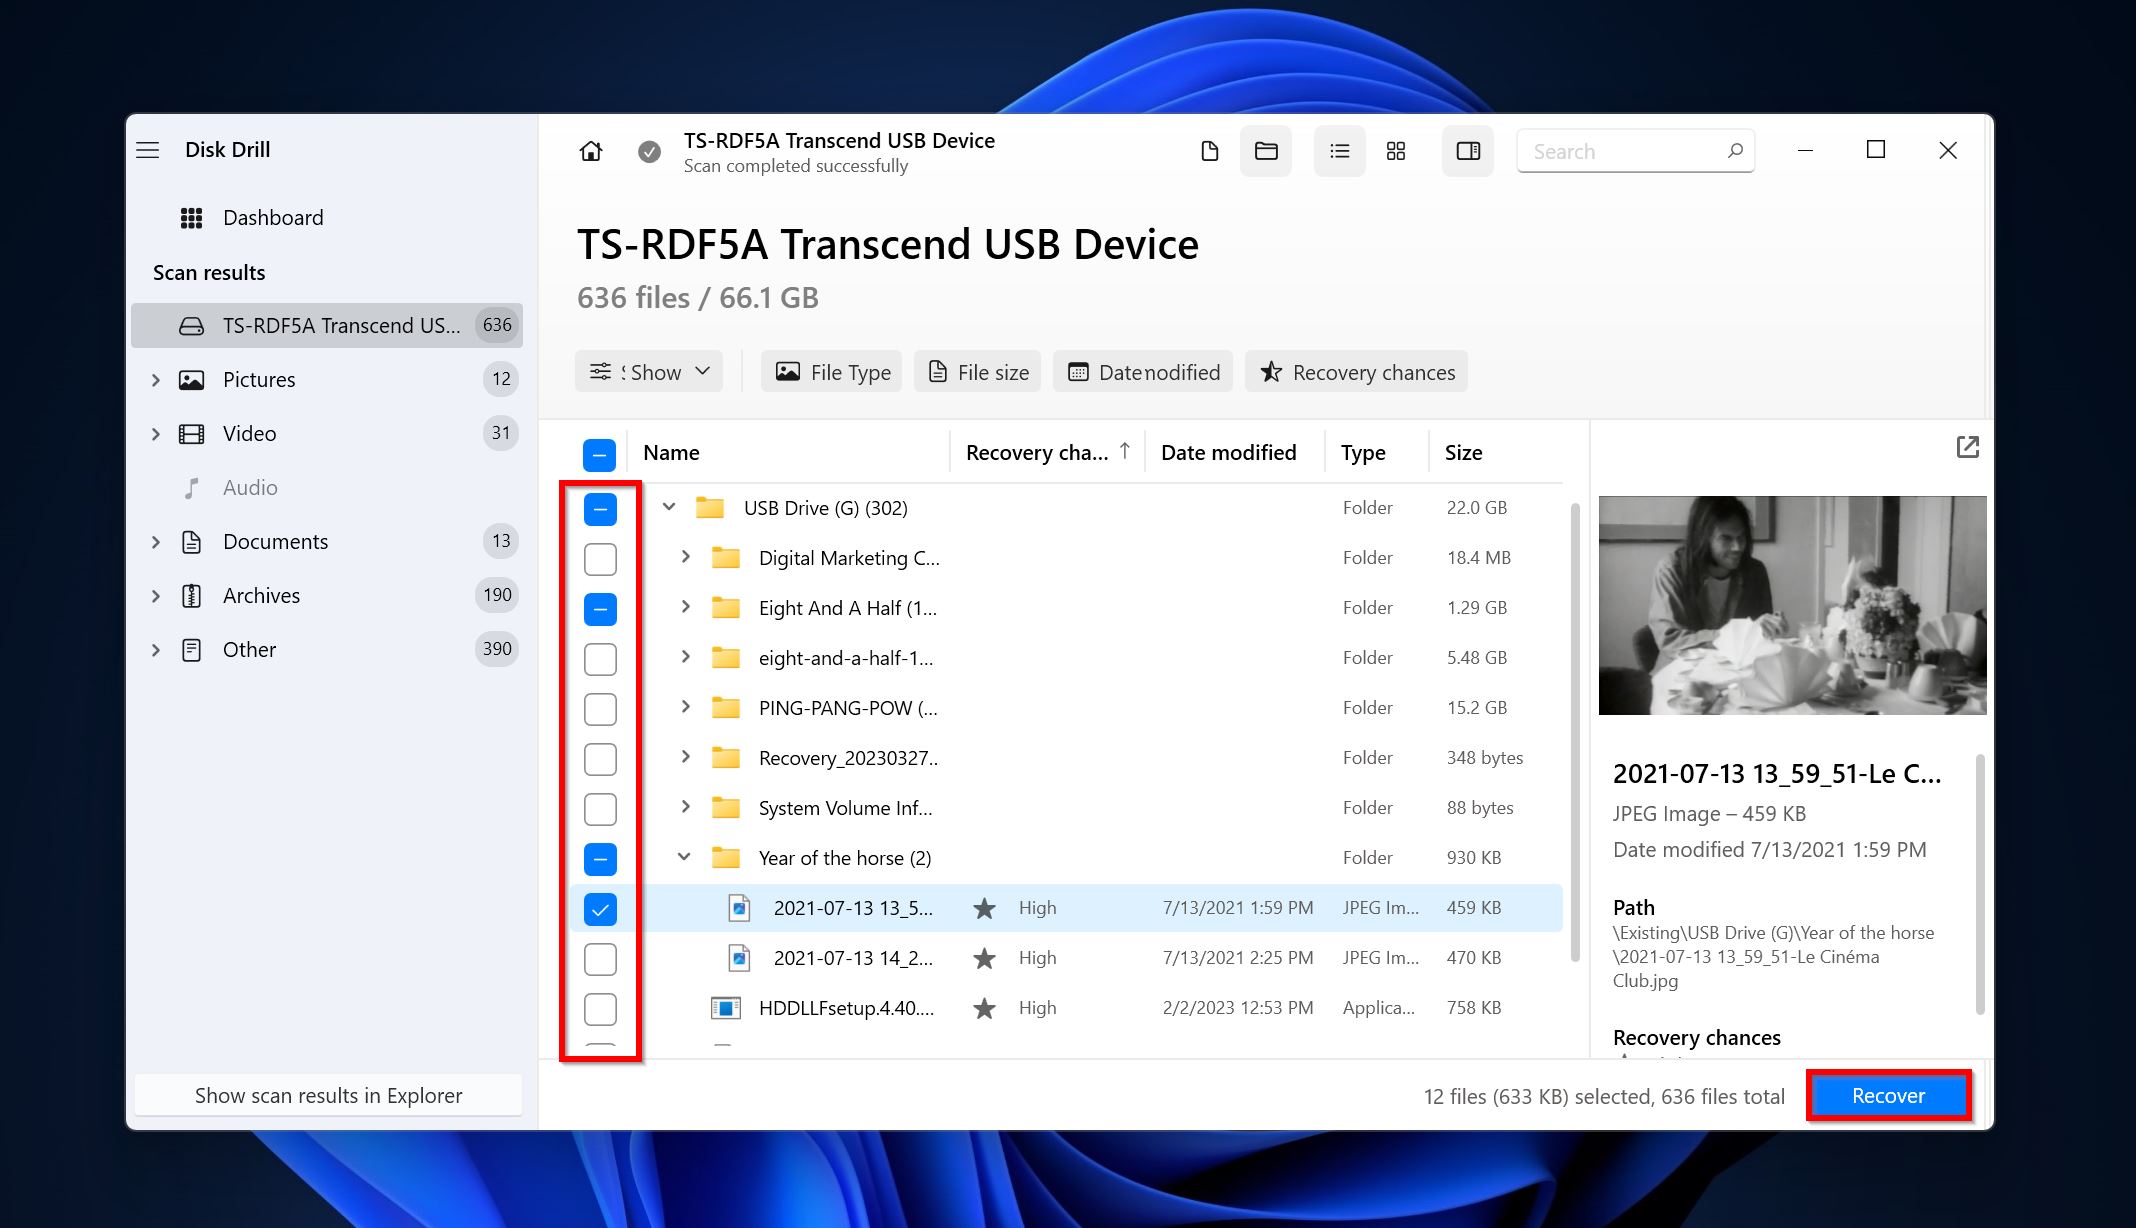
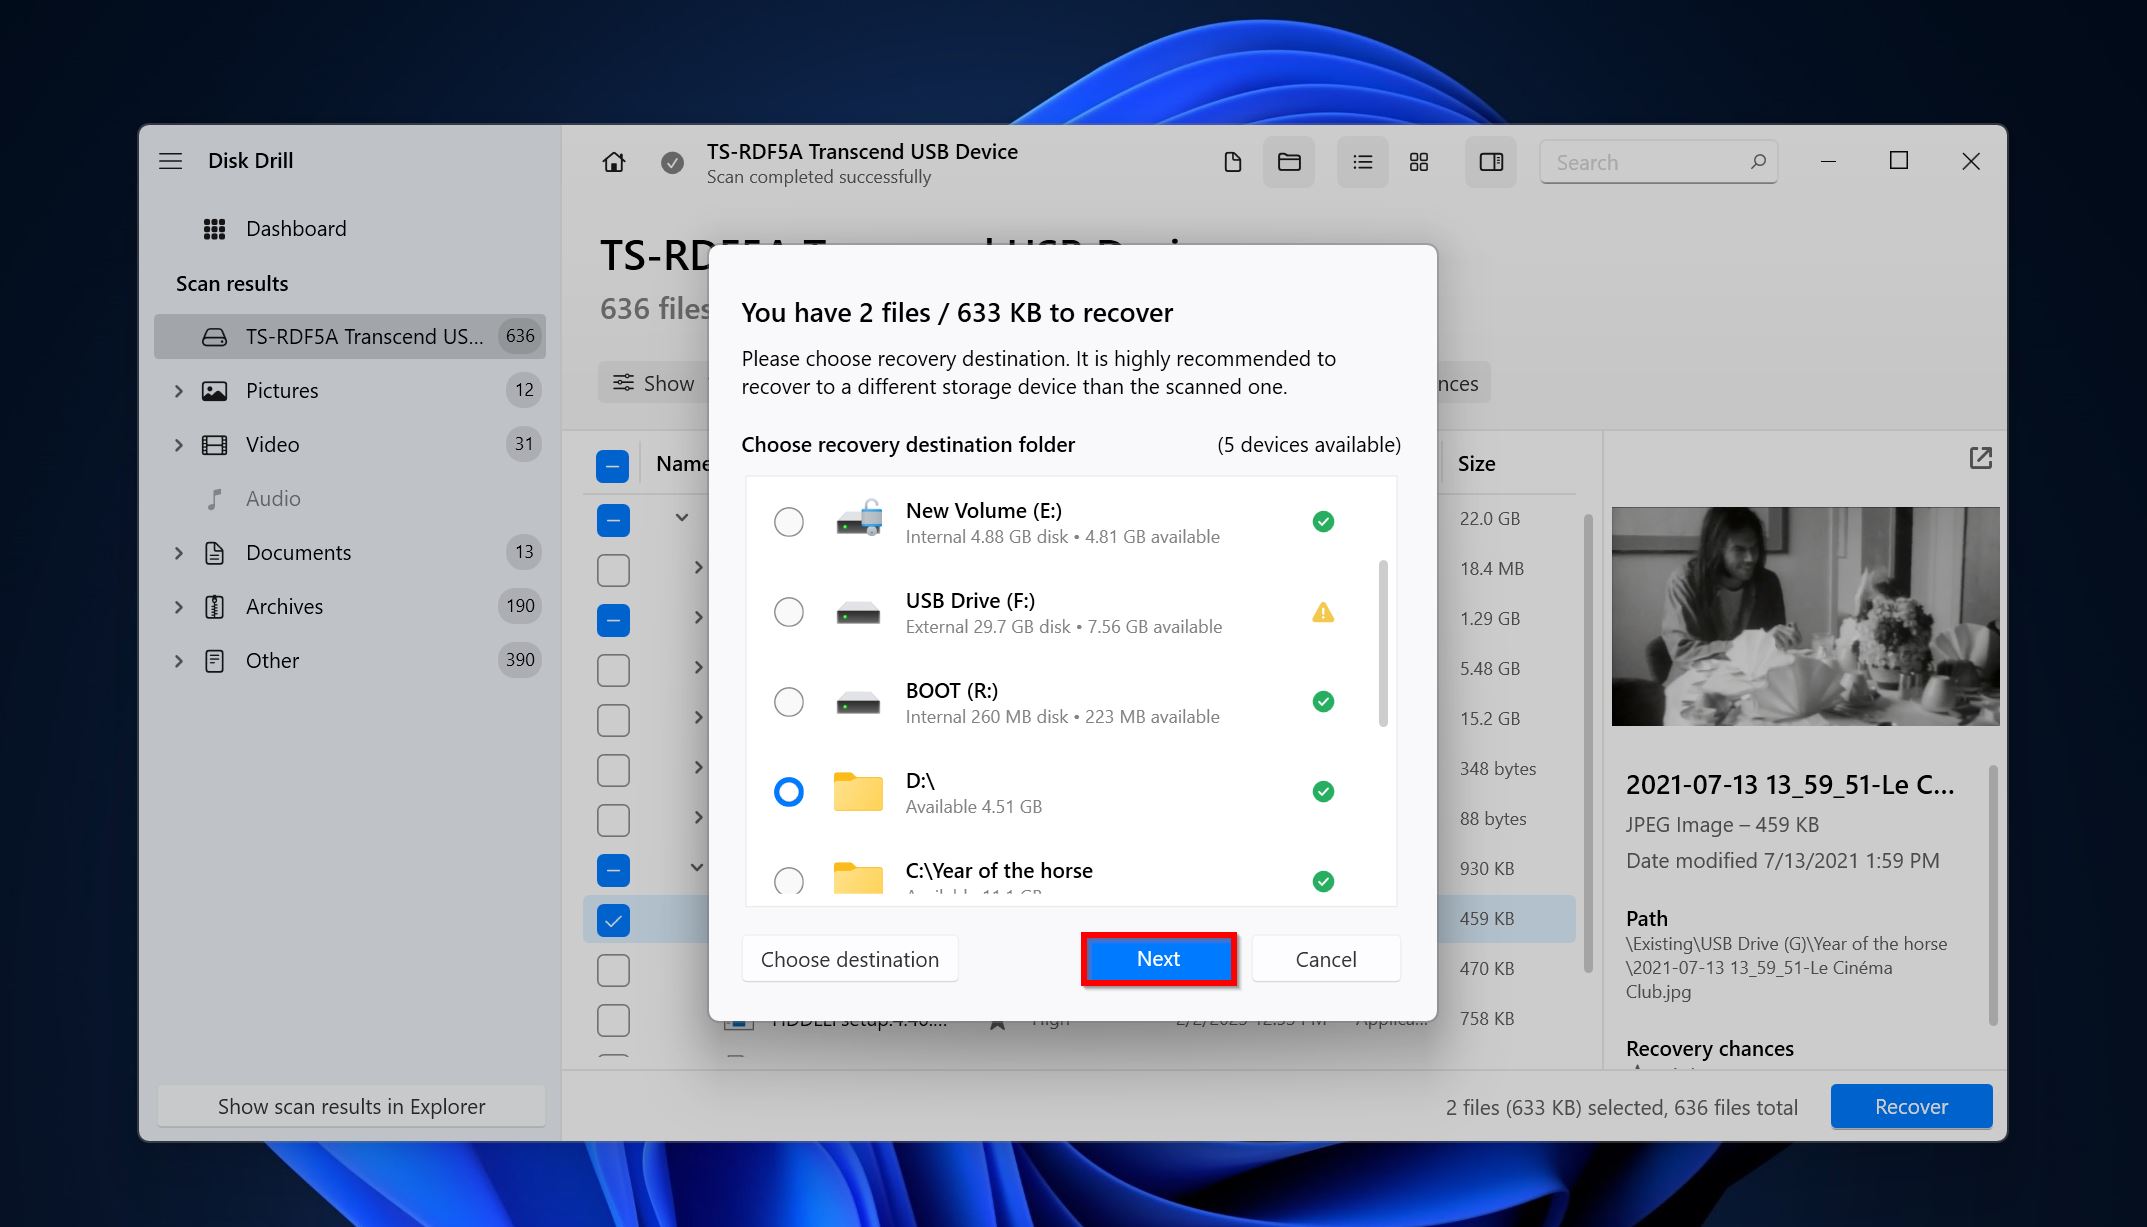
- Use the checkboxes next to the file names to select them. Disk Drill displays a preview of the currently selected file. To manually see a preview, click on the eye icon next to the filename. Click on Recover once you’re satisfied with your selection.
- Choose a recovery destination for the files, and click Next.
- Disk Drill will recover your files.
How to Recover Partition after diskpart Clean
After running the diskpart clean command, the space it occupied will become unallocated, and you won’t be able to use it. So, how do you make that space usable again? You have two options–create a new partition from the unallocated space using diskpart or Windows Disk Management, or use TestDisk to recover the cleaned partition in its entirety.
If you opt to go with the first option, be sure to recover your data. While data recovery programs can still recover your files if you performed a quick format, restoring data after a full format is impossible.
Option 1: Use diskpart to Create a Partition
If you’re comfortable using Windows Command Prompt, you can use the diskpart utility itself to create a new partition from the unallocated space.
Follow these instructions carefully:
- Search for “cmd” in Windows Search (Windows Key + S). Right-click on Command Prompt > Run as administrator.
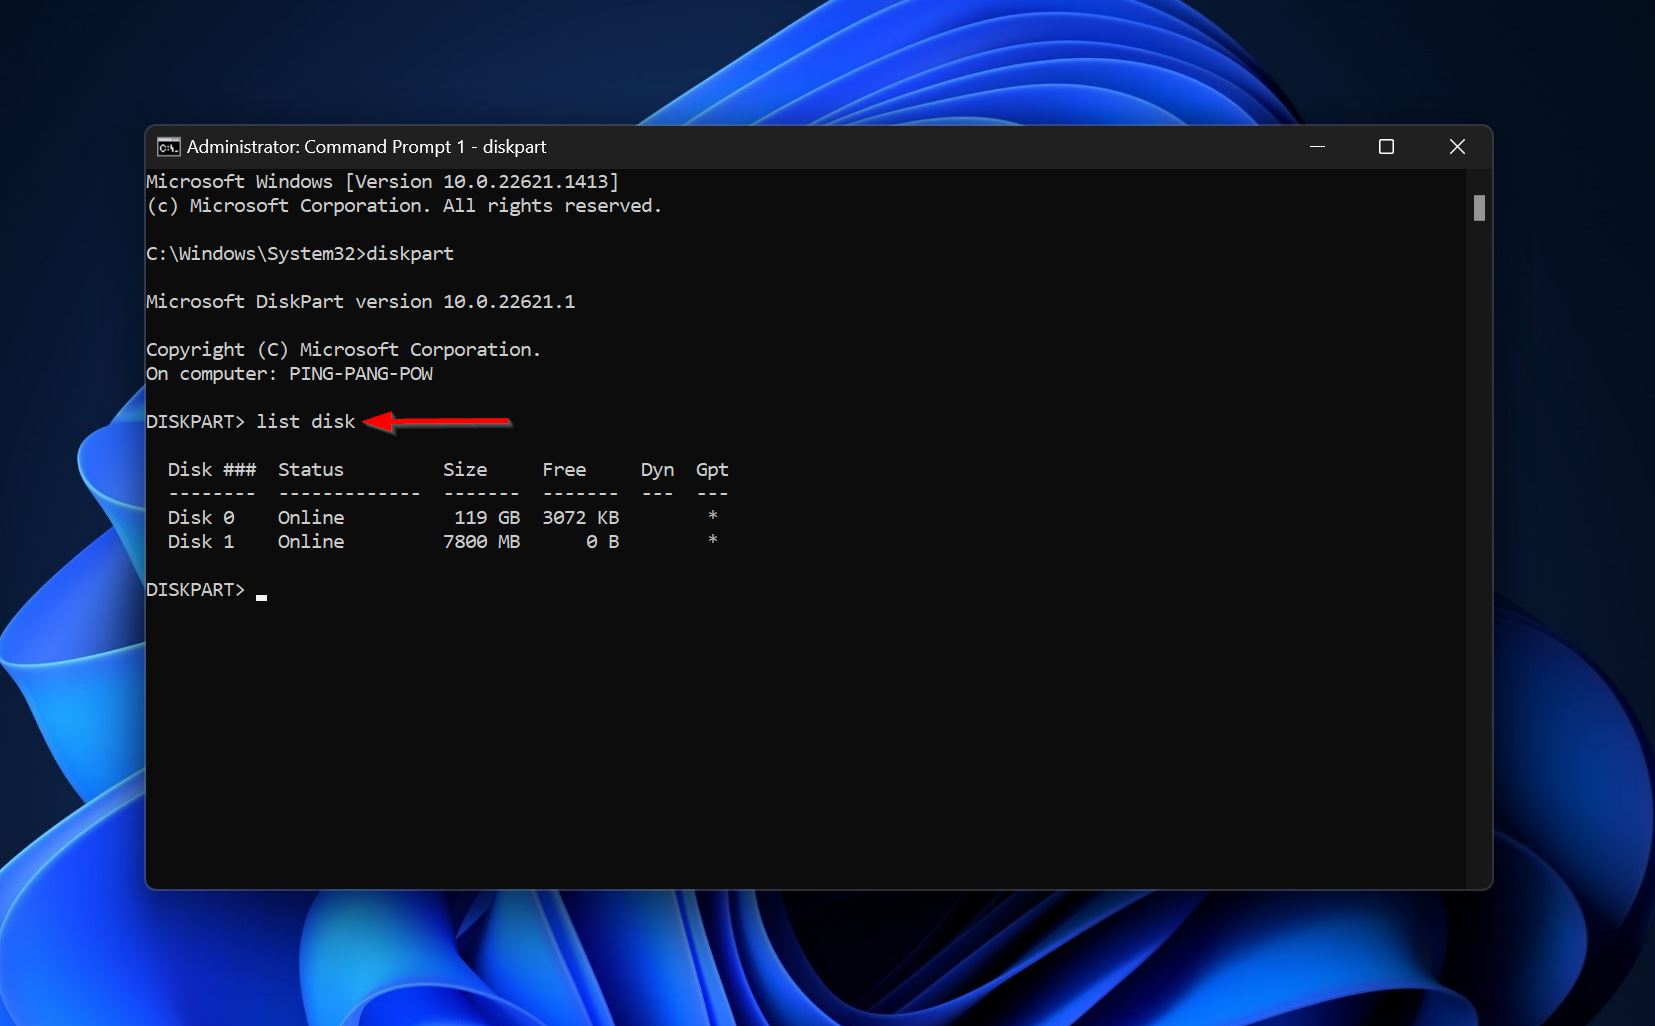
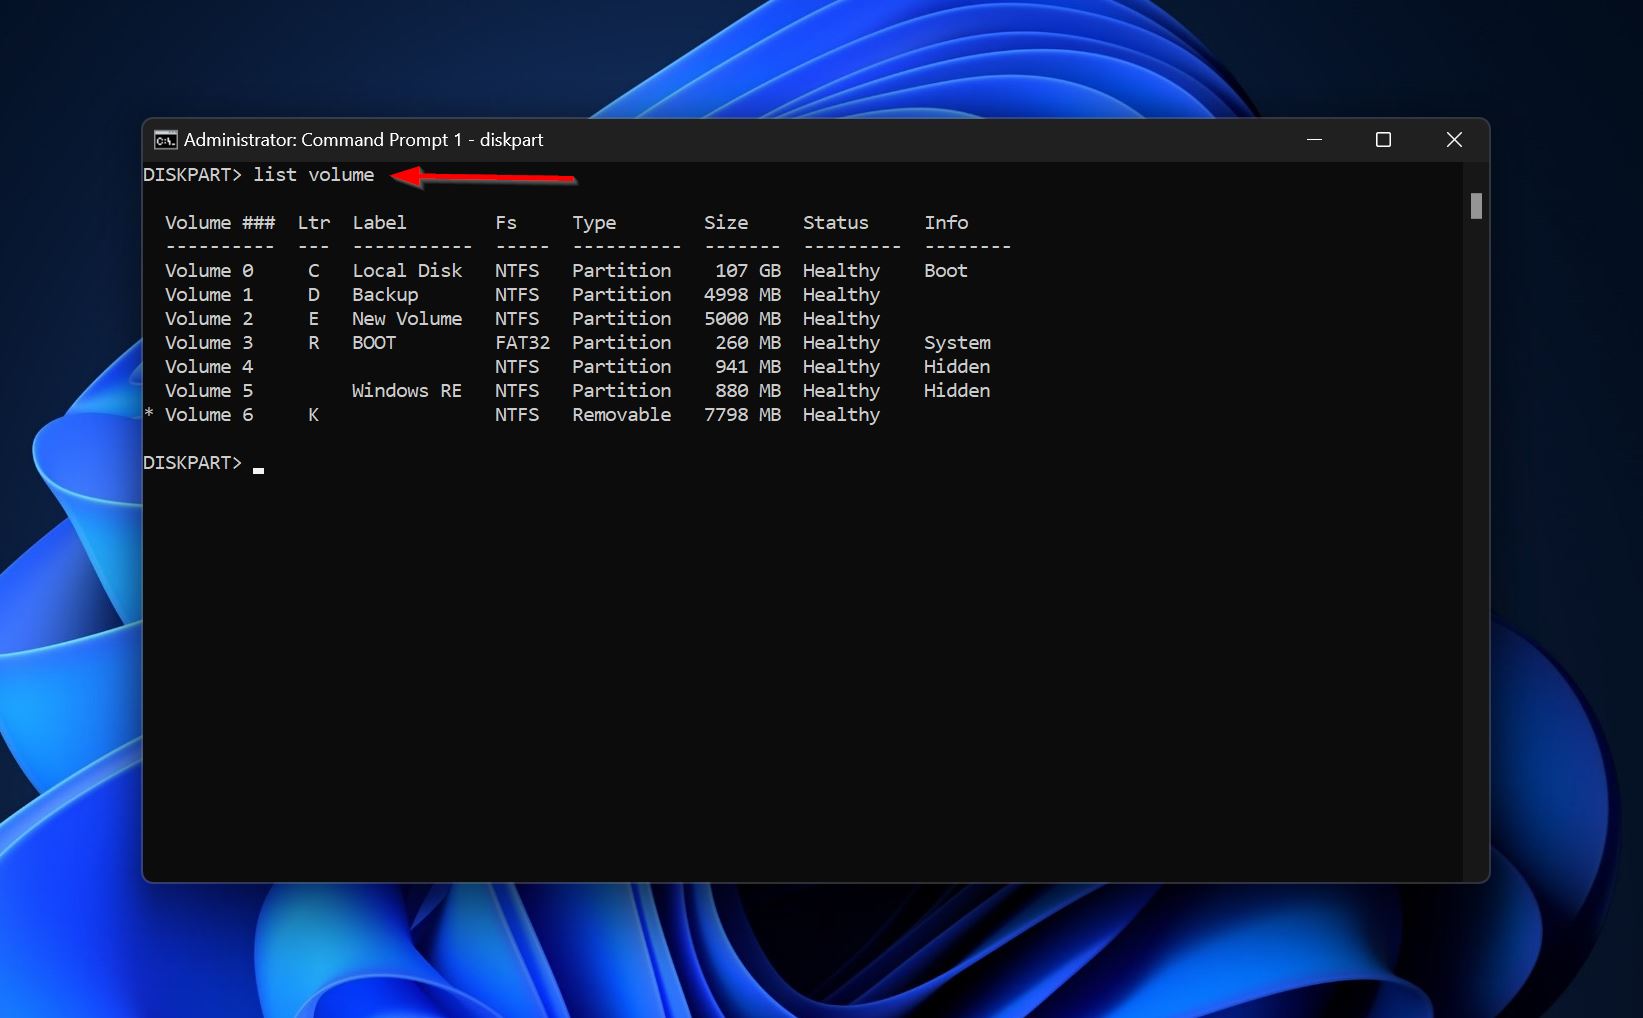
- Type diskpart in the console and press Enter.

- Type list disk and press Enter.
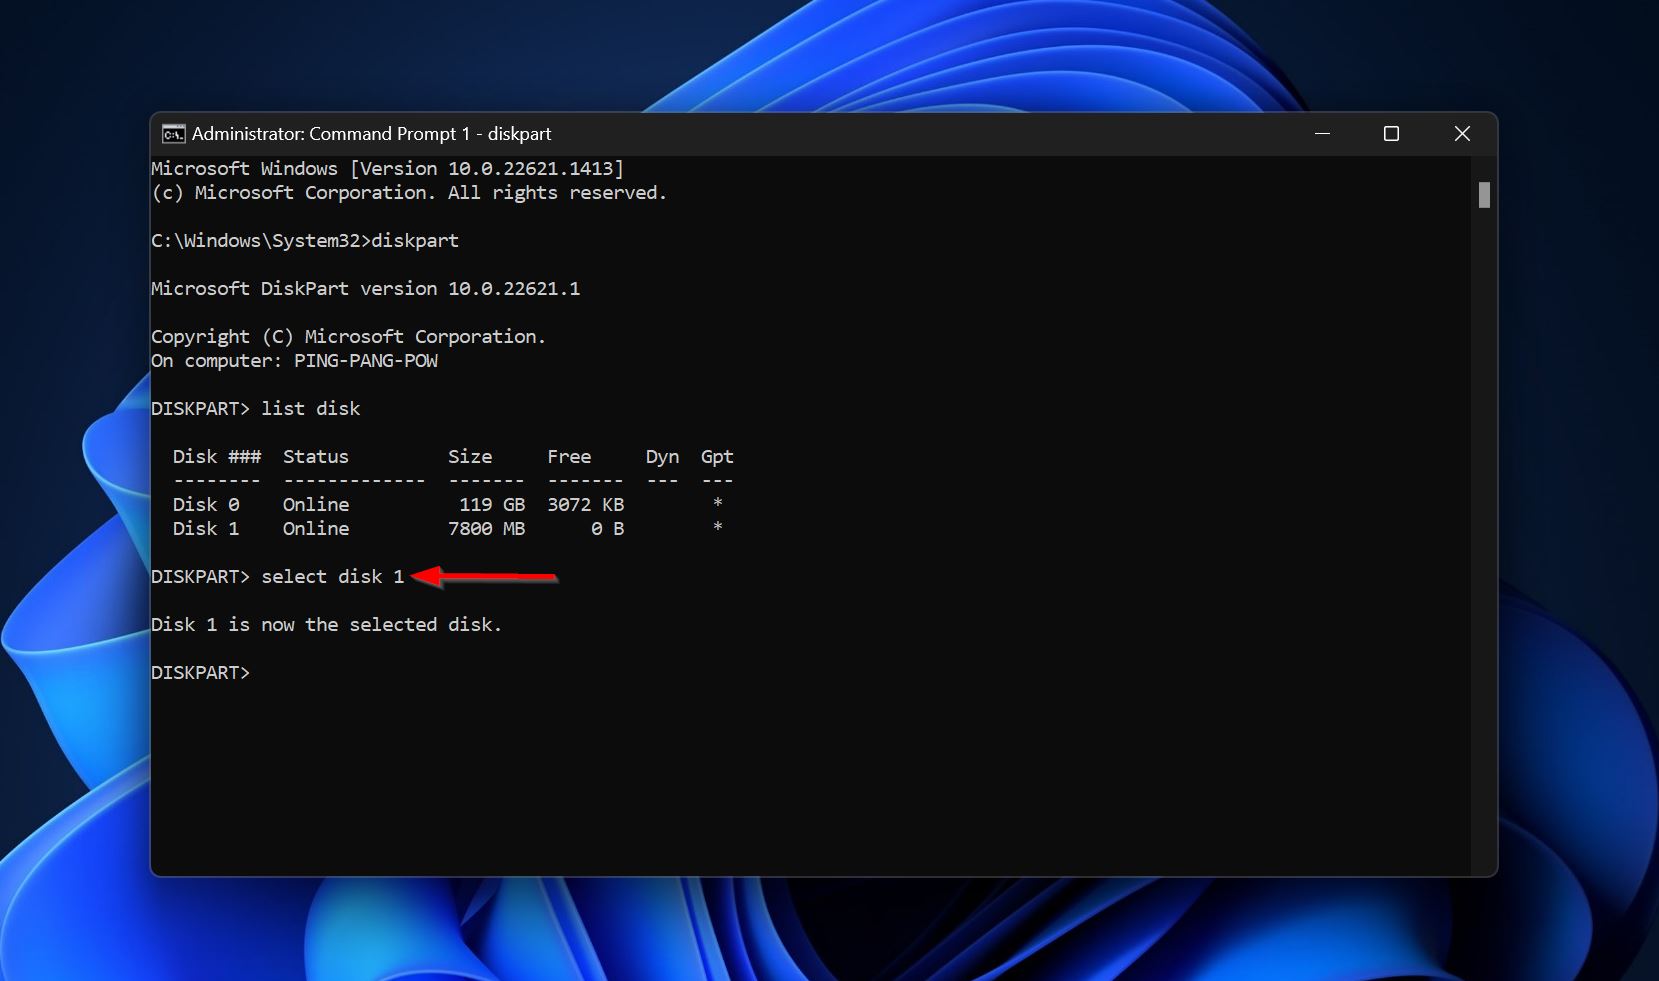
- Type select disk x and press Enter. Replace x with the disk number of the cleaned disk. For example, select disk 1.
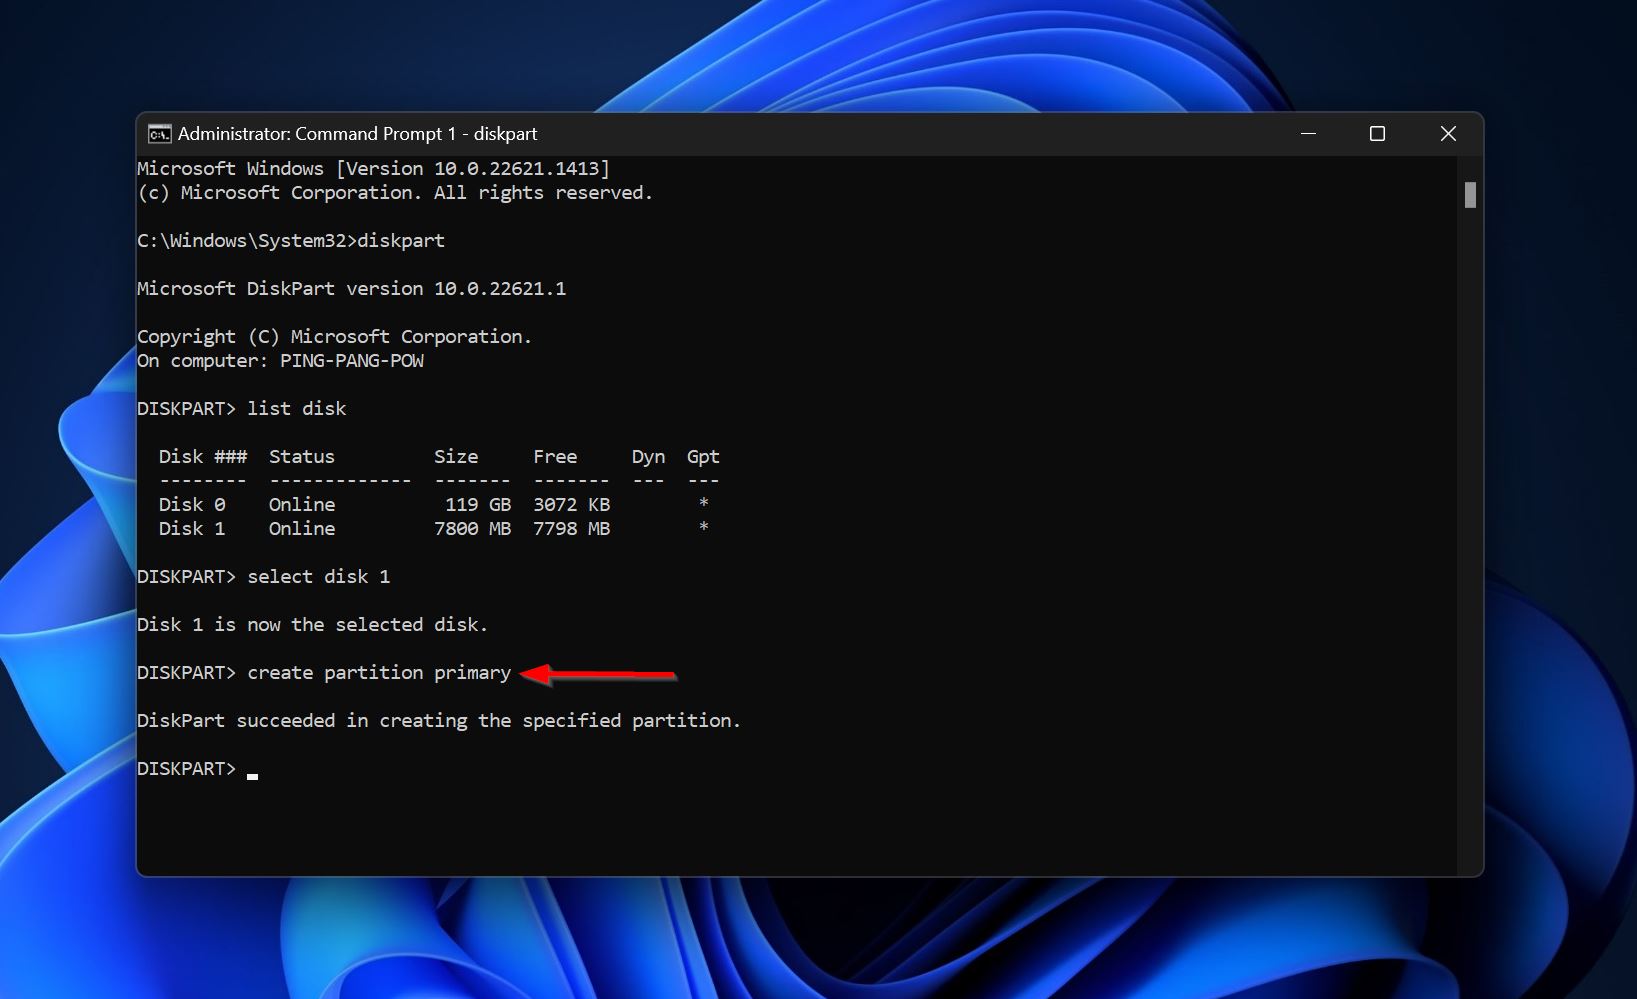
- Create a primary partition using the create partition primary command. The partition size will be equal to the total unallocated space on the drive.
- Type format fs=NTFS quick and press Enter. This will format the drive to the NTFS file system and make it ready to store your files. You can use a file system of your choice.

- Now, type list volume and press Enter.
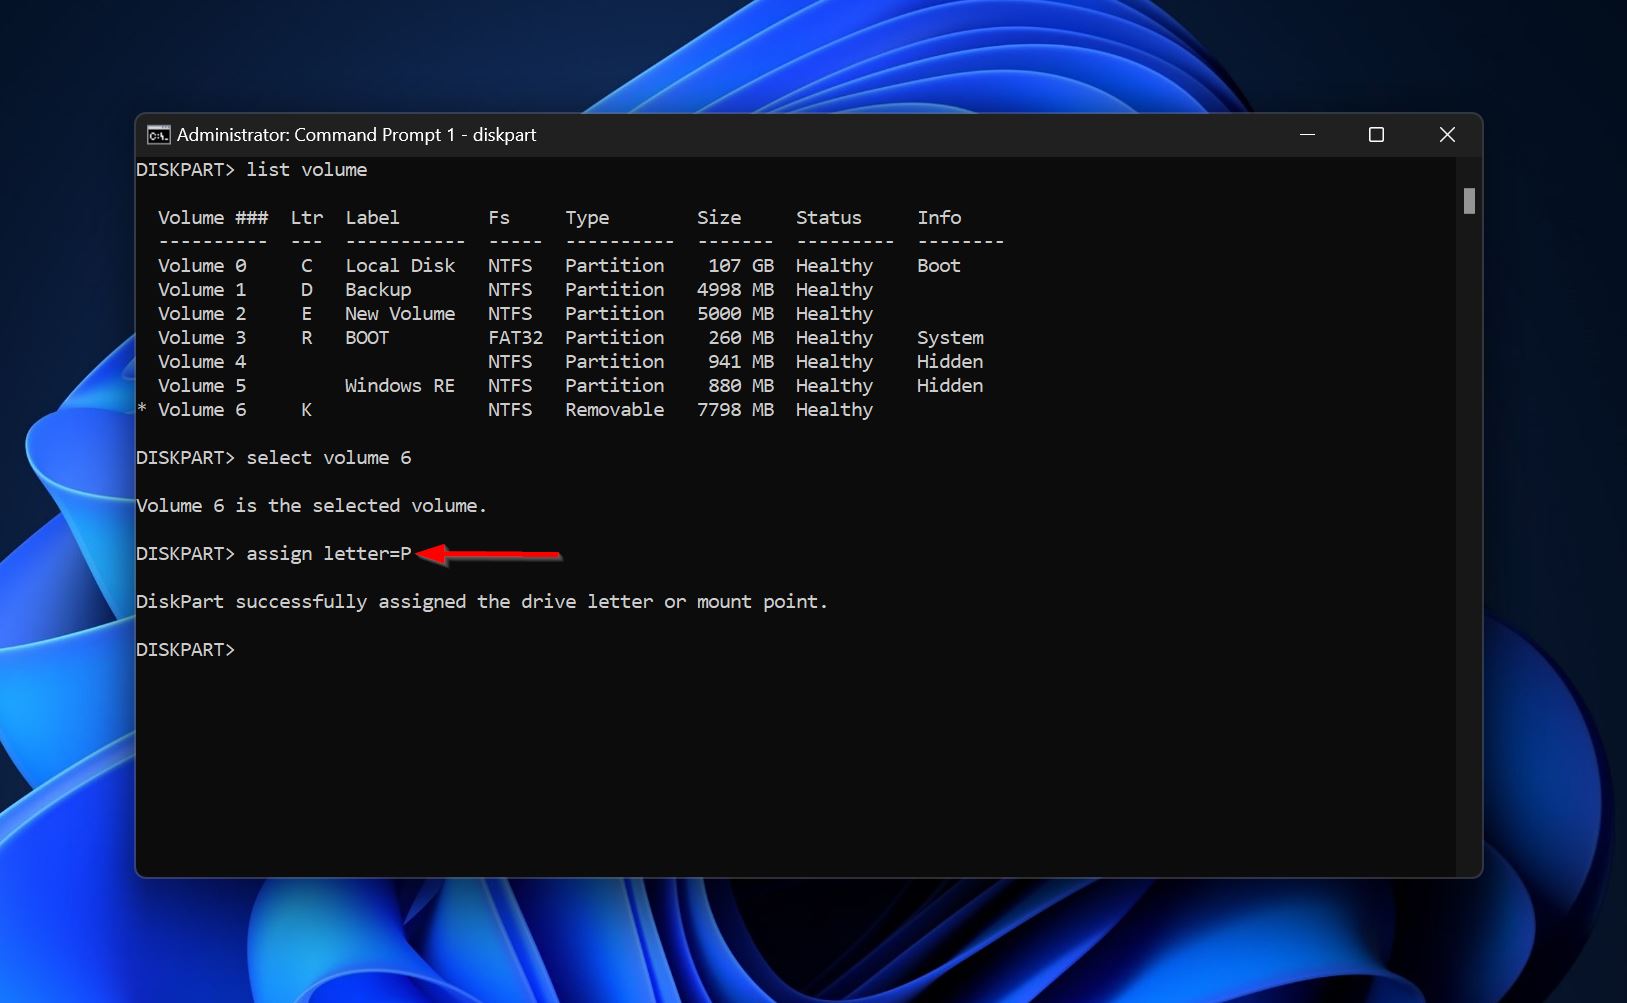
- Type select volume x and press Enter. Replace x with the number of the newly created partition. In our case, it was Volume 6.

- Type assign letter=X and press Enter. Replace X with whatever drive letter you want to assign to the volume.
Option 2: Use Disk Management to Allocate Space
A more approachable way to create a new partition using unallocated space, is to use the Disk Management GUI.
Here’s how to create a new partition from the cleaned disk, using Windows Disk Management:
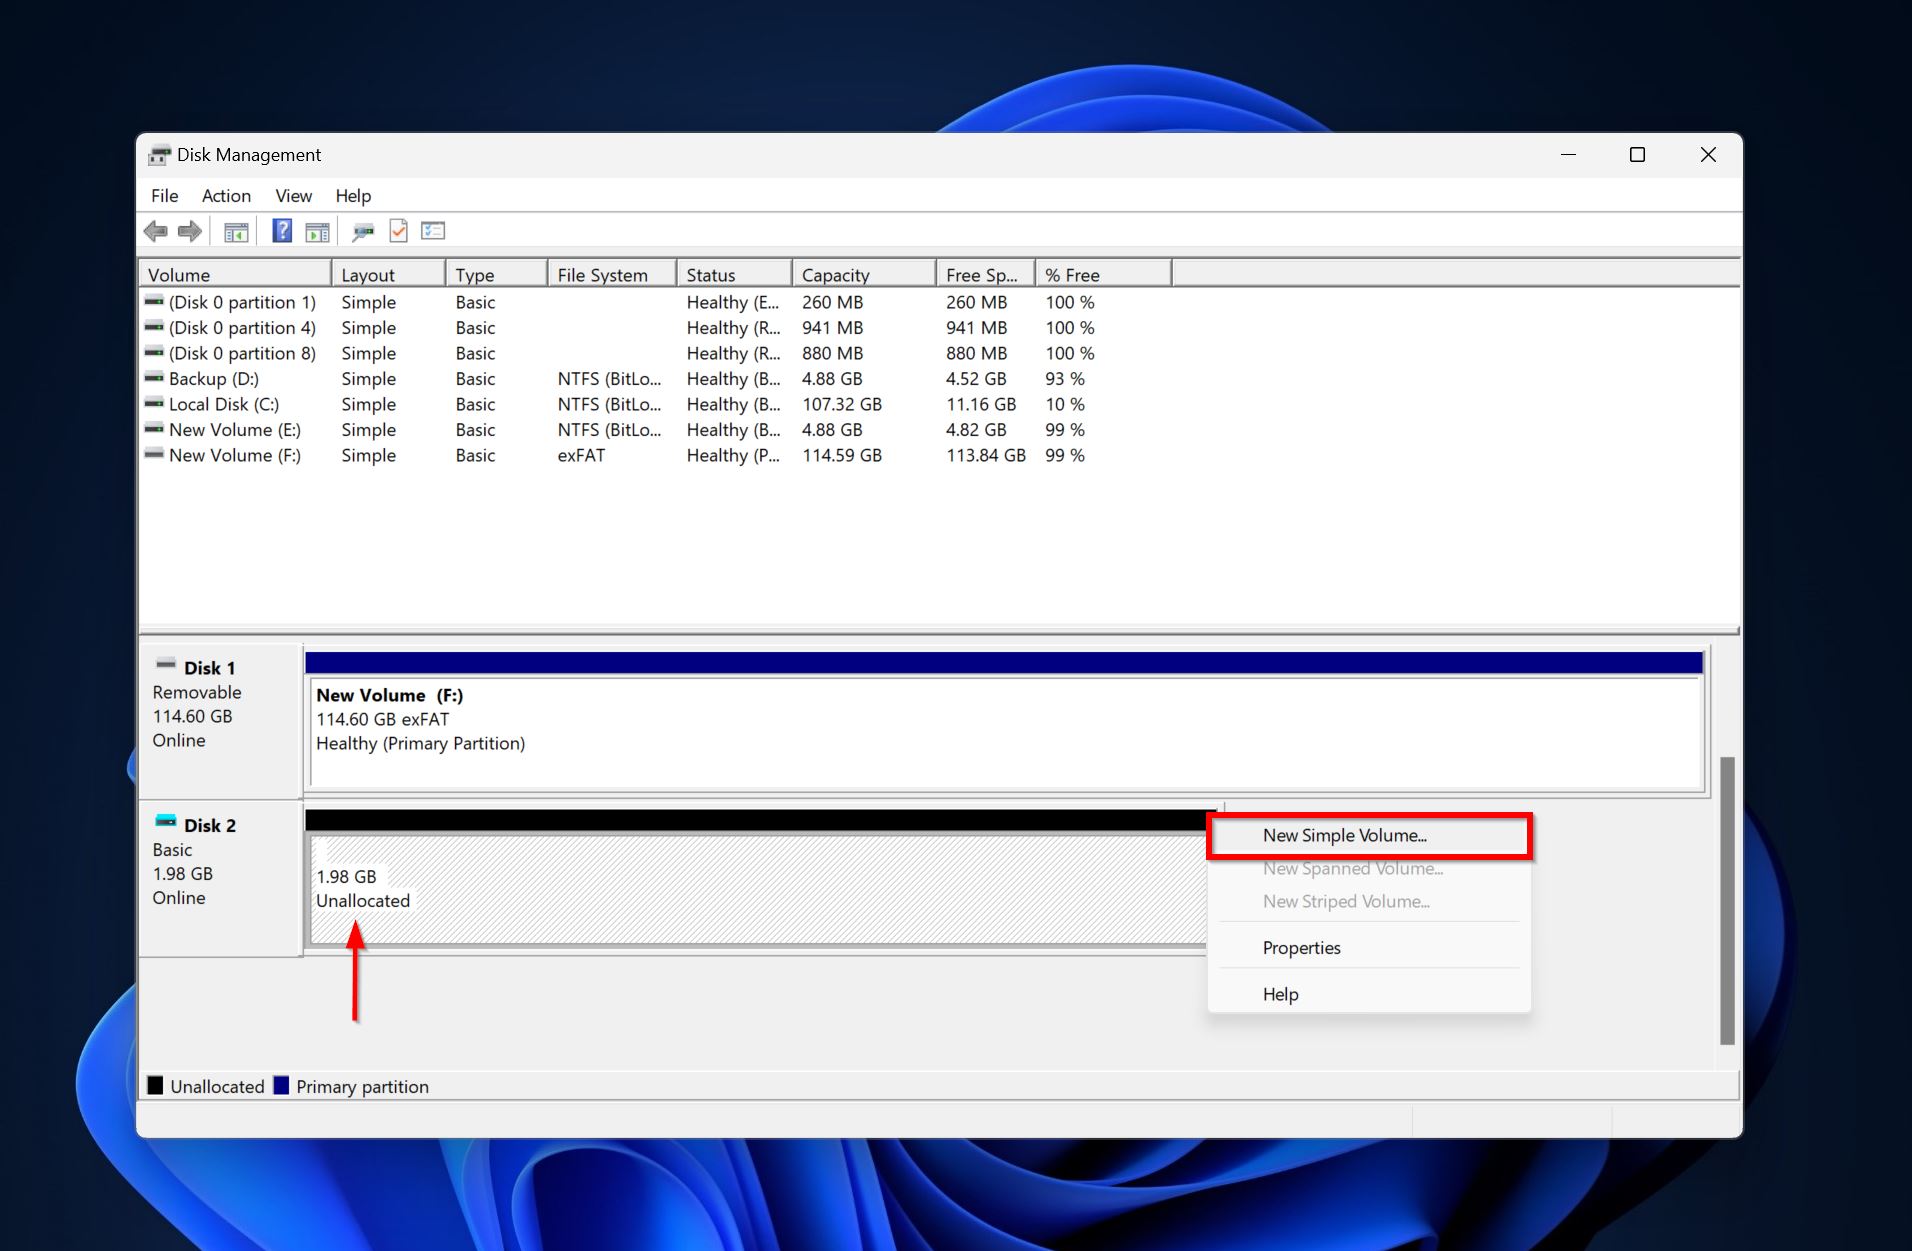
- Type “disk management” in Windows Search (Windows Key + S). Choose Create and format hard disk partitions from the search results.
- Look towards the bottom of the Disk Management. The cleaned disk’s space will show up as Unallocated. Right-click on this space and choose New simple volume.
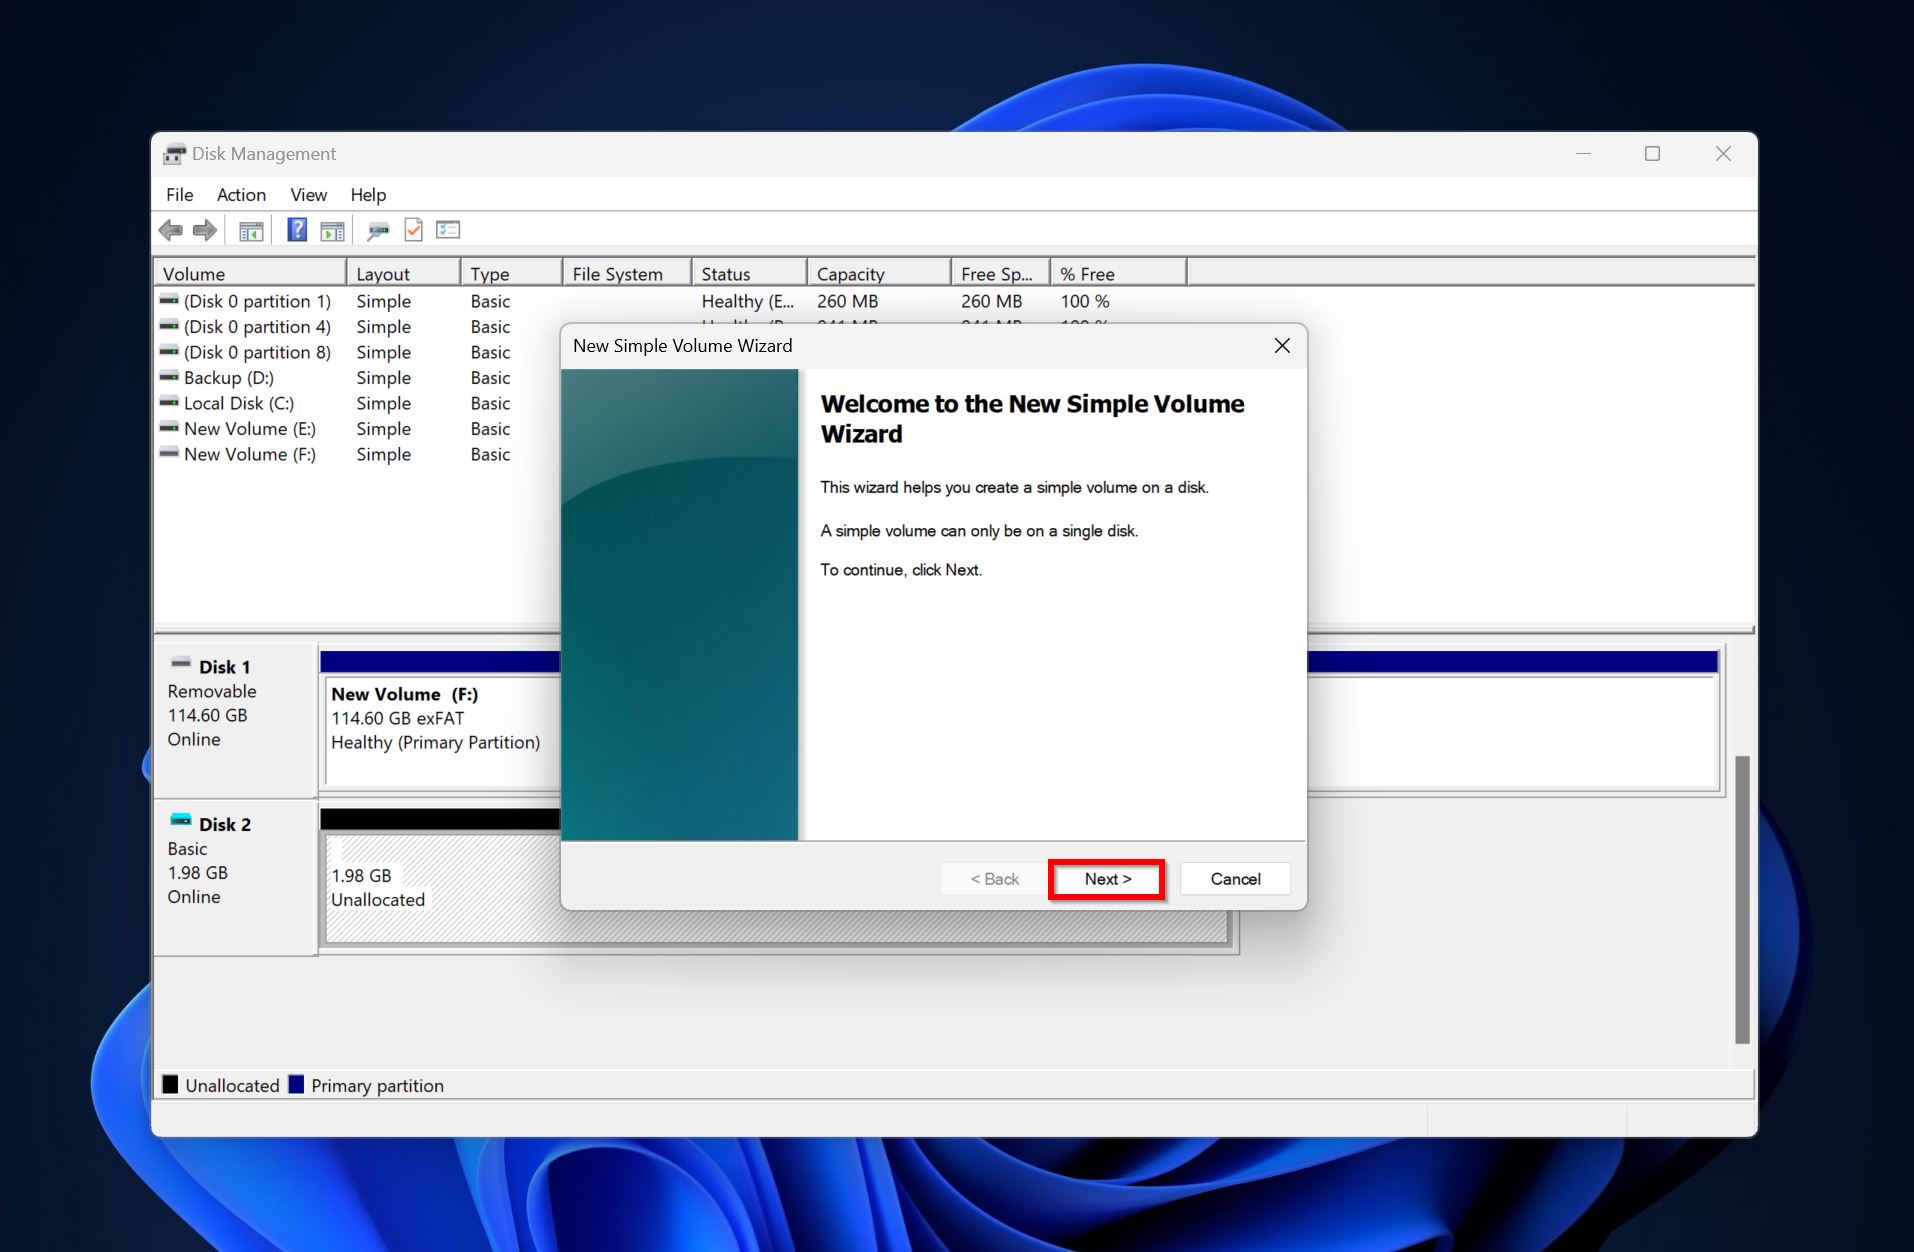
- Click Next on the New simple volume wizard welcome screen.
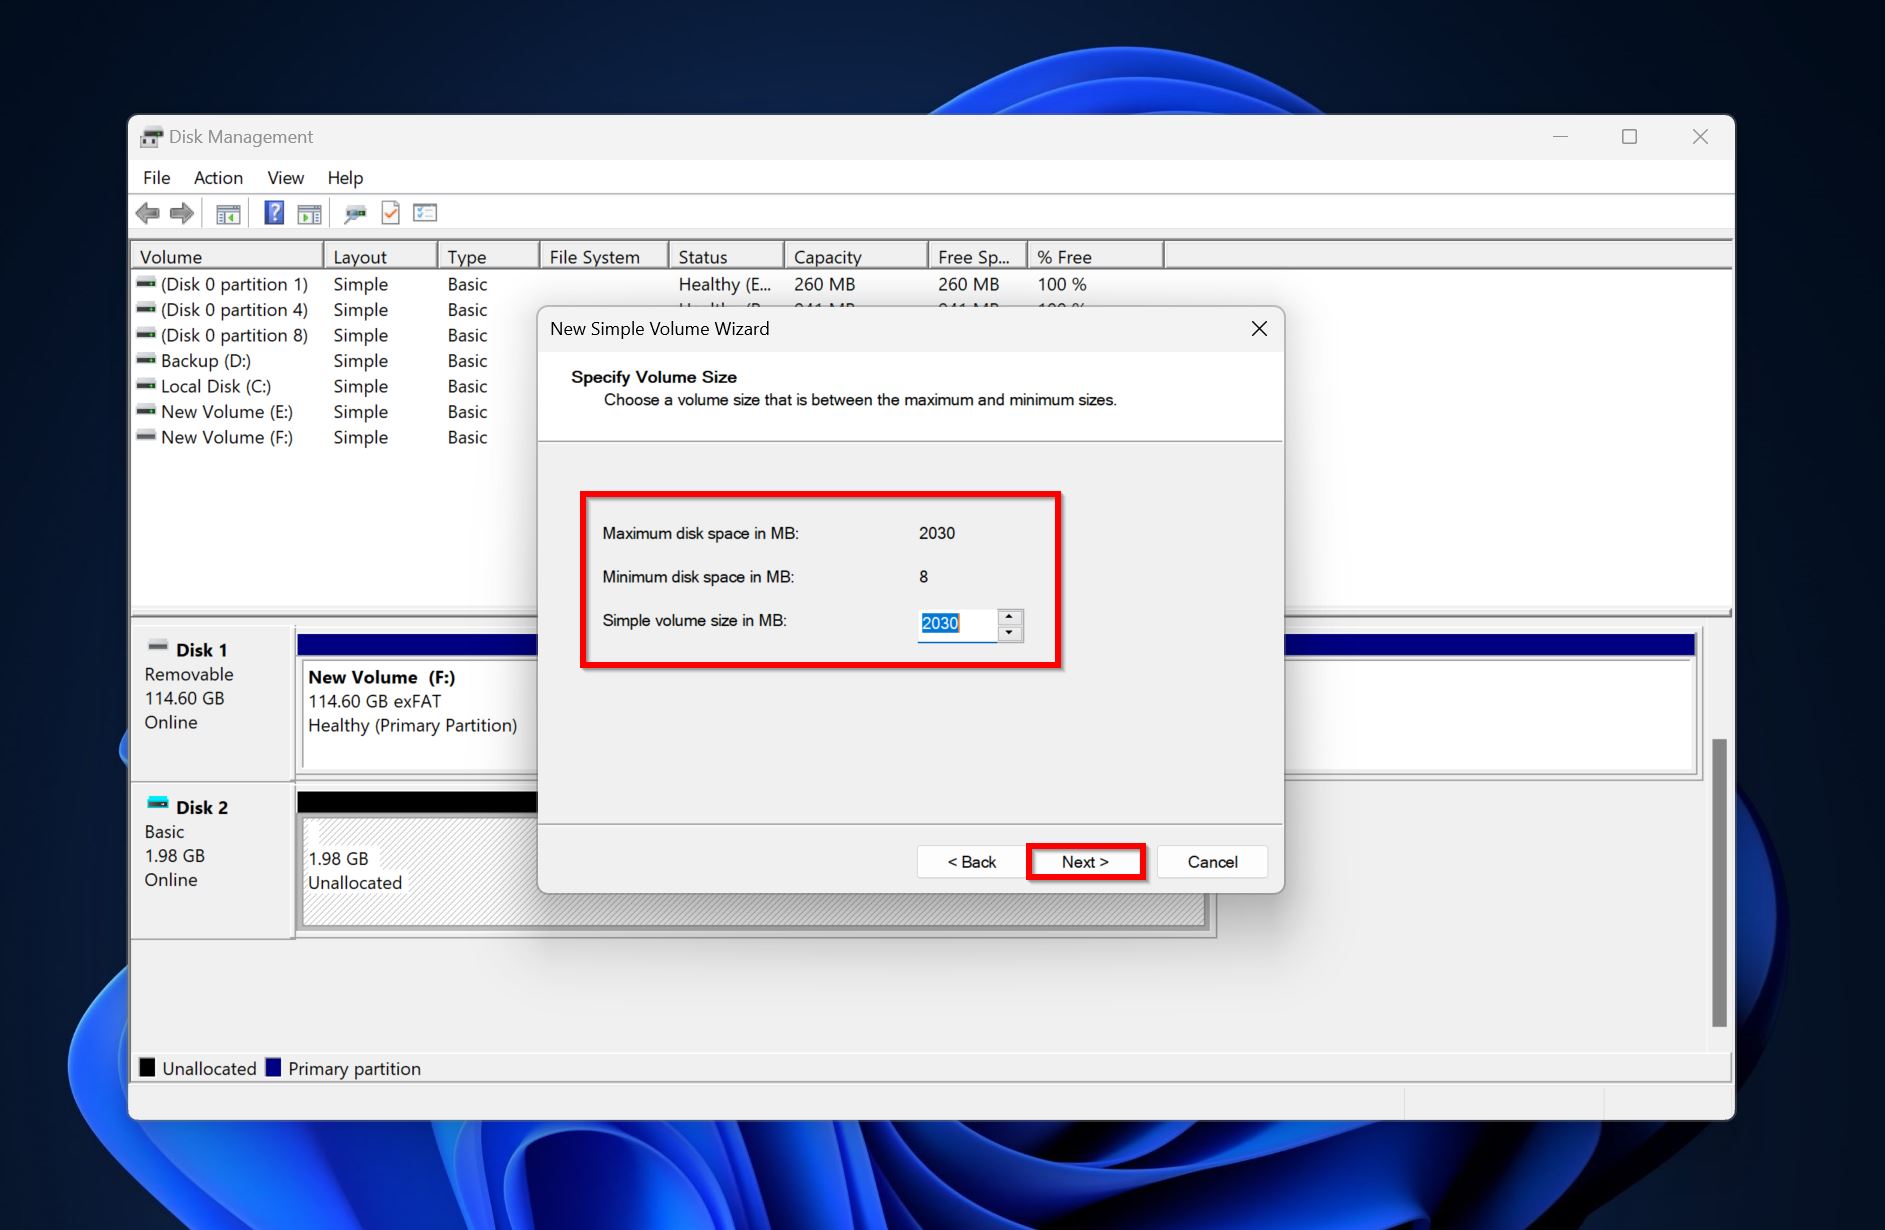
- Specify a partition size in the Simple volume size in MB field. Click Next.
- Choose a drive letter in the Assign the following drive letter drop-down menu. Click Next.

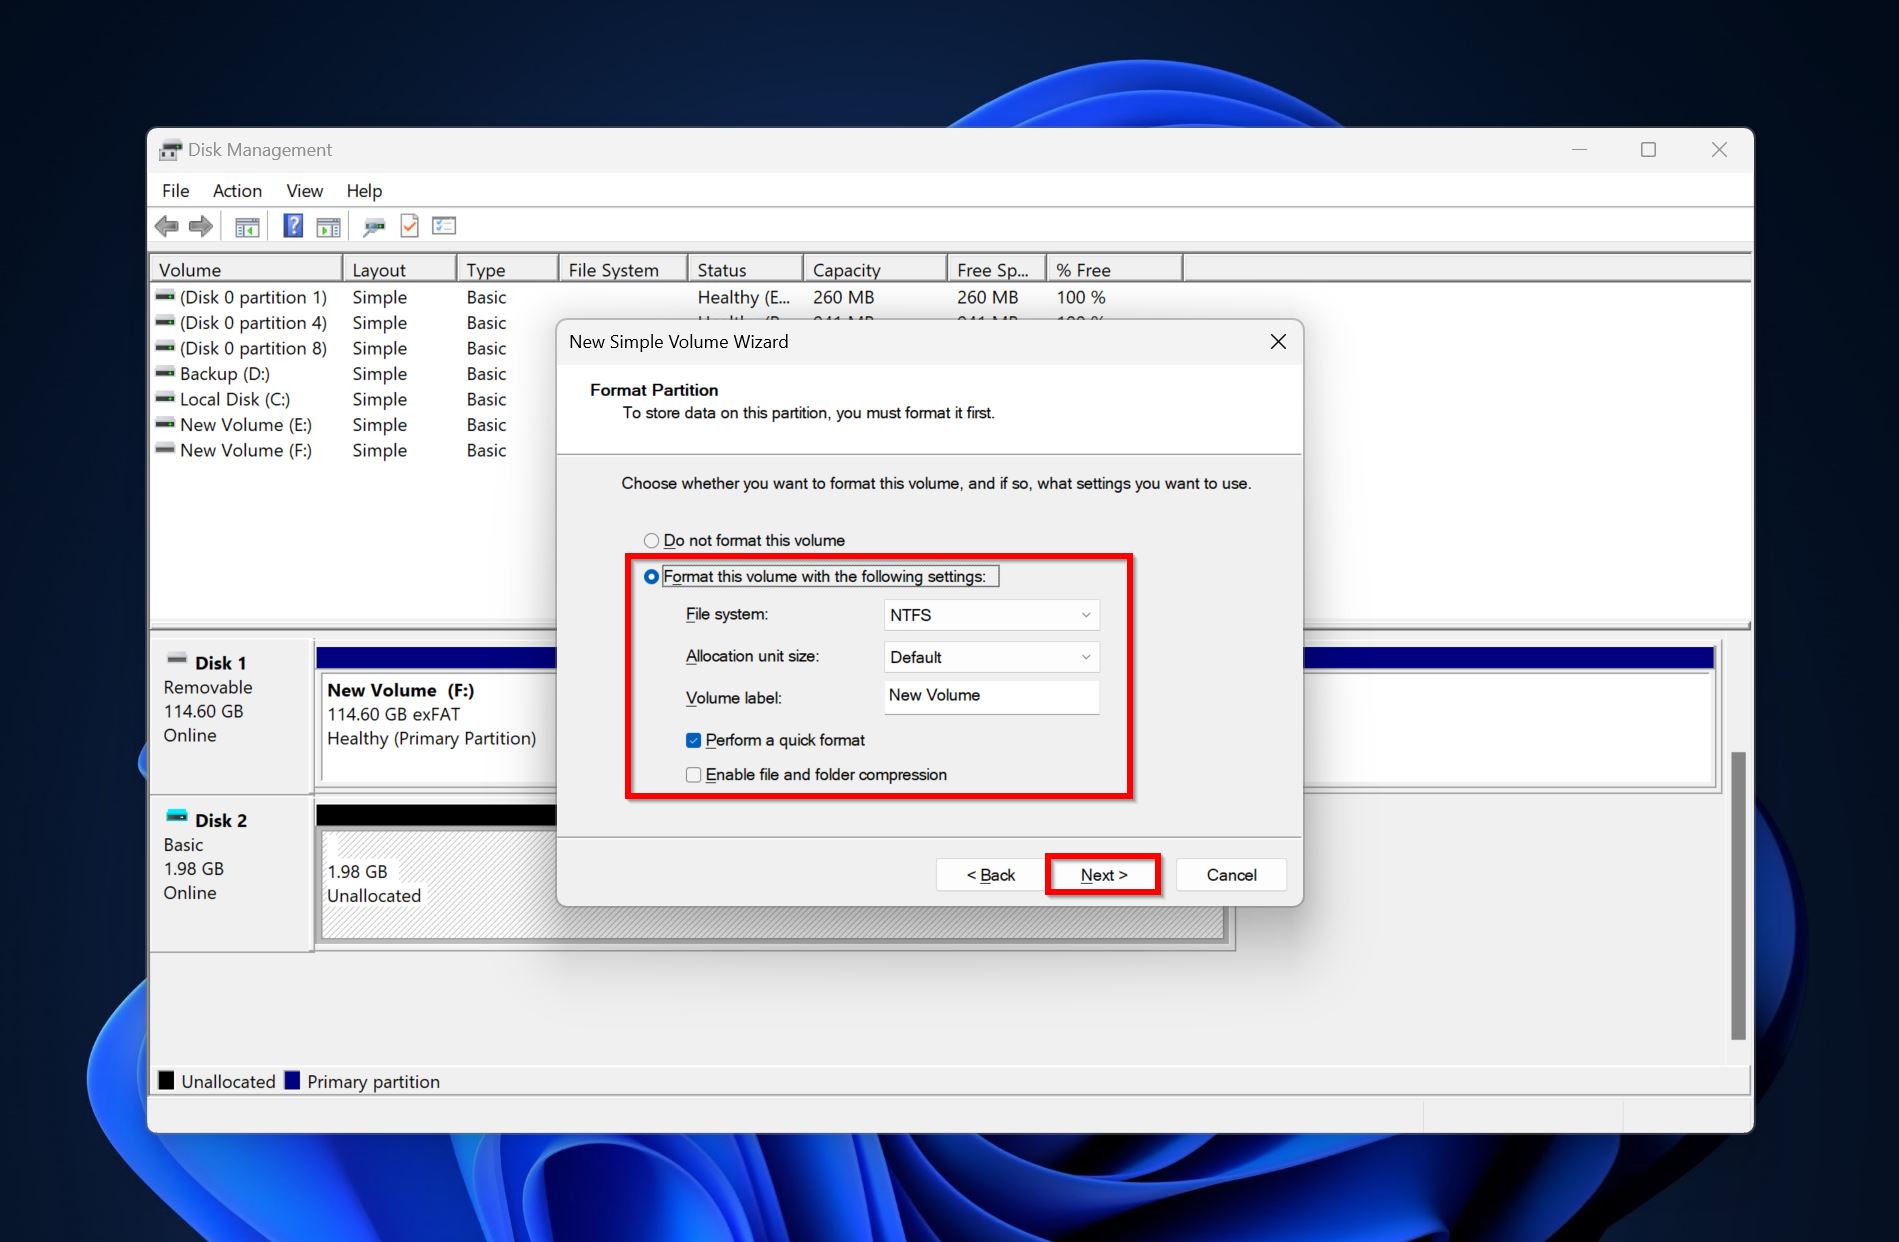
- Define a name for your partition in the Volume label field. This is optional. Choose the required file system according to your needs, and click Next.
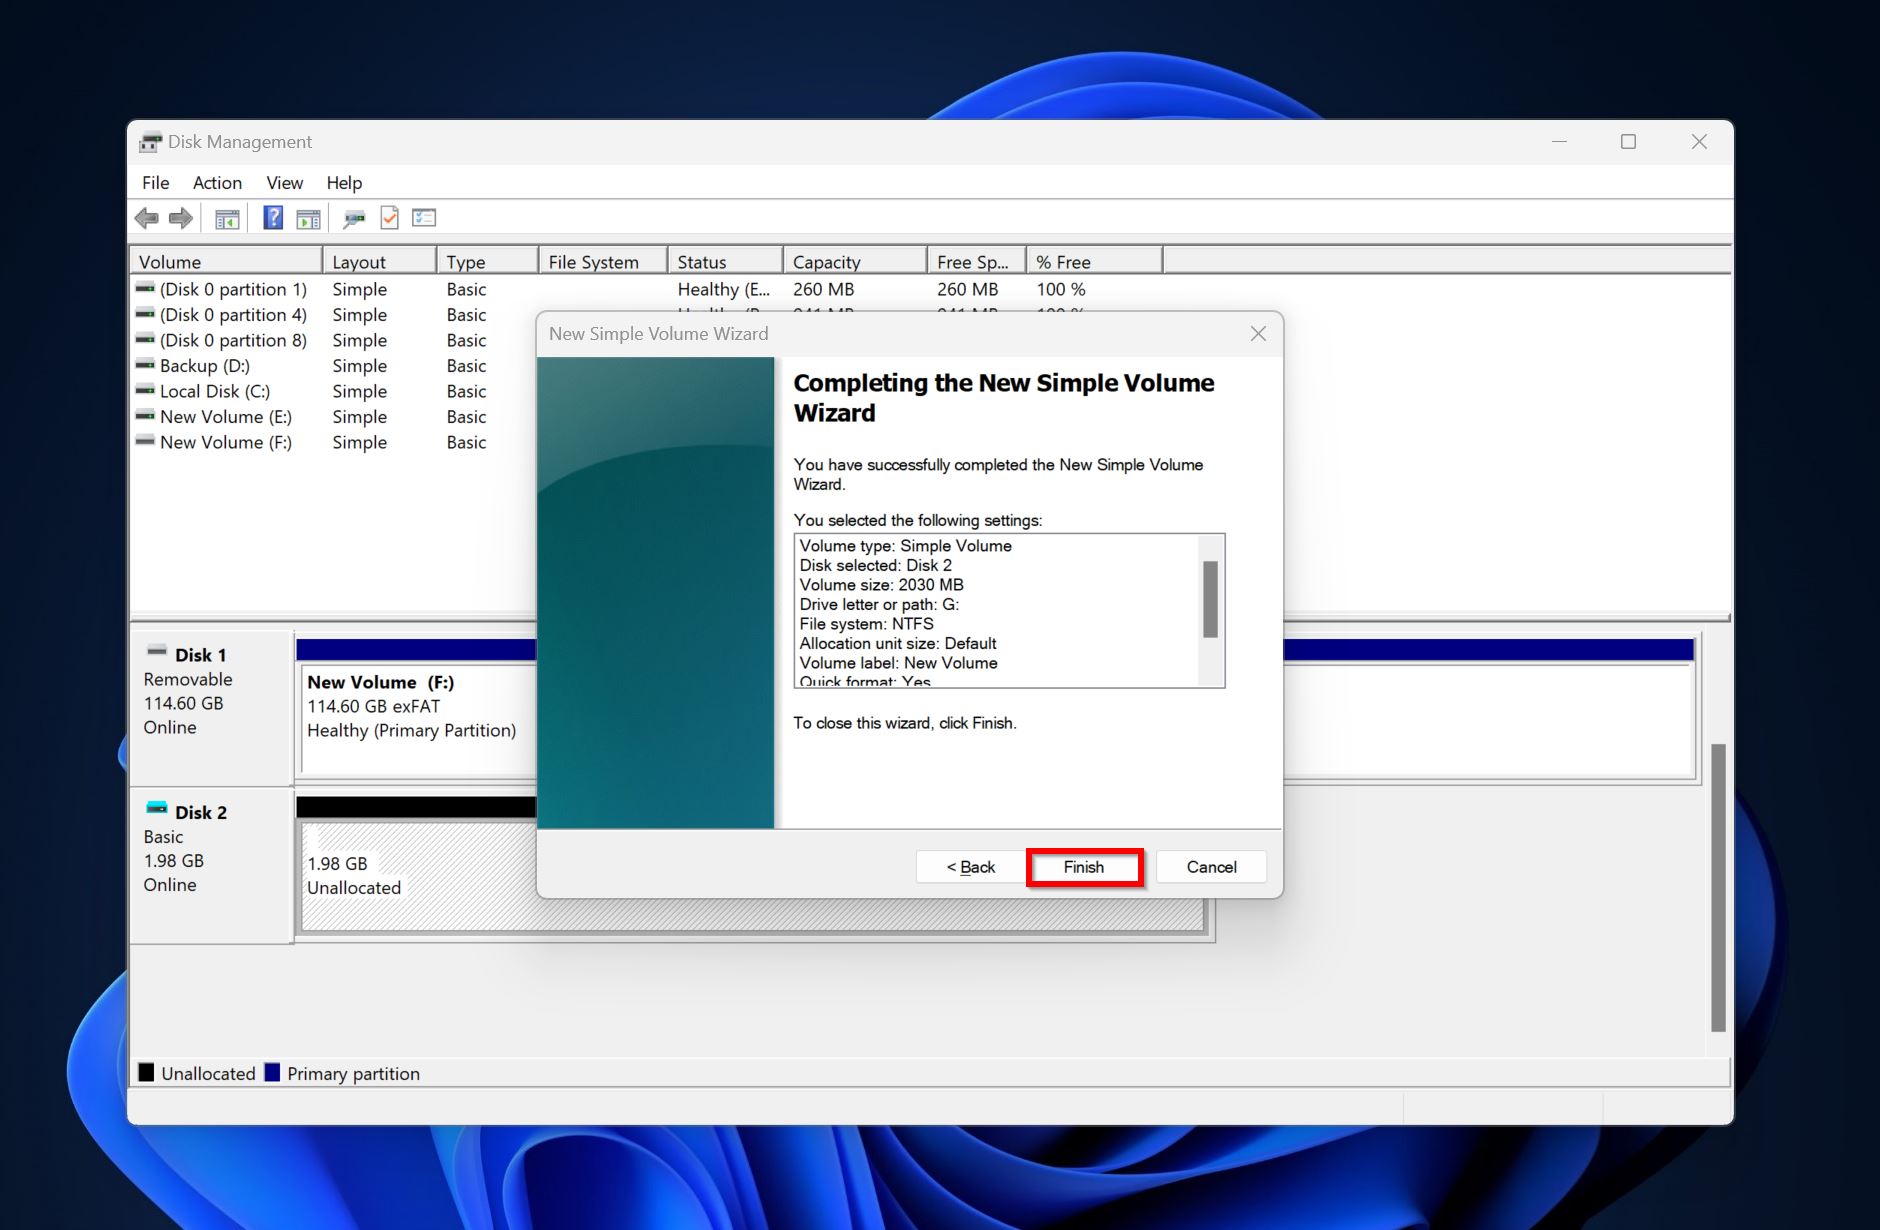
- Double-check everything and click Finish.
Option 3: Use Testdisk to Create a New Partition Table
TestDisk is an excellent partition recovery tool that can help you to essentially revert the effects of the diskpart clean command. It’ll recover partitions from external and internal drives along with the partition table. The program restores the partition to its original state, with all your files intact.
However, TestDisk doesn’t have a GUI and all navigation is to be done through the keyboard.
To recover a cleaned partition using TestDisk, follow these steps:
- Download TestDisk and extract the contents. Run the testdisk_win.exe file.
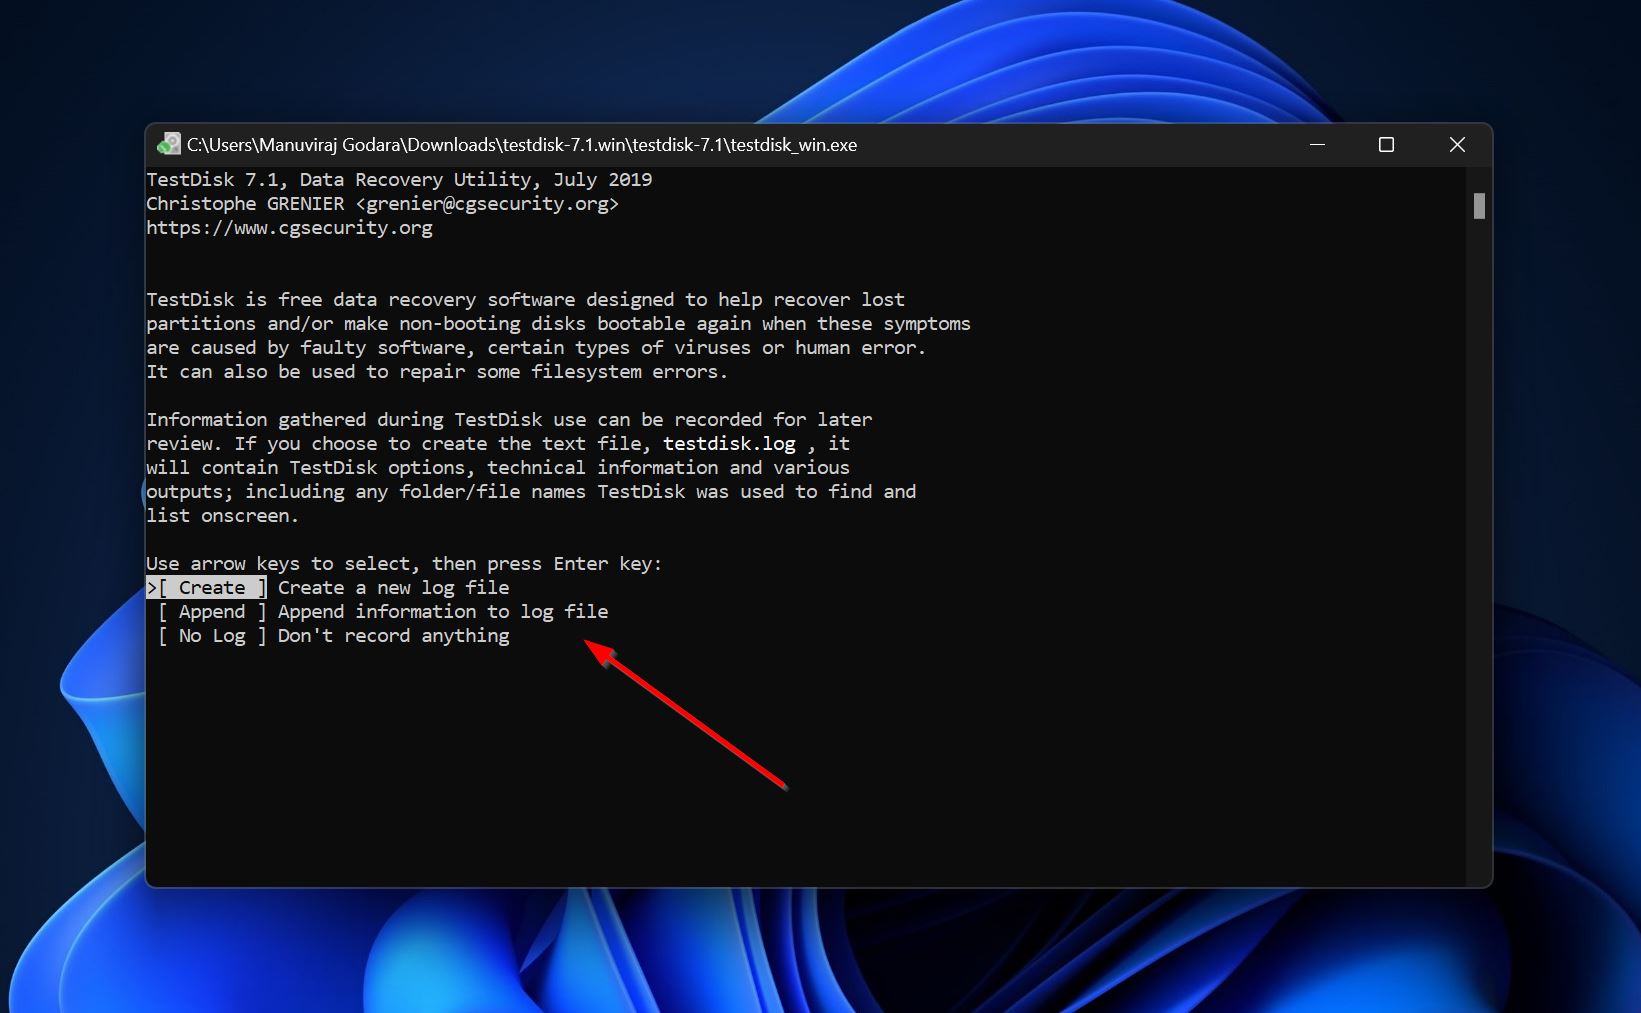
- Use the Up and Down arrow keys to select whether you want to create a log file or not. Press Enter to confirm your selection. It’s usually a good idea to create one.
- Select the disk you ran the clean command on, and press Enter. Again, use the arrow keys for this.

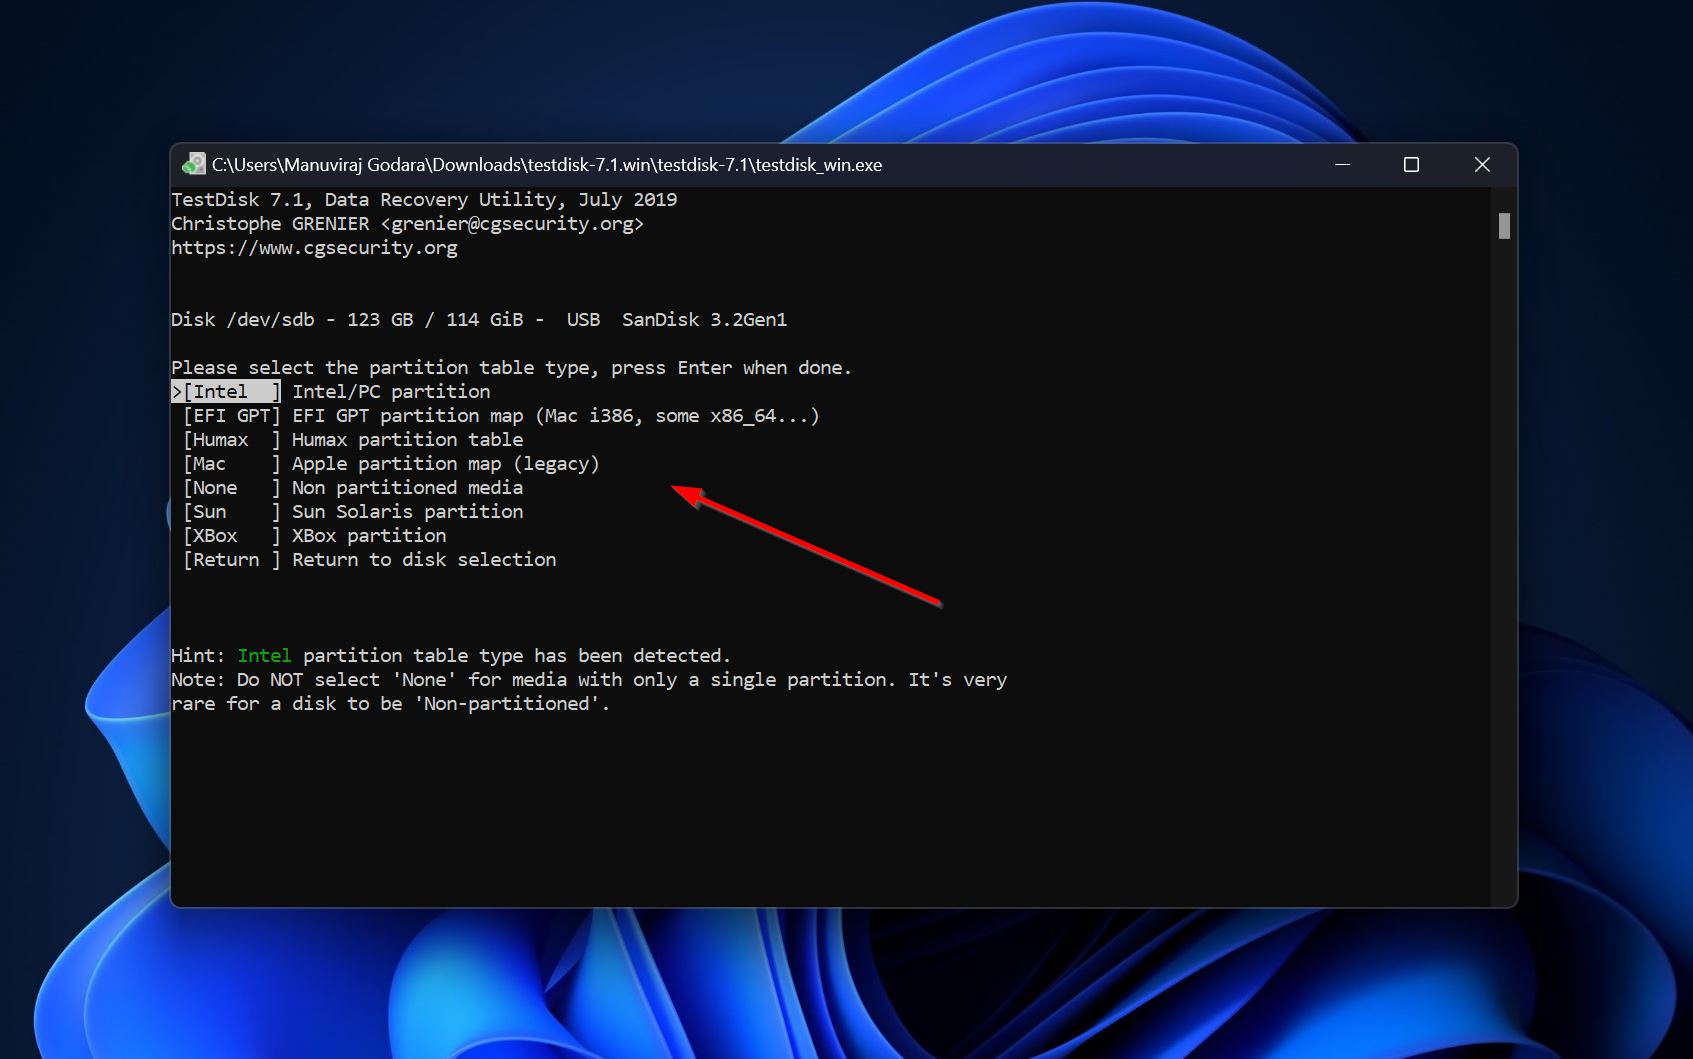
- Select the partition table type. TestDisk detects this automatically in most cases, so it’s best to leave the highlighted option as it is and simply press Enter.
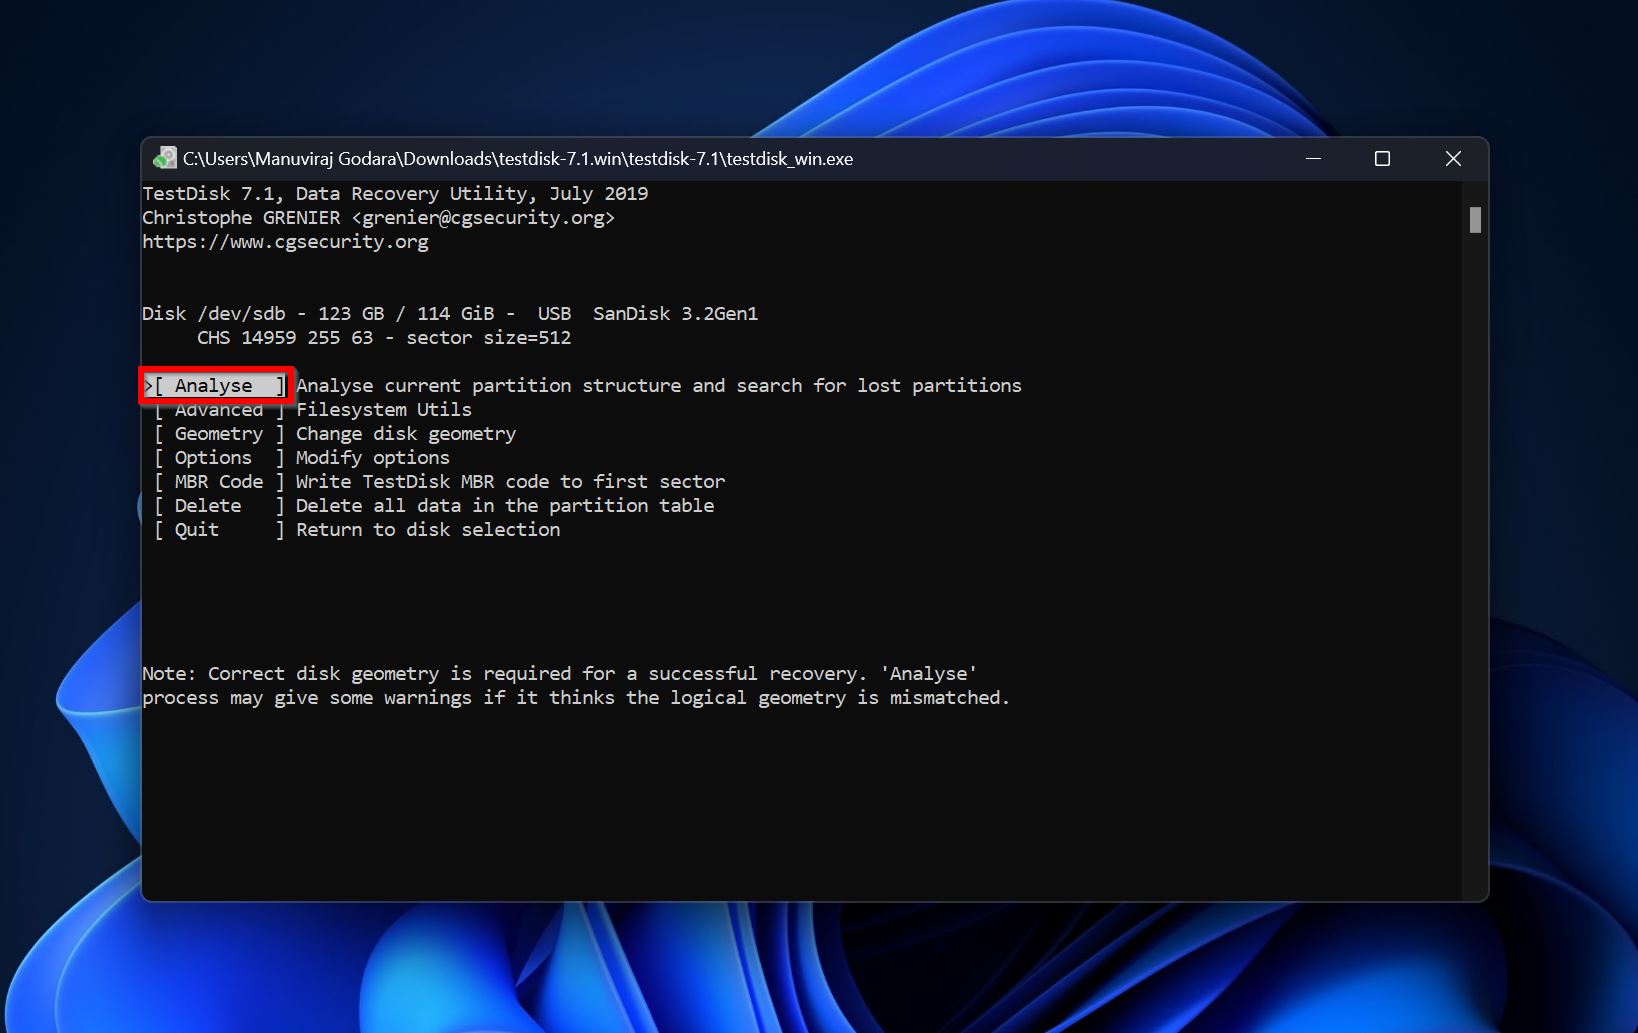
- Select Analyse and press Enter.
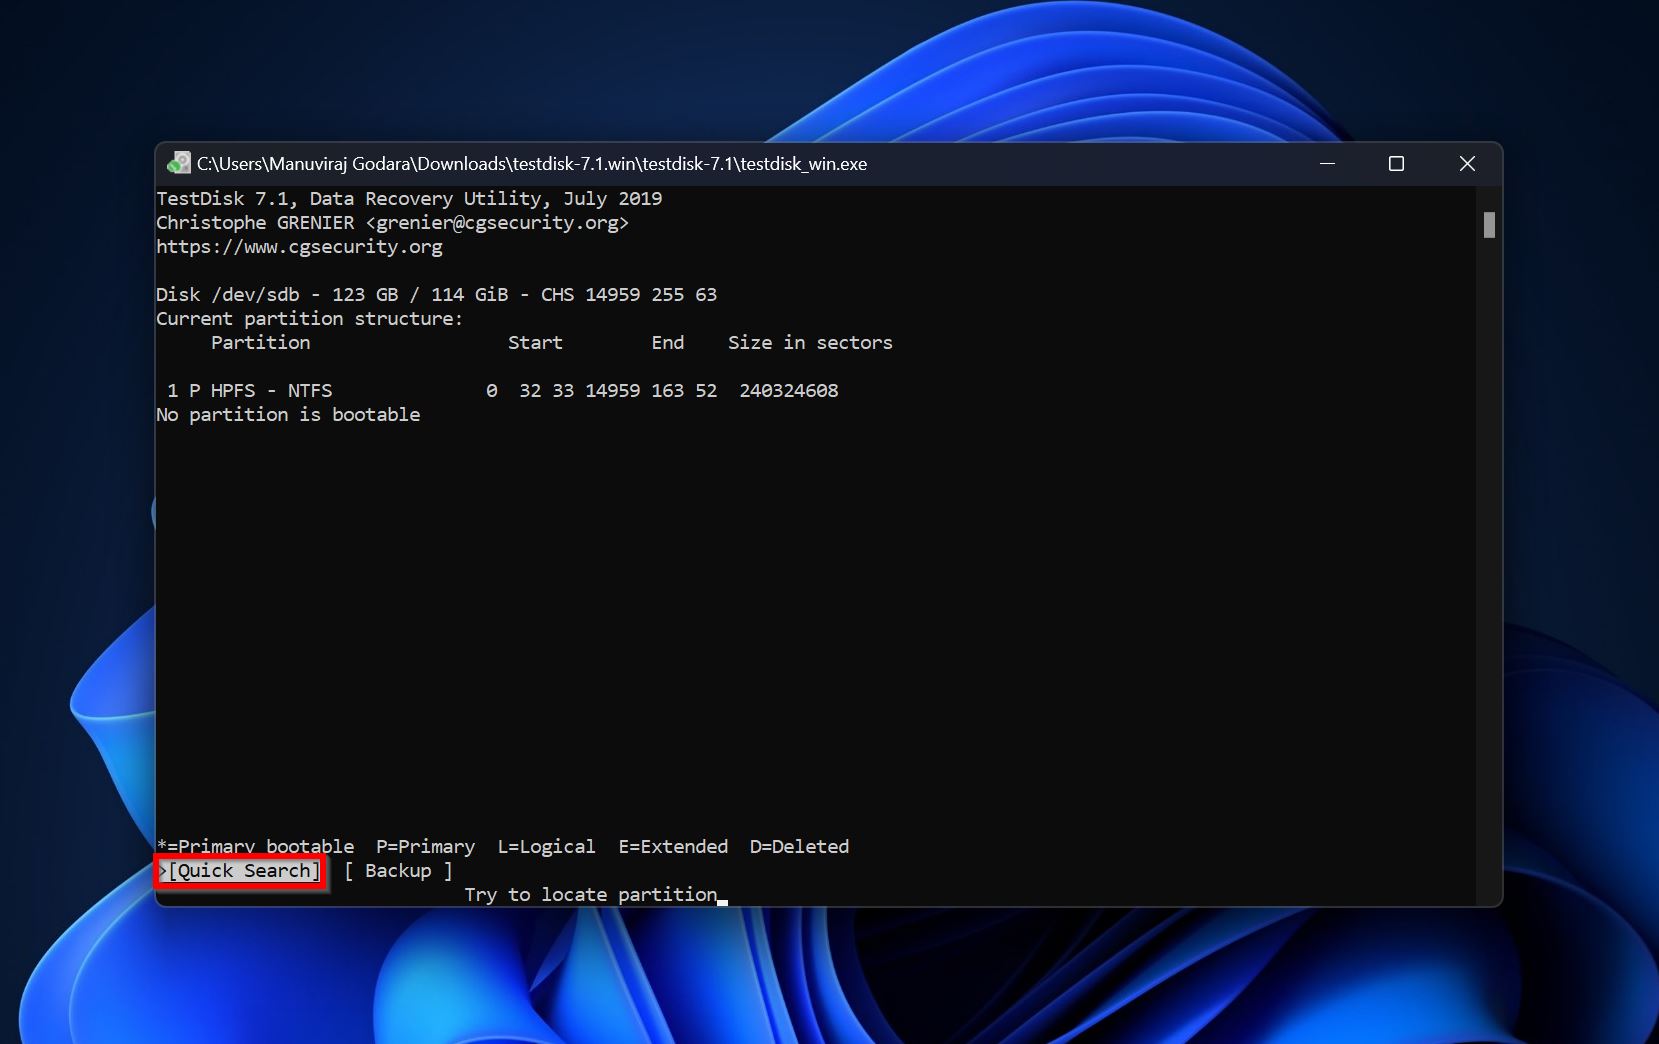
- Select Quick Search and press Enter.
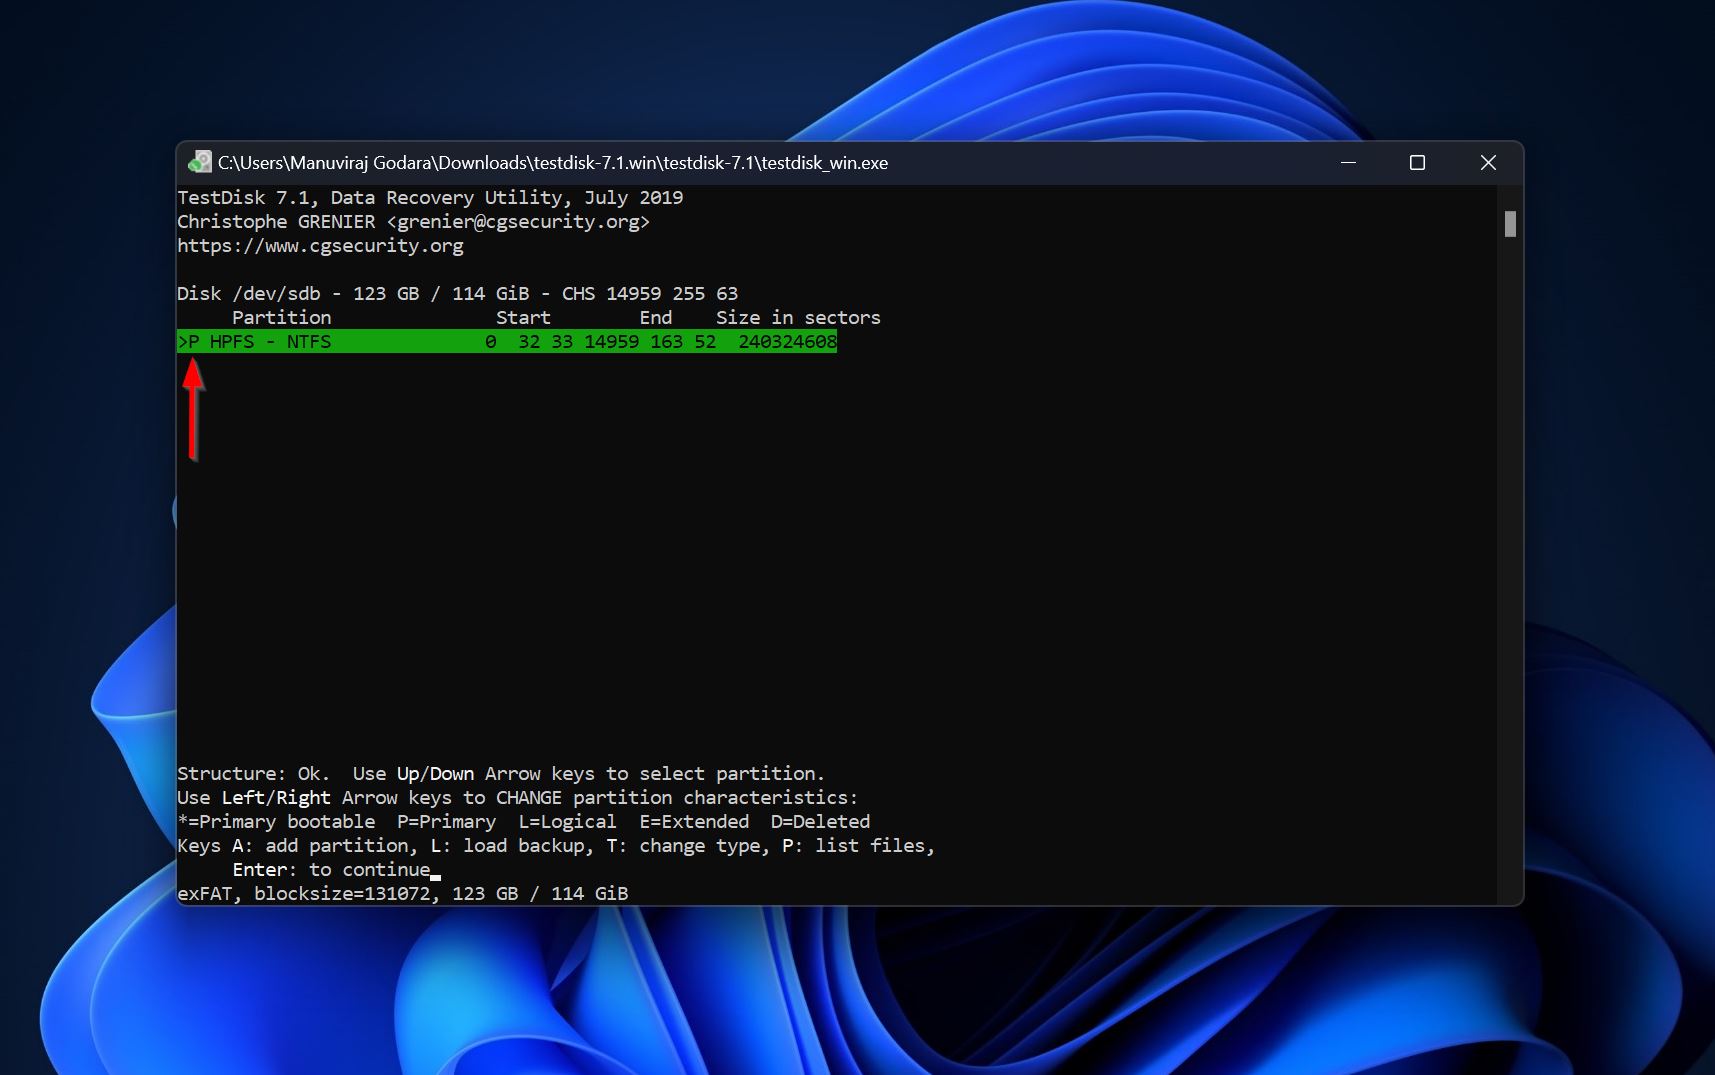
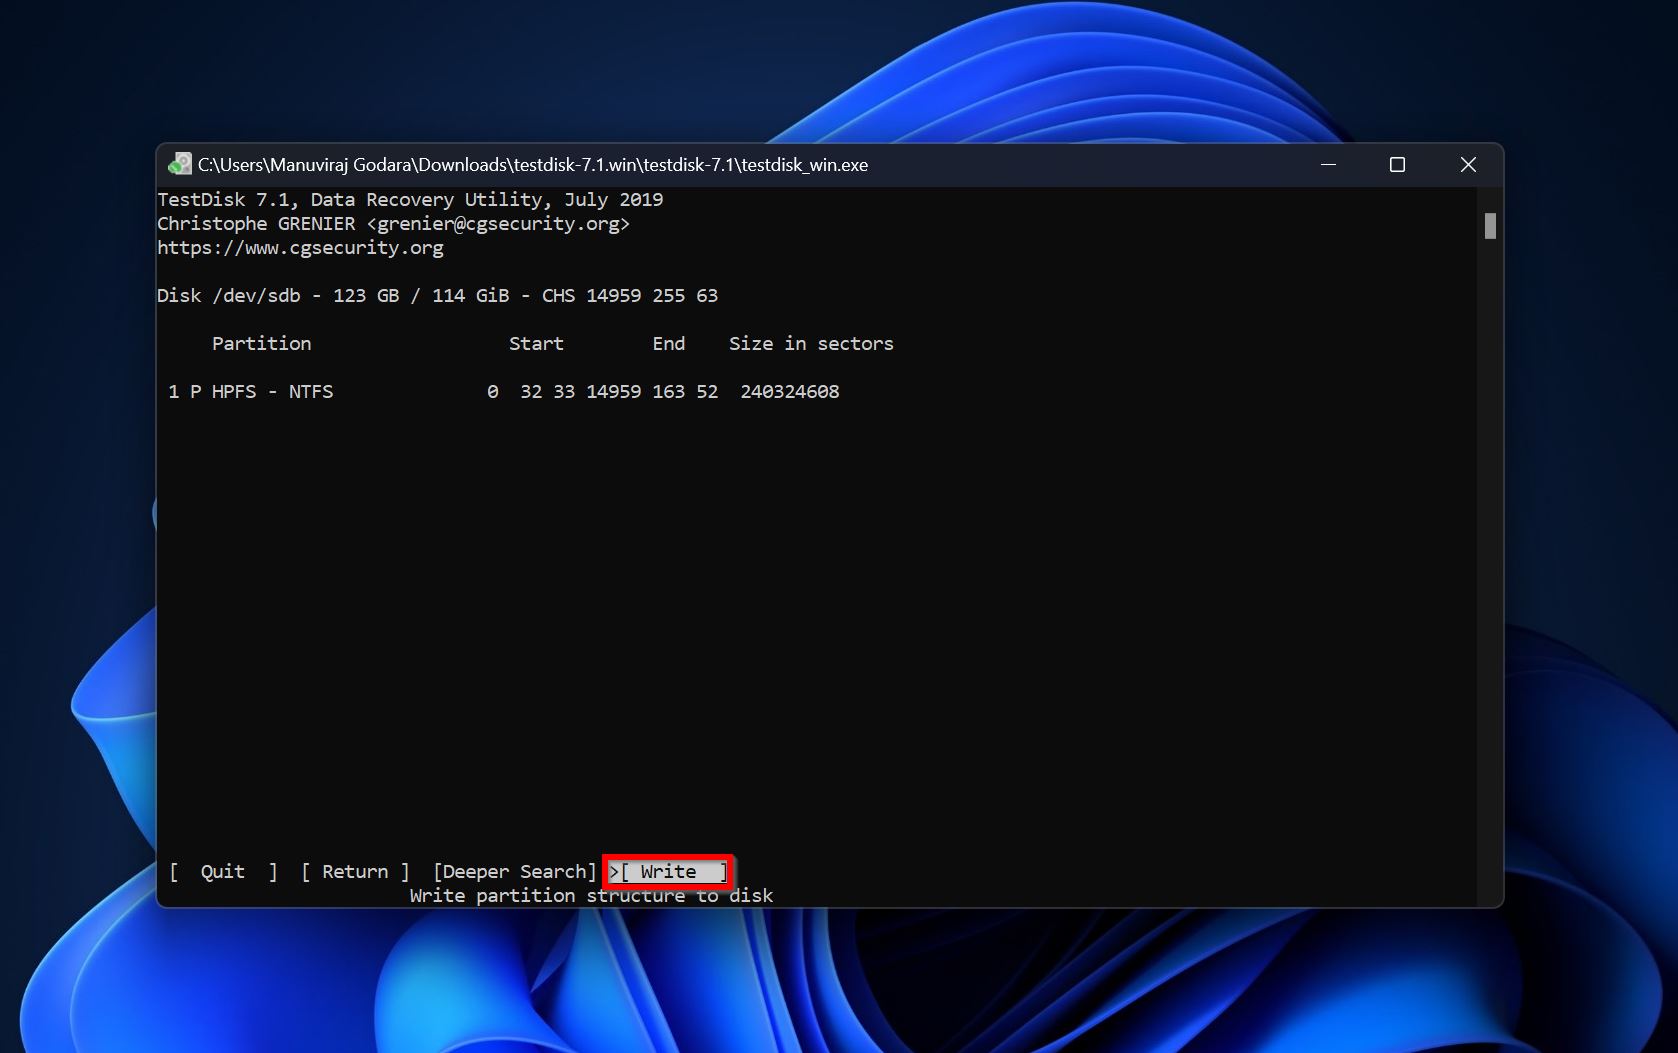
- Use the Left and Right arrow keys to cycle between the partition types, until there’s a P right at the beginning of the partition. Use the image below for reference. Press Enter.
- Select the Write option using the arrow keys and press Enter. If you want TestDisk to search for more partitions or if it didn’t find one you’re looking for, select Deeper Search instead and press Enter.
- Press Y on the confirmation prompt and press Enter.
- TestDisk will recover the partition.
Conclusion
The diskpart utility is one of the most powerful ways to manage your drives. But, it’s easy to make a mistake and run the clean command on the wrong disk. While data recovery programs can recover your data here, the best way to protect yourself against data loss is to have a regular backup schedule and stick to it.


