 A partition can become lost for many reasons. Corruption, user error, and malware are all common culprits. Once a partition is lost, the data that was stored on it will no longer be accessible as the operating system doesn’t know how to locate it.
Just like data after it has been deleted, your partition may still be recoverable. But, it won’t stick around forever, so you should act fast. In this article, we’ll show you how to recover lost partitions on an external hard drive.
Table of Contents
Can a Deleted Partition Be Recovered?
A deleted partition can, in fact, be recovered if it has been deleted or lost. When deleted, the partition, along with its file system, will remain intact for a time. During this time, the partition will not be visible and the data that was stored on it will be inaccessible as the operating system will not be able to find the data (due to the lack of a working file system).
While you can create a new partition or restore the previous one, the best course of action is to recover your data first. This is because any fix you try to implement may end up causing some of your data to become lost for good. Therefore, to make sure you get as much data as possible, you must equip yourself with a data recovery tool that’s up to the task.
How to Recover Data From Lost Partition
You can recover data from your lost partition using a data recovery tool like Disk Drill. It’s available on Windows 10 and 11, and specializes in the recovery of data from lost or deleted partitions. It supports a wide range of file systems, including FAT16/32/exFAT, NTFS, HFS, HFS+, APFS, and EXT2/3/4. It can even recover data from RAW partitions that no longer have a working file system.
Follow these steps to recover the data from your lost or deleted partition using Disk Drill:
- Download and install Disk Drill.
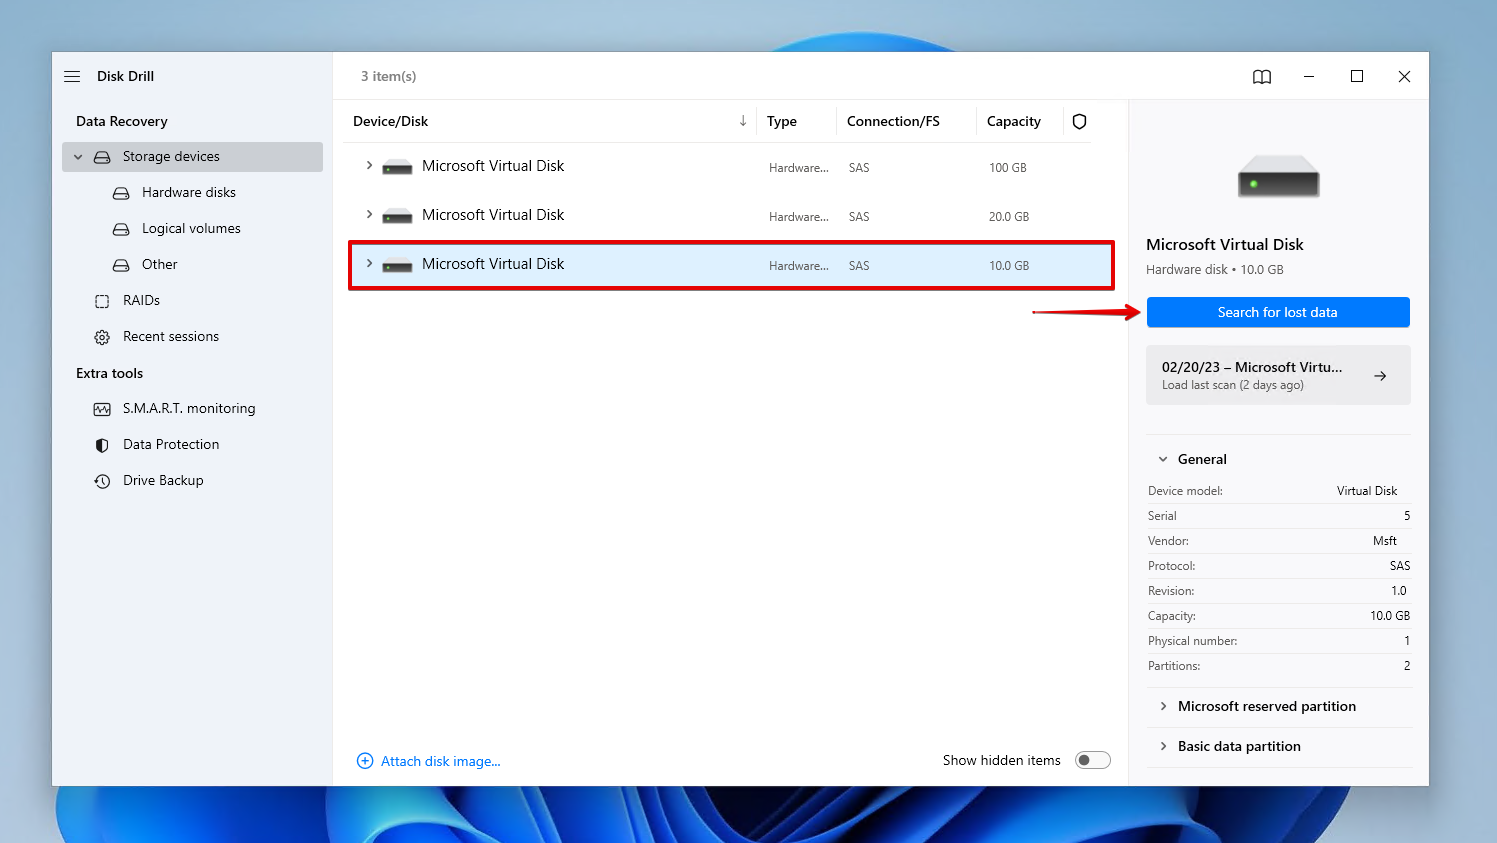
- Connect your external hard drive and select it from the list of devices. Click Search for lost data.
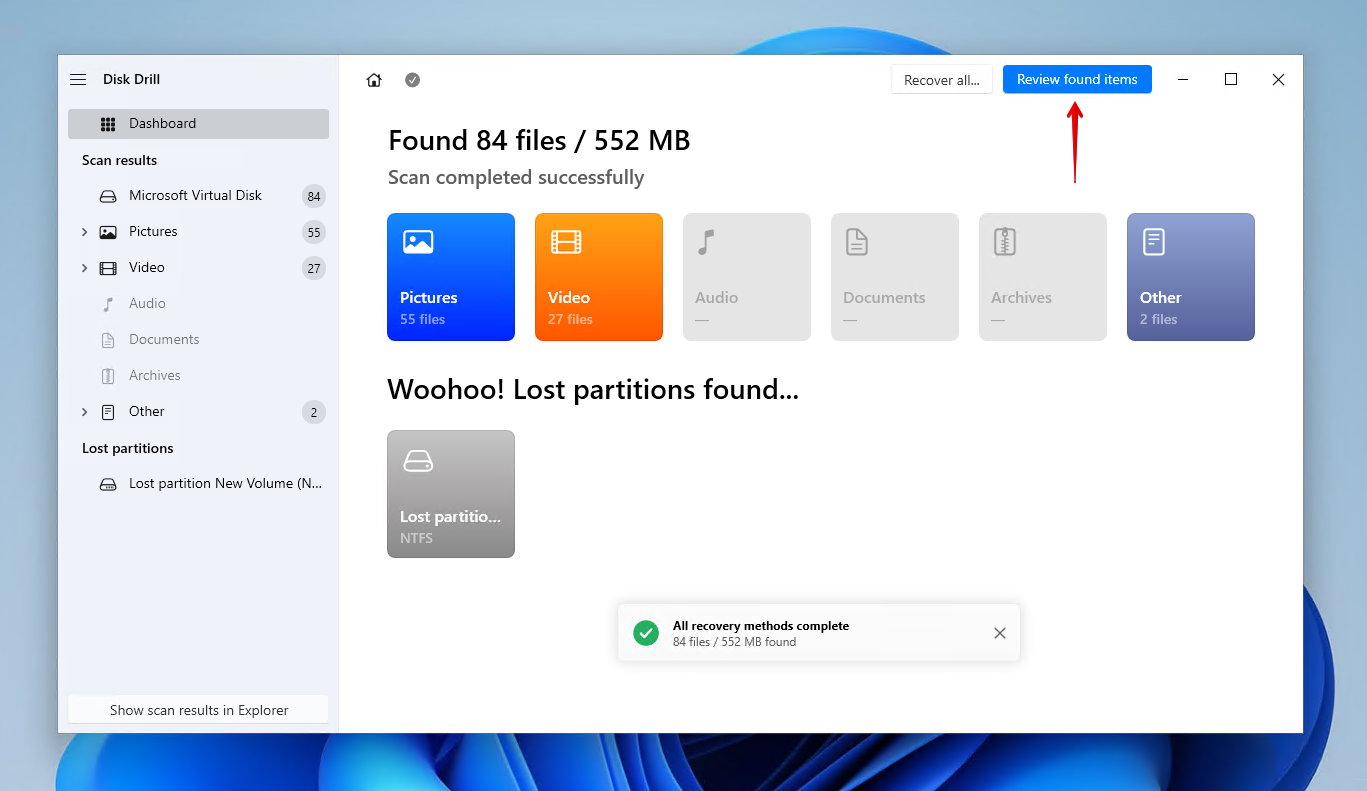
- Click Review found items to see all of the data that Disk Drill discovered. At the bottom of the window, you can click any lost partitions that Disk Drill has found to view its data. If you’re only interested in certain file types, click one of the colored file type icons. Or, click Recover all to restore everything immediately.
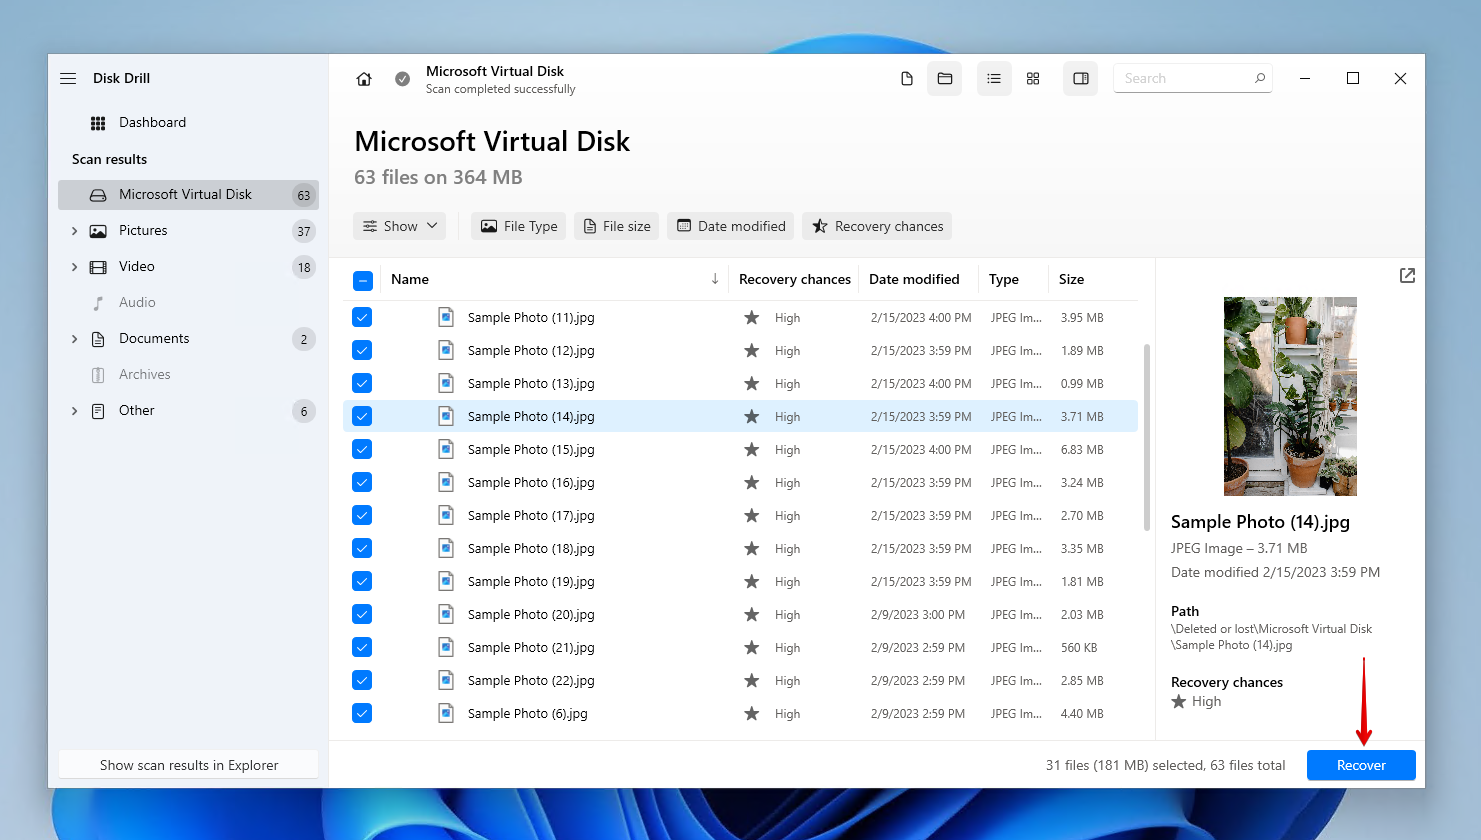
- Select the data you want to recover. Make use of the recover chance indicator and preview panel to see exactly what data is recoverable. The filter options are also helpful as they can filter out unnecessary data that you don’t want to recover. When you’re ready, click Recover.
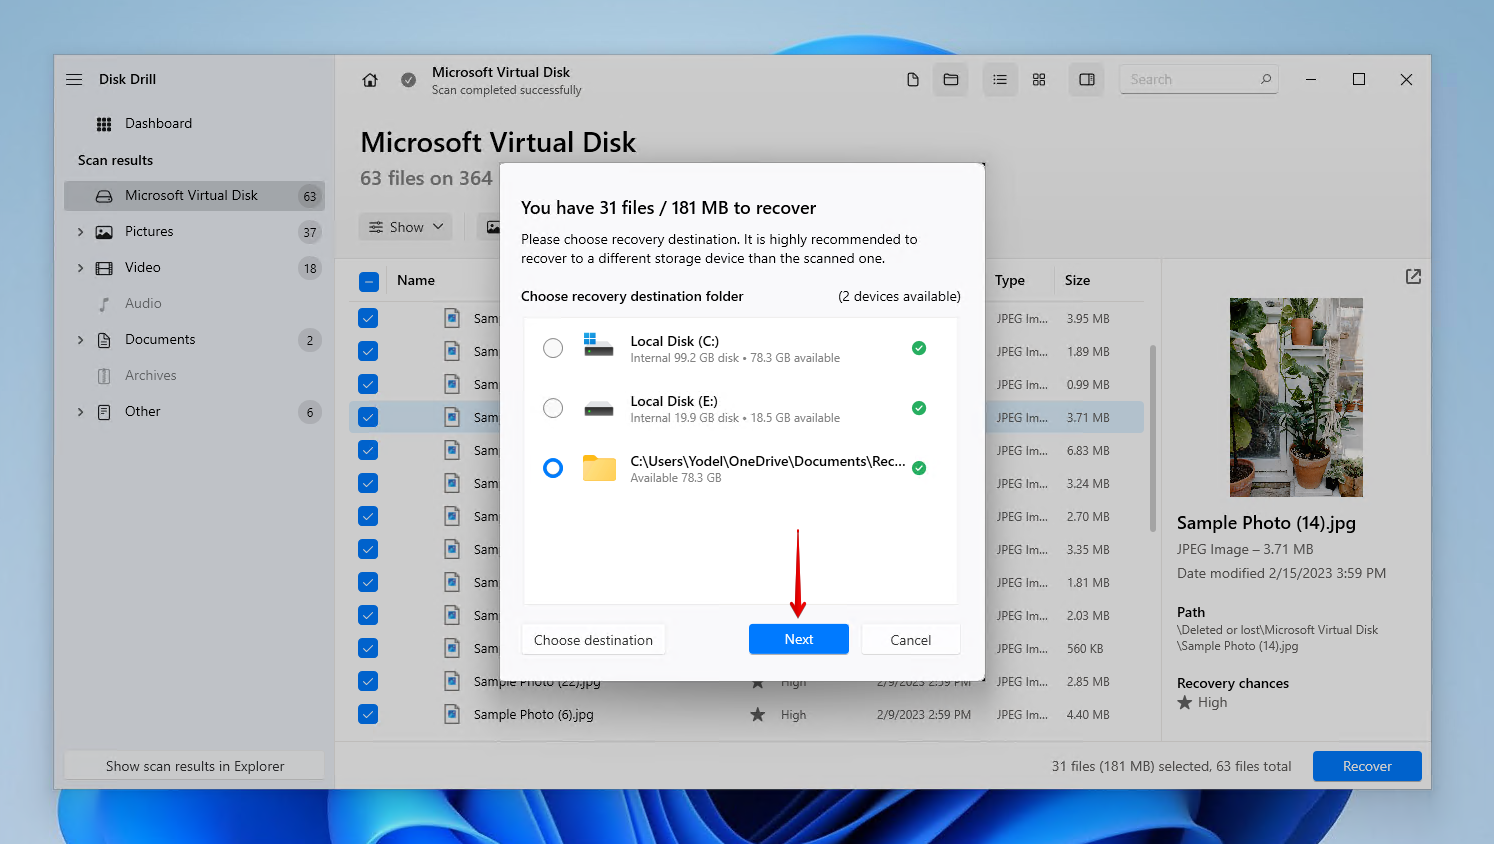
- Select an appropriate recovery location. Make sure you’re not recovering the data to the same external hard drive you’re recovering from, otherwise you risk overwriting your data. When ready to finish recovery, click Next.
How to Create a New Partition on External Hard Drive
Once the data from the lost partition on your external hard drive is safely recovered, you can either create a new partition or attempt to restore the old one. First, we’ll take you through creating a brand new partition so you can begin writing data to the drive.
This is how you create a new partition on an external hard drive using Disk Management:
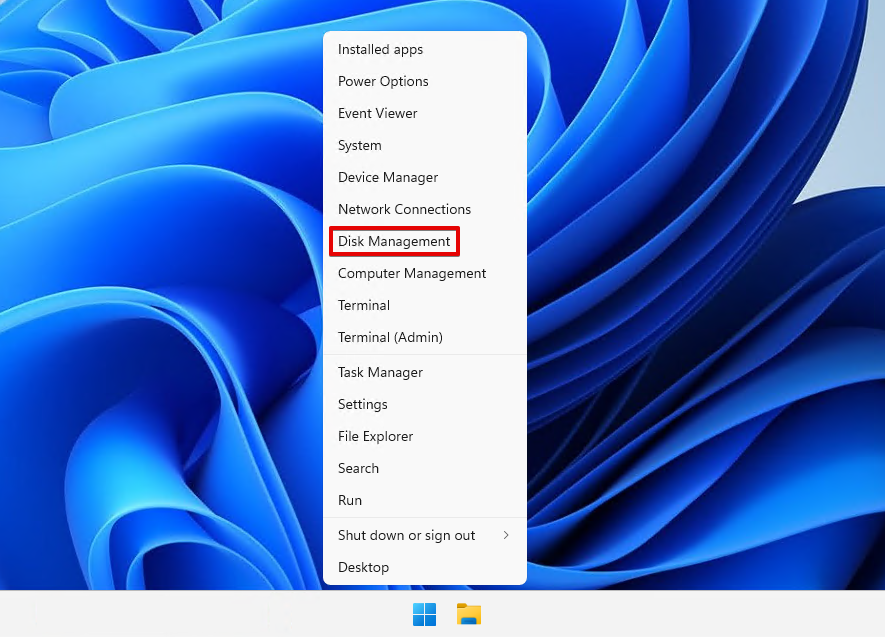
- Right-click Start and click Disk Management.
- Right-click the unallocated space on your external hard drive, then click New Simple Volume.
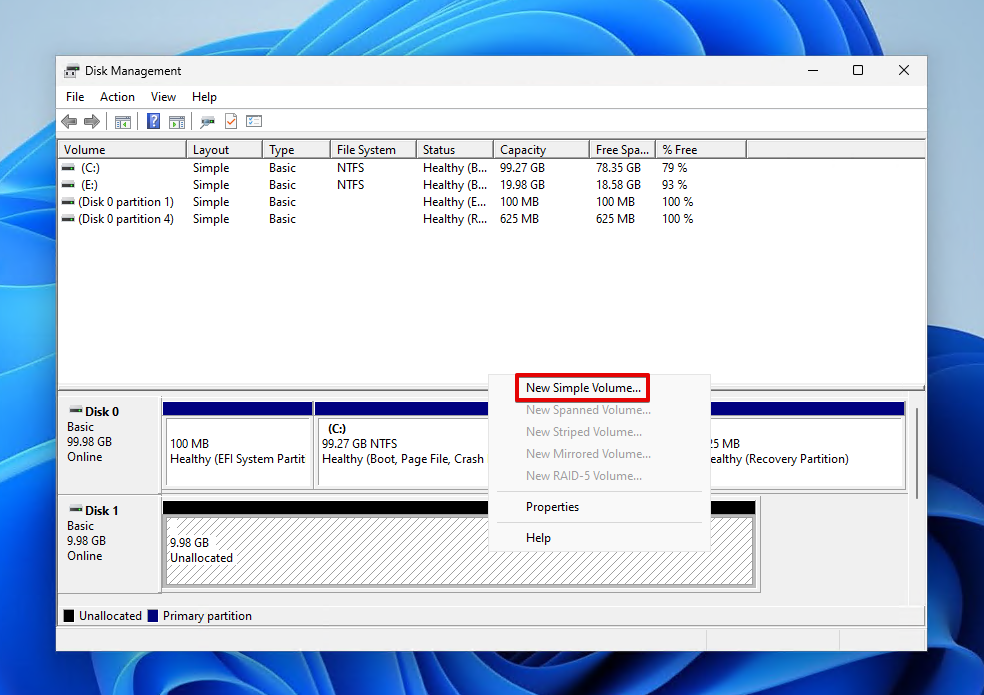
- Click Next.
- Specify the volume size. You can leave it as default and click Next.

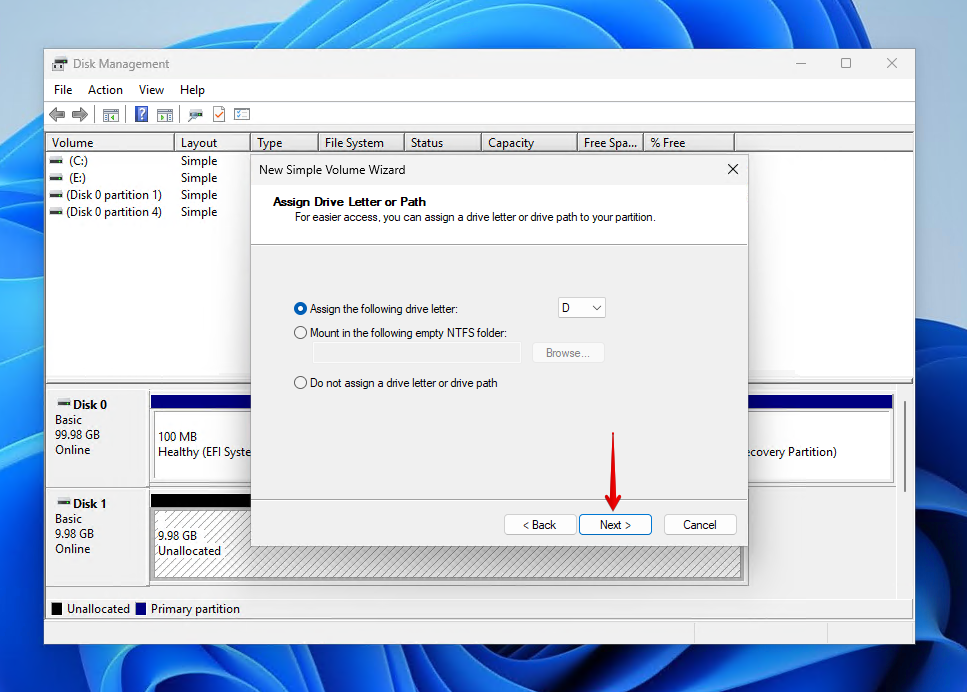
- Assign a drive letter, then click Next.
- Choose the file system you’d like to use and specify a volume label. Make sure Perform a quick format is ticked, then click Next.

- Click Finish.
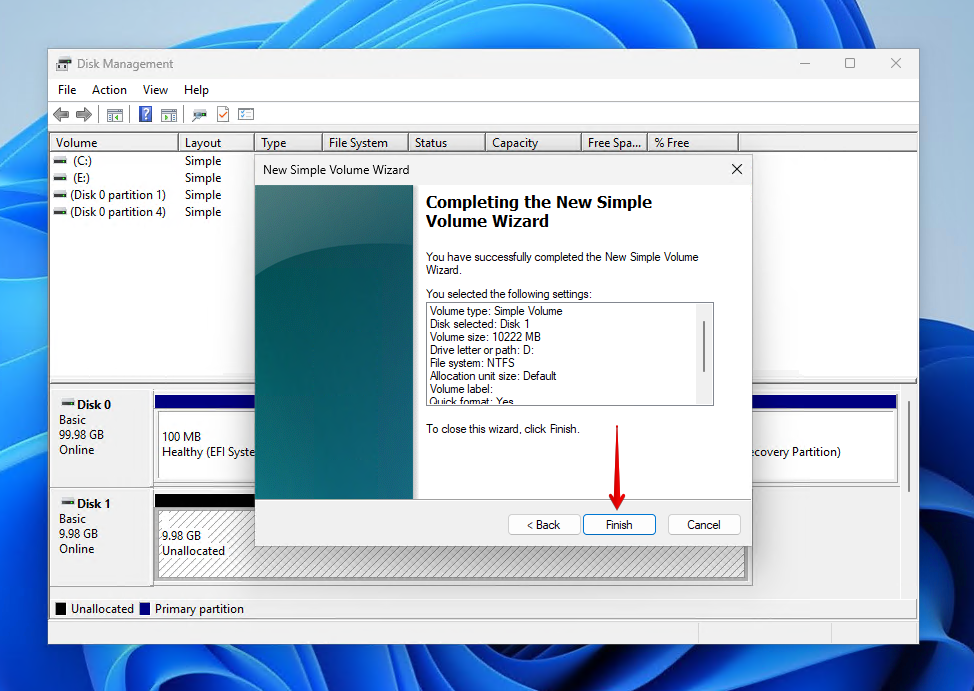
A new partition would have been created using the drive letter you specified earlier. You can now begin moving files to the partition.
How to Restore Old Partitions on Windows
If you don’t want to create a new partition, you can instead try restoring the old one. If you’re lucky, all of your data will be restored with it. Here are a few methods you can use to recover a hard drive partition.
Method 1: CheckDisk
CheckDisk is a popularly used volume-repair tool included with Windows. When run on its own, it merely scans your drive for issues and reports them back to you. But, with parameters, you can use CheckDisk to automatically fix any problems it finds, even bad sectors.
It’s worth mentioning that CheckDisk isn’t able to restore a lost partition per se, but it can fix the file system of the partition, which may be causing the problem of it not being visible or accessible.
Follow these instructions to fix a partition on an external hard drive:
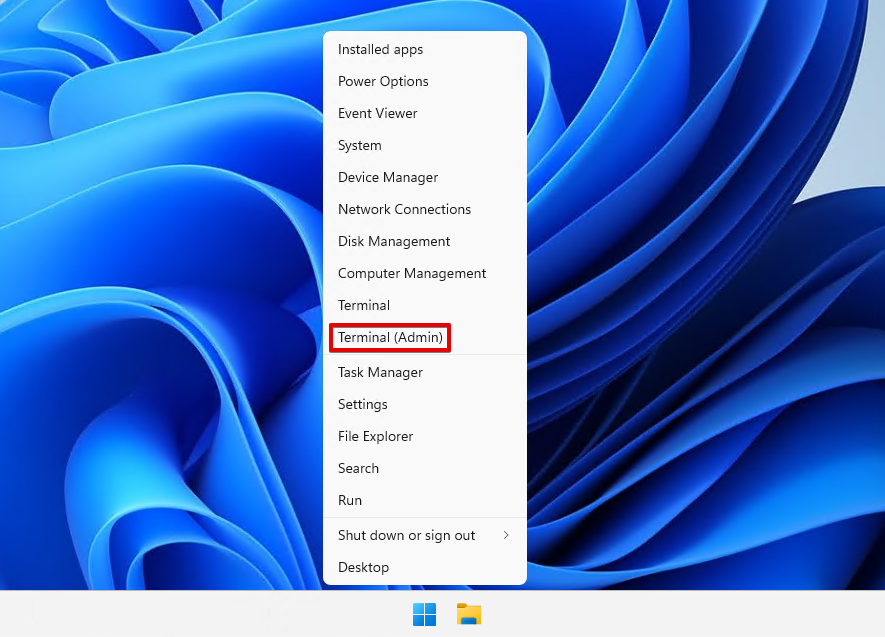
- Right-click Start and click Terminal (Admin). On Windows 10, this will be Windows PowerShell (Admin).
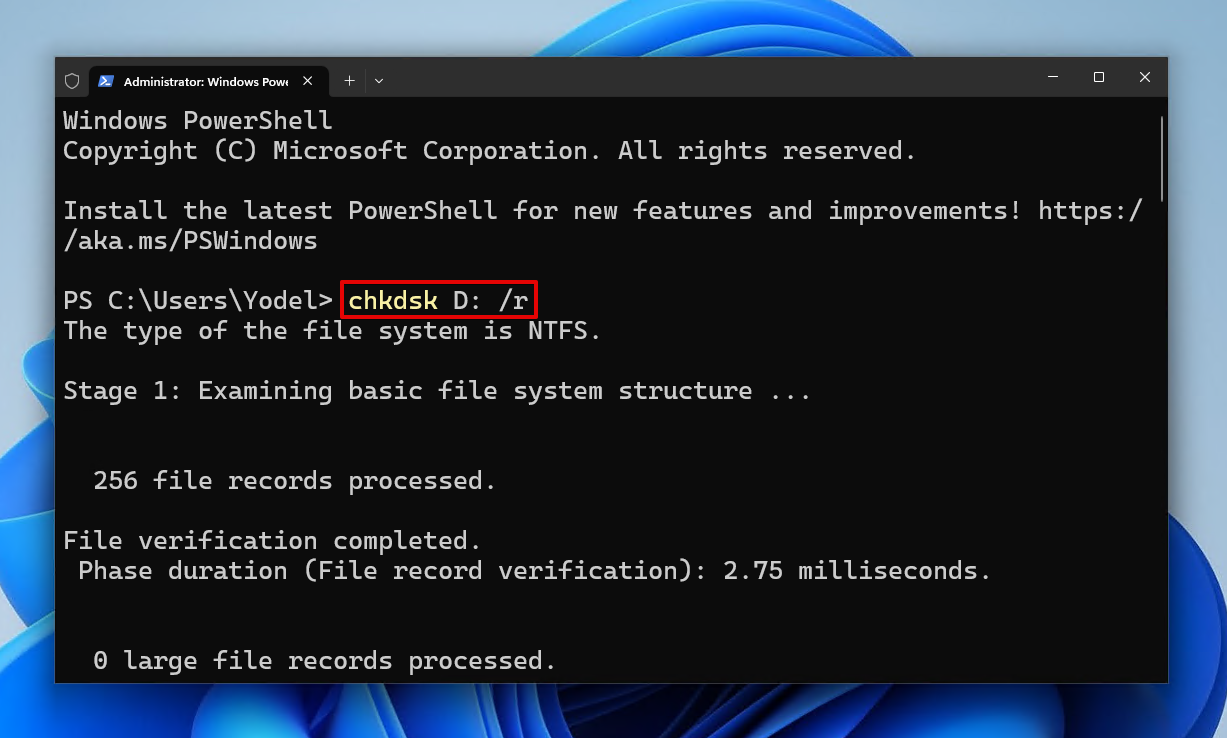
- Type chkdsk *: /r. Replace * with the drive letter of the disk your partition resided on. Press Enter.
Method 2: TestDisk
TestDisk is a free partition recovery tool that allows you to recover deleted partitions using CMD. It specializes in partition recovery and gives you the ability to fix the partition table of your drive. As it’s a command-line tool, it may be a bit difficult for beginners. No matter, as our easy-to-follow instructions can guide you through, no problem.
This is how to recover a lost partition on an external hard drive using TestDisk:
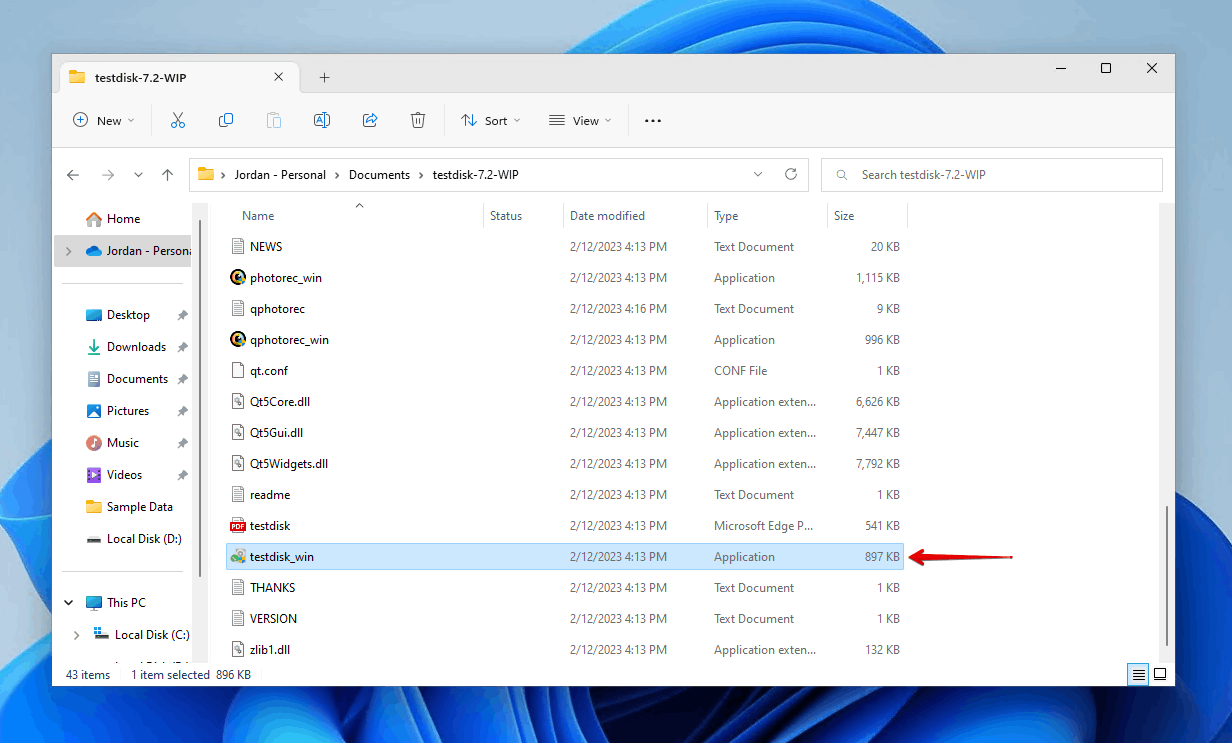
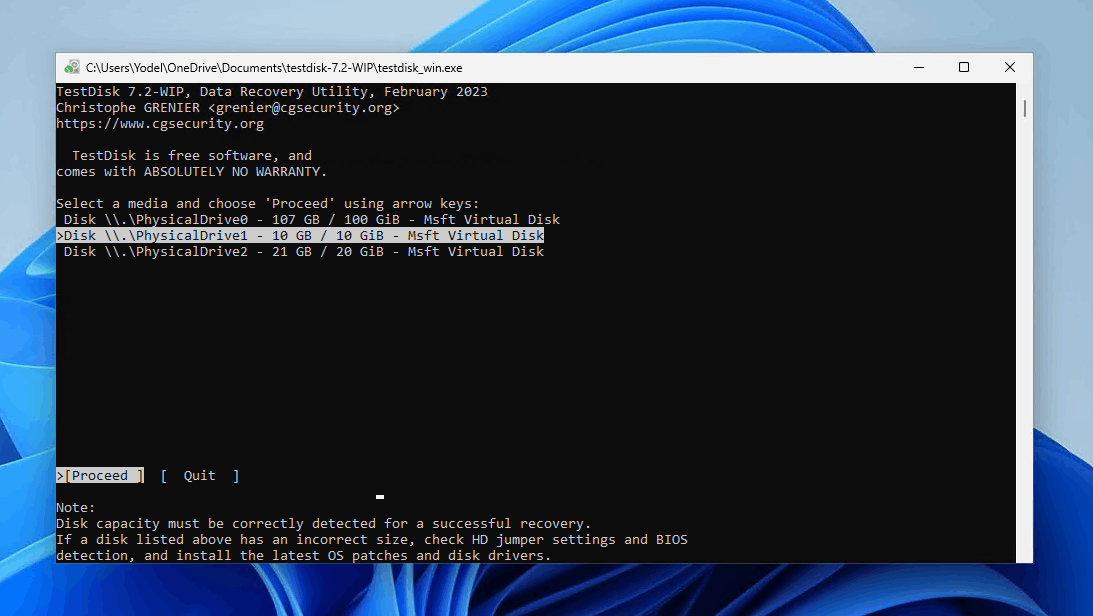
- Download and run testdisk_win.exe.
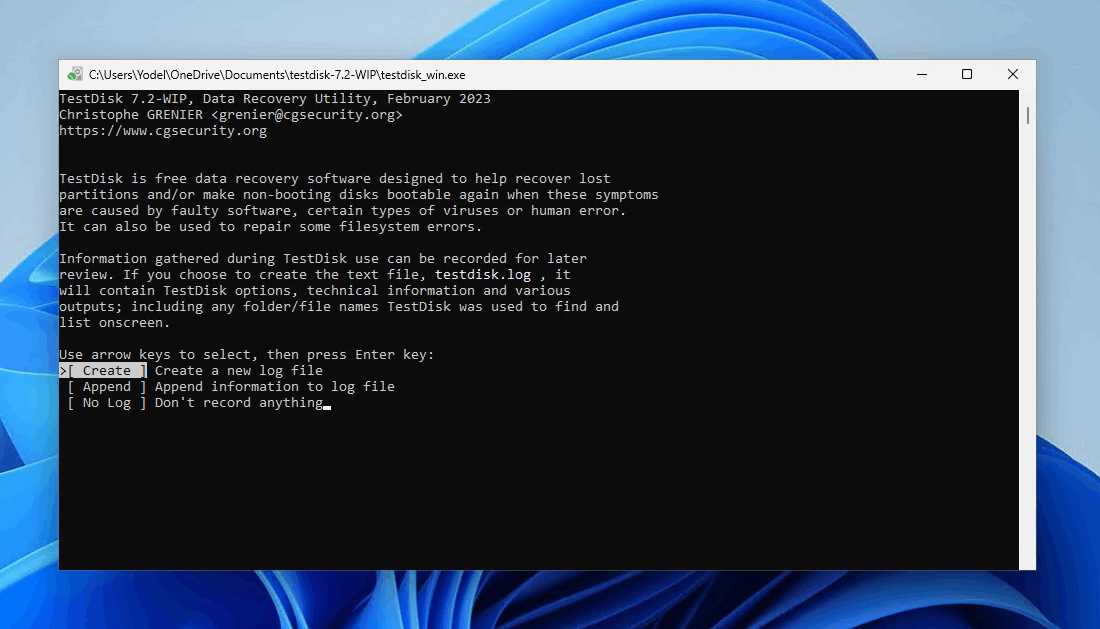
- Select the Create option and press Enter.
- Select the disk that contains the lost partition, then press Enter.
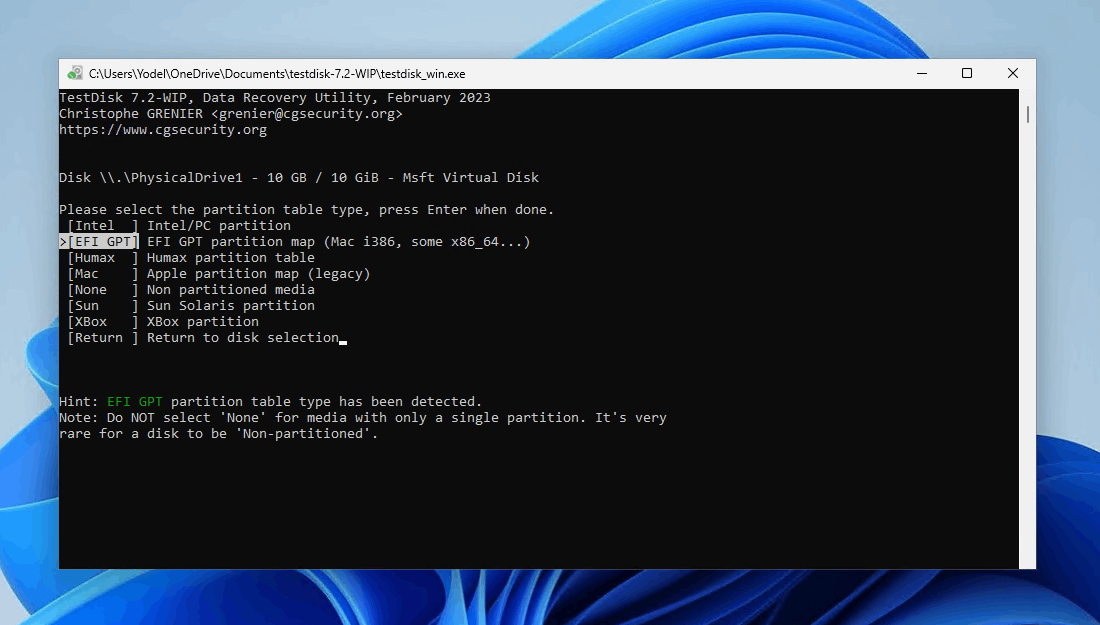
- Select the file system the lost partition is using, then press Enter.
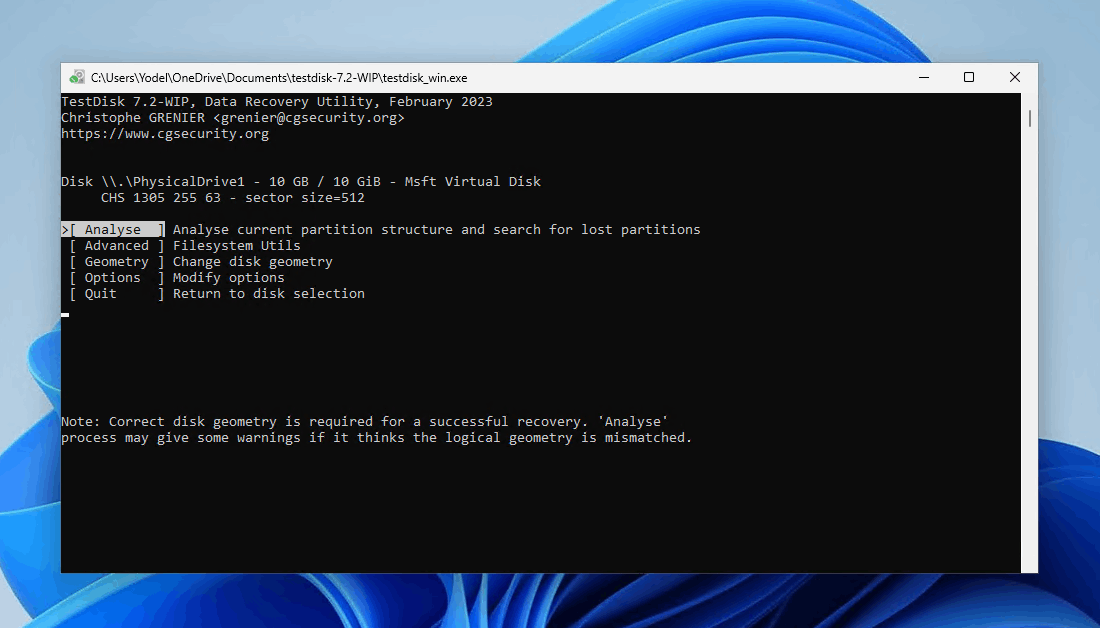
- Select Analyse then press Enter.
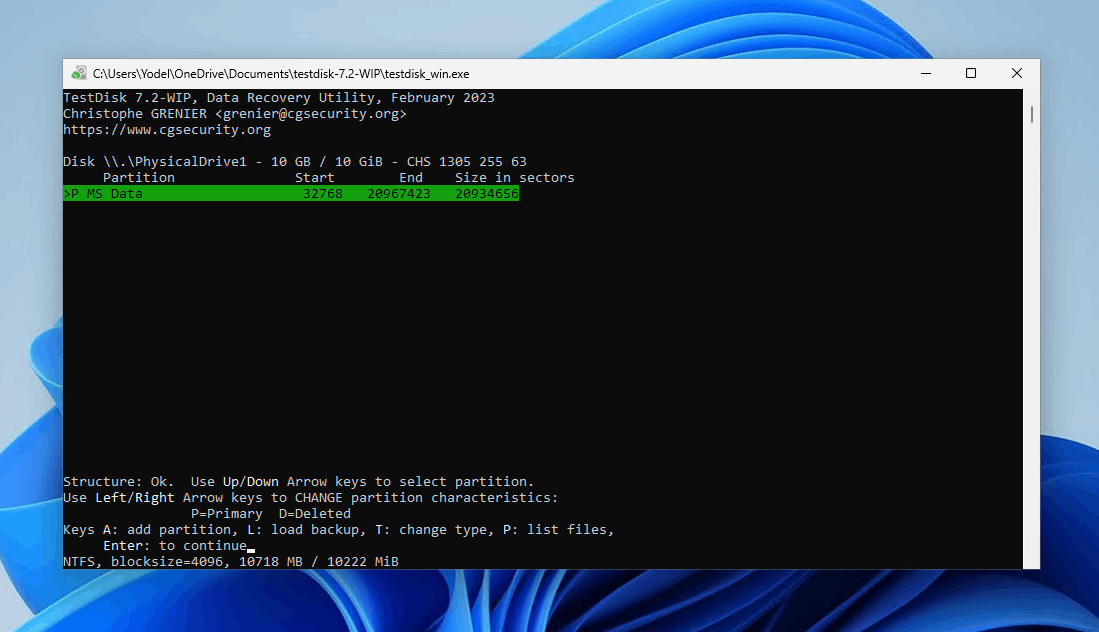
- Press Enter to begin a quick search.
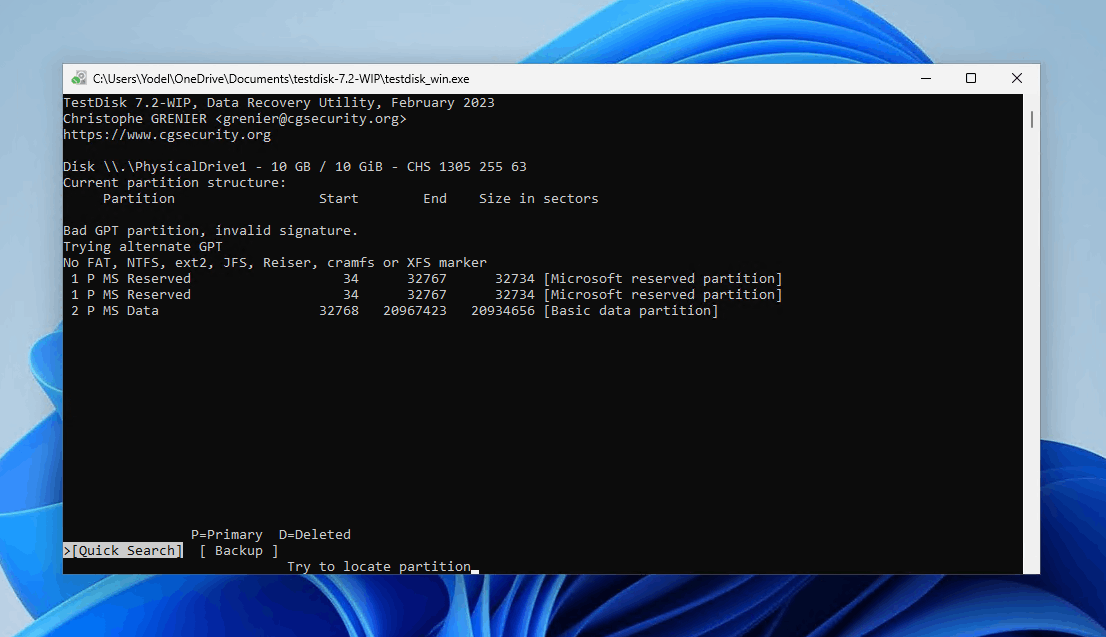
- Select the lost partition and press Enter.
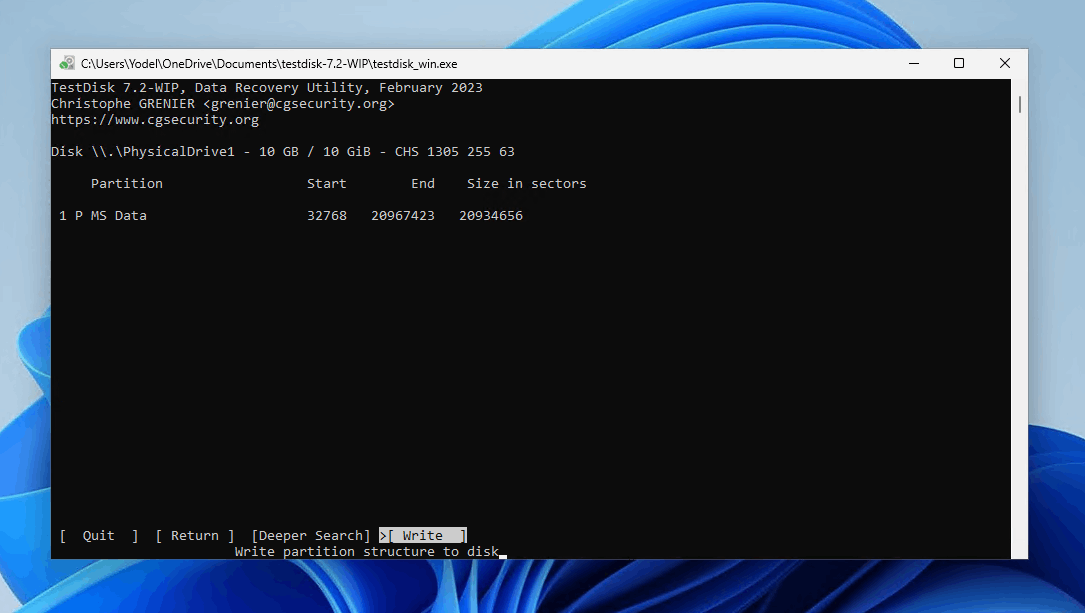
- Select the Write option and press Enter to restore the lost partition.
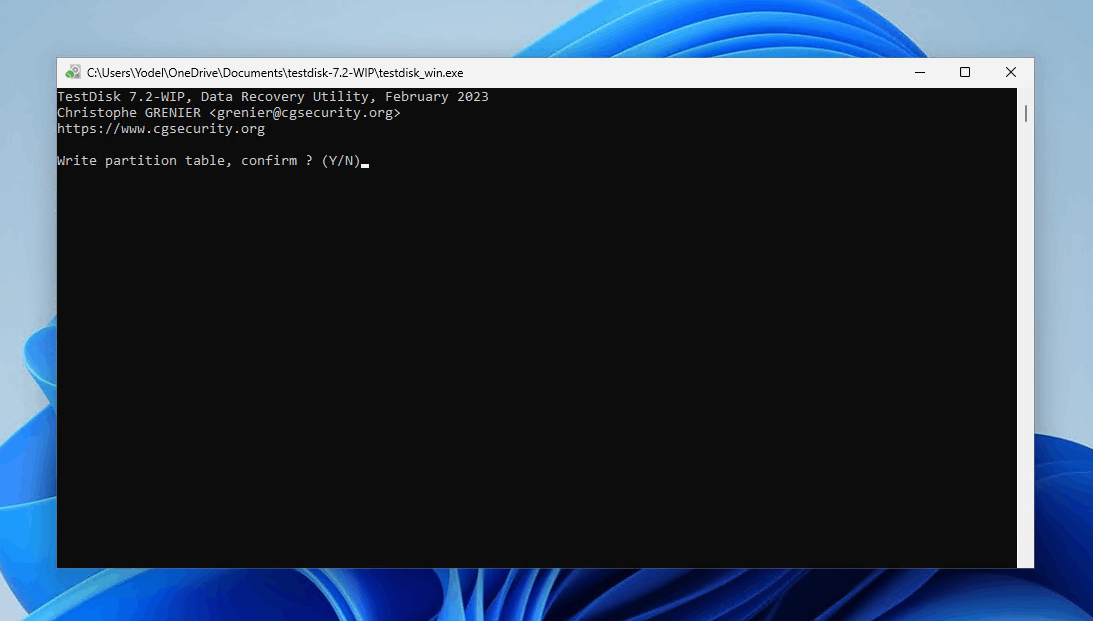
- Press Y to confirm.
Once the partition is written back to the disk, you need to restart your computer for the process to complete.
Method 3: Acronis Disk Director Home
Acronis Disk Director Home is a paid application that includes a toolset intended to optimize your disk usage and protect your data. Volume recovery is part of the toolset, which allows you to perform external hard drive partition recovery. As it’s a paid solution, we’d only recommend you get it if you’re able to get value out of the entire program.
Here’s how you restore a lost partition using Acronis Disk Director Home:
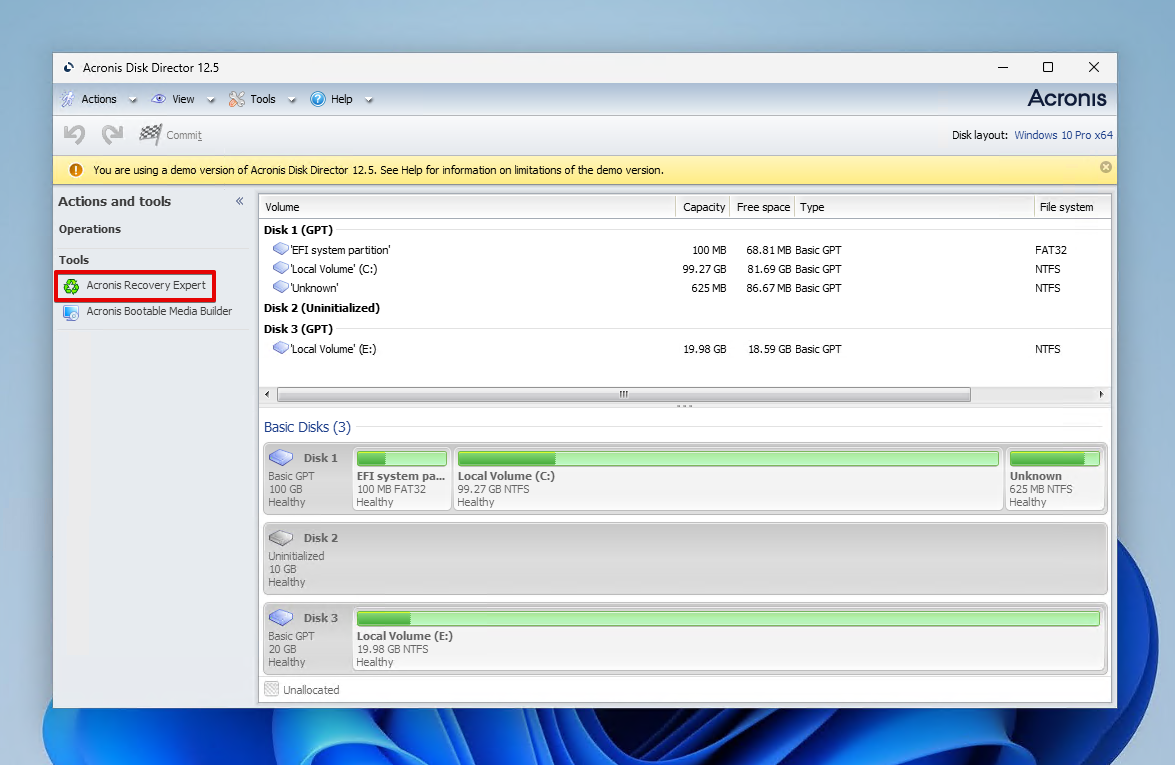
- Download and install Acronis Disk Director Home.
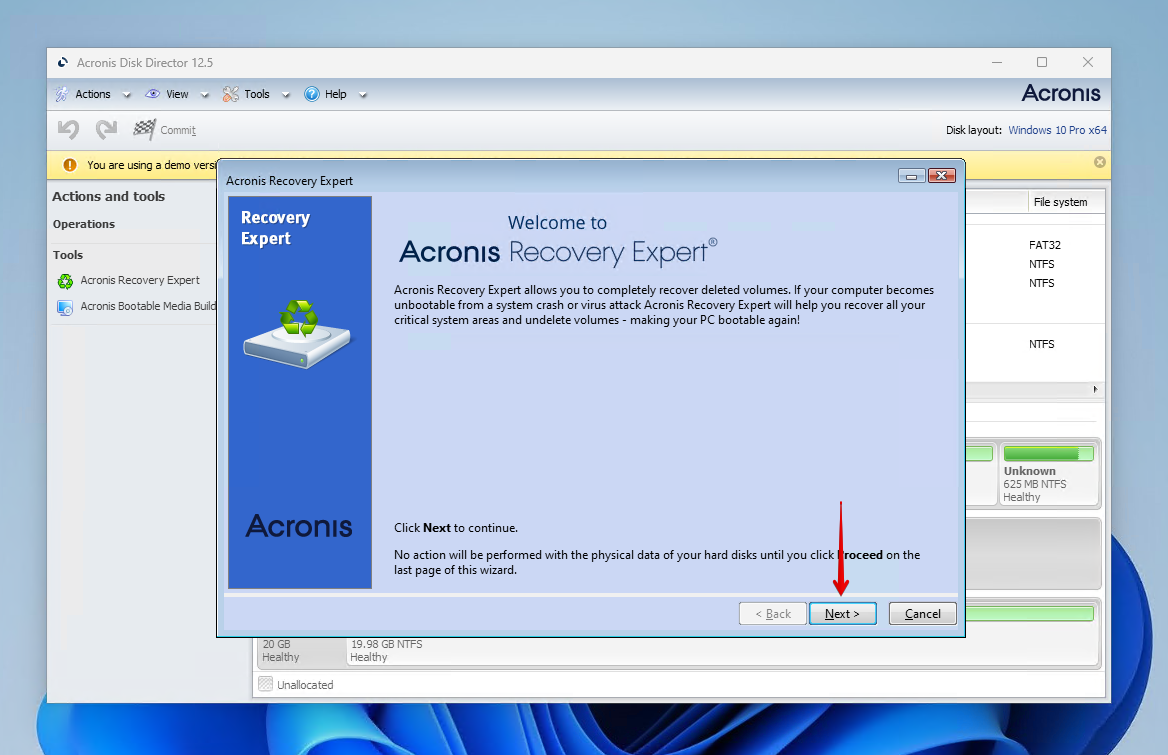
- Click Acronis Recovery Expert.
- Click Next.
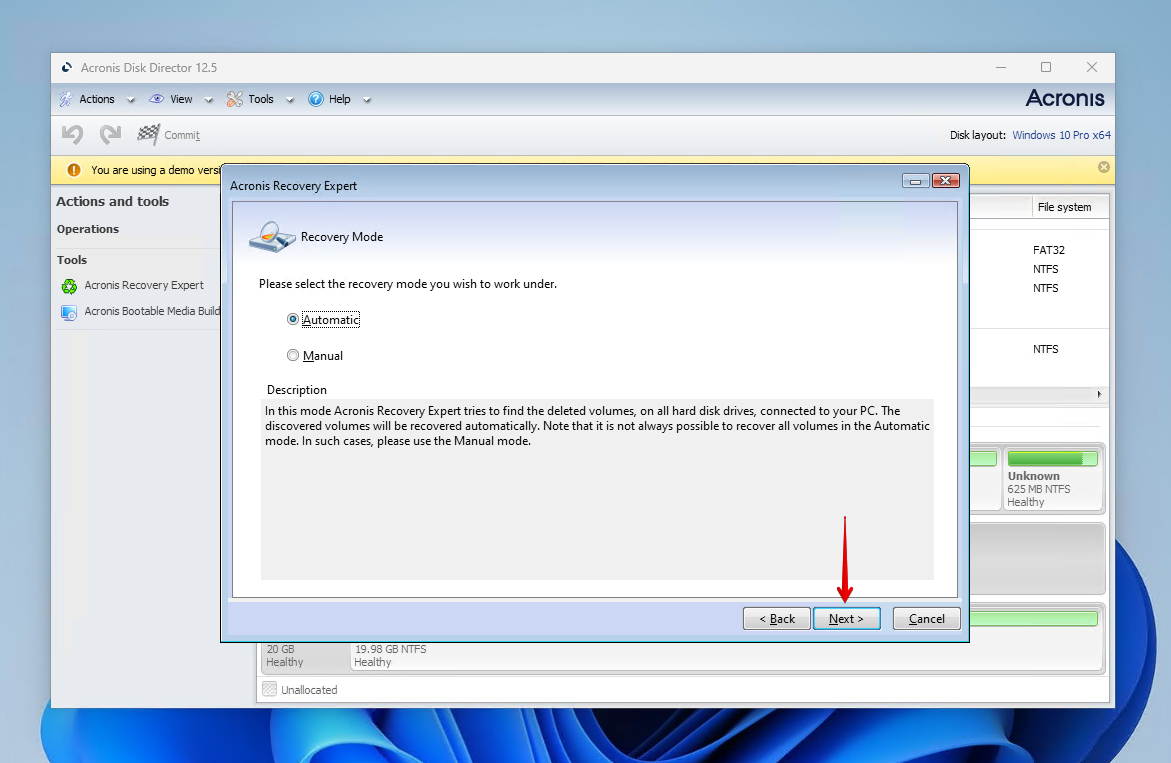
- Select Automatic and click Next.
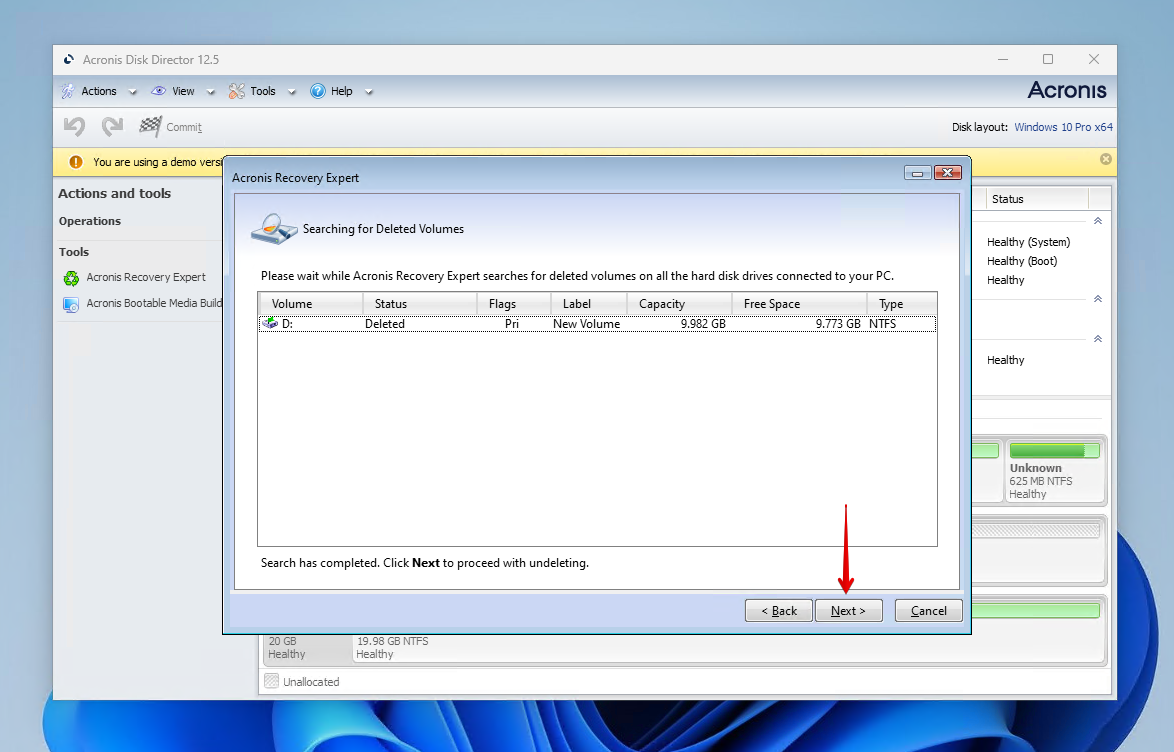
- Click Next once the lost partition is found.
- Click Next.
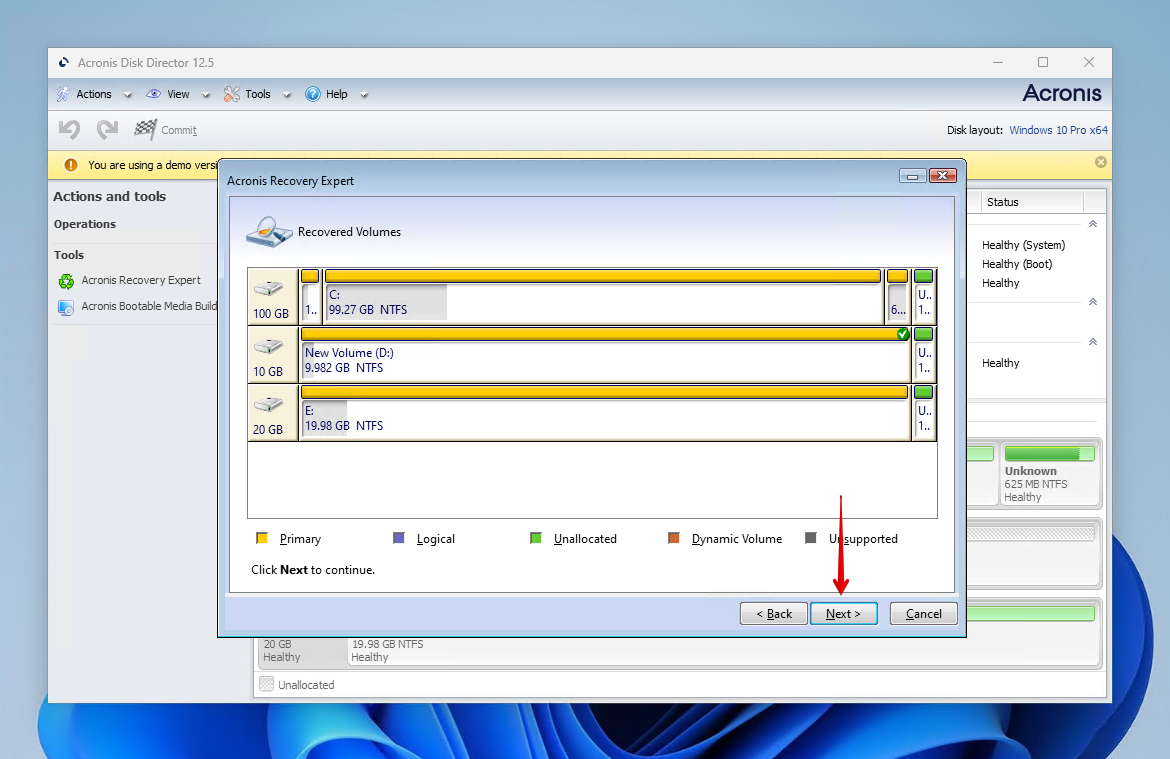
- Click Proceed to finish the recovery of the lost partition.
Conclusion
A lost partition doesn’t need to remain lost. If you act quickly enough, you can recover the lost partition, along with all of the data it contains. First, you should focus on recovering the data from the partition using a data recovery tool like Disk Drill. Once your data is back, you can either create a new partition or restore the old one using an application like TestDisk.
Once your data is back, implement a reliable backup solution so you can avoid going through the hassle of performing lost partition recovery again in the future.
FAQ
- Download and run testdisk_win.exe.
- Select the Create option. Press Enter.
- Select the disk. Press Enter.
- Select the file system. Press Enter.
- Select Analyse. Press Enter.
- Press Enter to begin a quick search.
- Select the lost partition. Press Enter.
- Select the Write. Press Enter to restore the lost partition.
- Press Y to confirm.
- Restart your computer
- Right-click Start. Click Terminal (Admin) (or Windows PowerShell (Admin) on Windows 10).
- Type chkdsk *: /r. Replace * with your drive letter. Press Enter.


