
When going to save a file, we may accidentally save over another file, and erase work that was important to us or that took a long time for us to complete. This can be frustrating and can set us back on a deadline that we may be trying to meet.
In this article we’re going to take a look at how to recover overwritten files. There are multiple ways to recover overwritten files in Windows, so if one isn’t working for you be sure to take a look at the other methods below.
Table of Contents
Is It possible to Recover Overwritten Files?
It can be challenging, but it is still possible to recover overwritten files. The recoverability of files depends on various factors, including OS settings, hardware, firmware, and more.
For instance, the principles of data overwriting differ between Hard Disk Drives (HDDs) and Solid-State Drives (SSDs). SSDs make it more difficult to recover files as they delete data blocks to allocate incoming data digitally.
Generally, there are two scenarios where a file can be considered overwritten:
- A file or folder with the same file name replaces another existing file: In this scenario, the old file’s data still exists on the drive but is stored in a different location.
- Overwriting data on the drive: In this case, the file or folder is written to the same dedicated space on the drive where a previous file was stored, effectively erasing the old data allocated in that space.
In the first scenario, the data still remains on the drive but becomes invisible to Windows. This increases the chances of successful file recovery.
In the second one, however, the data might no longer exist on the drive and have a lower chance of being successfully recovered.
How to Recover Overwritten Data
Accidentally overwriting your file can be distressing. However, when it comes to data loss, the faster you act, the better your chances of successfully retrieving your files.
By following these straightforward methods, you can initiate the data recovery process immediately and prevent further data loss.
Method 1:Use Software to Recover Overwritten Files
While the chances of recovering overwritten data are generally lower compared to deleted or hidden files, you can still attempt to retrieve your files using powerful data recovery tools.
It is crucial to initiate the data recovery process immediately when dealing with overwritten files, as time plays a significant role in increasing the likelihood of successful recovery.
Disk Drill is a reliable data retrieval app that can scan huge file systems and even predict the recovery chances for each file it scans. It can detect and recover almost every file type, ranging from documents, photos, videos, audio, raw files, Adobe files, and so much more.
Windows users can also avail themselves of the free version of Disk Drill, which allows for the recovery of up to 500 MB of data at no cost.
- Download and install Disk Drill for your computer.
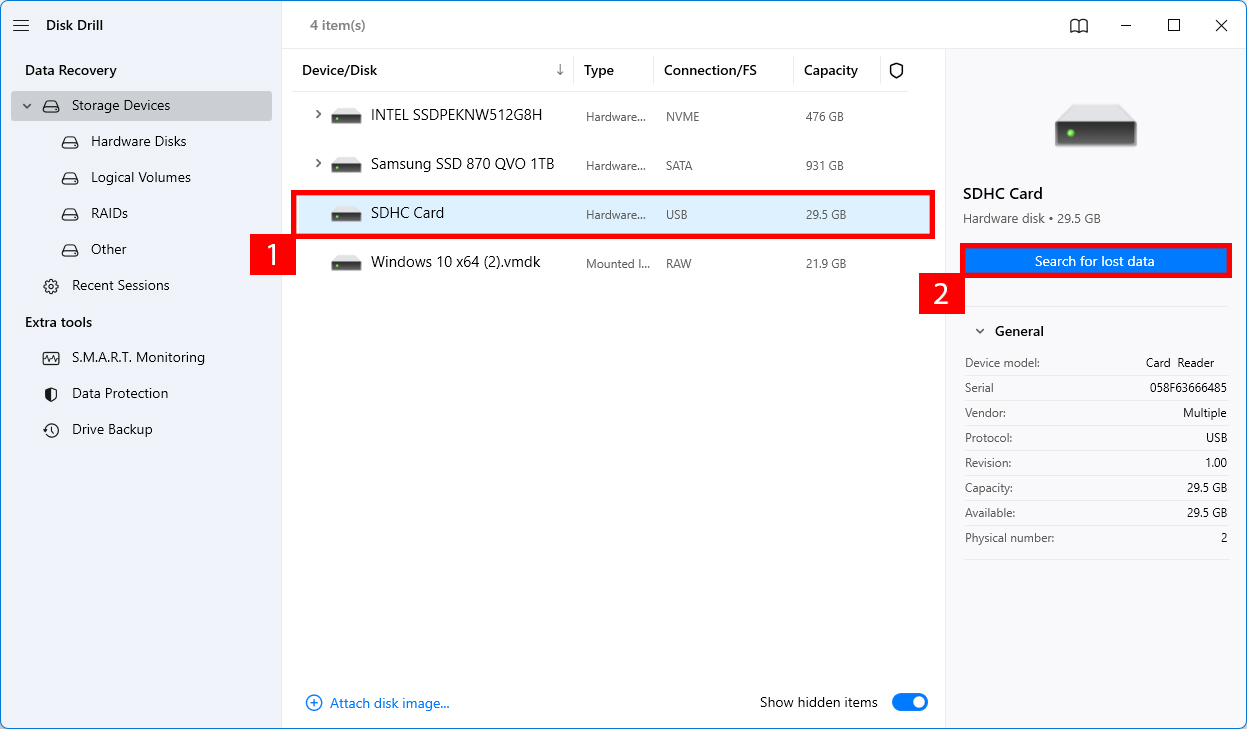
- Select the Device/Disk that you would like to scan for the overwritten files and then click on the Search for lost data button in the right part of the window.
- Wait for the scanning process to complete.
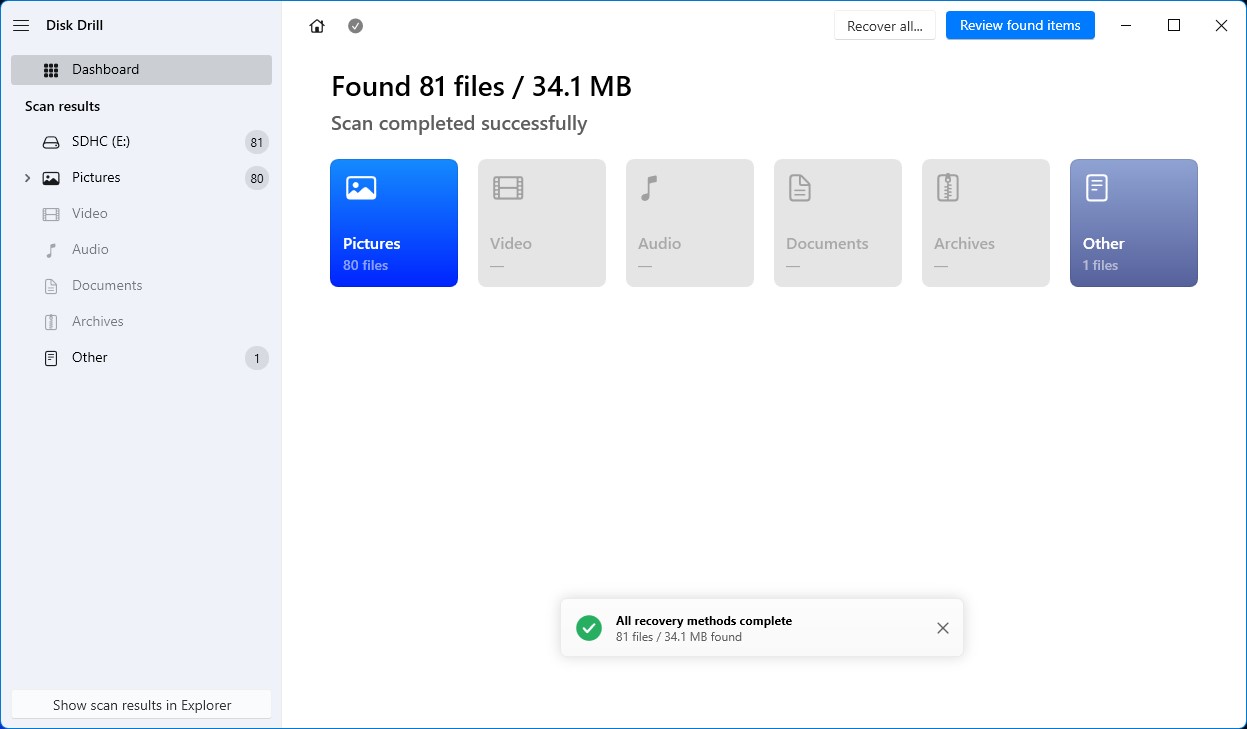
- Click Review Found Items, or simply click on a filetype to immediately filter only certain types of files you look for.
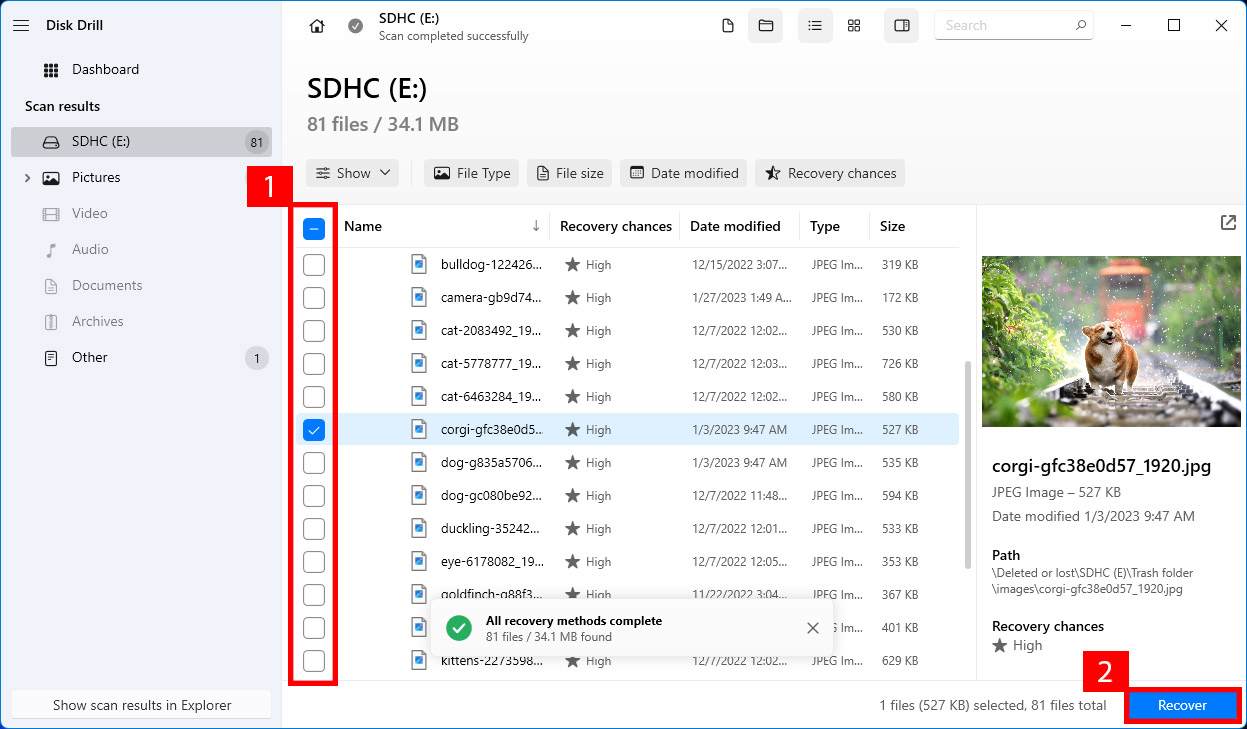
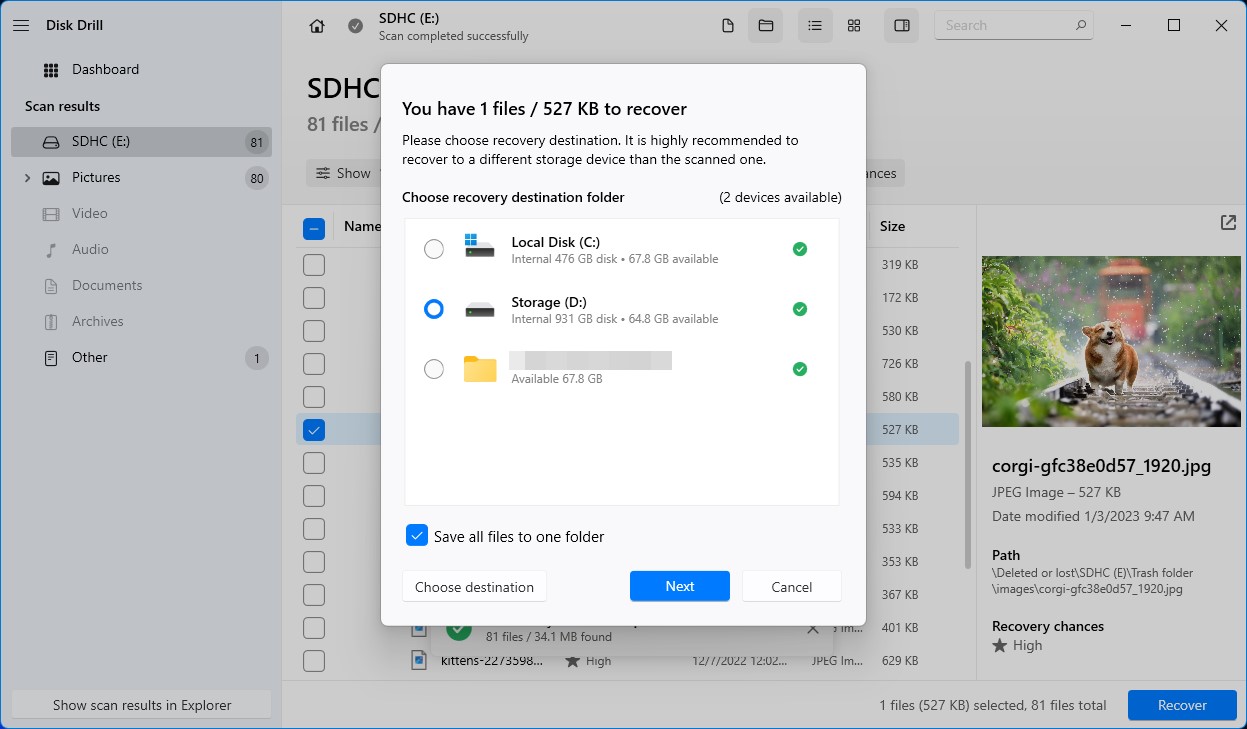
- Check the files that you would like to recover and then choose Recover.
- Choose a path for Disk Drill to recover the files to.
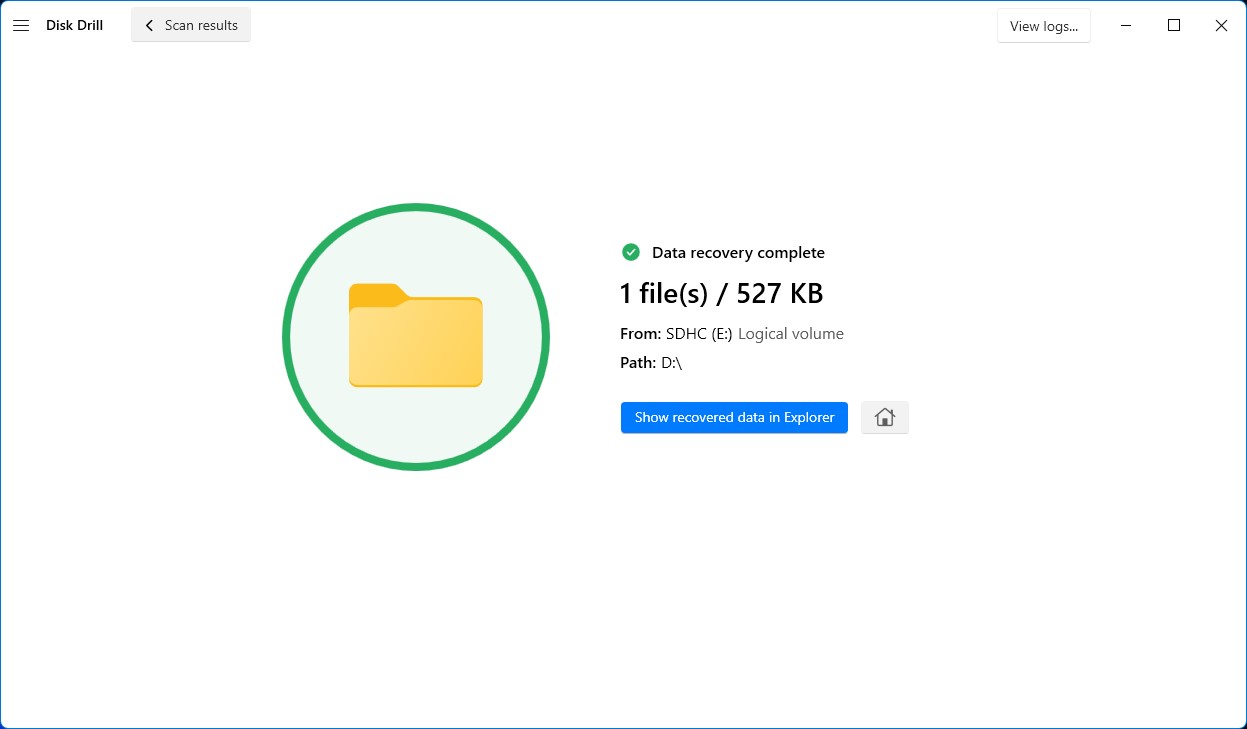
- You will then be greeted by a confirmation message letting you know that the recovery was successful.
While I choose to recover Word files in this example, recovering other types of data can be accomplished in the same way as shown from the steps above.
Method 2:Recover Overwritten Files Using Previous Versions
Previous versions are copies of files that Windows creates as part of a backup or as a restore point. Windows does this automatically for you and this is a feature that is built right into the operating system.
If you have modified a folder or file, sometimes you can right-click on it and restore it back to a previous version which, would allow you to recover replaced files should you accidentally overwrite one.
- Find the folder or file that you want to restore to a previous version of.
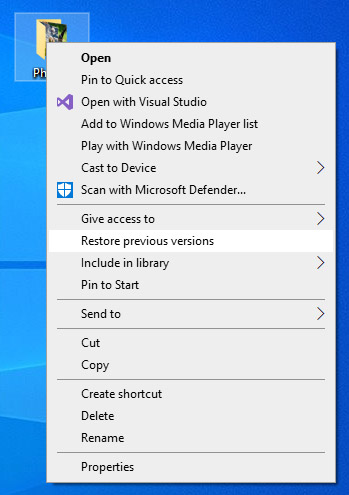
- Right-click on the file or folder and select Restore previous versions.
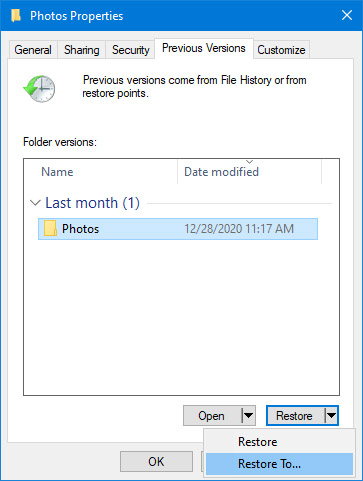
- You will then be greeted by a window that will list all of the previous versions that are available to you from within that app. If you have some, they will show up here. Select Open if you would like to view it beforehand to ensure you’re recovering the correct version of the overwritten file.
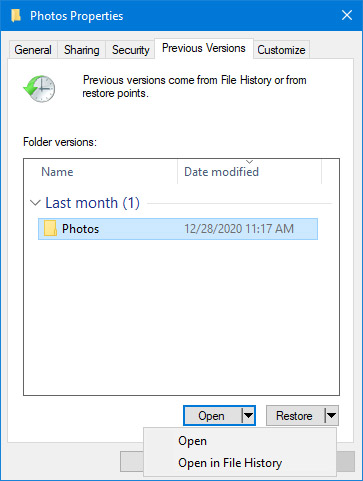
- Then, select the Restore To option after you have confirmed that this is the correct folder or file.
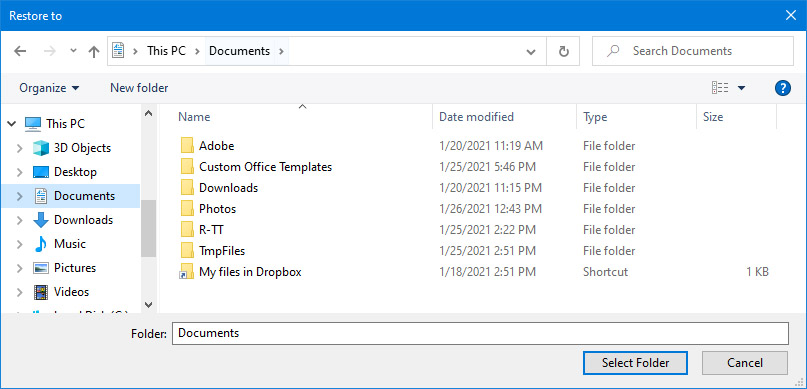
- Lastly, choose a location to restore the overwritten folder or file to.
That’s it! Being able to restore to a previous version is handy as it doesn’t require you to set anything up ahead of time. Windows is doing this for you automatically as you use your machine.
Method 3:Recover Overwritten Files from a Backup
If you back up your Windows machine to an external hard drive, then you can recover overwritten files from there. This would be a drive that you plug into your machine or a wireless hard drive that your computer has access to.
Recovering overwritten files from a hard disk is a much more reliable method as this will encompass all of the files that you have on your Windows computer, it isn’t limited to a per app basis.
- Launch Settings > Update & Security > Backup.
- If you have a backup set up, it will appear here. You can then restore your files back onto your machine.
If you don’t see a backup showing up by following the steps above, I would highly recommend that you set one up and back up your computer on the regular. No one thinks that data loss is going to happen to them and it’s best to be prepared.
Method 4: Use Software’s Built-In Backup Features
Many apps now include their own backup solutions, such as Adobe, AutoDesk, and Microsoft Office products. This feature allows them to create backup files and automatically save your work every now and then.
The Autorecover feature can be set up either automatically or manually in the settings of each respective application, although it is typically enabled by default.
However, it’s important to note that relying on this recovery method may not guarantee the retrieval of the most recent version of your work. Since autosave occurs at fixed intervals, it’s possible that the most recent changes were not saved immediately prior to the data loss.
In this example, we will demonstrate how to use Microsoft Office’s AutoRecover to retrieve a previous version of a document.
Microsoft Office also comes with a cloud feature that will save your work every time that you make a change automatically if you don’t mind having your information stored on the cloud.
- Launch Word or Excel.
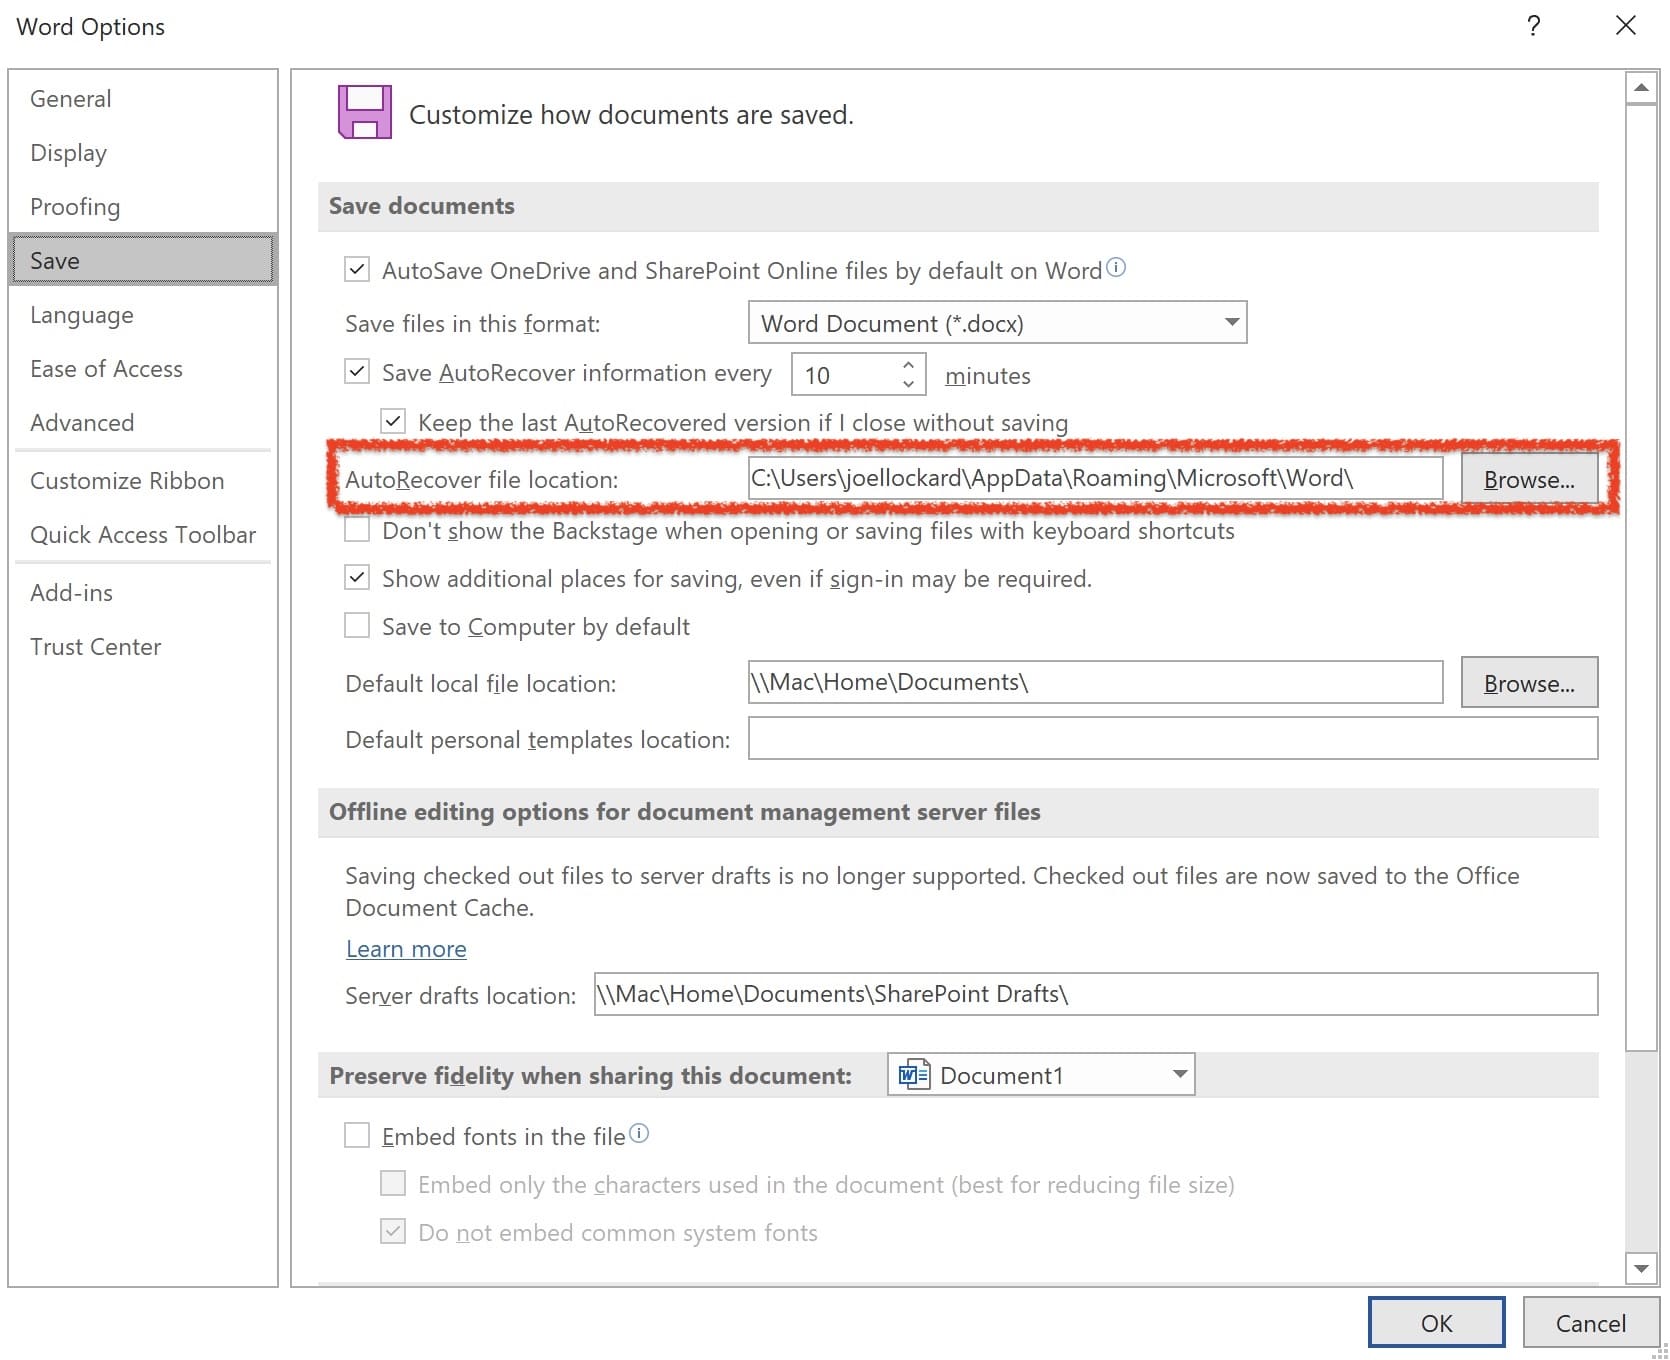
- Go to the navbar and choose File > Option > Save.
- Within this window, you can find the AutoRecover location for where your files are being saved to. You can also see how often AutoRecover is saving your work for you. You can note on mine, that it is saving every 10 minutes and that this is the default setting.
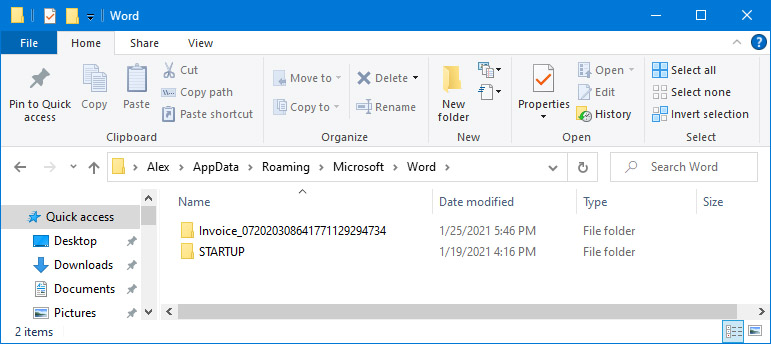
- Click on the Browse option to search through your recoverable files. When you click “Browse”, it will be a dialog box for selecting the auto-recovery folder initially, but not for opening documents from there. You can simply follow this path and then search for folders to locate your files. Find the file that you would like to recover and click OK to retrieve overwritten files.
Conclusion
Recovering overwritten files or folders on Windows can be challenging, but it is not impossible. This is particularly true if you have enabled Windows backup features or have File History turned on.
If you do not have any backups, you can check if the applications you used have autorecover features available. However, it is highly recommended to promptly use reliable third-party data recovery apps like Disk Drill to maximize the chances of successful file recovery.


