 Computers are indispensable tools for many people today, often housing important files for both work and personal life. That being said, it can be incredibly disheartening to encounter files getting deleted automatically due to some sort of malfunction or operating system feature.
In this guide, we’ll discuss the various ways you can prevent automatic file deletion on Windows PCs, as well as the different methods you can employ to recover data that’s already been lost.
Table of Contents
What Causes Windows to Delete Your Files?
There are quite a few reasons that could seemingly lead to Windows deleting files by itself, such as operating system options and malware interference. Here are some of the most common causes for automatic file deletion on Windows computers:
| Reason | Description |
| 🖱️ Malfunctioning mouse, stuck Delete key or faulty drivers | Faulty peripherals may lead to files being deleted from your PC without you realizing it. A sticky Delete key on your keyboard, for example, could periodically delete files that you have highlighted. The same goes for a mouse that’s going haywire. Broken drivers can also have a similar effect, as they may be causing your peripherals to function incorrectly. |
| 🛡️ Configuration of Windows Defender or other Antivirus software | Windows Defender or other third-party antivirus programs often come with a feature that allows them to automatically delete files that they deem unsafe or infected. It’s not uncommon for these kinds of programs to detect false positives, leading them to erase important files that they find dangerous. |
| 👤 Using a temporary user account | Temporary Windows user accounts are a great way to utilize a computer without having to commit to a complete profile. But one of its major disadvantages is that these types of accounts purge all files once the computer is shut down. |
| 🧹 Storage Sense configuration | Storage Sense is a built-in Windows feature that proactively frees up storage space by wiping files that it thinks you do not need. This includes files in the Recycle Bin, Downloads folder, and temporary folders. If you’ve lost files from these locations, there’s a good chance that Storage Sense is the culprit. |
| 🕷️ Malware or Virus | Malware can cause all sorts of problems with your PC, including slowing down your PC’s performance, making your data vulnerable to outside parties, and deleting important files. MongoLock is a notorious form of malware that immediately starts deleting files on your computer as soon as it’s infected. |
How to Stop Automatic File Deletion
Prevention is always better than a cure. With that said, here are some of the ways you can stop files from being automatically deleted on your Windows PC.
Method 1:Troubleshoot Input Devices
Are files getting deleted automatically when clicked? If that’s the case, then there’s a good chance that one of your peripherals is malfunctioning. Double-check that your mouse is functioning as it should by connecting it to another PC. You’ll also want to make sure that the Delete key on your keyboard isn’t stuck. A symptom of this will be if the сonfirm file delete appears continuously.
Another thing to consider is whether your mouse or trackpad allows macro commands. If it does allow macro commands, make sure there isn’t one with a Select > Delete sequence. Finally, you should try reinstalling or updating your peripheral drivers using Windows Device Manager.
Method 2:Add Files to Antivirus Exceptions
If you find that certain .dll or .exe files are going missing whenever you download them from the internet or attempt to launch them, the most likely reason is that Windows Defender keeps deleting files it finds threatening. The same goes for most other antiviruses. As long as you’re completely sure that the file or source is safe, you can add the file or website to the exception list of your antivirus software.
Windows Defender is a type of antivirus that comes with all modern copies of Windows, though many people opt for third-party programs instead. Whichever you use, the method of adding a file or website to the exclusions list is largely the same for most antiviruses.
For the purposes of this guide, we’ll walk you through the steps on how to add a file or website to the exclusions of AVG AntiVirus.
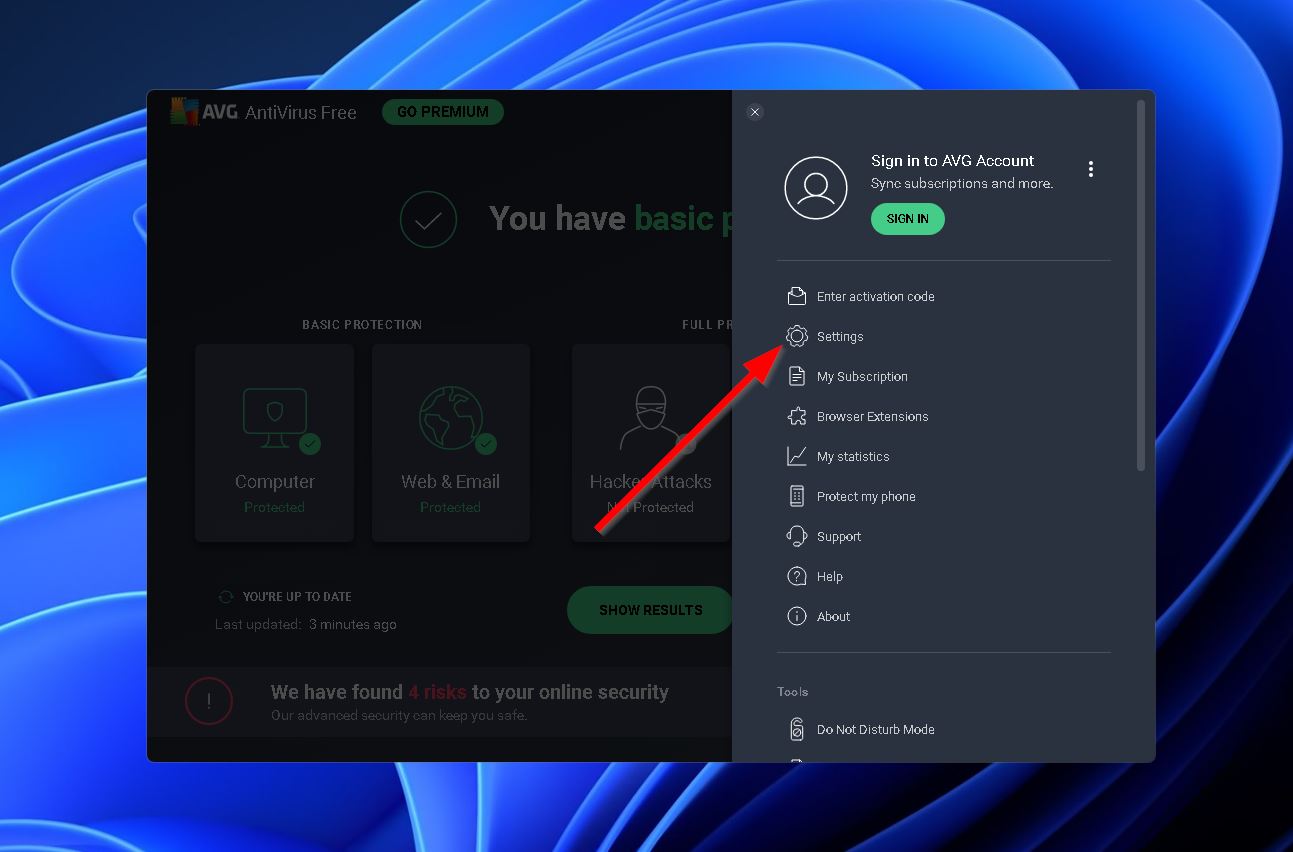
- To get started, launch the AVG AntiVirus interface, then click “Menu” in the top-right corner and select “Settings.”
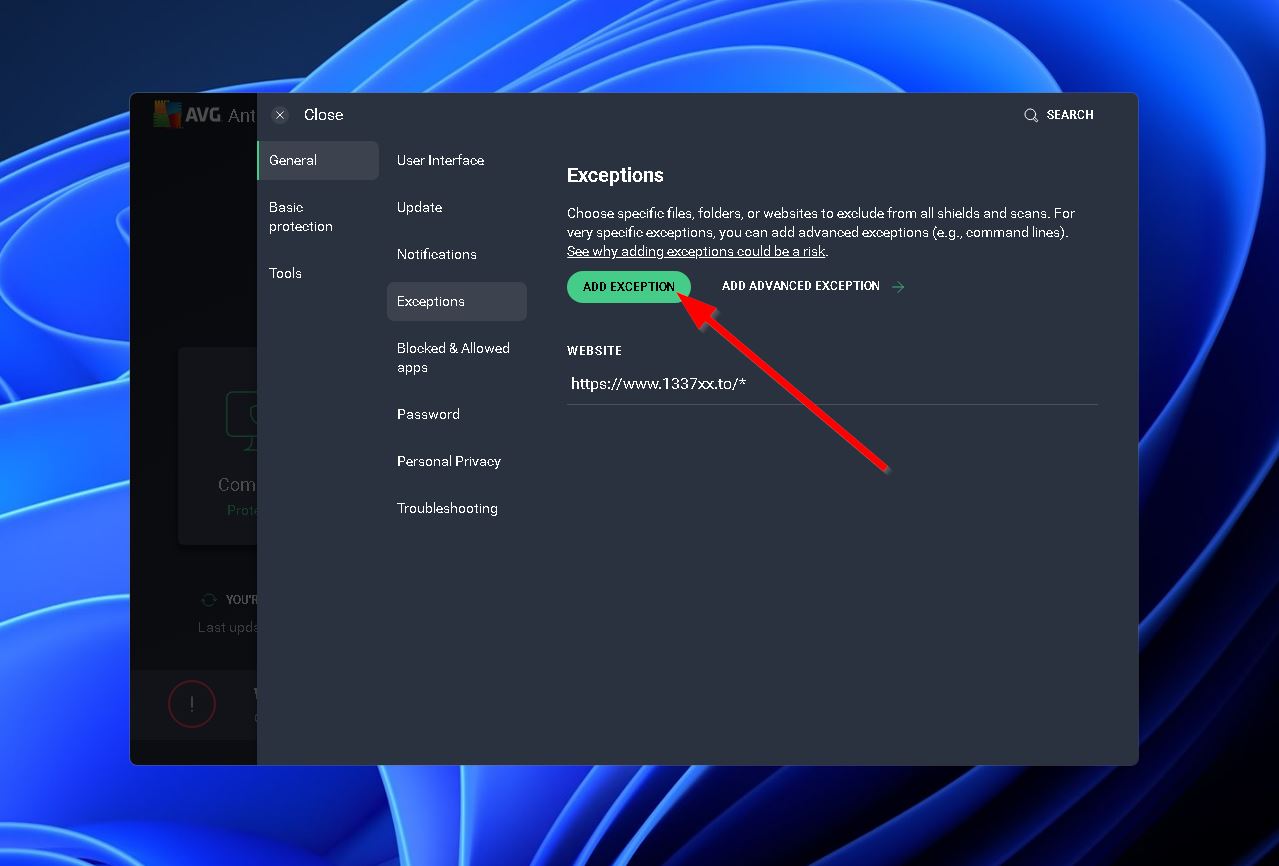
- Then, under “General,” select “Exceptions.”

- Click the “ADD EXCEPTION” button.
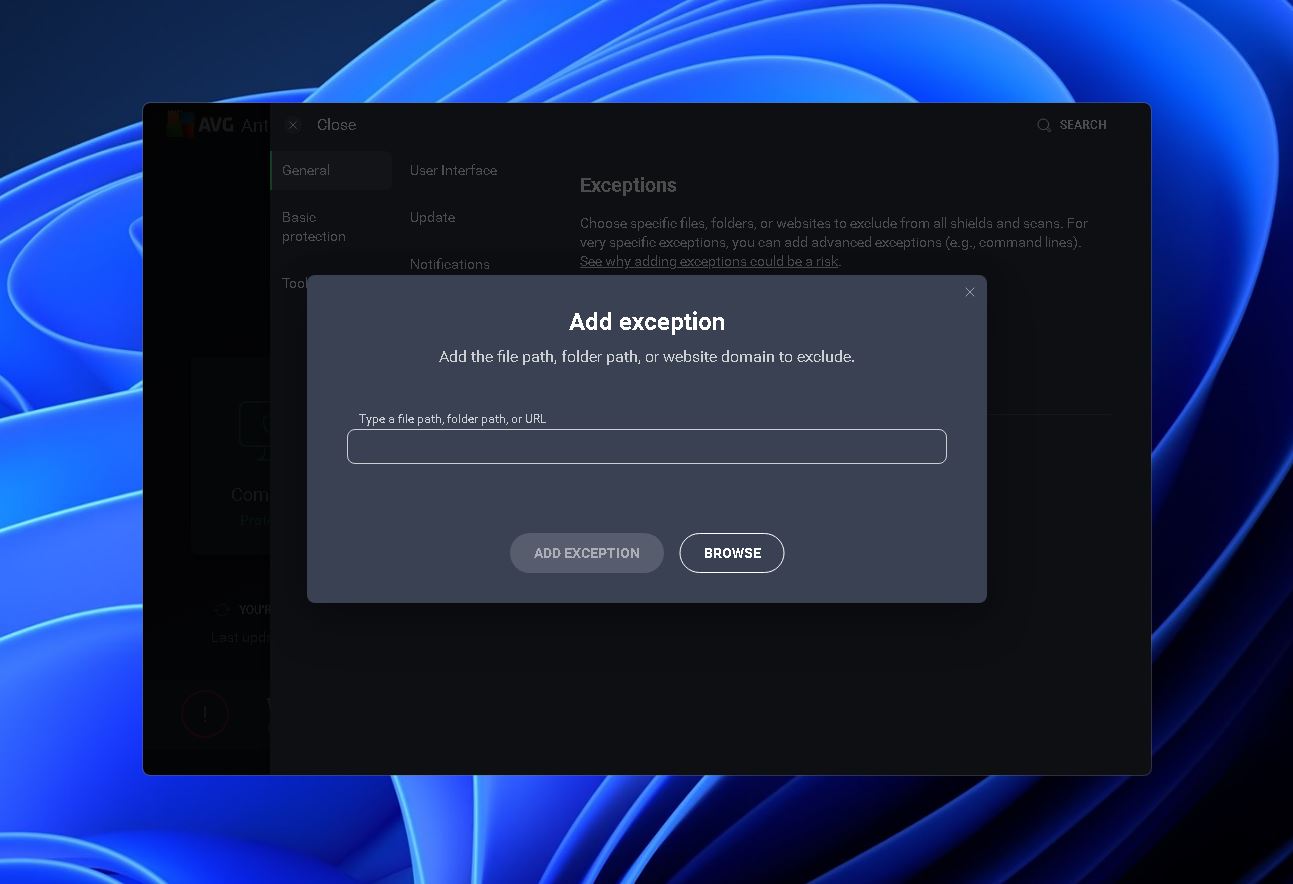
- After that, enter the file/folder path or URL of the file or website you’d like to add as an exception. You can also click the “BROWSE” button to select a file or folder from your computer.
Method 3:Reconfigure Storage Sense
Storage Sense is a feature included in relatively recent versions of Windows that frees up storage space by automatically deleting files from specific folders and locations, such as Recycle Bin, Temp folders, and your Downloads folder.
In case you notice Windows deleting files automatically from any of the locations as mentioned above, you’ll want to check if this feature is enabled and then disable it.
To get started, simply follow the steps below:
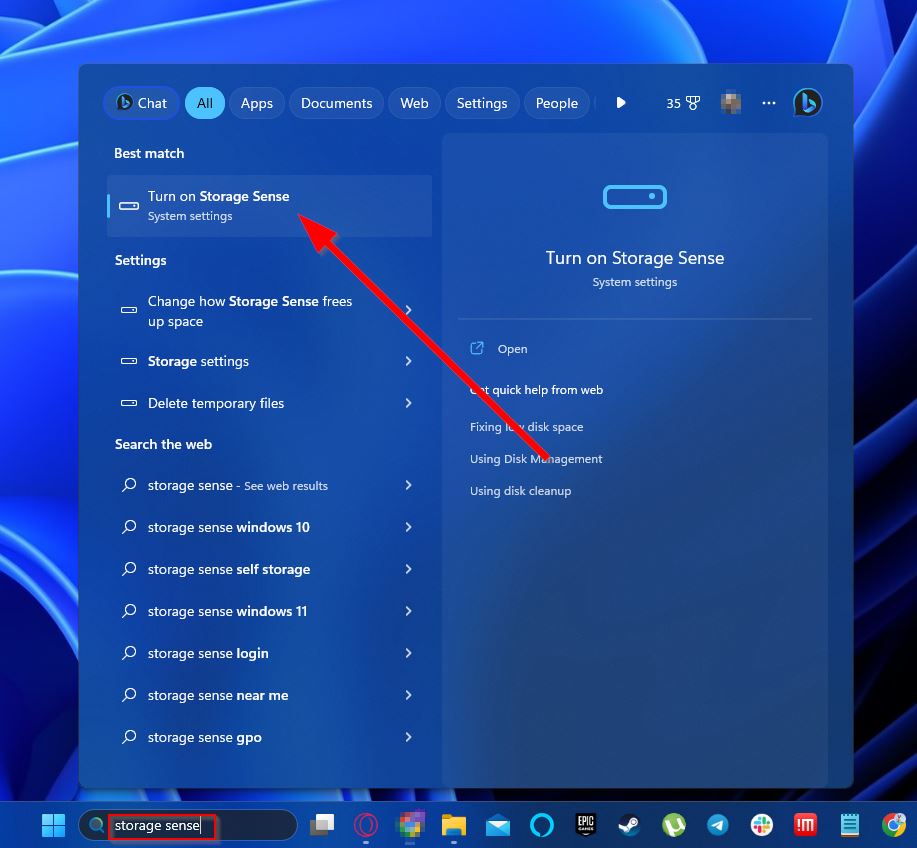
- First, type “storage sense” into your taskbar search feature and select the result labeled “Turn on Storage Sense.”
- Next, click on “Storage Sense” under “Storage Management.”

- Either switch off “Automatic User content cleanup” or set the “Delete files in my Downloads folder if they haven’t been opened for more than:” option to “Never.”
Method 4:Run Antivirus Scan
There are quite a few viruses and malware that can cause your files to be deleted or go missing, so it’s worth running an antivirus scan to weed out potential invaders. Windows Defender generally comes pre-installed with Windows these days, though some people prefer going with a third-party antivirus program.
For this guide, we’ll be using AVG AntiVirus. Here’s what you can do:
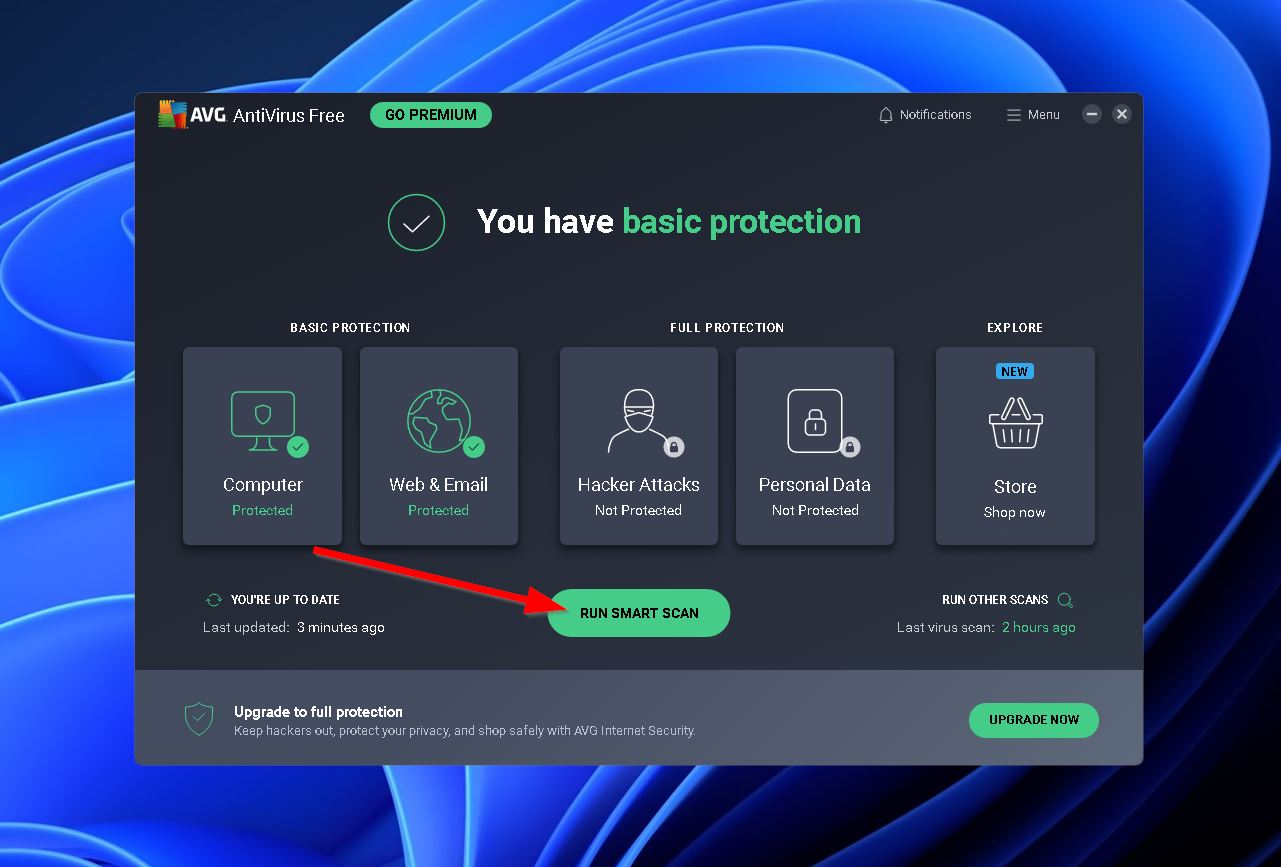
- First, launch the AVG AntiVirus interface.
- Next, click the “Smart Scan” button on the home screen. This will scan and automatically get rid of any viruses or malware the program comes across.
Method 5:Check your User Account
If you notice that all the files created or downloaded during a particular session seem to disappear after restarting or shutting down your PC, then your user profile has either been corrupted, or you’re utilizing a temporary profile. Keep in mind that temporary profiles were designed to purge accumulated data after restart/shutdown, so avoid using them if you’re planning on storing files on the computer.
If you’re not using a temporary user account, start by opening a command prompt with admin privileges, then execute the command sfc /scannow.This will scan your system files for corruption and replace any affected files with cached copies.
In case you run into a “Windows Resource Protection found corrupt files but was unable to fix some of them” error, run the DISM /online /cleanup-image /checkhealthDISM /online /cleanup-image /checkhealth command instead. This is a repair feature that aims to scan and fix issues with the Windows image if possible. If no errors turn up, but you’re still losing all your files despite not using a temporary user account, then you’ll need to create a new local user account.
How to Recover Lost Files After Files Stopped Deleting Automatically
Once you’ve stopped your Windows computer from automatically deleting files, the next thing to do is recover the data that’s already been erased.
Method 1:Check Recycle Bin
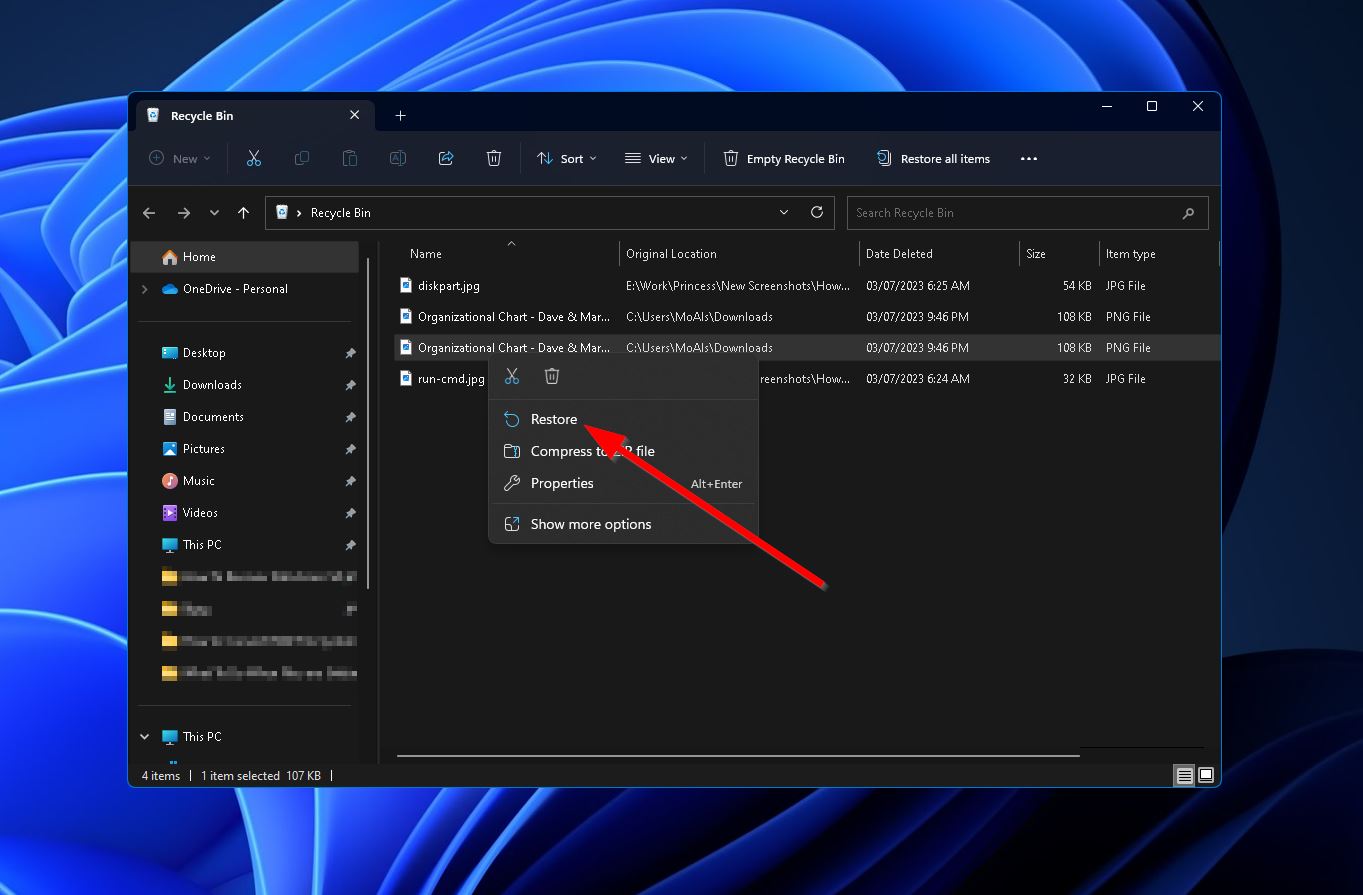
The first place to start looking for deleting files is the Recycle Bin which you can access from your desktop. If you find any of your deleted files in there, simply highlight them, then right-click and select “Restore.”
Method 2:Check Antivirus Quarantine
Antiviruses have a quarantine vault that houses threatening files that the program comes across. Some of your missing files may have been flagged by the antivirus and sent to quarantine, so it’s definitely worth checking. Here’s how to access the quarantine vault in AVG AntiVirus:
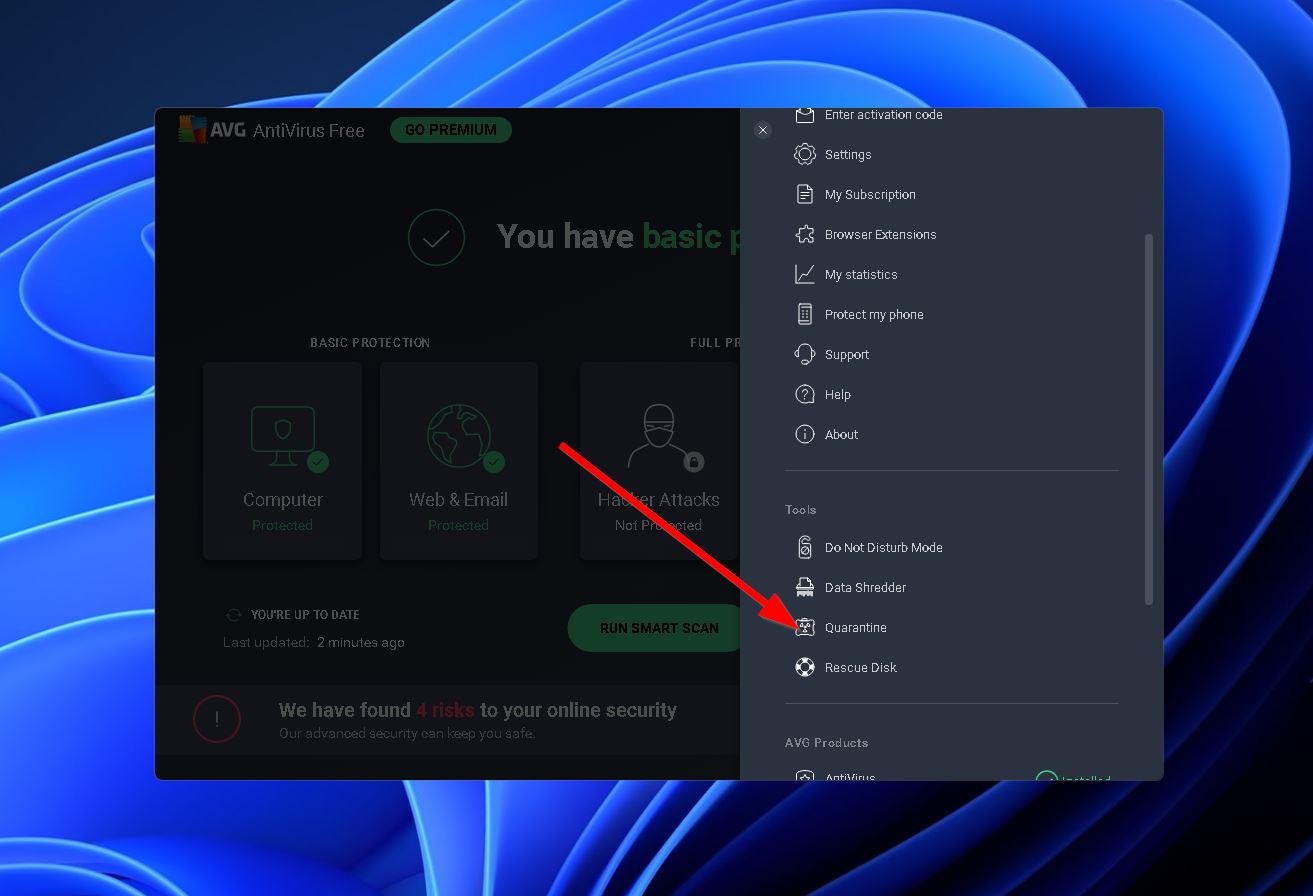
- To get started, launch the AVG AntiVirus interface, then click “Menu” in the top-right corner and select “Quarantine.”
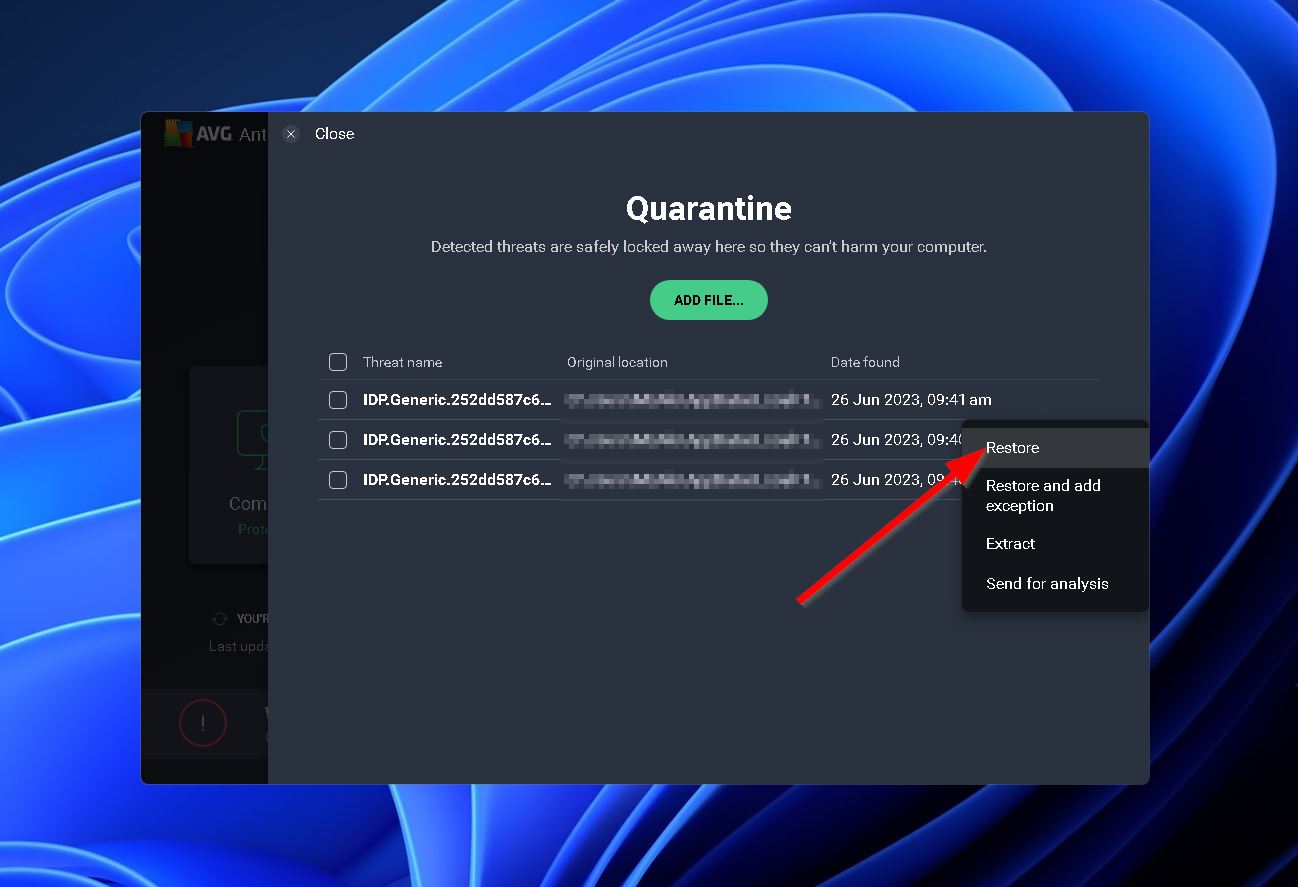
- You’ll see a list of all the files currently housed in quarantine. If you’re sure that the file is a false-positive and want to recover it, you can click the three dots icon on the far right and select “Restore.”
It’s worth noting that antivirus programs sometimes delete quarantined items after a certain period of time. Should that be the case, you can recover files deleted by an antivirus using a data retrieval program.
Method 3:Data Recovery Software
Should you have no luck with the Recycle Bin or antivirus quarantine, your next course of action is to use an effective data recovery program to retrieve your missing files.
Disk Drill is one of the most well-known options on the market, given its exceptional recovery rates, expertly designed user interface, and advanced file type and file system compatibility. It works with Windows 7/10/11, but keep in mind that Windows 7 and lower require an older version of the program.
For those who are unwilling to shell out money before testing a product, Disk Drill comes with a free trial version that lets you tinker with all of the app’s features and recover up to 500 MB worth of files.
Here’s a quick step-by-step guide on how to use Disk Drill to get back your deleted files:
- To get started, navigate to the Cleverfiles website, download the newest version of Disk Drill, then install it on your computer.
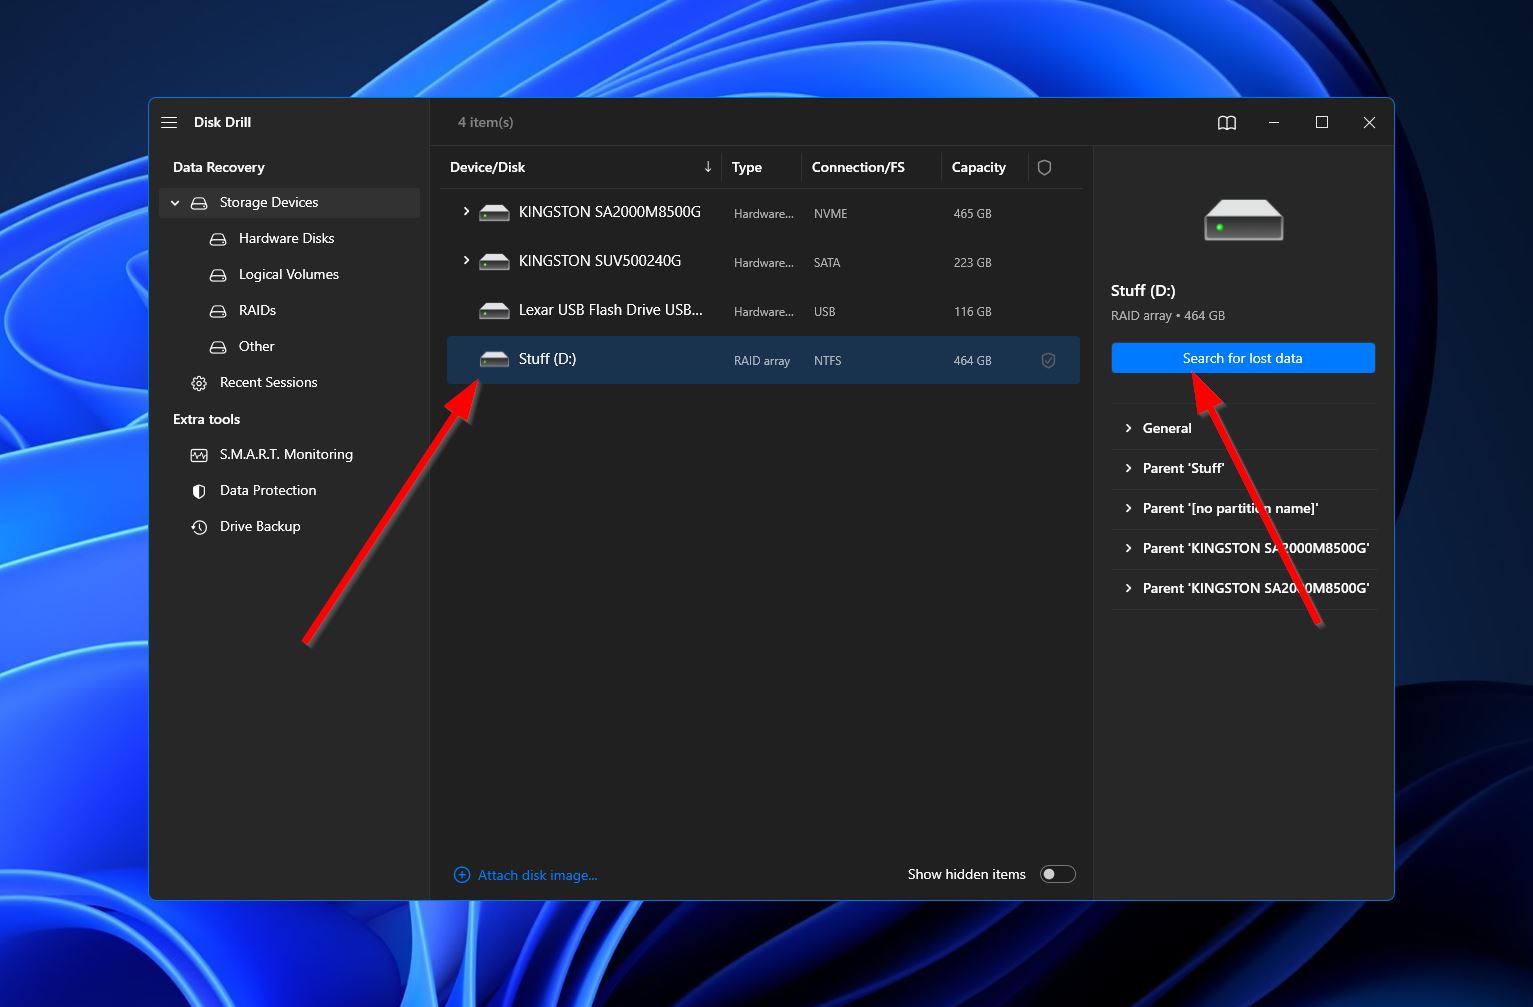
- Once successfully installed, launch Disk Drill, then select the storage device where your lost files were last located and click “Search for lost data.”
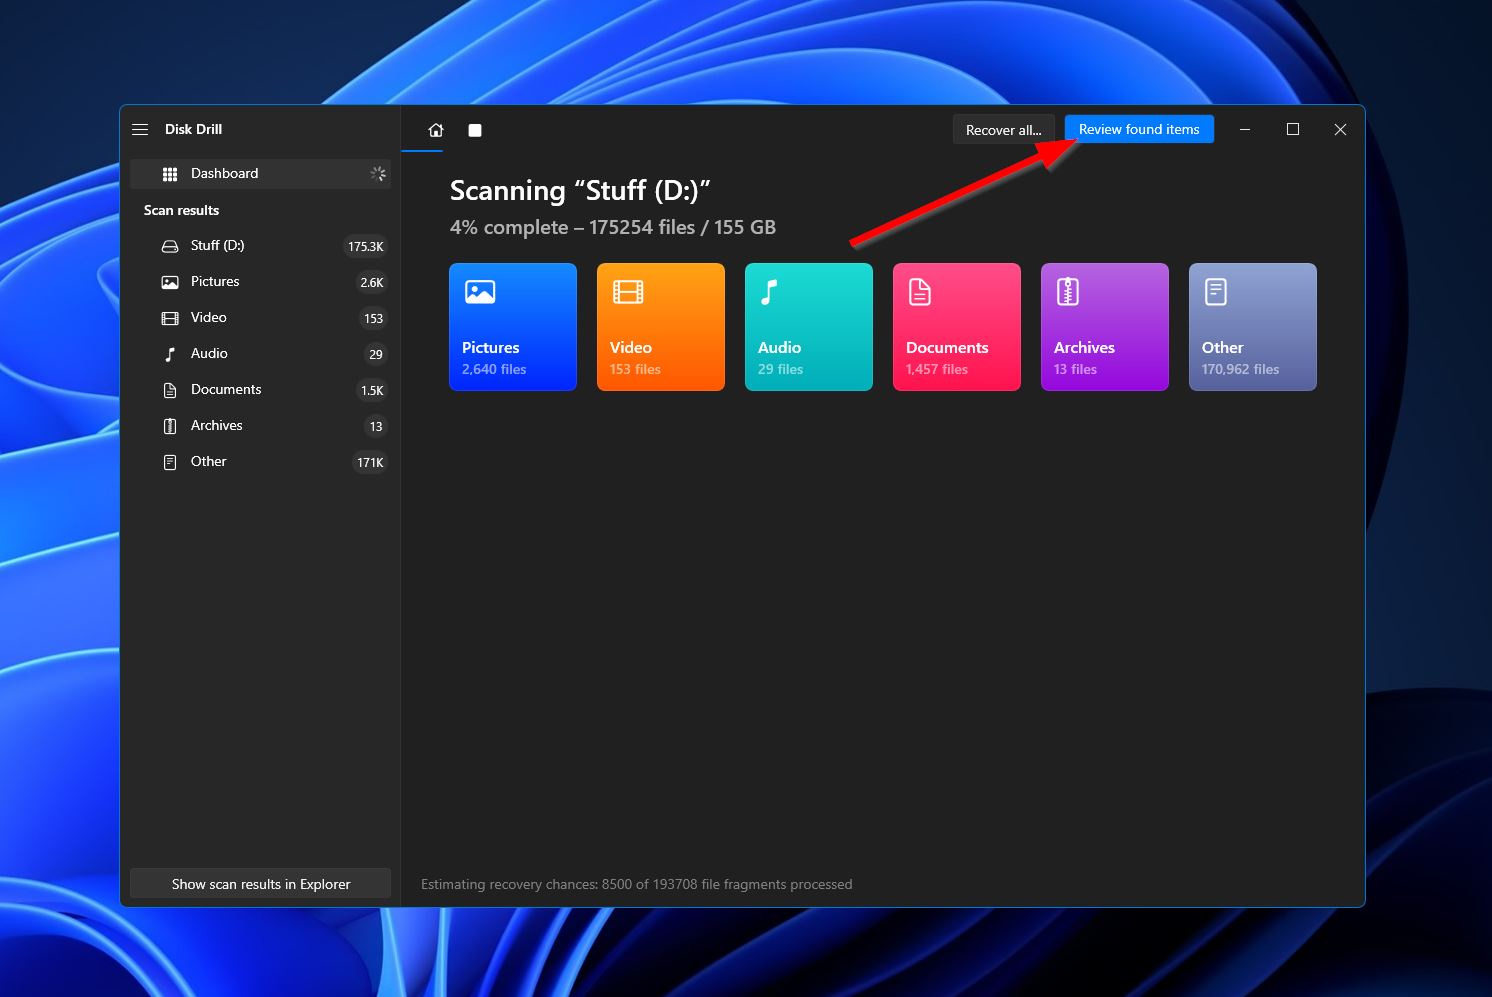
- Upon clicking, the app will begin scanning your drive for any recoverable files. Meanwhile, you can either wait for the scan to complete or click the “Review found items” button at the top-right corner to head to the results section as the scan continues.
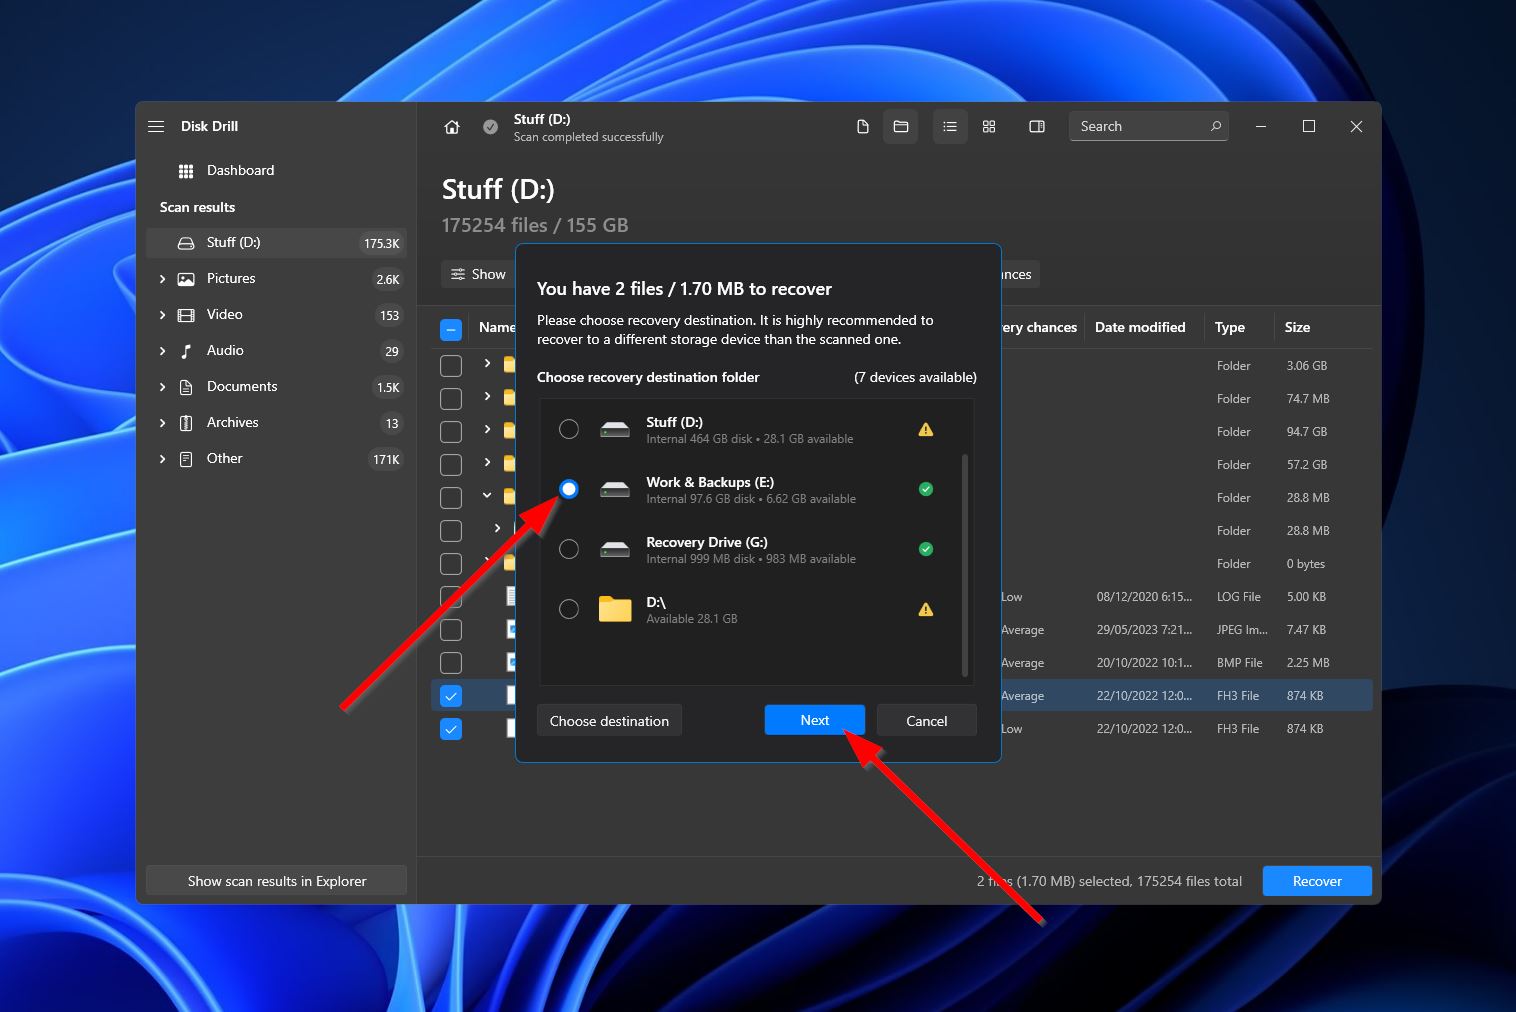
- When you’re at the results screen, you can filter the results using the categories on the left or the search bar at the top right. The search feature accepts both file names and file extensions. Once you locate the deleted files you’re after, highlight them by ticking the checkbox next to their names, then click “Recover.”

- After that, choose a destination folder for your recovered files. Click “Next” when you’re ready.
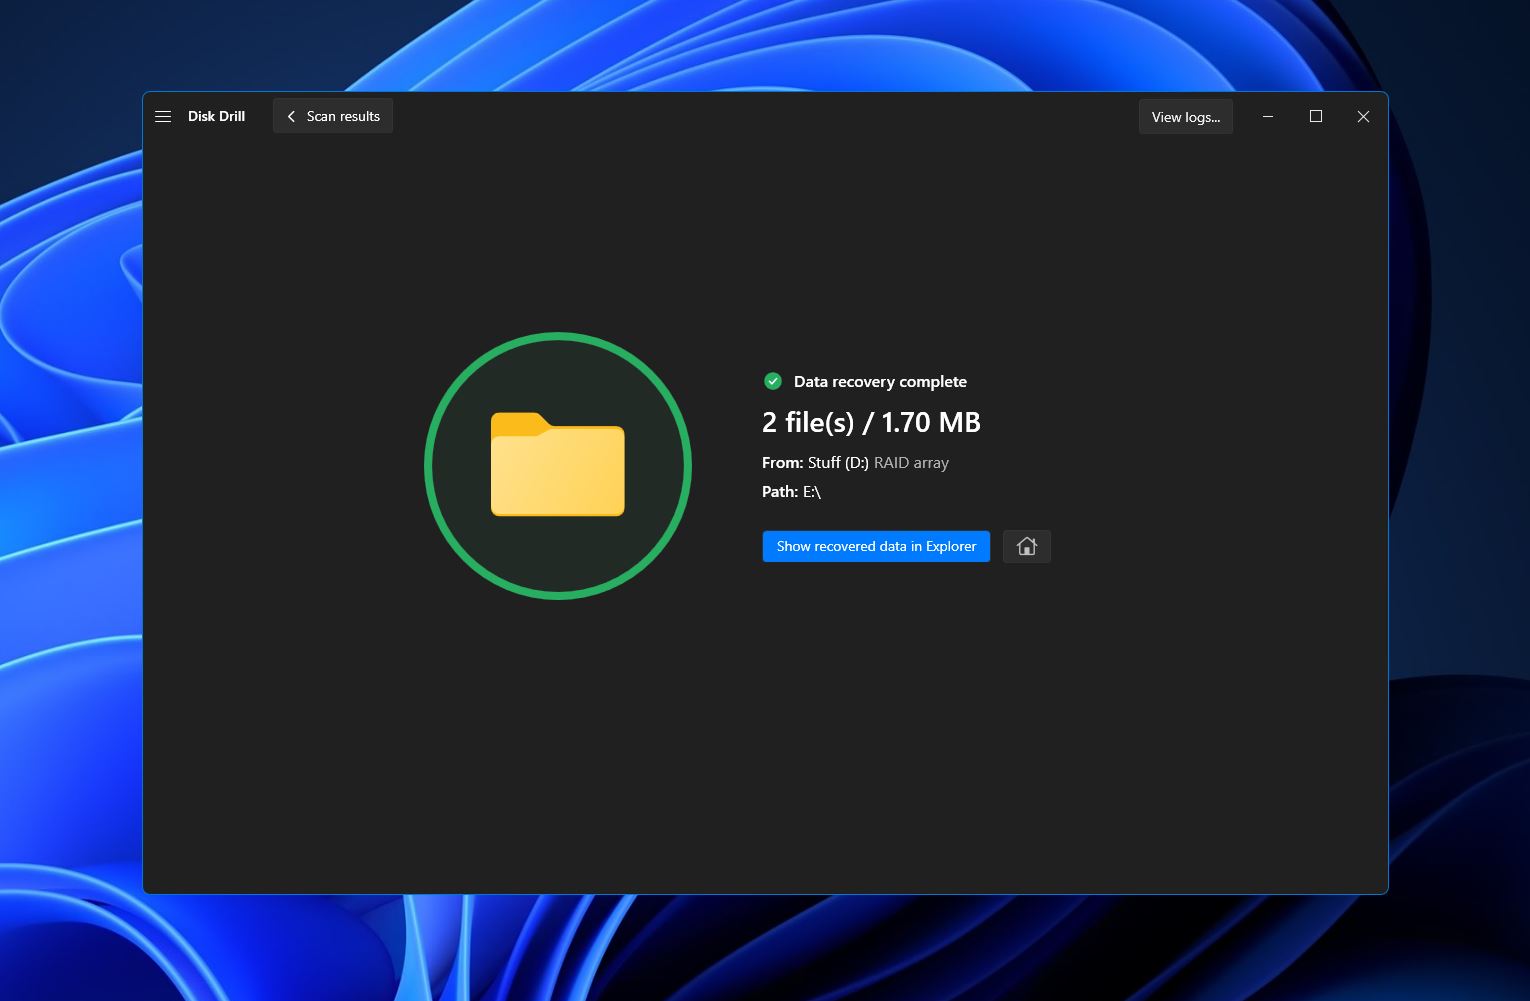
- Disk Drill will now begin the recovery process. Once complete, you’ll get a message and a button labeled “Show recovered data in Explorer.” Click it if you want to go straight to the folder with your retrieved files.
Conclusion
Files being automatically deleted can be a huge problem generally caused by an operating system feature, faulty hardware, antivirus settings, or a malware attack. To remedy this issue, you should start by figuring out the reason for the automatic deletion and put a stop to it. From there, you can work on recovering any files that may have been lost.


