 Microsoft’s ReFS file system may have been developed with data security in mind, but that doesn’t make it immune to a host of different data loss scenarios. Fortunately, losing data in a ReFS partition doesn’t mean it’s gone for good, and there are a couple of tried-and-tested methods you can use to facilitate file retrieval.
In this guide, we’ll go through the best ways to use a Windows computer to recover ReFS partitions that have become inaccessible or encountered data loss.
Table of Contents
What You Should Know About ReFS
Resilient File System, or ReFS for short, is a relatively new file system developed by Microsoft that focuses on safeguarding file integrity for large sets of data against corruption. It was meant to be a successor to the NTFS file system and first made its appearance in Windows Server 2012.
While the resiliency and scalability of ReFS surpass those of the NTFS file system, it comes with some significant drawbacks, such as the inability to act as a Windows boot drive, higher resource consumption, and a lack of file system encryption/compression.
ReFS is supported by Windows Server 2012 up to Windows 10, though the Windows 10 ReFS volume creation feature was removed in the 2017 Fall Creator update save for the “Enterprise” and “Pro for Workstations” versions. Recent updates from Microsoft suggest that Windows 11 will soon be getting ReFS support.
Below are some of the most common reasons that lead to the loss of a ReFS partition:
| Reason | Description |
| 🪟 Windows Update | A recent Windows update may have removed support for older versions of ReFS, rendering your partition inaccessible on your operating system. |
| 💥 Corruption | While ReFS is more resistant to corruption compared to other file systems, it’s still vulnerable to it as a result of virus/malware attacks, bad sector accumulation, and drive damage. |
| 🗃️ Accidental Formatting | No matter how secure a file system is, accidentally formatting your drive remains one of the most common data loss scenarios, even when it comes to ReFS. To recover deleted partitions or those that have been accidentally formatted, your best chance is to use a top-notch data recovery program. The same goes for NTFS partition recovery. |
Can You Recover the ReFS partition?
Although ReFS is a fairly uncommon file system, it is possible to recover partitions in this format. That being said, there aren’t a lot of utilities out there that can restore ReFS partitions, and creating a new one with default settings may lead to your files becoming irrecoverable.
The recommended course of action is to perform a reformat on the partition and select ReFS as the file system once more, though you’ll want to recover important files before you do this if you want to avoid data loss. This can be done using certain third-party applications or by utilizing one of Microsoft’s built-in Windows tools.
How to Recover the ReFS Partition
There are a couple of tried-and-tested methods for retrieving data from an inaccessible ReFS partition. The first is through the use of a quality data recovery program, while the other leverages the Windows ReFSUtil tool.
Method 1:Using Professional Data Recovery Software
Using a data recovery solution is a reliable method for retrieving files from your ReFS partition, though you’ll need a program that supports the file system. Disk Drill is a highly recommended option, offering a free trial that lets you recover up to 500 MB worth of files.
On top of that, the app boasts exceptional recovery rates, advanced scanning speeds, and an expertly designed interface that’s welcoming to both newbies and advanced users.
Here’s a quick step-by-step guide on how to use Disk Drill to recover ReFS partitions:
- To get started, download the most recent version of Disk Drill and make sure it’s properly installed on your computer.
Note: Windows 8 and below require an older version of the program.
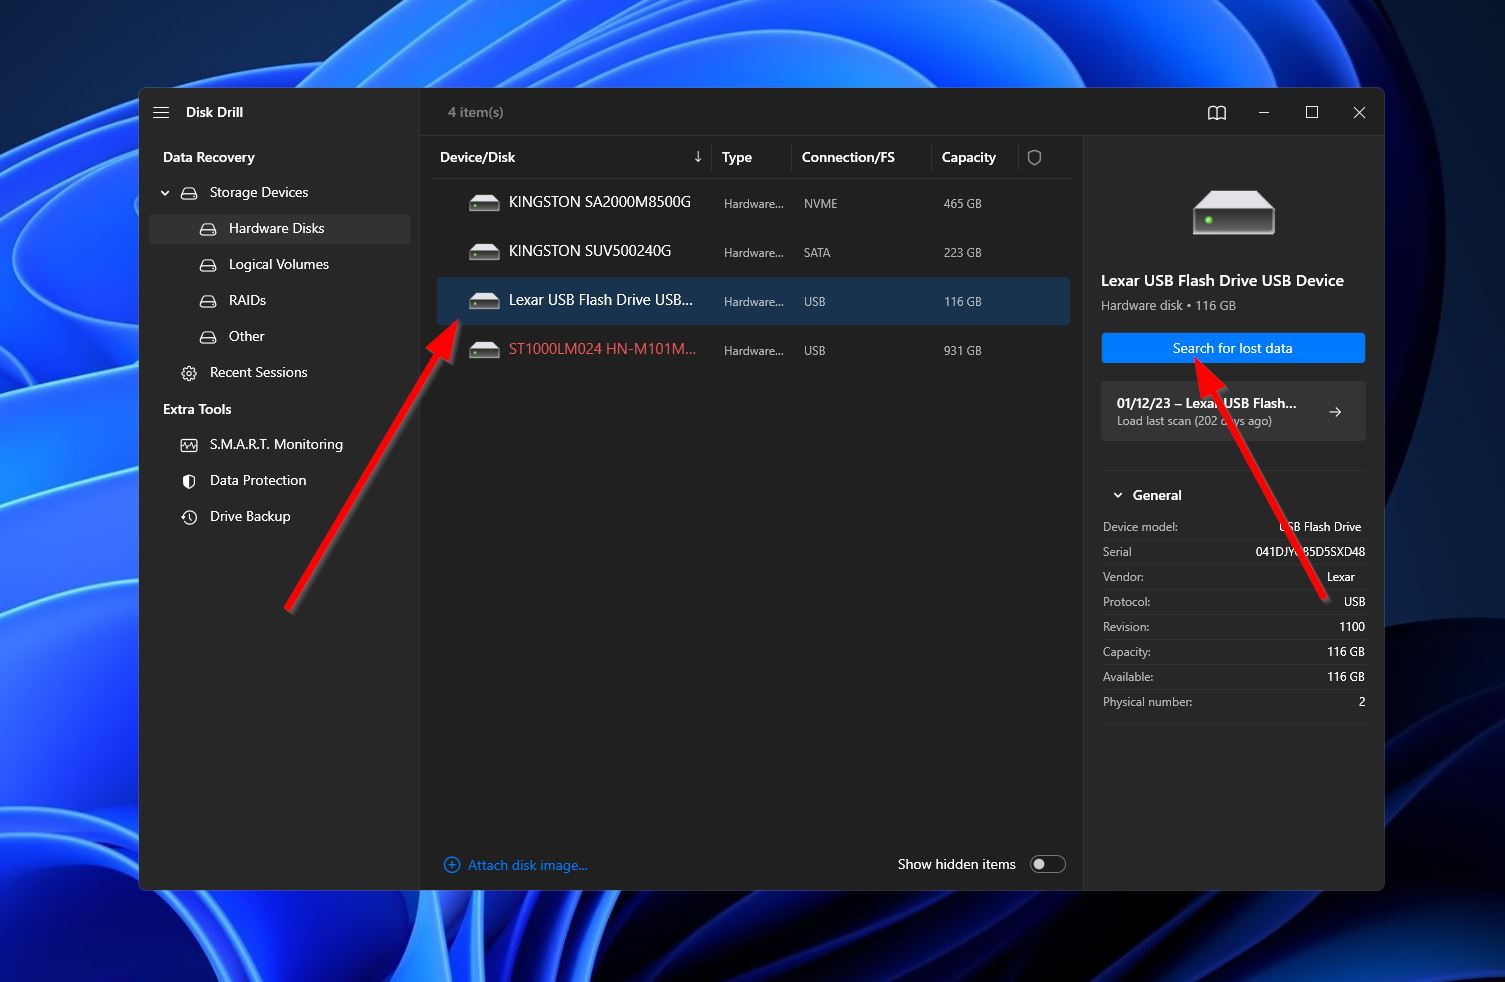
- Run Disk Drill once successfully installed, then select your drive with ReFS partition from the list of available devices/disks. After that, click the “Search for lost data” button.
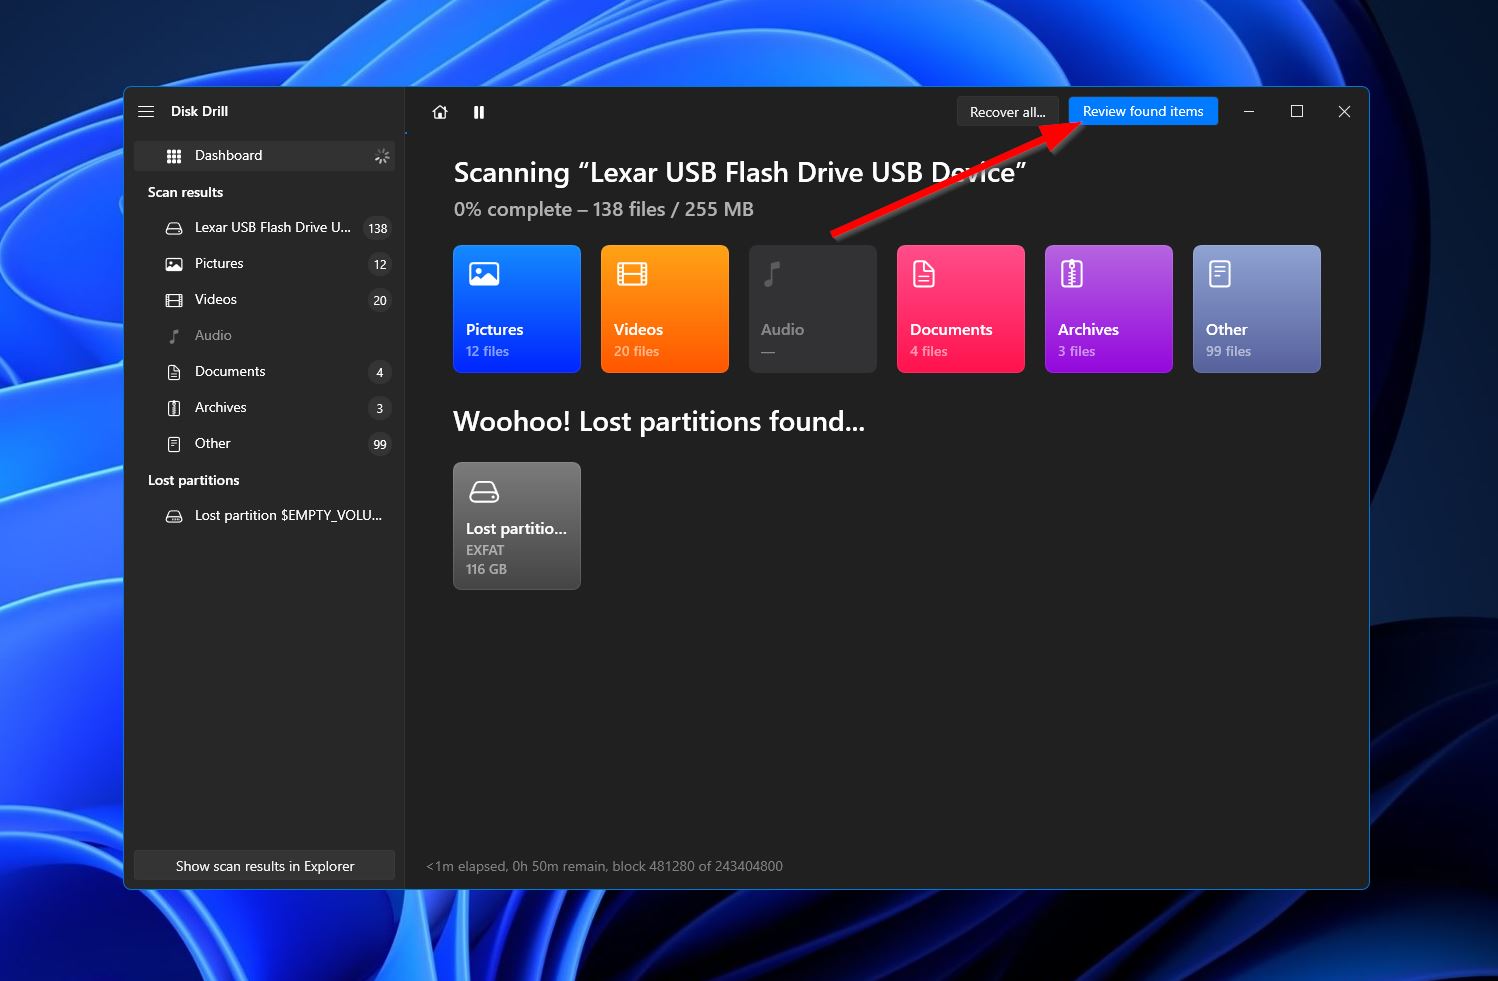
- The program will start scanning your disk for all recoverable files. It’s worth mentioning that Disk Drill is capable of detecting all partitions within a storage device, potentially allowing you to restore a partition partially or as a whole. Click the “Review found items” button to continue.
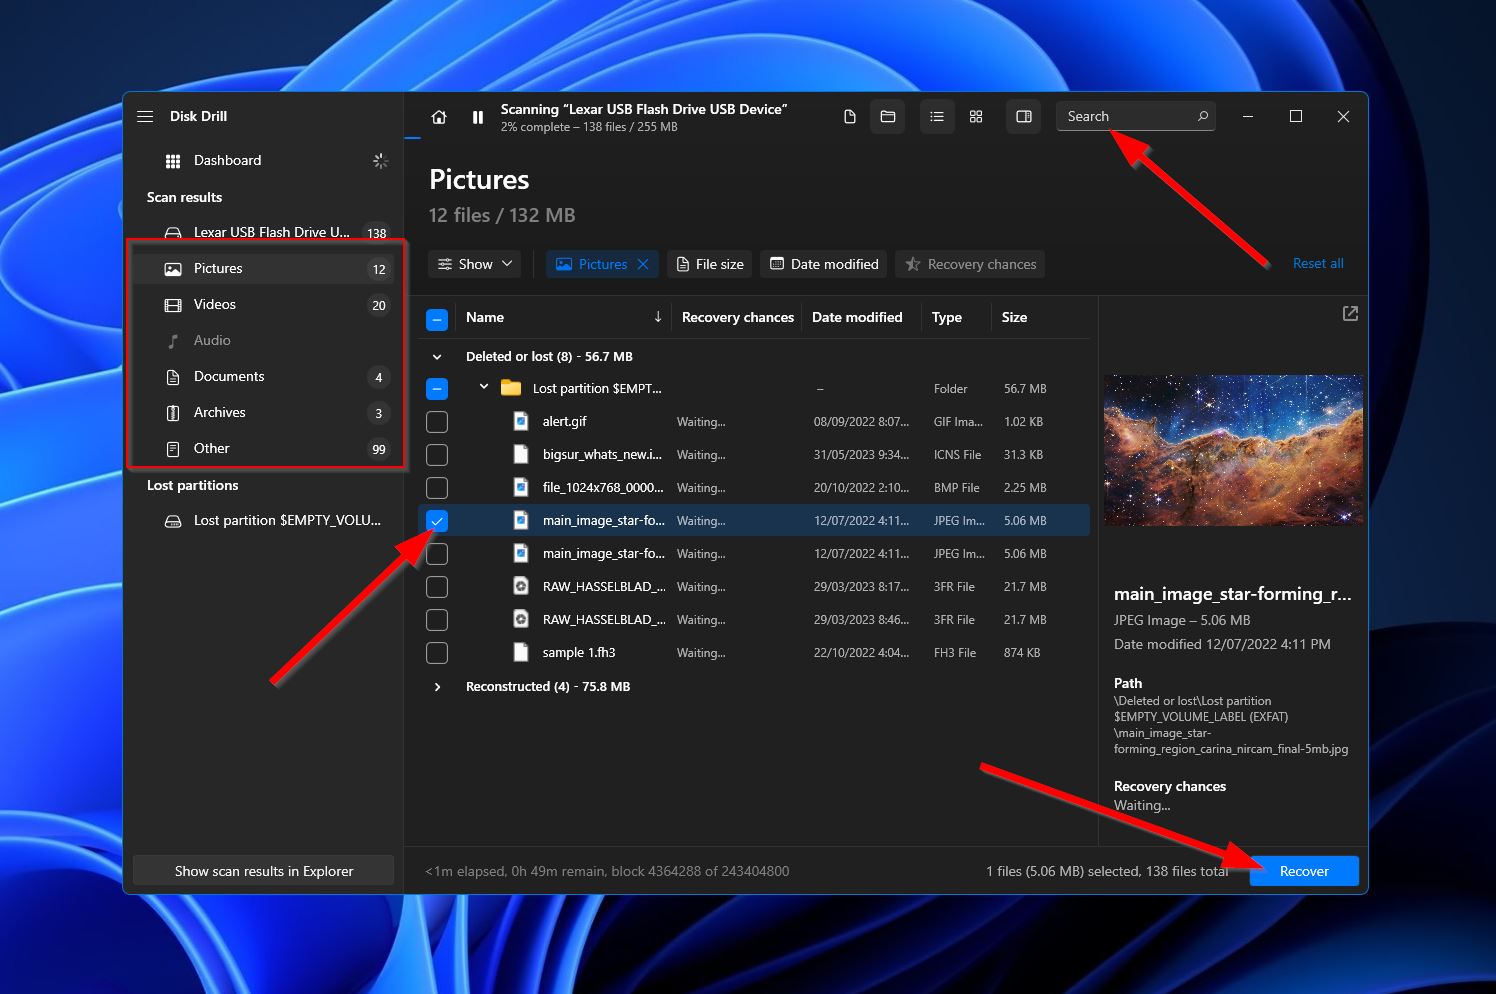
- In the results section, you can narrow down the list of found files by choosing one of the categories on the left. You can also use the search bar in the top-right corner, which accepts both file names and file extensions. Once you locate the files you want to restore, all you have to do is tick the checkboxes next to the file names, then hit “Recover” to proceed to the next step.
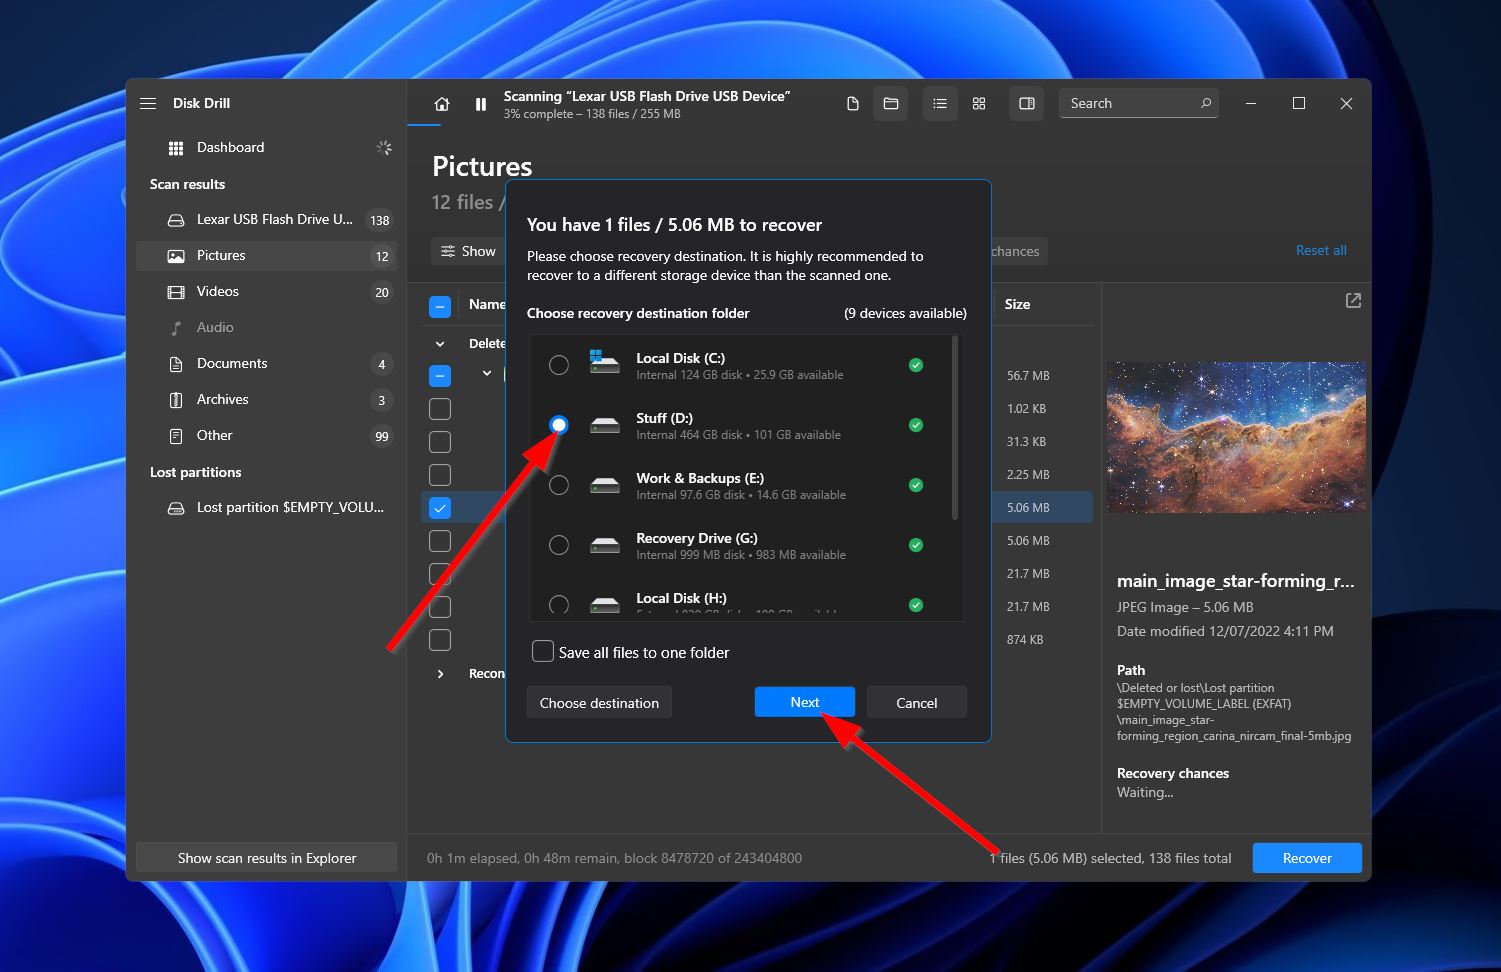
- Upon clicking, a small pop-up will appear where you’ll have to decide on the destination of your retrieved files. This should be on a different storage device than the one your ReFS partition is located on. Click “Next” to continue.
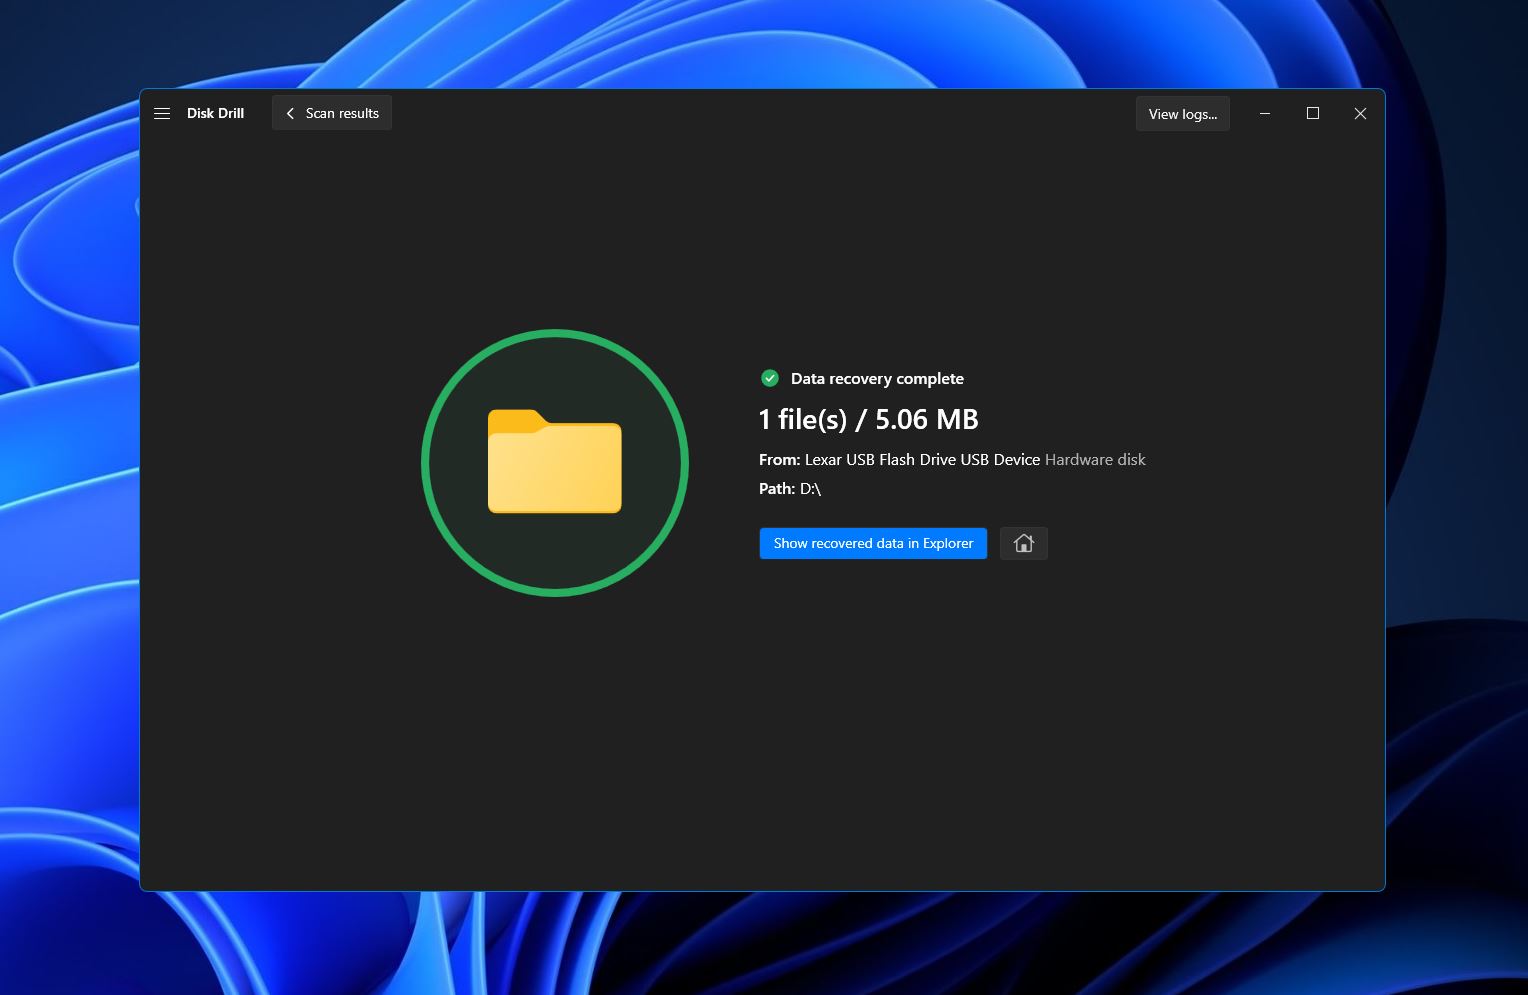
- Disk Drill will then attempt to recover the selected files. If successful, you’ll receive a completion message along with a button labeled “Show recovered data in Explorer.” Clicking the button will open the folder where the retrieved files were saved in.
Method 2:Using ReFSUtil command-line tool
ReFSUtil is a Windows tool accessible from the Command Prompt that allows you to diagnose and potentially recover files from a compromised ReFS volume. It’s a solid option to recover RAW ReFS partitions. While ReFSUtil offers several modes for scanning and recovering data, we recommend using the “full automatic” mode unless you’re a more advanced user.
To use the ReFSUtil command-line tool, simply follow the steps outlined below:
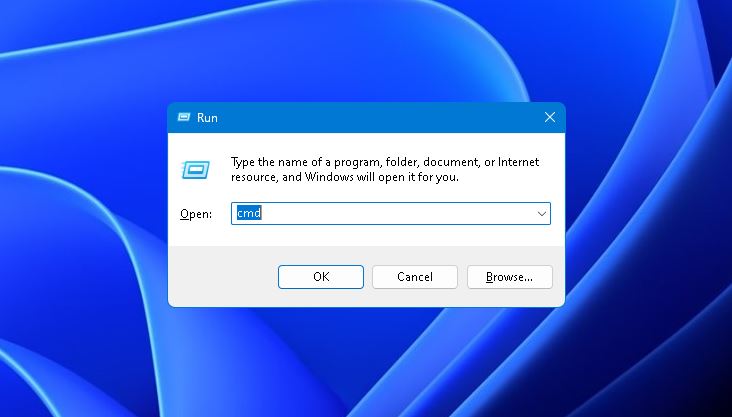
- First, press Windows + R to bring up the Run feature, then type in “cmd” and hit Ctrl + Shift + Enter to run with administrator access.
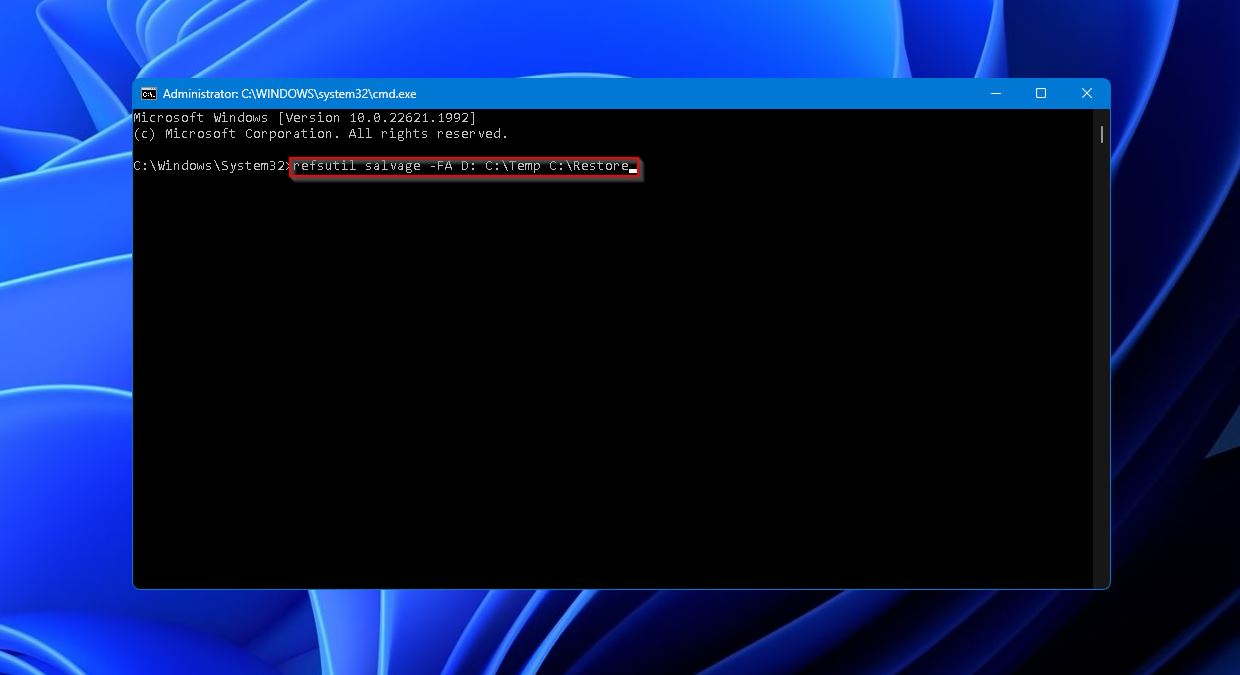
- Next, you’ll need to run the command
refsutil salvage -FA, followed by the source volume, working directory, and the target directory, respectively. For example, if “D:” is the volume you’re trying to recover, “C:\Temp” is your working directory, and “C:\Restore” is the target location in which your recovered files will be stored, then your string should look like this:refsutil salvage -FA D: C:\Temp C:\Restore
Conclusion
ReFS is a fairly ambitious file system that didn’t quite take off as well as Microsoft expected on account of its major drawbacks. And although it’s especially resilient against corruption and data loss, it’s still not immune to them. If you’re looking to restore a lost or inaccessible ReFS partition, your best bet is to leverage an effective data recovery program like Disk Drill or to use the ReFSUtil ReFSUtil tool.


