 Losing important data from your Windows NTFS partition can put you in a tough spot, especially if you’ve lost some important documents or files. The good thing is, recovering NTFS partitions is possible and easy.
When files are deleted from an NTFS partition, it’s a logical operation; the files still exist physically on the storage device until they’re overwritten with new data. You can use an NTFS partition recovery tool to re-establish this logical connection and recover your files.
Before we discuss NTFS recovery, let’s understand what NTFS is in a little more detail.
Table of Contents
What is NTFS File System?
NTFS is short for New Technology File System, and it’s the file system Windows uses for storing and retrieving files on your PC’s HDDs and SSDs.
Microsoft replaced the FAT (File Allocation Table) file system with NTFS in 1993 with the release of Windows NT 3.1. NTFS has since been the primary file system used by all Windows operating systems, including Windows 10 and 11.
Windows NTFS offers several benefits, including but not limited to:
- Larger capacity: NTFS supports HDDs of up to 16EB, speaking theoretically, and supports a maximum file size of up to 256TB on newer versions of Windows (8, 10, and 11).
- Offers more file attributes: NTFS offers file attributes like index allocation, reparse points, and compression. In fact, NTFS is the only Windows file system that allows compression.
- Disk usage permission: Administrators have the capability to allocate disk space to individual users with NTFS. It’s most commonly used for restricting the use of disk space on network drives.
- File-level encryption: NTFS supports file-level encryption (which is different from encrypting the full drive). You can encrypt individual files and folders with the Encrypting File System feature on NTFS partitions.
Only Windows uses NTFS natively. Windows NT, 2000, XP, Vista, 7, 8, 10, and 11 all use NTFS. But Linux-based operating systems can also mount NTFS partitions, i.e., they can both read and write on NTFS partitions.
NTFS is a proprietary file system, and since Apple hasn’t licensed it, Mac users can’t natively write to an NTFS partition. They can read the files on an NTFS partition, though.
Regardless of which OS you use the NTFS partition on, there are several things that could go wrong and lead to the accidental deletion of files.
Common Reasons of Data Loss from NTFS Partitions
Following are the most common reasons why you might have lost files from your NTFS partition.
| Reason | Description |
| ✂️ Formatting | If you formatted a drive to convert it to an NTFS partition, you’ll have lost all data on that partition in the process. You may have formatted a drive to convert the file system, remove malware or virus, or make some space on your hard drive. In any case, you’ll end up losing all your data. |
| ⚠️ Corruption of File System | While NTFS is far more reliable than its predecessor FAT32, it’s still vulnerable to corruption since it’s prone to fragmentation and lacks a mechanism to prevent bit rot (i.e., data degradation caused by wear out of the drive). NTFS partitions can also become corrupt because of hardware issues like failure of the hard drive’s controller or issues with the cable. Plus, system issues like a faulty RAID driver or BSODs can also lead to file system inconsistencies and corruption. |
| #️⃣ Encrypting of the Files | As discussed earlier, NTFS has the Encrypting File System feature for file-level encryption. Regardless, even encrypted files are like other files. If you lose them, but the information still exists on the file system about its location, there’s a small chance that you might be able to recover those files. |
| ☣️ Virus and Malware | Viruses can infiltrate drives and network systems and extract, encrypt, remove, or corrupt critical data. Once the virus or malware has entered the system, it will start damaging your files or stealing your data. Having an antivirus program and vigilance on your part about identifying suspicious emails and links goes a long way in protecting your data. |
However, if you’ve already lost the files, an NTFS data recovery software for Windows like Disk Drill will help you recover them.
How to Recover Files from an NTFS Partition
Disk Drill is your best bet for recovering files lost from an NTFS partition. It’s also easy to use; here’s a four-step process illustrating how you can use Disk Drill to recover files from an NTFS partition.
Step 1. Download and Install Disk Drill
Download Disk Drill and run the installation wizard. Be sure to install Disk Drill in a different partition than the one you want to recover files from to avoid overwriting of data. You’ll be able to recover up to 500MB of data on Disk Drill’s free version for Windows.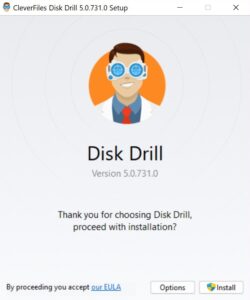
Step 2. Select NTFS Partition
Once you’ve launched Disk Drill after installation, you’ll need to select the NTFS partition you want to scan for potentially recoverable files. Click on the Search for lost data button to start the scan. At this point, Disk Drill will start scanning your NTFS partition.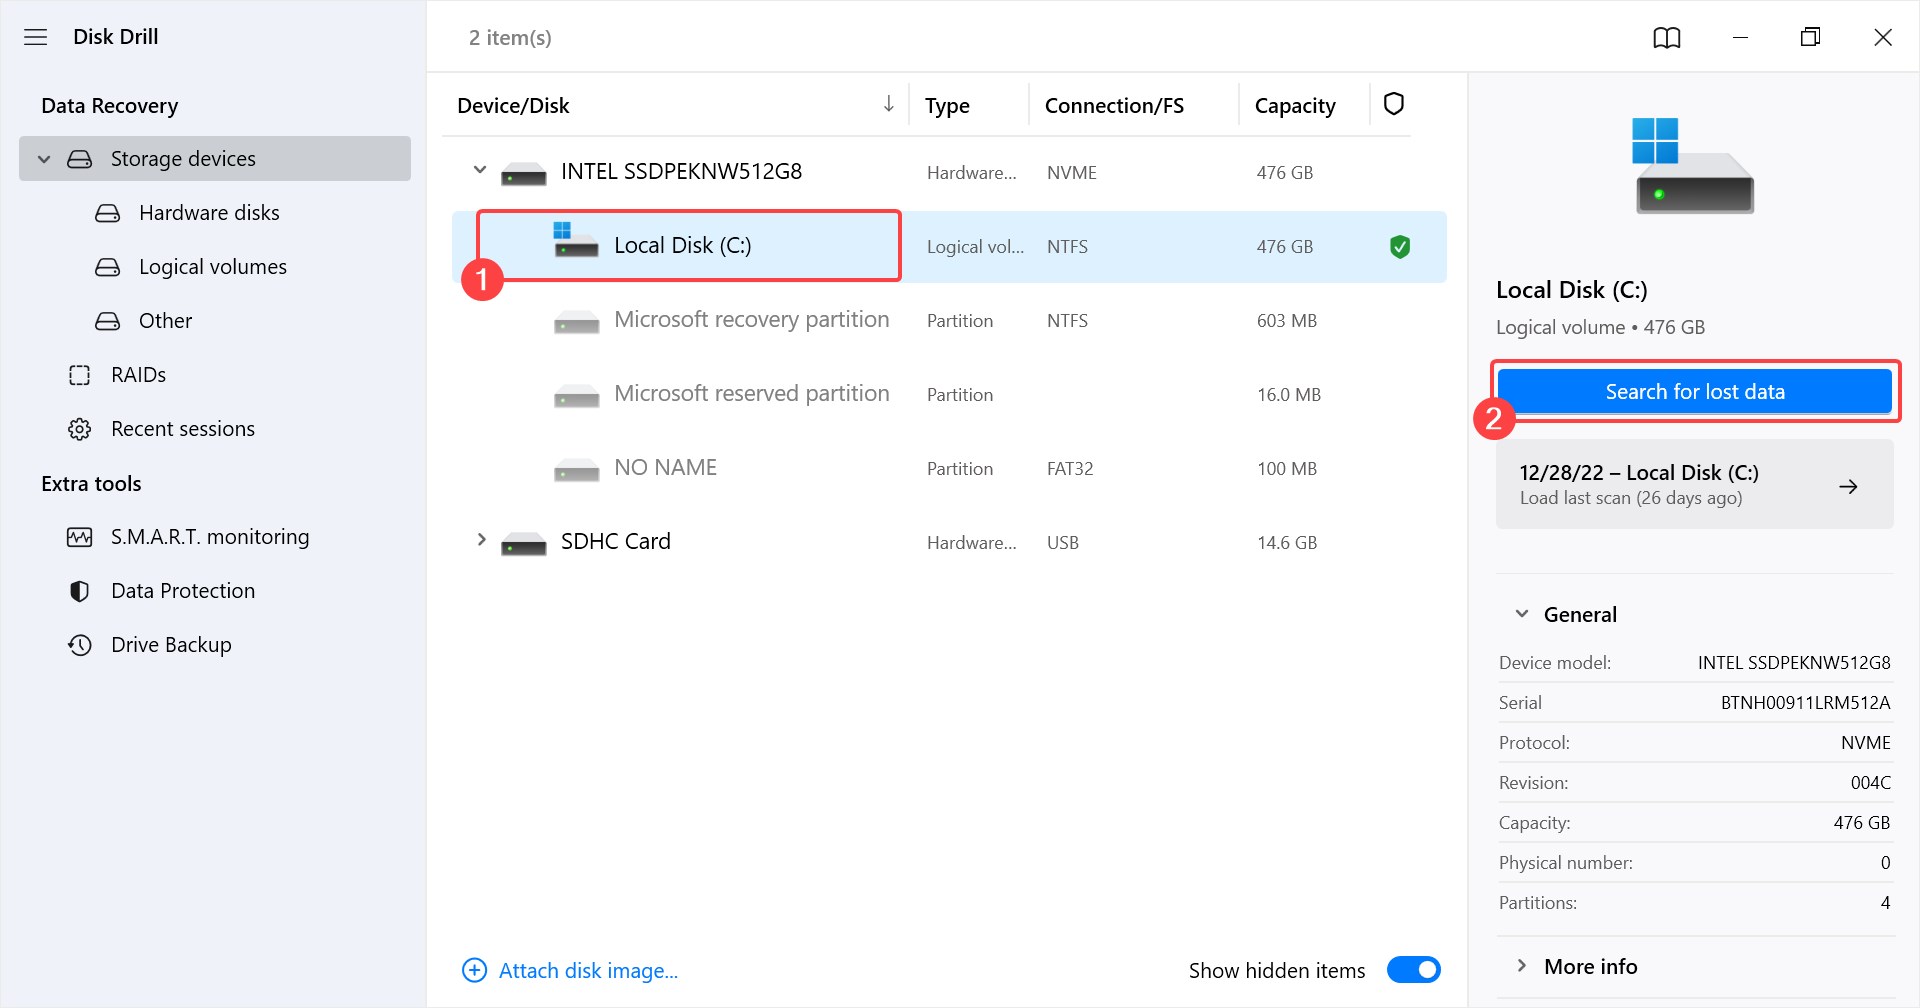
Step 3. Start Recovering Files
You don’t need to wait for the scan to complete, you can preview the files by clicking the Review found items button. Once you see the list of recoverable files, select the ones you want to recover by checking the box to the file’s left and clicking on the Recover button.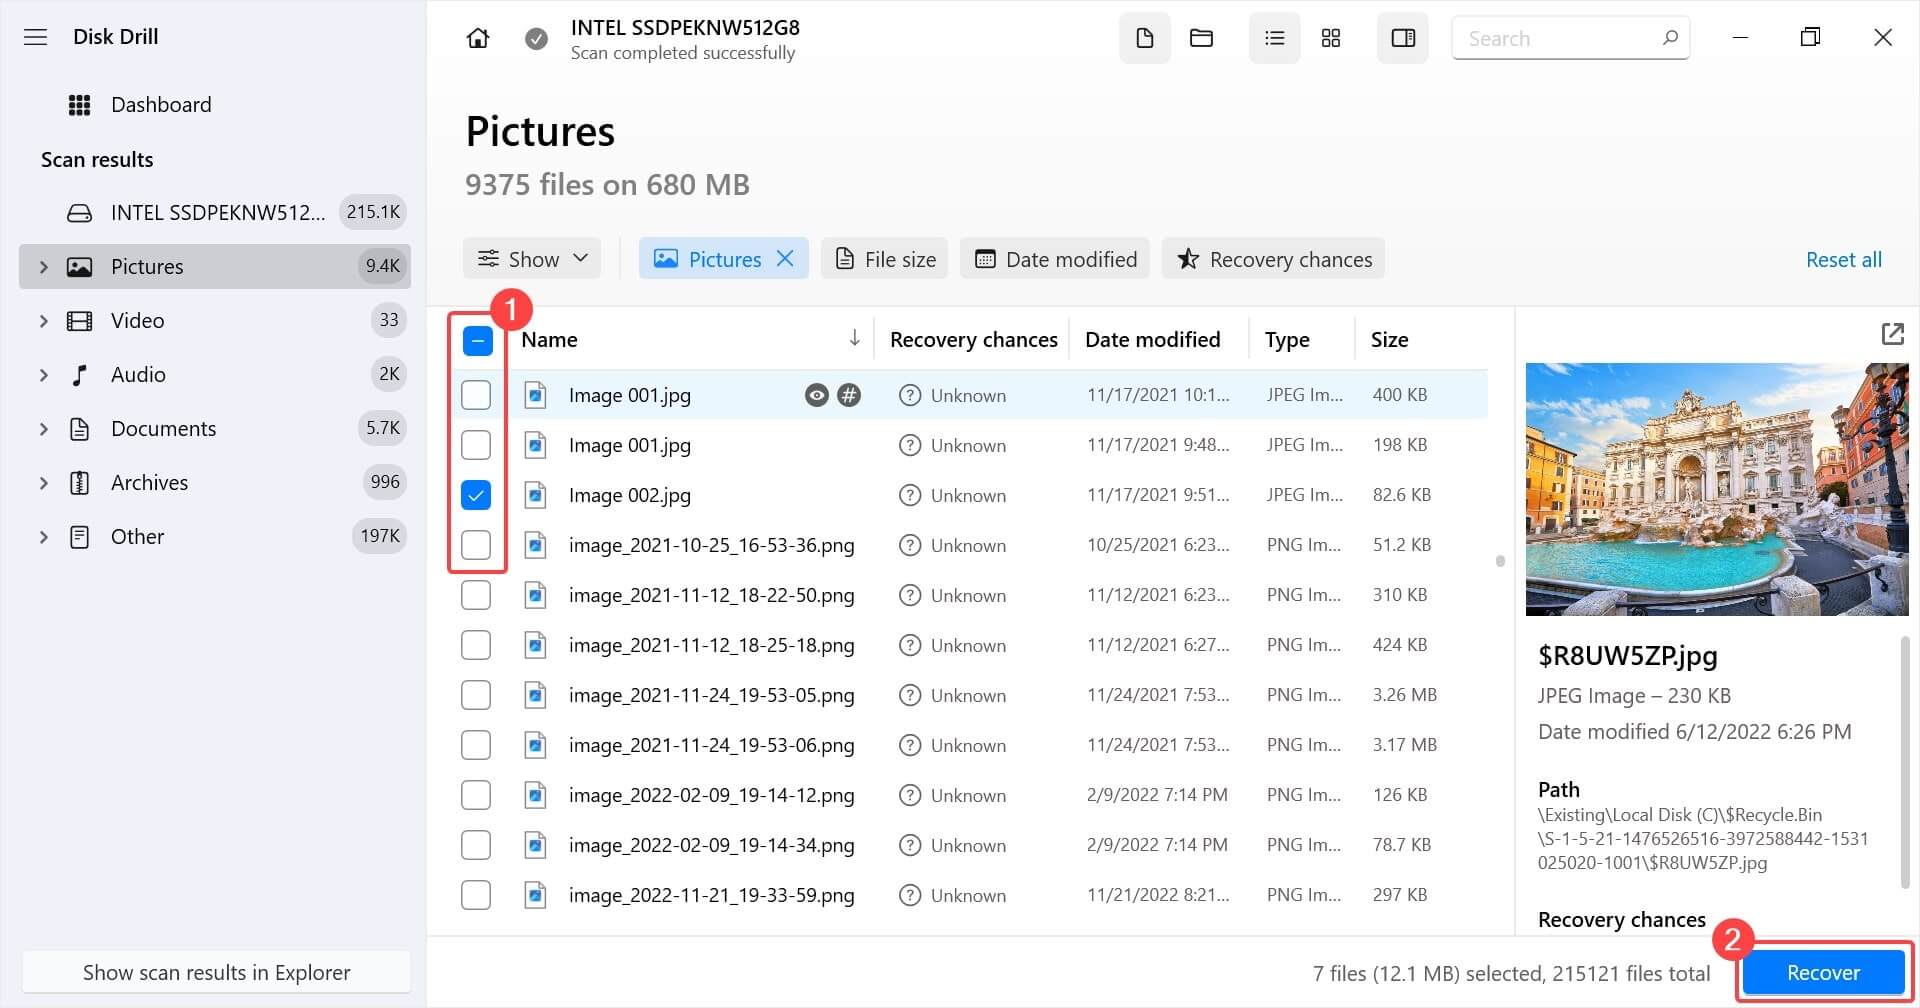
Step 4. Select Recovery Location
When you click the Recover button, you’ll be asked for the location where you want to save the files. Select a location different from the source drive to avoid overwriting data. Once you’ve selected a location, click Next.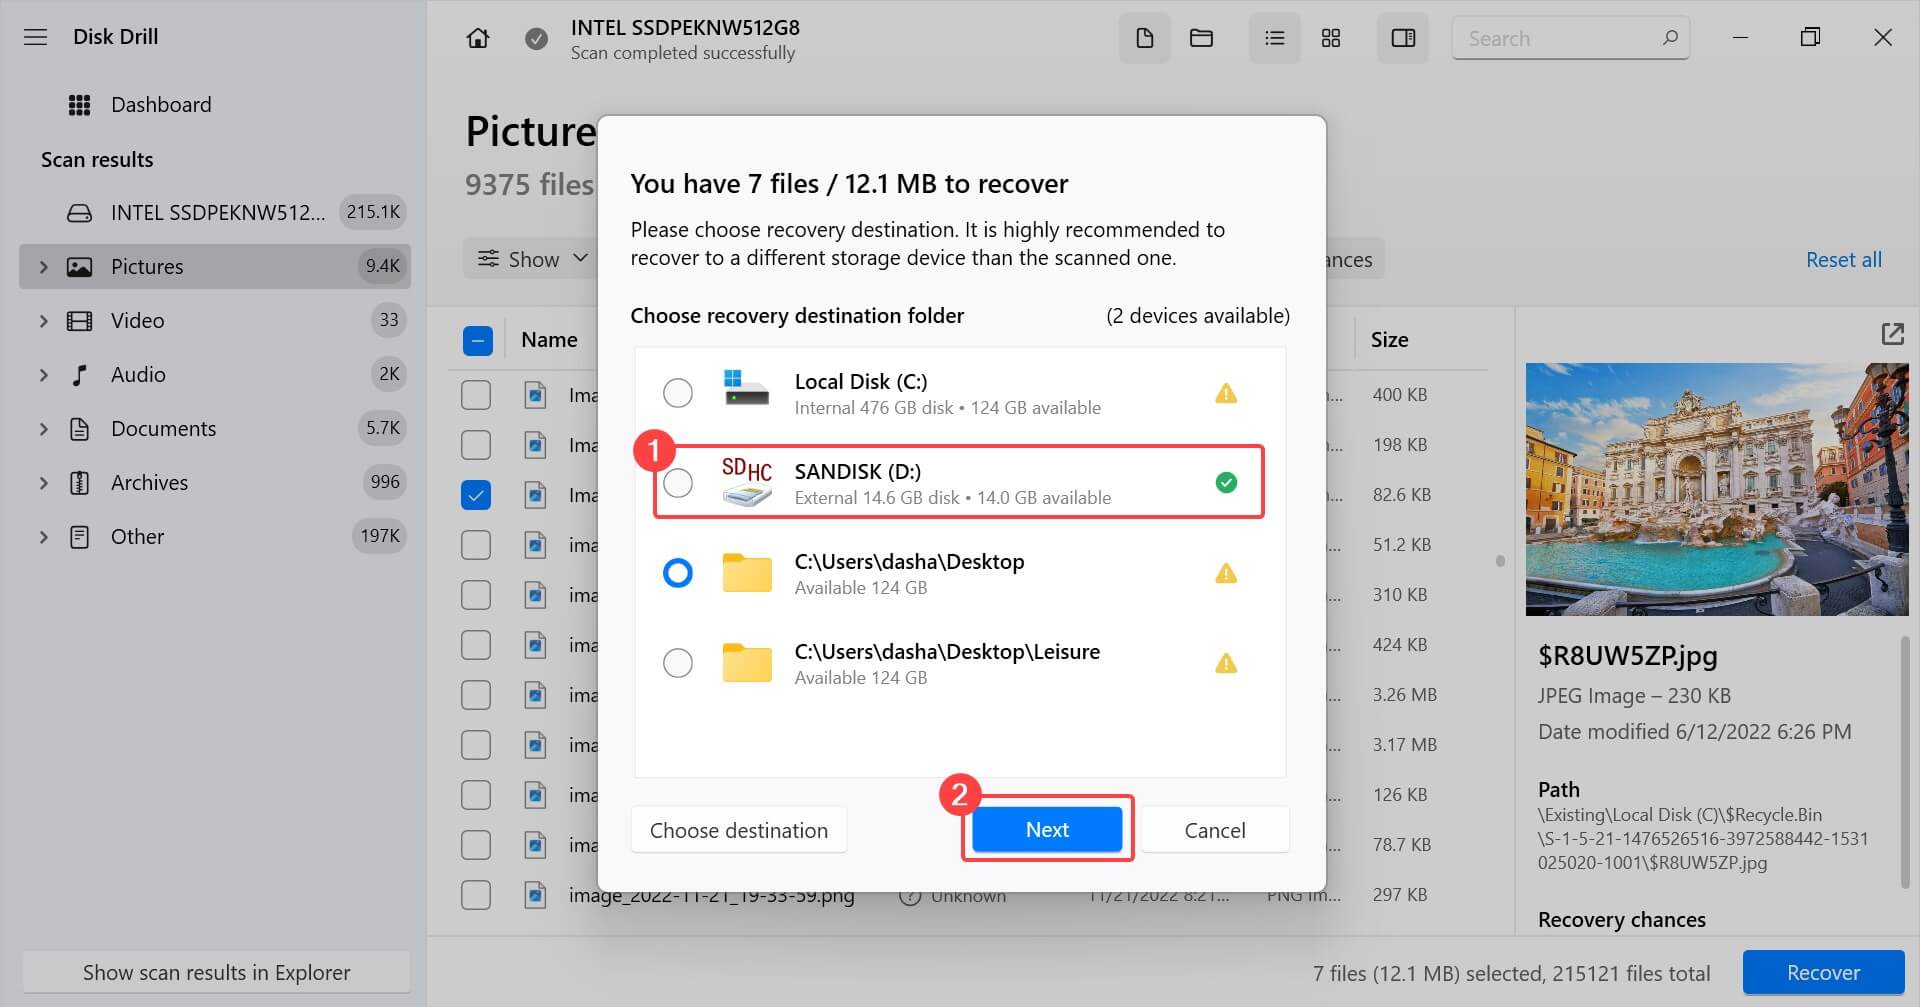
Now that you’ve recovered the files, you can fix your NTFS partition table if that’s what had caused the data loss in the first place and recover the entire partition.
How to Fix NTFS Partition Table and Recover the Partition
Inconsistencies in the NTFS partition table can lead to information loss regarding the partition and make the data in the partition inaccessible. Fortunately, there’s an easy way to fix the NTFS partition table. You can use a tool called TestDisk by following the steps illustrated below:
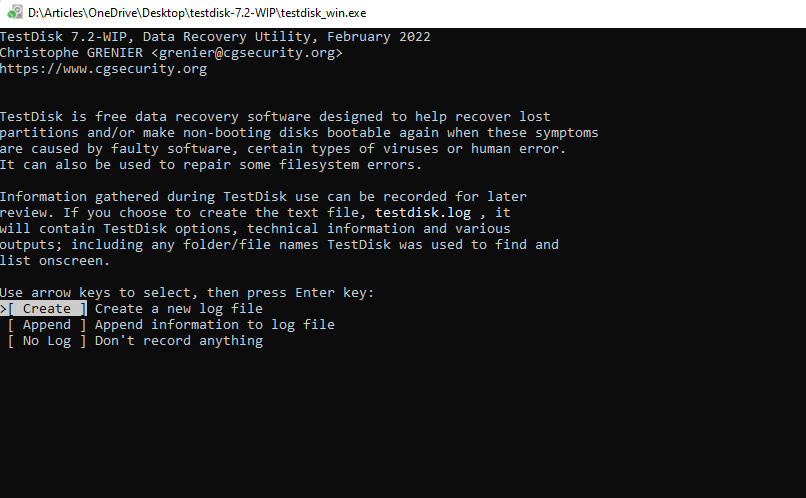
- Download TestDisk, extract the files into a folder, and run TestDisk. It’s a portable program and doesn’t require an installation.
- Select the [Create] option and press Enter. If prompted, enter your admin password.
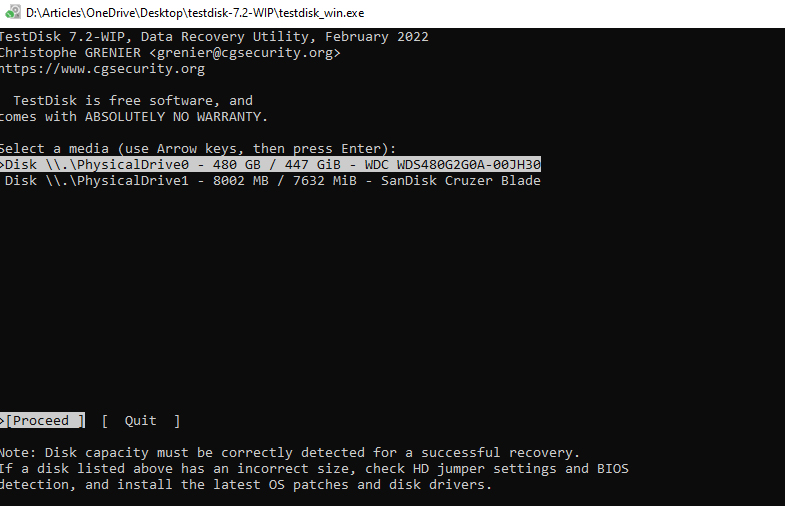
- Select the disk drive you want to repair and press Enter.
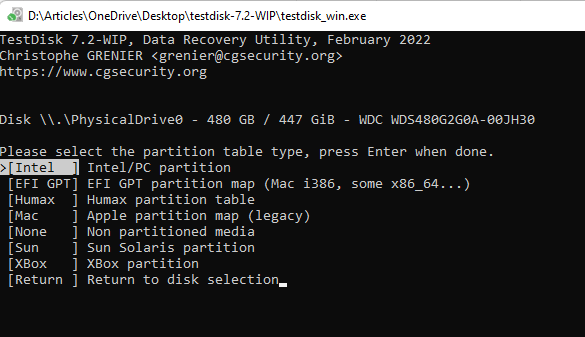
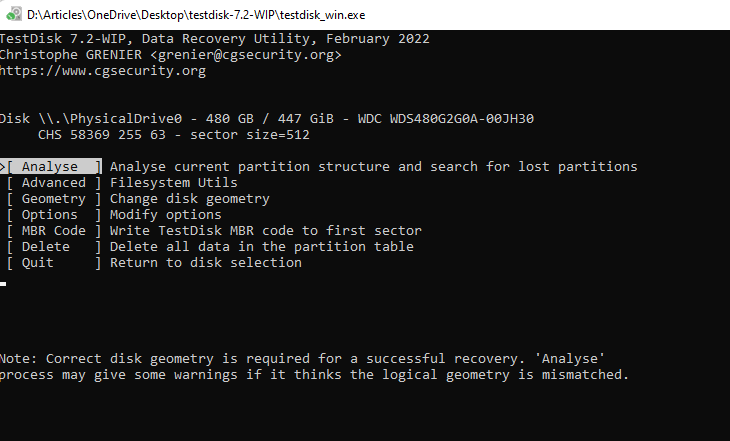
- Select [Intel] (Intel/PC partition), since we’re trying to repair an NTFS partition.
- Select [Analyze].
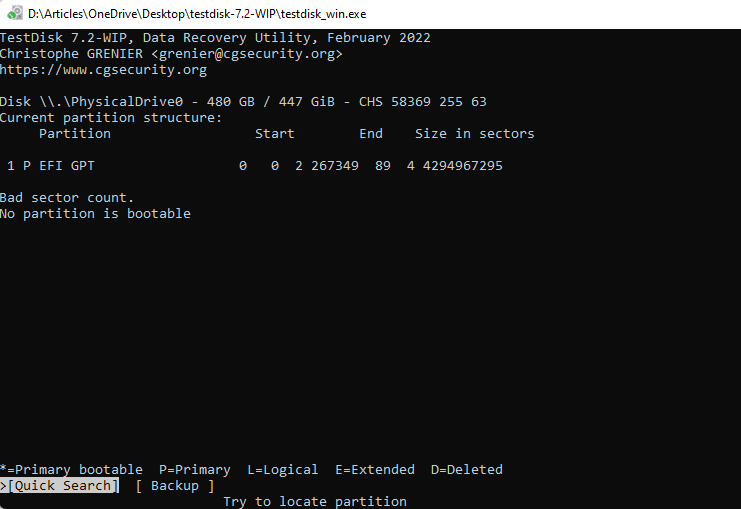
- Select [Quick search].
- Select the partition you want to repair and press Enter.
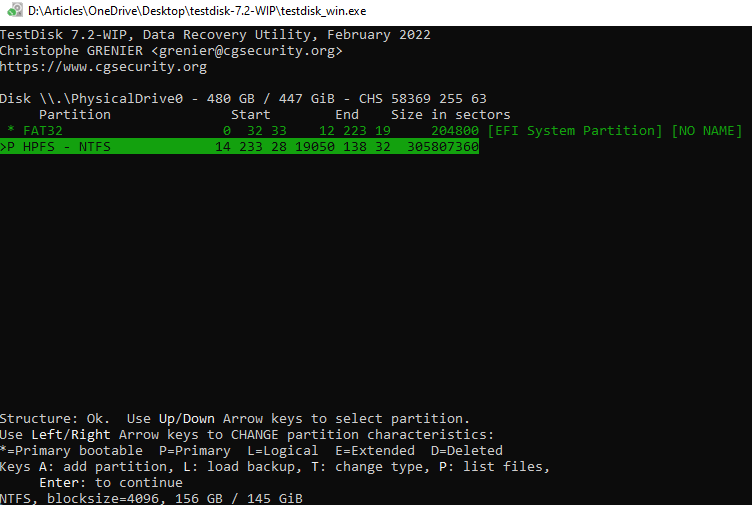
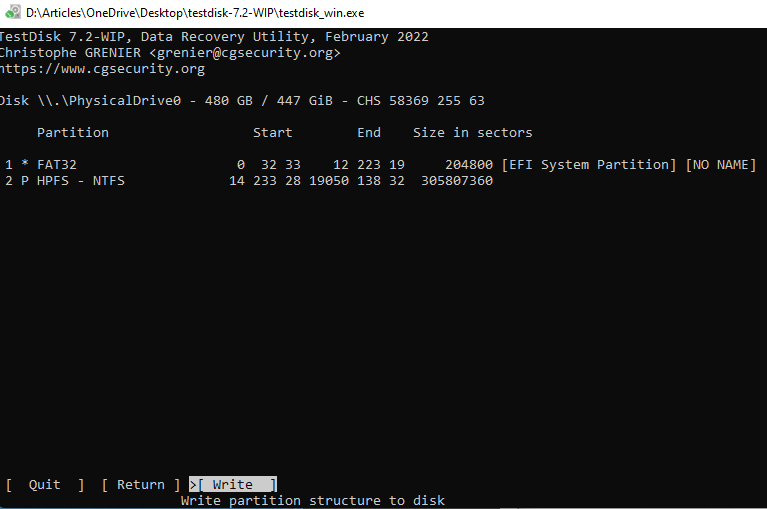
- Select [Write] at the bottom and press Enter. Doing this will write the partition table to the partition, or alternatively, you can press A to recover a broken partition and fix any existing inconsistencies.
Note: If the [Quick Search] option doesn’t find the partition, you’ll also see an option to run a [Deeper Search].


