 When Windows says that your USB needs to be formatted, it’s often due to an error that has occurred. In most cases, the USB flash drive will still contain data you need to retrieve. But, what do you do if the problem that has arisen is preventing you from accessing the USB?
Thankfully, there is a way you can format the USB without losing data. But, you must act swiftly to ensure the damage doesn’t worsen. Read on to learn how to format a flash drive without losing data.
Table of Contents
Can You Format a USB Without Losing Data?
Formatting a flash drive will delete everything on the USB and give it a new file system. Reformatting a flash drive will do the same thing, as it overwrites the previous file system with a new one. In order to format a USB without deleting everything, you must first back the data up. This may seem obvious, but it can be challenging if the USB is faced with a problem that doesn’t let you access it like normal (for example, a corrupted file system).
This is one of the reasons why data recovery software exists. See, when you delete a file (either intentionally or as a consequence of formatting), only the record to locate that data is deleted. The data itself remains, but only for a limited time.
If you need to format or reformat a USB drive, recovering the data on it first is the top priority (although sometimes it is necessary to format the USB first, then attempt to recover the data).
How to Back up Data From a USB Flash Drive
We’ll show you two possible methods for recovering data from a USB flash drive, one where the data isn’t accessible, and one where it is.
Scenario 1: The Data Isn’t Accessible – Data Recovery Software
Corruption, malware, user error – these are all common problems that USB drives face. If something has happened that is blocking you from getting to your data, data recovery software is the way to go. Disk Drill, a data recovery tool, specializes in cases like this. You can use it to scan your USB drive and get your data back in no time.
- Download and install Disk Drill.
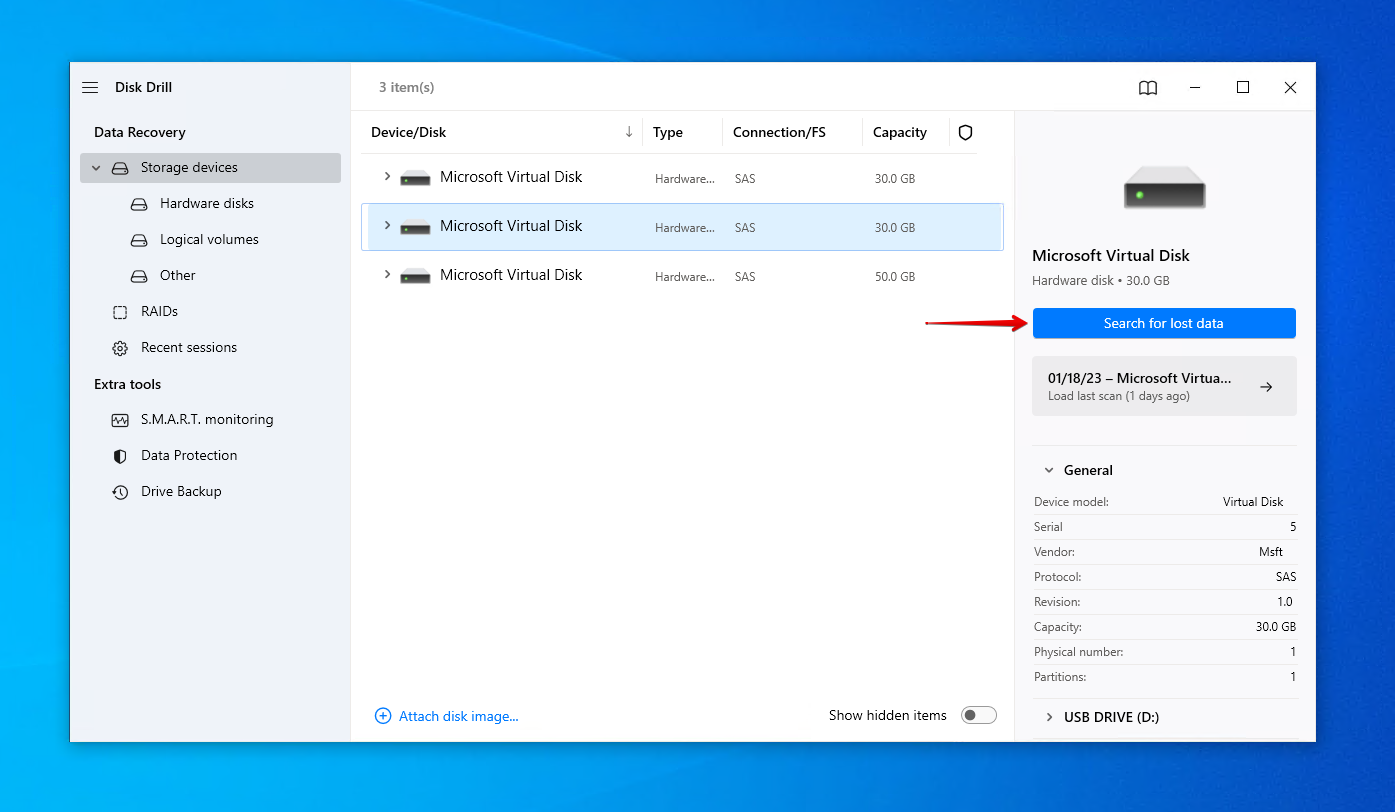
- Connect your USB thumb drive and select it. Click Search for lost data.
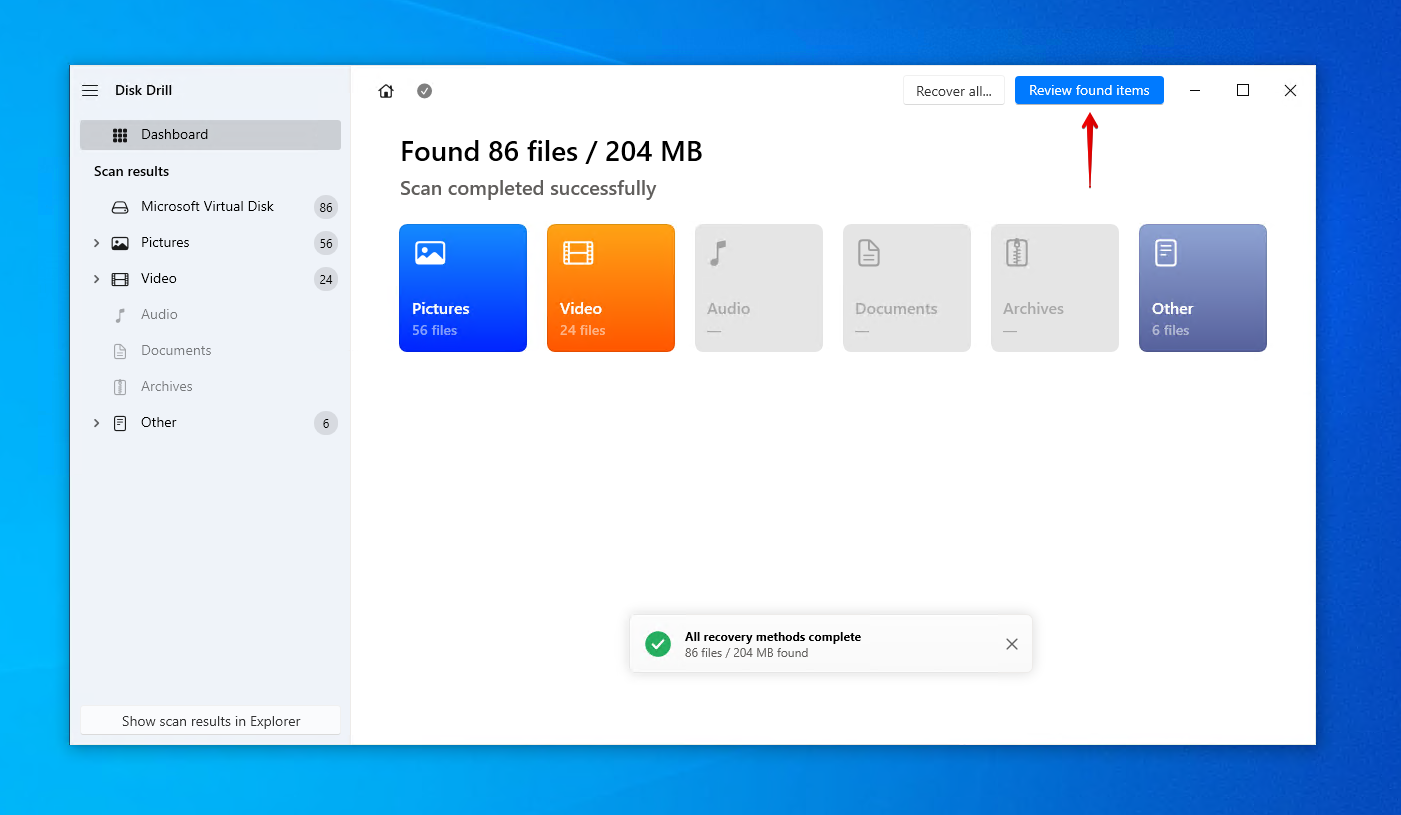
- Click Review found items when the scan is finished. If you want to recover everything straight away, click Recover all… instead.
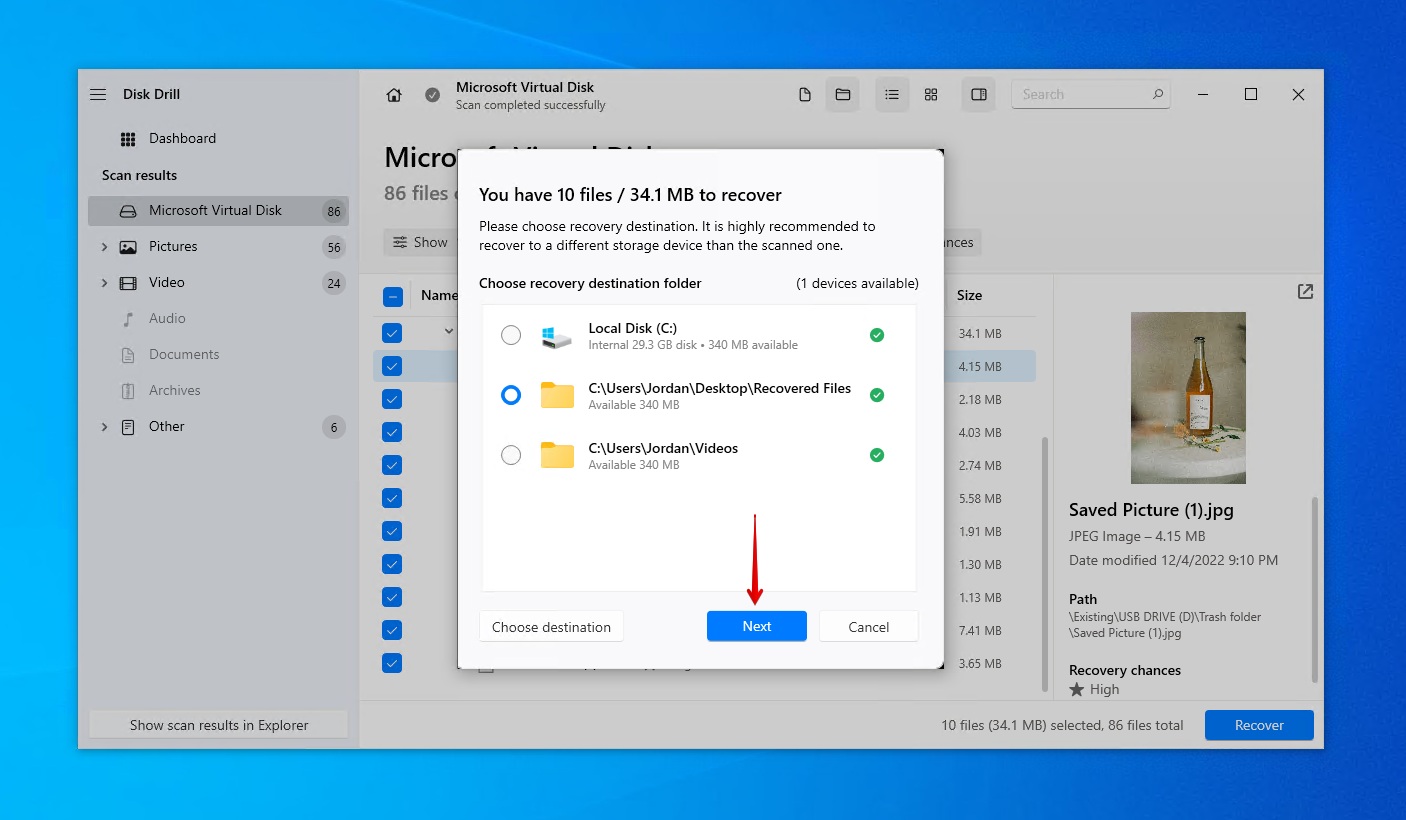
- Select the data that you want to recover. Be sure to use the preview panel where necessary to make sure you’re choosing the file files. To make it faster, you can also use the filter buttons and search box. When you’re ready, click Recover.
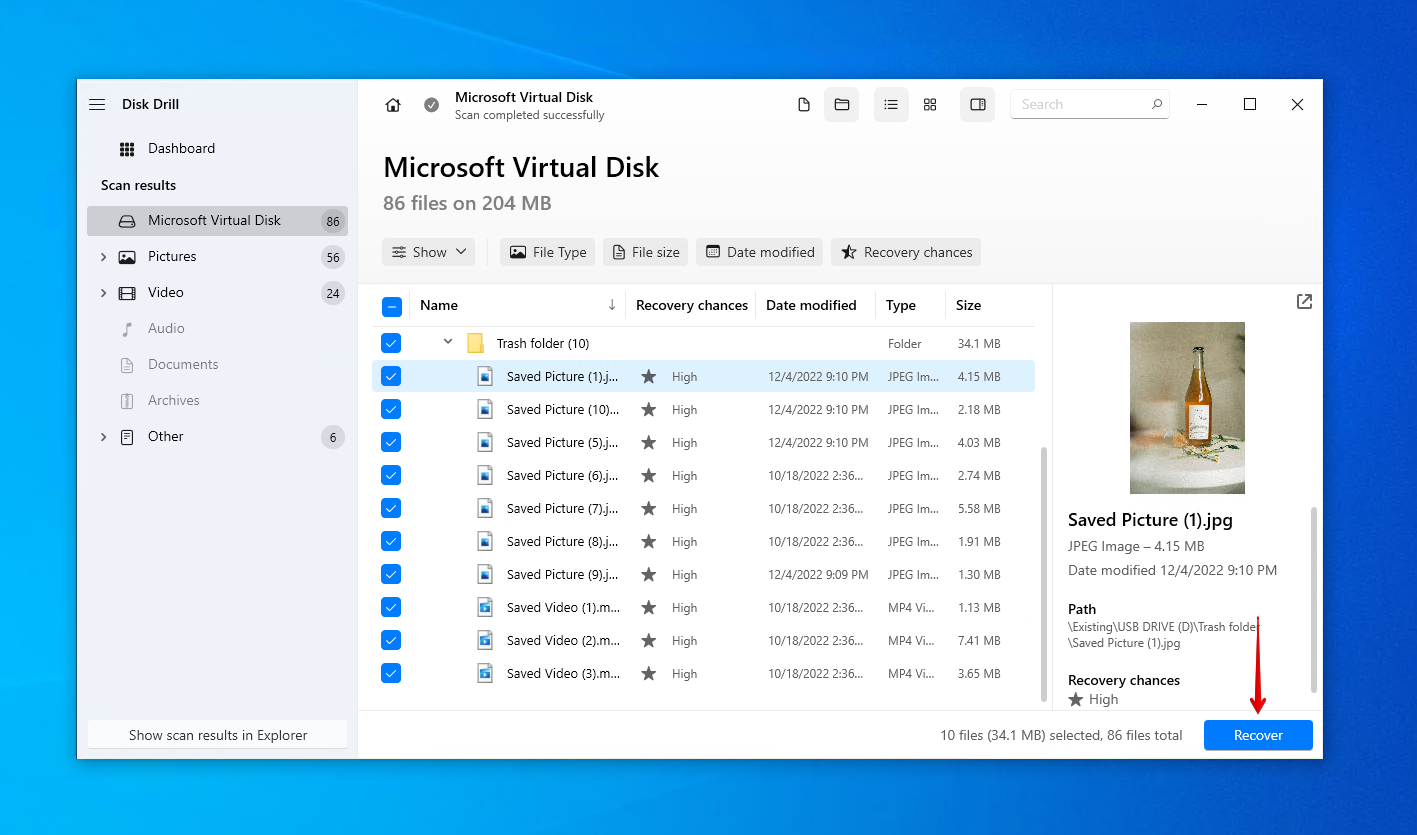
- Choose an appropriate output location. Make sure you’re not choosing a location on the same USB you’re recovering from. To finish, click Next.
Should data recovery software not be enough, consider seeking the services of a data recovery professional instead. This may be required in cases where the USB has become physically damaged and is no longer detectable.
Scenario 2: The Data Is Accessible – File Explorer
If your USB is being read by your computer like normal and you can access all of its contents, you simply need to back up the data using File Explorer.
- Open File Explorer and navigate to your USB.
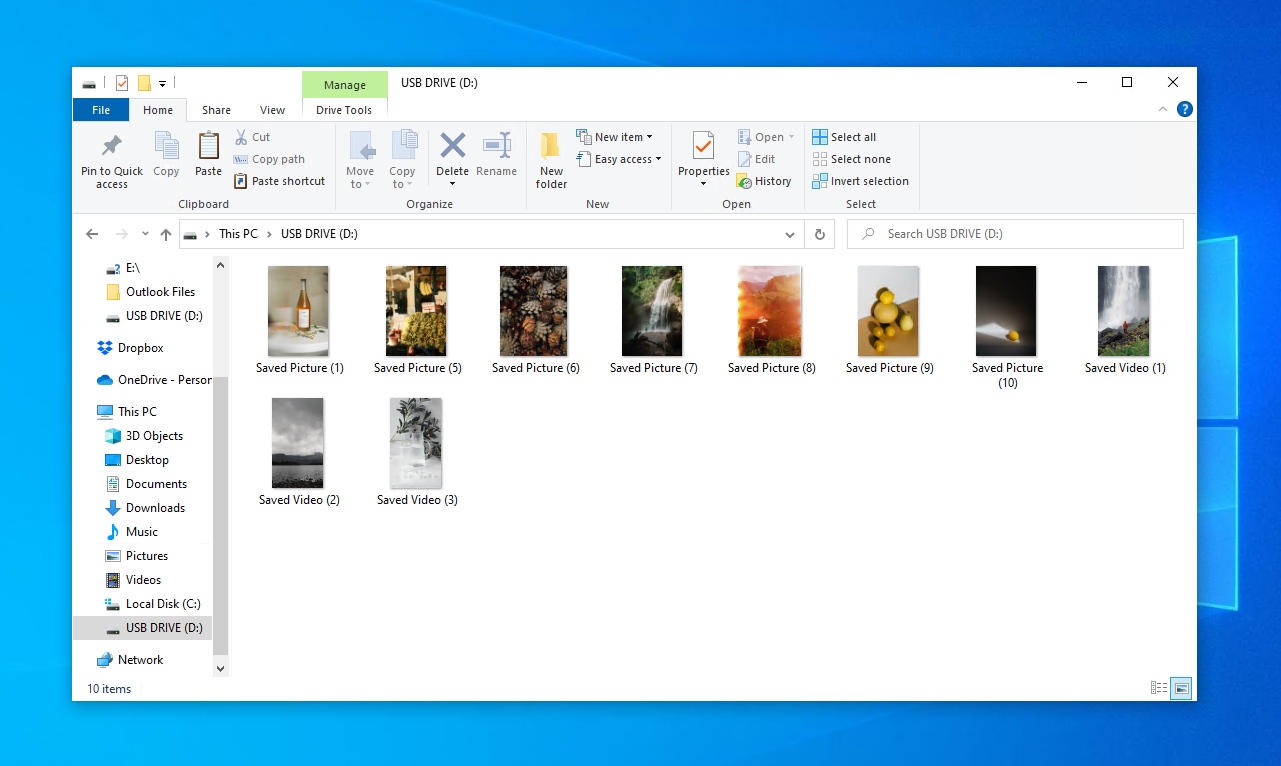
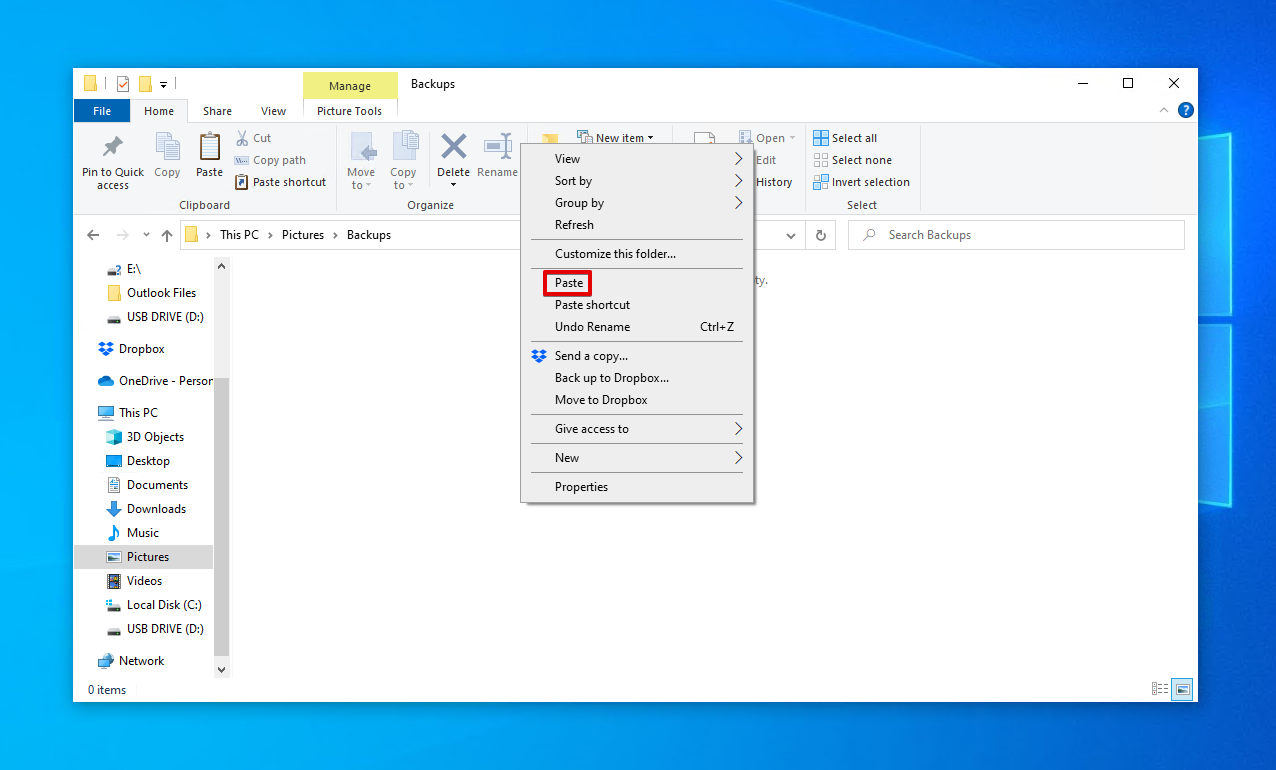
- Copy the contents of the USB.

- Paste it to a location on your computer or another healthy storage device.
Once your data is backed up, consider implementing a regular backup routine. File History is a great place to start, as it’s free and included with Windows.
How to Format USB Drive on Windows
Once your data is safely recovered and backed up, you can proceed to format the USB. Formatting a USB is a great way to remove most forms of damage it has sustained and restore it back to working order.
We’re going to show you a few ways you can go about formatting your USB drive.
Method 1: File Explorer
File Explorer is most probably the easiest way to format a USB flash drive, as all Windows users are familiar with it. In just a few clicks, your USB drive can be formatted and ready to store data once more.
Here’s how you can format your USB flash drive through File Explorer:
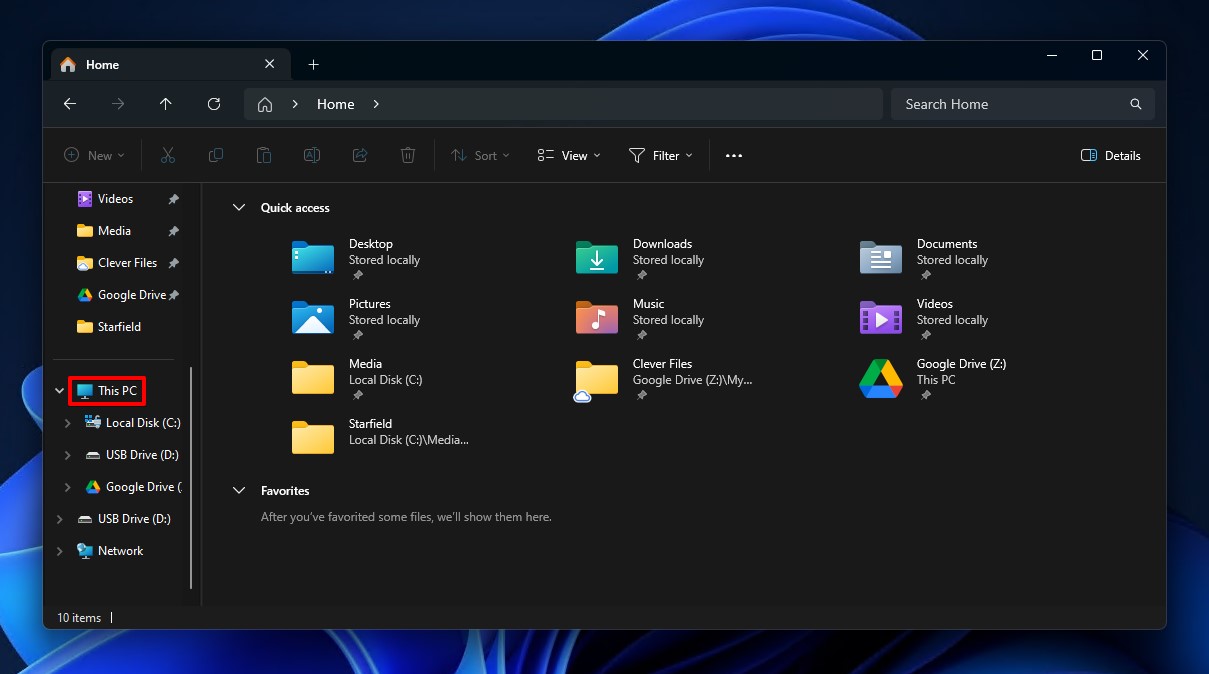
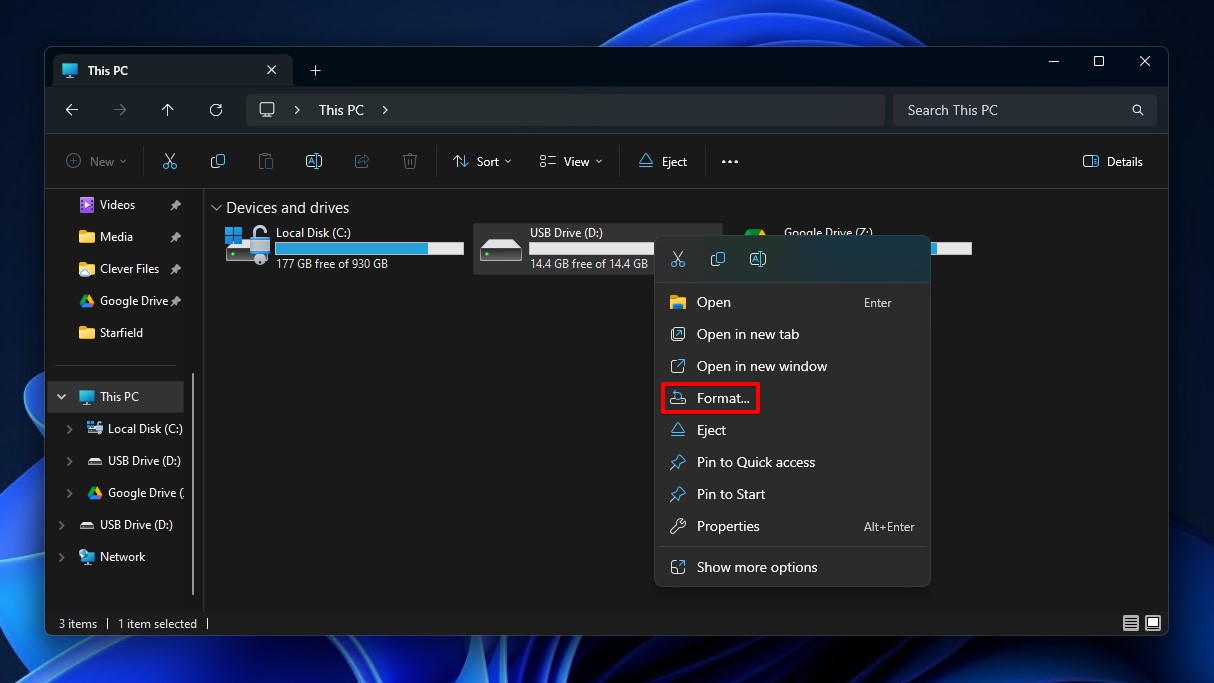
- Open File Explorer and click This PC.
- Right-click your USB flash drive and click Format.
- Input a volume label and make sure Quick Format is ticked. Click Start.
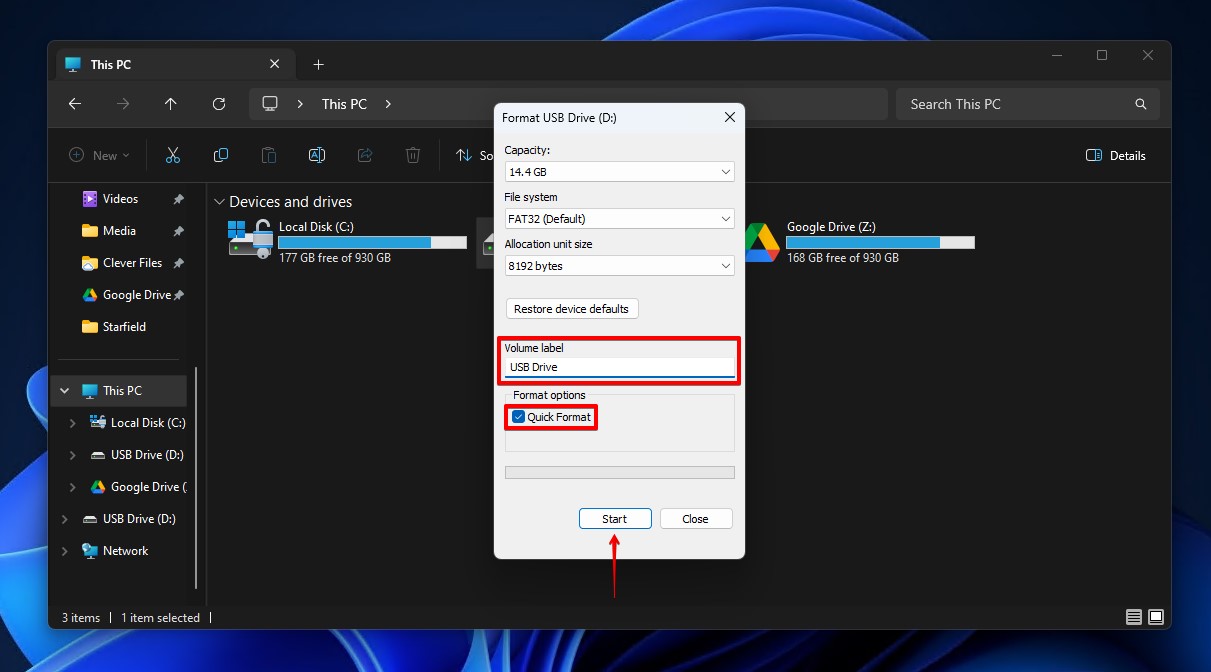
- Click OK when asked to confirm the action.
Method 2: Disk Management
Disk Management is another easy way to format a USB drive, as it can be done through a graphical user interface and also gives you more options to modify the flash drive after it has been formatted.
We’re going to show you how to perform a quick format. A quick format will delete everything on the drive, but leave some chance of recovery if needed. A full format, on the other hand, will completely zero the drive, rendering everything unrecoverable.
Follow these steps to format your USB drive using Windows Disk Management:
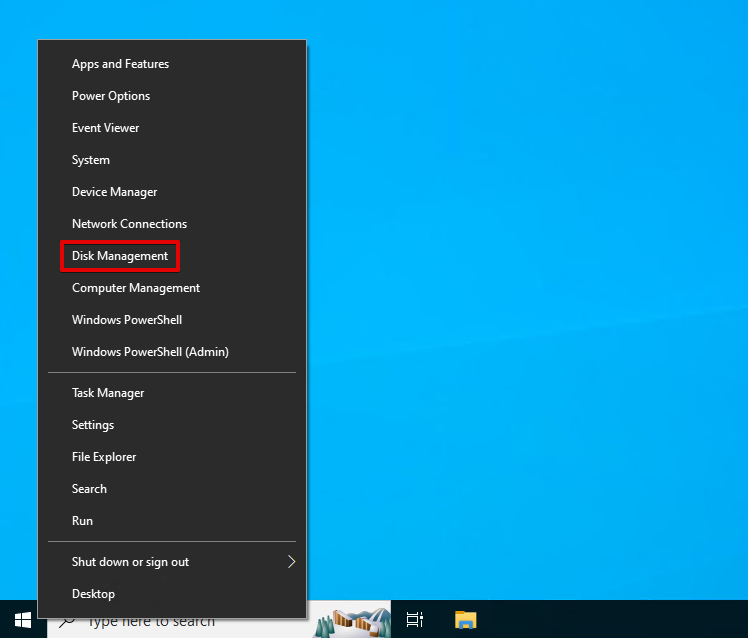
- Right-click Start and click Disk Management.
- Right-click the volume of your USB and click Format.

- Choose your desired format parameters. This is where you can also change the format of the USB. Make sure Perform a quick format is ticked and click OK.
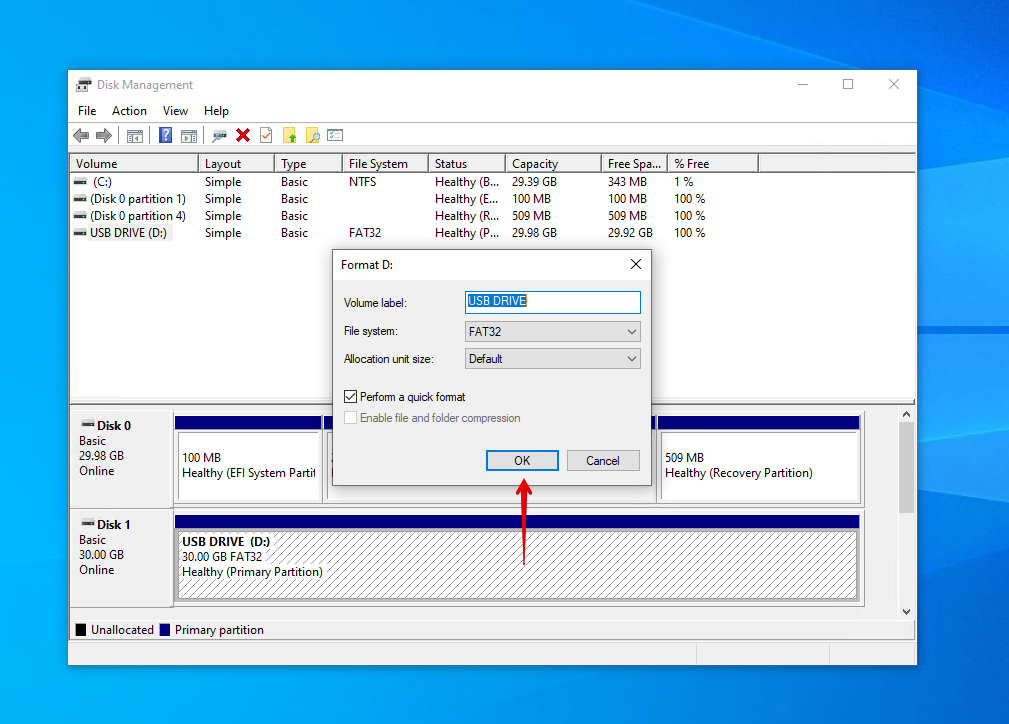
- Click OK again.
Method 3: PowerShell
PowerShell is a command-line config management program. With it, you can perform various administrative tasks and operations, such as formatting.
Note: This method will involve formatting the entire flash drive and creating a single partition. So, if you have other partitions on the flash drive, be sure to back the data up first.
The below instructions will guide you through formatting a USB flash drive using PowerShell:
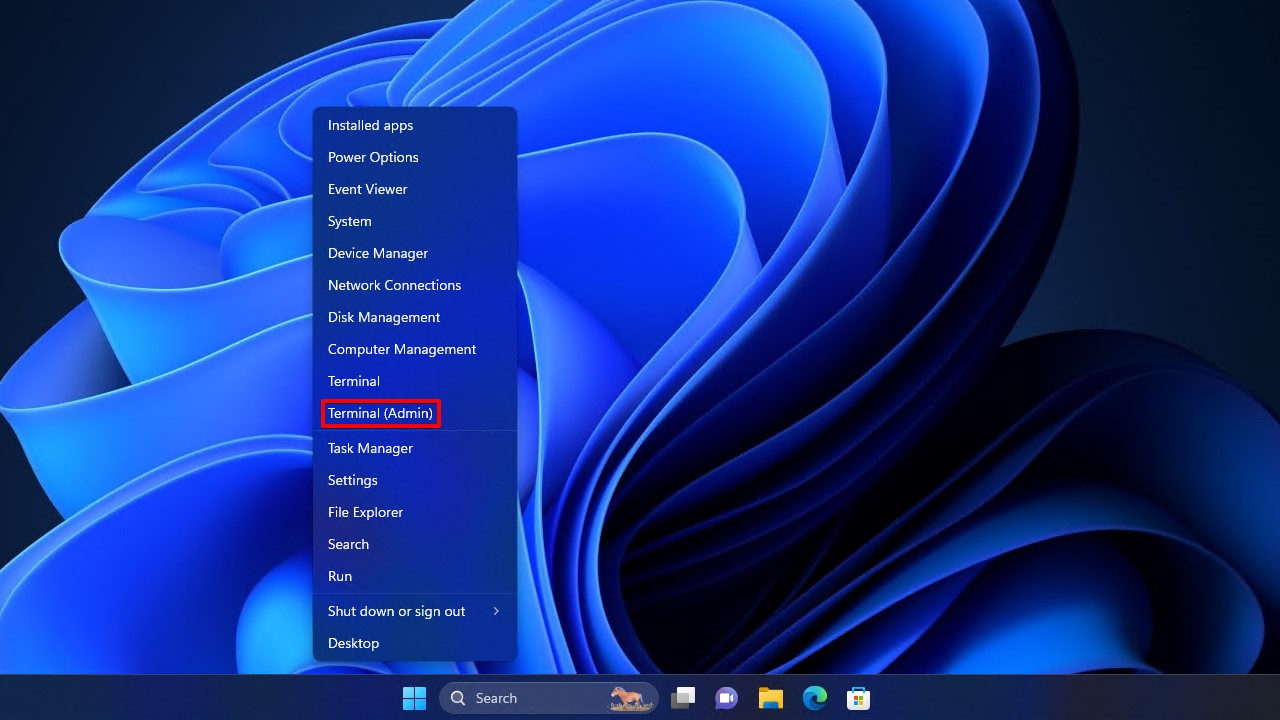
- Right-click Start and click Terminal (Admin). Alternatively, open Start and search for PowerShell. Open it as an administrator.
- Type
get-diskand press Enter. Make note of the disk number associated with your USB flash drive.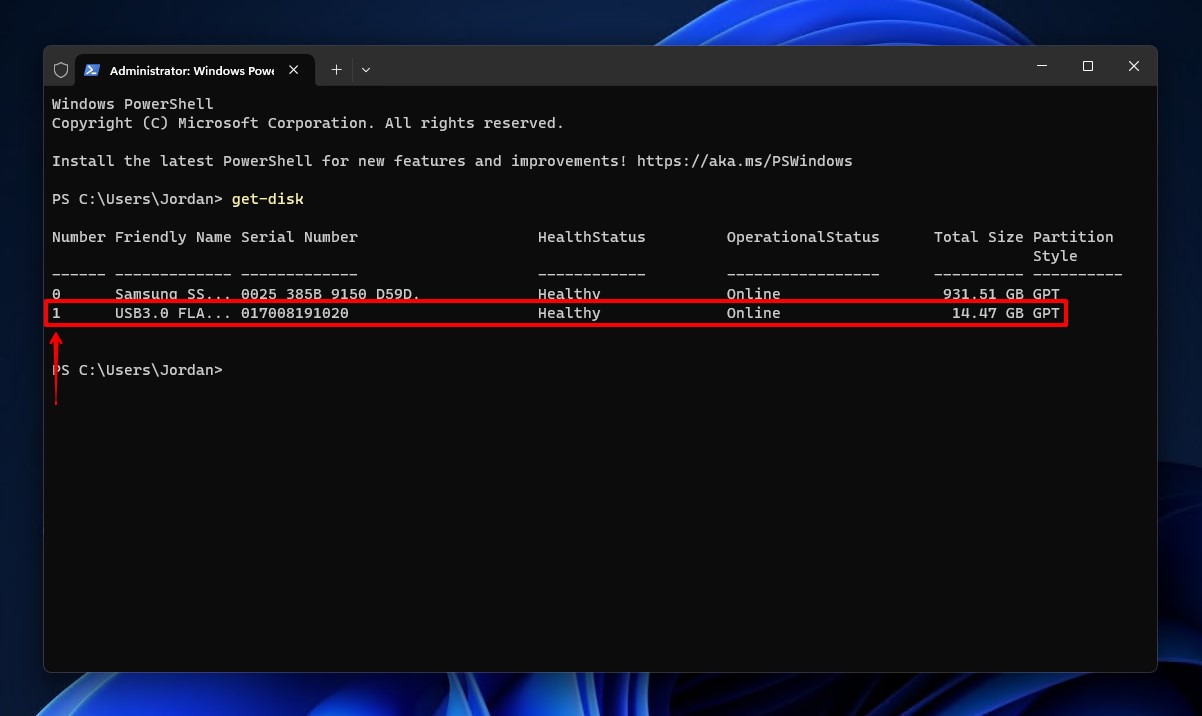
- Type
clear-disk -number X -removedata. Replace X with your USB drive number. Press Enter TypeY, then press Enter again to confirm the action.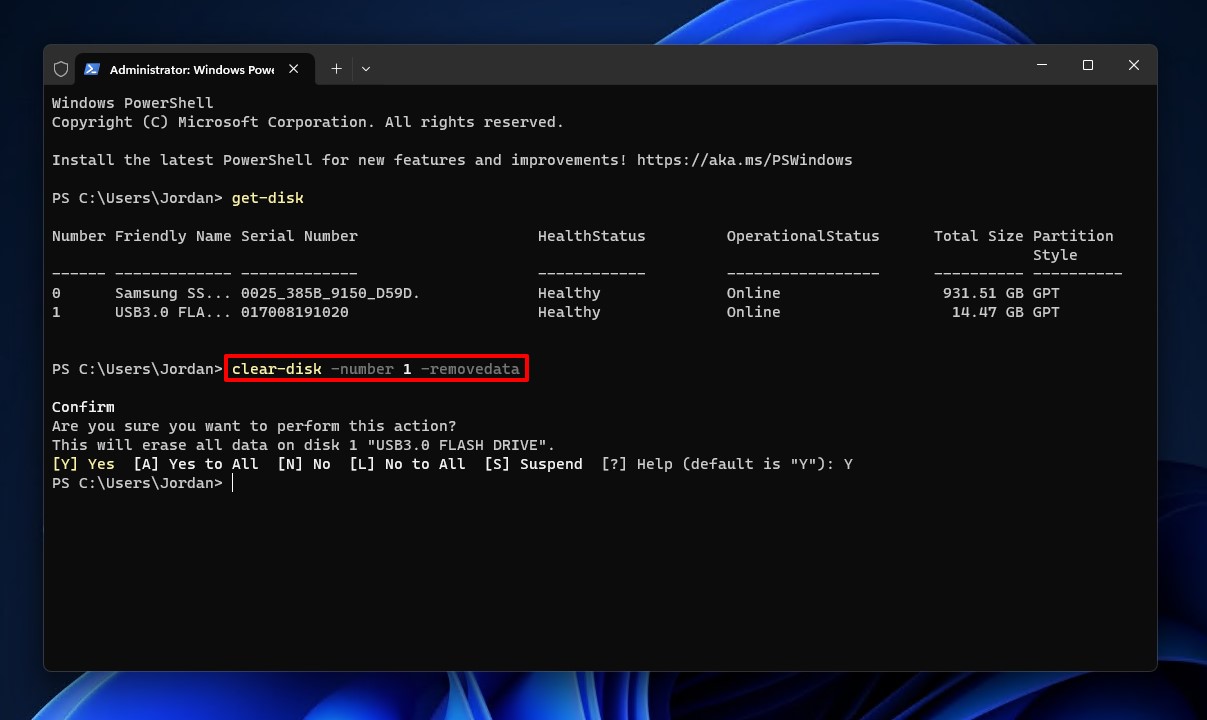
- Type
new-partition -disknumber X -usemaximumsize | format-volume -filesystem FAT32 -newfilesystemlabel Y. Replace X with your USB drive number, and Y with what you want to name the drive. Press Enter If you’re asked to initialize the disk first, please refer to the note at the end of the instructions for additional steps.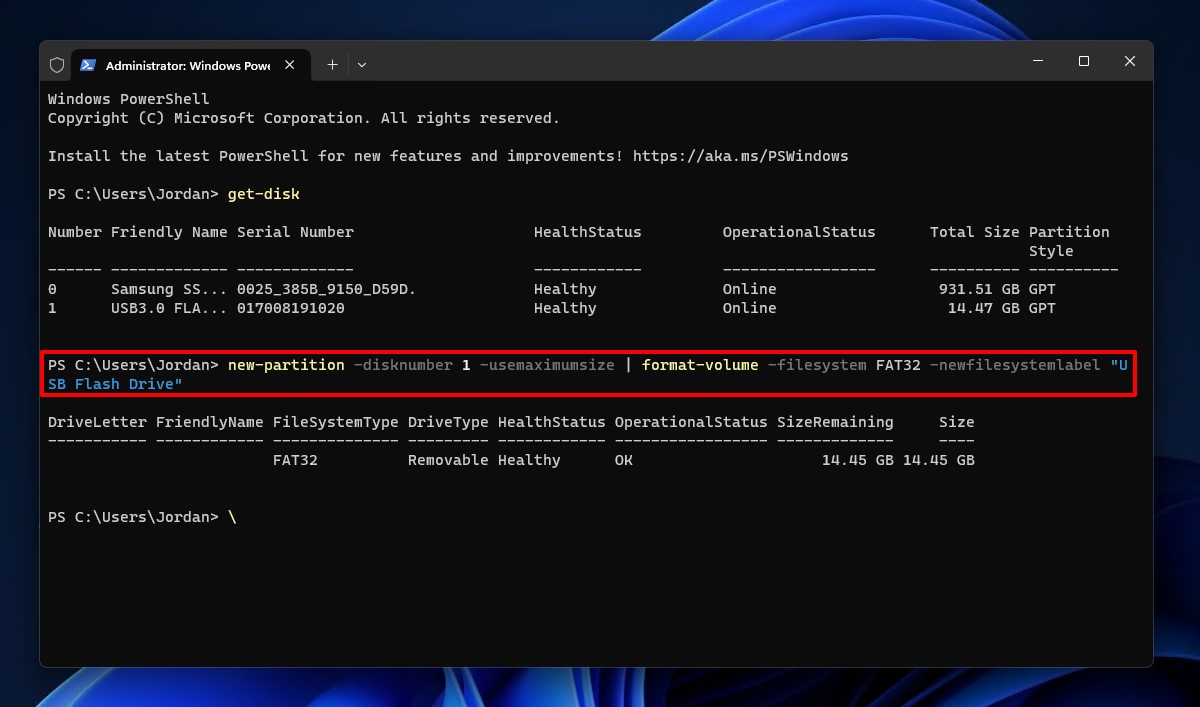
- Type
get-partition -disknumber X | set-partition -newdriveletter Y. Replace X with your USB drive number, and Y with the drive letter you want to be assigned to it.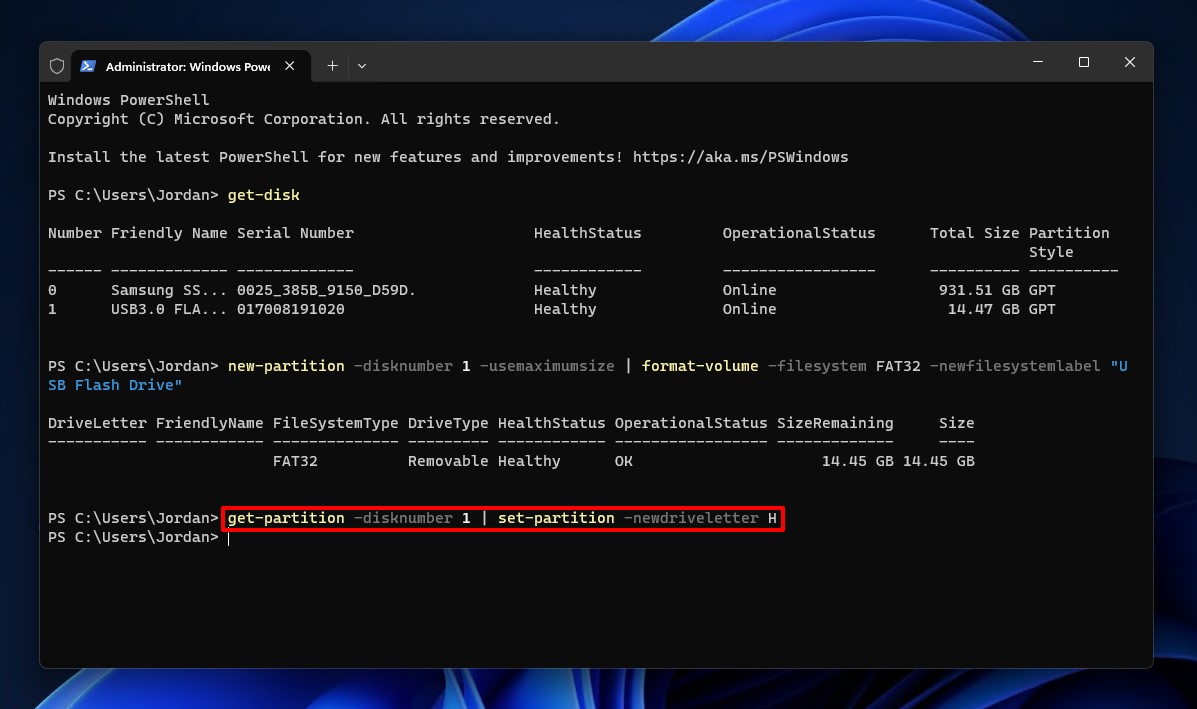
Note: If the USB drive became uninitialized after step 3, type initialize-disk -number X. Replace X with your USB drive number. This command will initialize the disk with the GPT partition style. If you want to use MBR instead, add -partitionstyle mbr to the command.
Method 4: Command Prompt (CMD)
Command Prompt is another reliable way to format a USB flash drive using a CLI. We’re going to guide you through two ways, one using DiskPart and the other using the standalone format command.
Format Command
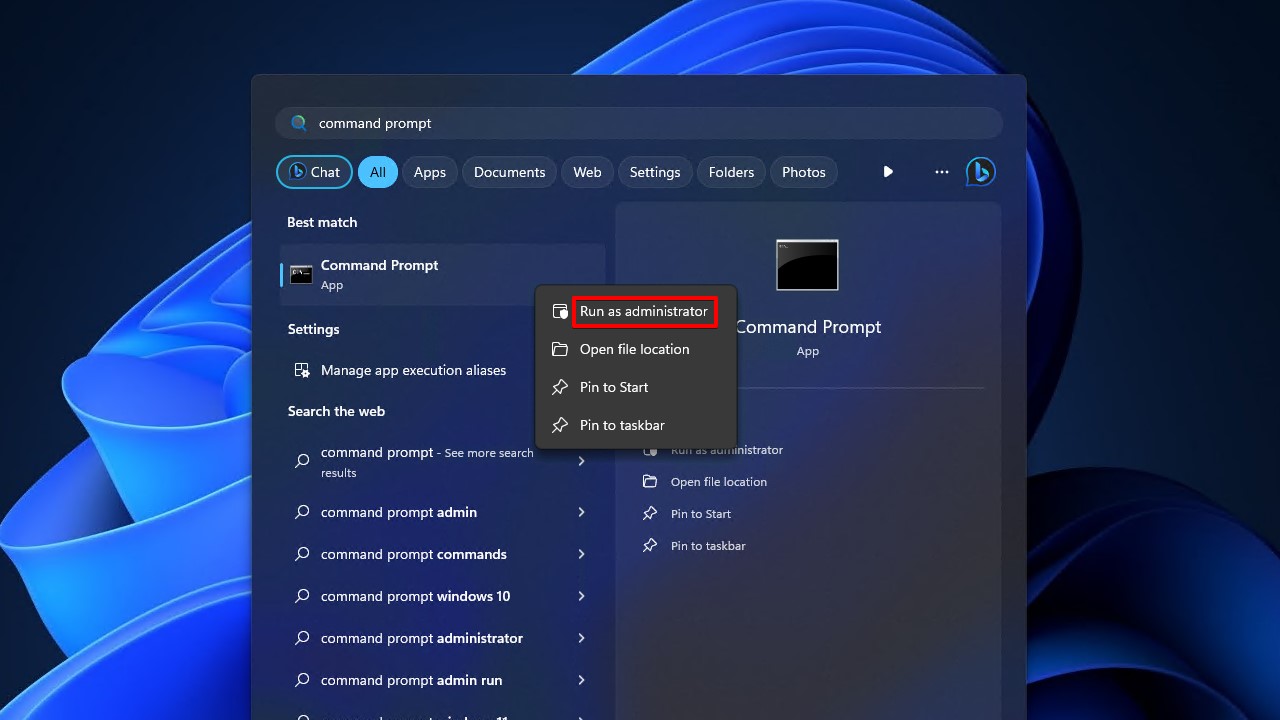
- Right-click Start and click Command Prompt (Admin). On Windows 11, you will need to search for it manually and open it as administrator.
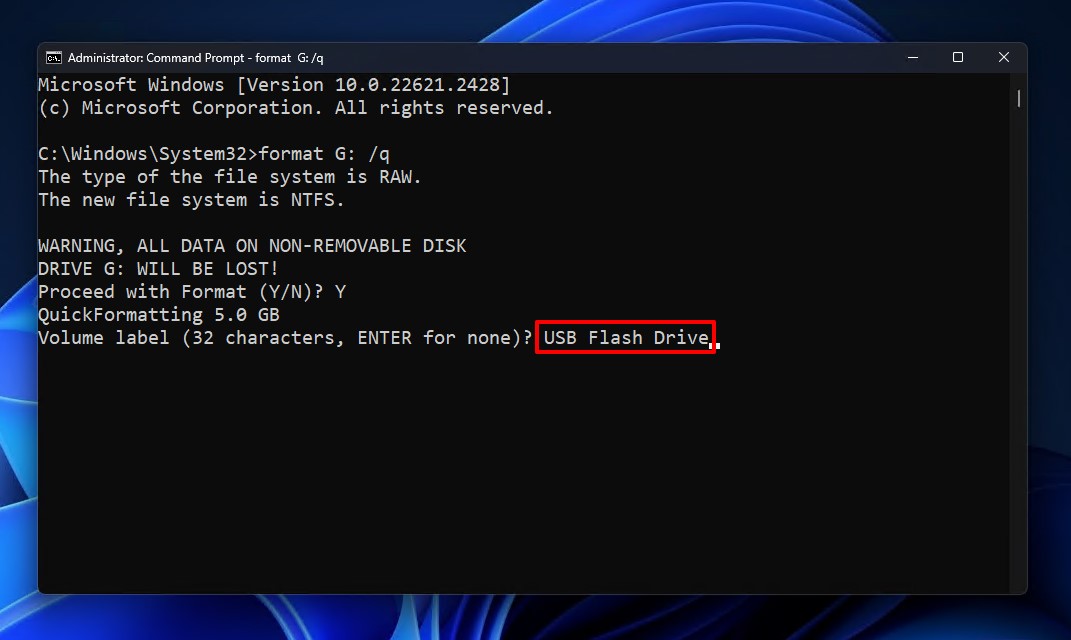
- Type
format *: /q. Replace * with the drive letter that’s assigned to your USB drive. Press Enter, and press Y if prompted to confirm.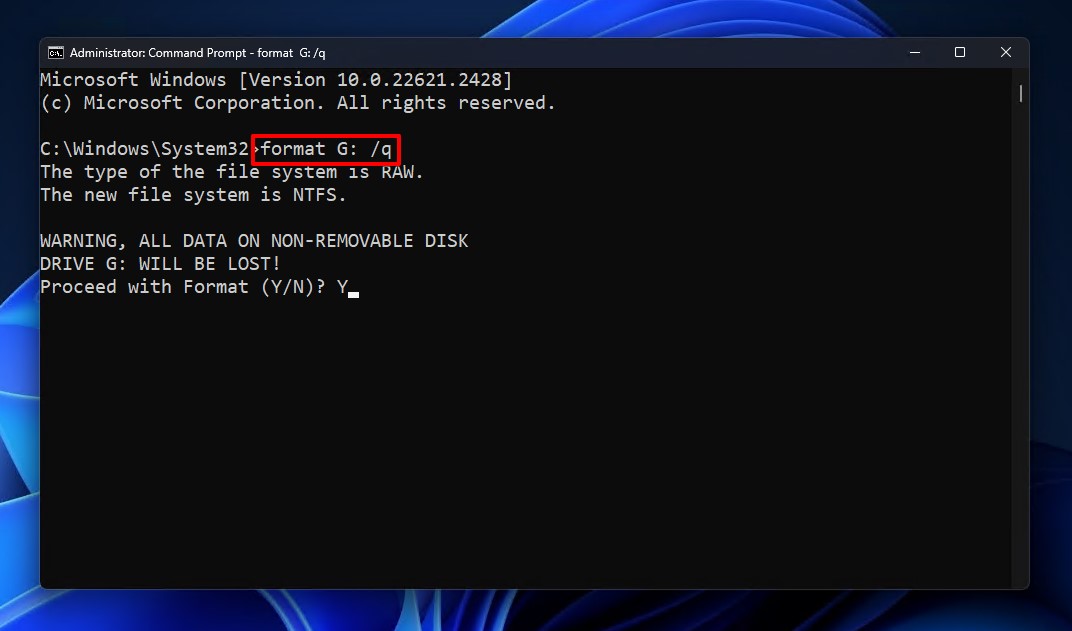
- Provide a volume label if needed, then press Enter.
DiskPart
- Right-click Start and click Command Prompt (Admin). On Windows 11, you will need to search for it manually and open it as administrator.
- Type
diskpartand press Enter.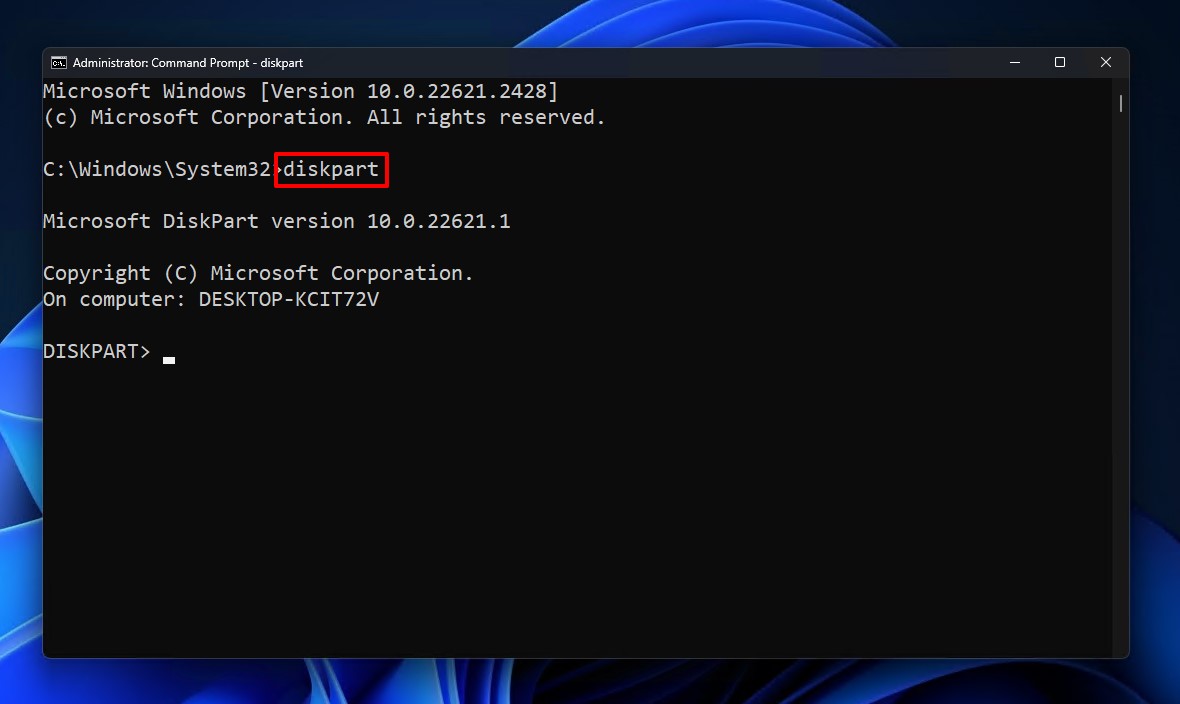
- Type
list diskand press Enter. Make note of your flash drive’s disk number.
- Type
select disk *. Replace * with your disk number. Press Enter.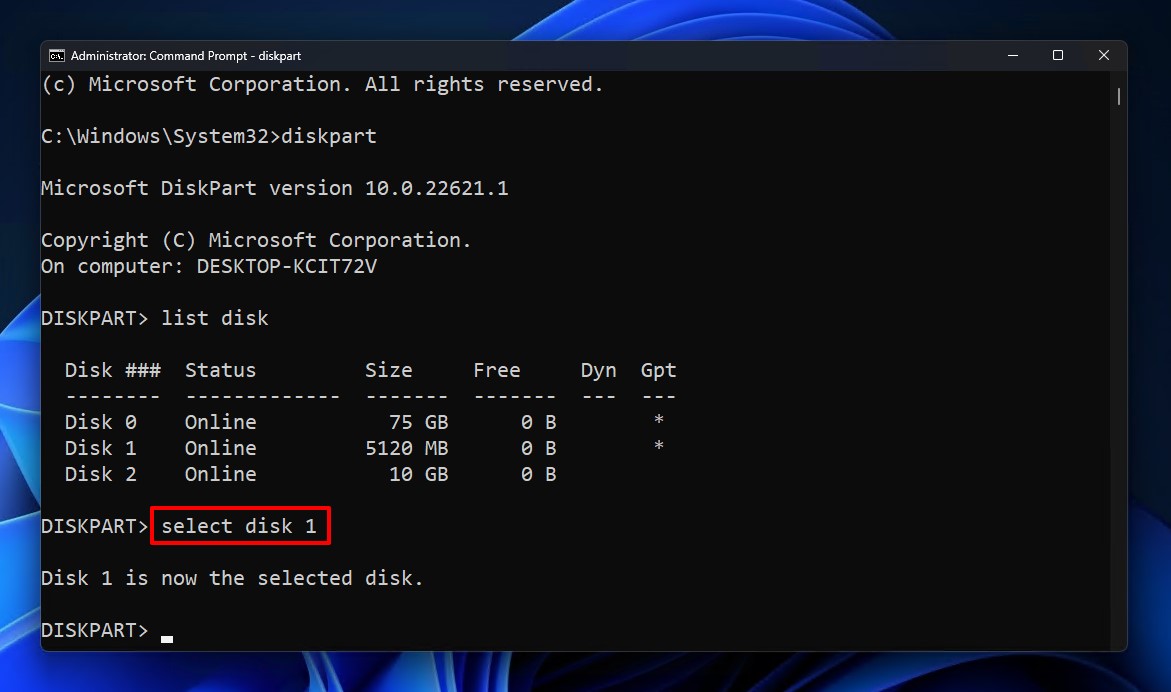
- Type
cleanand press Enter.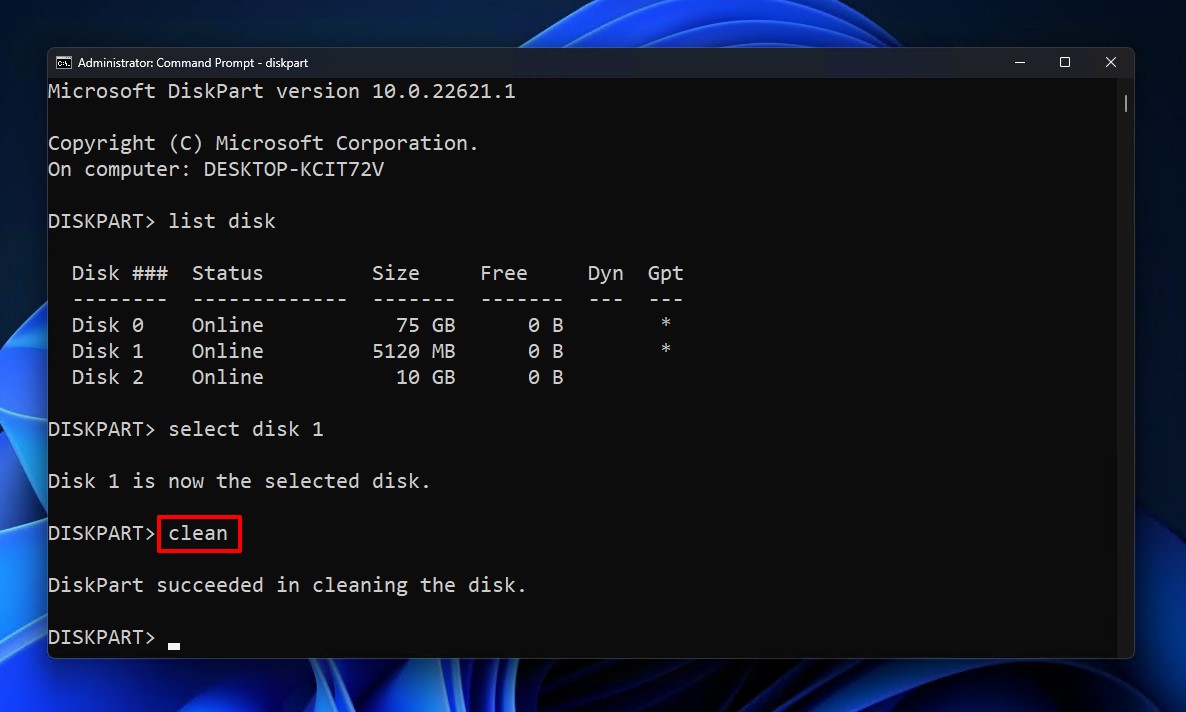
- Type
create partition primaryand press Enter.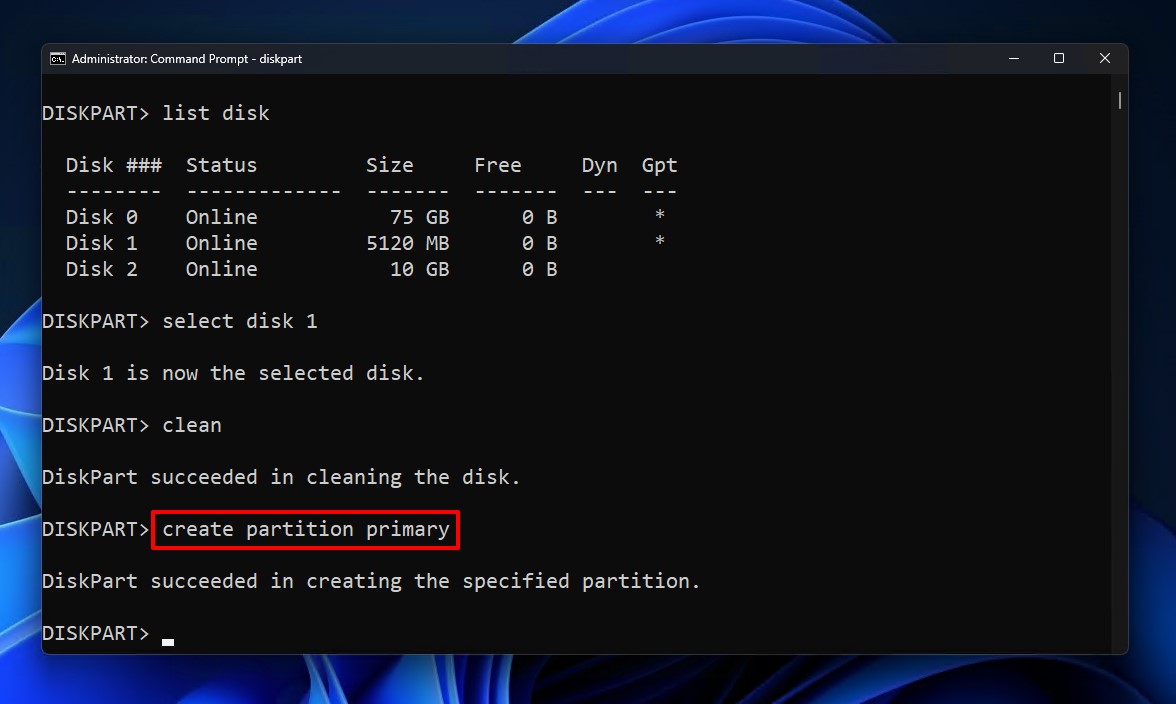
- Type
format fs=FAT32quick and press Enter.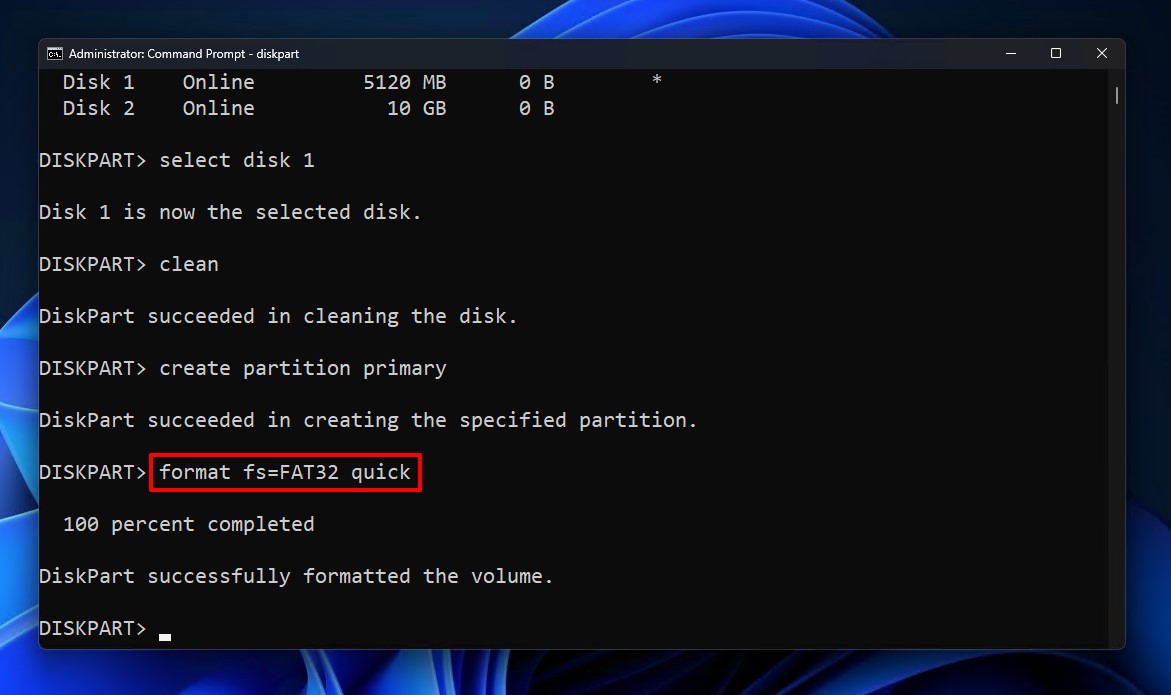
- Type
assignand press Enter.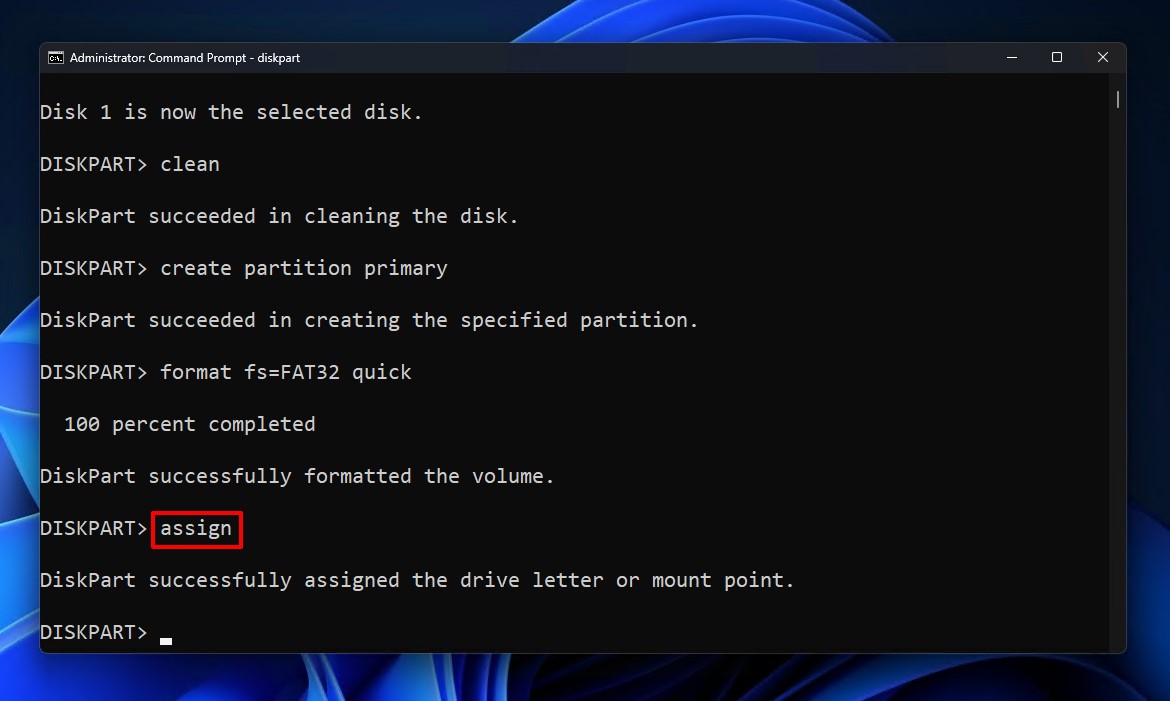
Conclusion
Formatting a USB deletes all of its contents. In order to avoid this, you must back up the data first. If you can access your USB fine, back up everything by copying and pasting it to a safe location on your computer or another storage device. If the USB is inaccessible, use a data recovery tool like Disk Drill to recover the data.
Once the data is secured, you can proceed to format the USB knowing that all of its contents are safely backed up.


