 A deleted USB partition will render any files that were stored in it, inaccessible. However, you can undo this and recover the deleted partition on your USB drive. How? Well, by following our detailed guide below. We’ve also included a section on how to keep your data safe when recovering the partition.
Table of Contents
What Is a USB Drive Partition
Partitioning a storage drive is an important way of organizing data. The partitions on your USB drive are separate logical divisions, viewed and treated as separate units by Windows. Typically, USB drives just have a single partition, unless you manually create separate ones. Each partition will have its own file system, and you can have multiple partitions with different file systems on a single USB drive.
USB partitions can be deleted, either accidentally, or because of logical damage such as corruption, and malware infections. Consequently, you will lose access to any data that was stored on the partition. Fortunately, in most cases, you can easily recover your data, and sometimes it’s also possible to recover the partition with the file system intact. Take a look at the next section for a detailed look at how to do so.
How to Recover Data from a Deleted USB Partition
Before you recover the actual partition, you must first recover your data from the USB drive. This way, even if you’re unsuccessful at recovering the partition, you will still have your files with you. Additionally, you can always create a new partition on your USB drive and copy these files back.
To recover data from the deleted USB partition, you’ll need an appropriate data recovery program, as not all data recovery tools work with a USB drive with a deleted partition.
Our recommendation would be to use Disk Drill as it can recover data from storage devices even if they’re corrupt, have a deleted partition, and don’t have a file system (RAW). It’s also easy to use, while being equipped with an advanced data recovery algorithm that’ll ensure you recover most, if not all, of your data in a few clicks.
Here’s what the data recovery process in Disk Drill looks like:
- Download Disk Drill and install it.
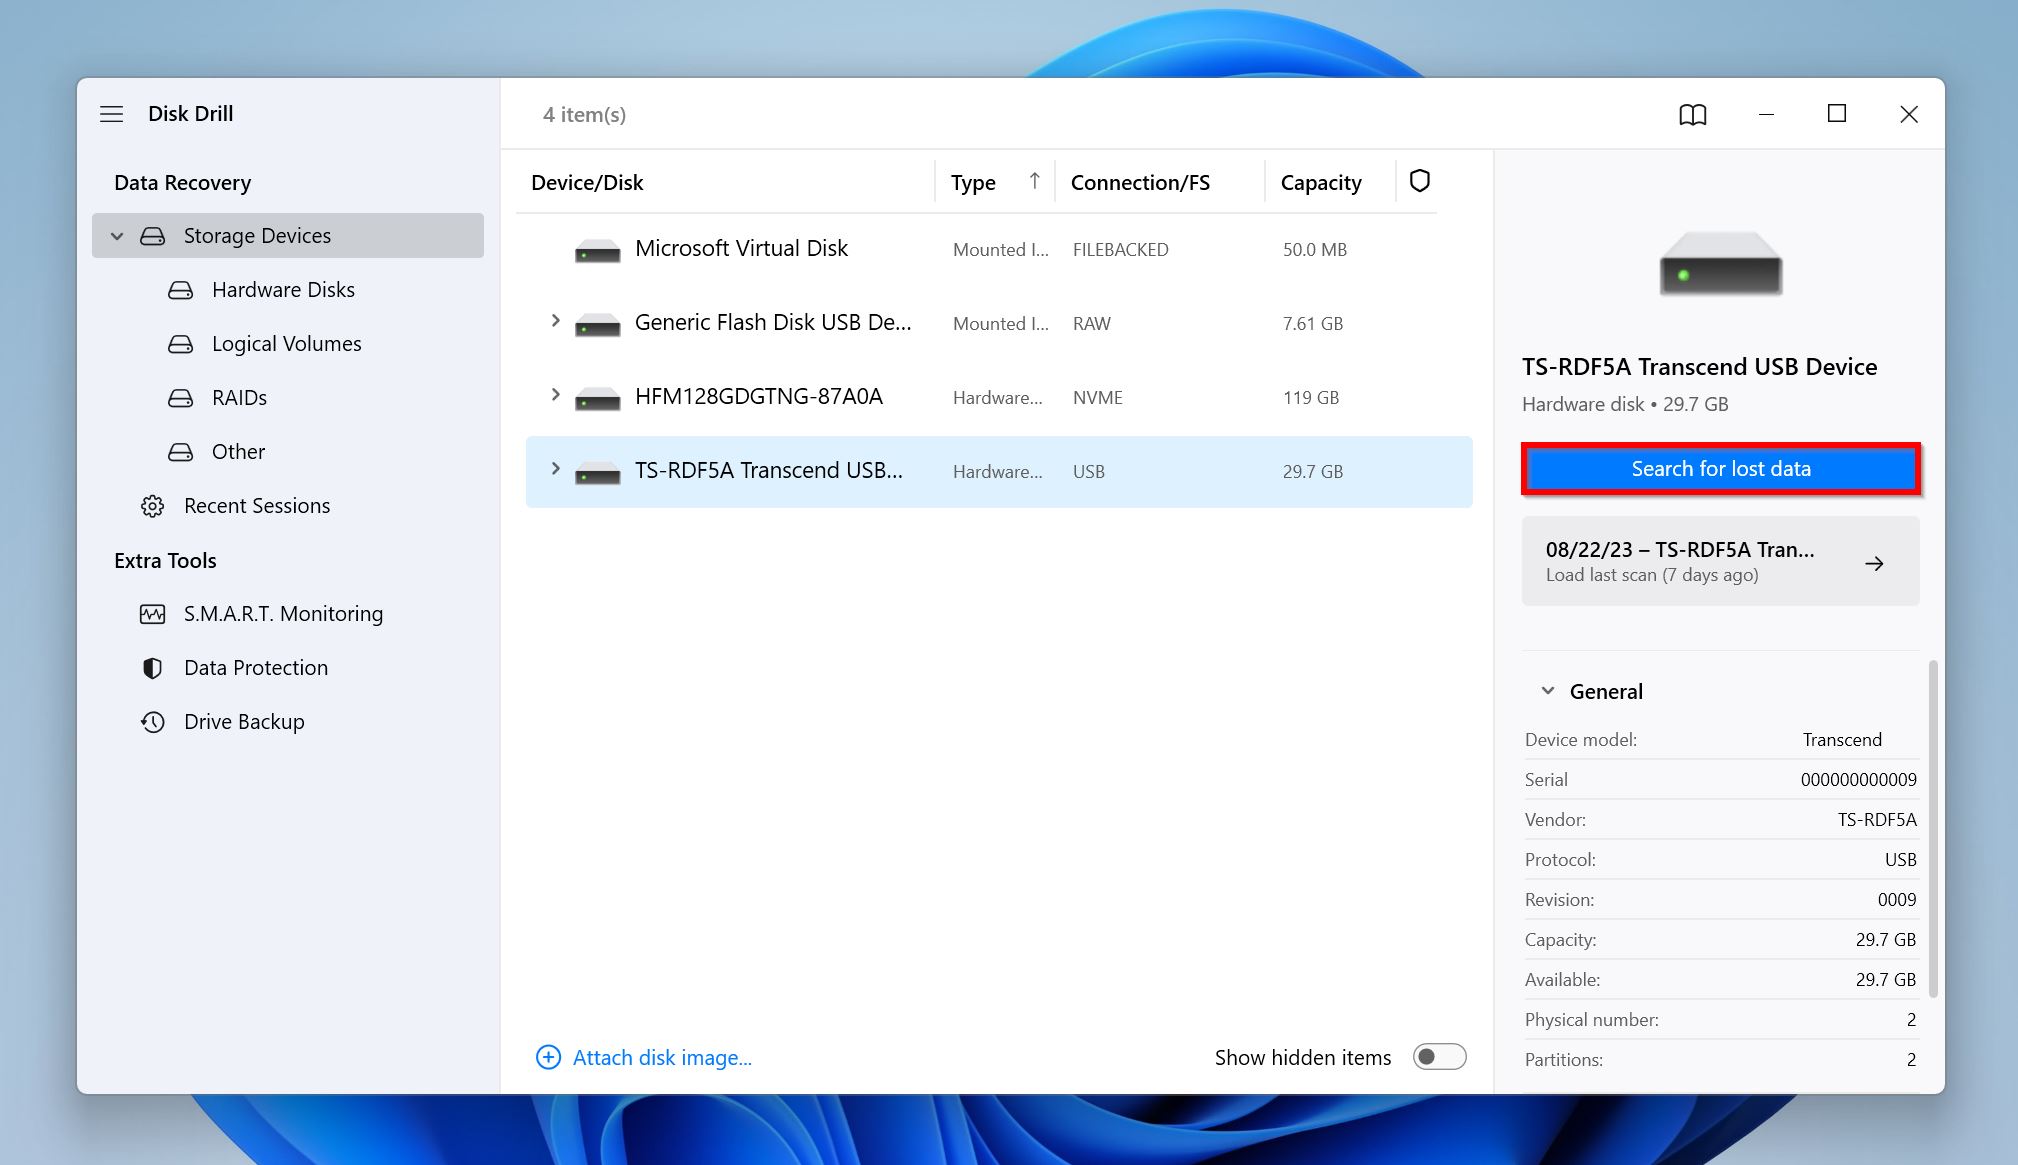
- Open Disk Drill, select your USB drive, and click on Search for lost data.
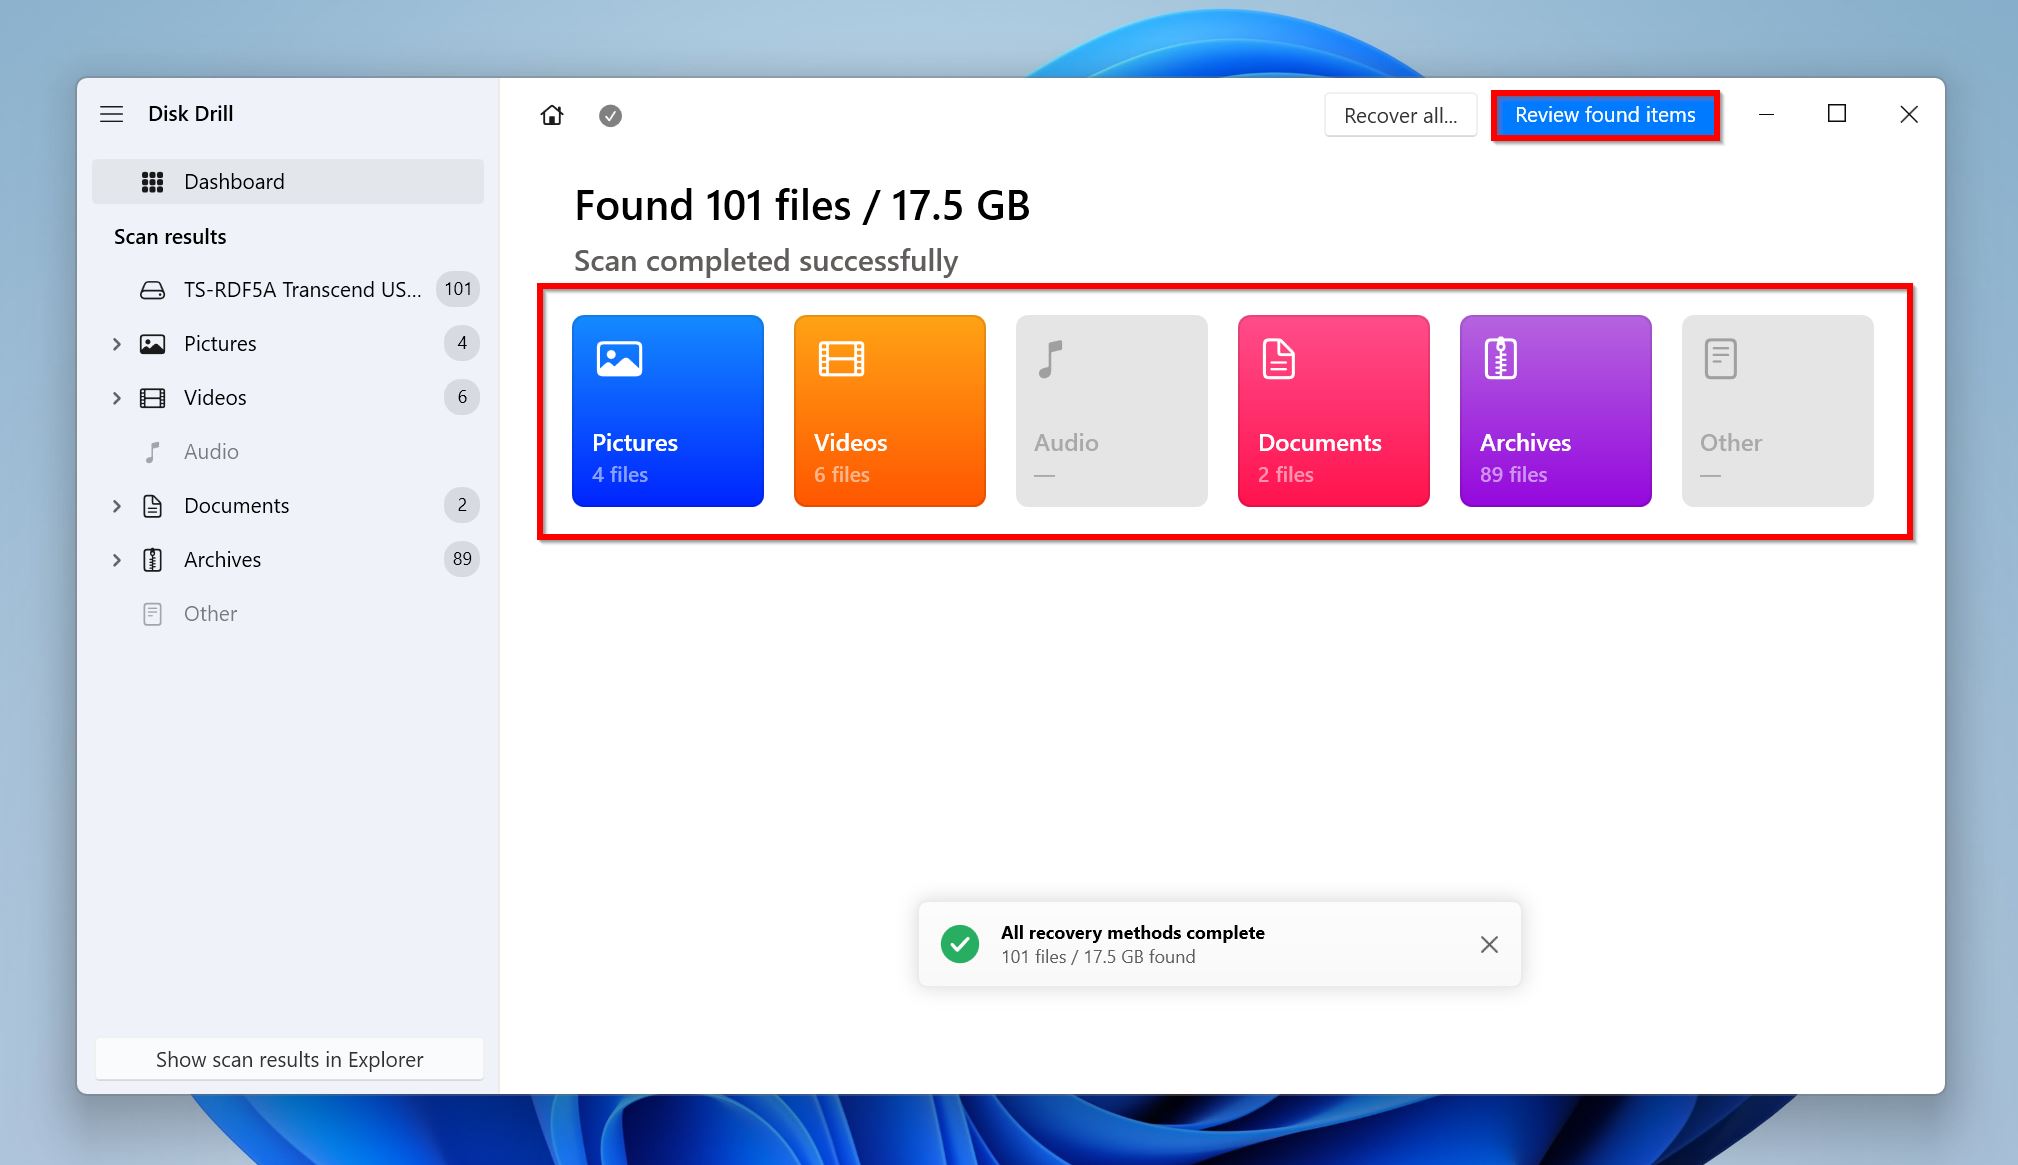
- Click on Review found items to view all recoverable files. You can also opt to filter out the results right away, by clicking on the relevant option (Pictures, Video, Audio, Documents, Archives, and Other).
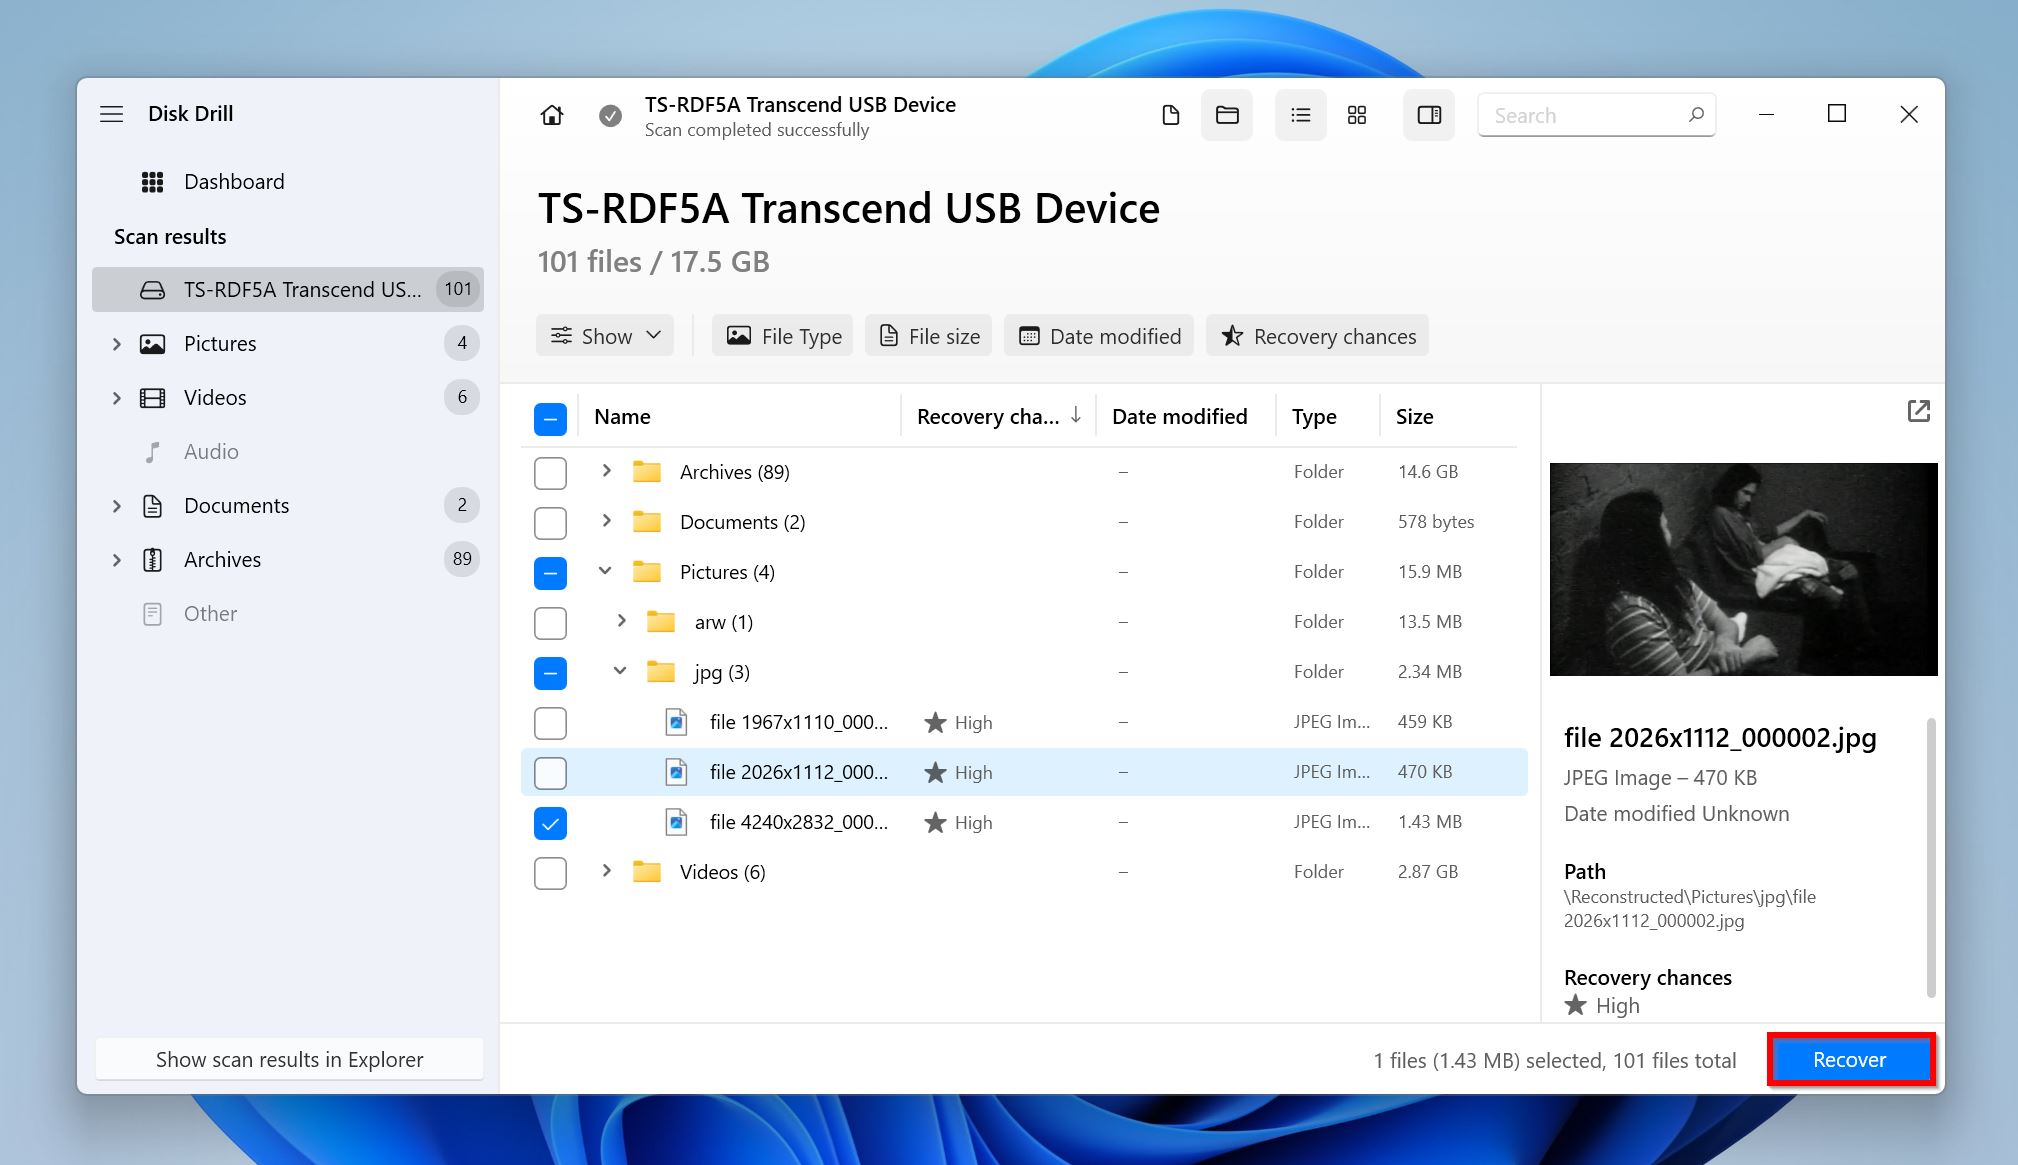
- Expand the Deleted or lost and Reconstructed section to view deleted files that are recoverable. To view files that currently exist on the USB drive, expand the Existing section.
- Select the files you wish to recover and click Recover. Disk Drill will display a preview of the currently selected file, but you can manually preview any file by clicking the eye icon that appears when you hover the cursor over the filename.
- Choose a recovery destination for the files and click Next. Don’t recover the files to the USB drive because you may need to format it again to create a new partition.
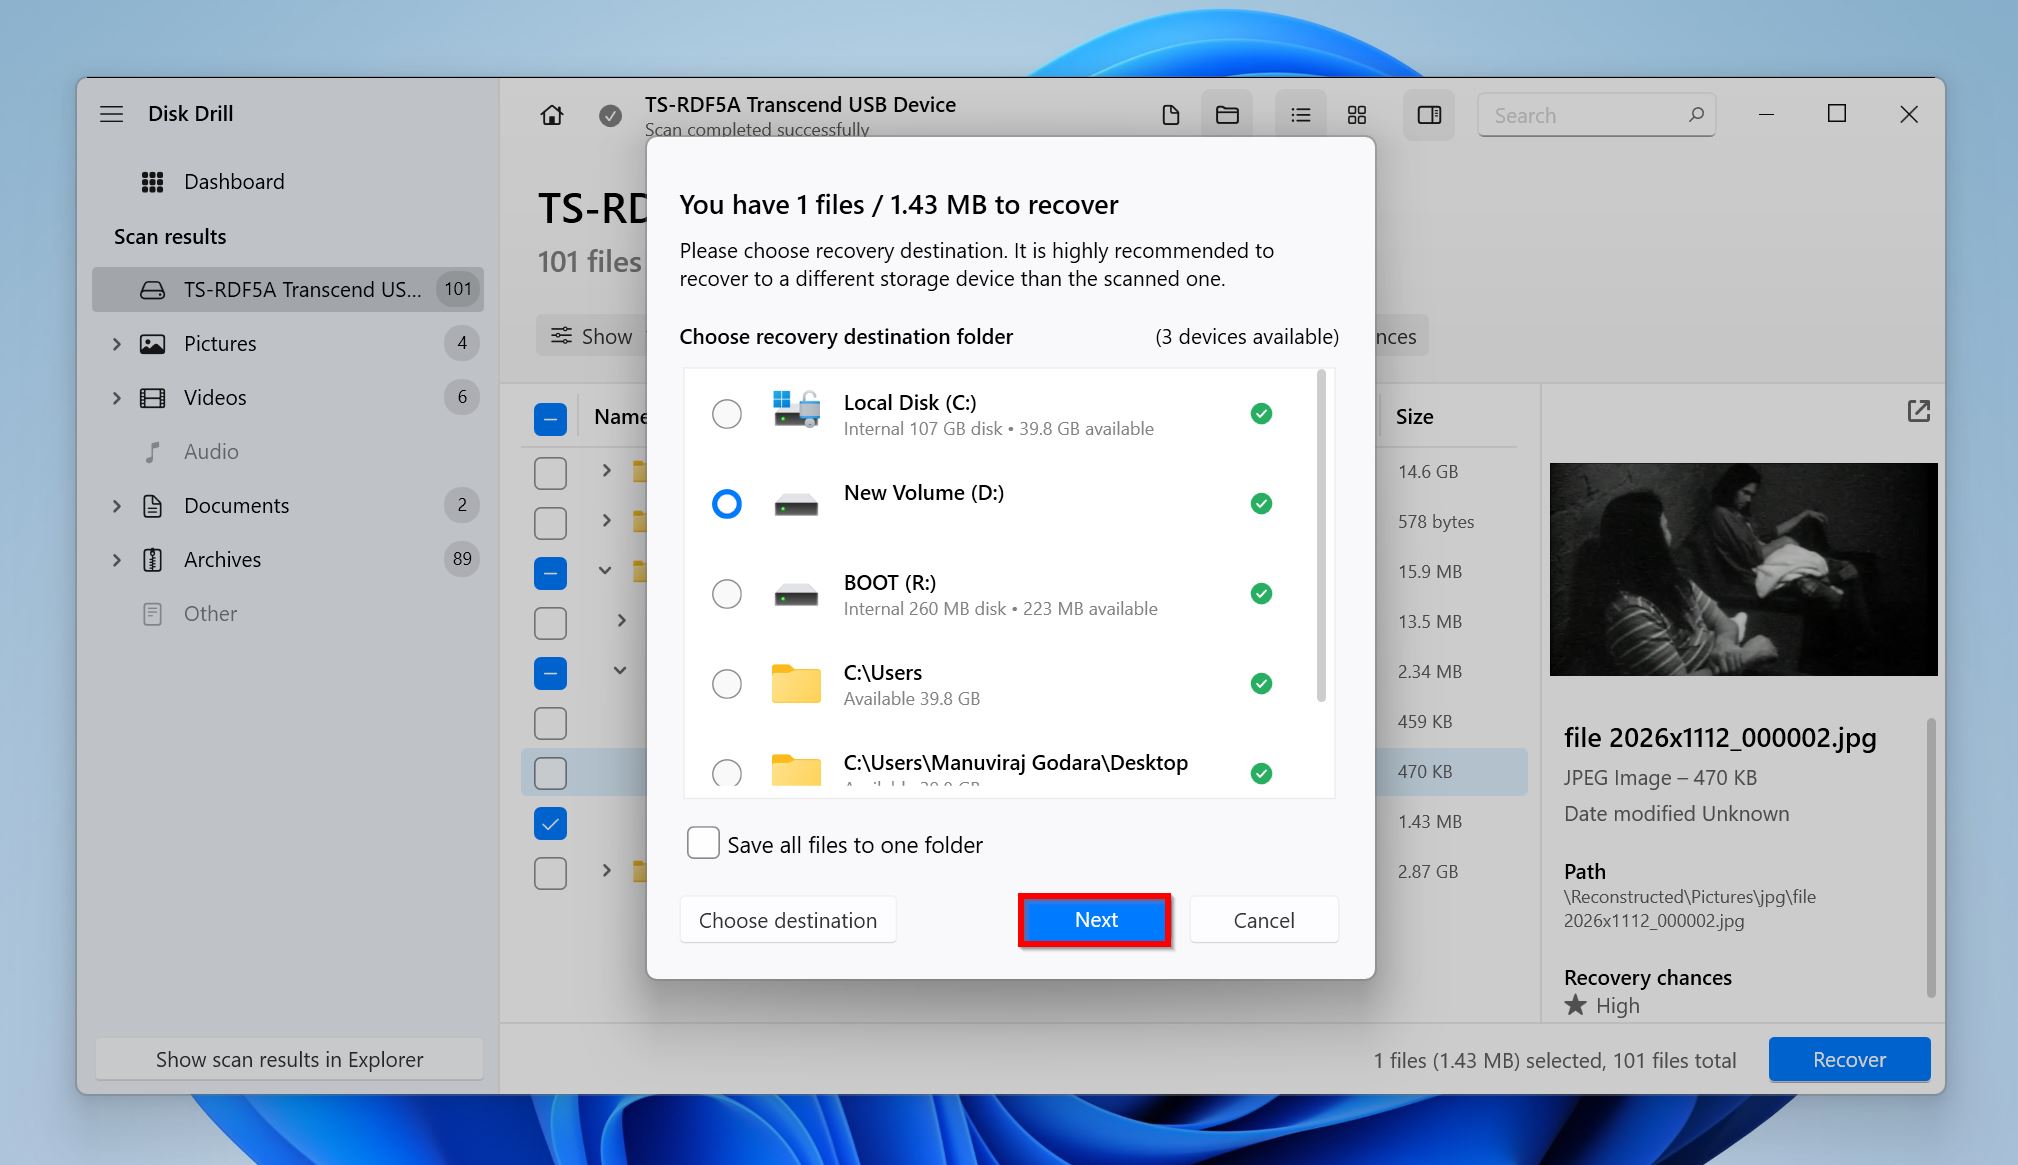
- Disk Drill will recover your files. You can recover up to 500 MB of files for free as part of Disk Drill’s trial.
Once your files are safe, you can proceed to perform USB partition recovery.
3 Ways to Recover a Deleted Partition on a USB Drive
You have three primary options when looking to recover a deleted partition from your USB drive–use a USB partition recovery tool, recover the deleted partition using CMD, or use Disk Management to create a fresh partition. If you recovered your data beforehand, all three options will restore the USB drive to its original state.
Let’s take a look at the fixes:
Method 1: Recreate the Partition Using TestDisk
TestDisk is a capable partition recovery and repair tool that can search for lost or deleted partitions and help you regain access to your data. It is only held back by its lack of a proper graphical user interface (GUI). However, you need not fret about that since the steps below will guide you through the entire USB partition recovery process in a detailed manner.
Let’s get to it:
- Download TestDisk and extract the contents of the downloaded archive.
- You’ll use the arrow keys to navigate around TestDisk and press Enter to confirm your selection.
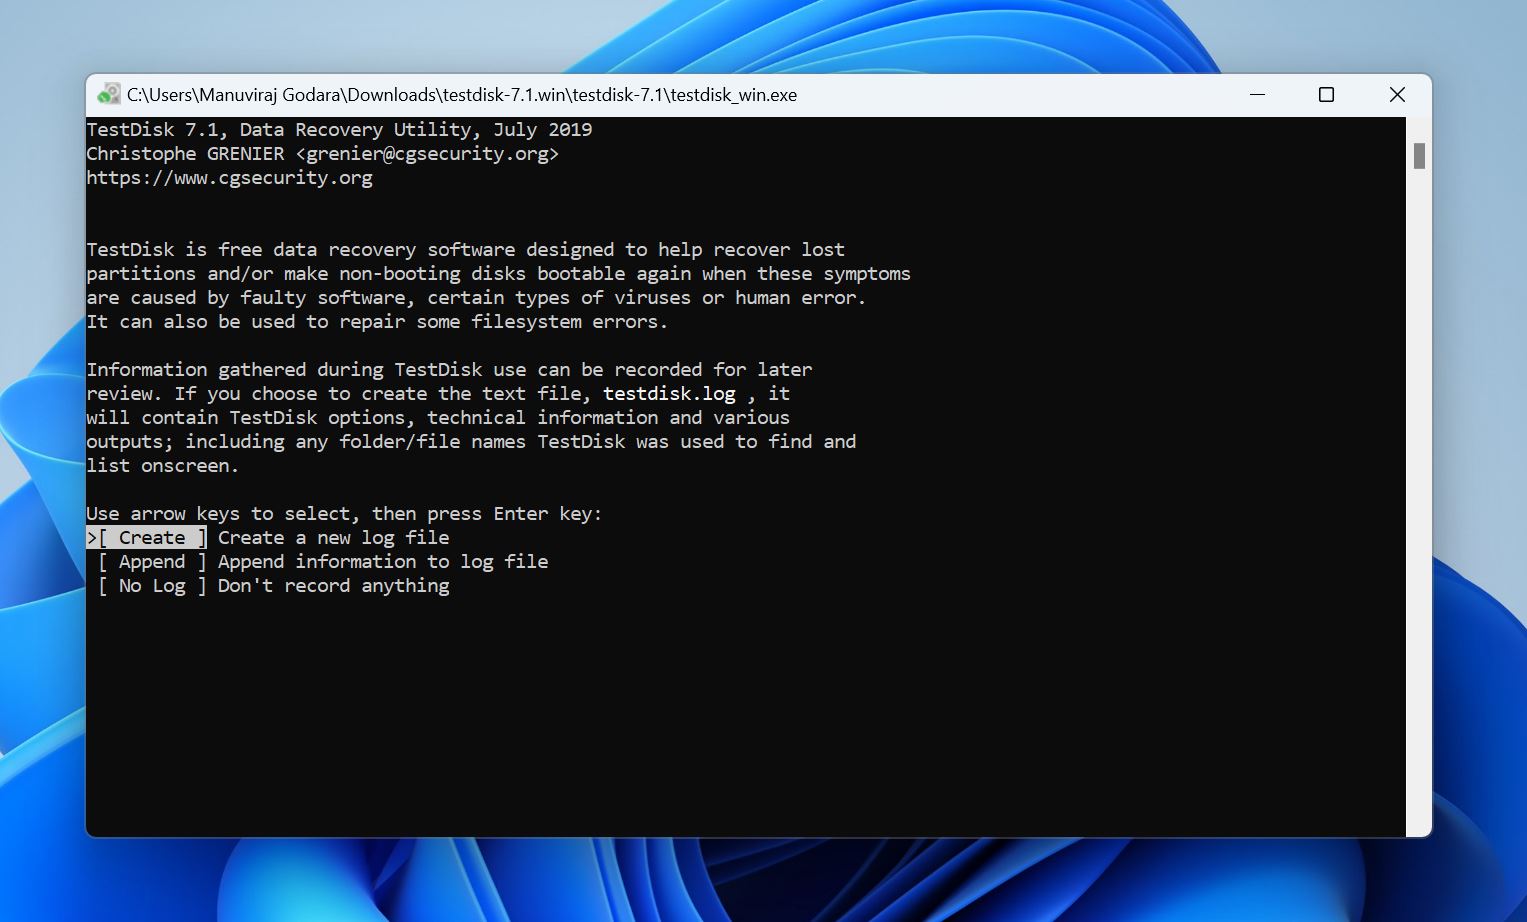
- Launch the testdisk_win.exe file from the TestDisk folder that you extracted.
- Decide whether you want to create a log file or not. Use the Up and Down arrow keys to highlight an option, and press Enter to select. You can choose any option you’d like here.
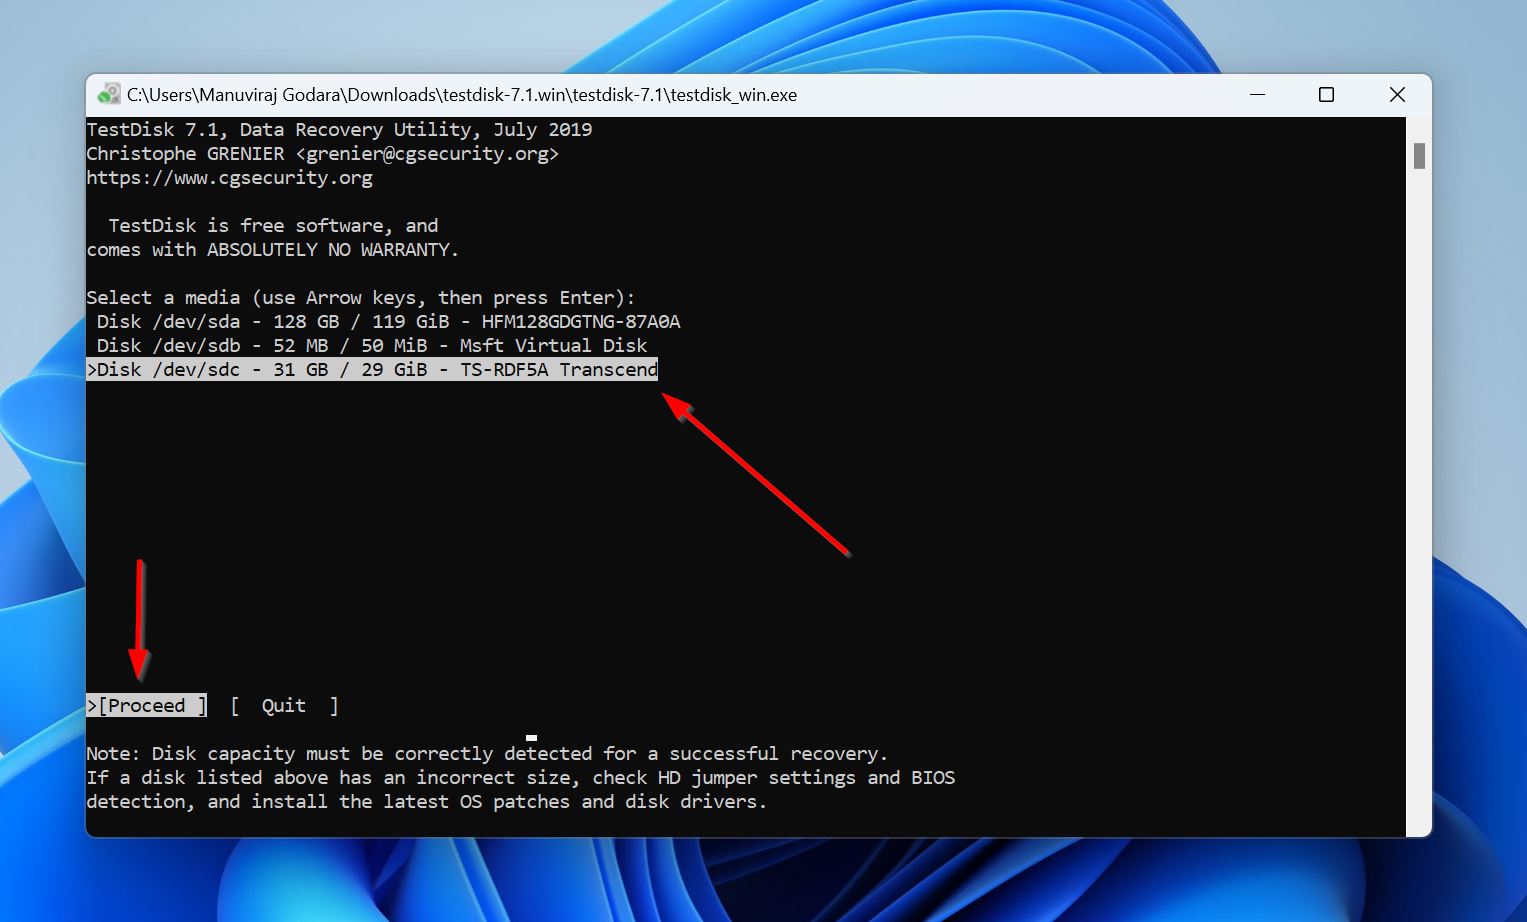
- Highlight the USB drive from the list of storage devices and select Proceed.
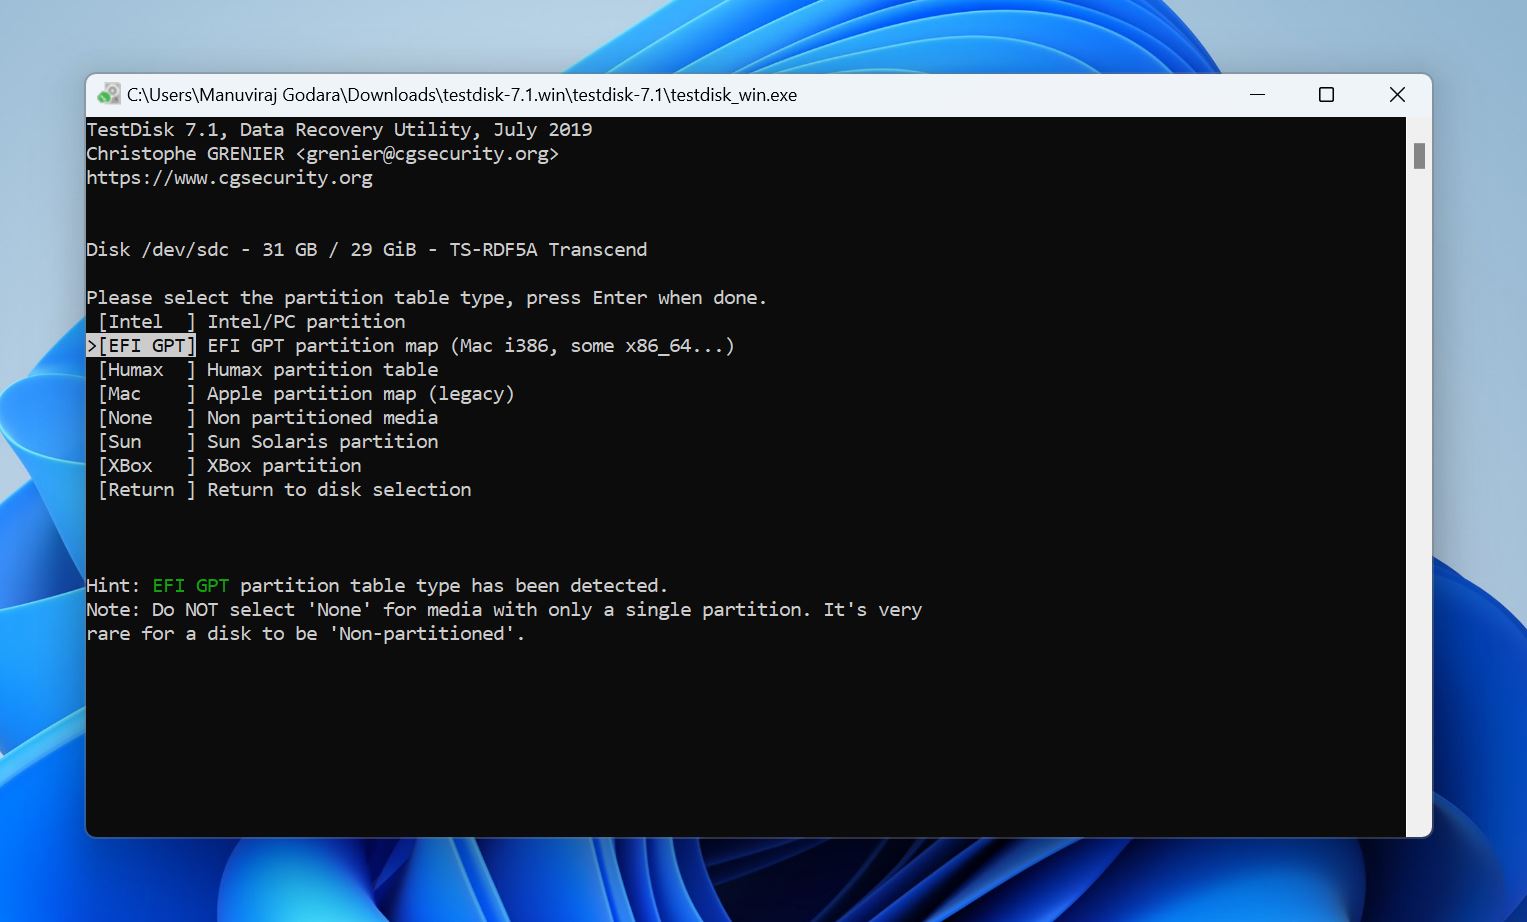
- Select a partition table type. TestDisk autodetects this, so it’s best to simply leave the selected option as it is and simply press Enter on this screen.
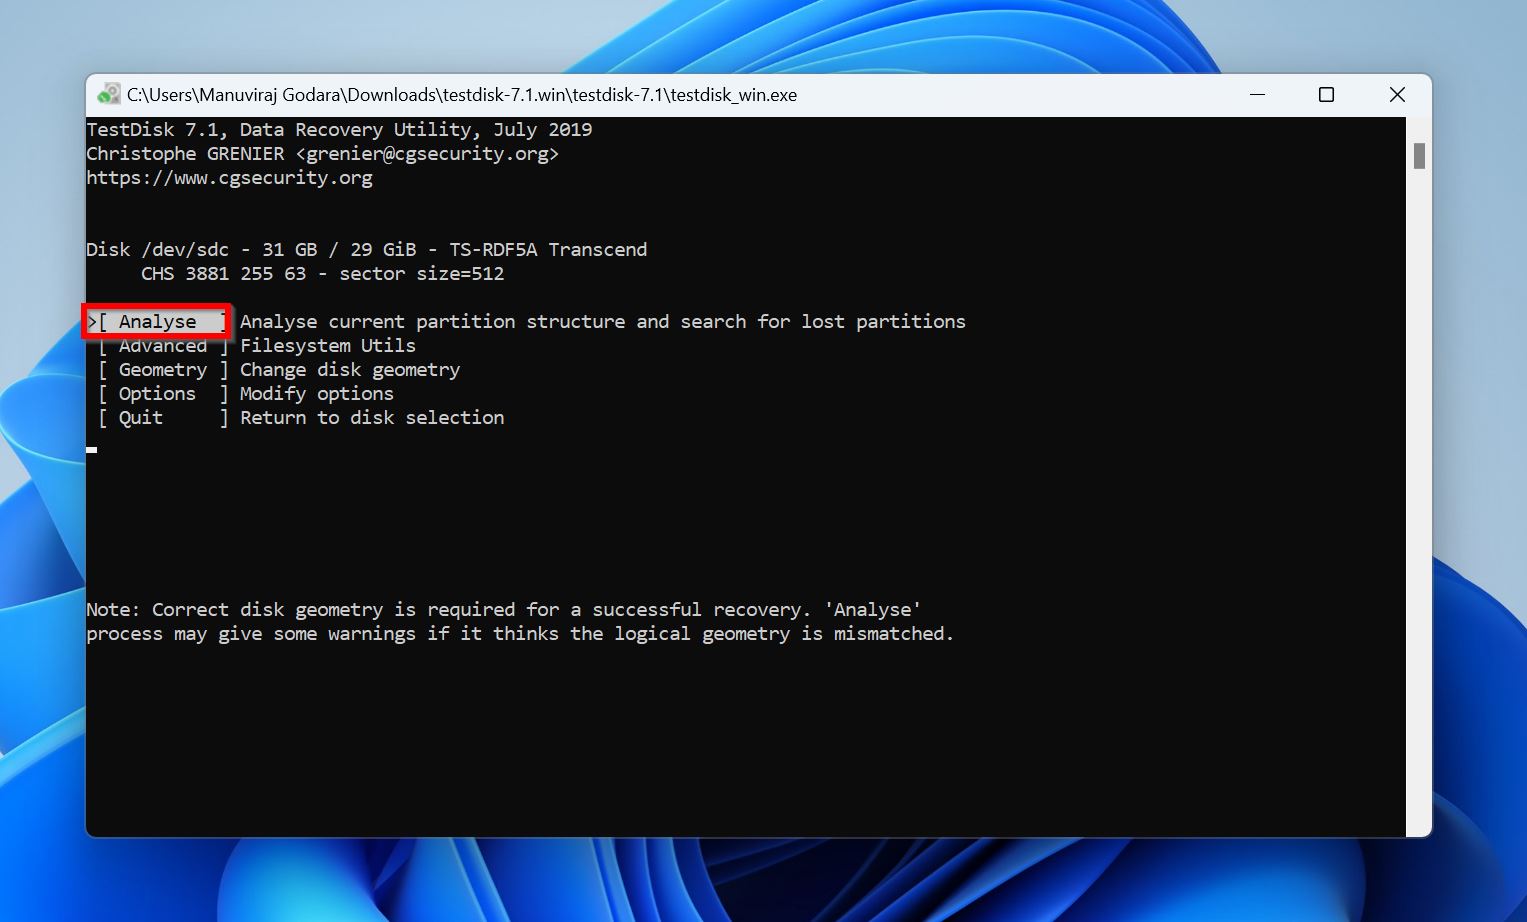
- Select Analyse and press Enter.
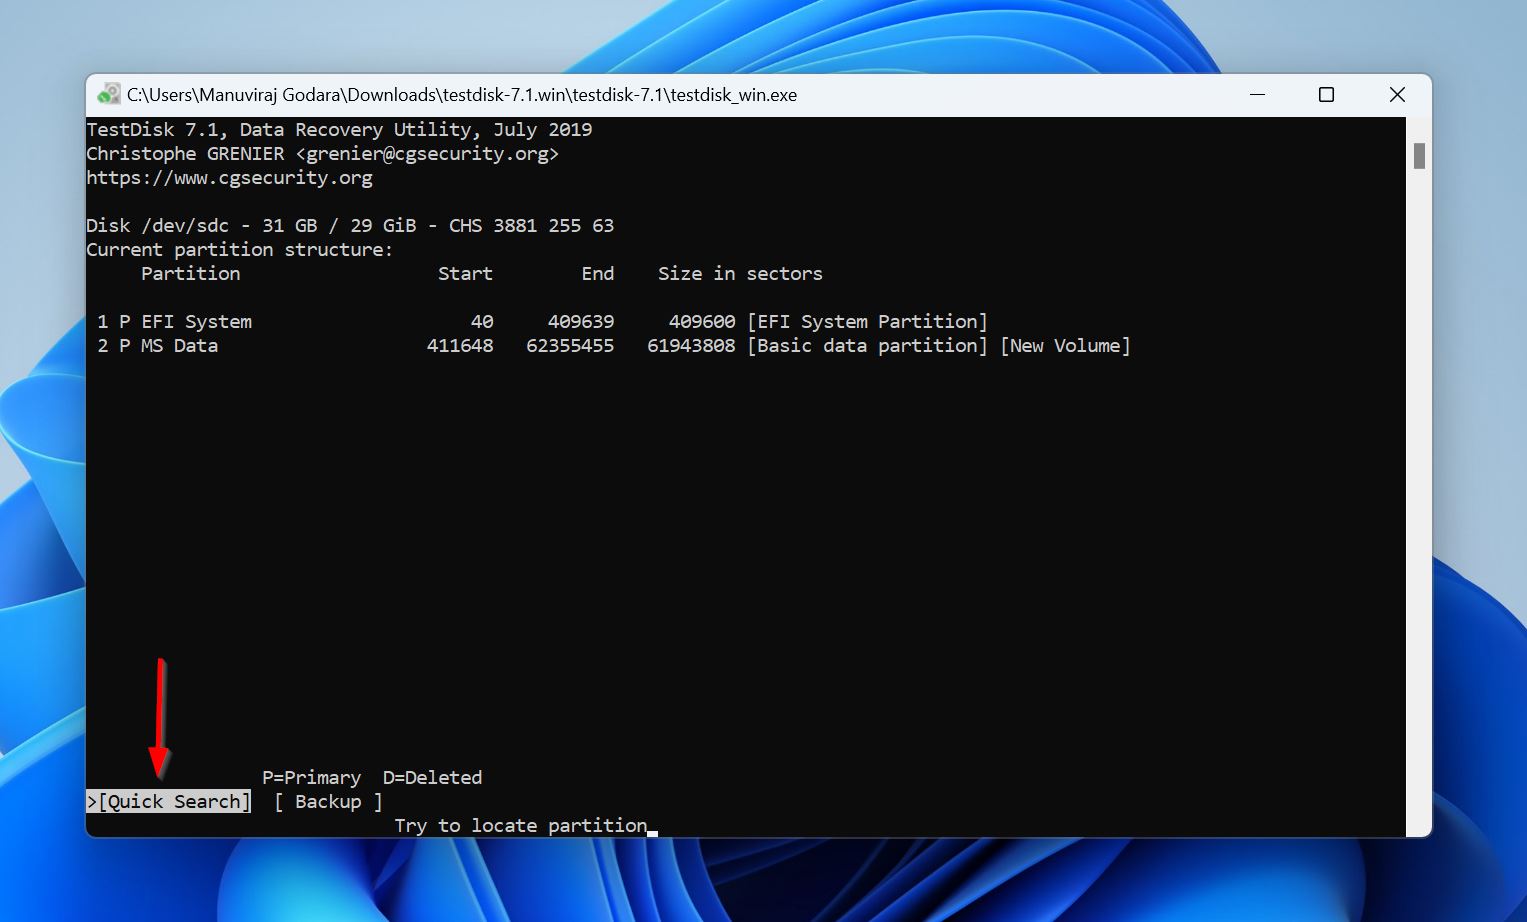
- Select Quick Search and press Enter. TestDisk will list the partitions.
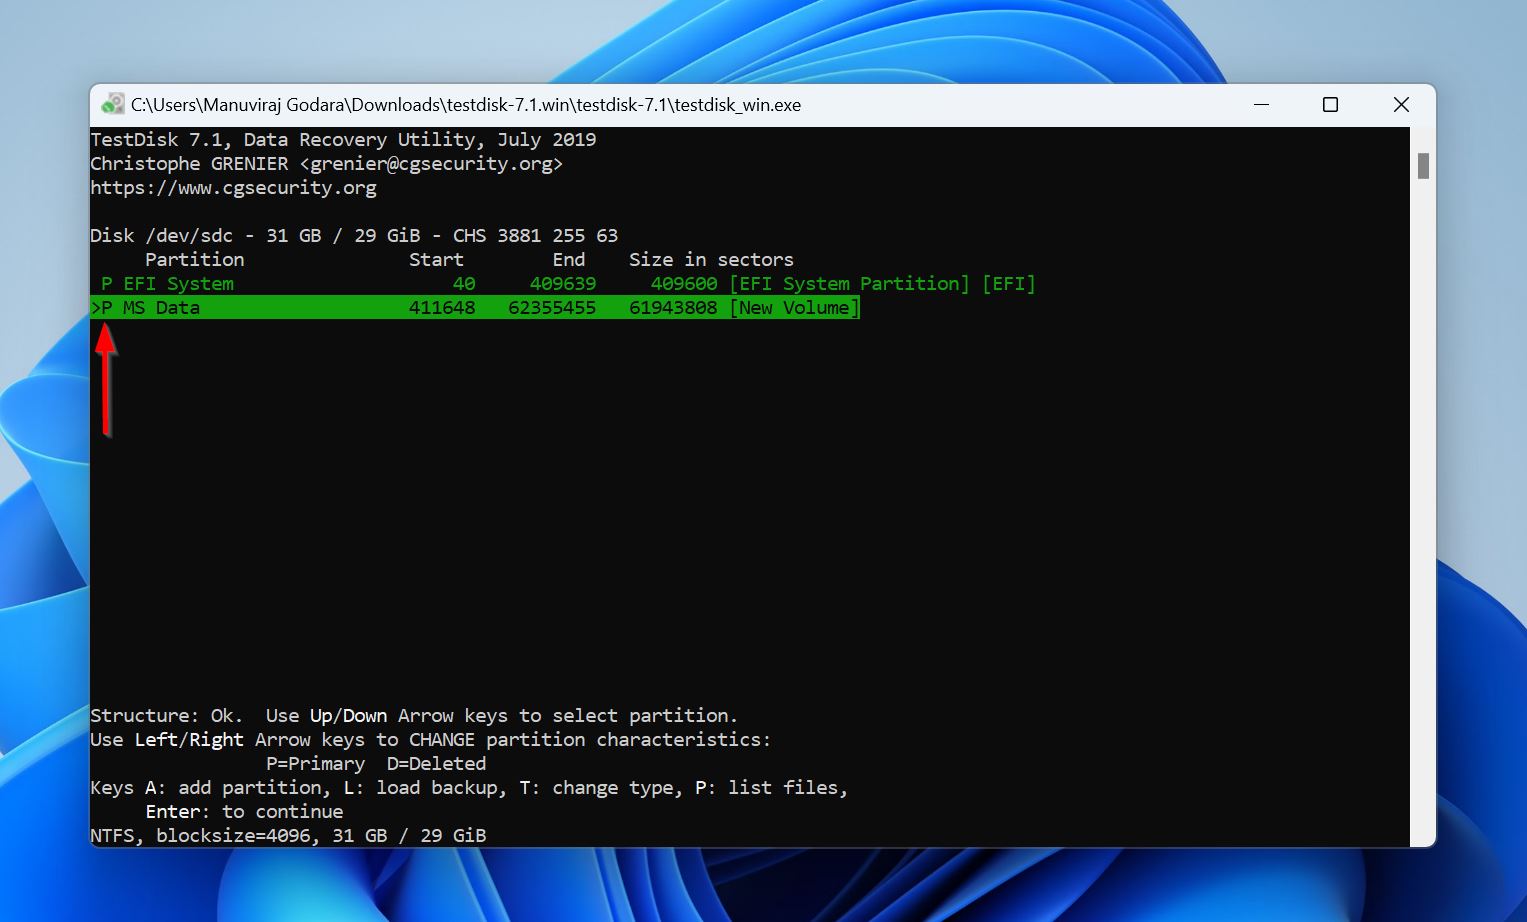
- Highlight the partition of your choice and press P to view its files. If all your files are there, press C to go back.

- The listed partitions will have one of these characters before them–P, D, L, and *, denoting Primary, Deleted, Logical, and Bootable respectively. The partition you wish to recover will have a D before it and you need to mark it as P. To do this, select the partition using the Up or Down arrow keys, and press the Left and Right arrow keys to cycle between the P, D, L, and * characters.
- Once the partition has been marked as P, press Enter.
- If you wish to search for more partitions, select the Deeper Search option and press Enter. If not, move to the next step.
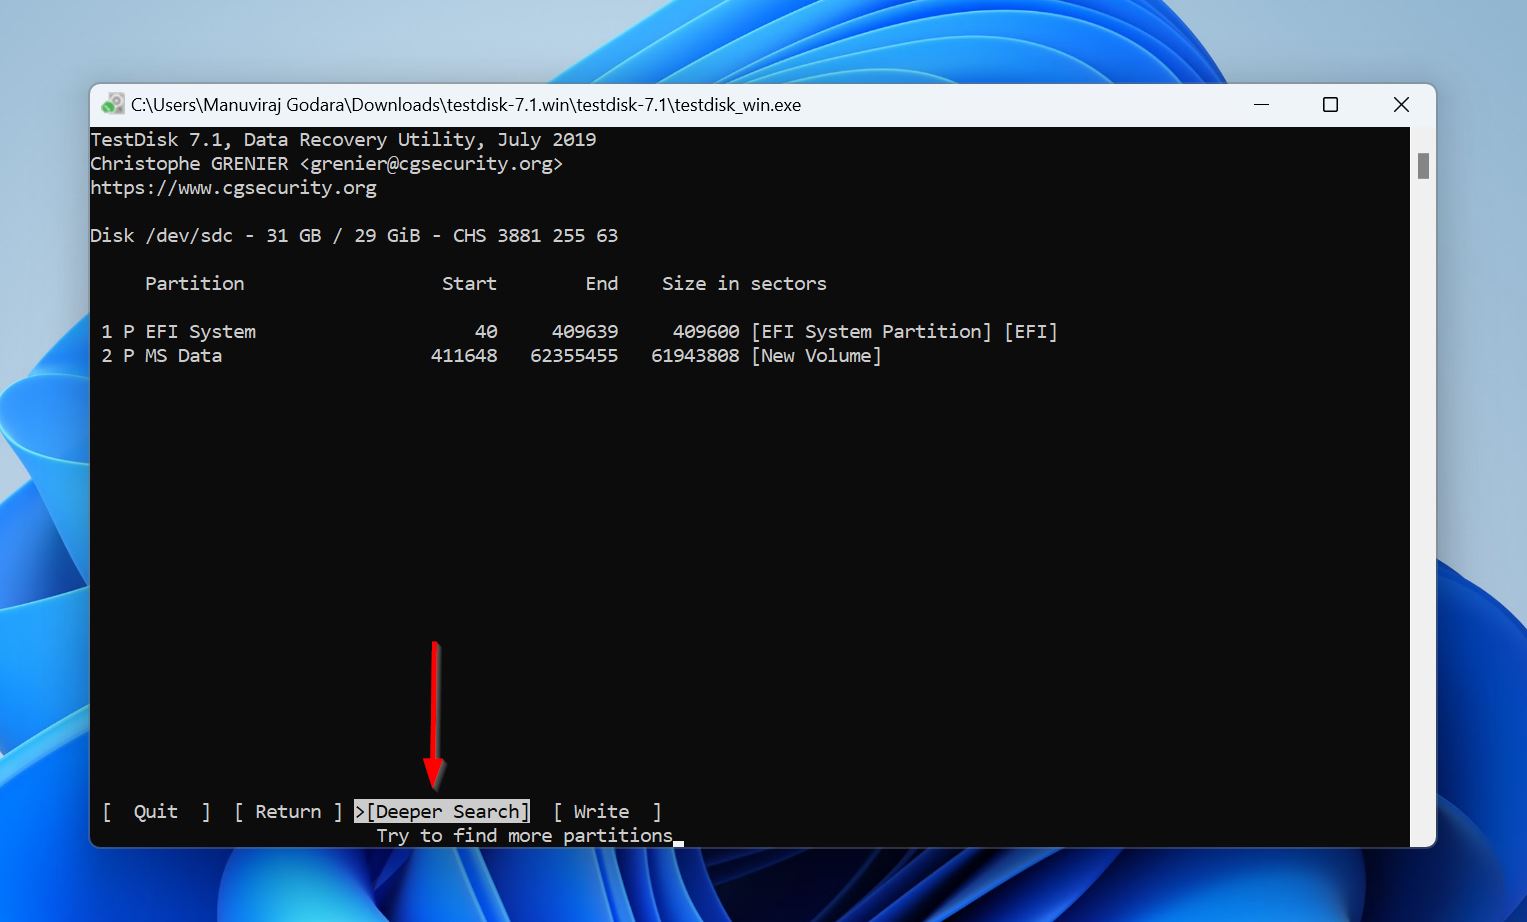
- Select the Write option and press Enter.
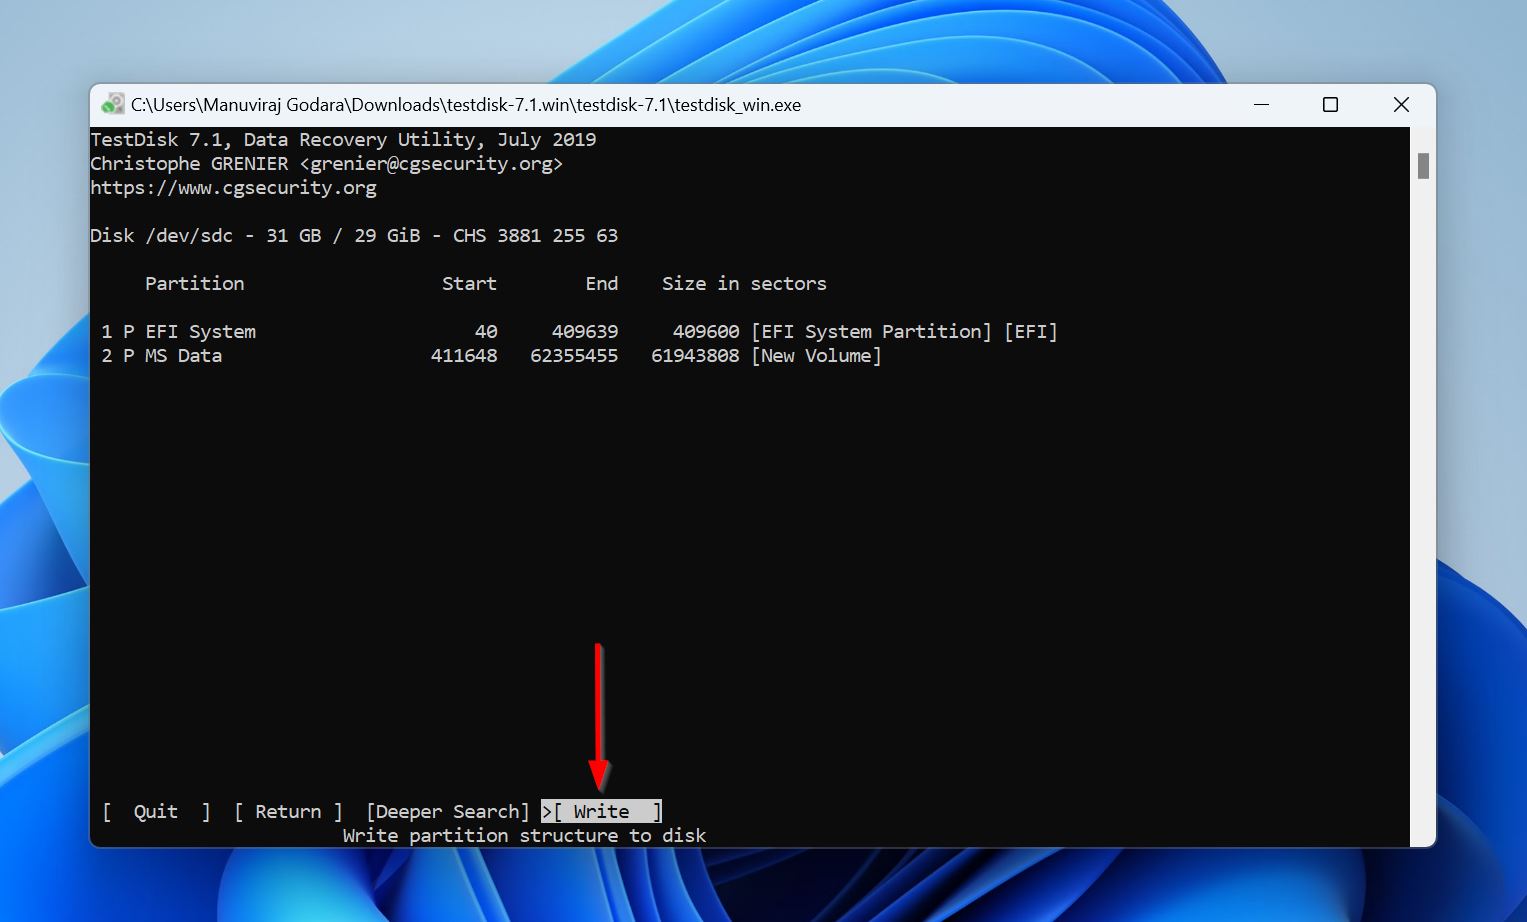
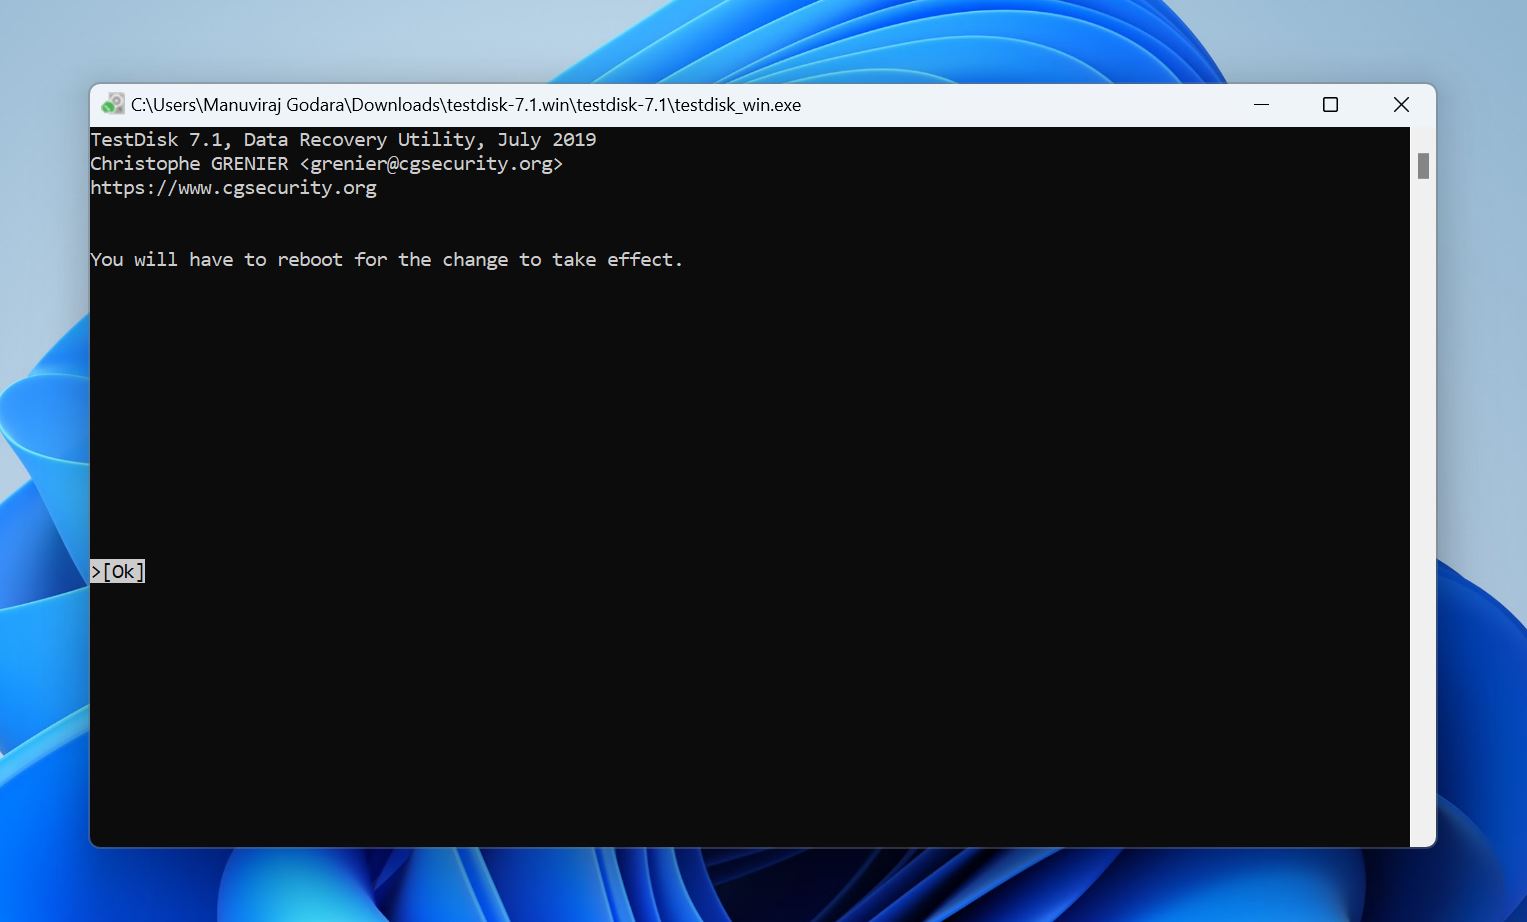
- Press Y on the confirmation prompt.

- TestDisk will recover the partition. Reboot your PC after this.
Method 2: Recreate the Partition Using Disk Management
Disk Management is an in-built Windows tool that lets you create and manage partitions on the storage devices connected to your Windows PC. Using the tool, you can recreate the partition on your USB drive and simply copy the data you recovered earlier to the new partition.
Here’s how to use Disk Management to recreate the partition on your USB drive:
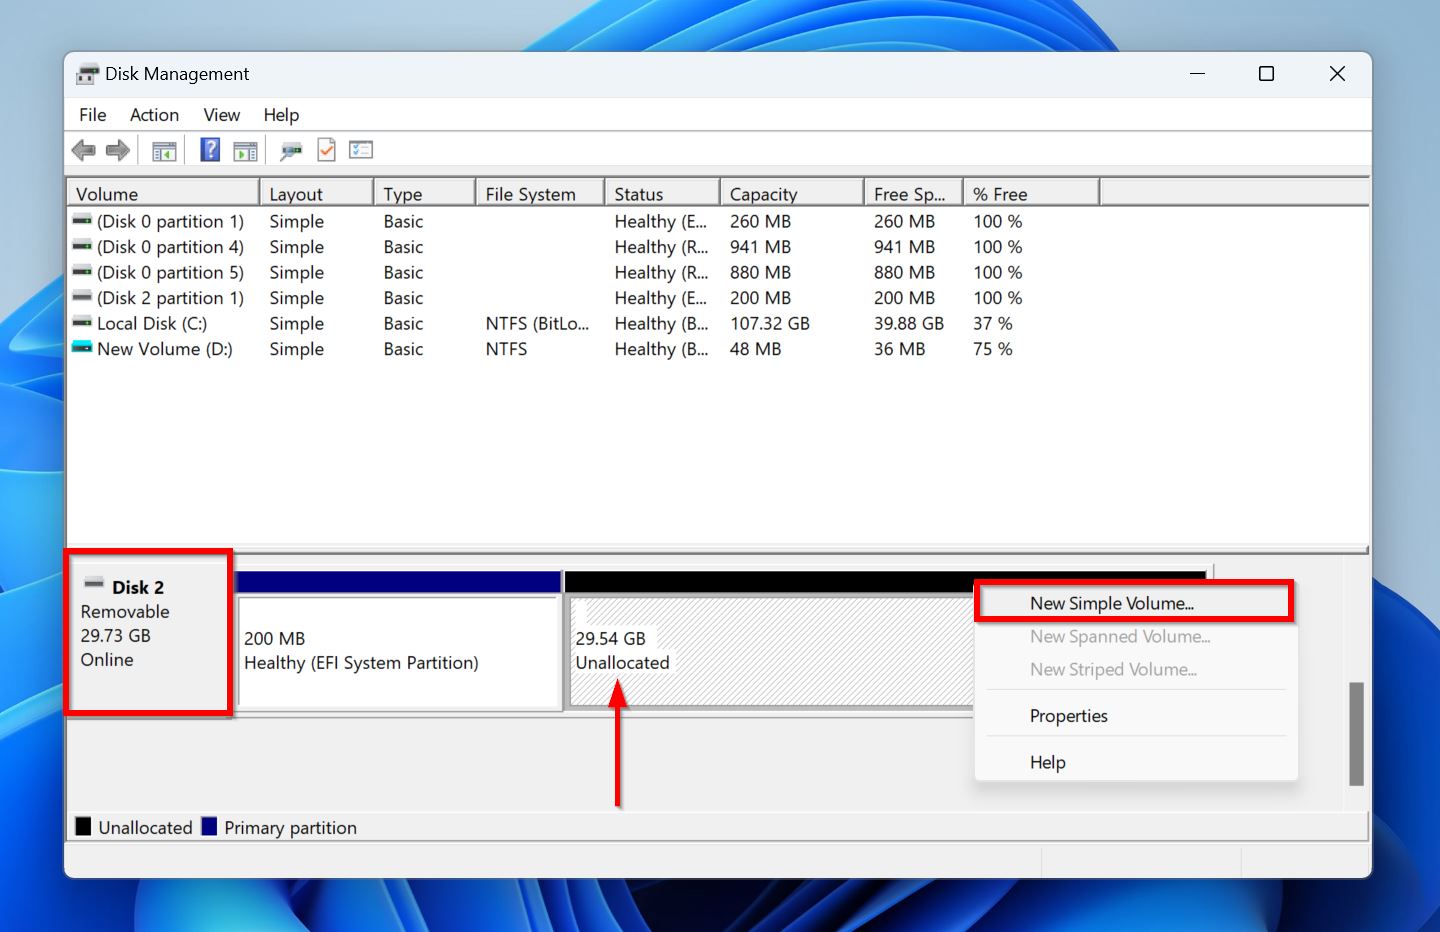
- Search for “disk management” in Windows Search (Windows Key + S). Click on the Create and format hard disk partitions option from the search results. This will open Disk Management.
- Look for your USB drive in the lower half of the Disk Management window. Right-click on the space labeled as “Unallocated” and choose New Simple Volume.
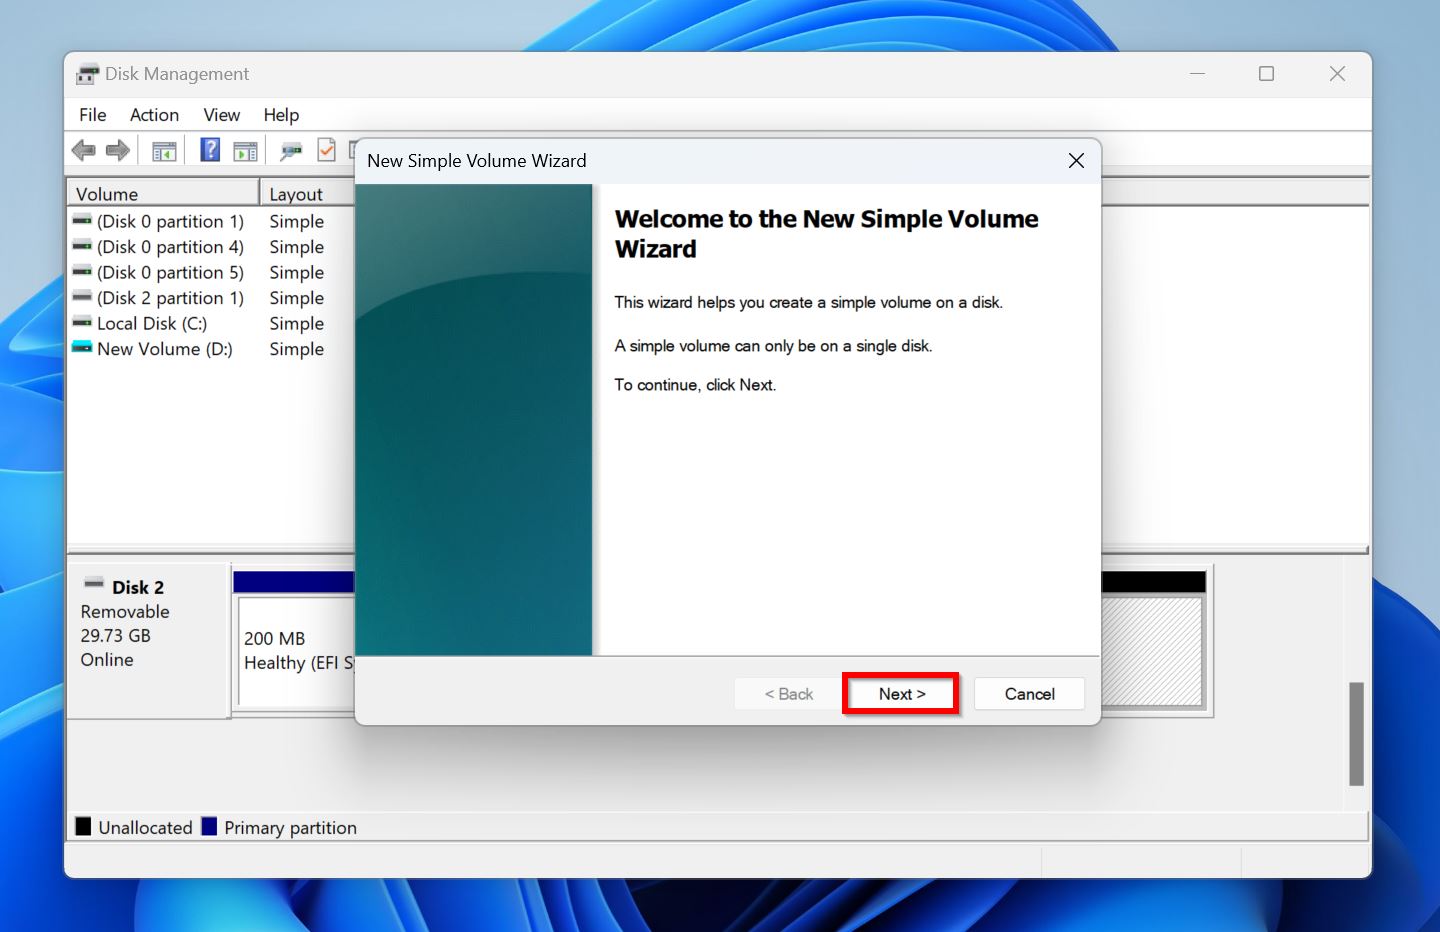
- Click Next on the New Simple Volume Wizard welcome screen.
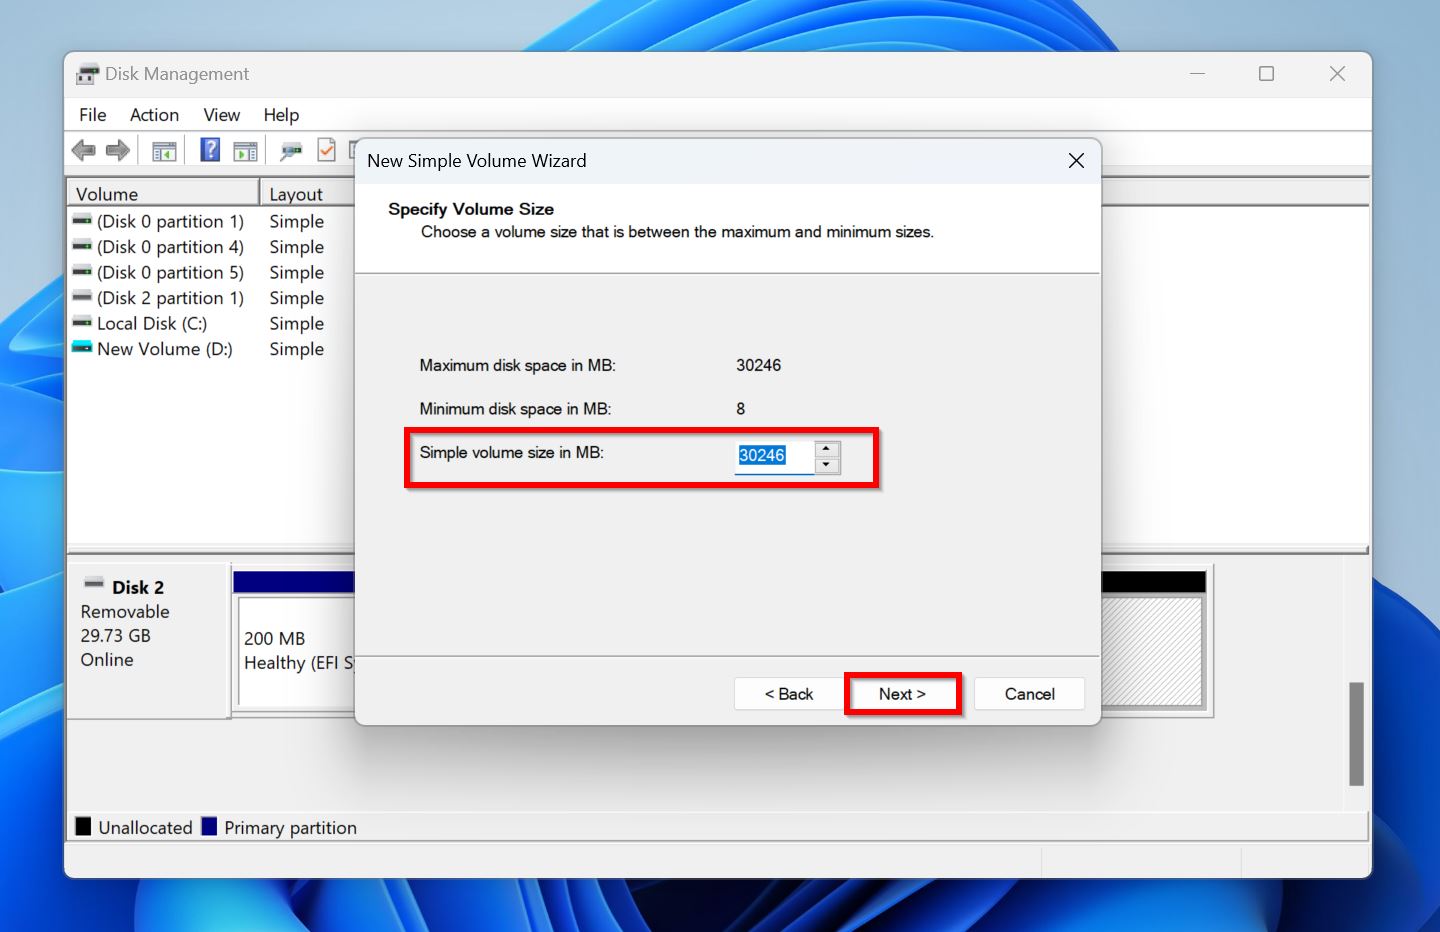
- Choose the partition size using the Simple volume size in MB box. Click on Next.
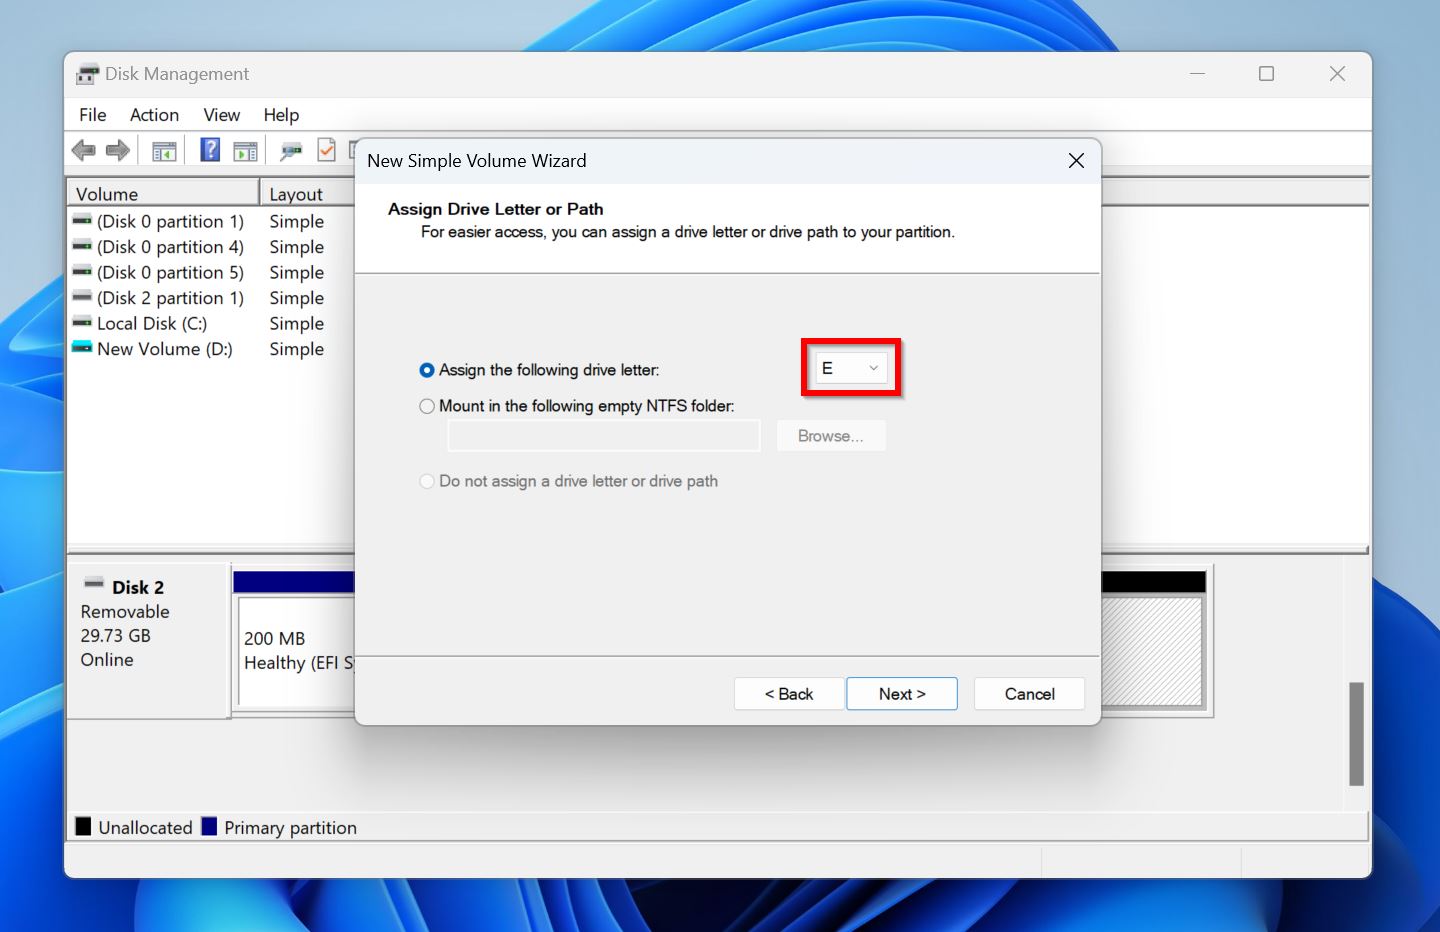
- Pick the drive letter you wish to assign to the partition, using the Assign the following drive letter drop-down menu. Click Next.
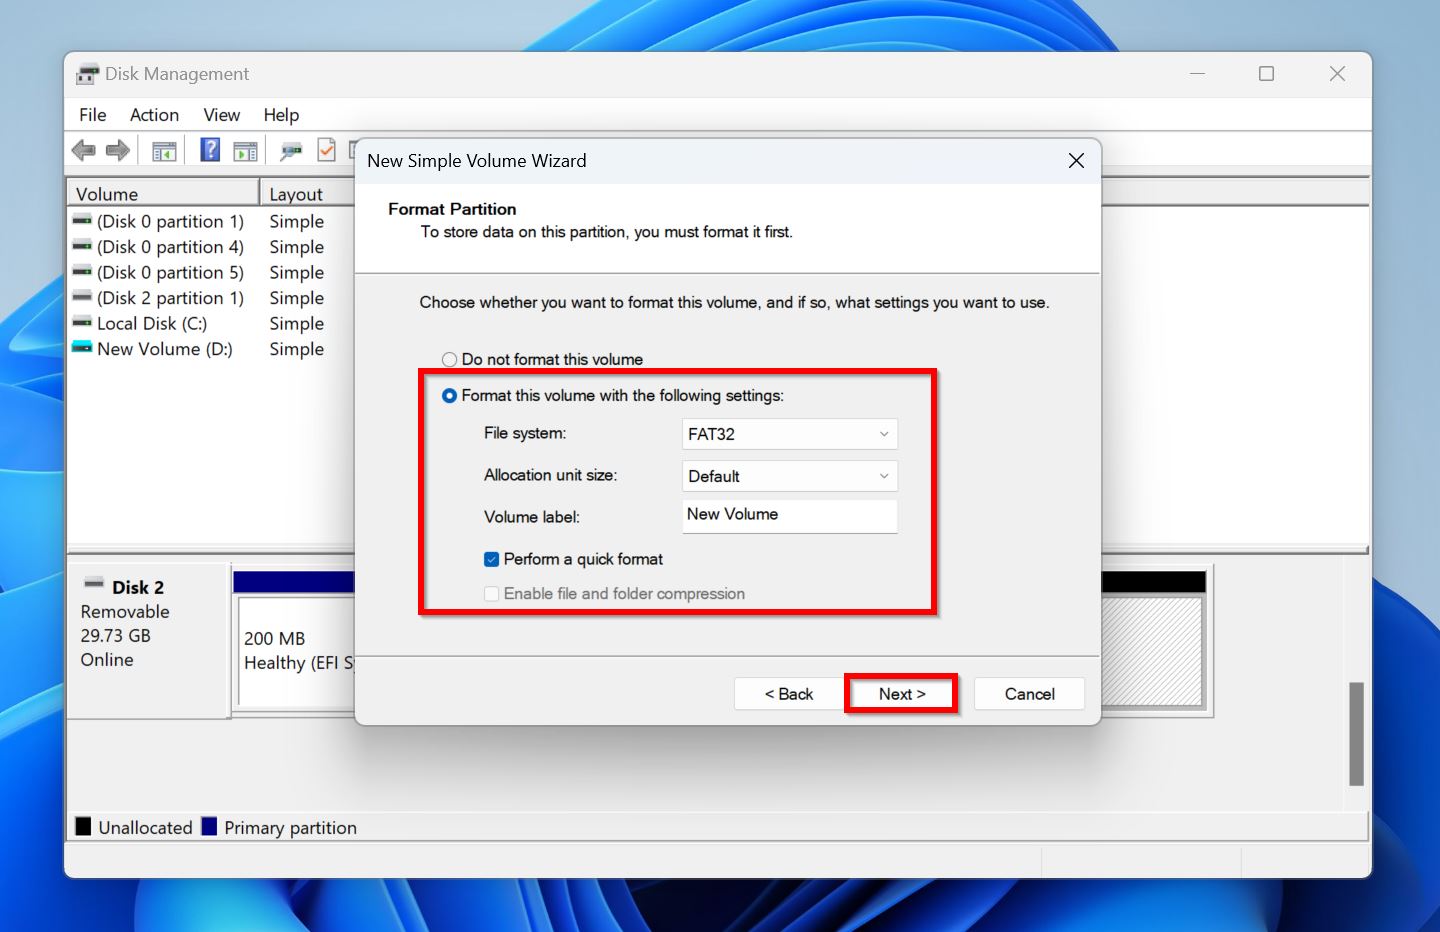
- Ensure the Format this volume with the following settings option is selected. Choose the File System and Volume Label (Name) you wish to assign to the partition and click Next.
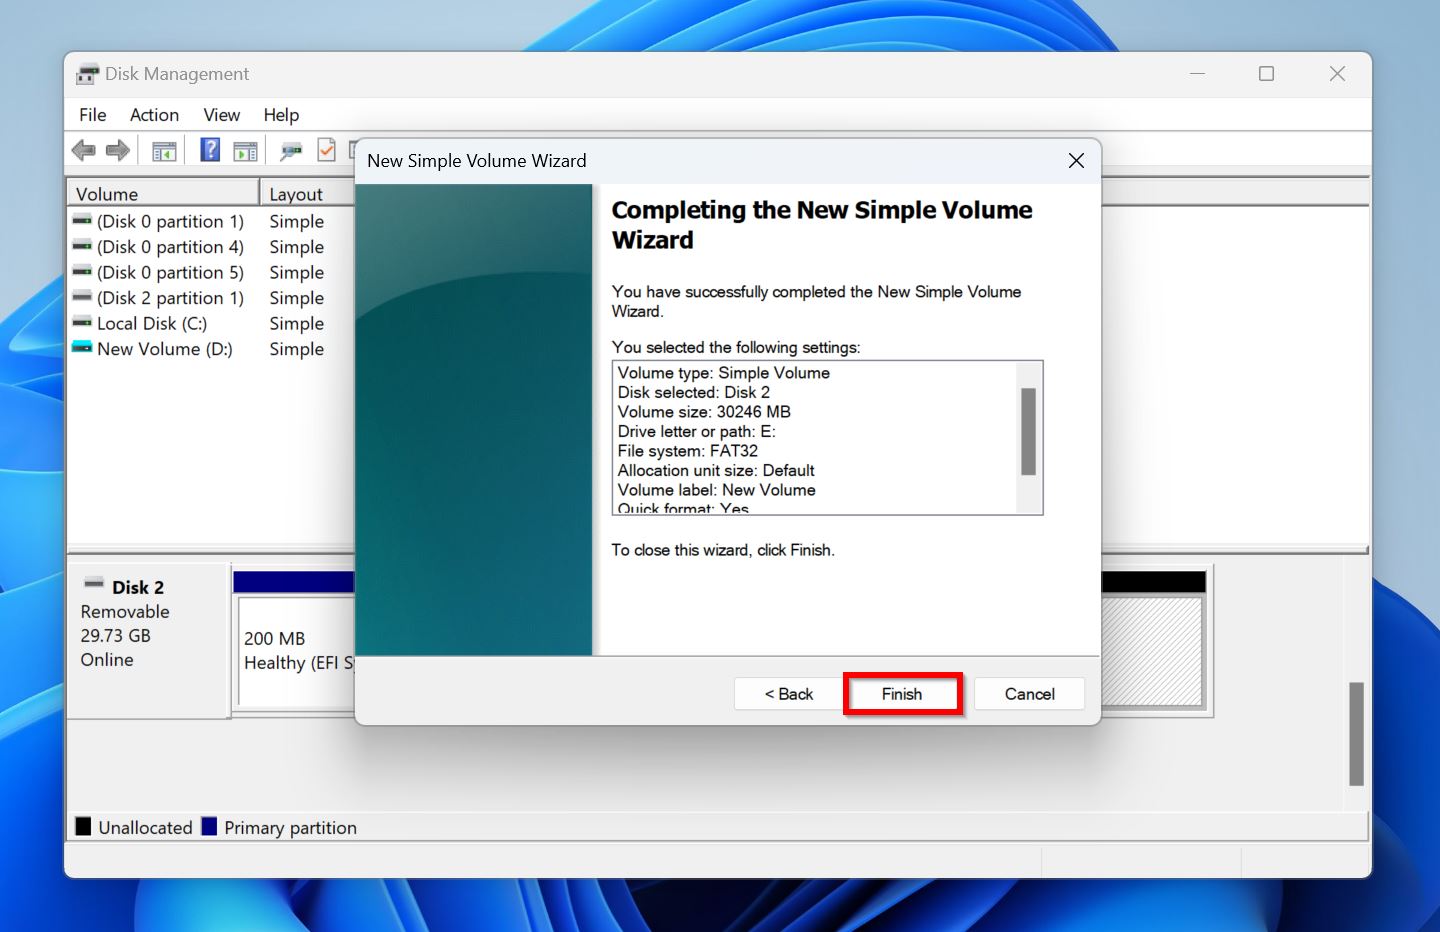
- Click on Finish and Disk Management will create the new partition for you.
- Copy the data you recovered earlier, to the newly created partition.
Method 3: Recreate Partition Using the Command Prompt (CMD)
An alternative to Disk Management, the Diskpart command-line tool in Windows also lets you create and manage partitions on your storage drives. It also offers more flexibility and customization. Diskpart can be run using an elevated Command Prompt (CMD) and you can use it to recreate the partition on your USB drive.
Here’s what the process looks like:
- Search for “cmd” in Windows Search (Windows Key + S). From the search results, right-click on Command Prompt > Run as administrator.
- Type
diskpartin the Command Prompt console and press Enter.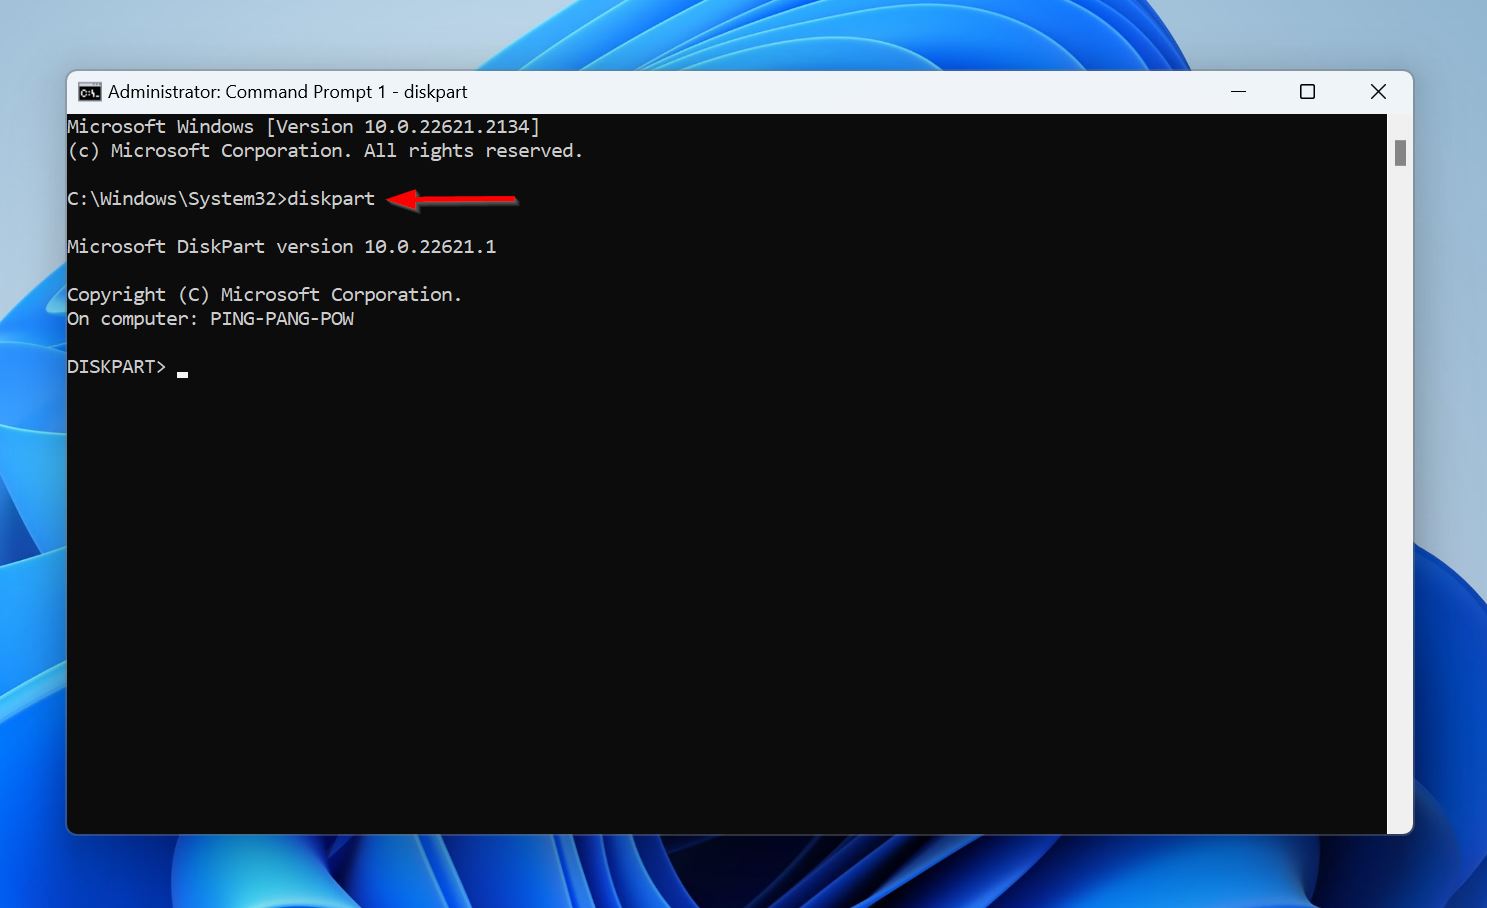
- Type
list diskand press Enter to view all the storage disks connected to your PC.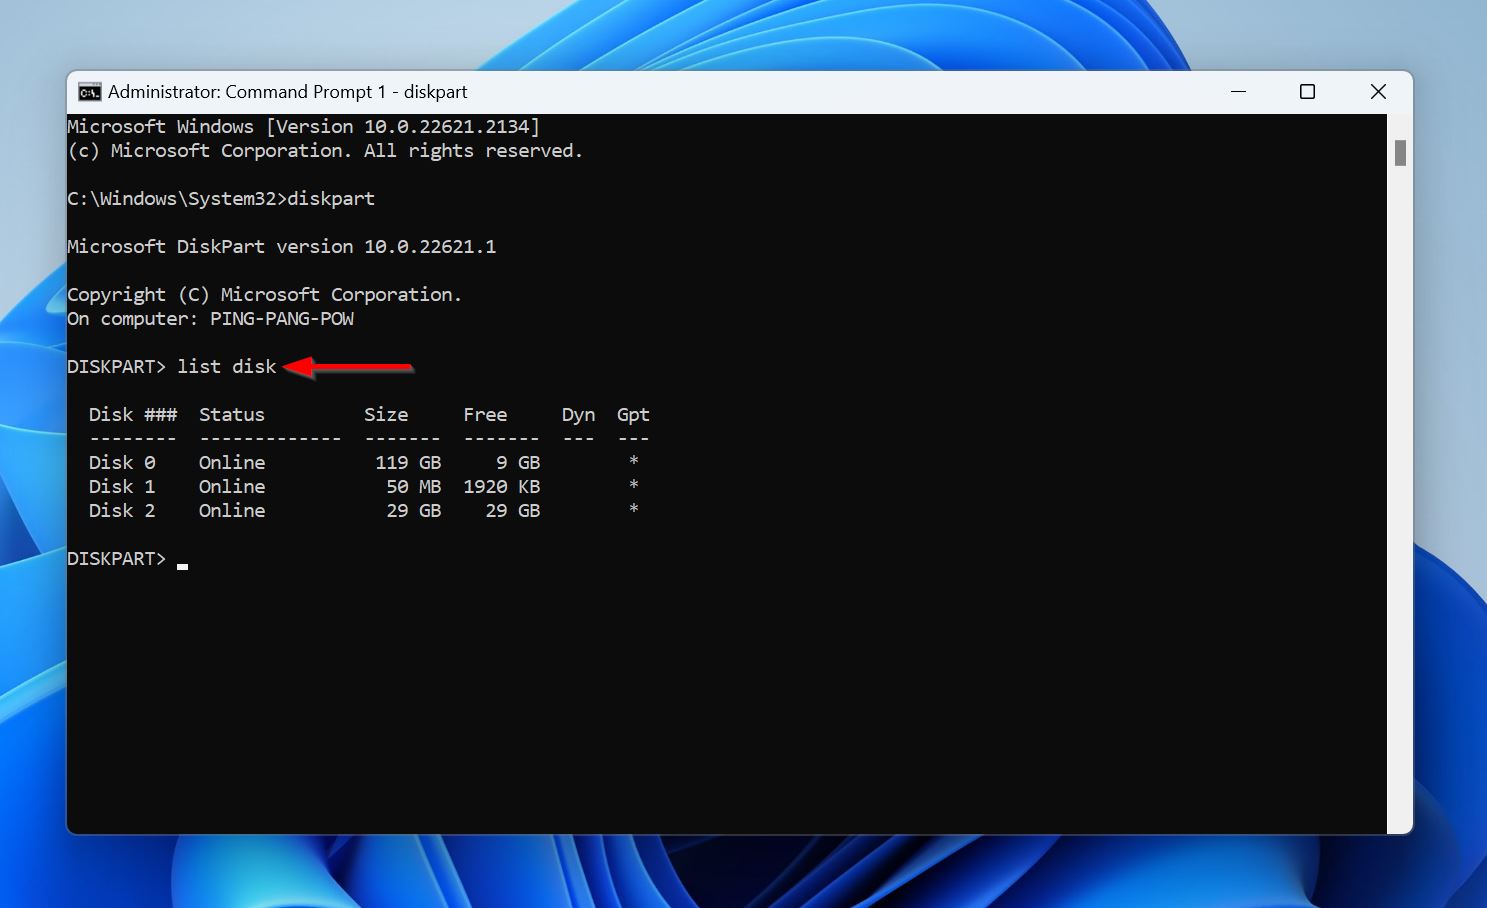
- Look for your USB drive, then type
select disk Xand press Enter. Replace X with the disk number of the USB drive. In our case, it was Disk 2, so we typedselect disk 2.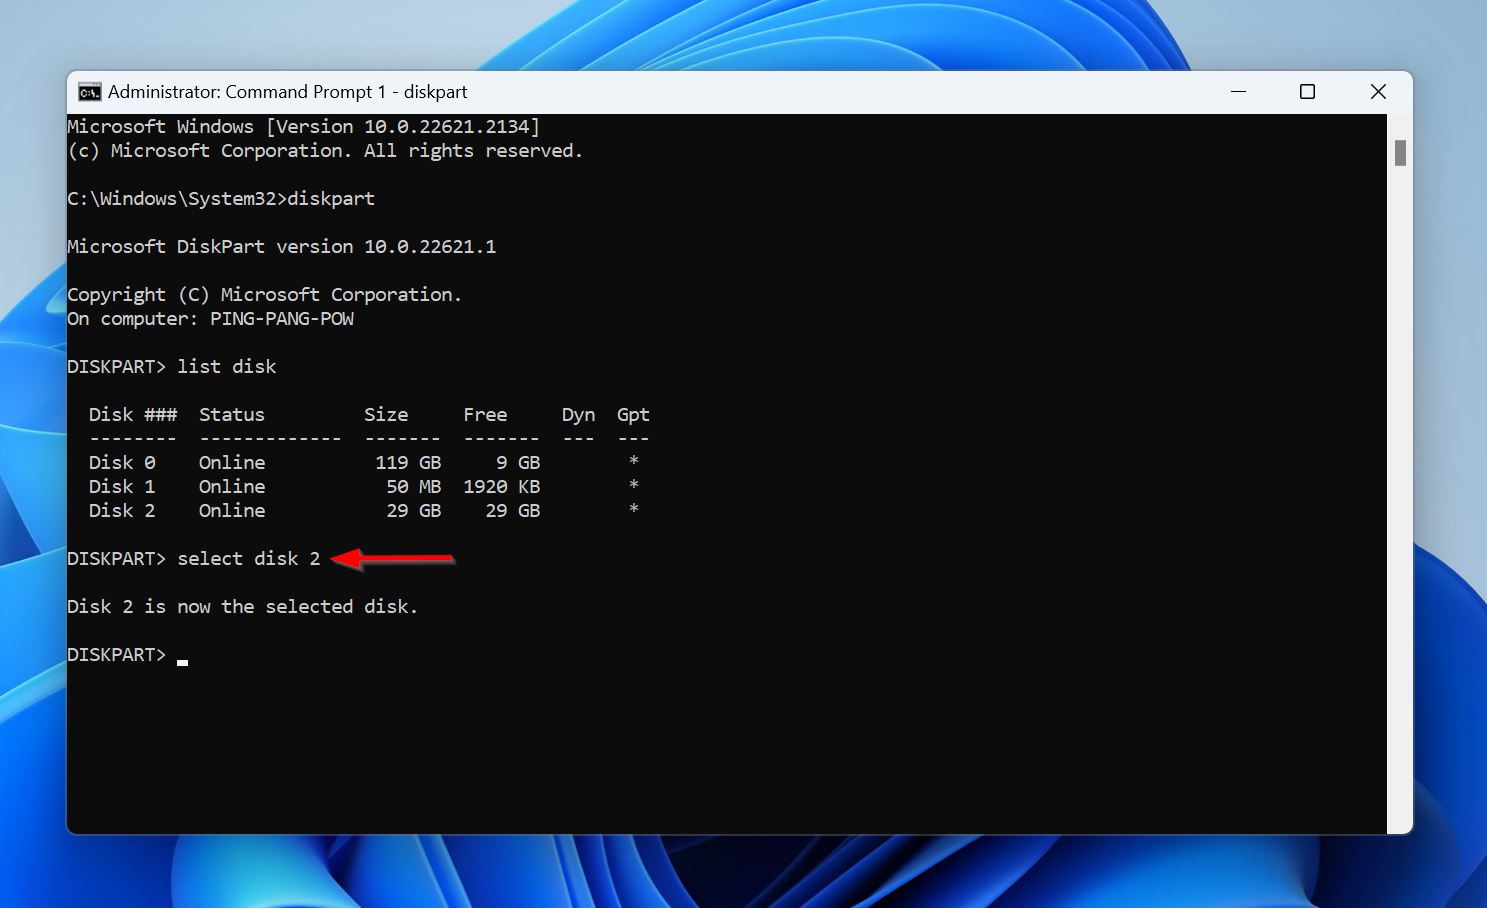
- Type
create partition primaryand press Enter. This will create a partition on the USB drive.
- To begin using the partition for storing your files, you need to format it. You can do this within the Diskpart utility, Disk Management, and Windows Explorer. To format the partition using Diskpart, type
format fs=NTFS quickand press Enter after the create partition primary command. This command will quick format the USB partition to the NTFS file system. You can choose another file system of your choice too.
Did you forget to recover data from your USB drive before using this method? Don’t worry, you can recover data from a formatted partition, as long as it wasn’t a Full-Format, i.e., you didn’t use the quick parameter in Diskpart, or didn’t select the Perform a quick format option in Disk Management and Windows Explorer.
Conclusion
In most cases, you can recover a deleted USB partition with its data intact, using a tool like TestDisk. But, if that doesn’t work out, you’ll need to use Disk Management, and the Diskpart utility to recreate the partition on your USB drive, requiring you to format the drive. It’s crucial that you first recover your files using a good data recovery program like Disk Drill, so you’re secured against data loss.


