 No doubt your USB has been an invaluable companion for carrying your photos, videos, and music wherever you go. As convenient as it is, this all comes into question when an unknown error appears that locks you out from accessing your data.
You should check your USB health every so often to make sure there’s nothing wrong with it, as there’s no guarantee that Windows will alert you to problems in time. Read on to find out how to check USB flash drive health.
Table of Contents
When to Check USB Flash Drive Health
You should check the USB drive’s health if and when you notice it is behaving unusually. Such indications may include:
| Indication | Description |
| 🐌 Slow performance | The same is true if your computer starts to slow down once the USB is connected. |
| 👻 Files are disappearing or duplicating | Damaged USBs may have their files and folders start disappearing or duplicating without interference. |
| 💬 Error messages appear | Pay attention to any error messages that appear when you connect your USB. This includes any notifications where Windows suggests you check or repair the USB drive. |
| 🚫 Files or folders won’t open | Check a flash drive if the files and folders stored on it refuse to open. |
| 💥 Physical signs of damage | Pay close attention to the USB connection point. Also, check for any damage that can expose the internal components. |
| 🔌 Interrupted read-write processes | If you suddenly lost power while performing read-write processes on the drive, check its health immediately. |
| 👤 If purchased from an unverified vendor | Some USB drives can be modified so they appear to have more capacity than they support. |
How to See USB Drive Information
It’s important to check your USB drive information and compare it against the information supplied by your manufacturer. This way, you can see if your USB is giving you an accurate reading of its storage capacity.
To check your USB drive information, you can use third-party software like the Flash Drive Information Extractor by ANTSpec Software. This will check the USB drive capacity, among other things. Not sure how much it is in Bytes? Use a Bytes to Gigabytes converting tool.
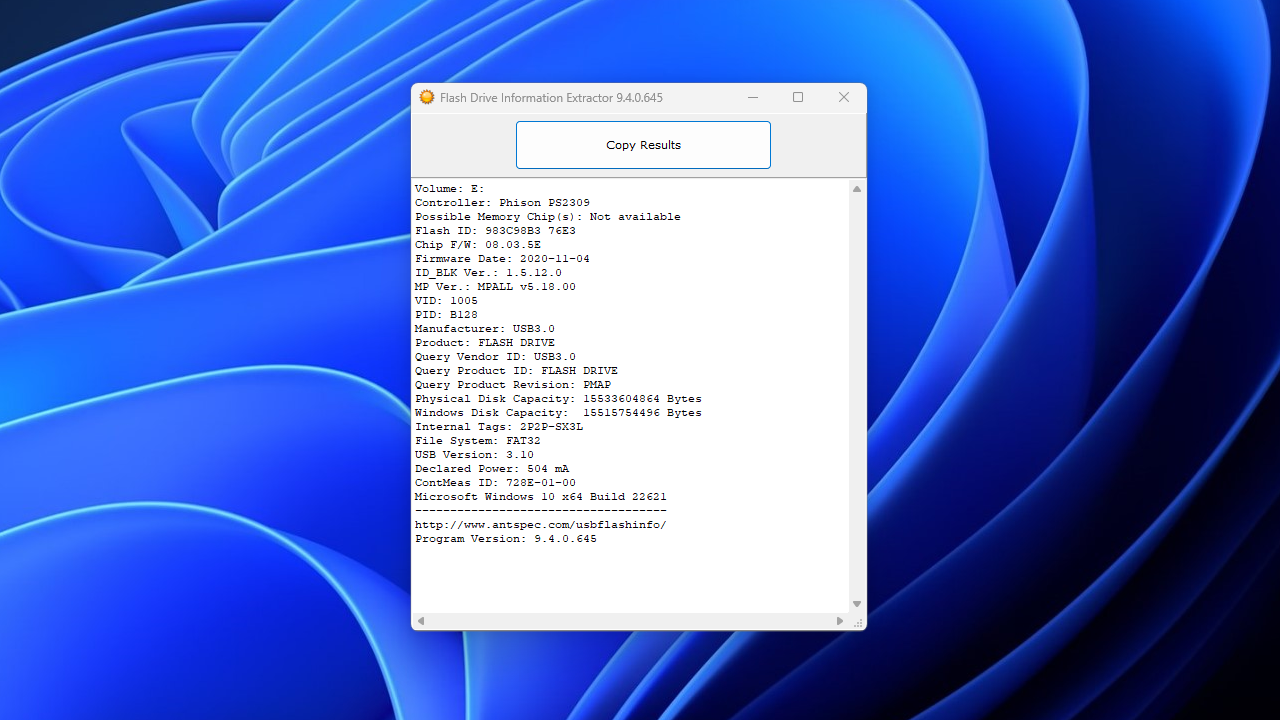
If you purchased your USB drive from an unverified vendor, it may be fake. That is, it may be modified to appear larger in capacity than it is, which can corrupt your data or crash the card. If you have doubts about its authenticity, use Fake Flash Test to test it.
How to Check USB Drives on Windows
After confirming your USB drive information is correct, see these methods for how to check usb drive for errors.
Method 1: Visual Check
Start with a visual check. Check the USB storage casing to see if it has been compromised. Then, move your attention to the connection point. Is it bent? Although the connection points were designed to be robust (considering USB drives are hot-swappable), significant damage can cause the data pins to stop functioning. Worse yet, they may even cause the device to short-circuit, frying the memory and leaving the USB drive inoperable. Finally, if your USB has any indicator lights, see if they’re working when connected to the computer.
Method 2: Command Prompt (CMD)
CheckDisk is a reliable tool you can use to scan and fix a USB drive that has encountered problems. It can even fix USB bad sectors by remapping them to working ones. To use it, you must use Command Prompt, or other similar applications such as PowerShell or Terminal (for Windows 11).
Follow these instructions to run CheckDisk using Command Prompt:
- Click Start and search Command Prompt. Open the first result.

- Type
chkdsk *: /r. Replace * with your USB drive letter. Press Enter.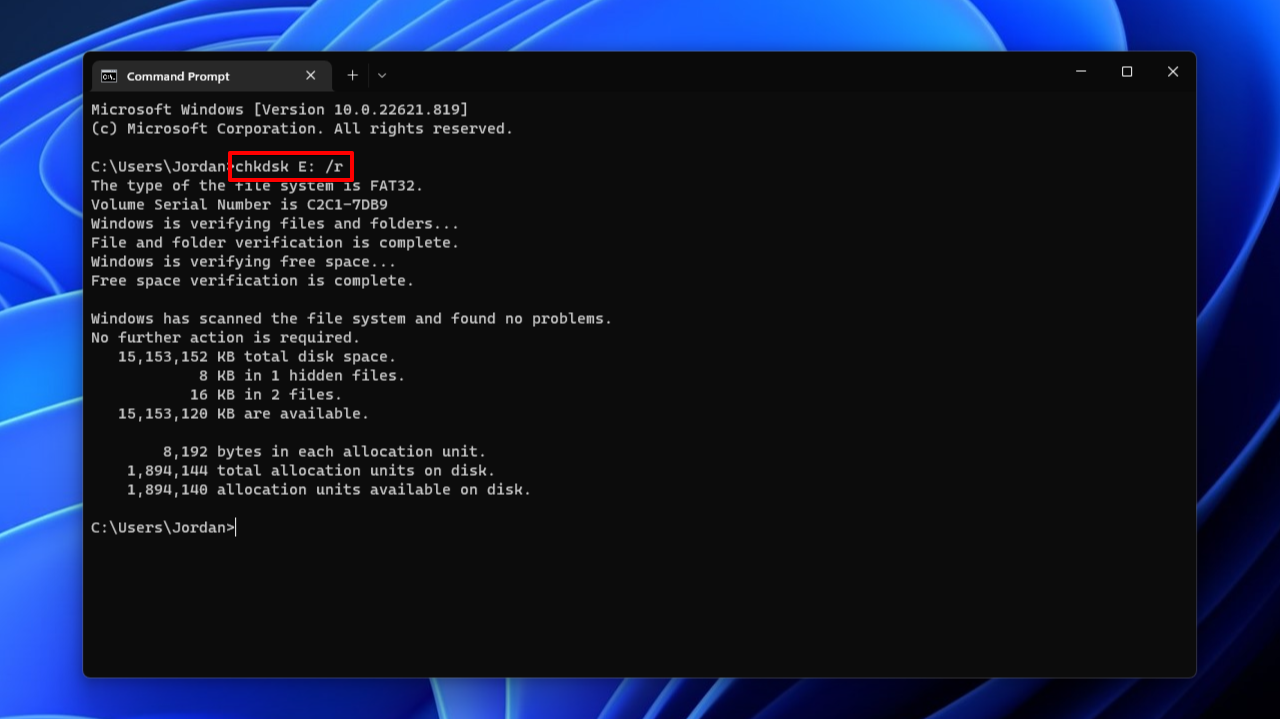
Method 3: Antivirus Scan
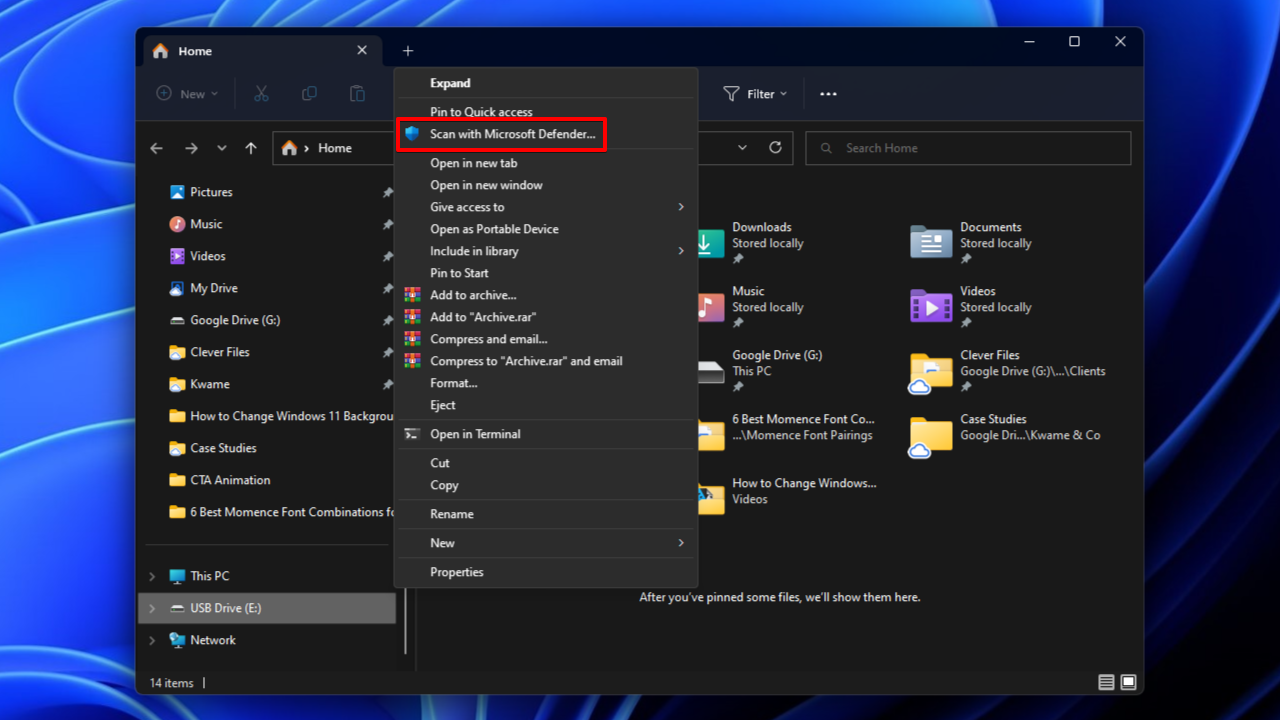
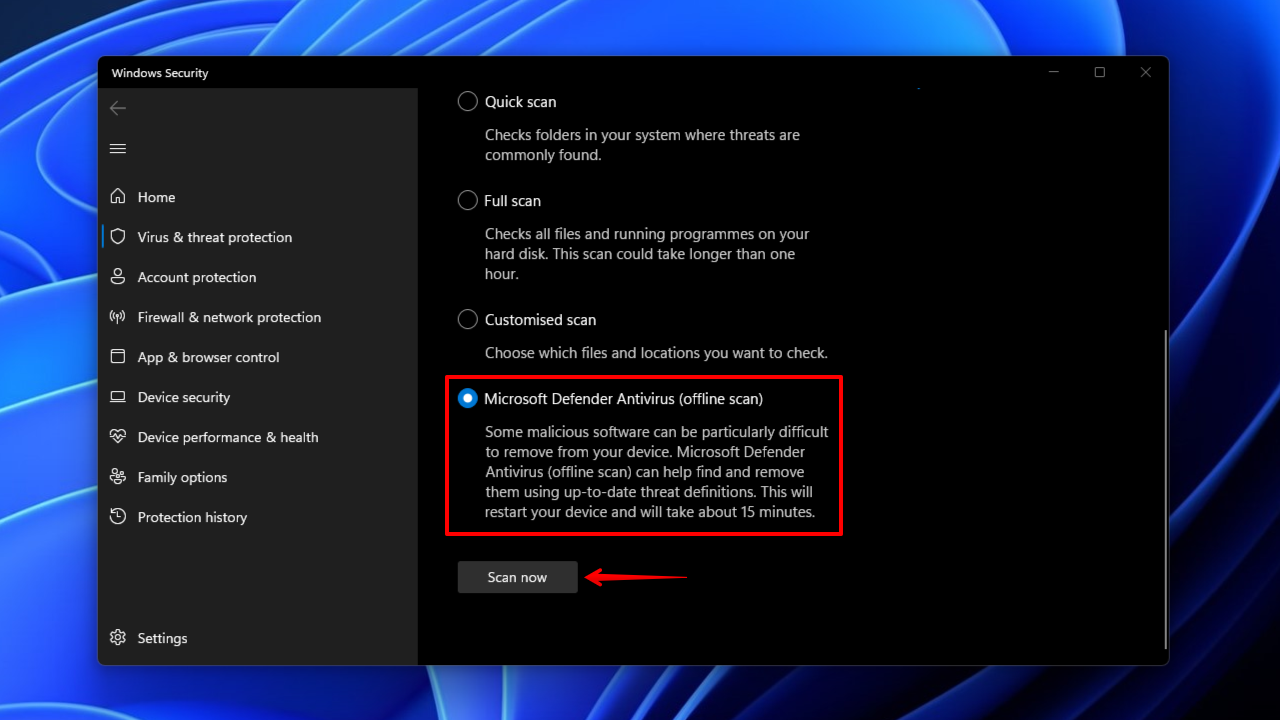
Ensure your USB drive hasn’t been infected with a virus. You can scan the USB drive for viruses using the antivirus application that comes with Windows Security, Microsoft Defender Antivirus.
Follow these steps to do a scan for viruses using Microsoft Defender:
- Open File Explorer, right-click your USB drive, then click Scan with Microsoft Defender. On Windows 11, you will need to click Show more options first. This will perform a quick scan automatically.
- For a more in-depth and comprehensive scan, select Microsoft Defender Antivirus (offline scan) then click Scan now. The offline scan runs from a trusted environment that sits outside the Windows kernel to target malware attempts to overwrite the master boot record.
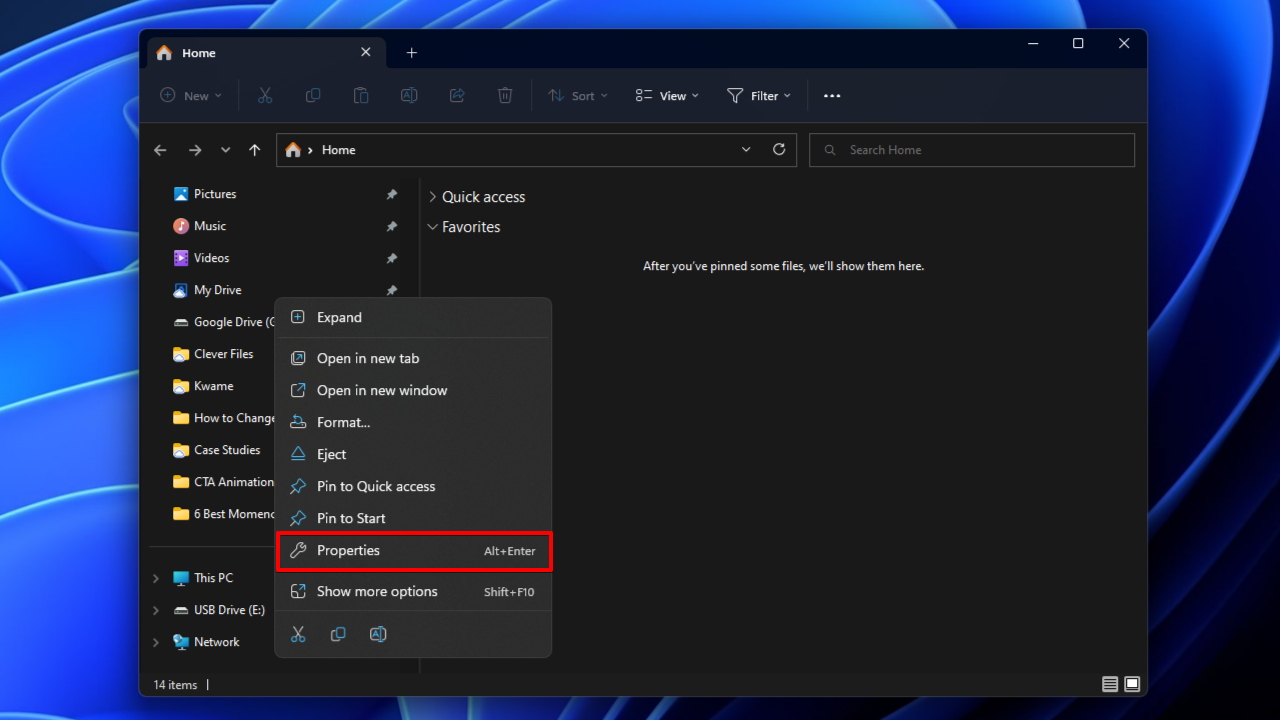
Method 4: Disk Error Checking
Disk error checking is essentially a GUI for CheckDisk. Windows allows you to perform error checking on connected drives for file system-related errors. If it detects any errors, it will also give you the option of fixing them.
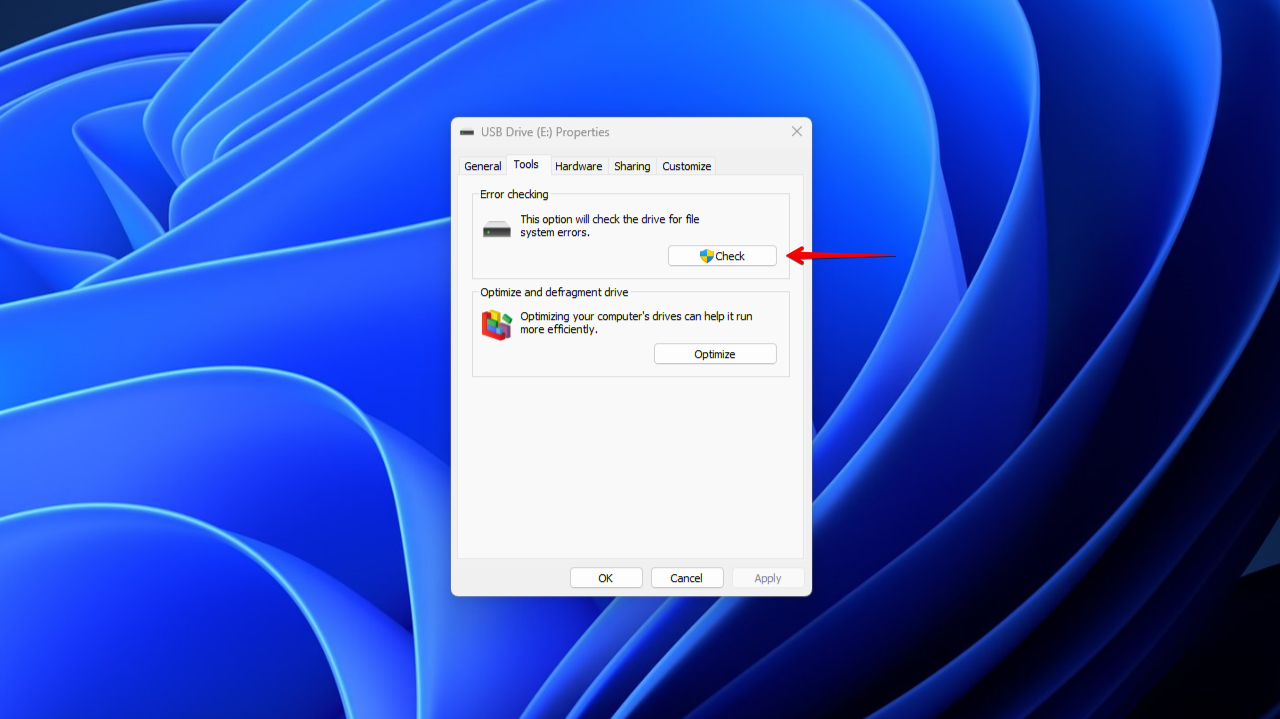
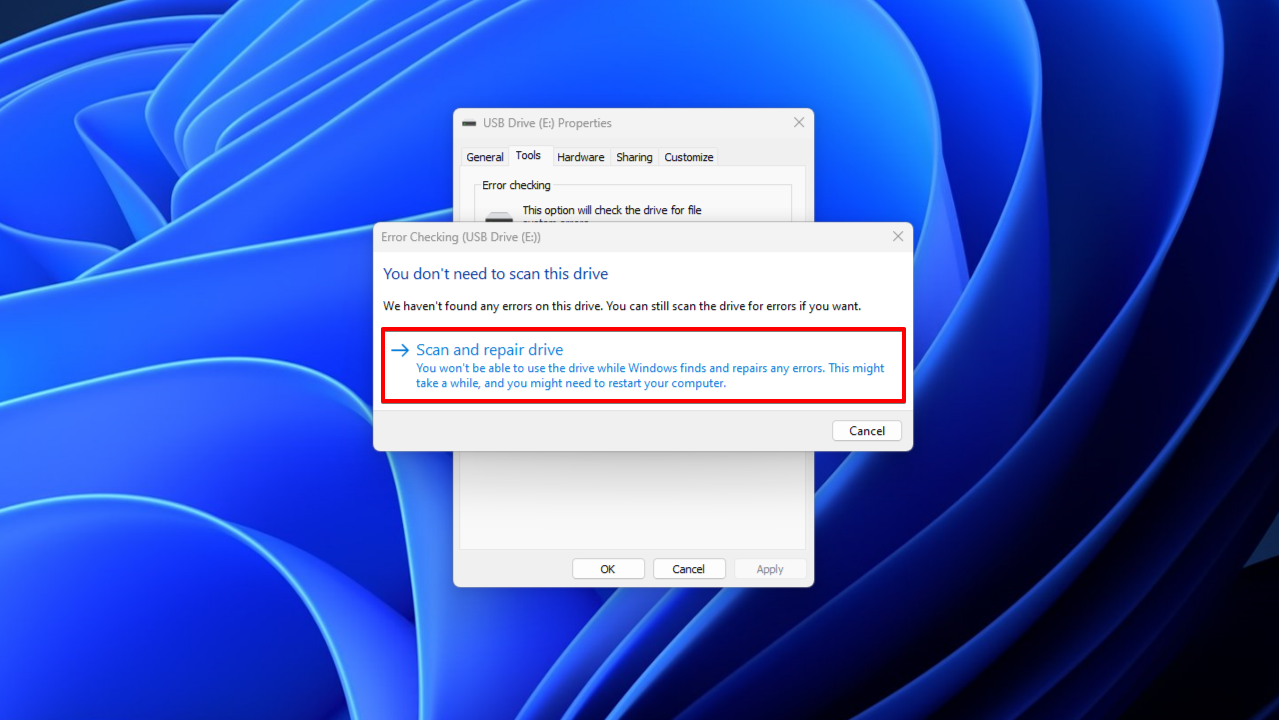
This is how you perform disk error checking on a USB flash drive:
- Open File Explorer, right-click your USB drive, then click Properties.
- Go to the Tools tab and click Check.
- Click Scan and repair drive.
Method 5: Third-party Software
The Check Flash tool was developed by Cherkes Mihail. It’s a freeware tool that was built to perform various tasks on USB drives, like scanning for errors and checking read/write speeds. The program also creates a drive map of your USB, allowing you to quickly see any bad sectors that are found with the scan. By default, the scan will do one full pass, but you have some options for customizing the scan length.
It has some other useful features too. In addition to those that we’ve mentioned, the program also allows you to save an image of your USB drive and restore it if needed. You also have the option to perform a full erase to securely wipe the USB of its contents to ensure nothing can be recovered.
Follow these steps to check your USB drive using Check Flash:
- Download and extract Check Flash. Open ChkFlsh.exe.
- Select your USB drive from the dropdown list.

- Click Start!. Examine the results.
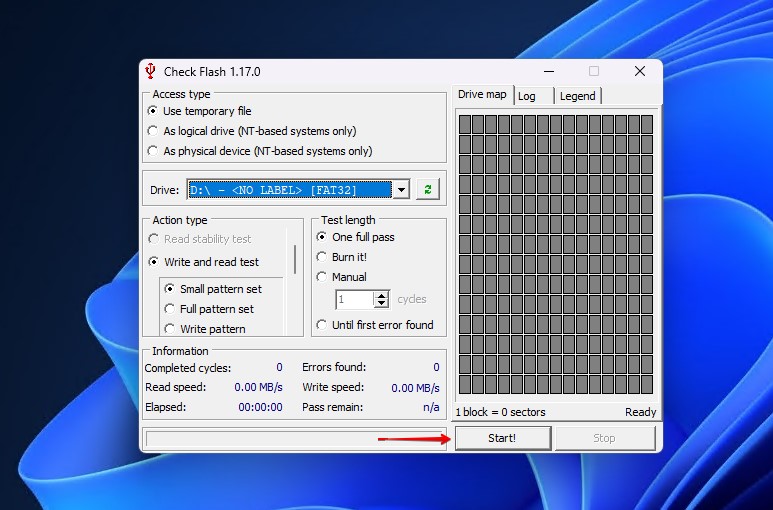
Note: If unsure what the colored blocks indicate, click the Legend tab for a breakdown.
How to Restore Data from a Corrupted USB Flash Drive
Should your USB stop working before you see any signs that point to potential failure, you can attempt to recover your data using a data recovery tool such as Disk Drill Data Recovery. Disk Drill is capable of scanning your USB drive for lost data and recovering it. It also has a byte-to-byte backup tool, allowing you to take a snapshot of your USB and recover data from it. After all, working from a copy is much safer.
Here’s how you can back up your USB drive and recover data from it:
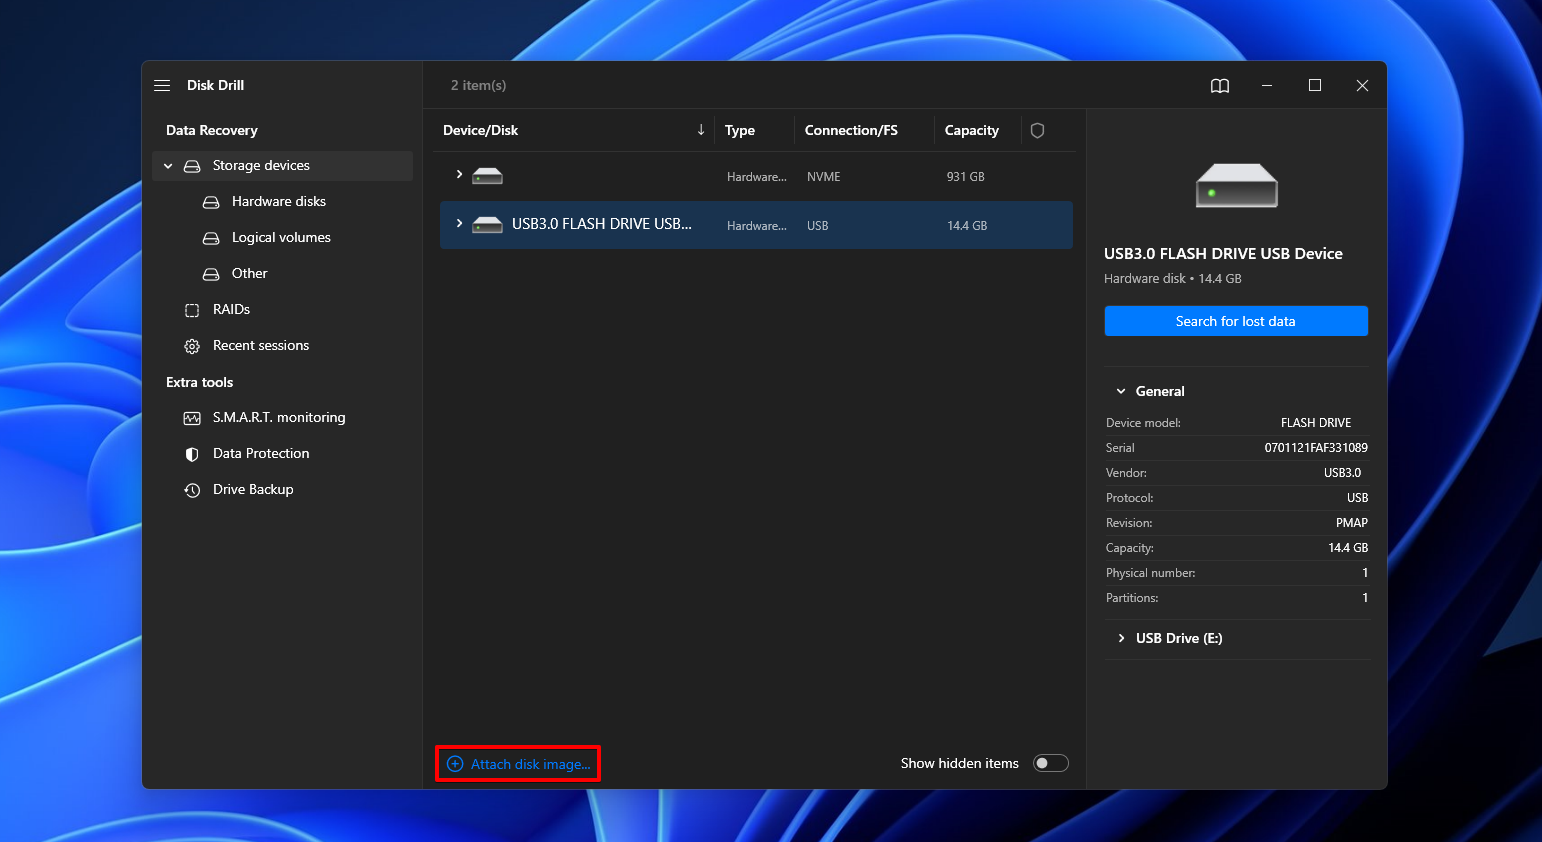
- Download and open Disk Drill.
- Click Drive Backup.
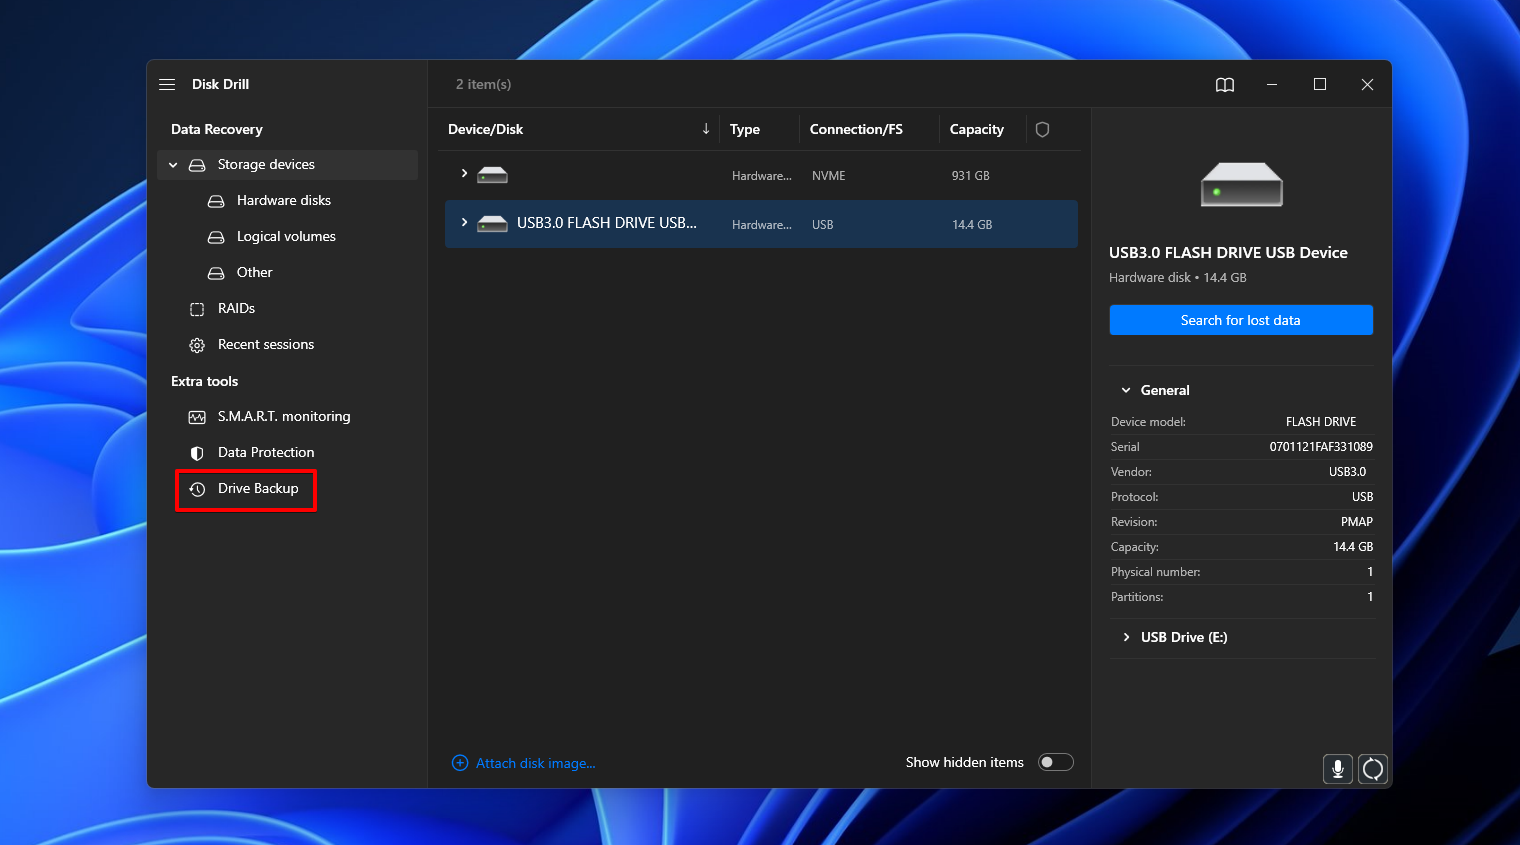
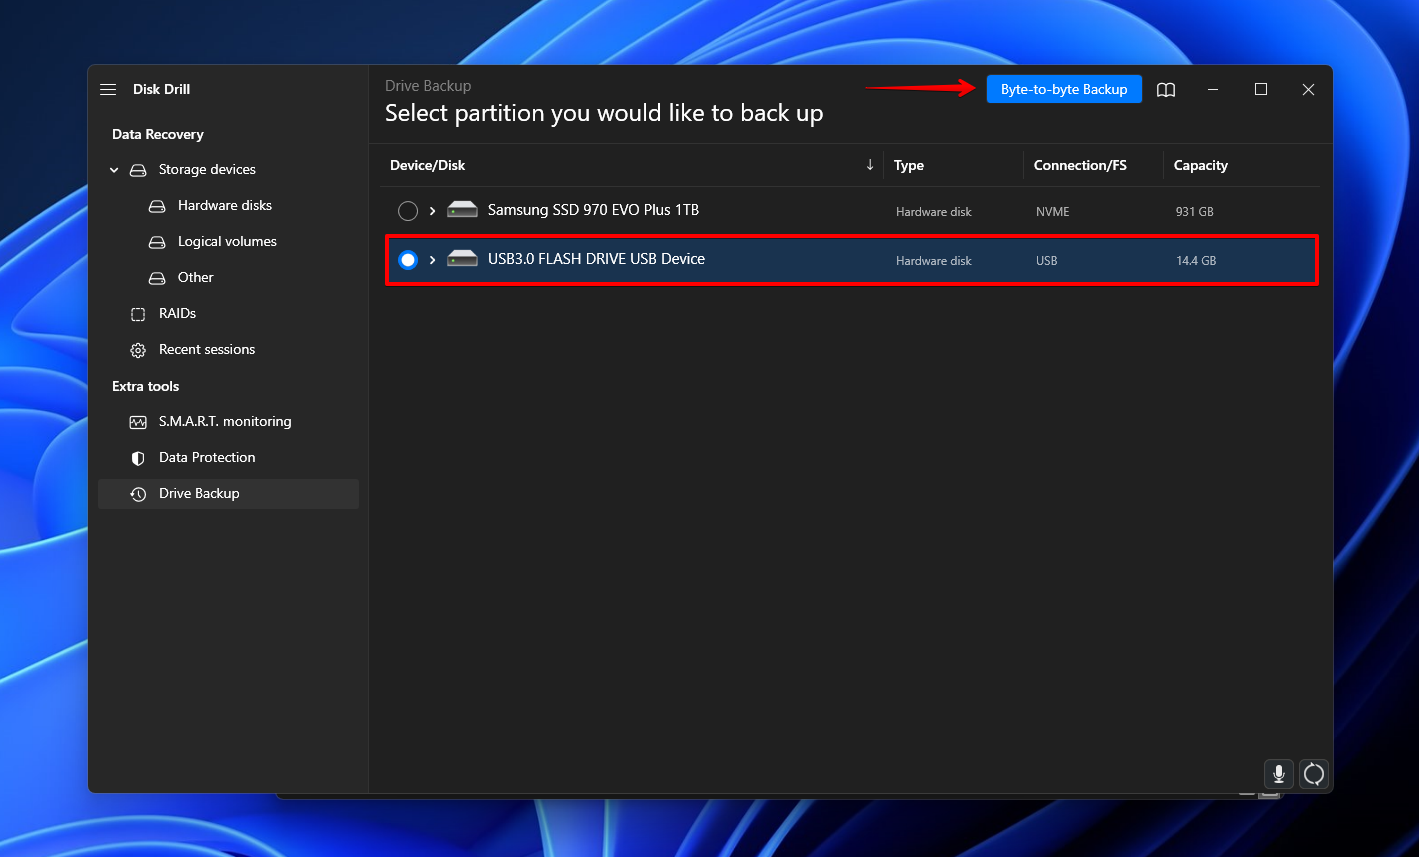
- Select the USB drive, then click Byte-to-byte Backup.
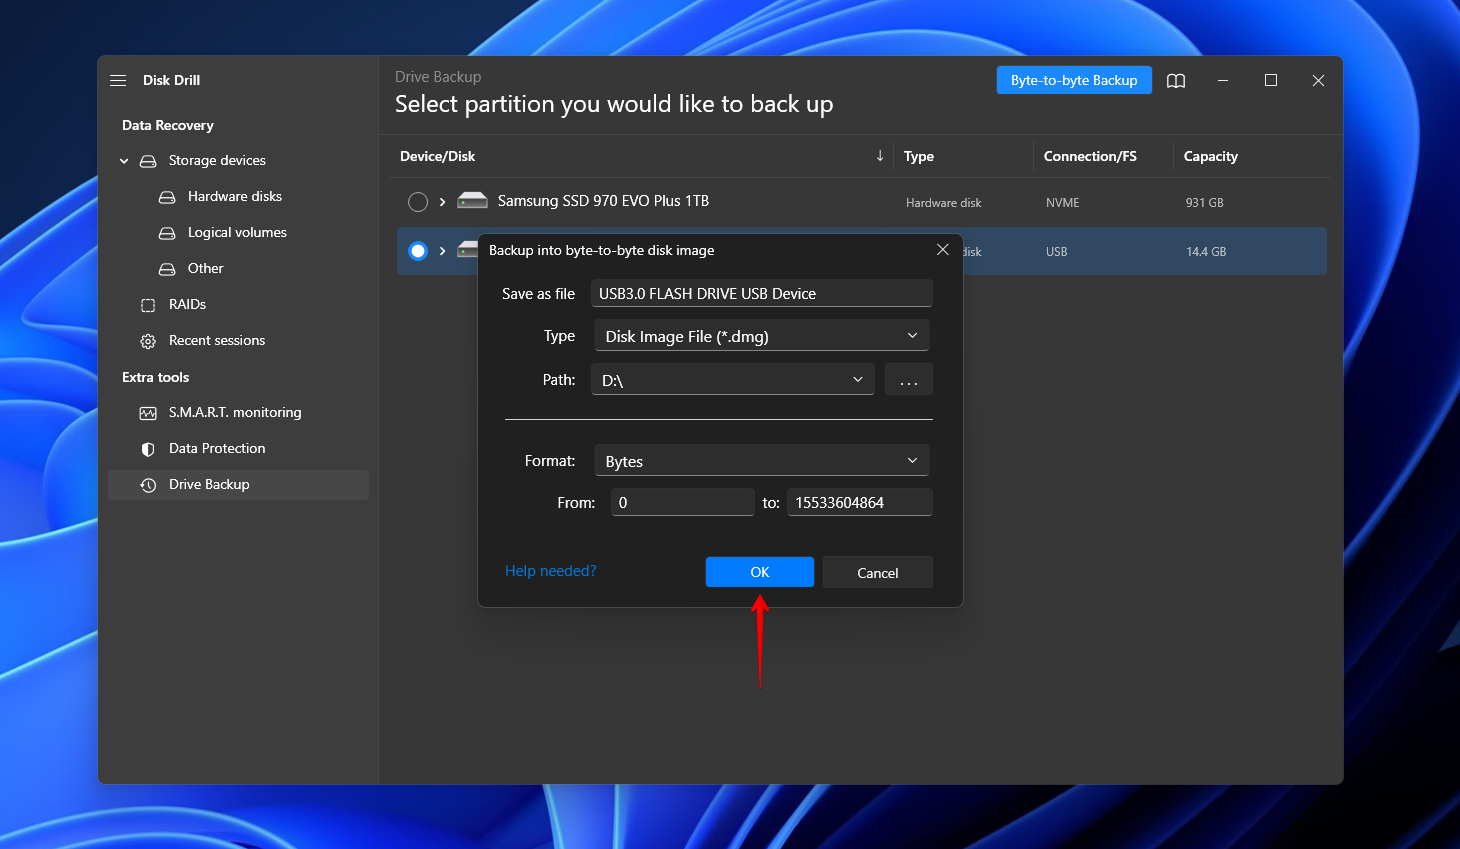
- Name the backup and specify where to store it. Click OK.
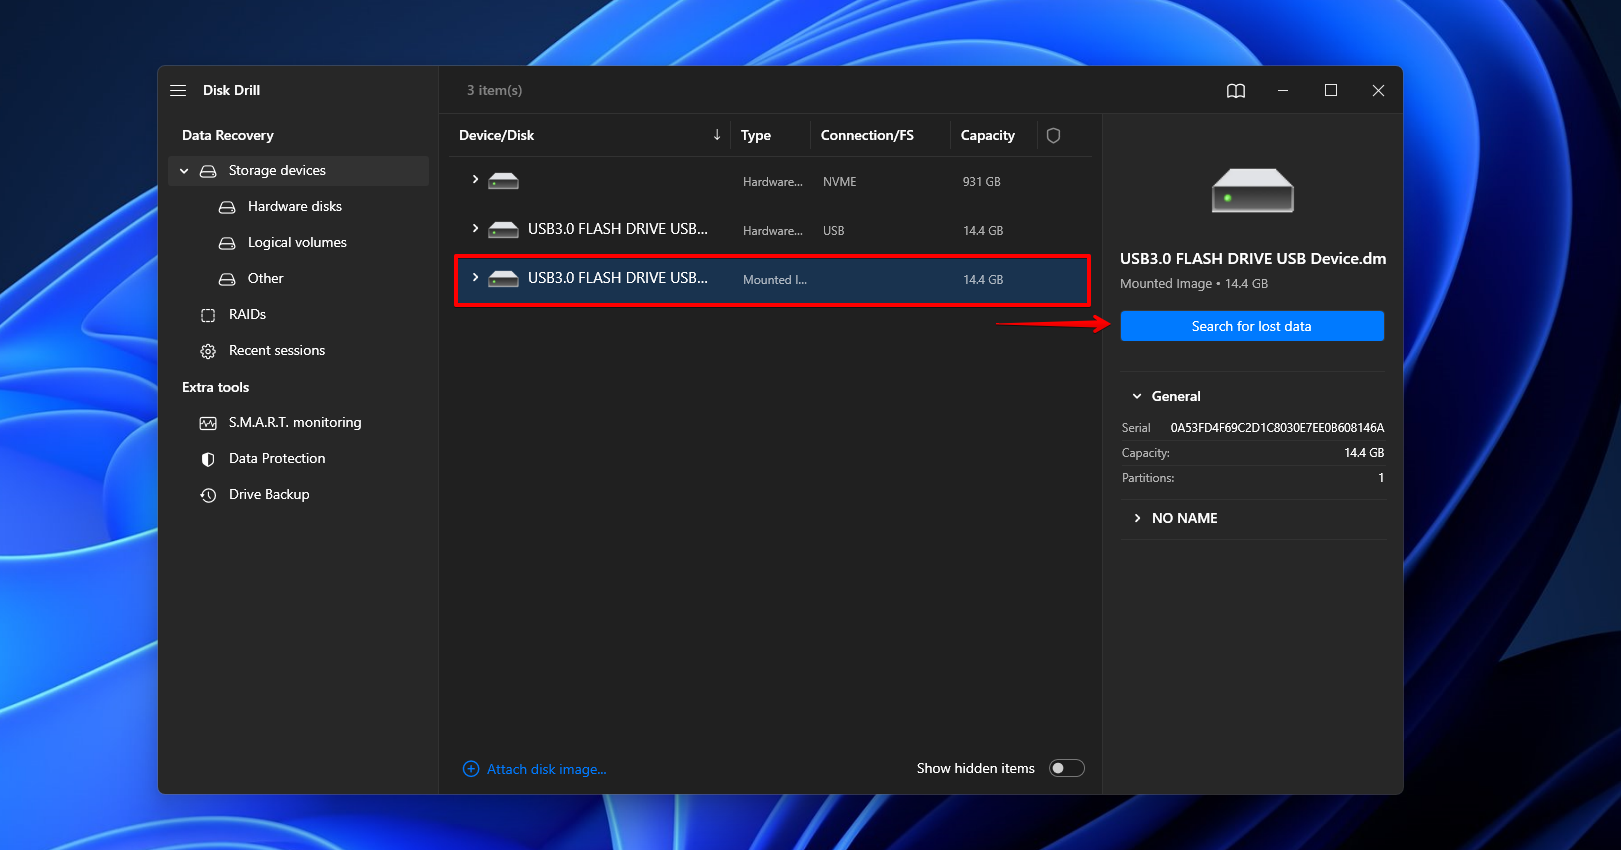
- Return to Storage Devices and attach the image file.
- Select the image file and click Scan for lost data.
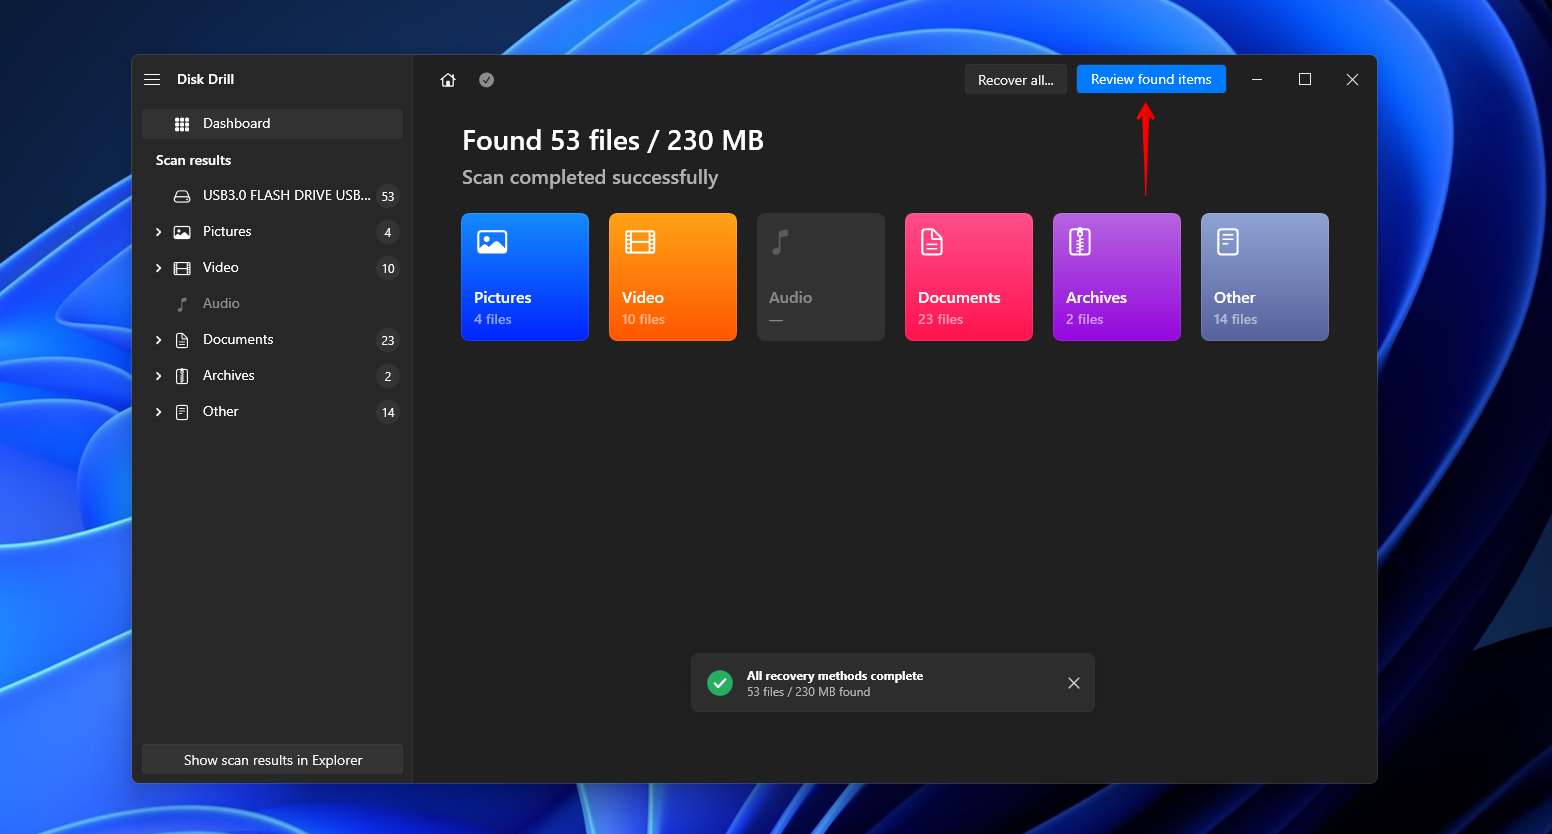
- Click Review found items when the scan is finished.
- Mark the files you want to recover. Use the filters at the top to organize the search results. When you’re ready, click Recover.
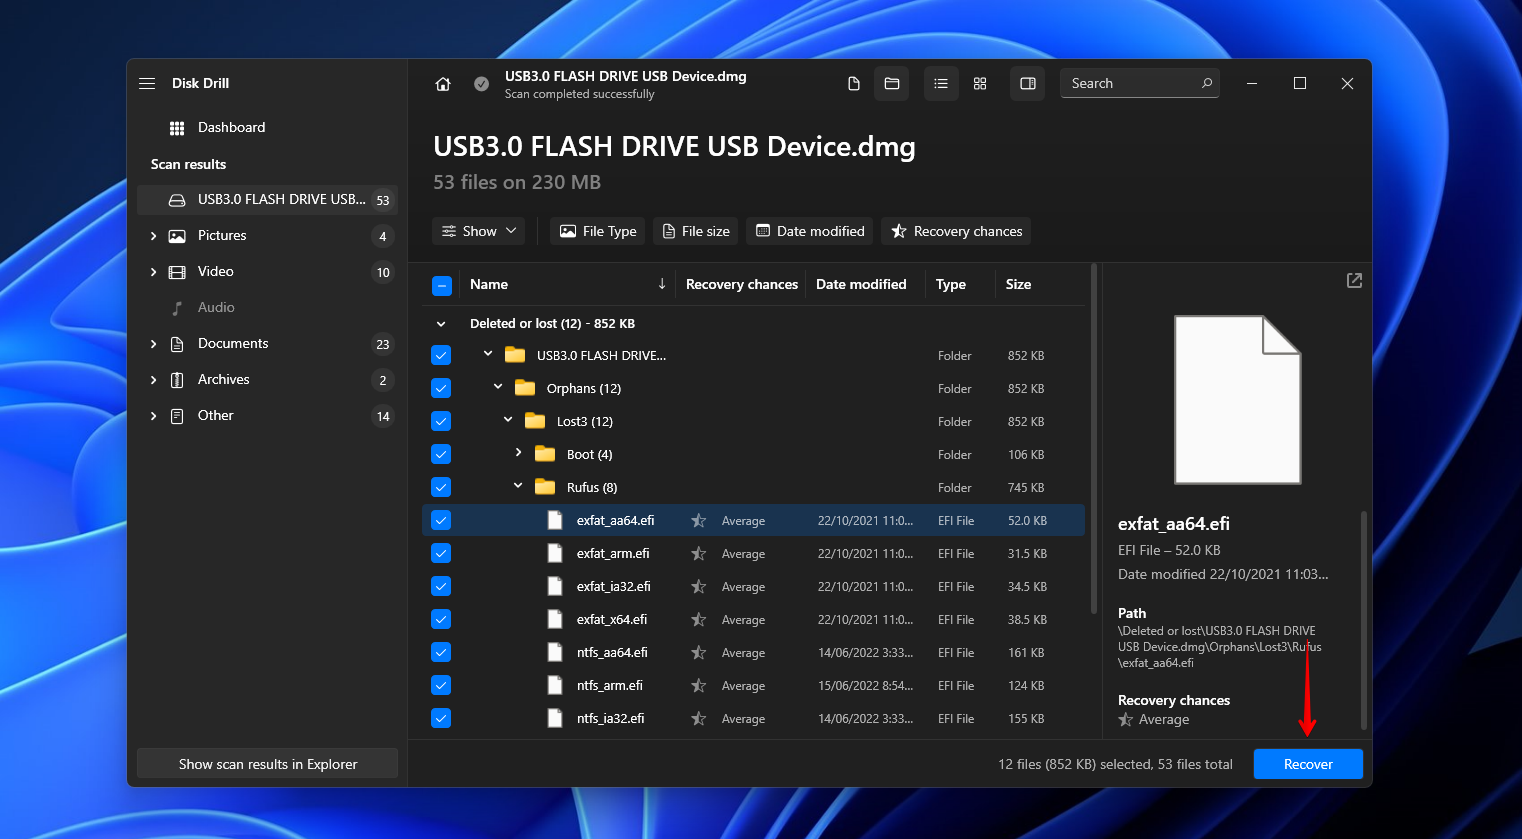
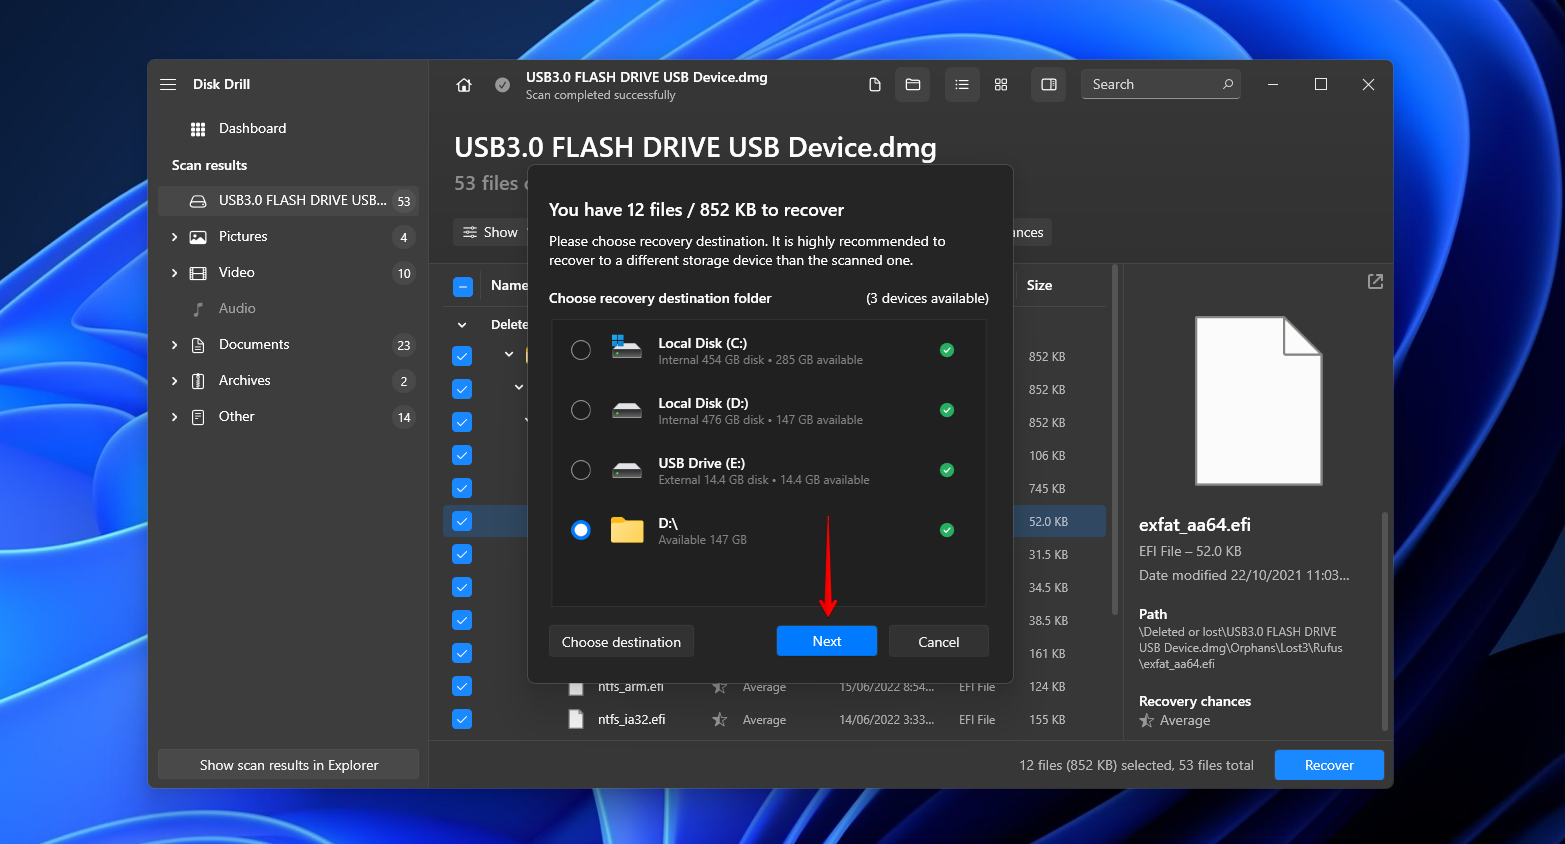
- Select an appropriate recovery location and click Next to complete USB recovery.
Following data recovery, you are free to repair your USB by formatting it with a new file system to overwrite any damage it has sustained. However, for more severe cases (such as physical damage), you may need to rely on a data recovery service to perform more in-depth recovery for you.
Conclusion
When checking your USB flash drive health, start by scanning the drive with Flash Drive Information Extractor and compare the results against the manufacturer specifications to ensure the USB drive is legit. If everything is correct, start by doing a quick visual inspection to see if there are any physical faults. You can then perform multiple tests to verify its health by scanning it with CheckDisk, checking for viruses with Microsoft Defender, and performing disk error checking.
If your USB drive has already encountered an error and stopped working, immediately back it up and recover your data using a data recovery tool like Disk Drill. Once your data is recovered, format the USB drive to restore it to its original state. Going forward, practice good data management habits by safely ejecting the USB and always taking extra care when connecting or disconnecting.
FAQ
- Open Command Prompt.
- Type chkdsk *: /r. Replace * with your USB drive letter. Press Enter.
- Open the terminal.
- Insert your USB.
- Type badblock -w -s -o error.log /dev/sdX.


