 Verbatim has made quite a name for itself in the external storage device niche, offering reliable flash drives and hard drives at reasonable prices. But just like any other brand, Verbatim products are vulnerable to several types of data loss, including accidental deletion.
On the plus side, prematurely erased files aren’t necessarily gone for good and can often be recovered if you know the right methods. In this guide, we’ll walk you through the best ways to recover data from Verbatim USB drives and discuss a few fixes in case your device stops working correctly.
Table of Contents
Overview of Verbatim USB Drives
Verbatim is a popular storage media brand founded towards the end of the 1960s. It initially became known for developing quality floppy disks and later pivoted to CD-R and DVD-R in the 1990s and early 2000s. In more recent years, Verbatim has been releasing removable storage devices like external hard drives and USB flash drives. These products have been well-received by consumers on account of their toughness and reliability while still maintaining an affordable price tag.
How to Recover Deleted Files from a Verbatim USB Drive
The best way to go about restoring deleted files from your Verbatim USB drive is by utilizing a reliable data recovery program. We’ll go through a couple of the more notable ones below.
Method 1:Disk Drill
Disk Drill is one of the most well-known data recovery programs on the market, boasting incredible recovery rates and a smart UI that caters to both novice and experienced users alike. It supports most major file systems and can retrieve pretty much any type of file. Furthermore, the program has a built-in byte-to-byte backup feature that you can use to create an image of a corrupted USB that can be scanned safely.
Are you not quite sold on Disk Drill just yet? You can download the trial version that lets you try out all of the app’s features and capabilities, with Windows users being able to recover up to 500 MB worth of files for free. Here’s an easy, step-by-step guide on how to recover deleted data from a Verbatim USB drive using Disk Drill:
- Download the newest version of Disk Drill and install it on your computer.
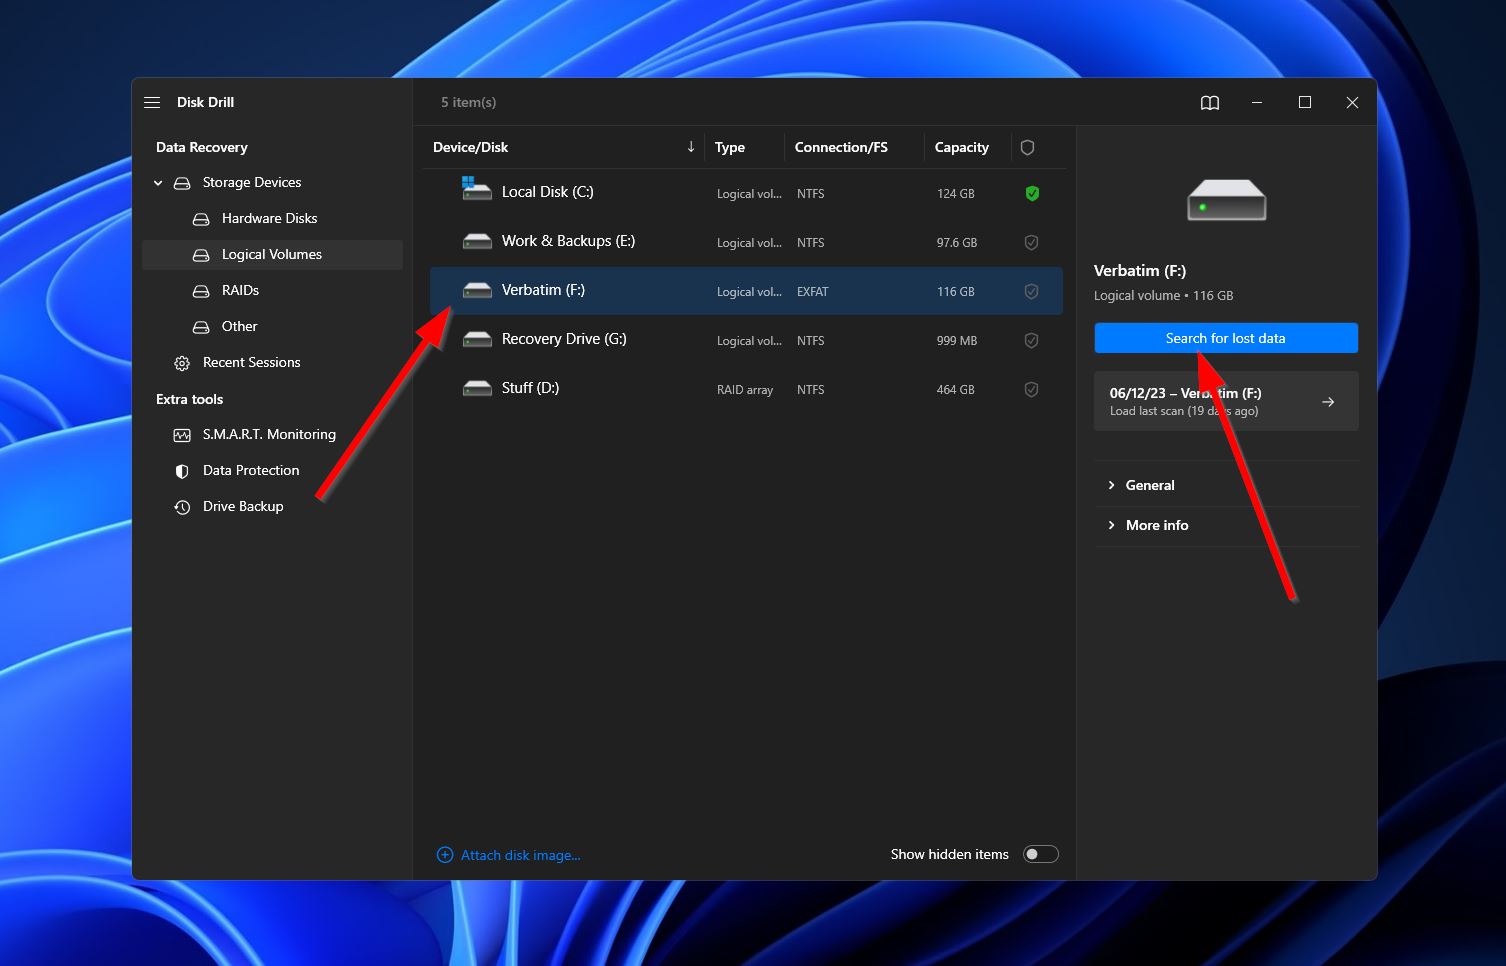
- Make sure your Verbatim USB drive is connected to your computer, and then launch Disk Drill. From there, select your USB drive from the list of available storage devices and click “Search for lost data.”
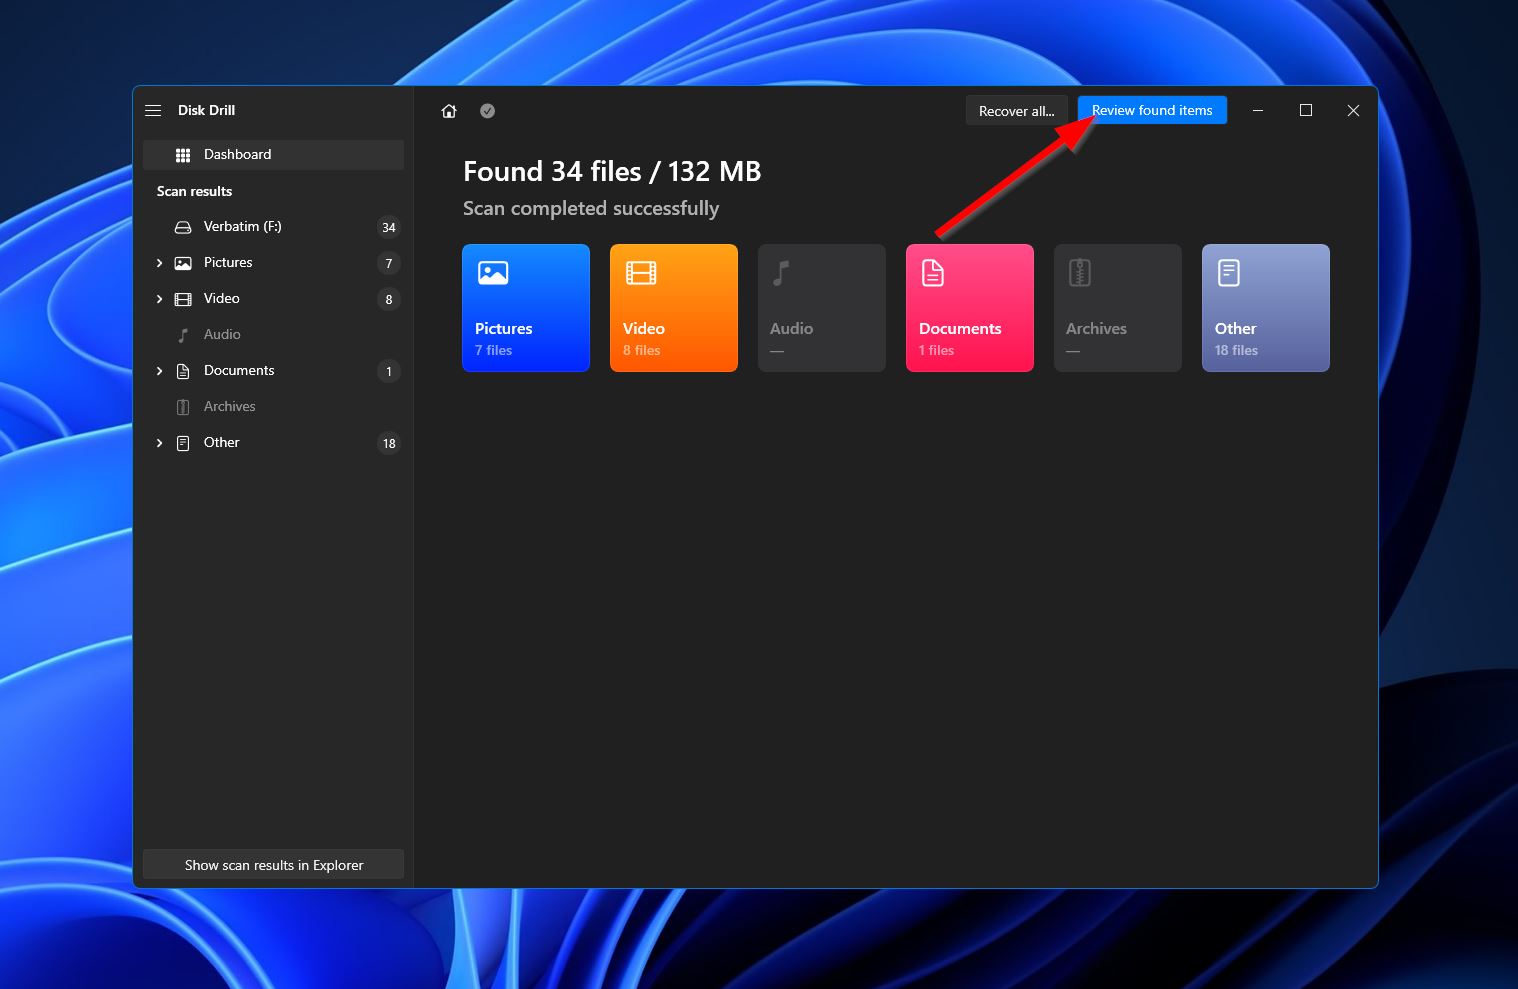
- The program will begin scanning your drive for any retrievable files. During this time, you can click the “Review found items” button in the top-right corner to check out any unearthed files as the scan progresses. Alternatively, you can just wait for the scan to reach completion and click the same button to proceed to the next step.
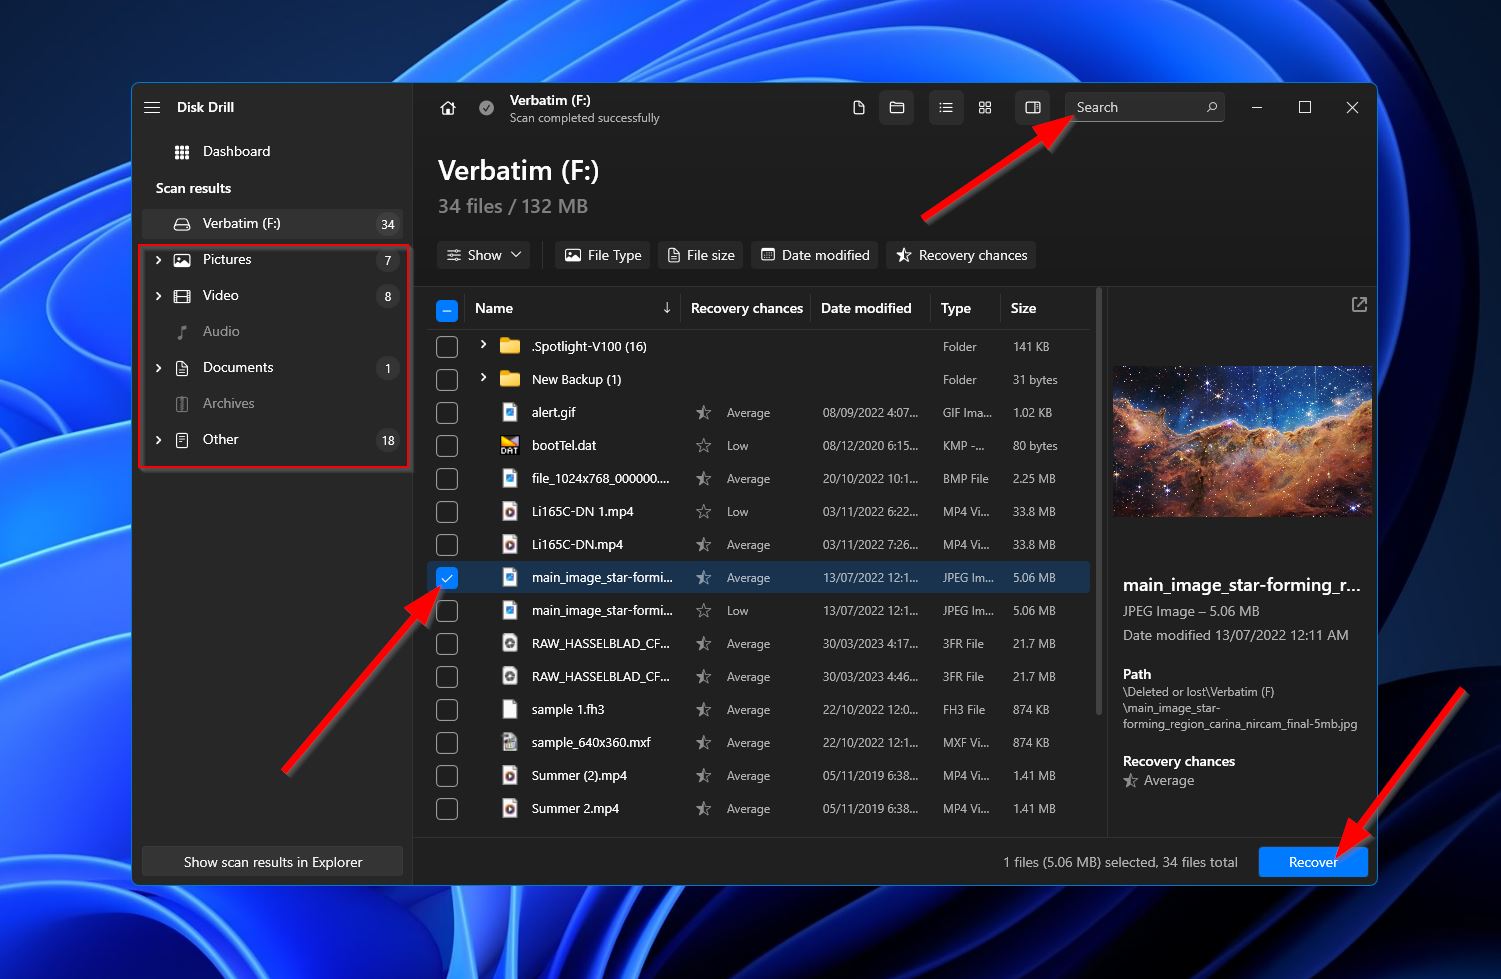
- When you get to the results screen, you can filter the found items using the categories on the left-side panel or the search bar at the top-right corner. Keep in mind that the search bar not only accepts file names but file extensions as well. Once you’ve located the deleted files you want to restore from your Verbatim USB, select them by ticking the checkboxes next to their file names, then click the “Recover” button in the bottom-right corner.
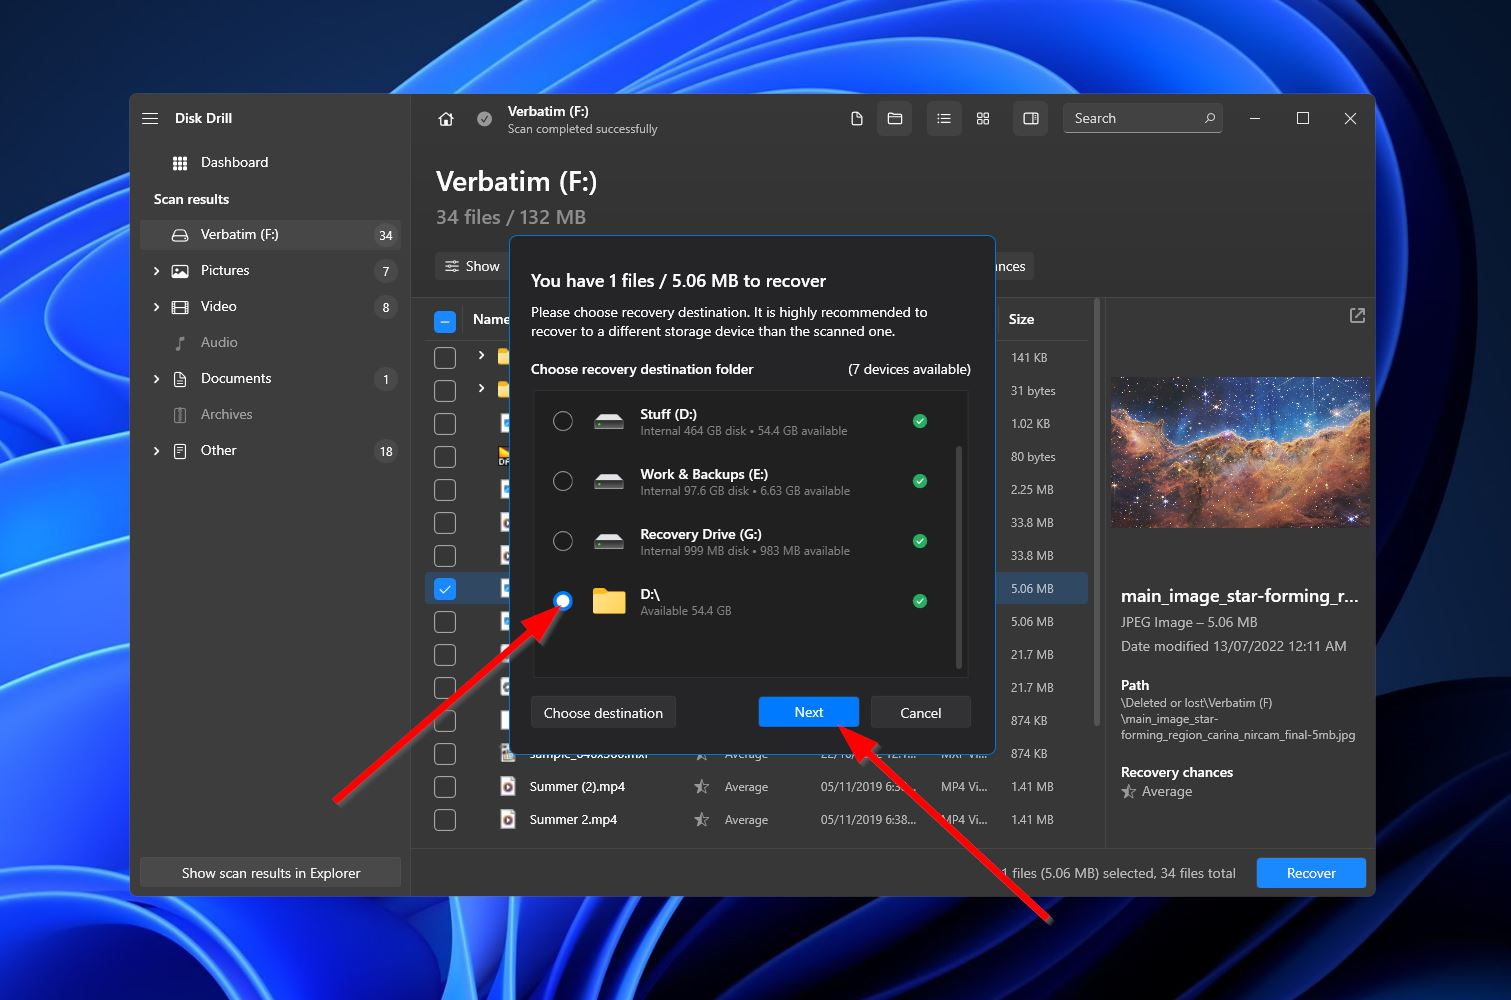
- A small pop-up window will appear, asking you to choose a destination for your recovered files. This has to be on a different storage device than the Verbatim USB you just scanned. Hit “Next” when you’re ready.
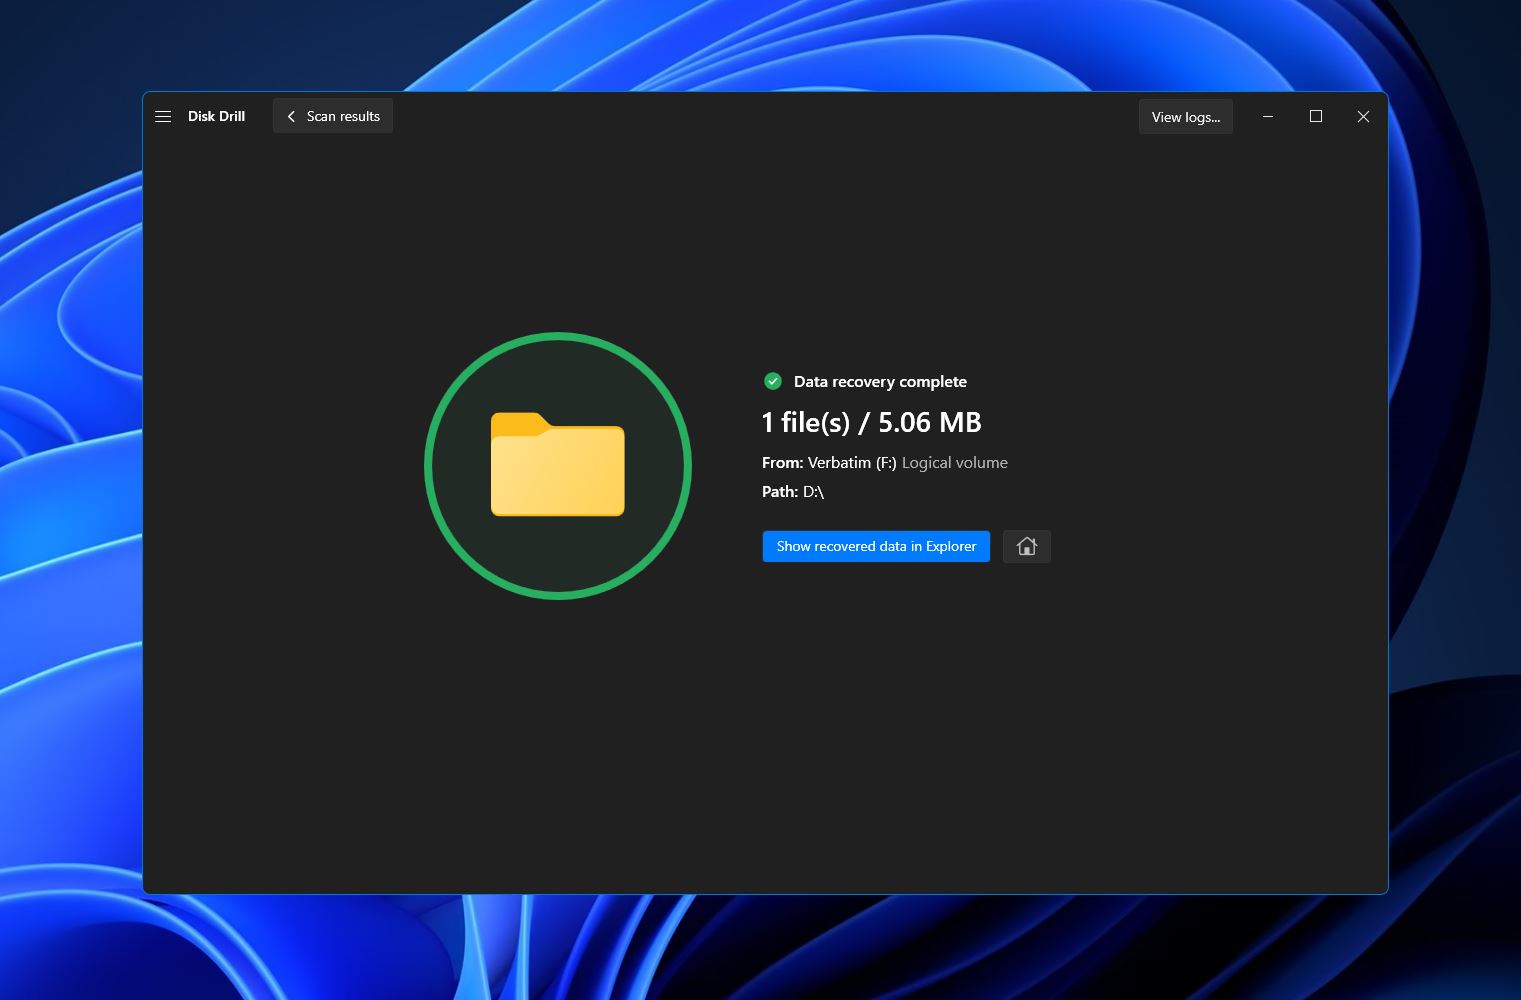
- Disk Drill will now proceed with the recovery of your selected files. Once done, you’ll see a completion message on-screen, along with a button labeled “Show recovered data in Explorer.” Clicking that button will open the folder where your retrieved files were saved.
Method 2:PhotoRec
For those seeking a completely free option, PhotoRec is an open-source data recovery program that performs well and supports most computer operating systems. The biggest downside here is that it’s geared primarily towards advanced users and would make a poor choice for computer novices. But if you don’t mind that, here are the steps on how to use PhotoRec to recover deleted files from your Verbatim USB:
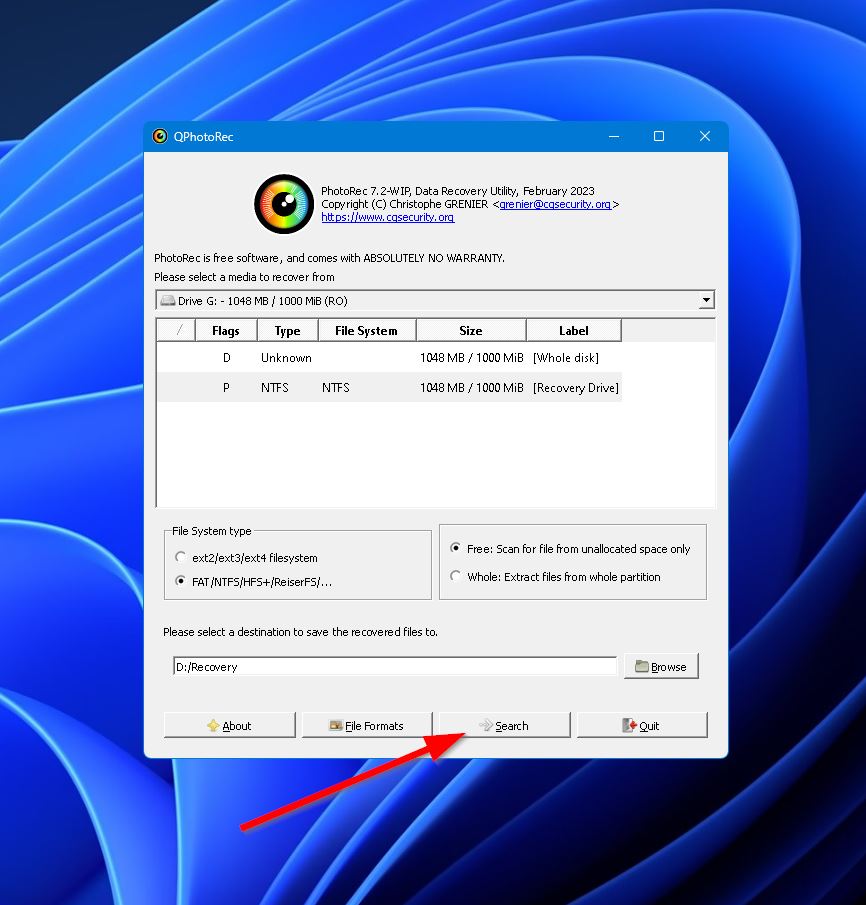
- Download the PhotoRec ZIP file from the CGSecurity website, extract its contents, and run the “qphotorec_win.exe” file.
- Click the dropdown near the top of the window and select your Verbatim USB from the list of devices.
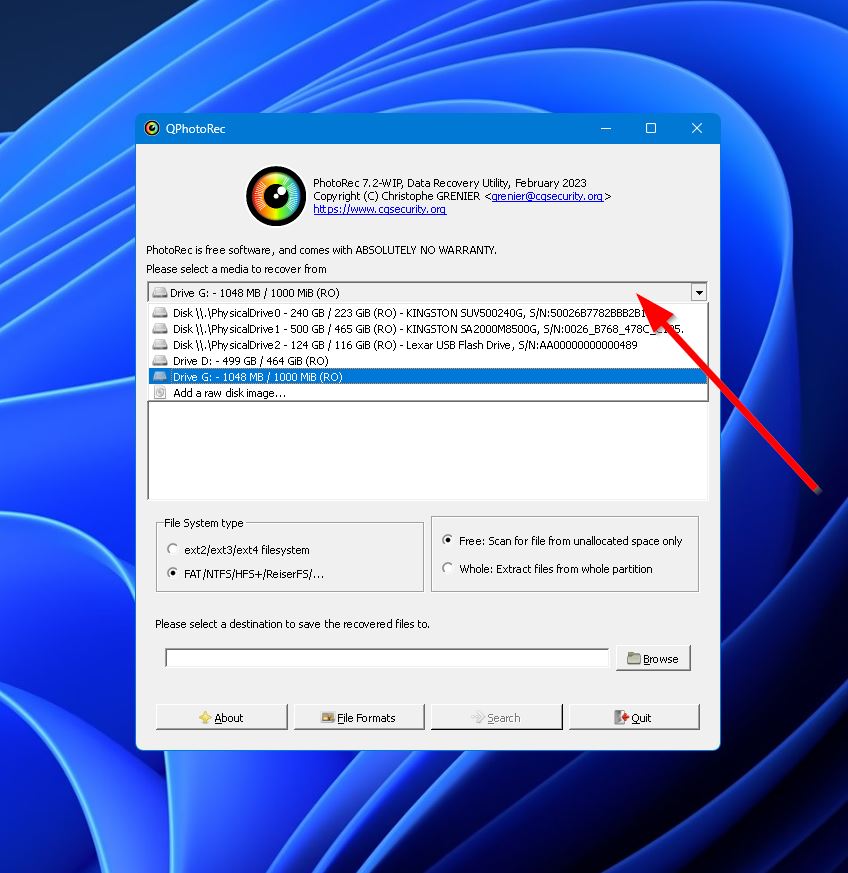
- Select the whole disk or a specific partition on the USB drive.

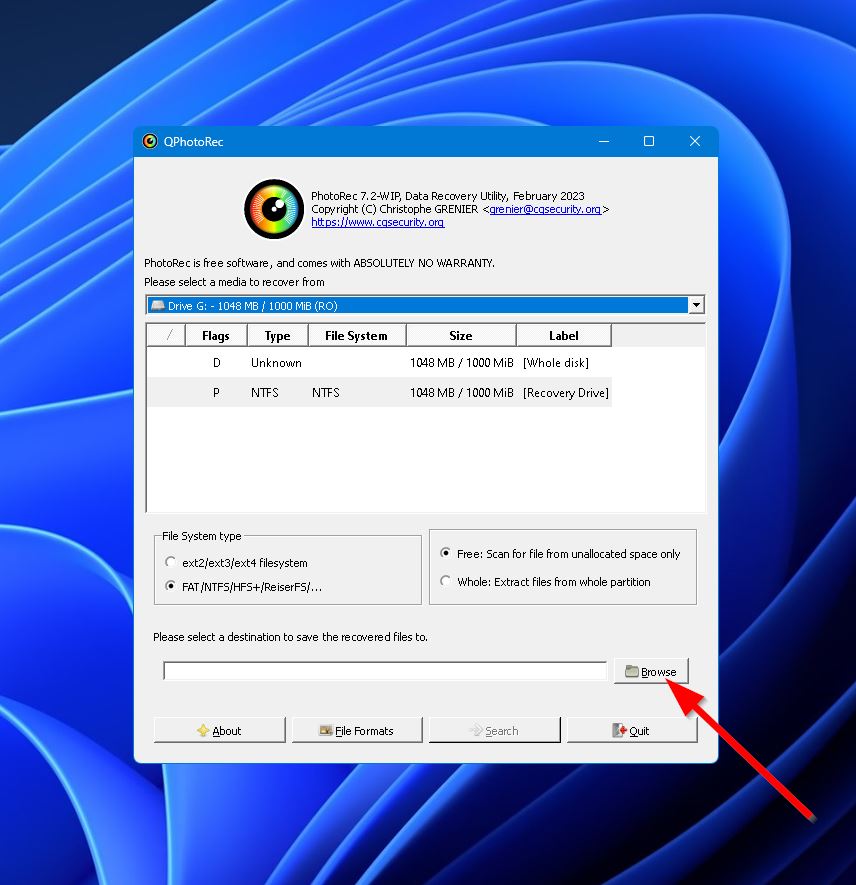
- Select the file system type of your Verbatim USB and whether you’d like a “Free” or “Whole” scan.

- Click the “Browse” button to select a destination for your recovered files.
- Once you’re all set, click the “Search” button near the bottom of the window. PhotoRec will then scan your Verbatim USB drive and potentially recover any files it comes across.
How to Fix Verbatim USB that is Not Working
You can try out the fixes below if your Verbatim USB is not working. The same goes if your Verbatim USB drive is not recognized by Windows.
- Check the USB drive: As basic as it sounds, the first thing you should do when your Verbatim USB stops working is to take a closer look at the device to make sure it’s undamaged and properly connected to your computer’s USB port.
- Reinstall the driver: Next, you’ll want to head to Windows Device Manager > Disk Drives and uninstall the Verbatim USB drivers. Restart your PC after that, and new Verbatim drivers should be installed by the OS automatically.
- Use chkdsk command: Windows comes with a built-in feature called “chkdsk” that can act as a Verbatim USB repair tool. It scans storage devices for errors and potentially fixes them. Simply open a command prompt with admin privileges, then type “chkdsk” followed by a space and the drive letter of your Verbatim USB. E.g., “chkdsk f:.”
- Format Verbatim USB drive: If all else fails, formatting the drive is the best course of action for getting your USB back in working order. You can do so by opening an instance of Windows Explorer, then right-clicking your Verbatim USB from the left-side panel and selecting the “Format” option. A pop-up window will appear with various options. When you’re ready, click “Start” to begin the formatting process.
Conclusion
Verbatim makes quality USB drives that perform well and last a long time, but they’re not immune to accidental deletion and data loss. Fortunately, there’s a good chance that you can retrieve those lost files using an effective data recovery program. And if you’re running into trouble getting your Verbatim USB to work, you can try the quick fixes outlined above.
FAQ:
- Toggle the physical write protection switch on the USB drive if it has one.
- Configure the drive settings using Windows Registry Editor.
- Use the DiskPart feature in Windows Command Prompt to remove the read-only attribute.
- Format the Verbatim USB drive.
- Make sure the USB drive is properly connected to your PC.
- Open Windows Explorer, then right-click the Verbatim USB from the panel on the left and select “Format.”
- Choose your desired options in the pop-up that appears and click the “Start” button to finalize the format.


