 If you notice that your USB suddenly has smaller storage space available, it might be because of unallocated space on your flash drive. You can verify if this is true by going into the Disk Management console on your PC. If your USB drive has unallocated space, you can always convert that into usable storage space with the right set of tools.
Note: You should recover files from the unallocated space before trying to fix it so you don’t end up overwriting any data.
Table of Contents
What is Unallocated Space on USB Drive
You often see unallocated space on your hard drive when you’re installing Windows or open the Disk Management console on your PC. On a USB drive, unallocated space can often appear after you’ve burned an operating system like Chrome OS or any Linux-based OS on your USB drive.
The unallocated space represents the space on your USB flash drive that hasn’t been partitioned. Any storage space that hasn’t been partitioned isn’t accessible for Windows, and therefore, you can’t read files from or write files to that space.
You can convert the unallocated space into allocated space fairly easily, but before you do that, you should try and recover the files that still exist in that space to avoid overwriting data. Let’s talk about how you can recover the files from a USB drive even though they may not be accessible, and then discuss methods of allocating the unallocated space.
How to Recover Data from Unallocated Space on a Flash Drive
Since you can’t access the unallocated space using your PC, you’ll need a data recovery tool like Disk Drill to recover data from the unallocated space. Here’s a quick four-step guide to recovering unallocated space on a USB flash drive.
Step 1. Download and Install Disk Drill
Start by downloading Disk Drill and installing it on your PC. The free version will allow you to recover up to 500MB of data.
Step 2. Start the Scan
Launch Disk Drill after installation. You’ll see all partitions listed on the home screen; look for the unallocated disk space. Select it. Click on the Search for lost data button to start the scan.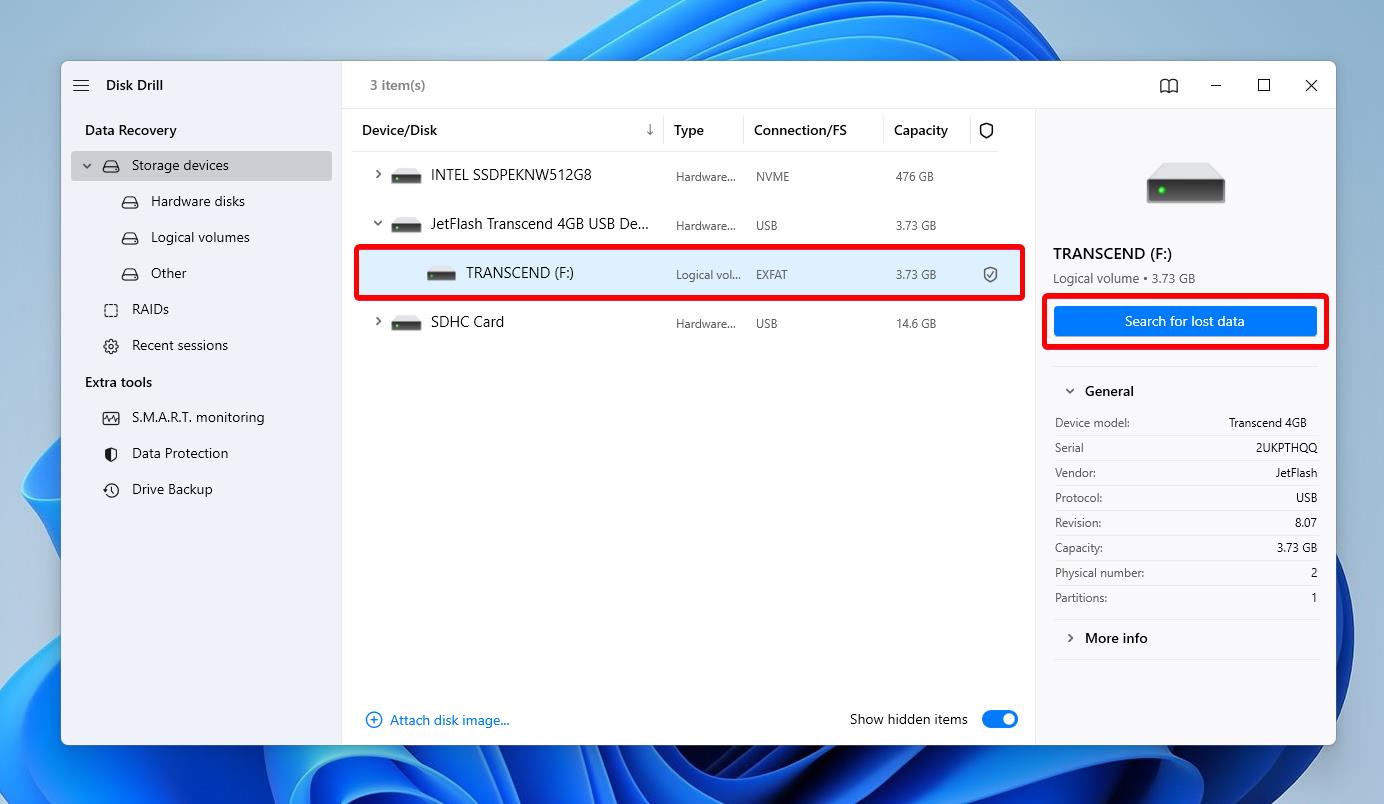
Step 3. Preview Found Files
Once the scan completes, click on the Review found items button at the top. You can also view the files while the scan is still running by clicking the same button. You won’t be able to recover files until the scan is complete, but you’ll be able to preview files. You can go ahead and start selecting the files you want to recover while Disk Drill continues the scan parallelly.
Step 4. Select File Recovery Location
Check the boxes next to the files and folders you want to recover and click on the Recover button. It will open a small window where you’ll need to select a location where you want to save the recovered files. Don’t save the files on the USB drive you’re recovering them from to avoid overwriting data. Once you’ve selected a location, click Next and you’re all done.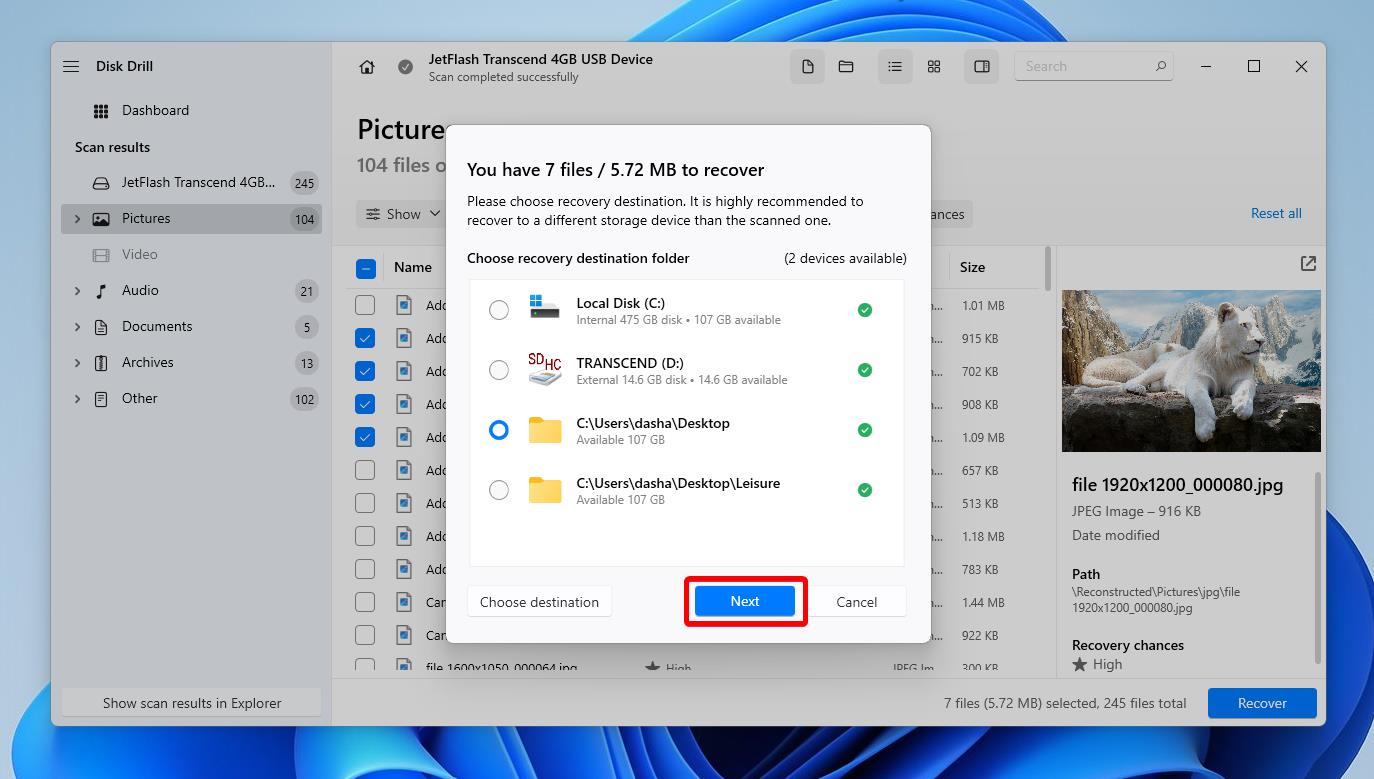
How to Fix Unallocated Space on USB Drive
Now that you’ve finished recovering the files, we can talk about how to allocate unallocated space on your USB drive. There are two methods of going about it, and we’ll walk you through both methods step-by-step.
Method 1: Disk Management
The Disk Management console lets you control storage devices connected with your Windows computer. It allows you to create a new partition using any unallocated space lying on your storage device.
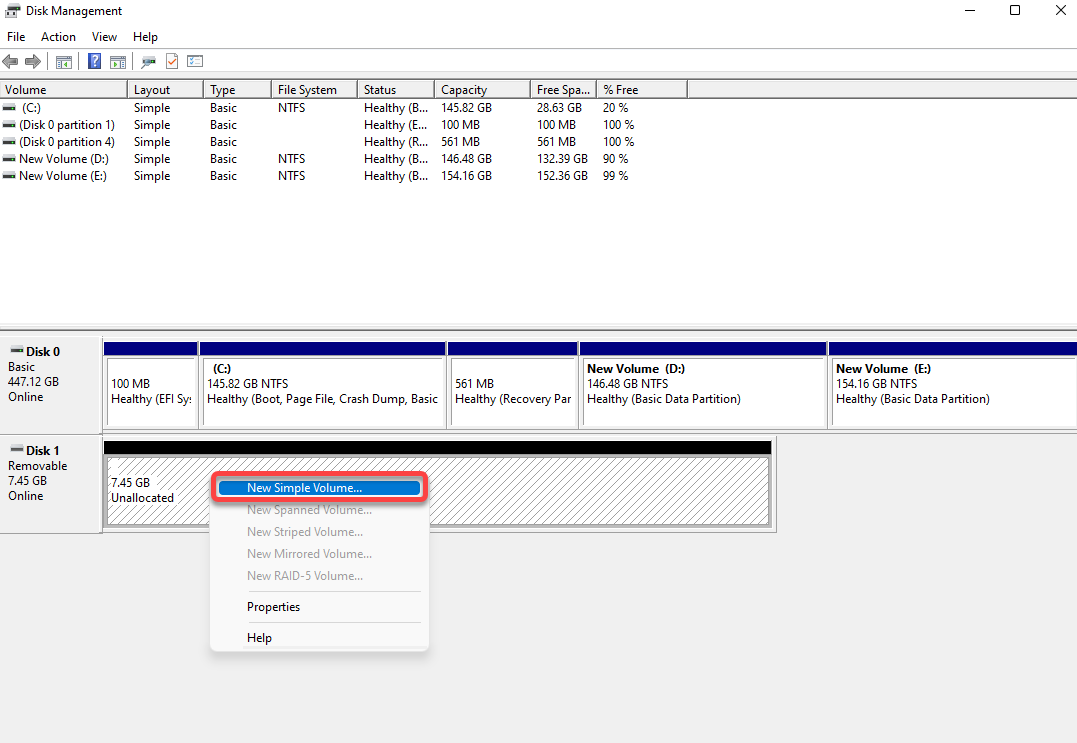
- Press Win + R, type diskmgmt.msc, and press Enter to launch the Disk Management console.
- Find the unallocated volume (which will be labeled as such), right-click on it, and select New Simple Volume.
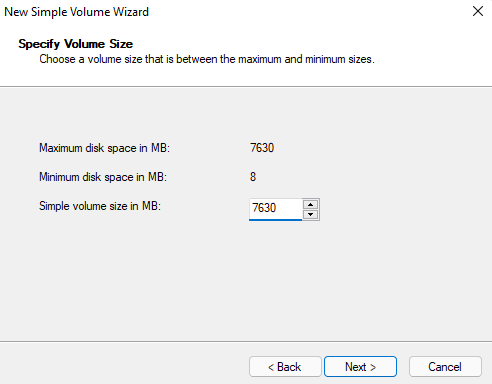
- You’ll see an installation wizard for creating a new volume. Click Next. On the next screen, enter a size for the new partition, and click Next again.
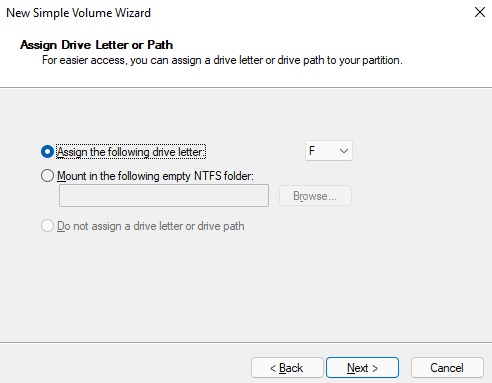
- Select a drive letter you want to assign to the new partition, and click Next.
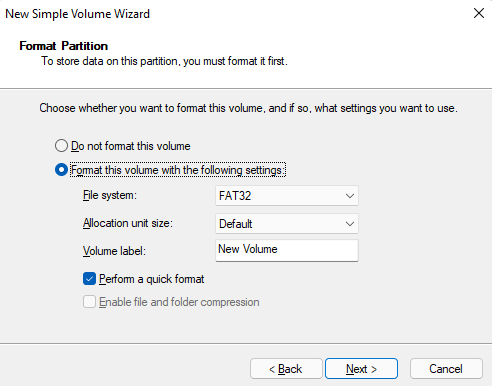
- On the next screen, select a File system, enter a Volume label, and click Next.
- Click Finish and you’ll have created a new partition.
At this point, the space that previously appeared as unallocated should now appear as a volume with a drive letter that you assigned to it.
Method 2: Using DiskPart
DiskPart is a disk-partitioning command-line utility that you can use for converting the unallocated space on your USB drive to a new partition.
- Press Win + R, type cmd, and press Ctrl + Shift + Enter to launch Command Prompt with administrative privileges.
- Execute the following commands:
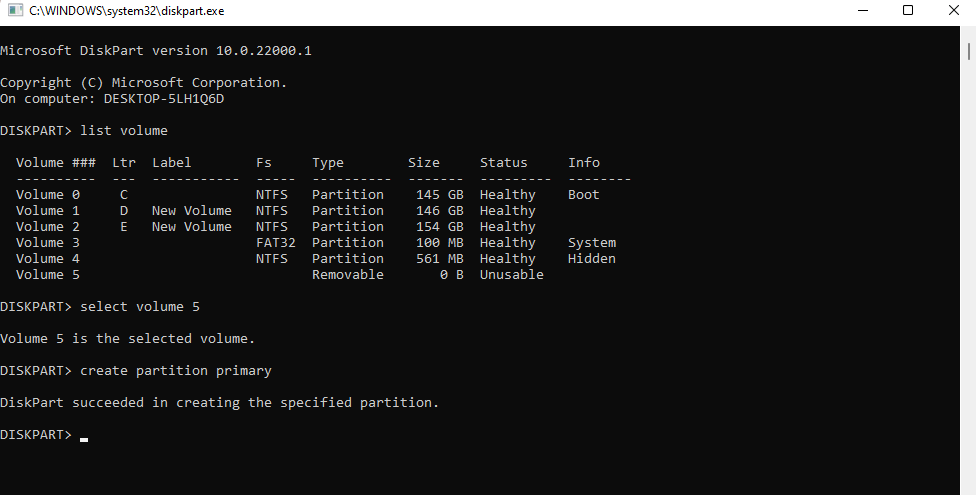
diskpart
list volume
- You’ll now see a list of volumes available on your computer. Find the volume that has unallocated space and run the following command:
select volume 5
(replace ‘2’ with the relevant disk number)

- Next, execute the following command:
create partition primary
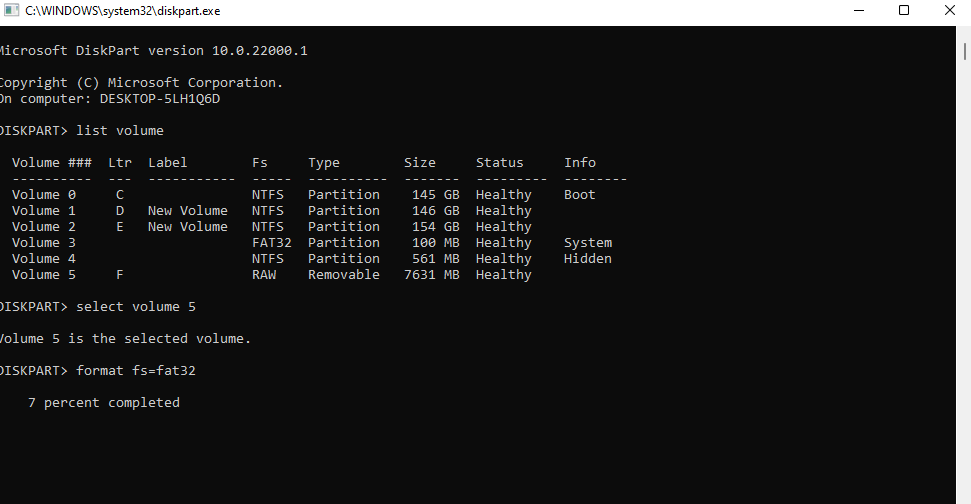
- As a final step, format the disk into your preferred filesystem. If you want to format it as FAT32, execute the following commands:
format fs=fat32
At this point, you should be able to access the unallocated space again.
Conclusion
Seeing unallocated space on a USB that contains important documents can be an unpleasant, anxiety-inducing experience. However, you can recover the files from a USB drive that has unallocated space without a lot of effort, provided you choose the right tool.
Using a smart tool like Disk Drill to recover files from unallocated space on a USB drive can improve the chances of recovery considerably. The important thing is to stop using the USB flash drive right away, recover files using Disk Drill, and then go about fixing the USB drive.


