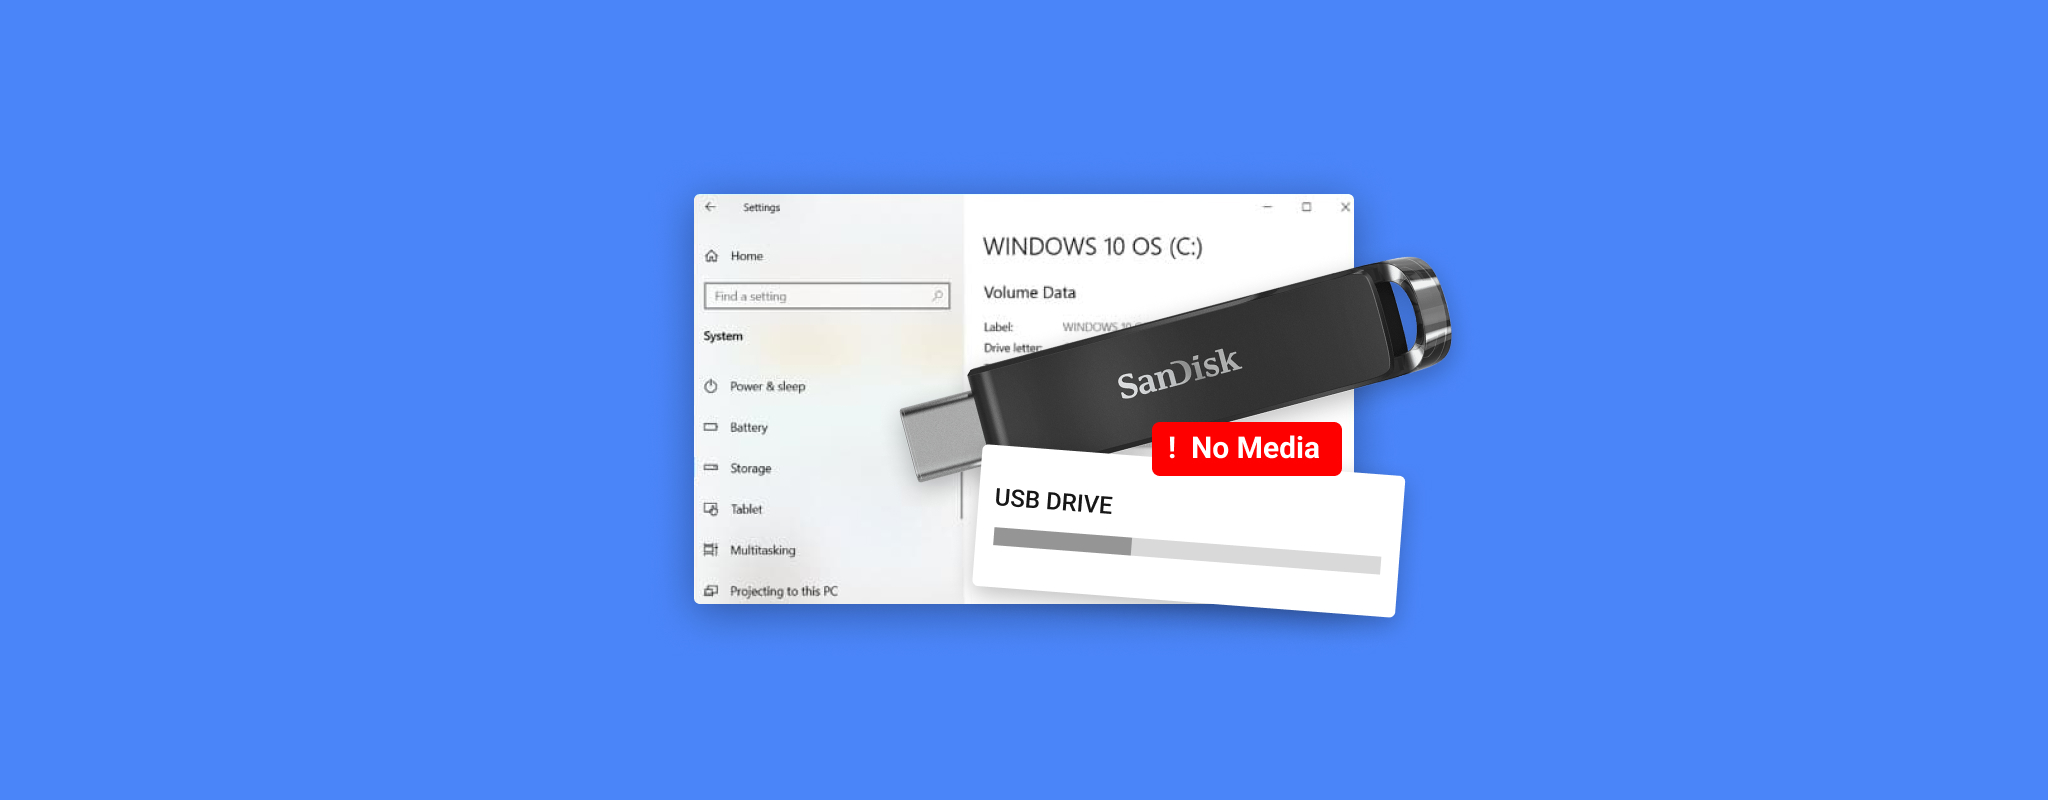
 When you insert a USB drive in your PC and it doesn’t show up, you’re confused why your USB drive is suddenly not working. You quickly go to the Disk Management console, but your USB drive shows “No Media” under the disk name.
You’re probably about to panic, but take a pause. In this guide, we tell you what went wrong with the USB drive, how to get your data back from the USB drive, and how to bring it back to its previous usable condition.
Table of Contents
What Does No Media Device Mean?
Disk Management usually gives you a complete overview of storage devices connected to your PC. If a USB drive shows the “No Media” message in the Disk Management console, you won’t be able to access it from anywhere else on the PC. Even when you try looking at the disk’s status using Diskpart, you’ll see “No Media” next to the USB drive and the size listed as 0 bytes.
When you don’t know what caused your device to malfunction, there’s little chance that you’ll be able to fix it. Since neither Disk Management or Diskpart give you a clear answer, you’ll need to use deductive reasoning to determine the cause.
Here are possible causes that can lead to the flash drive “No Media” issue:
| Cause | Description |
| 🔌Loose USB port | If the USB port’s connection has become loose, that could cause the issue. |
| ❌ Outdated or corrupt USB driver | The USB drivers on your PC could have become outdated or corrupted, causing the “No Media” problem. |
| ⚠️ Logical errors | Possible file system corruption or damage to the drive’s Master Boot Record (MBR) can lead to the USB showing “No Media” issue. |
| ☠️ Abrupt removal | Suddenly removing the USB drive can result in logical errors, which can consequently cause the “No Media” error. |
| 🐞 Malware or virus | A malware or virus infection can render your USB drive unusable and cause the “No Media” issue. |
| 🤕 Physical damage | Hard bad sectors as a result of physical damage to the drive can lead to the “No Media” problem. |
How to Recover Data from a “No Media” Device
It’s best to recover important data from the USB drive before you start trying to fix it. If you cause further damage while troubleshooting and end up with a dead USB flash drive, you might lose any chances of recovering data.
The easiest way is to use data recovery software like Disk Drill. This comprehensive data recovery tool is capable of scanning and recovering from different storage devices like USB drives.
It can also scan hundreds of file formats, including photos, videos, audio, documents, Adobe product files, and many more. On top of that, it allows you to preview files before recovering them so you know which files are intact.
If you haven’t used a data recovery tool before, we’ll walk you through the simple four-step process below.
- Download Disk Drill and install it on your PC. The free version will allow recovering up to 500MB of data.
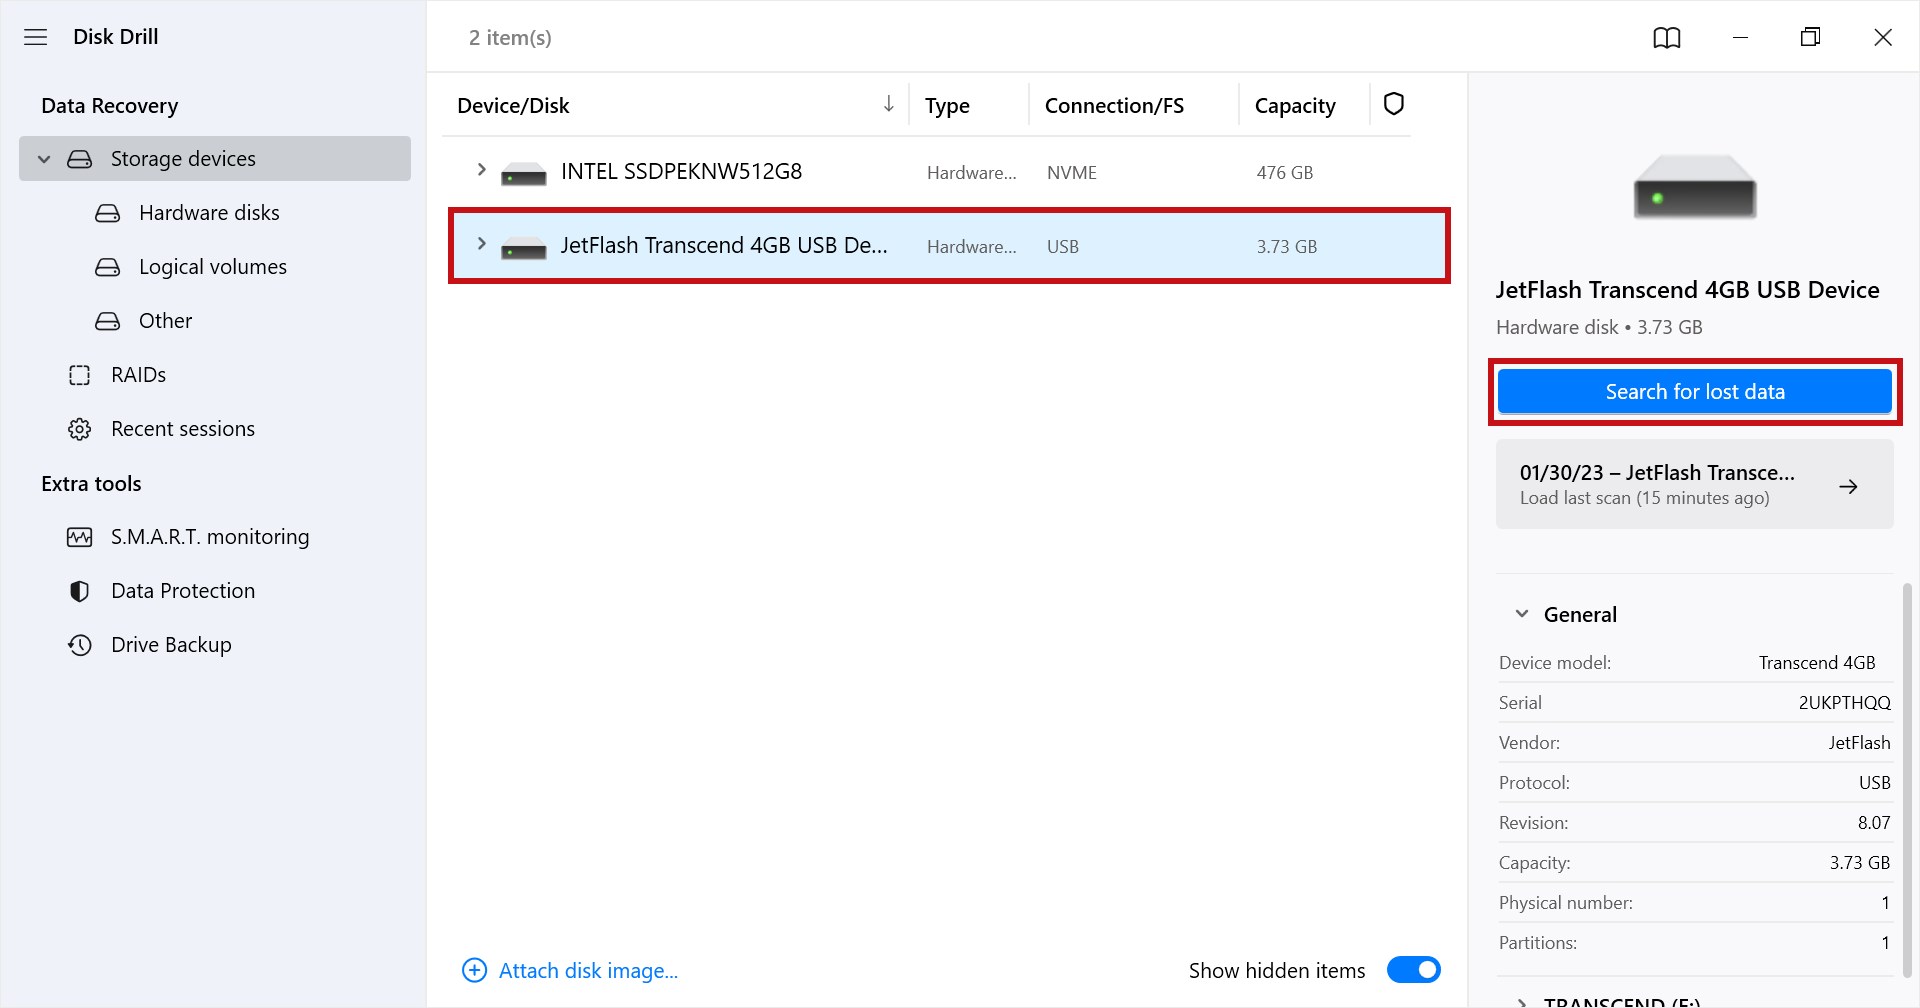
- Once Disk Drill is installed, launch the app. Select the USB drive from the app’s home screen and select Search for lost data. Let Disk Drill complete the scan.
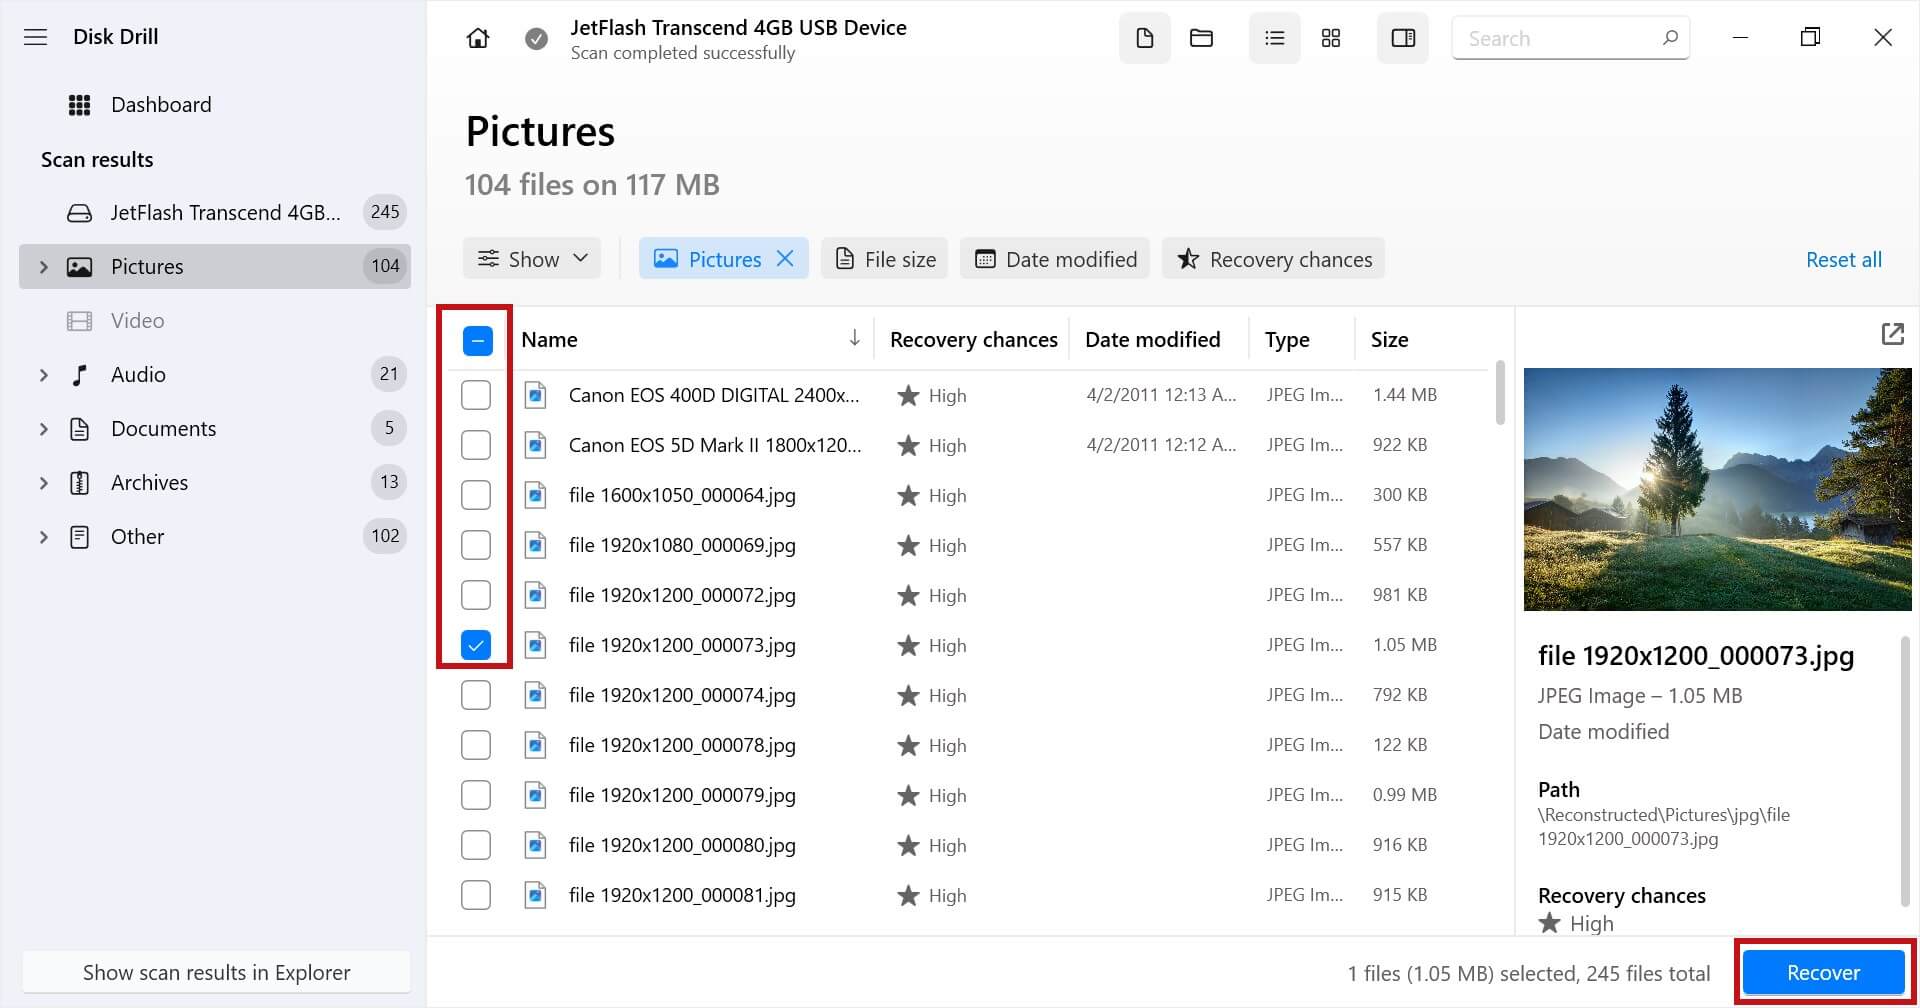
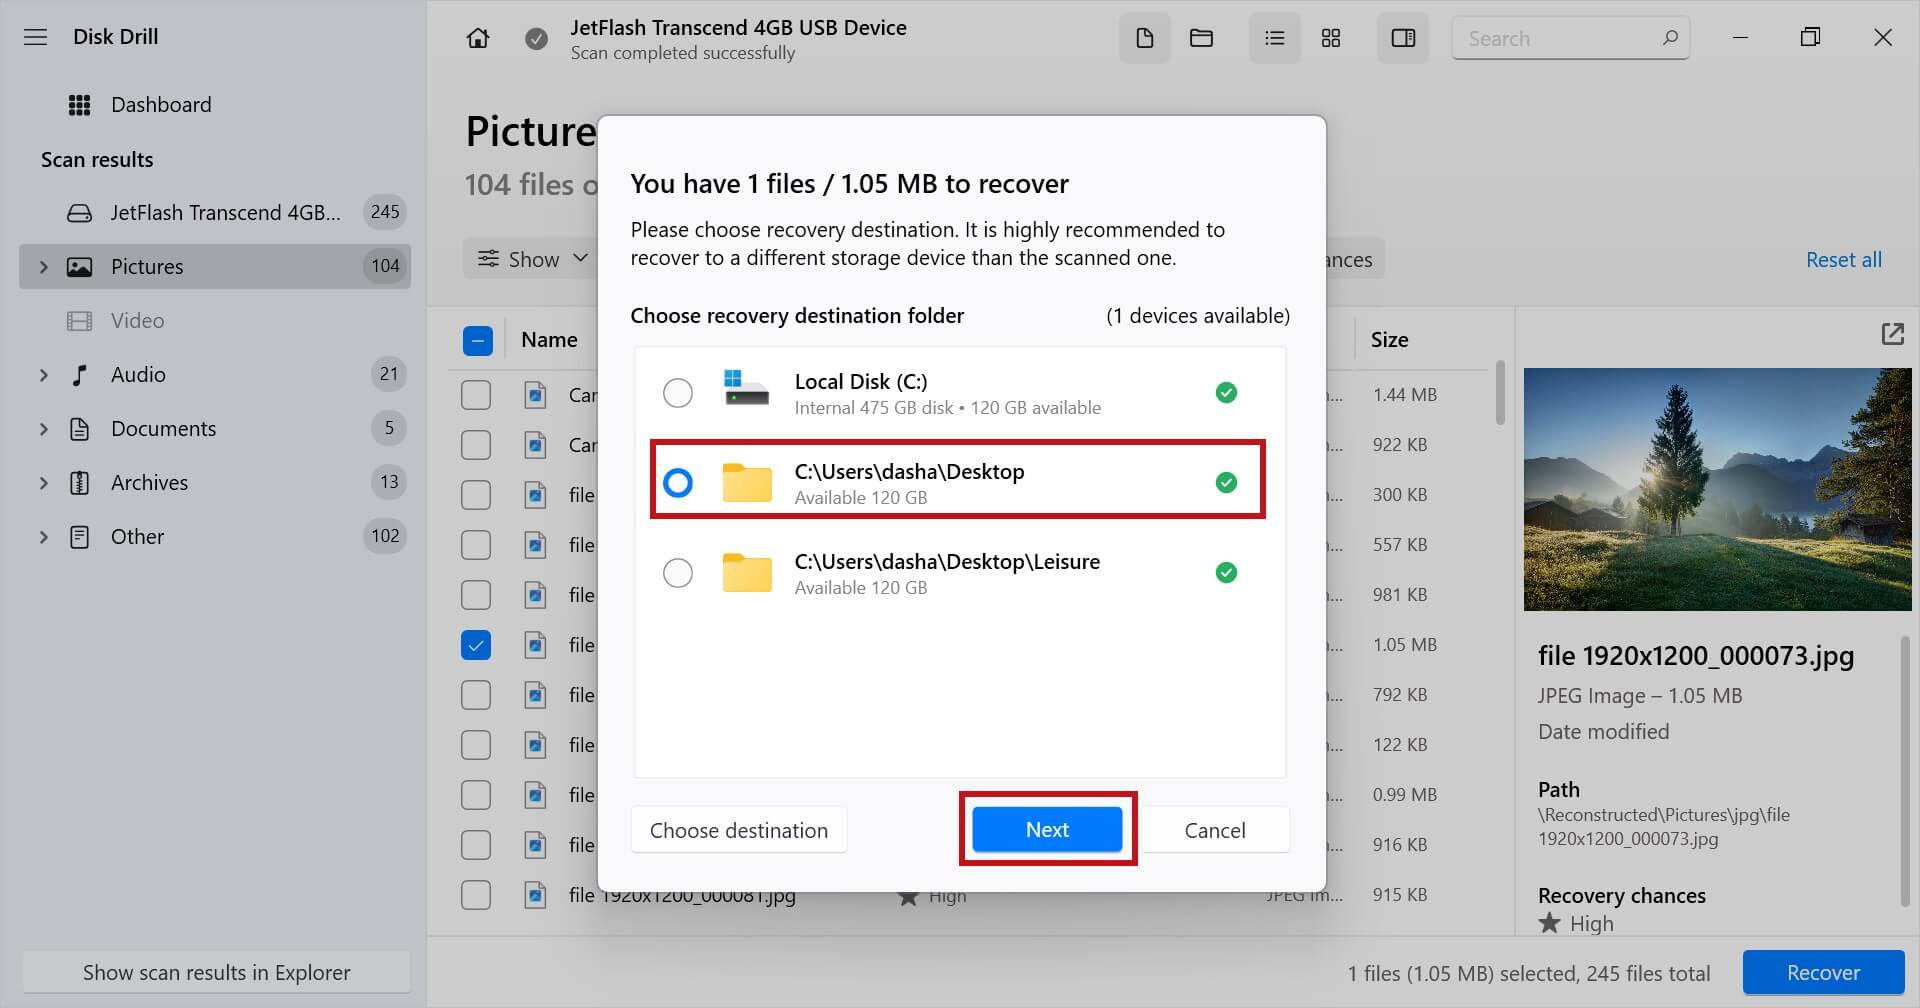
- Once the scan is complete, you’ll see a list of files that can be recovered. Select the files you want to recover by checking the box next to them. Then, click the Recover button.
- Once you press the Recover button, you’ll need to choose a location where you want to recover the files. Make sure you choose a location different from the USB drive you’re recovering the files from to avoid overwriting the data. Once you’ve selected a location, click Next.
How to Fix “No Media” Issue on a USB Drive?
Now that you know how to recover data from a USB drive showing “No Media” in Disk Management, you can start fixing it. We discuss some methods for fixing such flash drives below.
Method 1: Check the Device in Another PC or Port
If your USB drive isn’t inserted properly, the port has become loose, or the USB drive is unable to draw enough power from the port, you can try inserting the USB drive into a different port on your computer. If that doesn’t work, try inserting the USB drive into a different computer to see if the problem is with the PC or the USB drive.
Method 2: Update, Reinstall, or Enable the Device Driver
Outdated or corrupt drivers can cause the USB “No Media” problem too, and they’re fairly easy to fix.
You can update the driver automatically from within Windows, but since Windows isn’t all that great at finding updated drivers, you might want to directly download the latest driver from the manufacturer’s website.
Alternatively, you can reinstall the same driver if it has become corrupted. To reinstall:
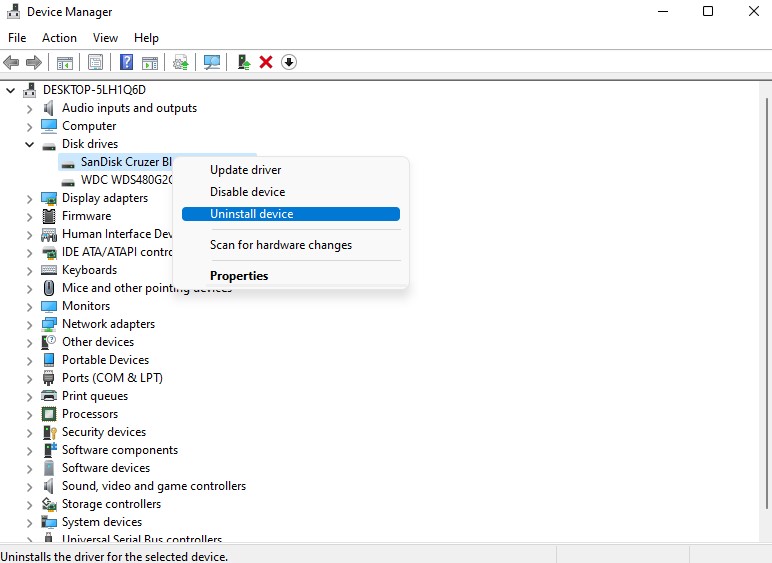
- Search for device manager in the Start Menu and press Enter.
- Expand the Disk drives list, right-click on your USB device, and click Uninstall device.
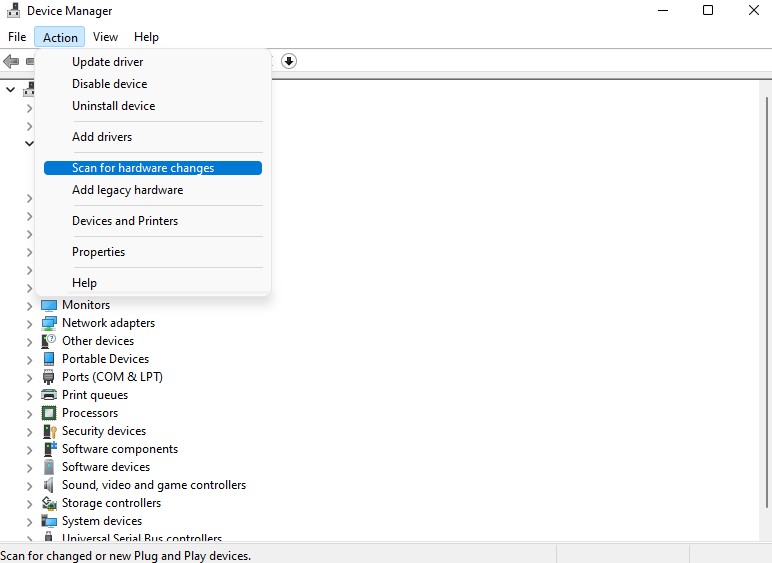
- Once the device disappears from the list, click on the Action tab at the top and select Scan for hardware changes. That should reinstall the driver and address the driver corruption.
In some cases, the USB devices may have been disabled altogether. In that case, you only need to right-click and select Enable instead of updating or reinstalling the driver.
Method 3: Antivirus Scan
If a virus or malware is the reason that there’s no media in the device, you can run an antivirus scan to remove the virus. An antivirus scan will remove the virus and malware in most cases, but not always. Either way, it’s worth a shot before you format the entire drive.
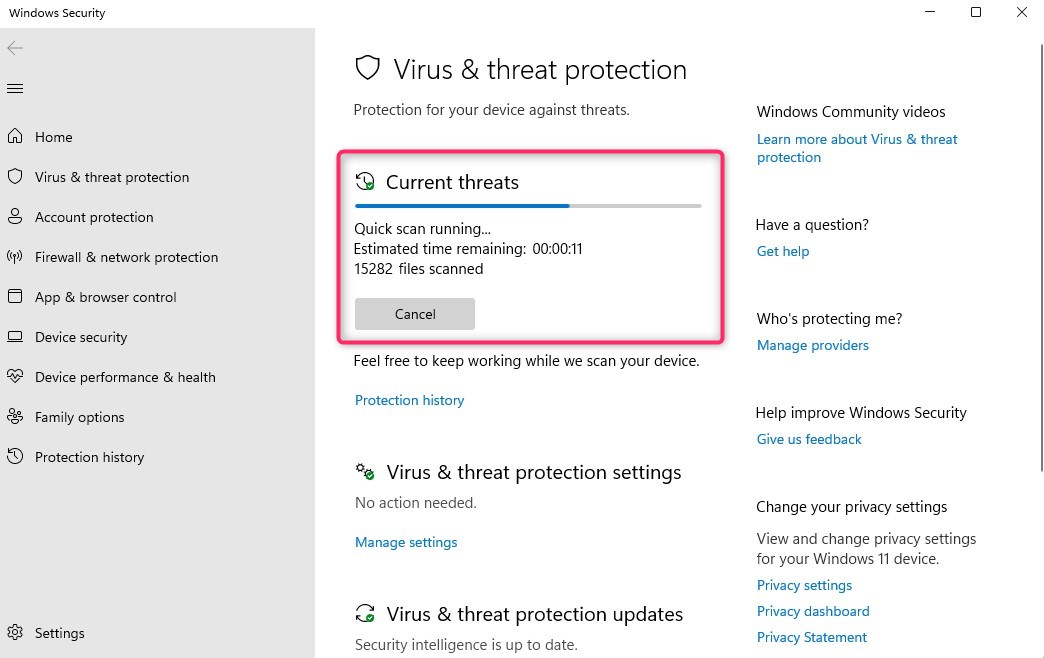
The exact way to perform a scan depends on the antivirus you’re using. However, you can apply the same general process to get the job done. Here, we illustrate performing a scan using Windows Defender:
- Search for virus and press Enter to launch the Virus & threat protection section of Windows Defender.
- Select the Quick scan button. Alternatively, you can click on Scan options if you want to run a full or custom scan.
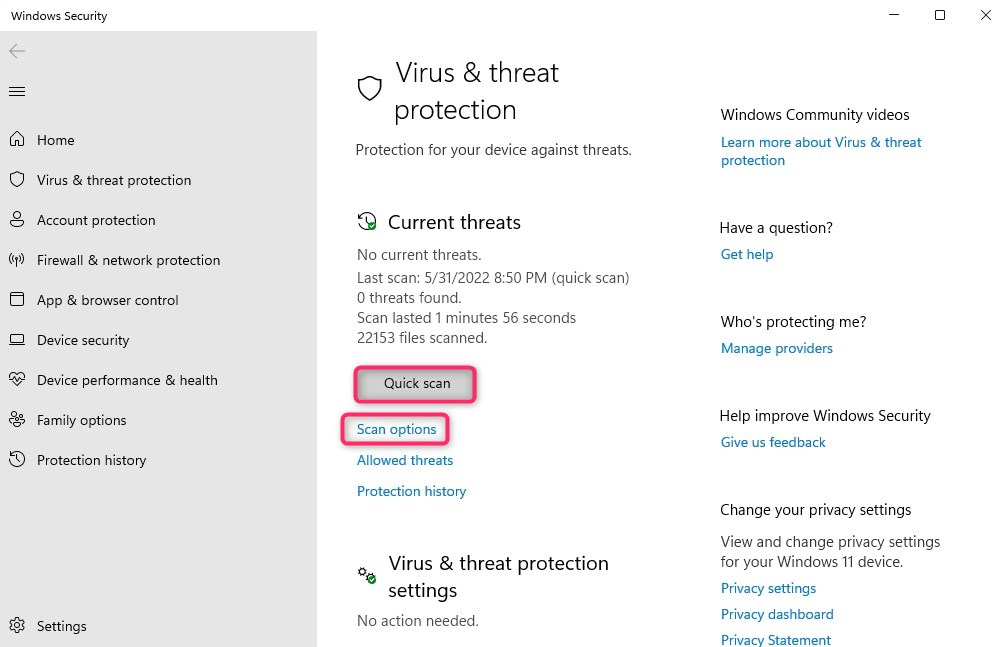
- Let the scan complete.
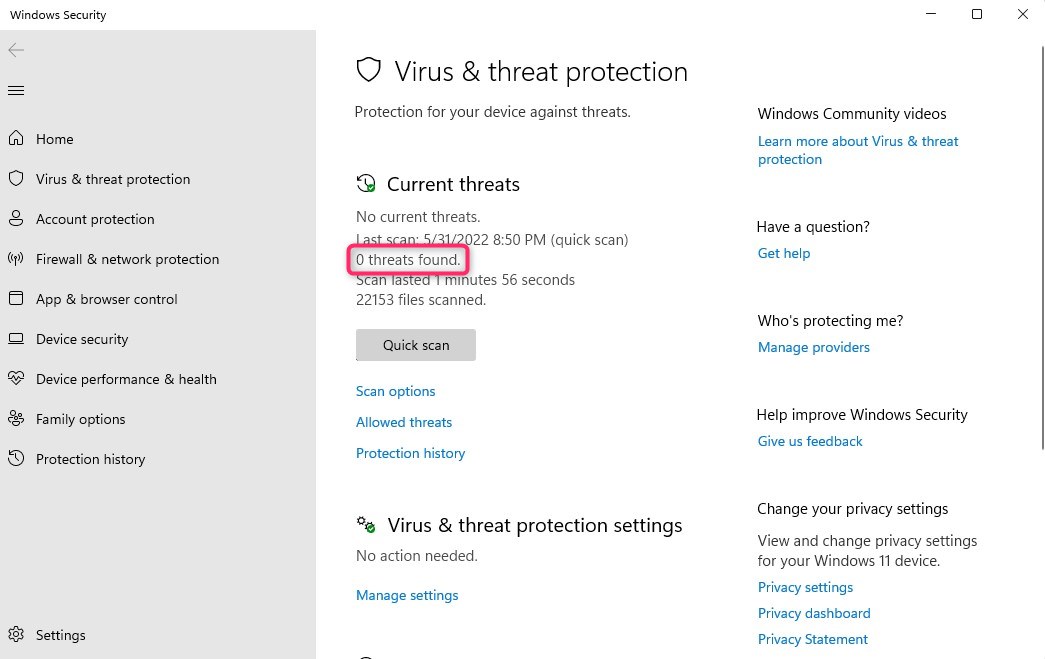
- If threats are found, Defender will try to automatically remove or quarantine them. If not, you’ll see a 0 threats found message.
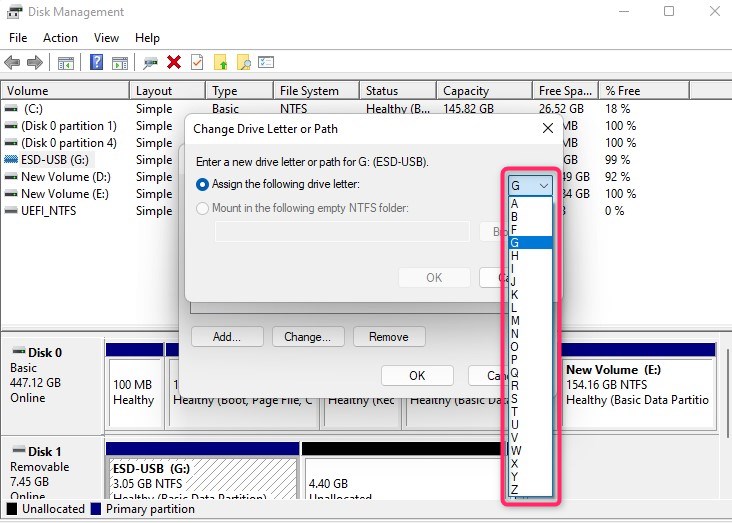
Method 4: Change Drive Letter
Sometimes, the simplest of methods can solve the most complex problems on Windows. If you haven’t been able to resolve the USB drive “No Media” issue so far, changing the drive letter might just do it.
To change the drive letter:
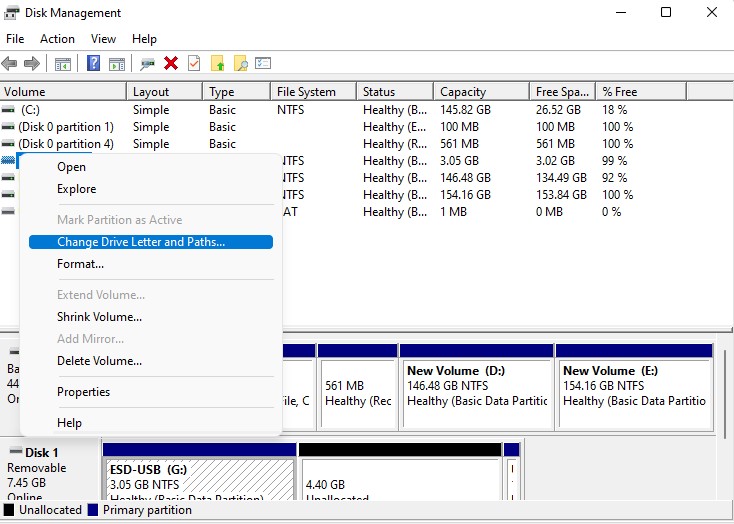
- Launch Disk Management and right-click on the USB drive.
- Select Change Drive Letter and Paths.
- Click Change.
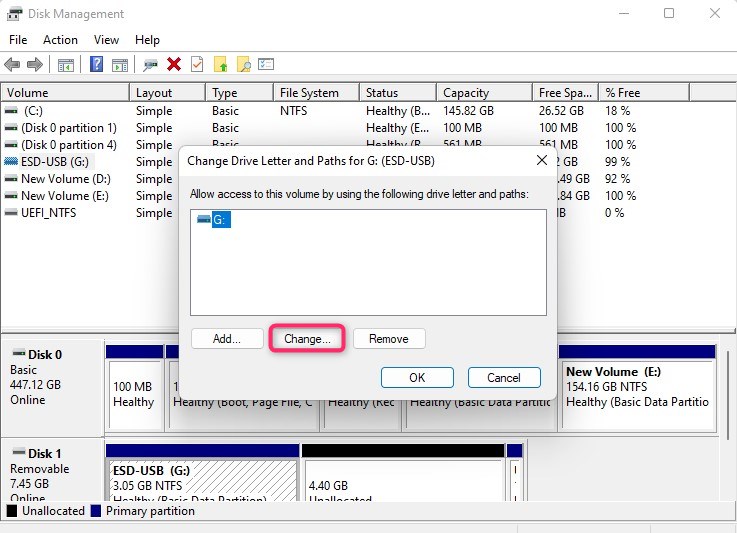
- Expand the drop-down menu next to the Assign the following drive letter option and select a different letter. Click OK to exit and save changes.
Method 5: Run CHKDSK
If the “USB Drive Shows ‘No Media'” issue in Disk Management is caused by file system errors, you can use the Command Prompt utility CHKDSK to attempt to fix it. Running CHKDSK can help fix file system errors and bad sectors on different storage devices.
Here’s a quick guide on how to use CHKDSK for your USB drive:
- Connect your USB drive to your computer. Then, open Command Prompt as administrator by searching “Command Prompt” from the Start menu and selecting Run as administrator.
- Type
chkdsk N: /r, replacing N with the letter of your USB drive.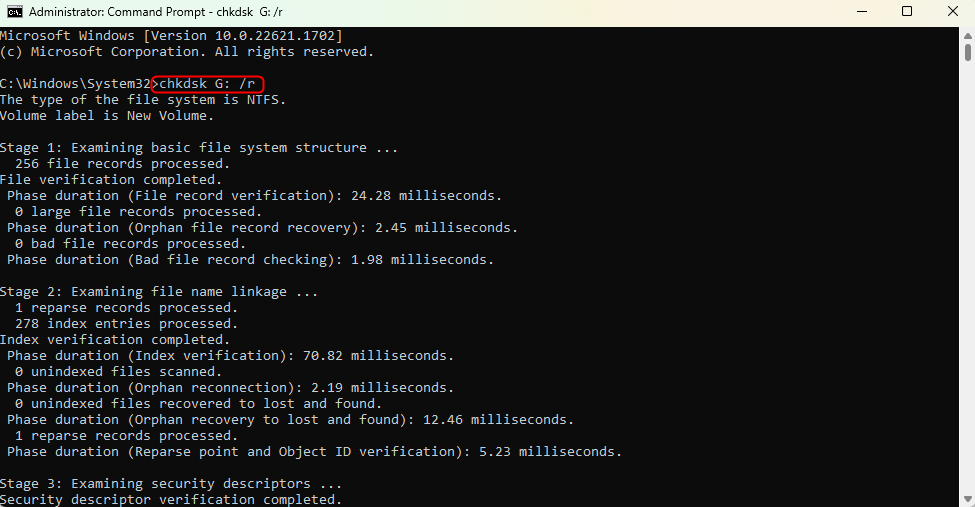
- If needed, restart your computer and reconnect your drive to check if the issue has been fixed.
Method 6: Attempt to fix MFT
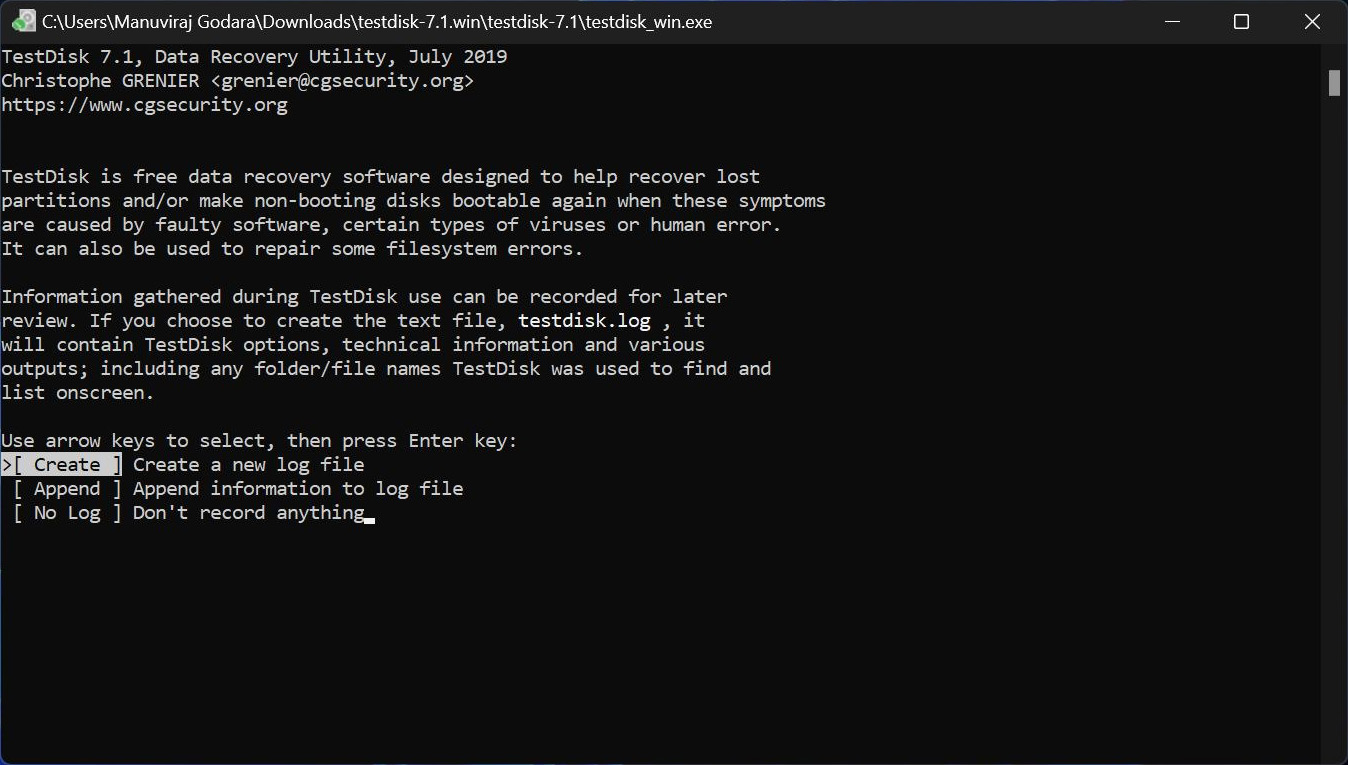
The Master File Table (MFT) is the file that contains all the information to process and retrieve files from an NTFS partition.
When a USB drive with an NTFS partition shows “No Media” in Disk Management, it can mean that the MFT itself is corrupted. In this case, you can use TestDisk to attempt to fix MFT. Here’s what you can do:
- Download TestDisk and extract the zip file to a folder. Then, run the testdisk_win.exe file.
- You will be greeted by the option to create a record for your session. Select Create to create a log for your session. Use the Arrow keys to choose your next action. Then, press Enter.
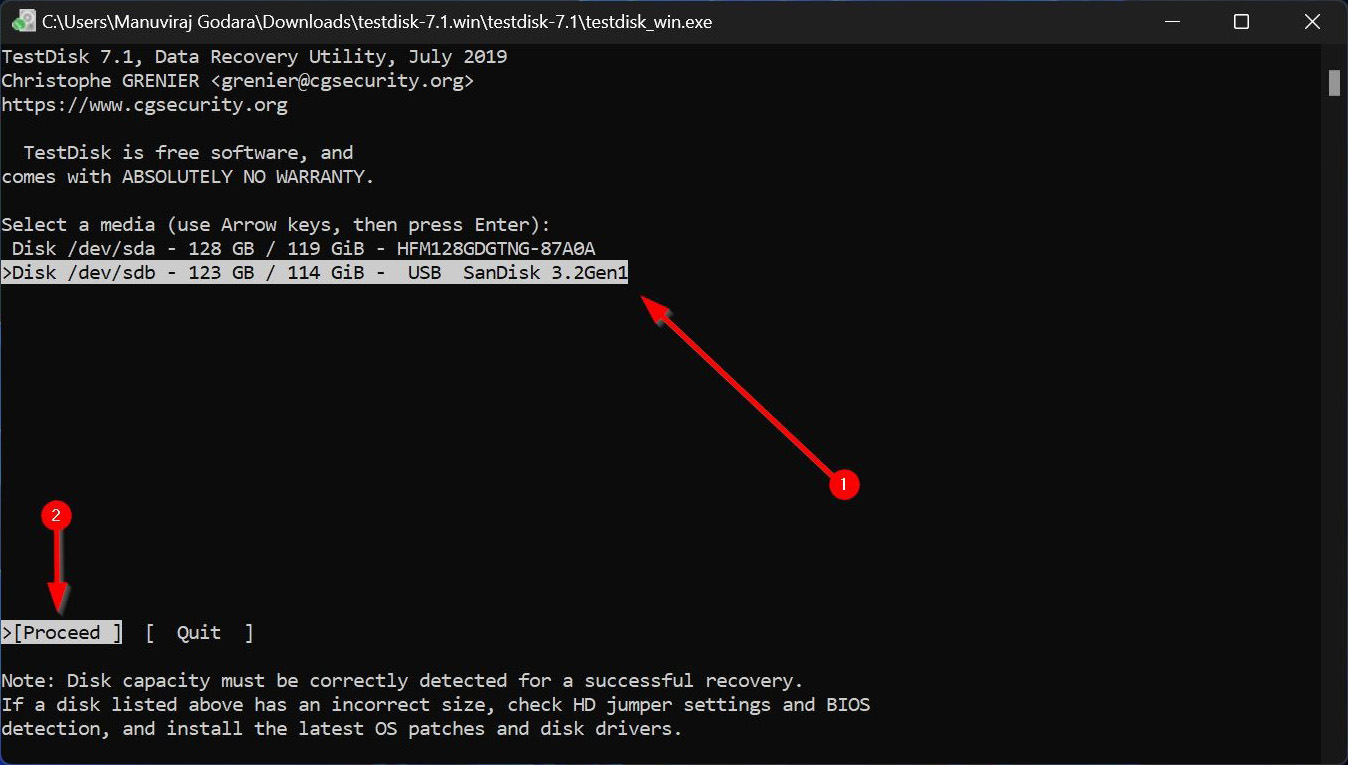
- Choose your USB drive. Select Proceed and press Enter.
- Select the partition table type if you want to choose another drive. If not, just press Enter, since TestDisk automatically attempts tp detect the partition table for you.
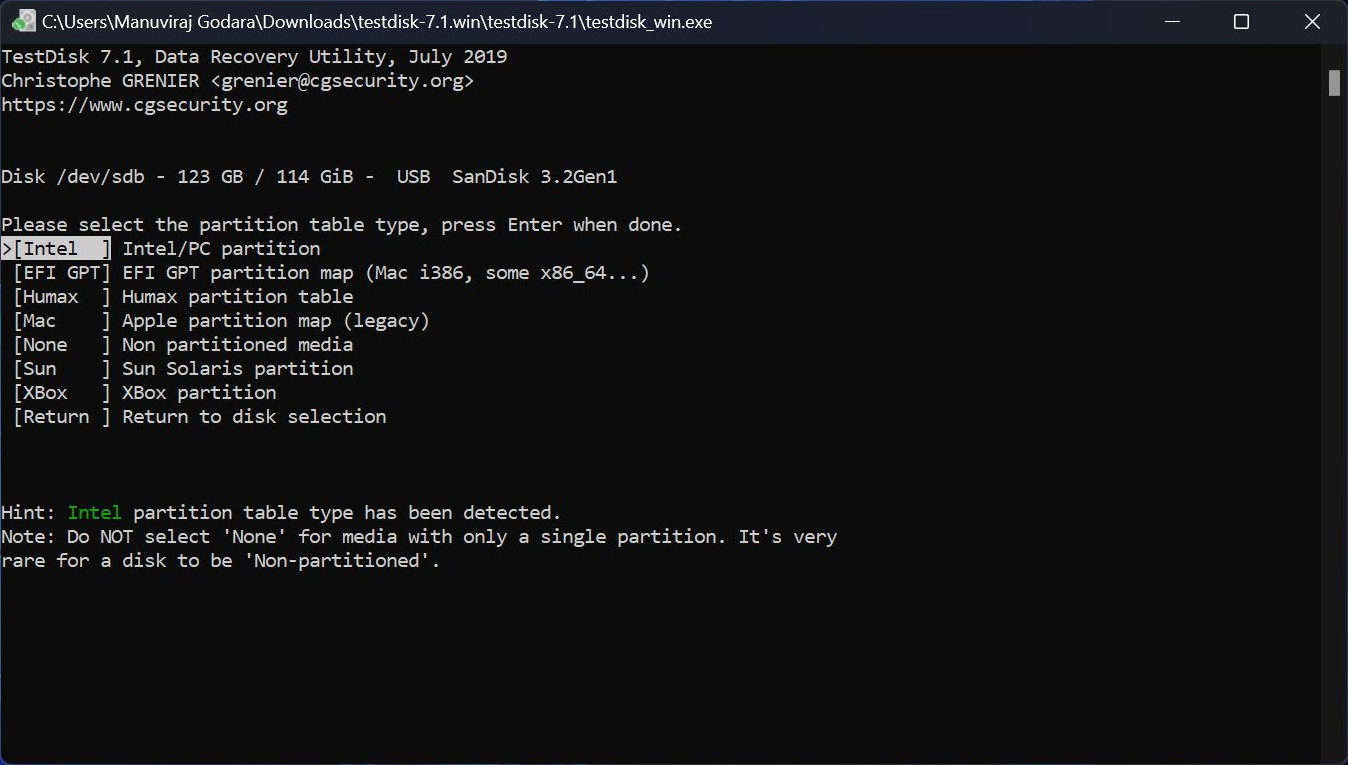
- Select Advanced and press Enter.
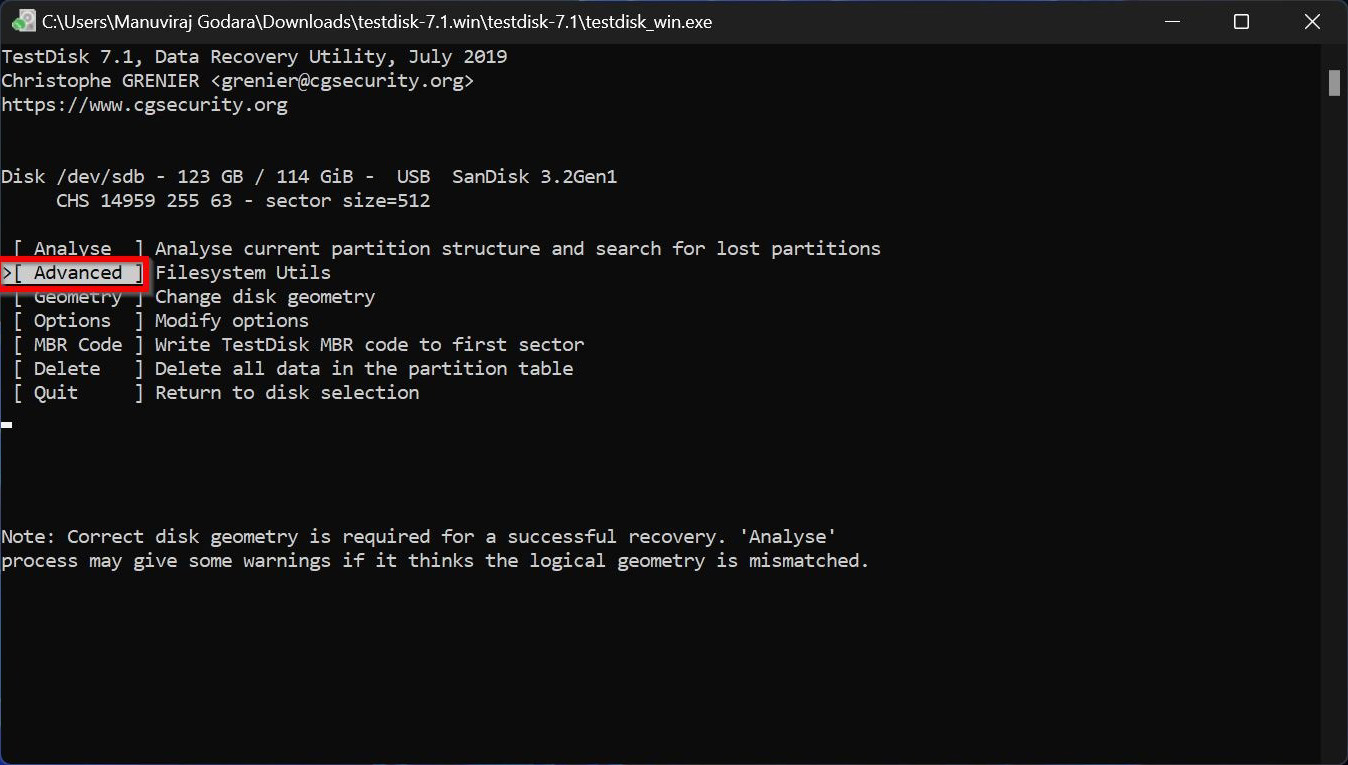
- Select your partition again and choose the Boot action on the bottom part of the window. Then, press Enter.
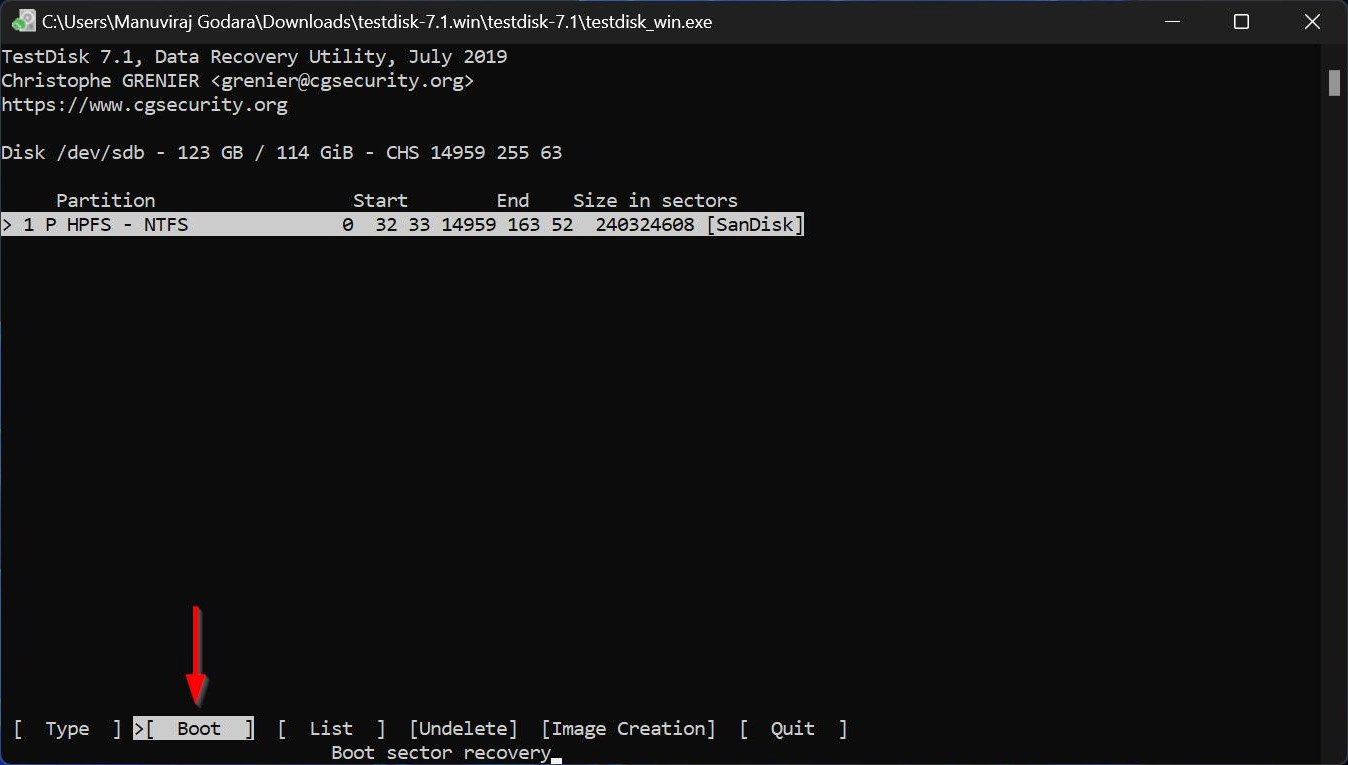
- Select the Repair MFT option and press Enter.
After following these steps, TestDisk will now attempt to fix your MFT. However, this method is not guaranteed to be successful. If both the main MFT and MFTmirr of your USB drive are damaged, the chances will be slimmer, if not impossible.
Method 7: Format the USB Drive
In case it’s not an MBR problem and none of the other fixes worked for you, it’s time for a format. Since you’ve already recovered the data, formatting shouldn’t be a big problem. Plus, it will also fix the issue if it’s being caused by unallocated space on the USB drive.
To format:
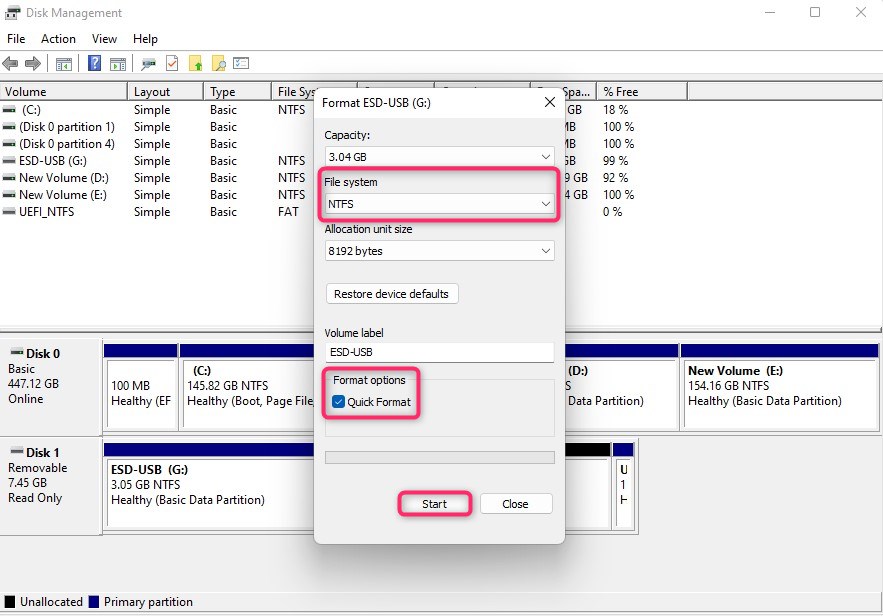
- Search for disk management in the Start Menu and press Enter.
- Right-click on the USB device and select Format.
- Select a file system, check the box next to Quick Format, and click Start.
Conclusion
If your USB drive shows ‘No Media’ in Disk Management, it does not mean it’s impossible to repair your drive and access your files again. But before attempting any repair, make sure that all the important data you have in your USB drive is backed up. If you didn’t have any backup before this, you can use data recovery tools like Disk Drill to recover your files.
With the instructions we provided above, you should now have an idea why your USB drive is behaving this way and all the ways you can do to fix this issue.


