 Bad sectors aren’t a good look on any hard drive. If some bad sectors have started to appear on your external hard drive, they may be revealing a problem that could get worse with time. But, what are they exactly? Are they something you can ignore, or are they an early warning sign of your external hard drive’s upcoming demise?
In this article, we’ll explain what they are and how you can fix bad sectors on an external hard drive.
Table of Contents
What are Bad Sectors on a Hard Drive
Every hard drive contains spinning magnetic disks that store your data. Each disk is divided using sectors. Bad sectors are parts of a disk that are no longer usable due to it being permanently damaged. When a bad sector appears, there’s a good chance the data is lost, depending on the type of bad sector it is. Operating systems, like Windows, will automatically mark the sector as unavailable so no data is written to it going forward.
It’s normal for hard drives to have a few bad sectors, but once a disk starts to accrue a large number of bad sectors, it generally points towards disk failure.
Hard drive bad sectors come in two varieties: physical and logical.
- A physical bad sector is the result of physical damage, such as the hard drive head making contact with the disk or overheating issues.
- A logical bad sector can be caused by software, malware, and interrupted disk write processes.
Physical bad sectors cannot be repaired. Moreover, you cannot recover data from them. Instead, they’re marked as unusable, and the data residing in that sector is lost. However, logical bad sectors do have a chance of being repaired using repair tools. We’ll demonstrate how in the next section.
What Causes Bad Sectors on a Hard Drive
There are many reasons why each type of bad sector can manifest, and sometimes there’s really nothing you can do to prevent them.
Here are some examples of what can cause physical bad sectors:
- Drive overheating – Your hardware has a specific temperature range that it can operate at. If your drive overheats and exceeds its operable temperature range, it can cause metallic components to expand and contract, damaging the read/write heads or magnetic platters.
- Faulty drive head – If the drive head gets misaligned and ends up making physical contact with the platters, it will most certainly lead to some level of data loss as a result.
- Power surges – Following a power outage, your computer may fall victim to a power surge, causing some delicate electronic components to become fried or damaged.
And here are some common causes behind logical bad sectors:
- Error Correction Code (ECC) mismatch – ECC is used to detect and fix data corruption. If there is a mismatch, it means the ECC mechanism has failed to fix it, and so the sector is marked as a bad sector.
- File system corruption – A file system can become corrupted due to improper shutdowns, resulting in a logical bad sector appearing.
- Incomplete write operations – When a write operation is interrupted, the information written to the drive will be incomplete. The data will become corrupted and lead to issues with file integrity, which could contribute to logical bad sectors.
How to Recover Lost or Deleted Files From an External Hard Drive
Before you fix bad blocks on a hard drive using one of the solutions we’ve presented in this article, you should be aware that there’s a chance your data will be lost in the process. Therefore, before you proceed, we recommend recovering all data from the external hard drive first.
To do so, you will need to use a data recovery tool. We recommend Disk Drill for the job, a professional data recovery tool that excels in recovering your lost or deleted files quickly and efficiently, even if the external hard drive contains bad sectors.
Performing recovery on an external hard drive is an important part of the repair process. For maximum data protection though, it’s always a great idea to make a copy of the drive before doing anything. These instructions will guide you through making a byte-to-byte copy of your external hard drive and recovering data from it:
- Download Disk Drill to your computer and open it.
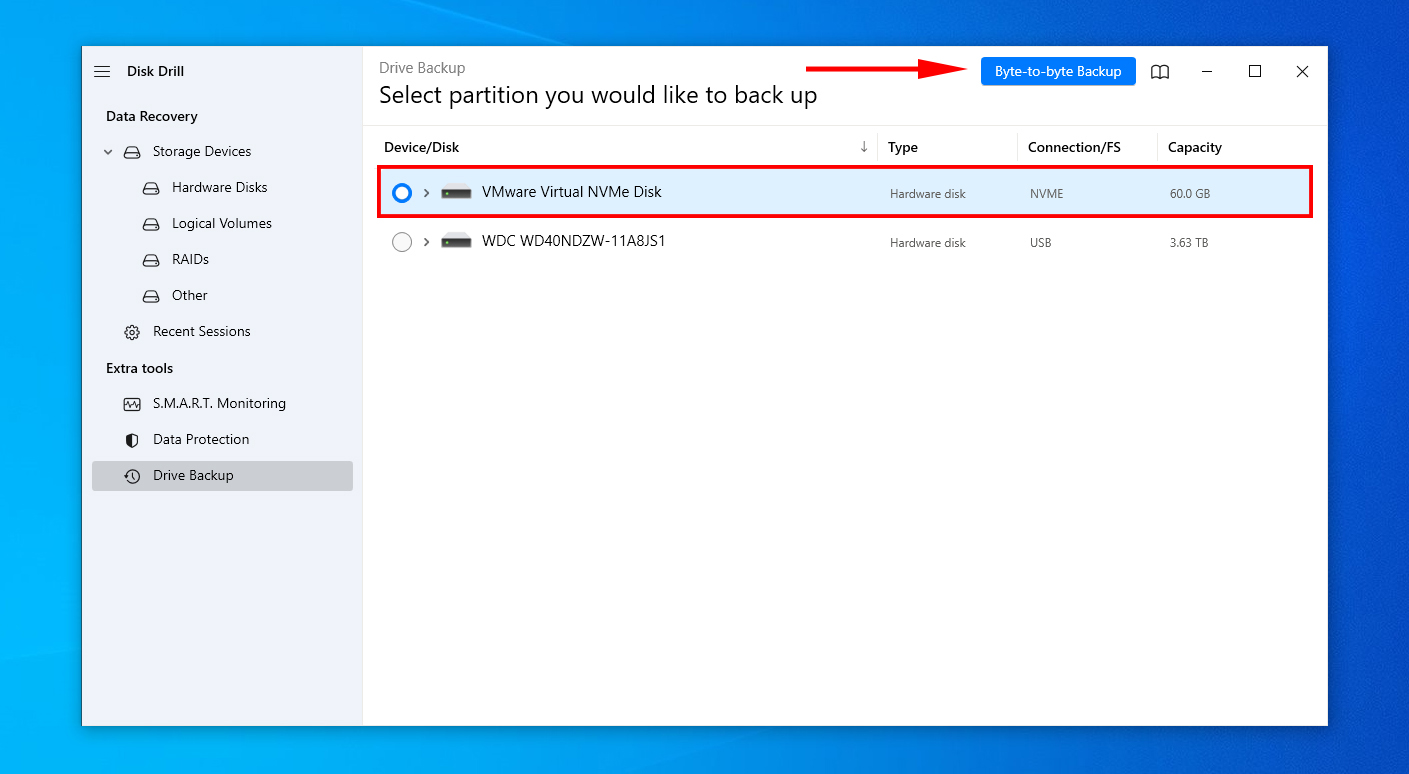
- Click Drive Backup. Select your external hard drive, then click Byte-to-byte Backup.
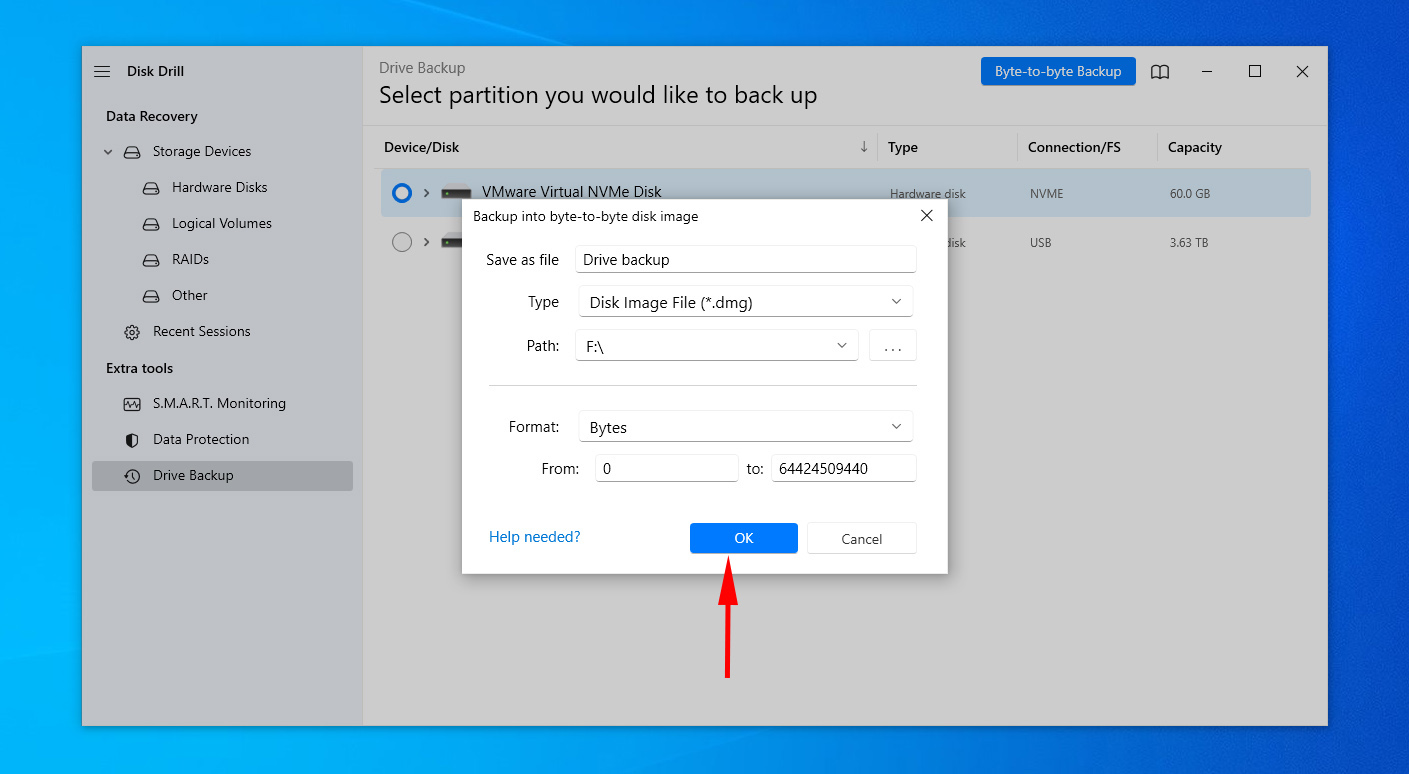
- Give the backup a name and specify where you want to store it. Click OK. Click Done when it’s finished.
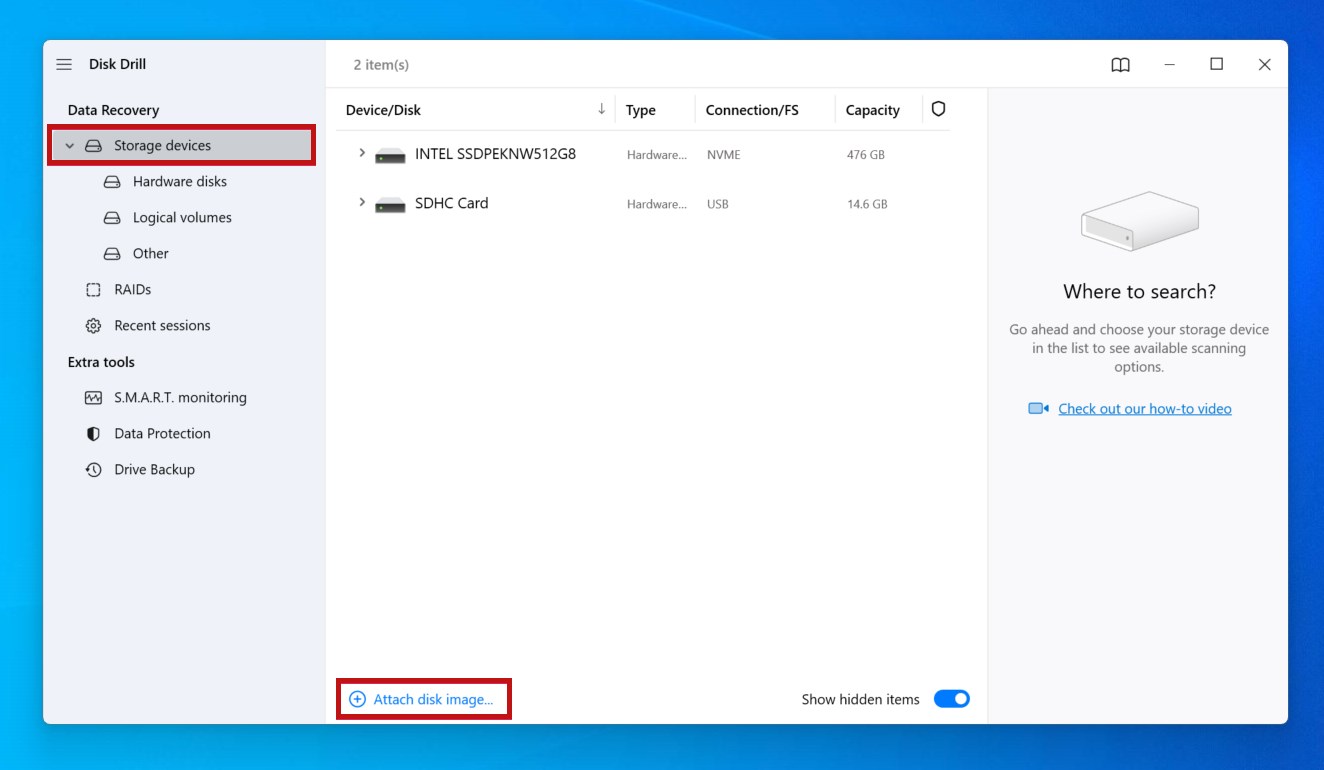
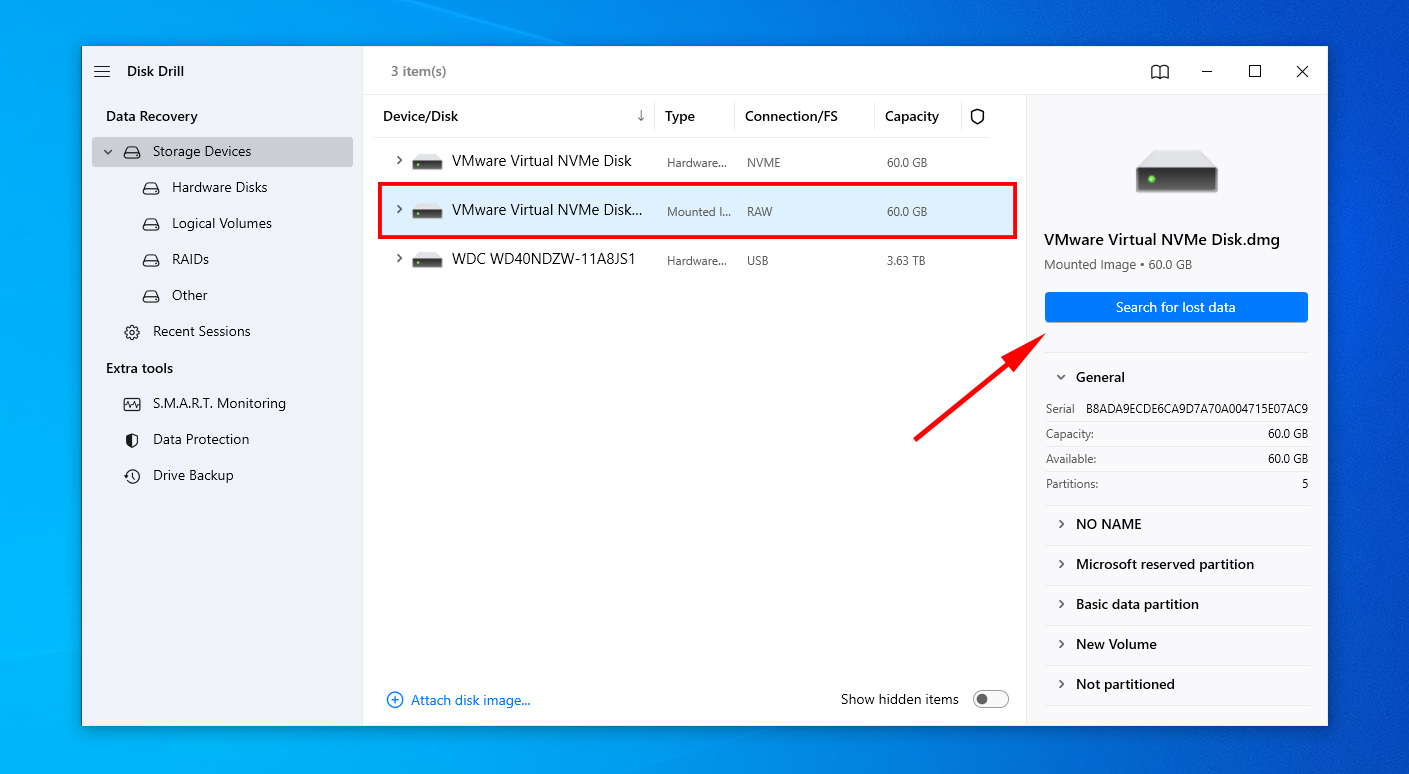
- Go back to the Data Recovery section, and attach the disk image by clicking Attach disk image.
- Select the disk image and click Search for lost data.
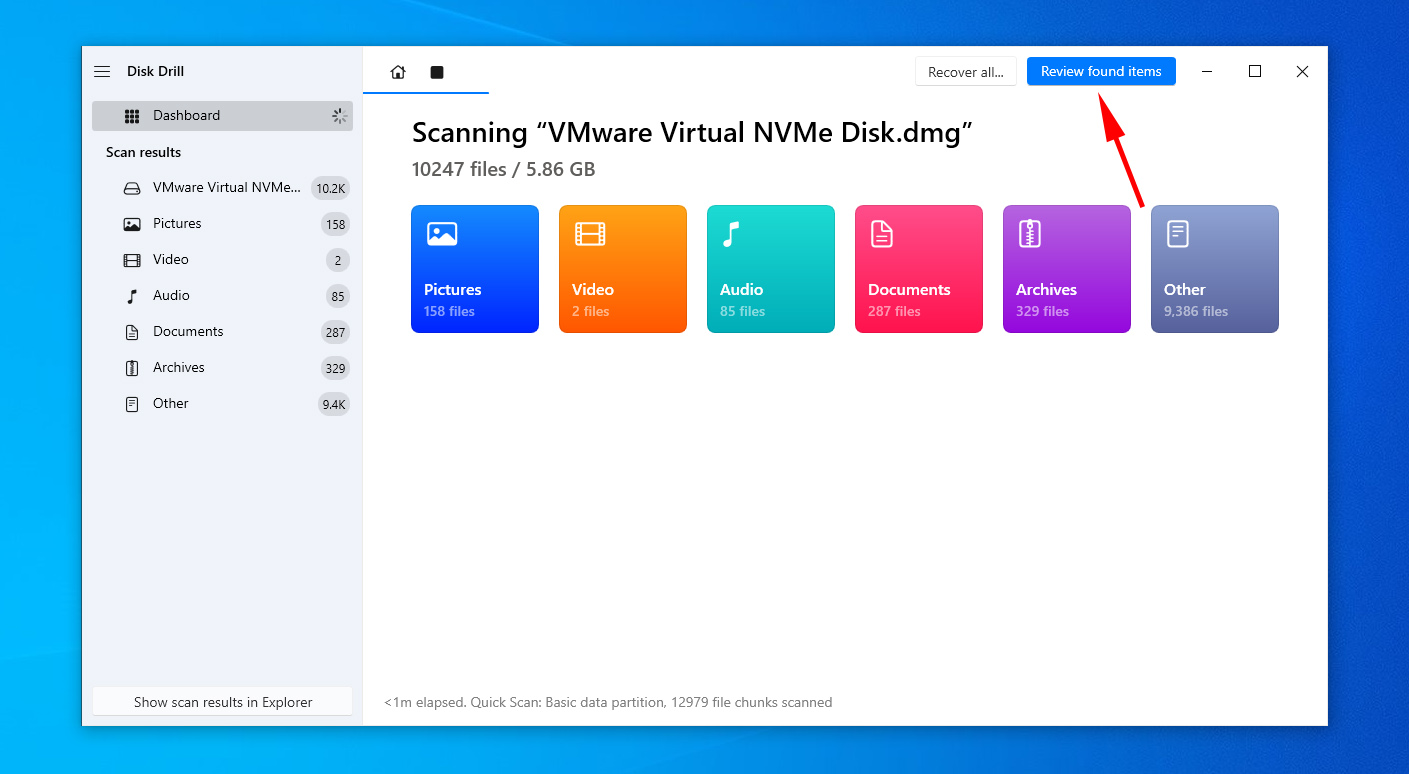
- Click Review found items.
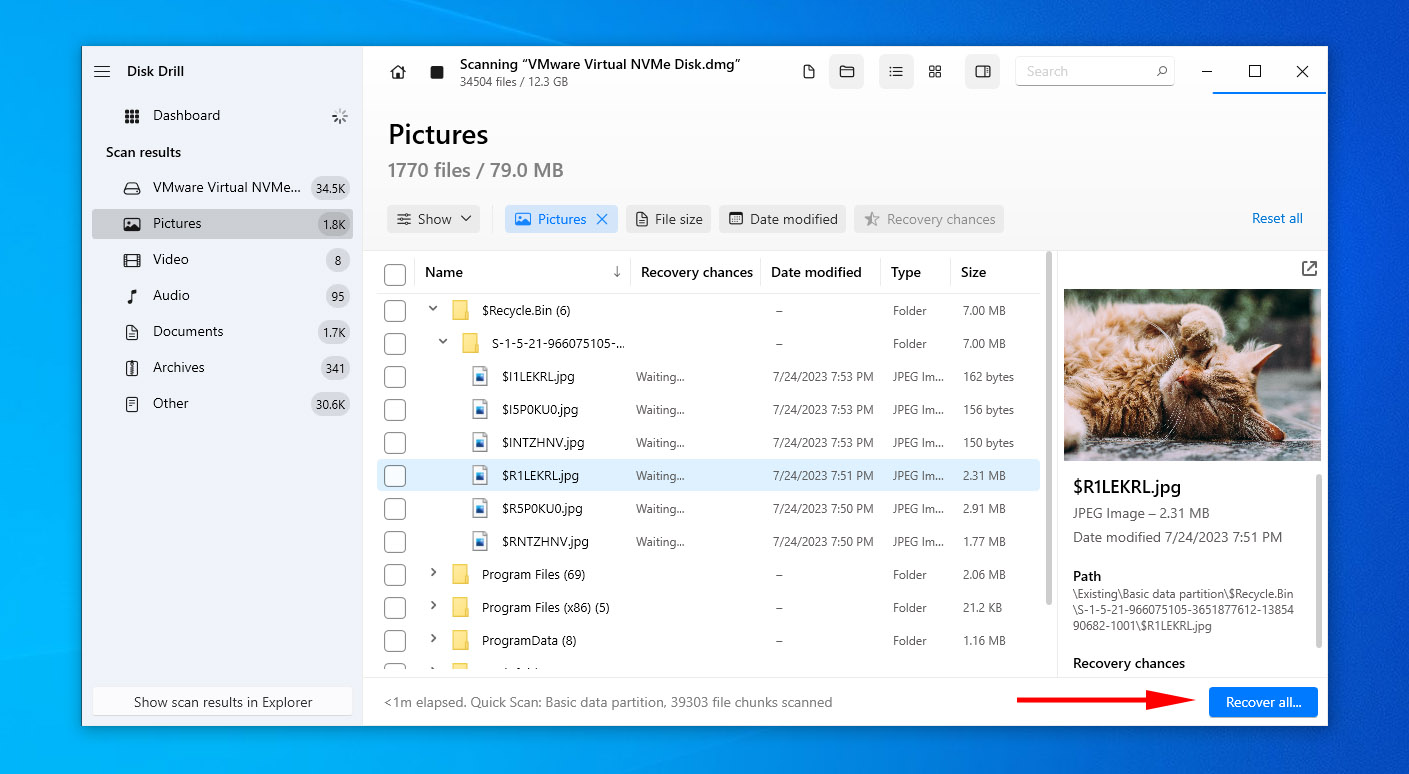
- Search the results and tick the files you want to recover. Using the Recovery chances column, you can get an idea of which files have the best chance of recovery. Click Recover when you’re ready.
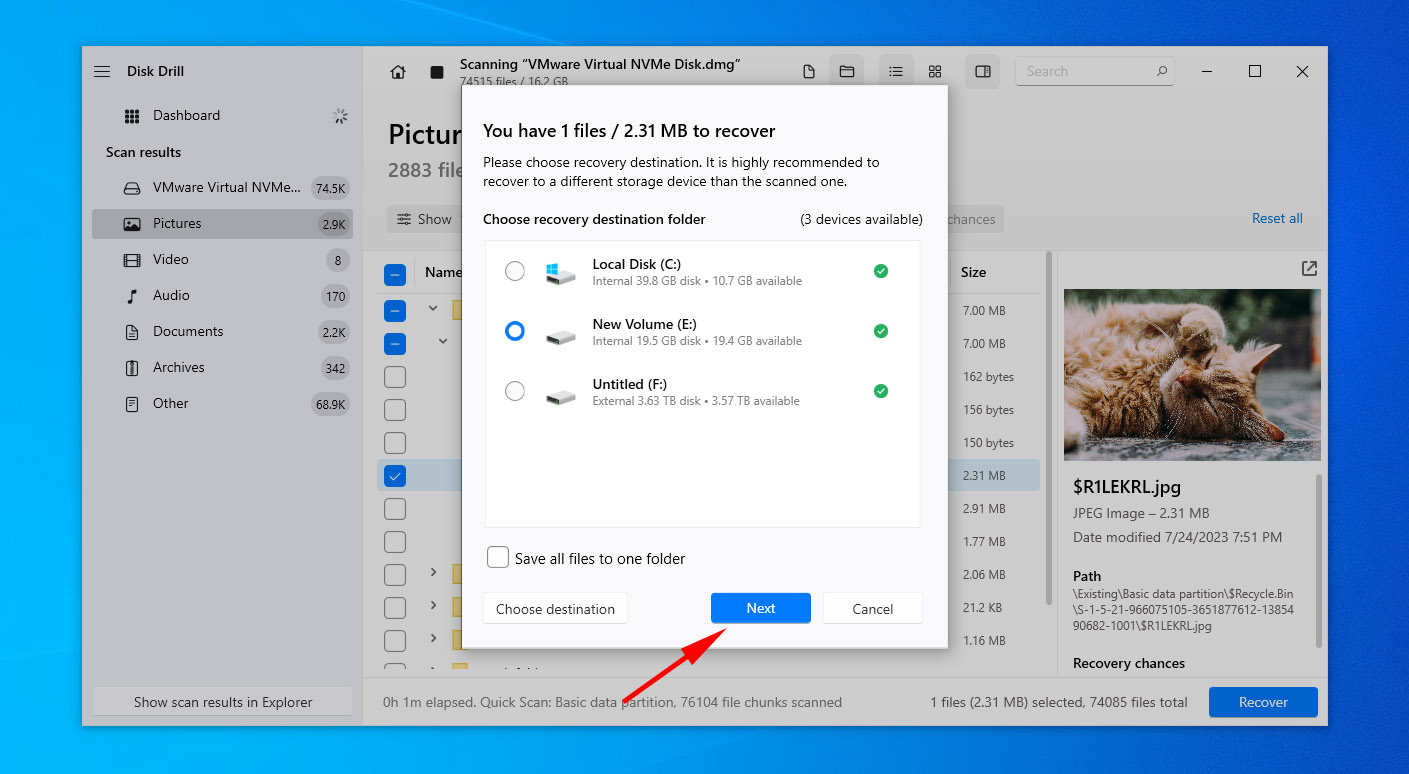
- Select a destination to save them. Don’t choose a location on the same external hard drive you’re recovering from. Click Next to finalize.
How to Fix Bad Sectors on a Hard Drive
Fixing an external hard drive with bad sectors has no guarantee of success. But, there are some fixes you can attempt to implement in hopes to restore it to working condition. Here are some solutions that will show you how to fix bad sectors on an external hard drive.
Solution #1: Repair Using Error-checking Tool
Windows includes a disk error-checking tool that utilizes the functionality of CHKDSK. While running CHKDSK through Command Prompt does give you much more control over the process, using the error-checking tool is much easier and doesn’t require an understanding of all of CHKDSK’s parameters. The error-checking tool will scan your drive for bad sectors and attempt to repair them.
Follow these steps to scan your external hard drive for bad sectors using the disk error-checking tool:
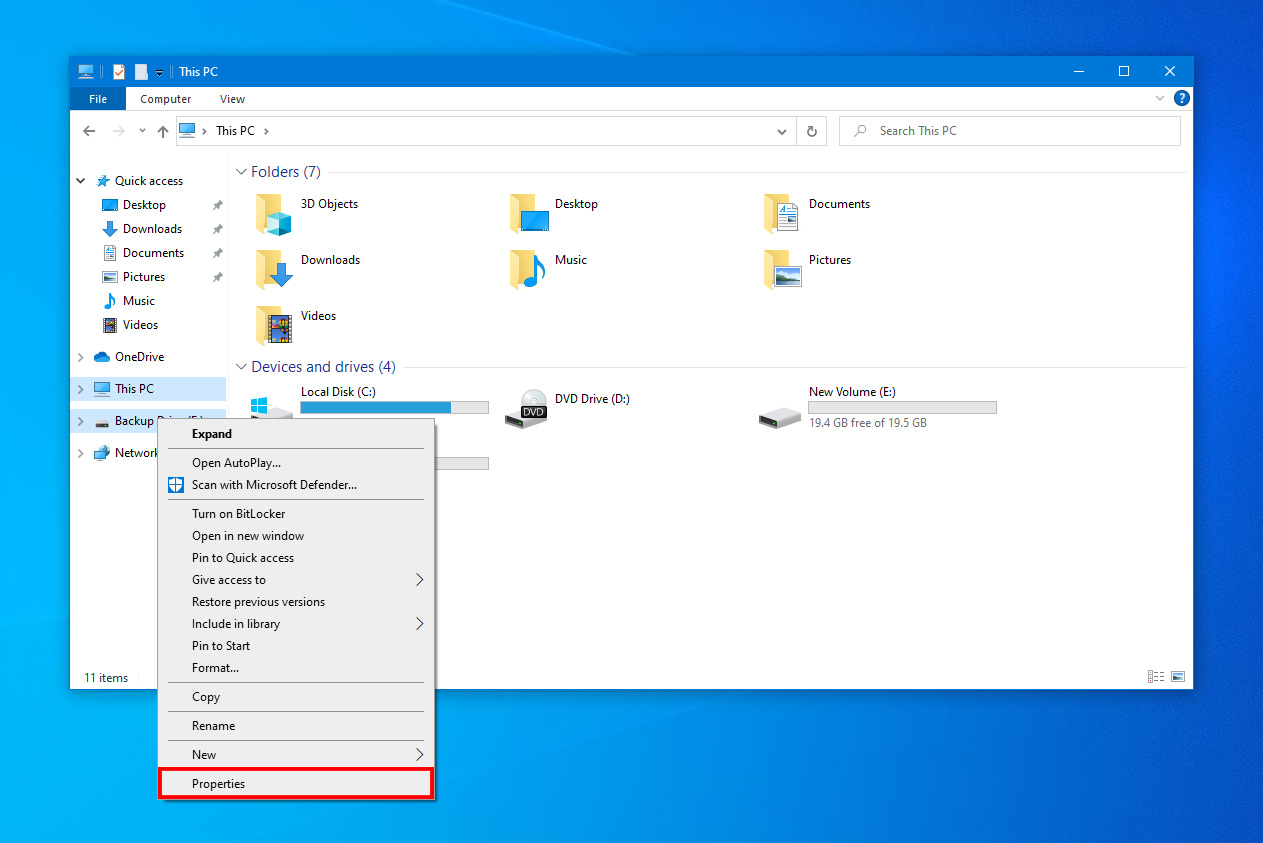
- Open File Explorer.
- Right-click on your external hard drive, then click Properties.
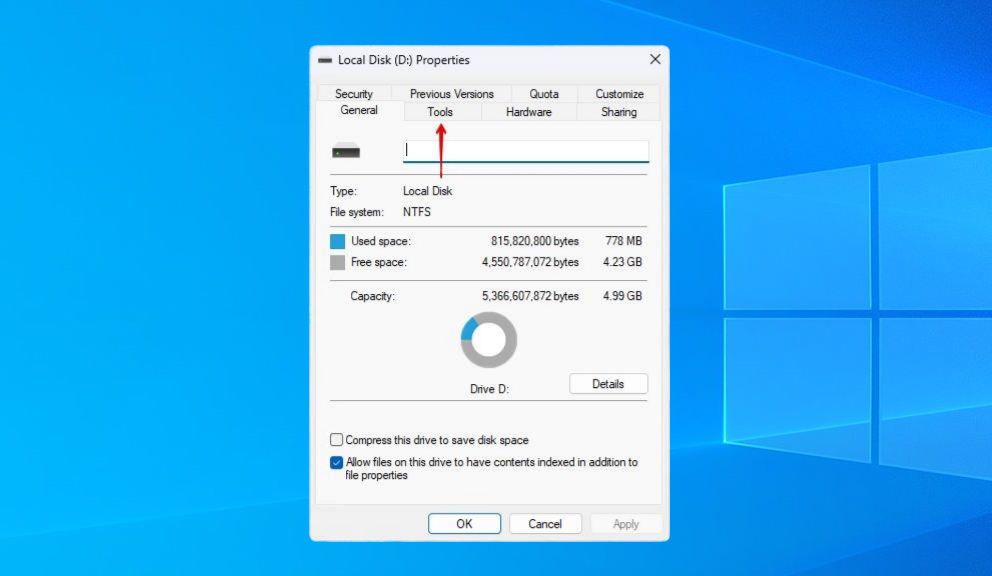
- Click Tools.
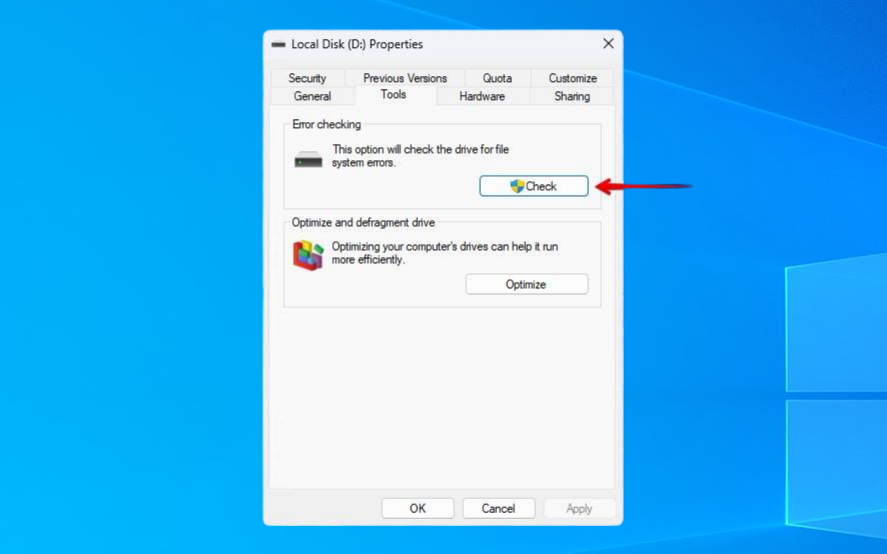
- Click Check.
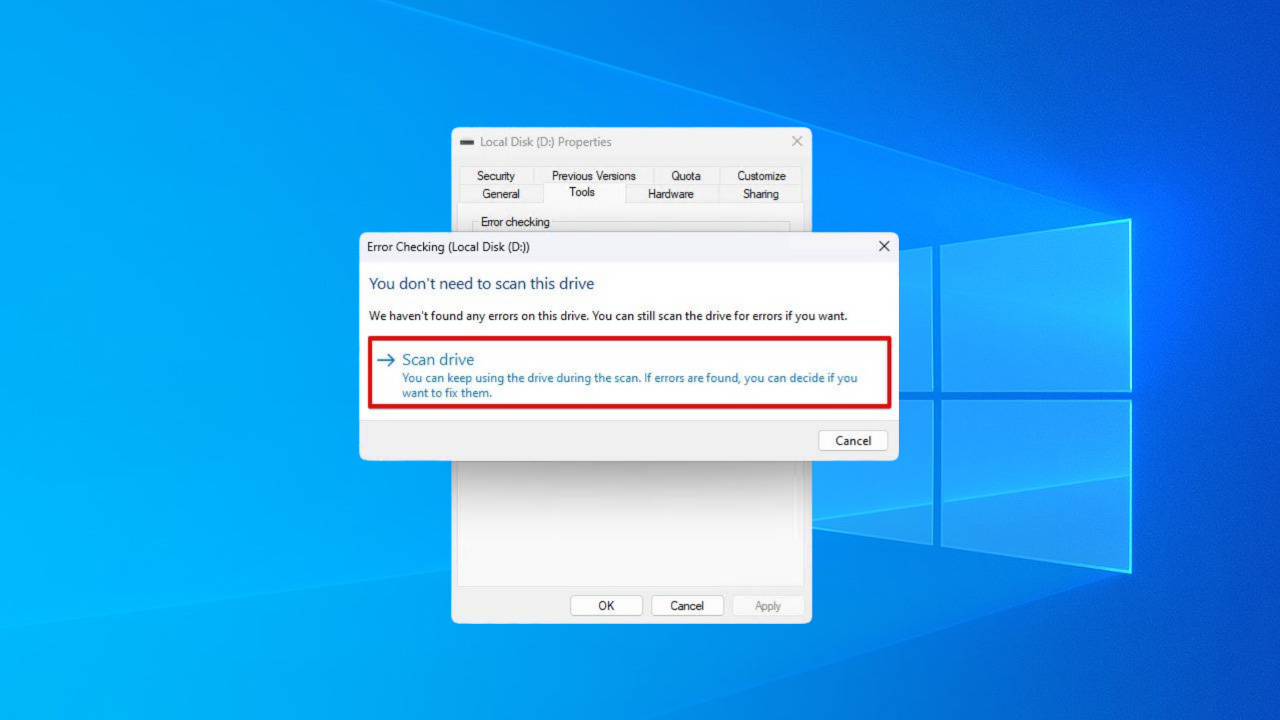
- Click Scan drive.
Solution #2: Repair with CHKDSK
CHKDSK is a Windows repair tool that can repair bad sectors on external hard drives. It’s able to scan your drive for logical and physical errors. It maps out unusable physical bad sectors and attempts to repair logical ones.
The below instructions will guide you through using CHKDSK on an external drive:
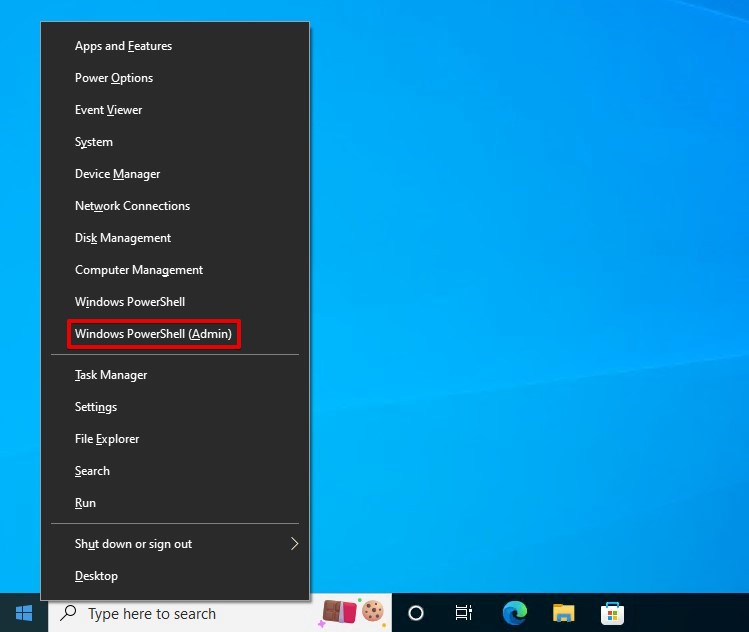
- Right-click Start and select Windows PowerShell (Admin).
- Type
chkdsk D: /f /r. Replace D: with the drive letter used by your connected external hard drive. Press Enter.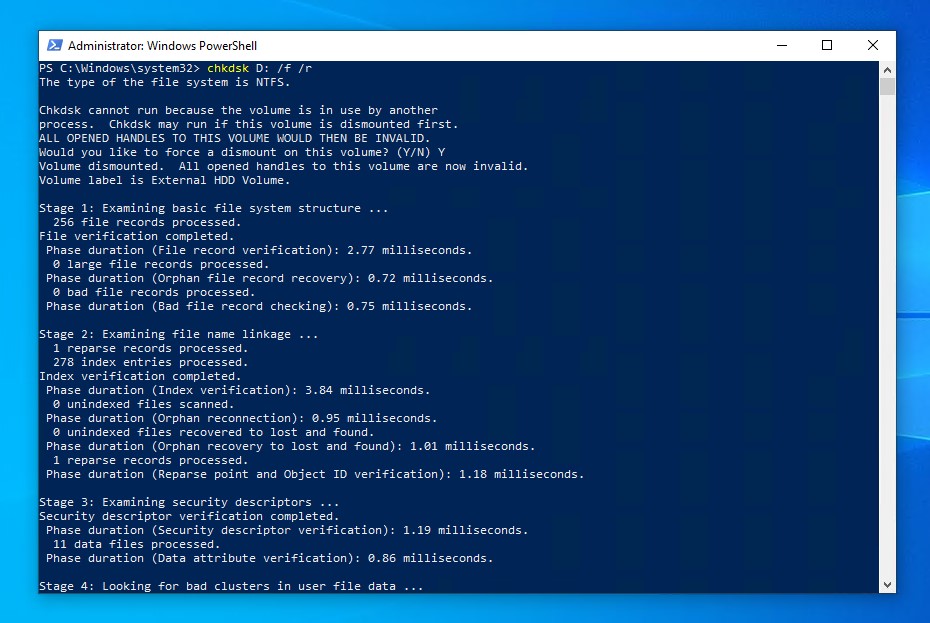
Solution #3: Repair with Repair-Volume
CheckDisk is a very useful command, but sometimes it misses the mark. The repair-volume command was released with Windows 8 and Server 2012. It is similar to CheckDisk, with the benefit of added functionality. It can find and repair volume-related problems, such as bad sectors.
Here’s how you can use the repair-volume command to repair a hard drive with bad sectors:
- Right-click Start and select Windows PowerShell (Admin).
- Type
Repair-Volume -DriveLetter D -OfflineScanAndFix. Replace D with your own drive letter. This will take the drive offline momentarily to try and fix it. Press Enter.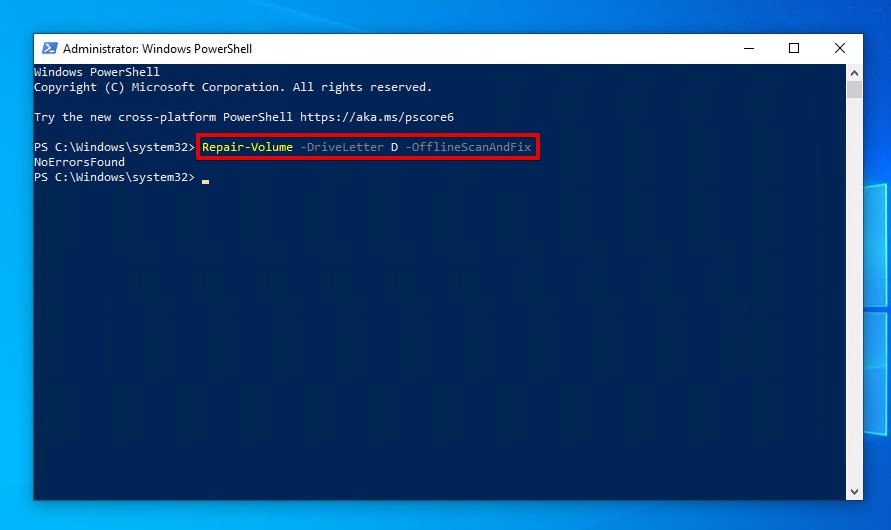
Solution #4: Remap Bad Sectors
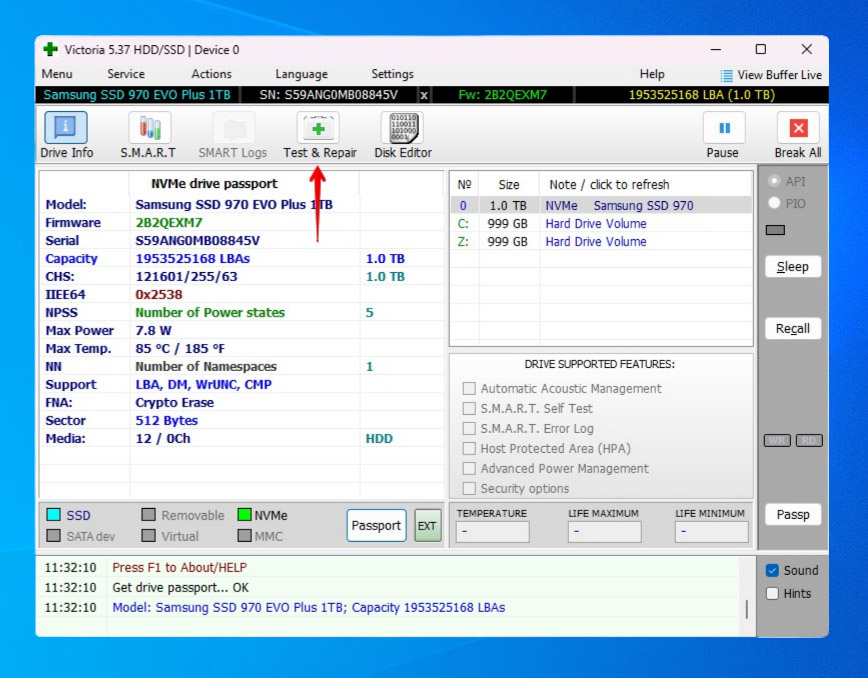
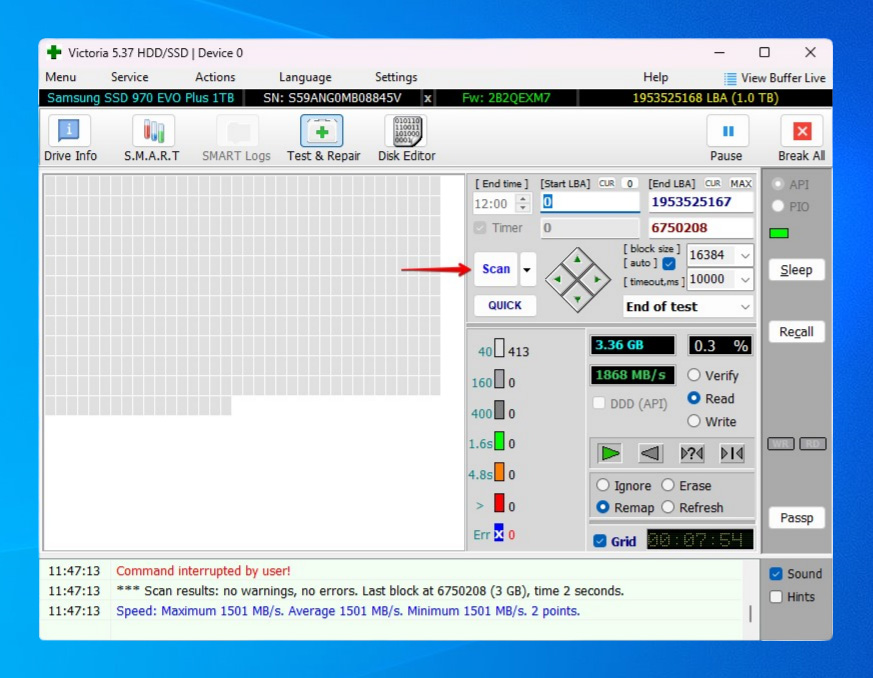
Using the third-party tool Victoria, you can scan your external hard drive for bad sectors. If the program finds some, you can use the remap option to replace damaged or broken sectors with spare working ones. Technical users can minimize scan times by specifying the Logical Block Addressing (LBA) start and end blocks.
Follow these instructions to remap bad sectors using Victoria:
- Download and extract Victoria.
- Click Test & Repair.
- Select Remap.
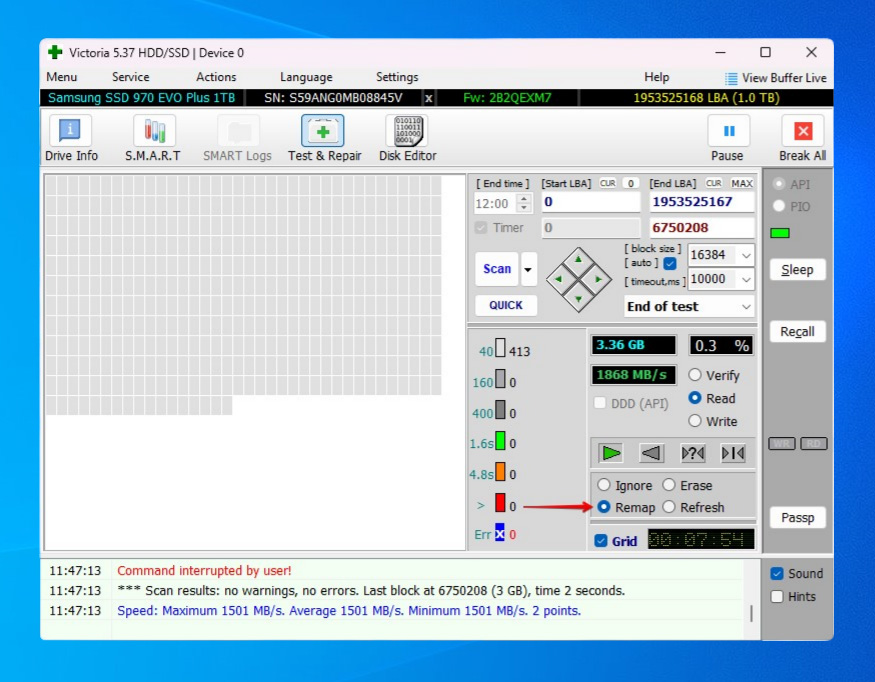
- Click Scan.
Solution #5: Perform a Full Format
One of the most reliable ways to fix hard drive-related problems is by performing a format. In most cases, you can get away with a quick format to fix external hard drive errors. But, when it comes to the case of bad sectors, you need to perform a full format instead. A full format will scan every part of the drive for bad sectors. Bad sectors are then remapped to backup sectors so the problematic sector is no longer used.
- Right-click Start and select Disk Management.

- Right-click your external hard drive’s partition, then select Format.
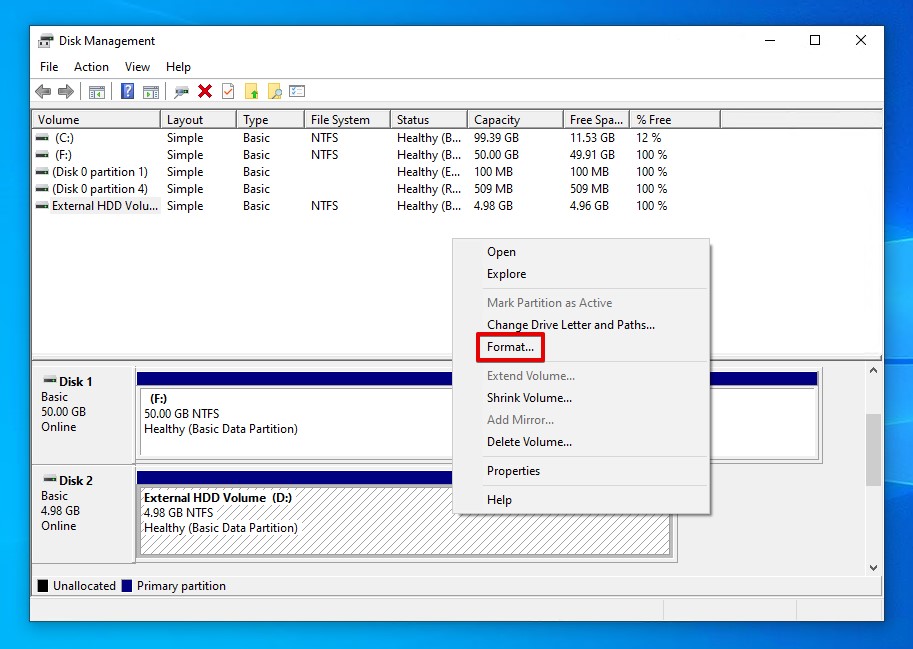
- Specify the name and file system you want to use. Make sure Perform a quick format is unticked. Click OK.
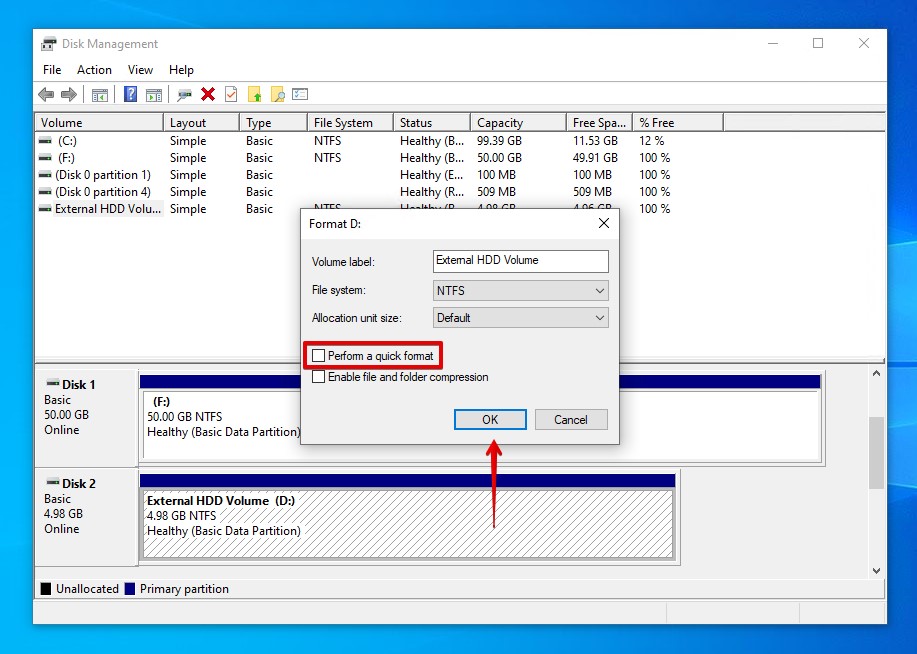
- Click OK when asked if you want to continue.
Conclusion
The sudden appearance of bad sectors can be cause for concern, especially if they keep increasing at an alarming rate. Physical bad sectors cannot be fixed, but logical bad sectors do have a chance of being repaired.
Before implementing any fixes, start by recovering your data using a data recovery tool. Then, you try repairing the bad sectors using the built-in error-checking function. If that doesn’t work, you can also try running the repair-volume command in PowerShell. Victoria, a third-party tool, is also useful for remapping bad sectors. However, if all else fails, your last option is to perform a full format of the external hard drive.
FAQ
- Click Start, then click Computer.
- Right-click the hard drive, then select Properties.
- Click the Tools tab, then click Check now under the Error-checking section.
- Check Automatically fix file system errors and Scan for and attempt recovery of bad sectors. Click Start.
- Click Force a dismount.
- Right-click Start and select Windows PowerShell (Admin).
- Type chkdsk D: /f /r (replacing D: with your drive letter) and press Enter.


