 Panic strikes when you realize you’ve lost important documents or the only copy of photos and videos you had by formatting a hard drive. If you’re in a similar situation, you’re probably wondering how to unformat a hard drive on Windows 10 or 11. This guide explains how you can unformat a drive with unformat software.
Table of Contents
Is it Possible to Unformat a Hard Drive?
Yes, it’s possible to unformat a hard drive on Windows. While you can’t just perform the formatting process in reverse, you can recover the data that you lost as a result of formatting. All you need to recover this data is a robust data recovery solution.
However, data recovery isn’t possible in a handful of cases. Here are cases where unformatting the hardware might not be possible:
- You performed a full format: If you had performed a full format, you won’t be able to unformat the drive, at least without help from a data recovery service. On the other hand, if you had the Quick Format option checked (and it’s checked by default), you’ll be able to recover the data from a formatted hard drive using a data recovery solution.
- Overwriting: When you format a drive using the quick format option, it doesn’t wipe the data off the hard drive. Those files are just marked as empty space by the controller, but they might still exist on the physical surface of the drive. However, if it’s been a while since you formatted the drive and you’ve written a lot of new content on the drive since then, the old files might have been written over, making it impossible to unformat the drive.
Factors not related to the formatting itself can influence the possibility of unformatting. For example, if the hard drive has undergone severe physical damage since the time you formatted it, you won’t be able to recover the data.
💡Interesting fact: Right until Windows 95, you could unformat hard drives using the Command Prompt. Older MS-DOS versions (versions 5.0 to 6.22) had an UNFORMAT for undoing the last format. Unfortunately, the command is not available in modern versions of Windows.
How to Undo a Format on Hard Drive
The easiest way to undo format on a hard drive is using a data recovery solution. Below, we explain the process of unformatting the hard drive using two of the best recovery solutions.
Unformat Hard Drive Using Disk Drill
Disk Drill is the best data recovery solution on the market. Unformatting the hard drive with Disk Drill is an easy, four-step process, as illustrated below.
Step 1. Download and Install Disk Drill
Download Disk Drill and install it on your computer. The free version allows you to recover up to 500MB of data.
Step 2. Scan the Hard Drive
Launch Disk Drill after it has been installed. If you’re trying to unformat an external hard drive, make sure it’s connected to the computer. Then, select the hard drive from the list that appears in Disk Drill and click the Search for lost data button.
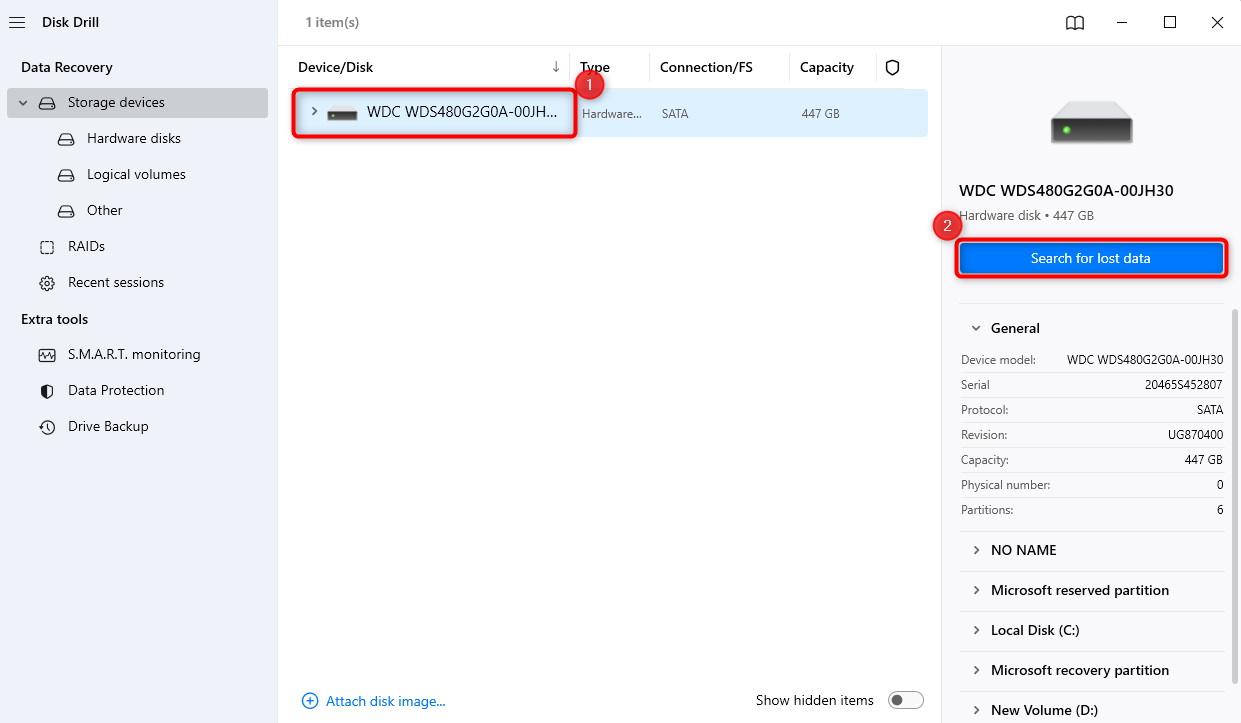
Disk Drill can scan drives even after their file systems have changed. For example, if you formatted the hard drive to NTFS from exFAT, Disk Drill will still be able to scan it. In fact, formatting the drive to a different file system improves the chances of recovery since different file systems write data to different physical areas on the hard drive.
Step 3. Review Found Files
Select all files by selecting the checkbox at the top. Alternatively, if you performed a format to clean the drive and only need a handful of important files back, you can review the files Disk Drill found during the scan.
Disk Drill allows you to filter the files by file type or file extension. For example, you can select Pictures from the left sidebar if you only want to view pictures. If you know the file’s file extension, you can enter the extension in the search to narrow down the scan’s results.
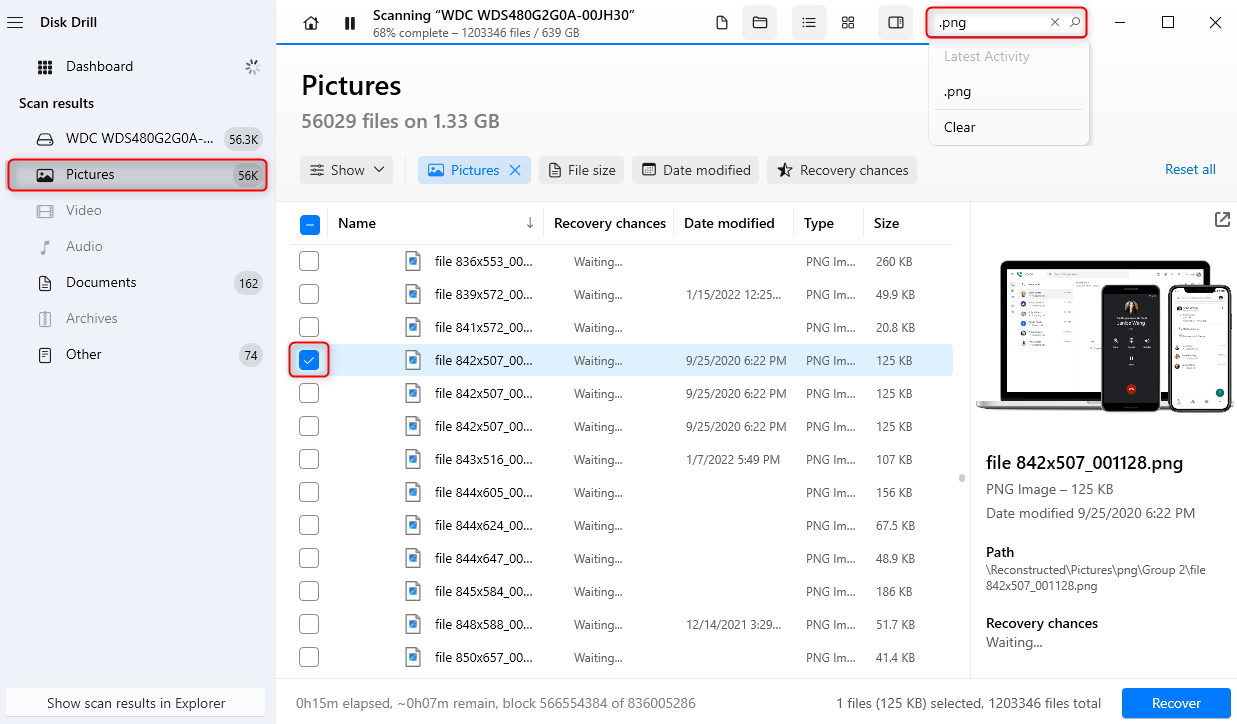
Check the box next to each file that you want to recover.
Step 4. Unformat the Drive
When you’re done selecting the files to recover, click the Recover button at the bottom right. Select a location where you want to recover the files, but make sure you choose a location different from the source location to avoid overwriting.
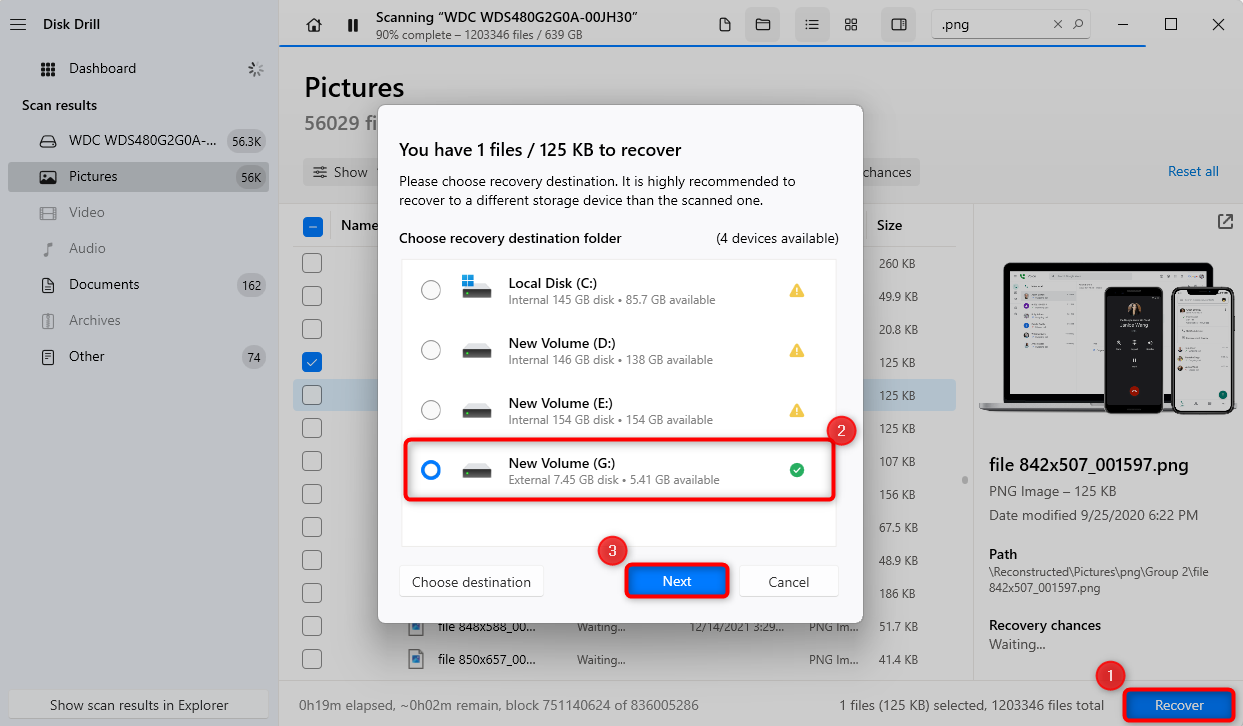
Click Next after selecting the recovery location. This will start the recovery process. You can then navigate to the recovery location and access the files you recovered. When you’re done, you’ll have successfully unformatted the drive.
🔗Check out our comprehensive Disk Drill review to take a detailed look at its feature set and capabilities.
Unformat Hard Drive Using Recuva
Recuva is another data recovery solution you can use to unformat a hard drive. The process is pretty similar to Disk Drill, but Recuva lacks many of the useful features that Disk Drill offers like the ability to sort files by file type after the scan is complete.
Step 1. Download and Install Recuva
Download Recuva and install it on your PC. While Recuva has a paid plan, most of its features are free.
Step 2. Scan the Hard Drive
Launch Recuva once it has been installed. You’ll see a wizard the first time you launch it. The wizard walks you through the process of performing the scan. You can select the file type (such as pictures, music, documents, etc.) and the location that you want to scan.
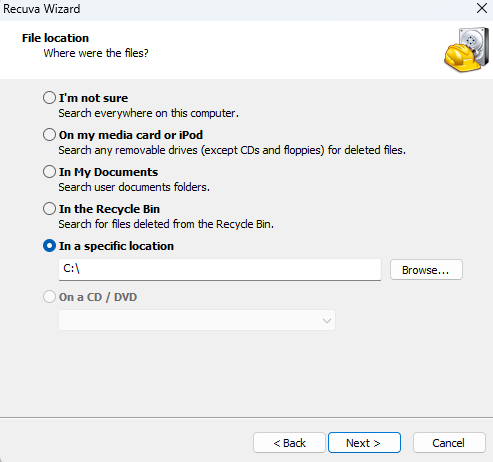
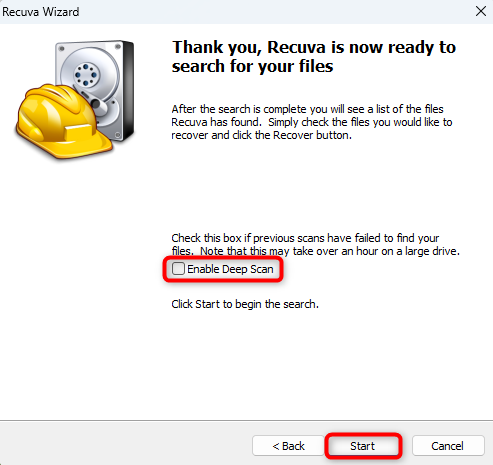
When you click Next, you’ll see a checkbox labeled Enable Deep Scan. Select it if you want to perform a deep scan, or just click Start to proceed with a normal scan.
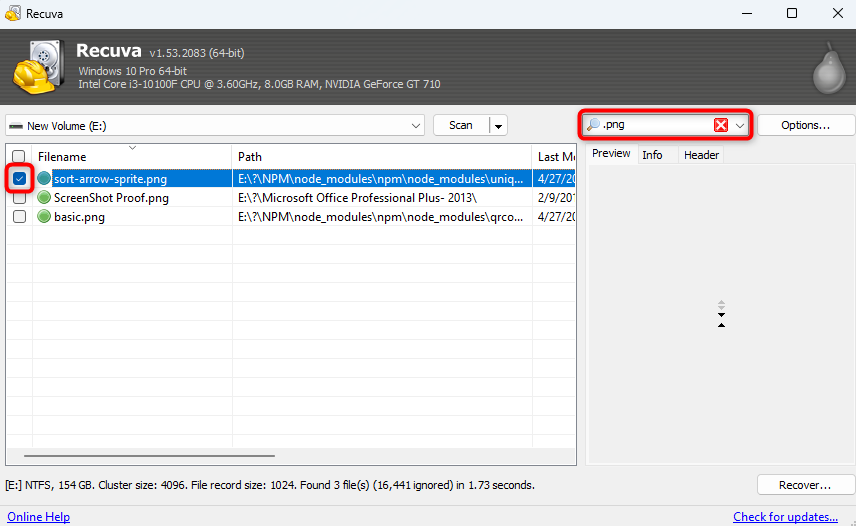
Step 3. Review the Scan Results
After the scan completes, you’ll see a list of files Recuva found on the drive. Select the ones you want to recover. You can click on the Switch to advanced mode button and use the search bar to search for files with a specific file extension. However, you can’t sort files by file type like pictures and documents. Start selecting the files you want to recover by selecting the checkbox next to each file’s name.
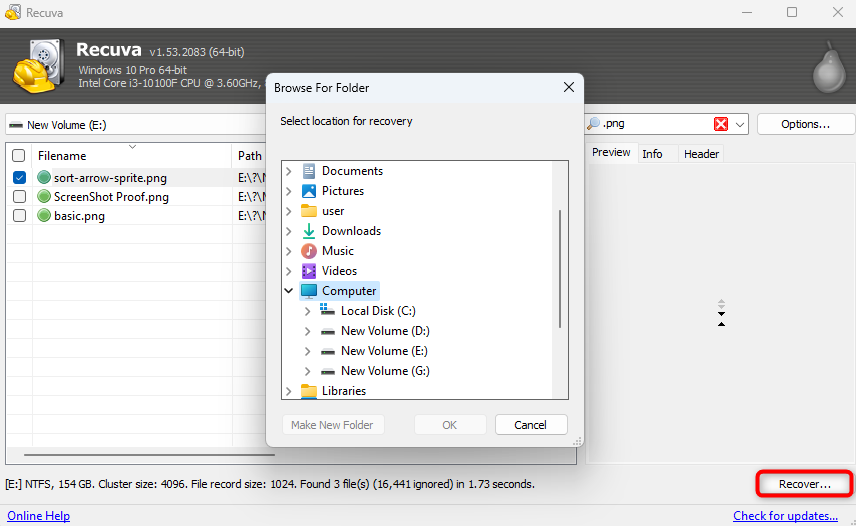
Step 4. Unformat the Drive
If you want to select all files, just click on the checkbox at the top. After you’ve selected all the files you want to recover, click on the Recover button. You’ll see a dialog box pop up where you must select a recovery location. Remember to choose a recovery location different from the source location to avoid overwriting the data. When you’re done, you’ll have unformatted the drive.
Conclusion
Multiple reasons can lead you to format a drive. However, if you forgot to back up your data before formatting, you’ll need to use a data recovery solution like Disk Drill. Using Disk Drill is fairly simple. You can just download the program to your computer, scan the hard drive, and get your data back. You can also use other free solutions like Recuva if you don’t mind the lack of features and ease of use.
FAQ
- Download and install Disk Drill on your computer.
- Scan the hard drive using Disk Drill.
- Review the files and select the ones you want to recover.
- Recover the files.


