 Formatting a hard drive used to seem like a tech-savvy person’s job. But nowadays, even casual users can format a hard drive without losing data.
The simple key? Performing an updated drive backup. But what if you can’t format your drive using straightforward methods? What are the different ways to safely format a hard drive without losing your files?
Whether you’re using Windows or iOS, read on. In this guide, we will teach you how to format a hard drive without losing data in no time.
Table of Contents
Can You Format a Drive Without Losing Data?
While the quick format doesn’t erase files on a hard drive, it cleans the partition table, effectively making files inaccessible to the Windows OS and putting them in danger of being overwritten. A complete format or reformatting is even worse, as it overwrites your whole drive with zeroes, effectively wiping it clean.
If that’s the case, can you format a hard drive without losing data? Yes, you can. Making a backup before formatting is the only way to format a hard drive without losing data. However, if you have to format your drive to solve an error that prevents you from accessing that data, such as the drive becoming RAW, it becomes quite tricky.
Luckily, data recovery software can help you in this scenario.
Case 1:Data is Inaccessible – Data Recovery Software
Your data may not be accessible for backup due to different reasons, such as hard drive errors or when your hard disk is not detected. You can still format the drive without erasing data using reliable data recovery software like Disk Drill, even if you can’t access your drive and the only solution left is formatting.
Disk Drill is an all-around data recovery tool that supports byte-to-byte backup for various storage devices. You can also use it to help format raw drives without losing data.
On top of that, it has plenty of data retrieval features that can scan and get data from different file systems, such as NTFS, FAT32, exFAT, and others.
Disk Drill’s free trial version allows you to recover up to 500 MB worth of data on Windows. It can recover almost any file type, from documents, photos, videos, and audio to Adobe files (Photoshop, Lightroom, Illustrator, etc.), among many others.
To perform a byte-to-byte backup of your hard drive using Disk Drill, simply follow the steps outlined below:
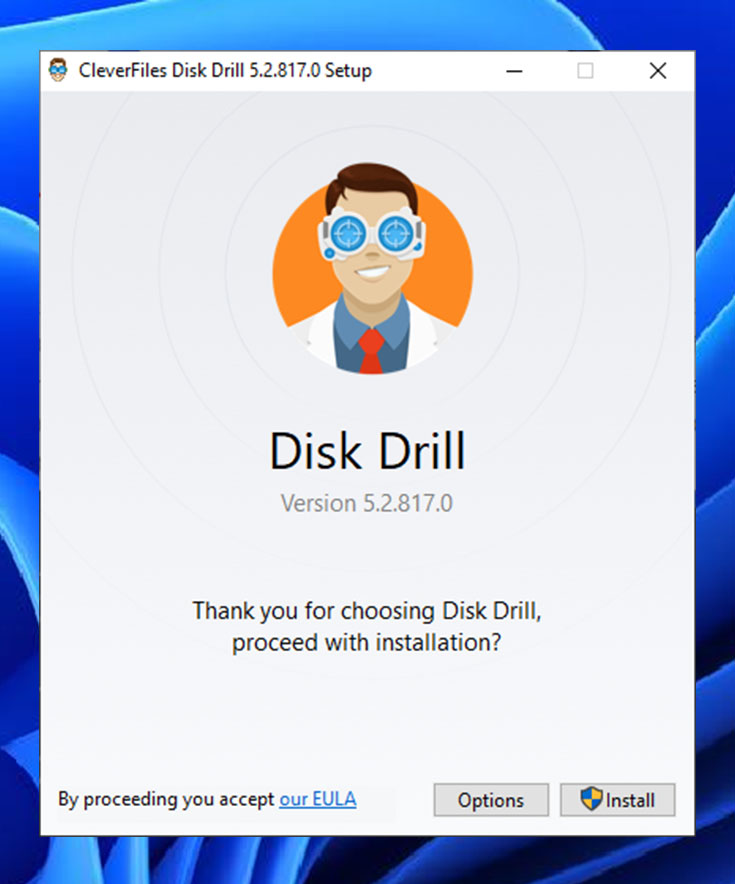
- Download the Disk Drill installer from Cleverfiles’ official website to get started. Then, launch the installation program and follow the instructions to successfully install the app.
- Once successfully installed, launch the Disk Drill app. Then, go to Drive Backup under the Extra tools menu of the app.
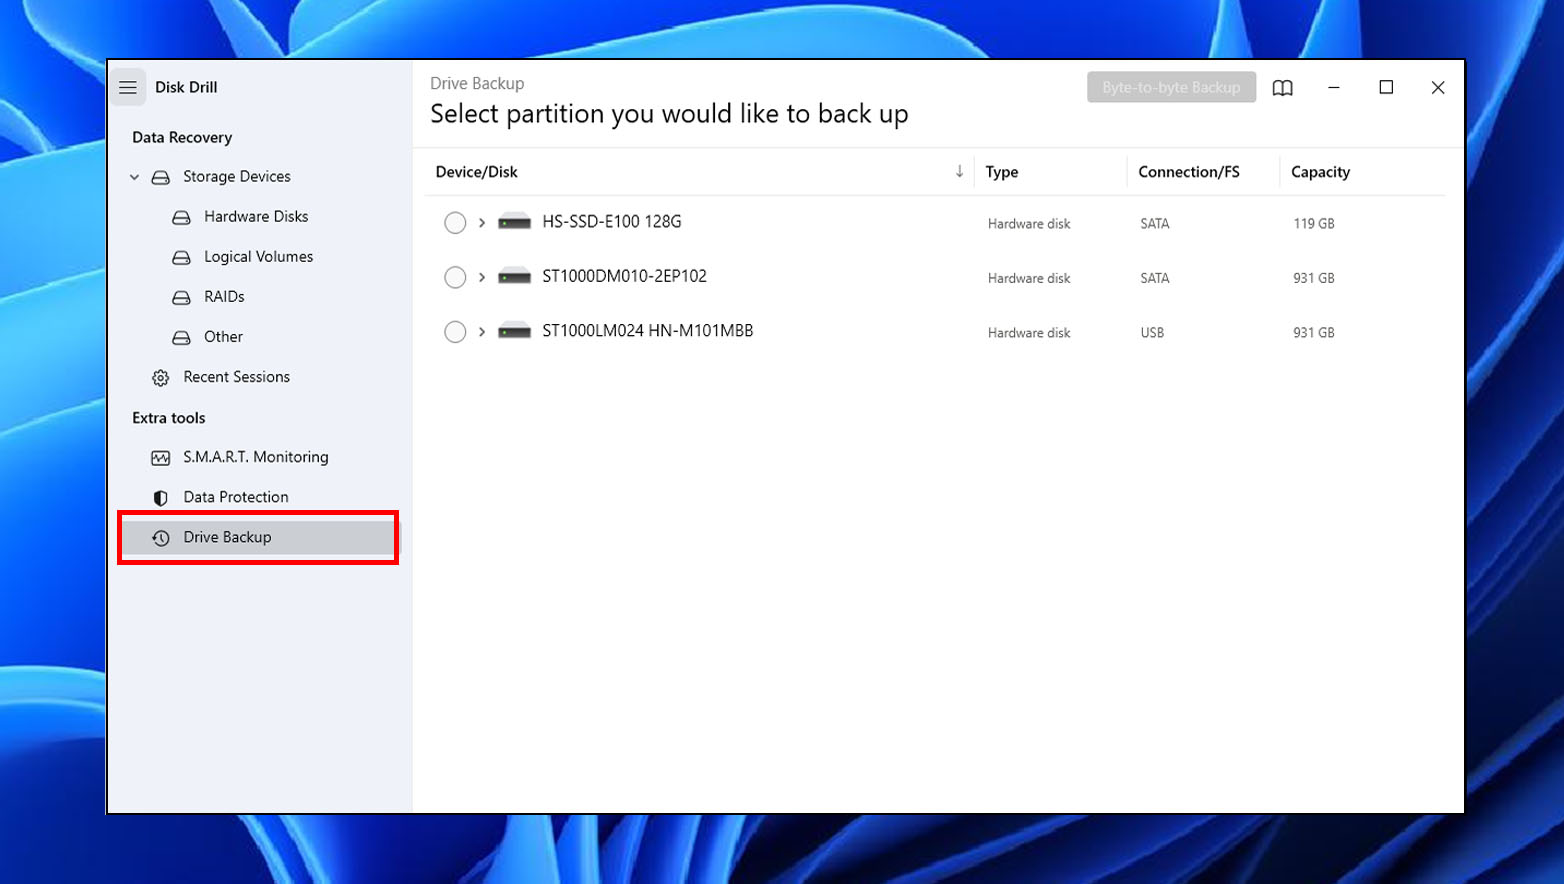
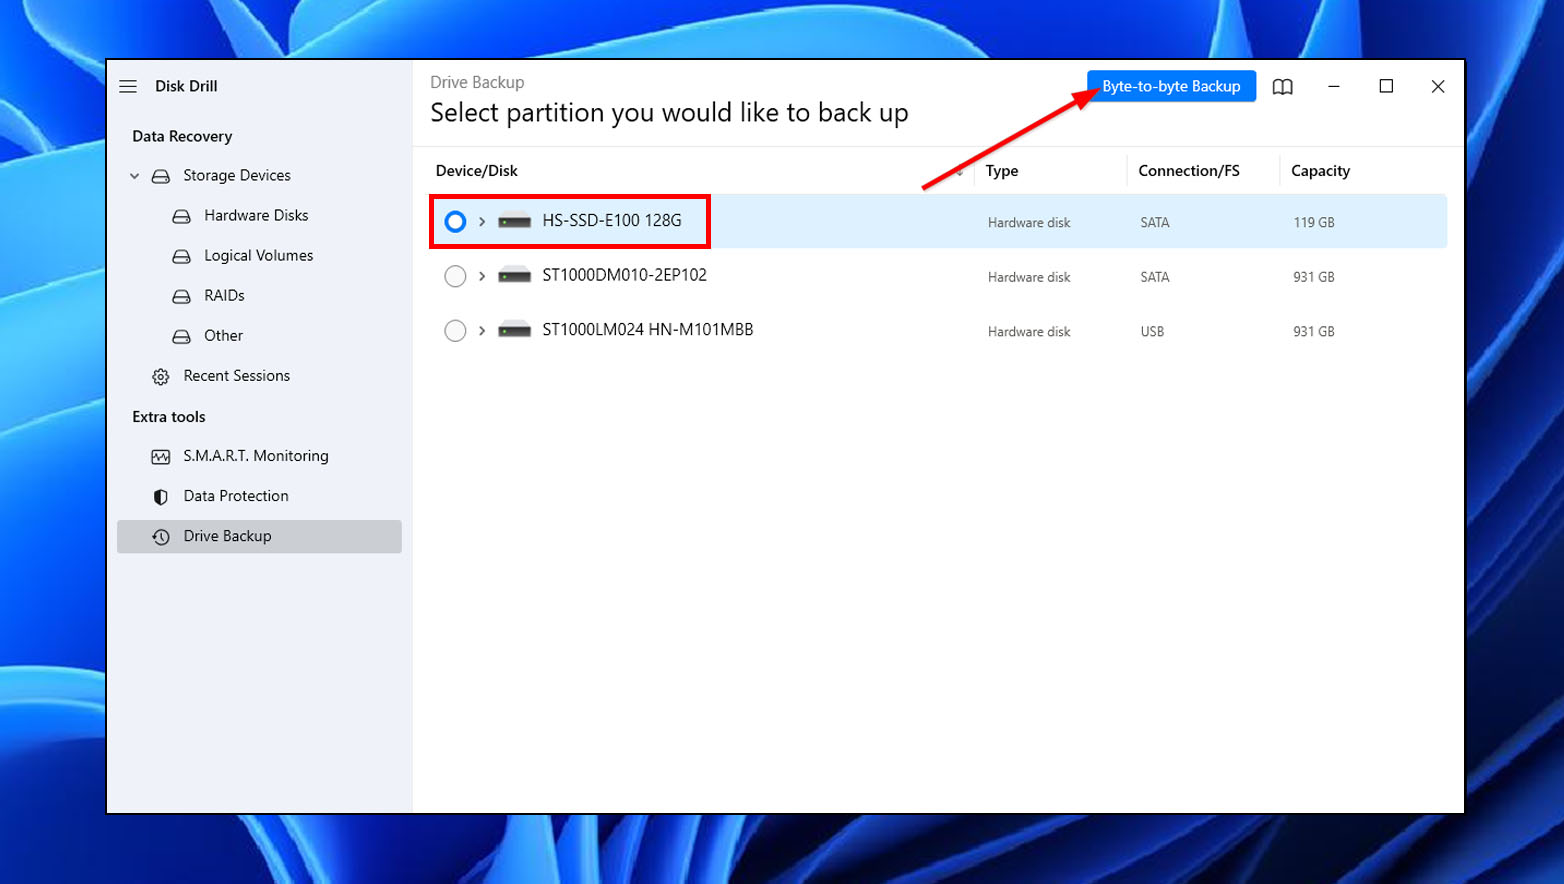
- Select the hard drive you want to back up and click Byte-to-Byte Backup.
- After that, choose the file destination where you want to store your backup. Then, ensure that the location you choose has enough disk space to accommodate the backup.
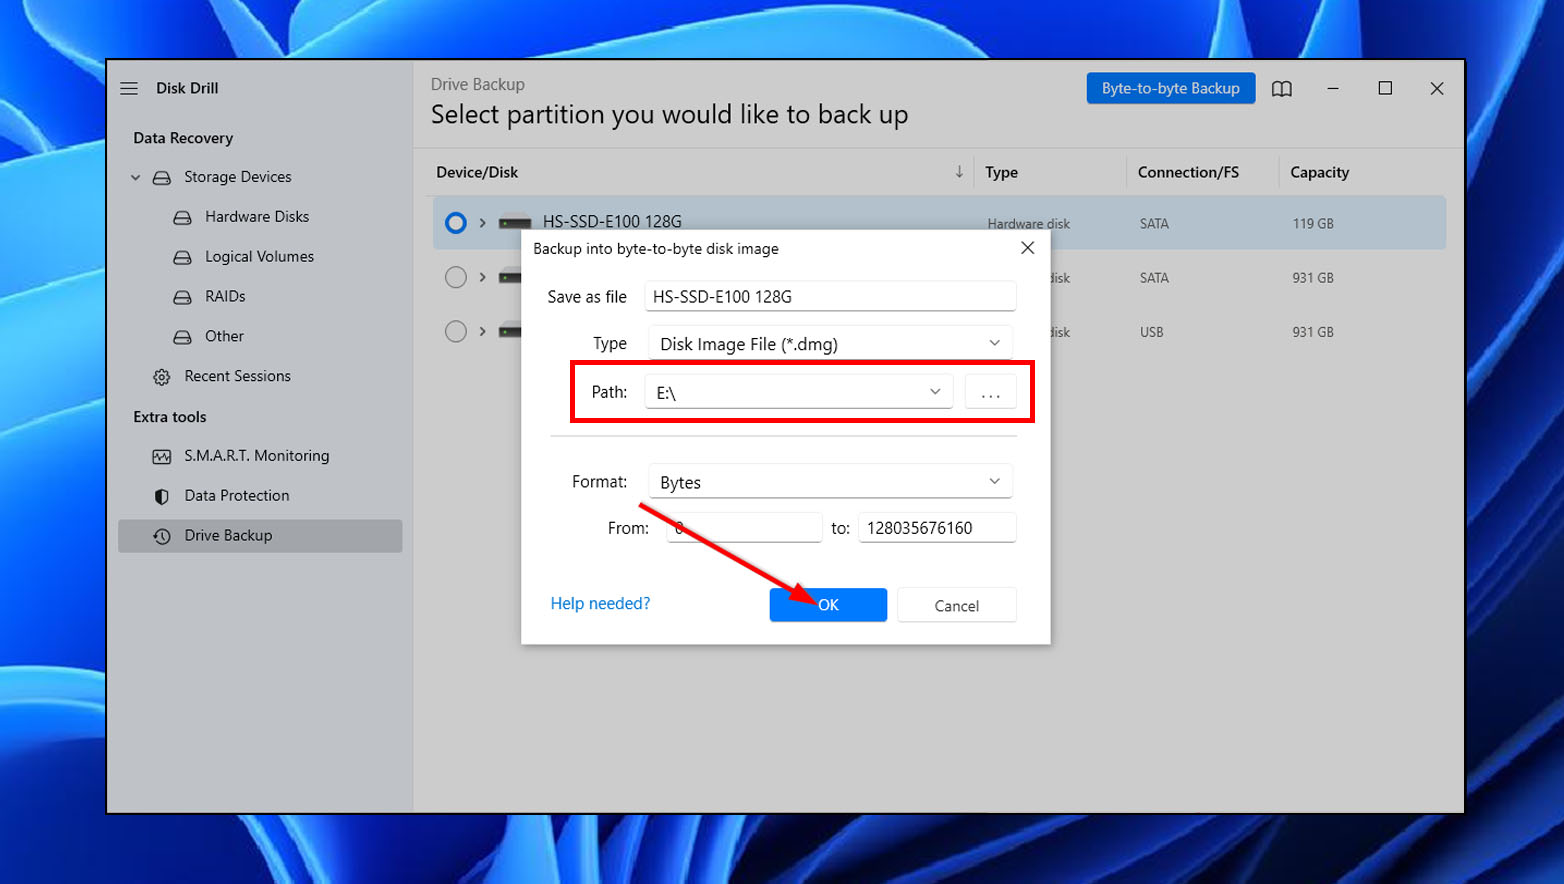
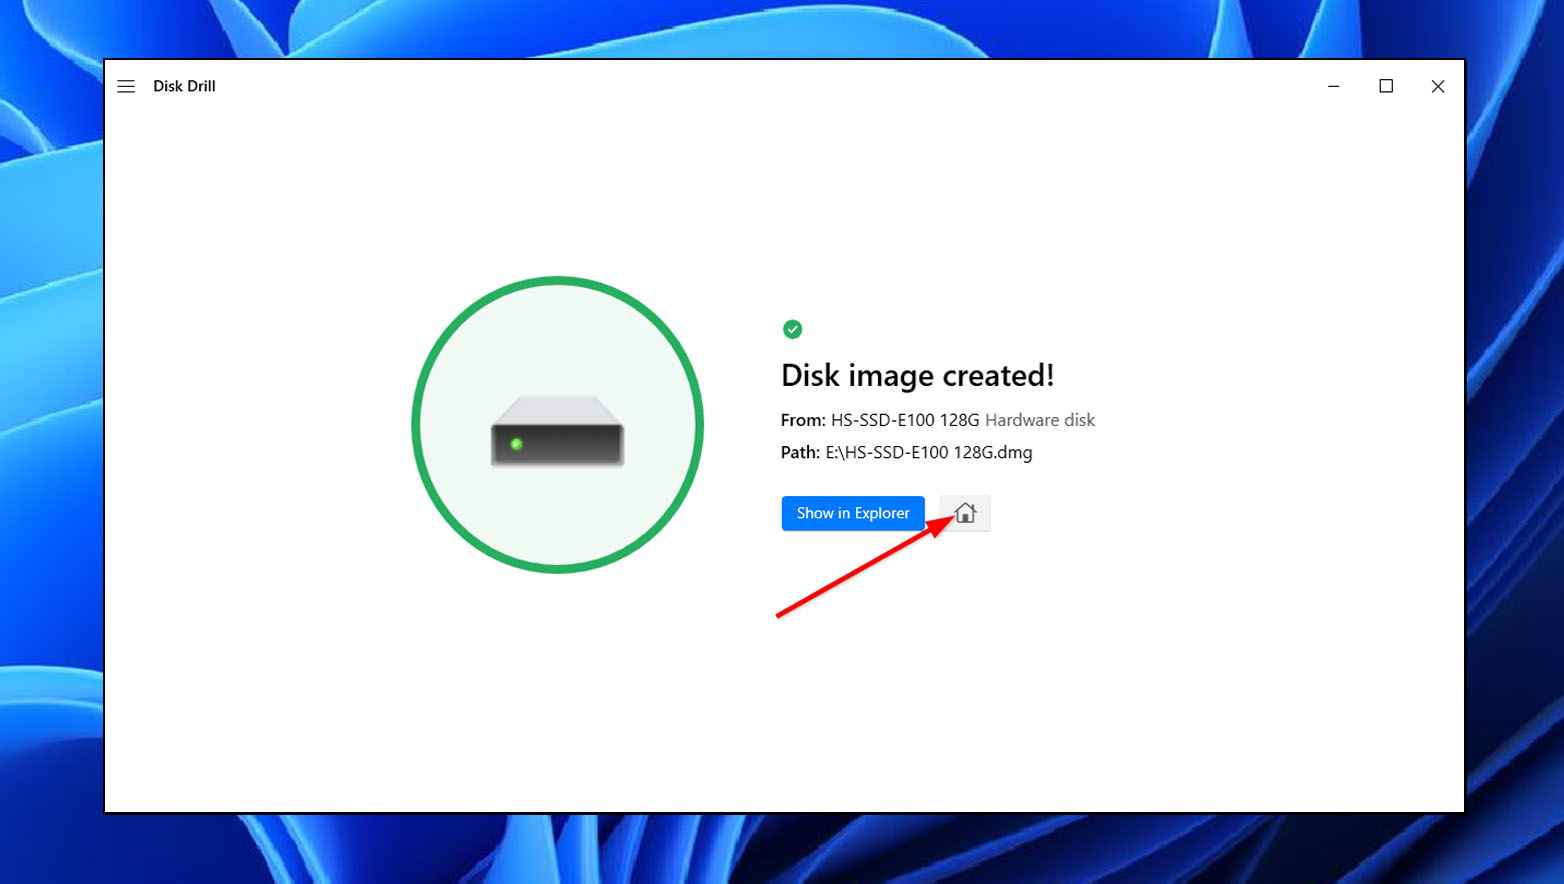
- Disk Drill will proceed to create the backup. When it’s finished, click the Home button.
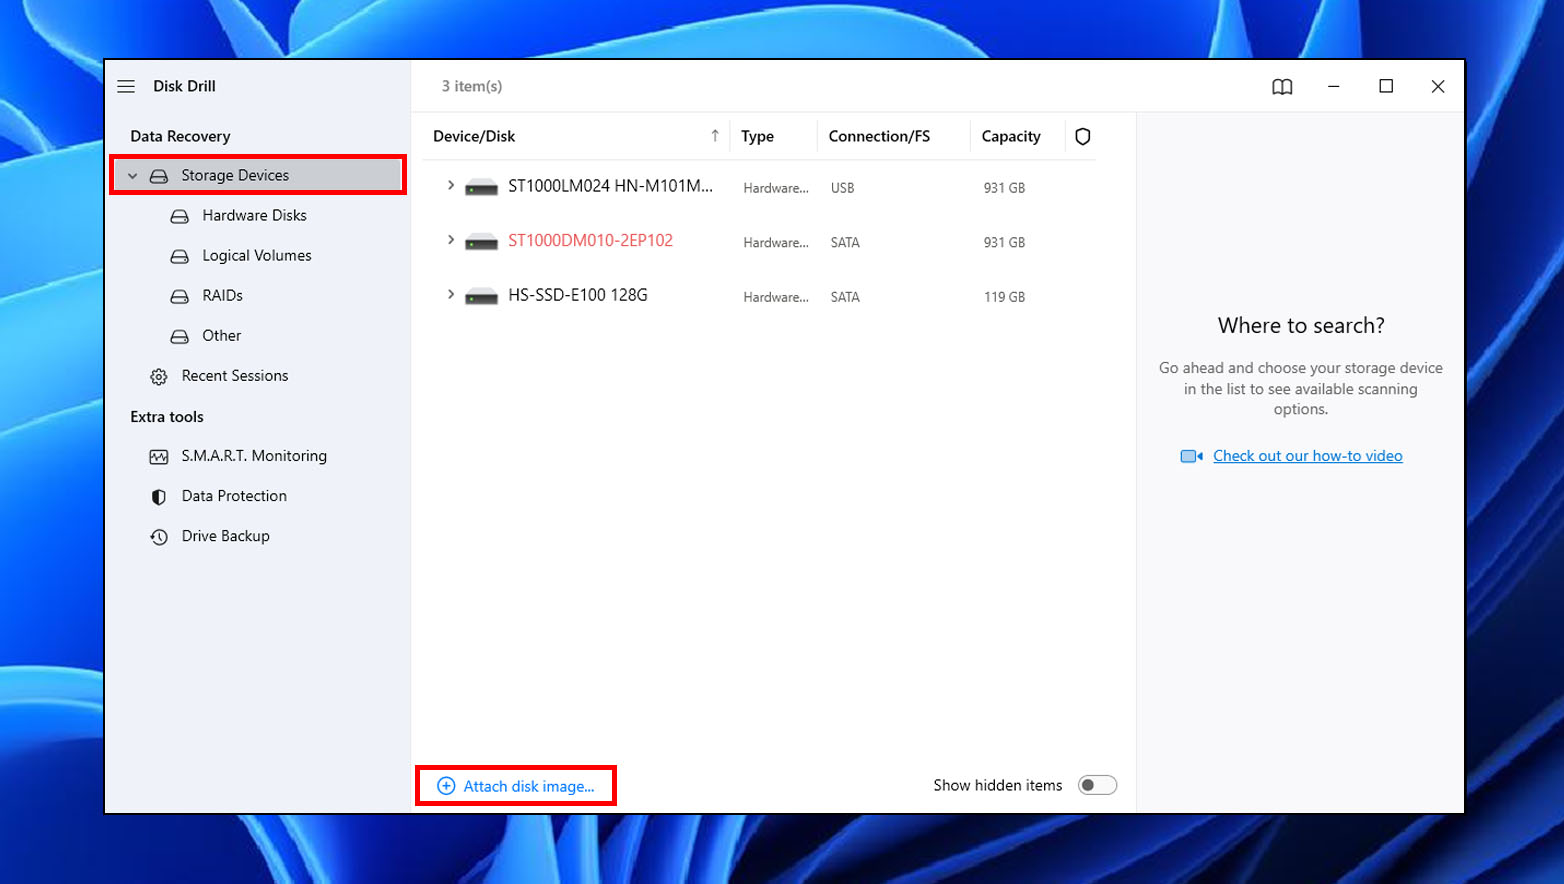
Once you’ve backed up your hard drive, you can now scan it safely using Disk Drill. From the main screen of the app, do the following:
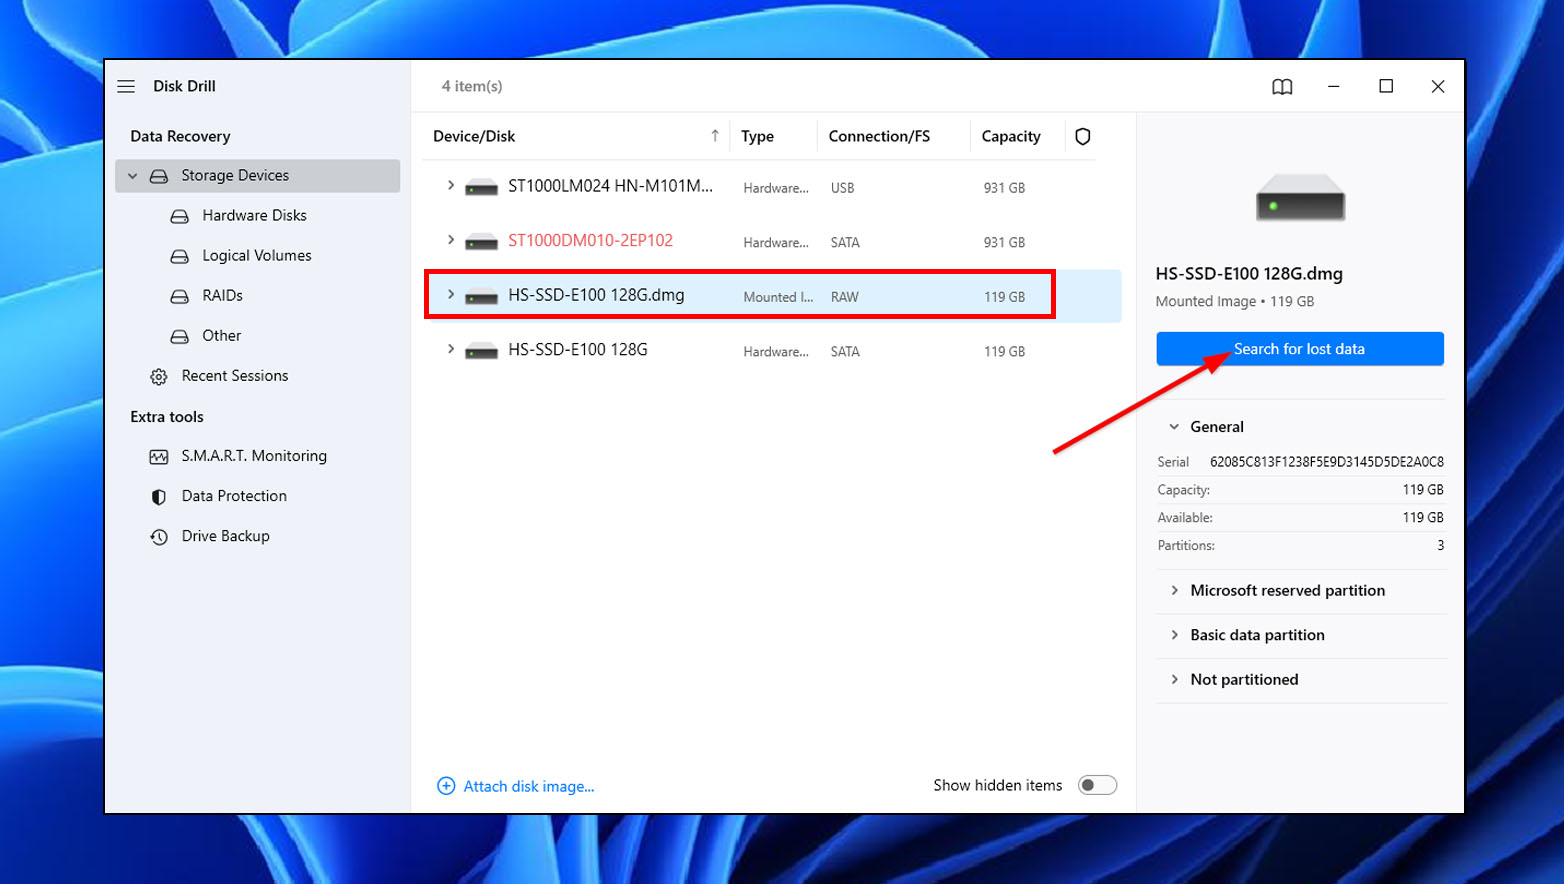
- Go to Storage Devices below the Data Recovery menu. Click Attach disk image.
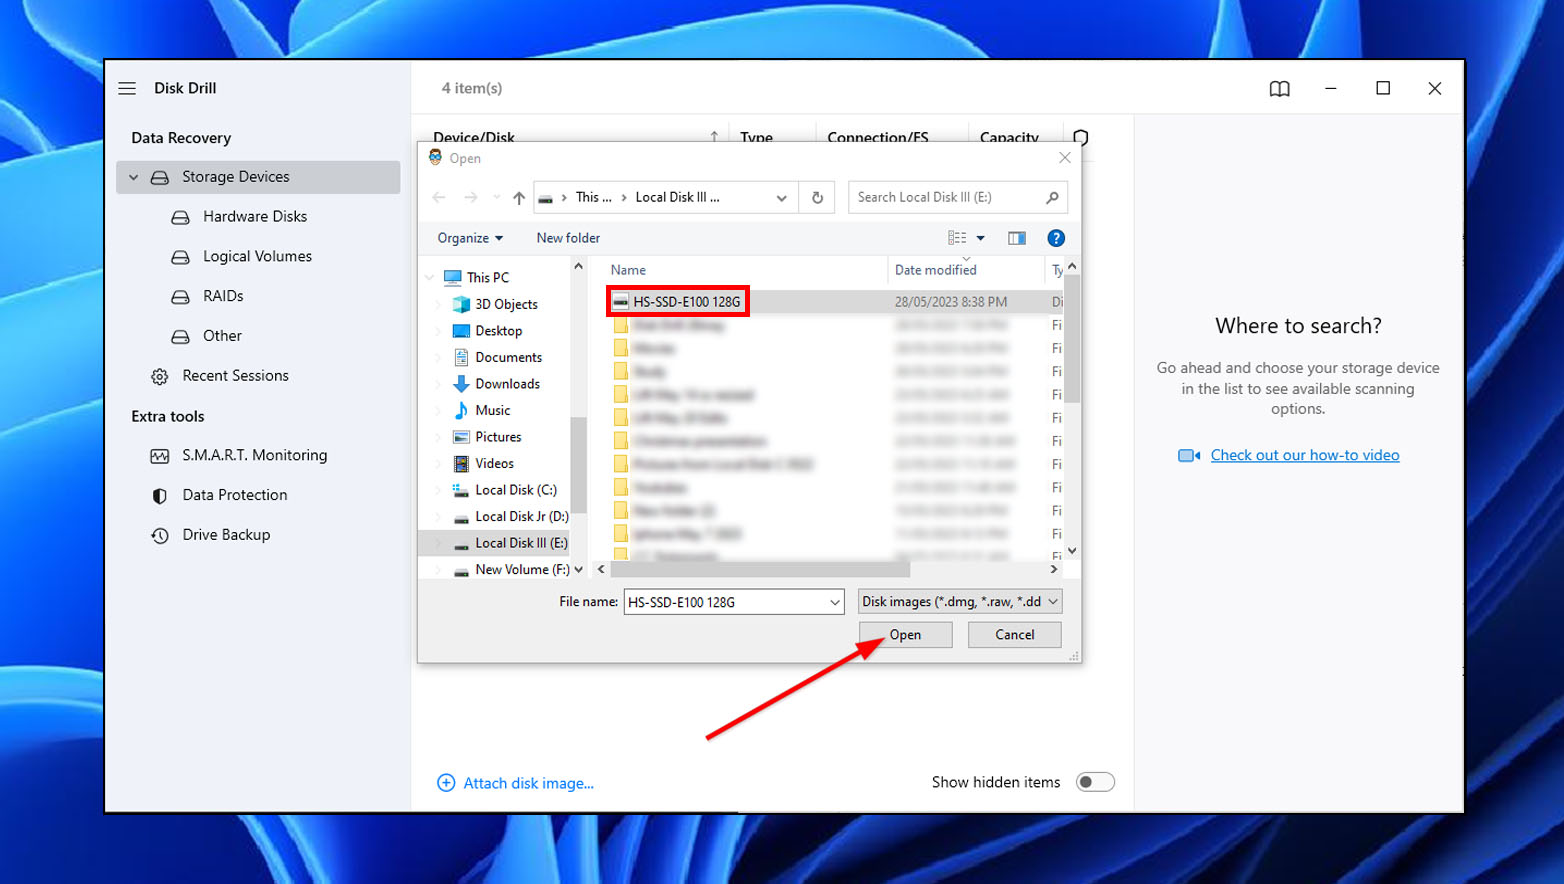
- Next, select your recently created backup, then click Open.
- Once you see the disk image in the list of available devices, select it and click Search for lost data.
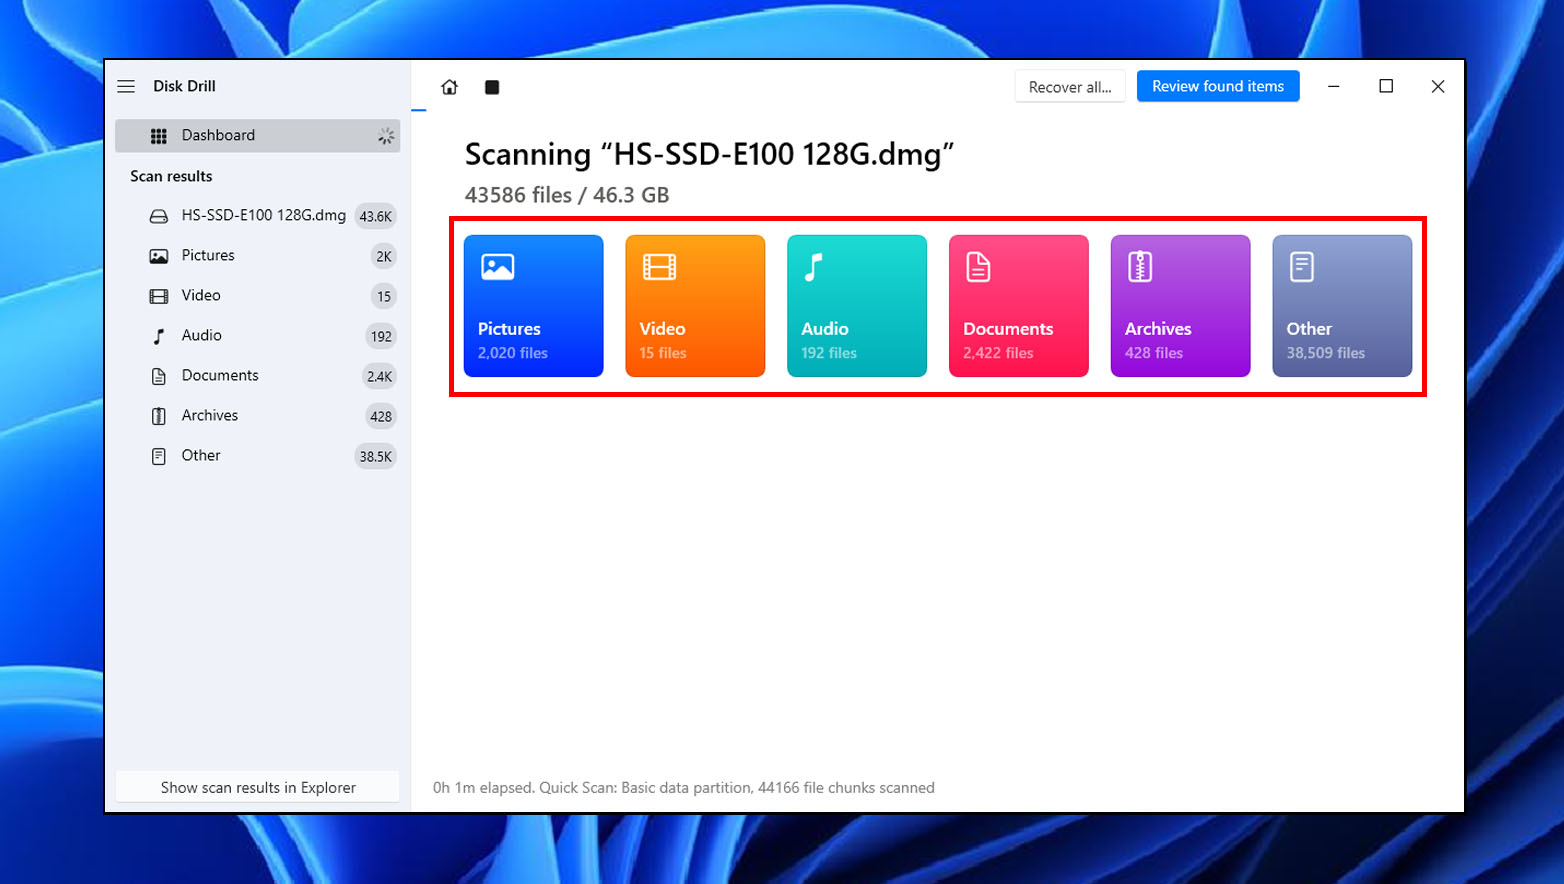
- Upon clicking, Disk Drill will start scanning the backup version of your drive. You can preview your files even during the scanning process by selecting any of the categories on the screen or clicking Review found items. You can also choose to wait for it to finish scanning.
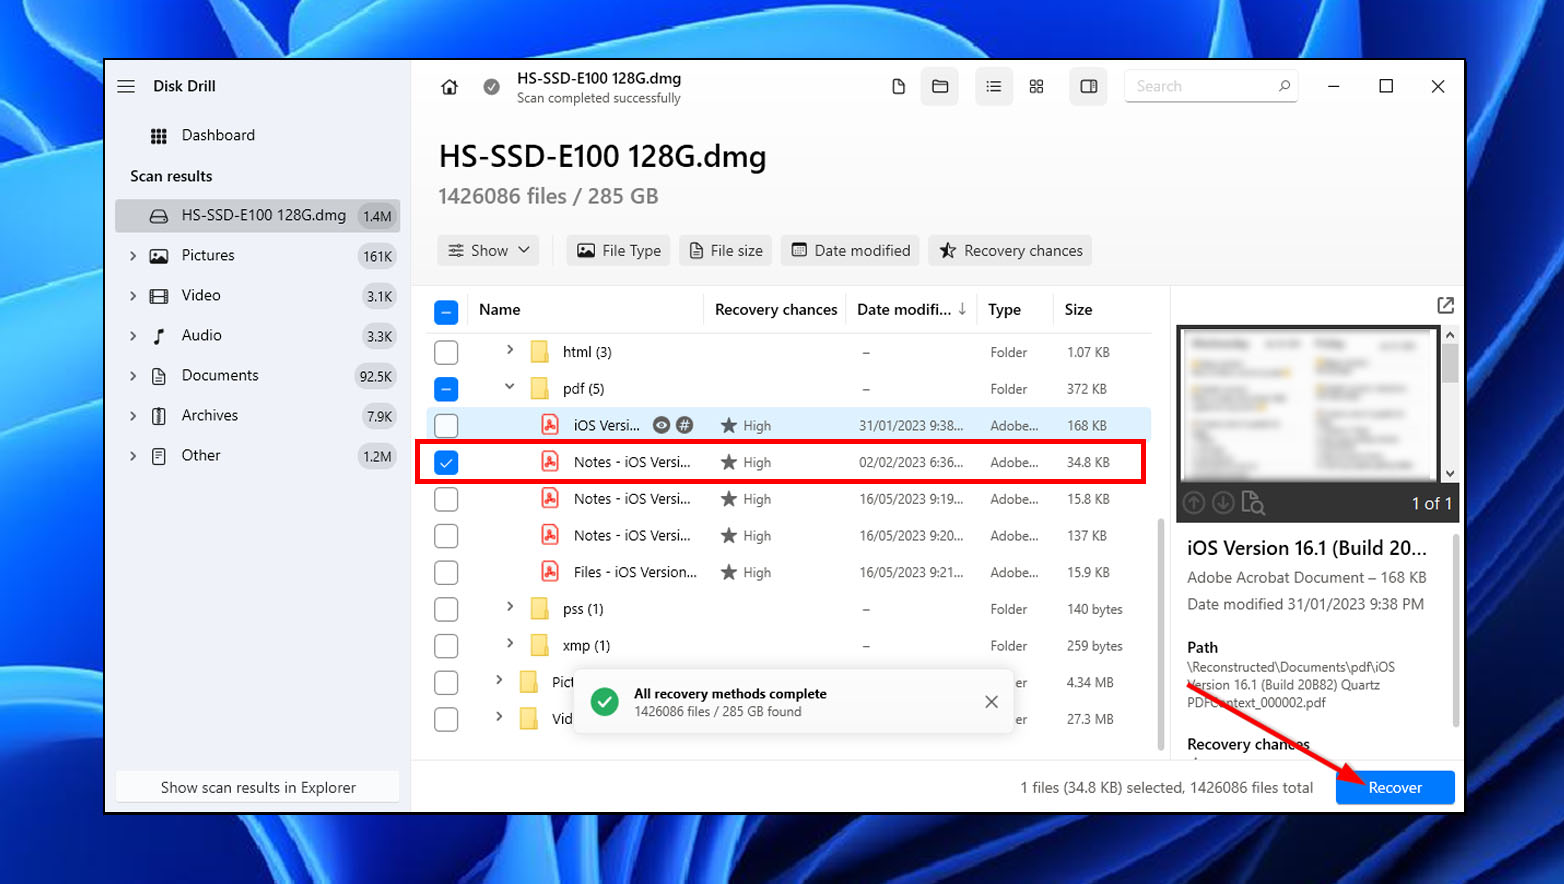
- Once the scan finishes, click Review found items.

- After that, you can now see all the files scanned, along with the preview for music and videos. Next, select the files you want to recover and click Recover.
- Choose the destination folder and click Next.

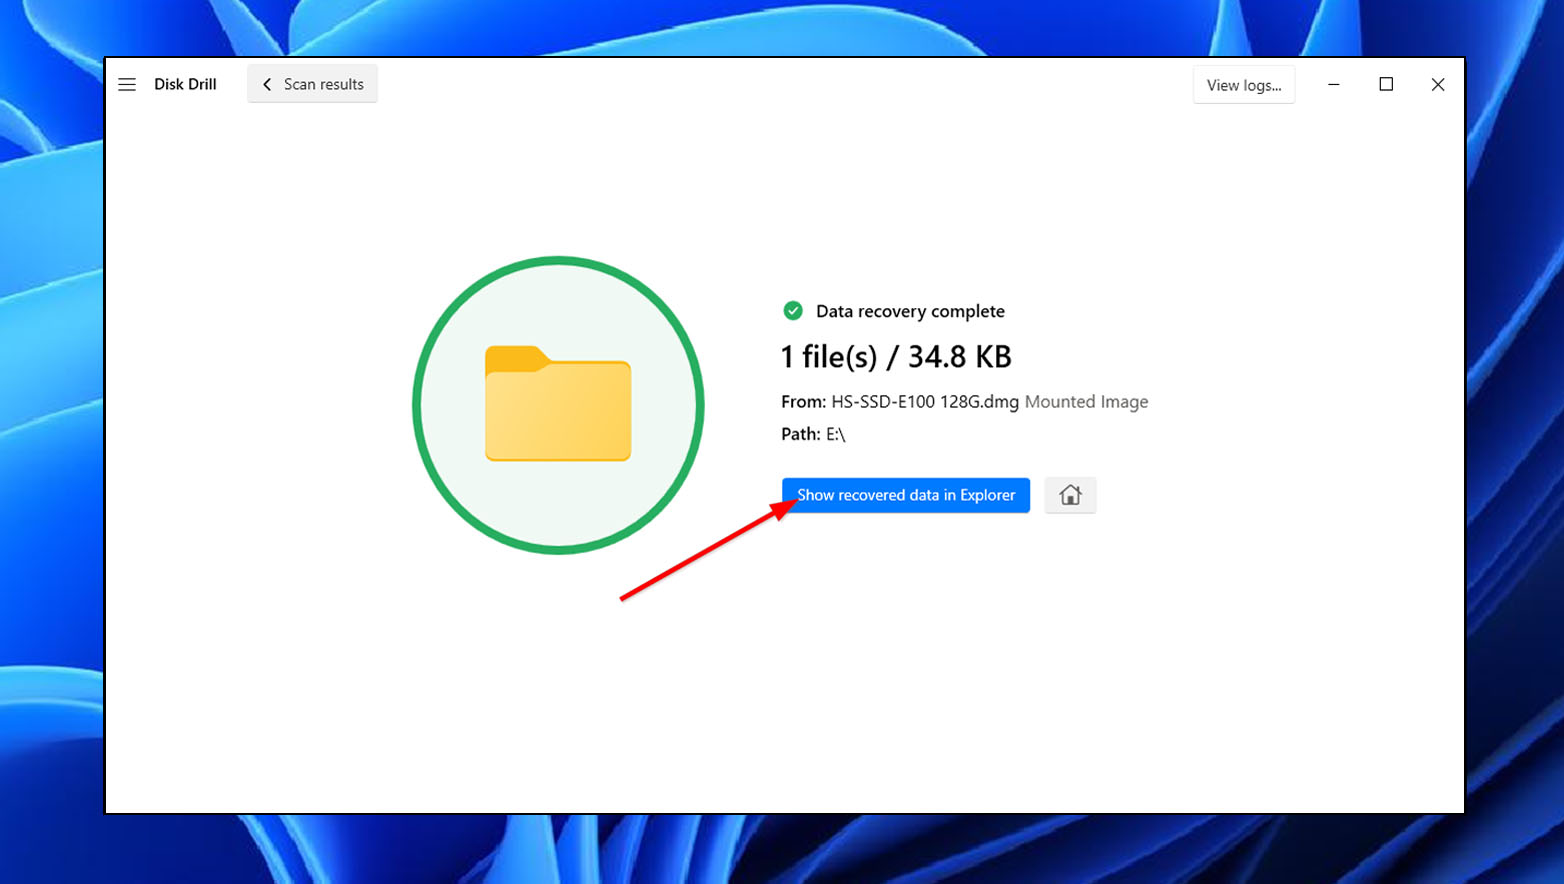
- Disk Drill will display the recovery status, along with the destination and total files recovered. Click Show recovered data in Explorer to access your recovered files.
Case 2: Data is Accessible
Backing up your files on your hard drive is much simpler when your data is accessible. Simply copy all the data that you need to another drive using File Explorer on Windows, Finder for iOS, or any file manager of your choice.
It is important to note, though, that you should avoid using the Cut feature when backing up your files. This way, you can avoid data corruption in case the file transfer gets interrupted or ends in error.
After successfully recovering and backing up your necessary files, you can now proceed to format the disk without losing data.
How to Format a Hard Drive
Here are the steps for formatting your hard drive for Windows and Mac users.
Note that if you reformat an external hard drive to be used as media storage for PS4/5, it will not accept the NTFS format. It is recommended to choose ExFAT and not FAT32 as the format of your drive since this is more efficient and powerful.
How to Format Drive on MacOS
Disk Utility is available on Mac devices and handles disk-related functions in the system. Complete the following steps in Disk Utility to safely format your hard drive:
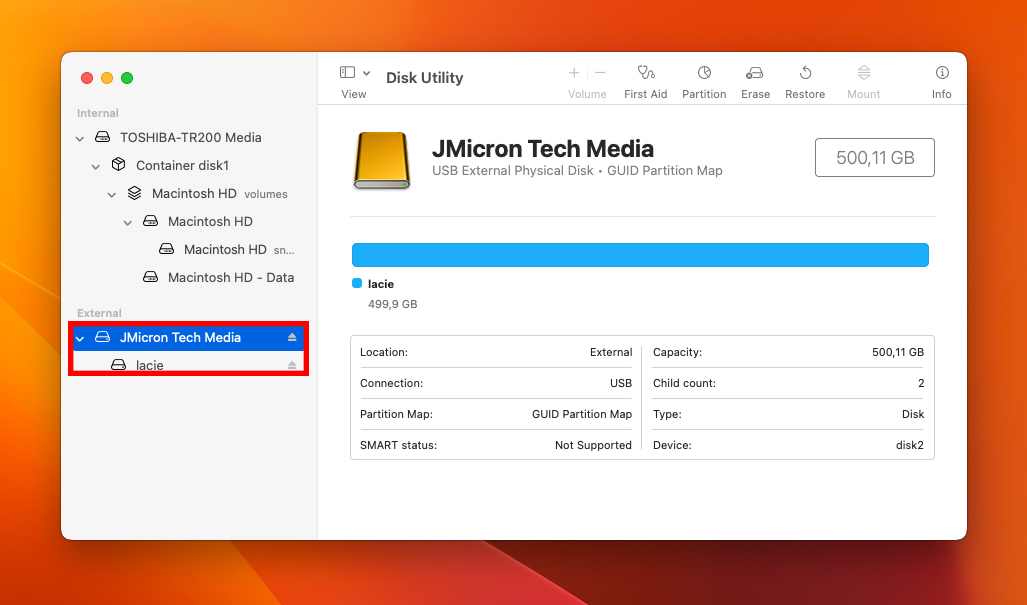
- To get started, select the drive you wish to format from the list.
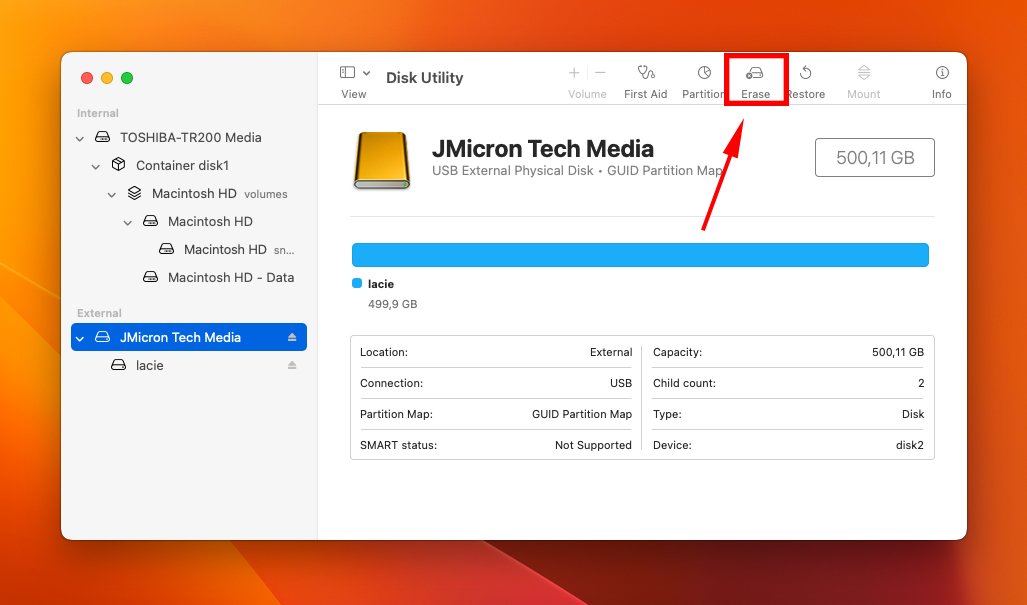
- Next, select the “Erase” tab.
- Select the format type you want to use and give the drive a name.
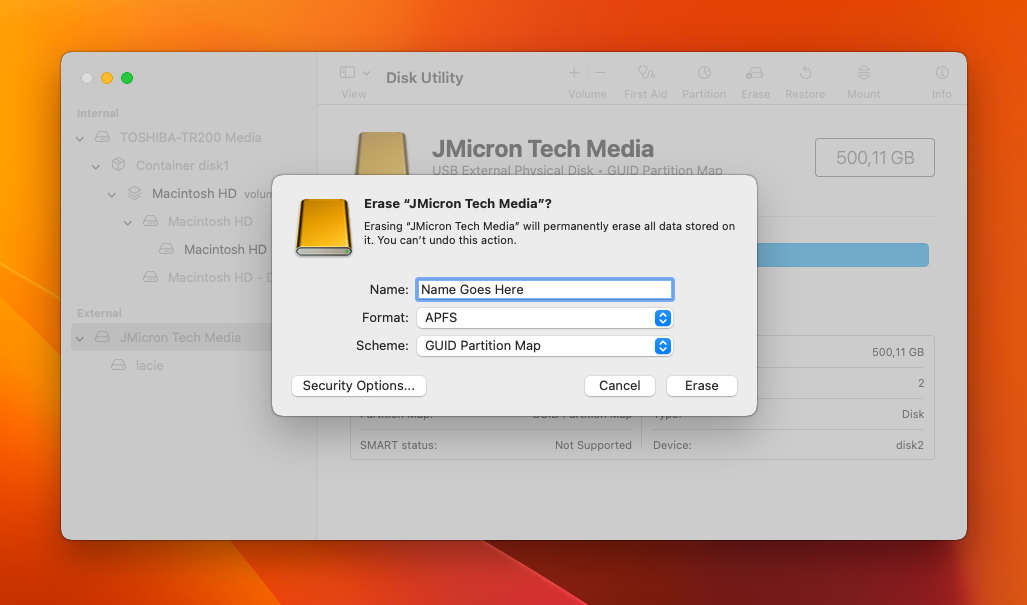
- Click erase.
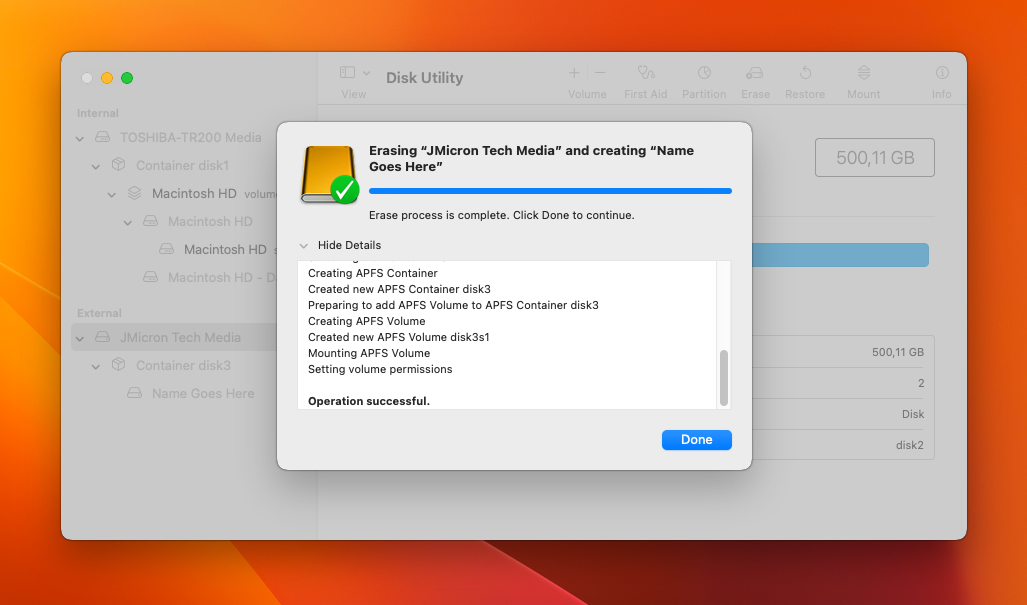
- After that, wait for the process to finish and check if it has been successfully formatted.
How to Format Drive on Windows
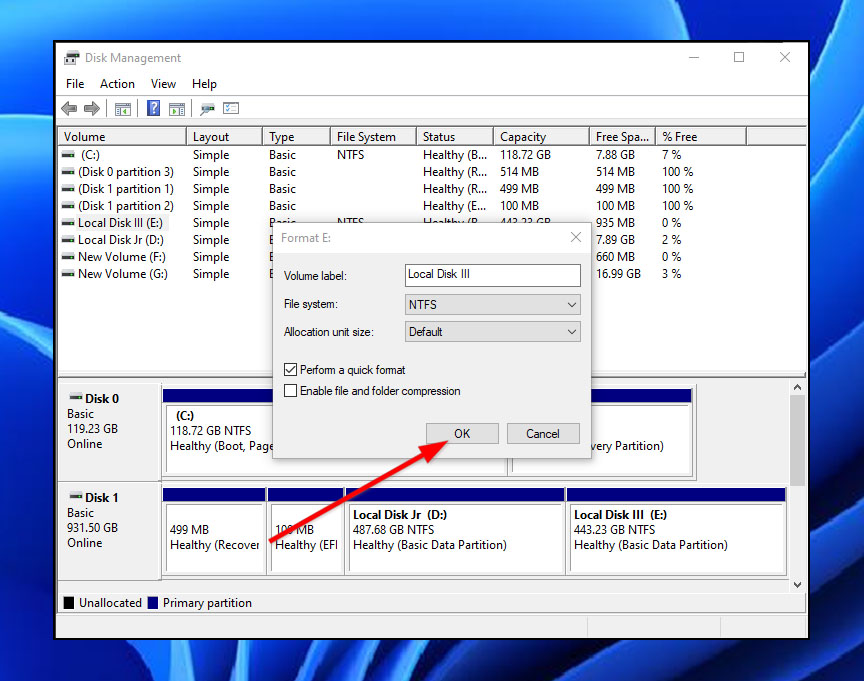
If you have a computer with Windows XP up to the latest version of Windows 10, Disk Management is already included in your system and can be used to format your drive. This tool handles different drives and partitions on your computer. Here’s a quick and easy step-by-step guide on how to format your drive using Disk Management:
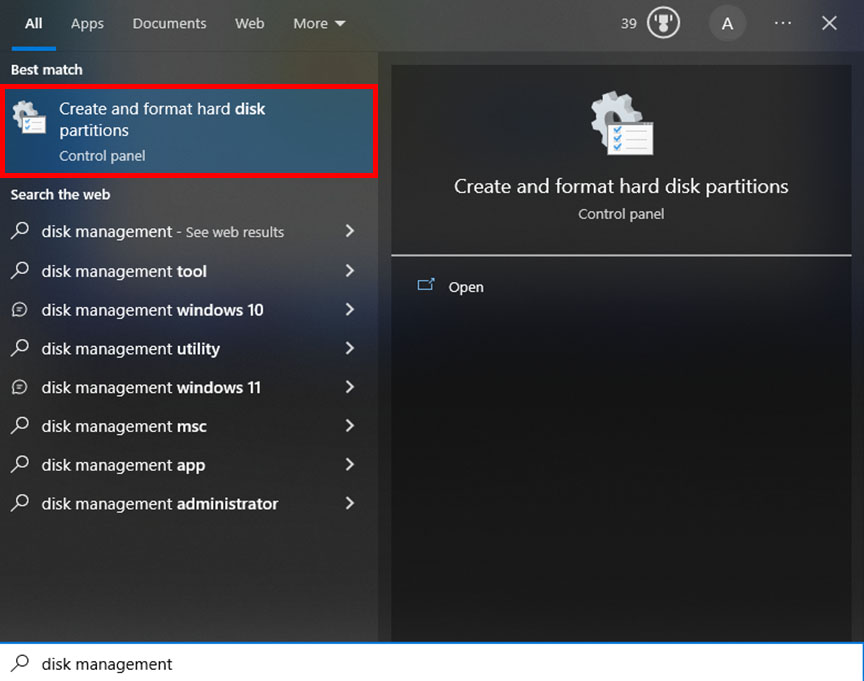
- First, use the Start menu to search for and open Disk Management.
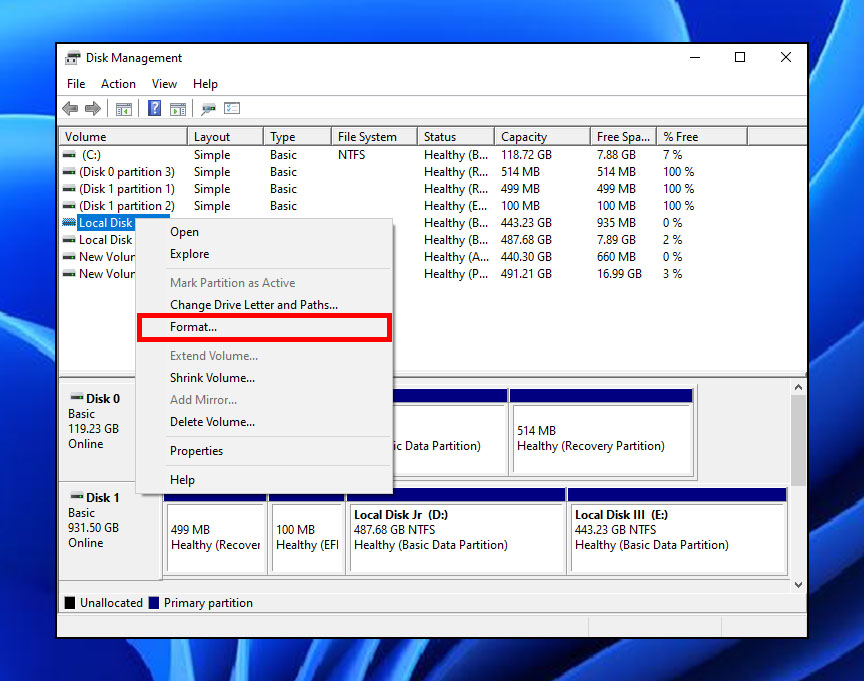
- Next, select the drive you wish to format from the list, then right-click on the drive and select Format.
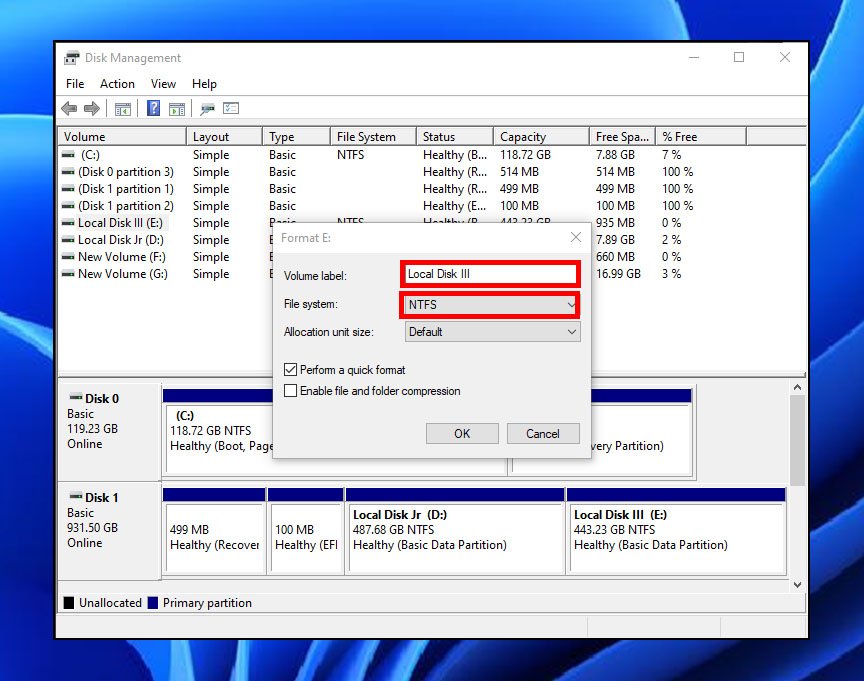
- Enter a name for the drive in the Volume label and select the format type in the File system dropdown box. You can change the drive’s format or choose the same format as before.
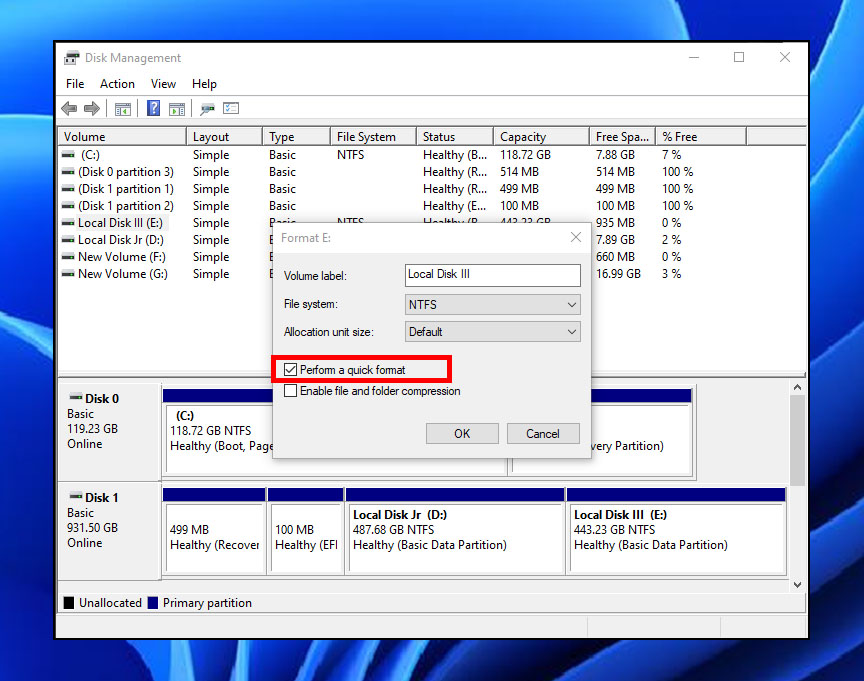
- Next, check or don’t check the Perform a quick format option to toggle between quick format and full format.
- Click OK to start the process. Note that the time it will take to finish will vary depending on whether you choose to do a quick format or a full format for your drive.
Conclusion
Formatting a hard drive without losing data is a straightforward process for both PC and Mac users. Manually backing up your files is the right approach for hard drives that are accessible in File Explorer or Finder. Meanwhile, data recovery software should be used to assist with file backups for inaccessible drives.
With the step-by-step instructions provided in this article, you can proceed to format the drive without losing data on Windows or Mac.


")