 When your external hard drive isn’t being detected by your computer, it feels as though all of your data is locked, just barely out of reach. Even after performing the typical computer restart, there’s still no visible way to access your external hard drive’s contents.
This problem can happen for a number of reasons. Before you exhaust yourself trying to get into the external hard drive, read on to find out how to recover external hard disk data when it is not detected.
Table of Contents
Why the External Hard Drive Is Undetectable
External hard drive problems present themselves in many forms. If your external hard drive has suddenly become unreadable by your computer, here are a few common problems that could have caused this to happen:
| Problem | Description |
| ❌ Improper device removal | If you don’t remove your external hard drive safely, important write processes may be interrupted that could corrupt your files, or worse, your file system. |
| 💾 External hard drive corruption | Corruption to the file system of your external hard drive may result in it failing to be read by your Windows computer. |
| 🔧 Outdated or corrupted drivers | Drivers are responsible for the communication between your hard drive and computer. If they’re out-of-date or corrupted, this communication may break down until resolved. |
| 💥 Hardware malfunction | Physical damage to the external hard drive is often the most severe and can render the drive permanently unreadable, depending on the damage. |
External hard drive troubleshooting is fairly easy once you know what the cause is. Regardless, this next section will discuss how to fix an undetected hard drive that’s visible in Disk Management, as well as how to recover data from a hard disk which is not detected.
Fixes for External Hard Drives That Are Visible in Disk Management
If your external hard drive is visible in Disk Management and it’s reflecting the correct size, you have a good chance at fixing it. The below solutions have proven effective for restoring access to external hard drives, with some even allowing you to recover an external hard drive without formatting. Be sure to attempt each of these solutions in order to avoid increasing the risk of permanent data loss.
Method 1: Recover Data With Data Recovery Software
Data recovery software should be your first go-to when your hard drive is undetectable. As you’re unsure what has caused it, each action you perform could be detrimental to your data. Therefore, our first step is to create a copy of your external hard drive and recover what data you can. To do so, we’re going to use Disk Drill.
Follow these steps to back up and recover data from an external hard drive that’s not recognized:
- Download Disk Drill and open it.
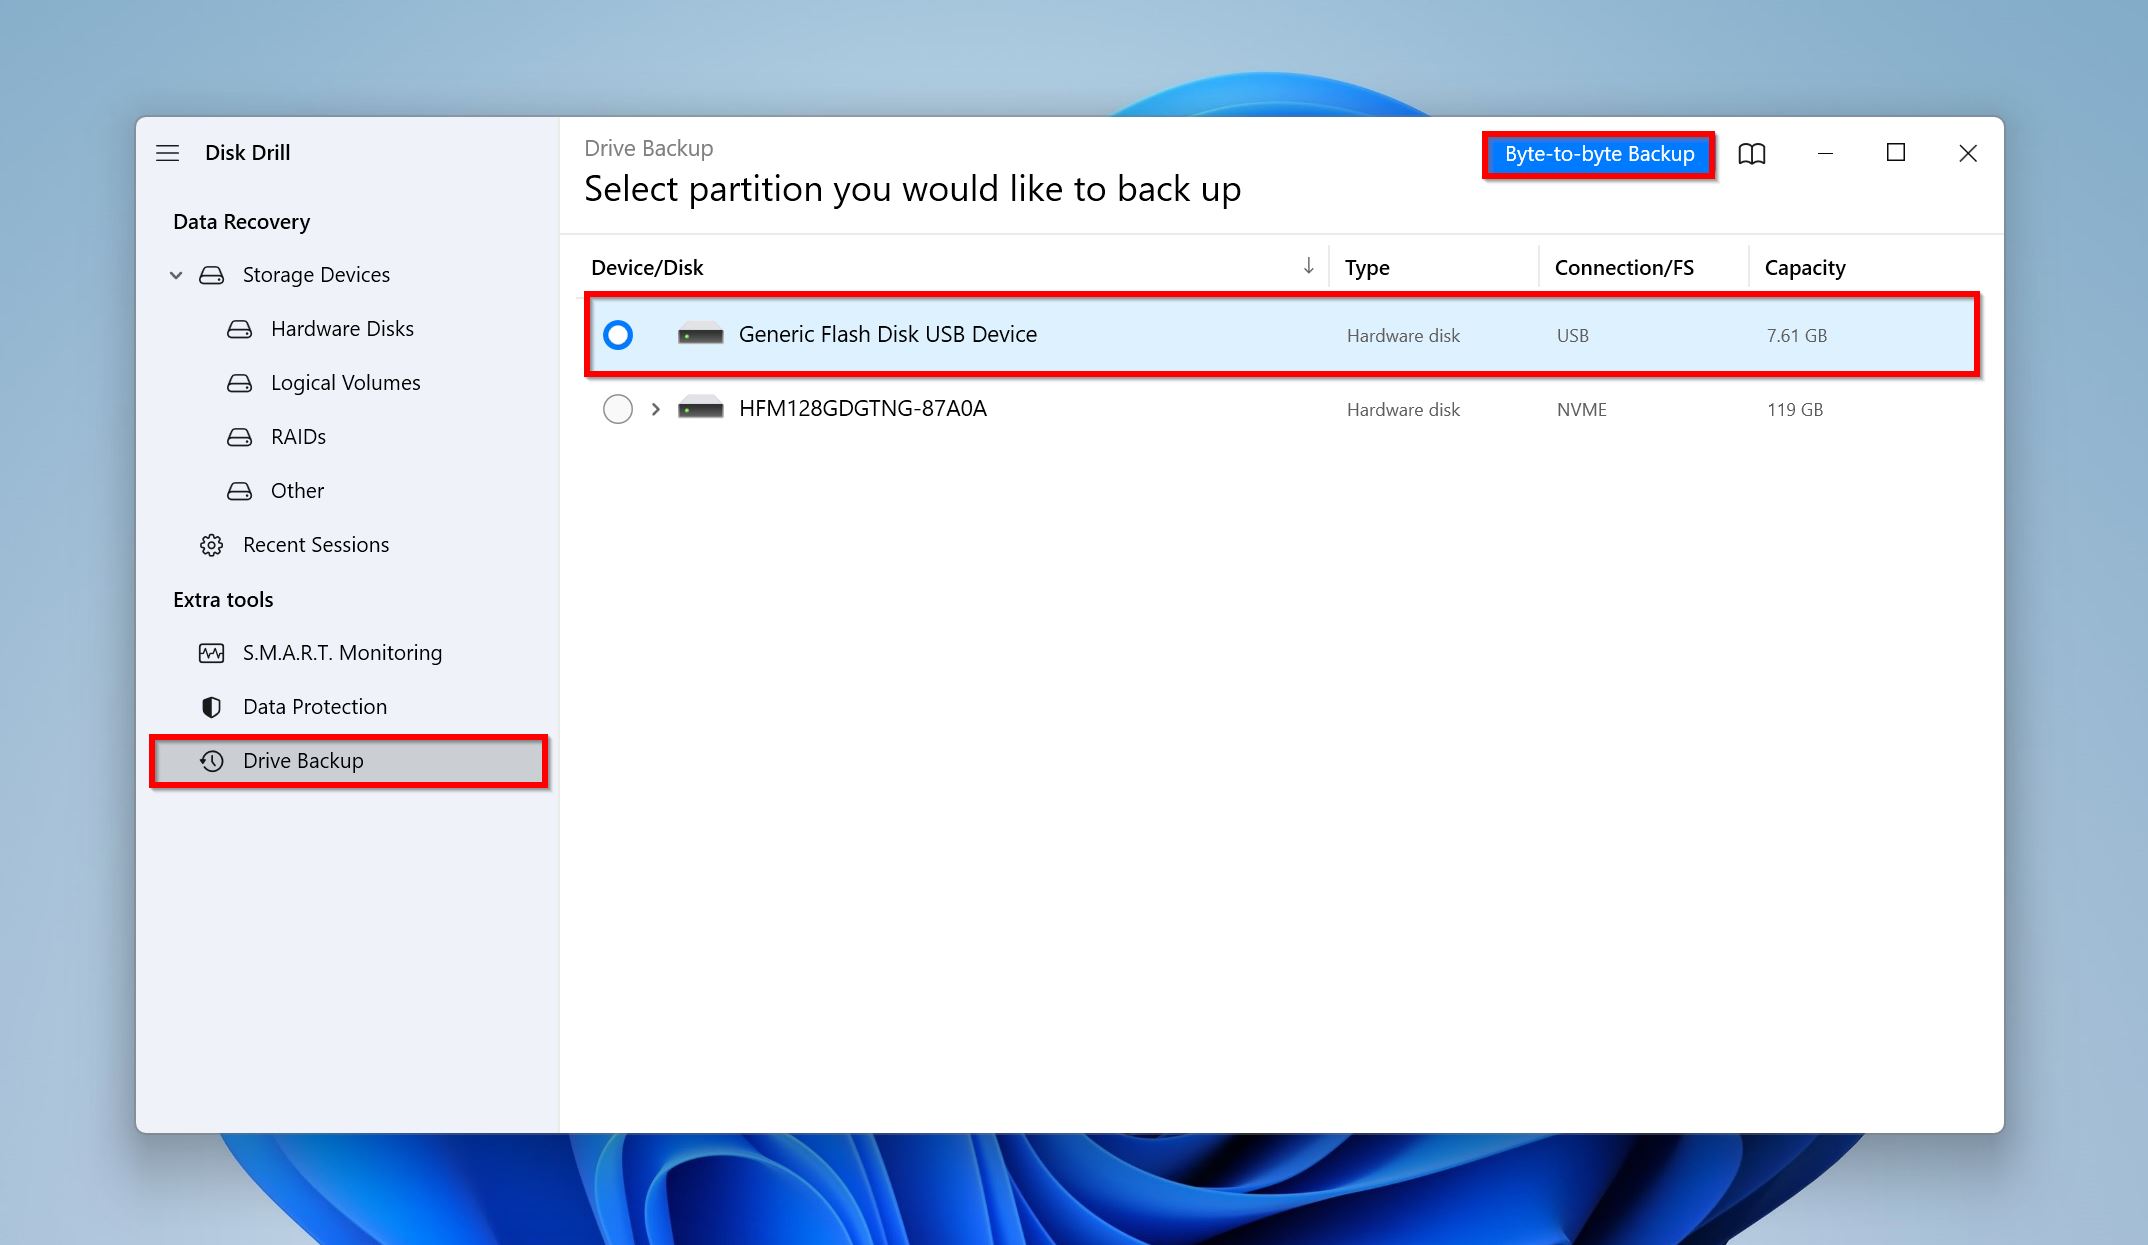
- Click Drive Backup.
- Select your external hard drive, then click Byte-to-byte Backup.
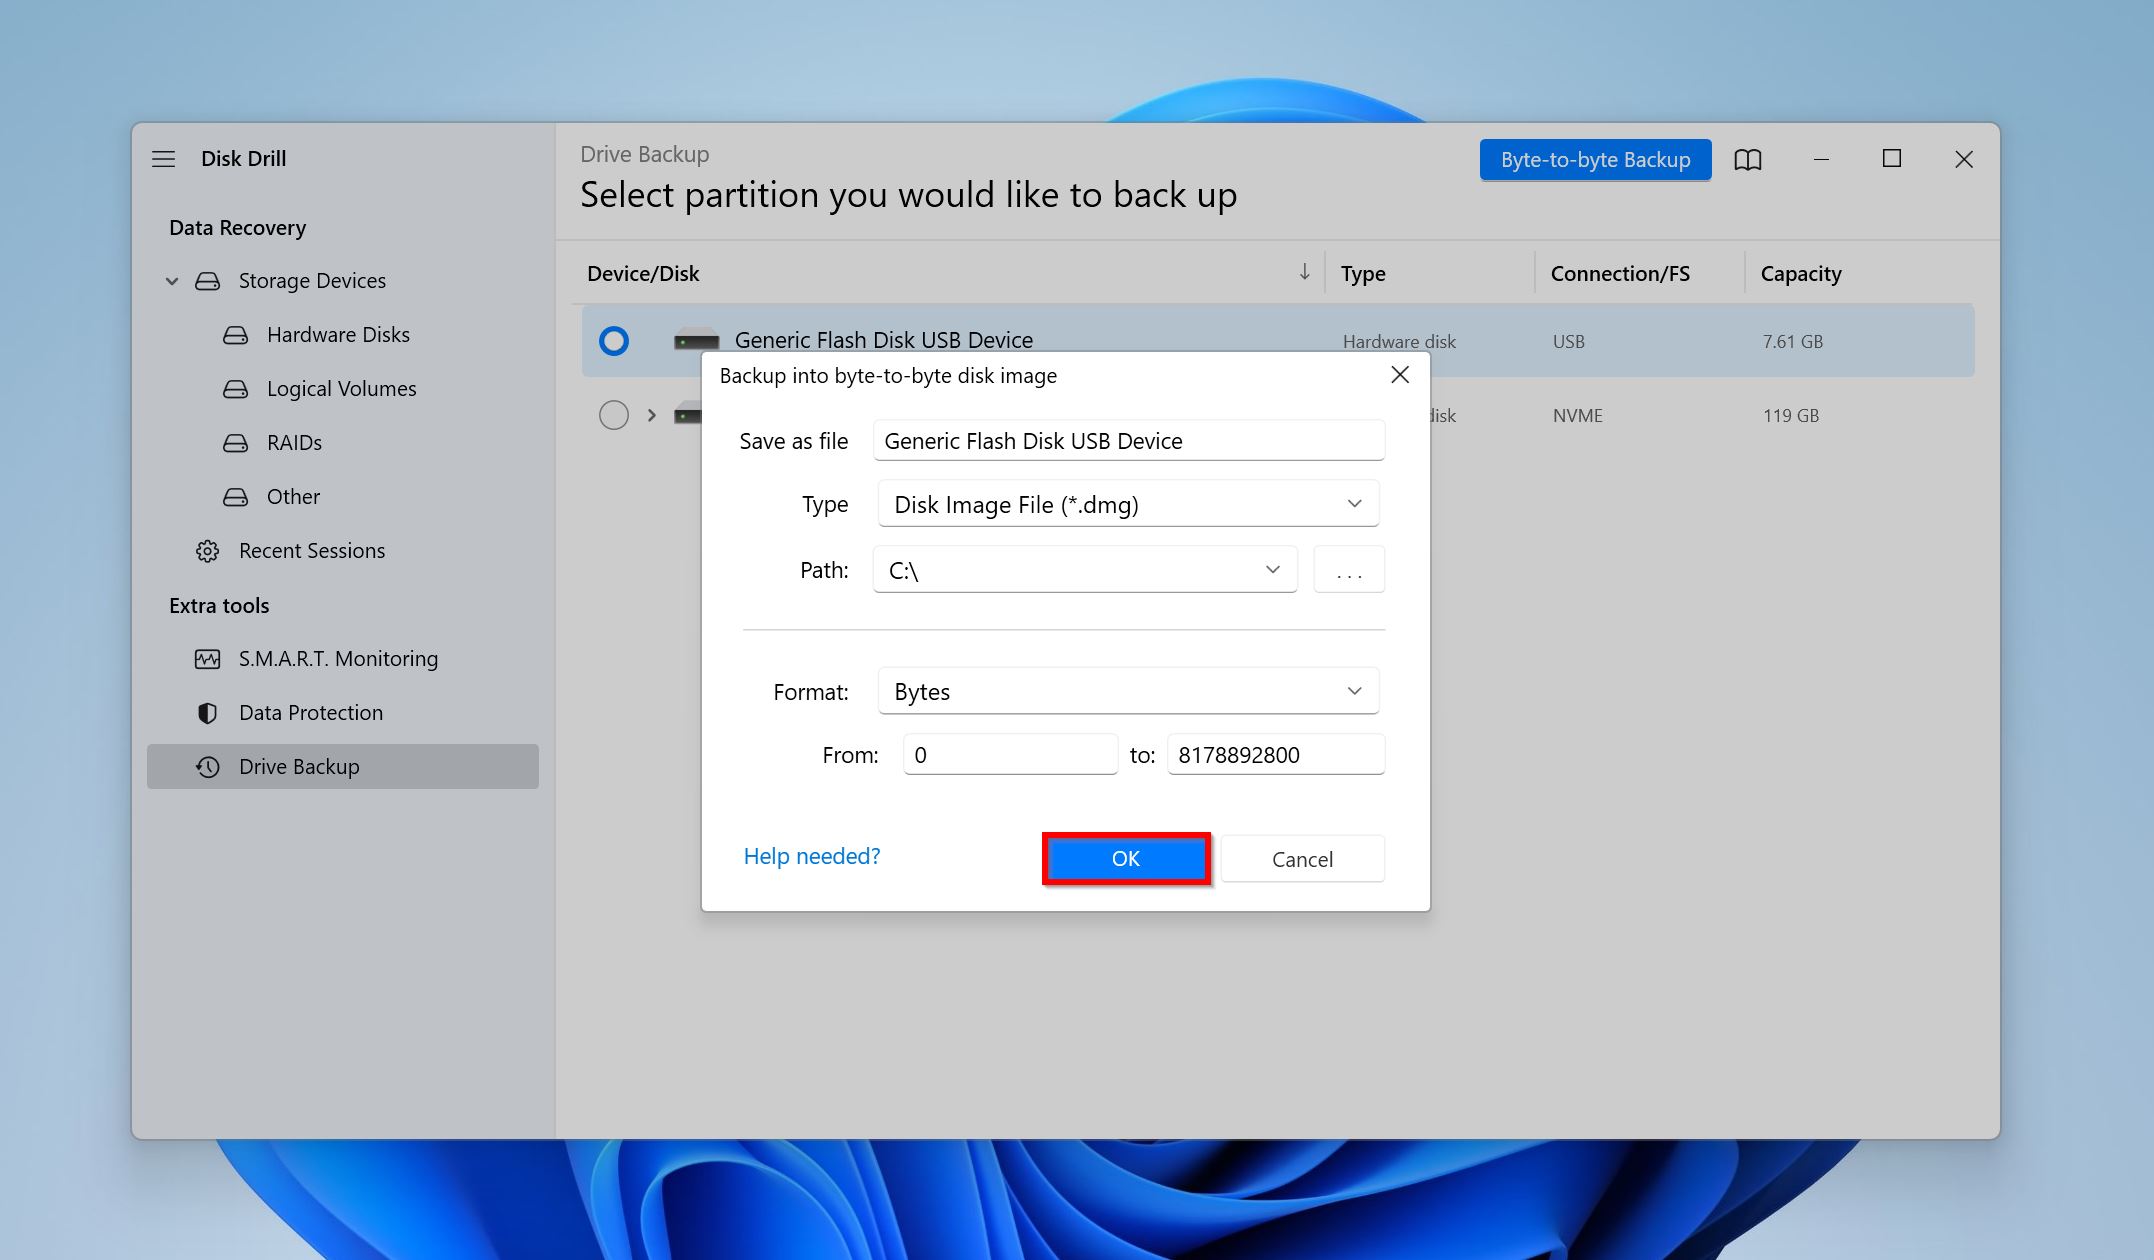
- Choose where you want to store the backup, then click OK.
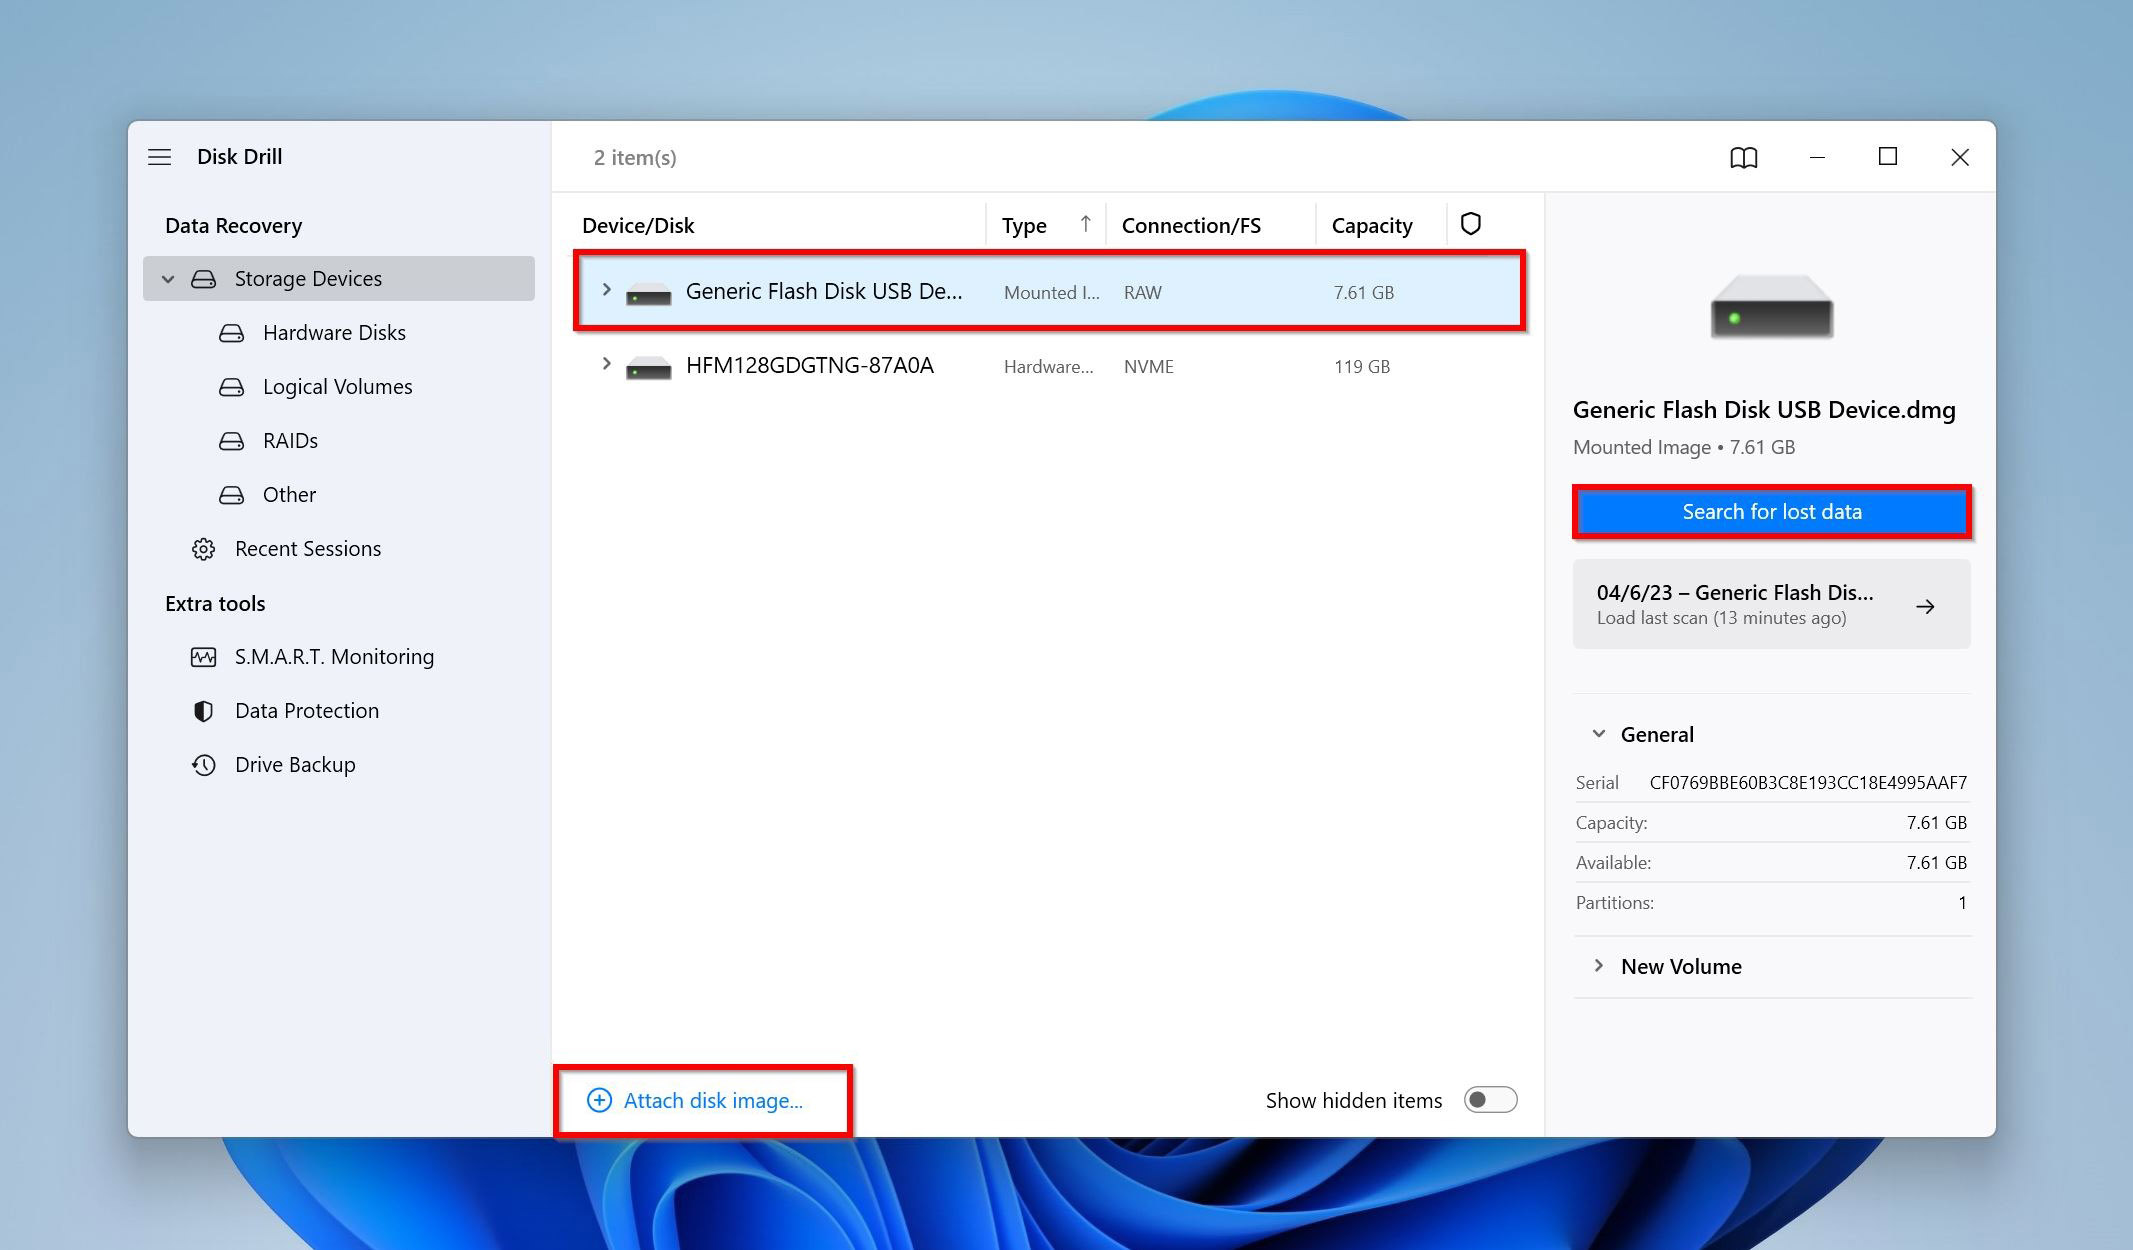
- Click the Data Recovery tab when finished, then click Attach disk image. Select the disk image you just created, then click Search for lost data.
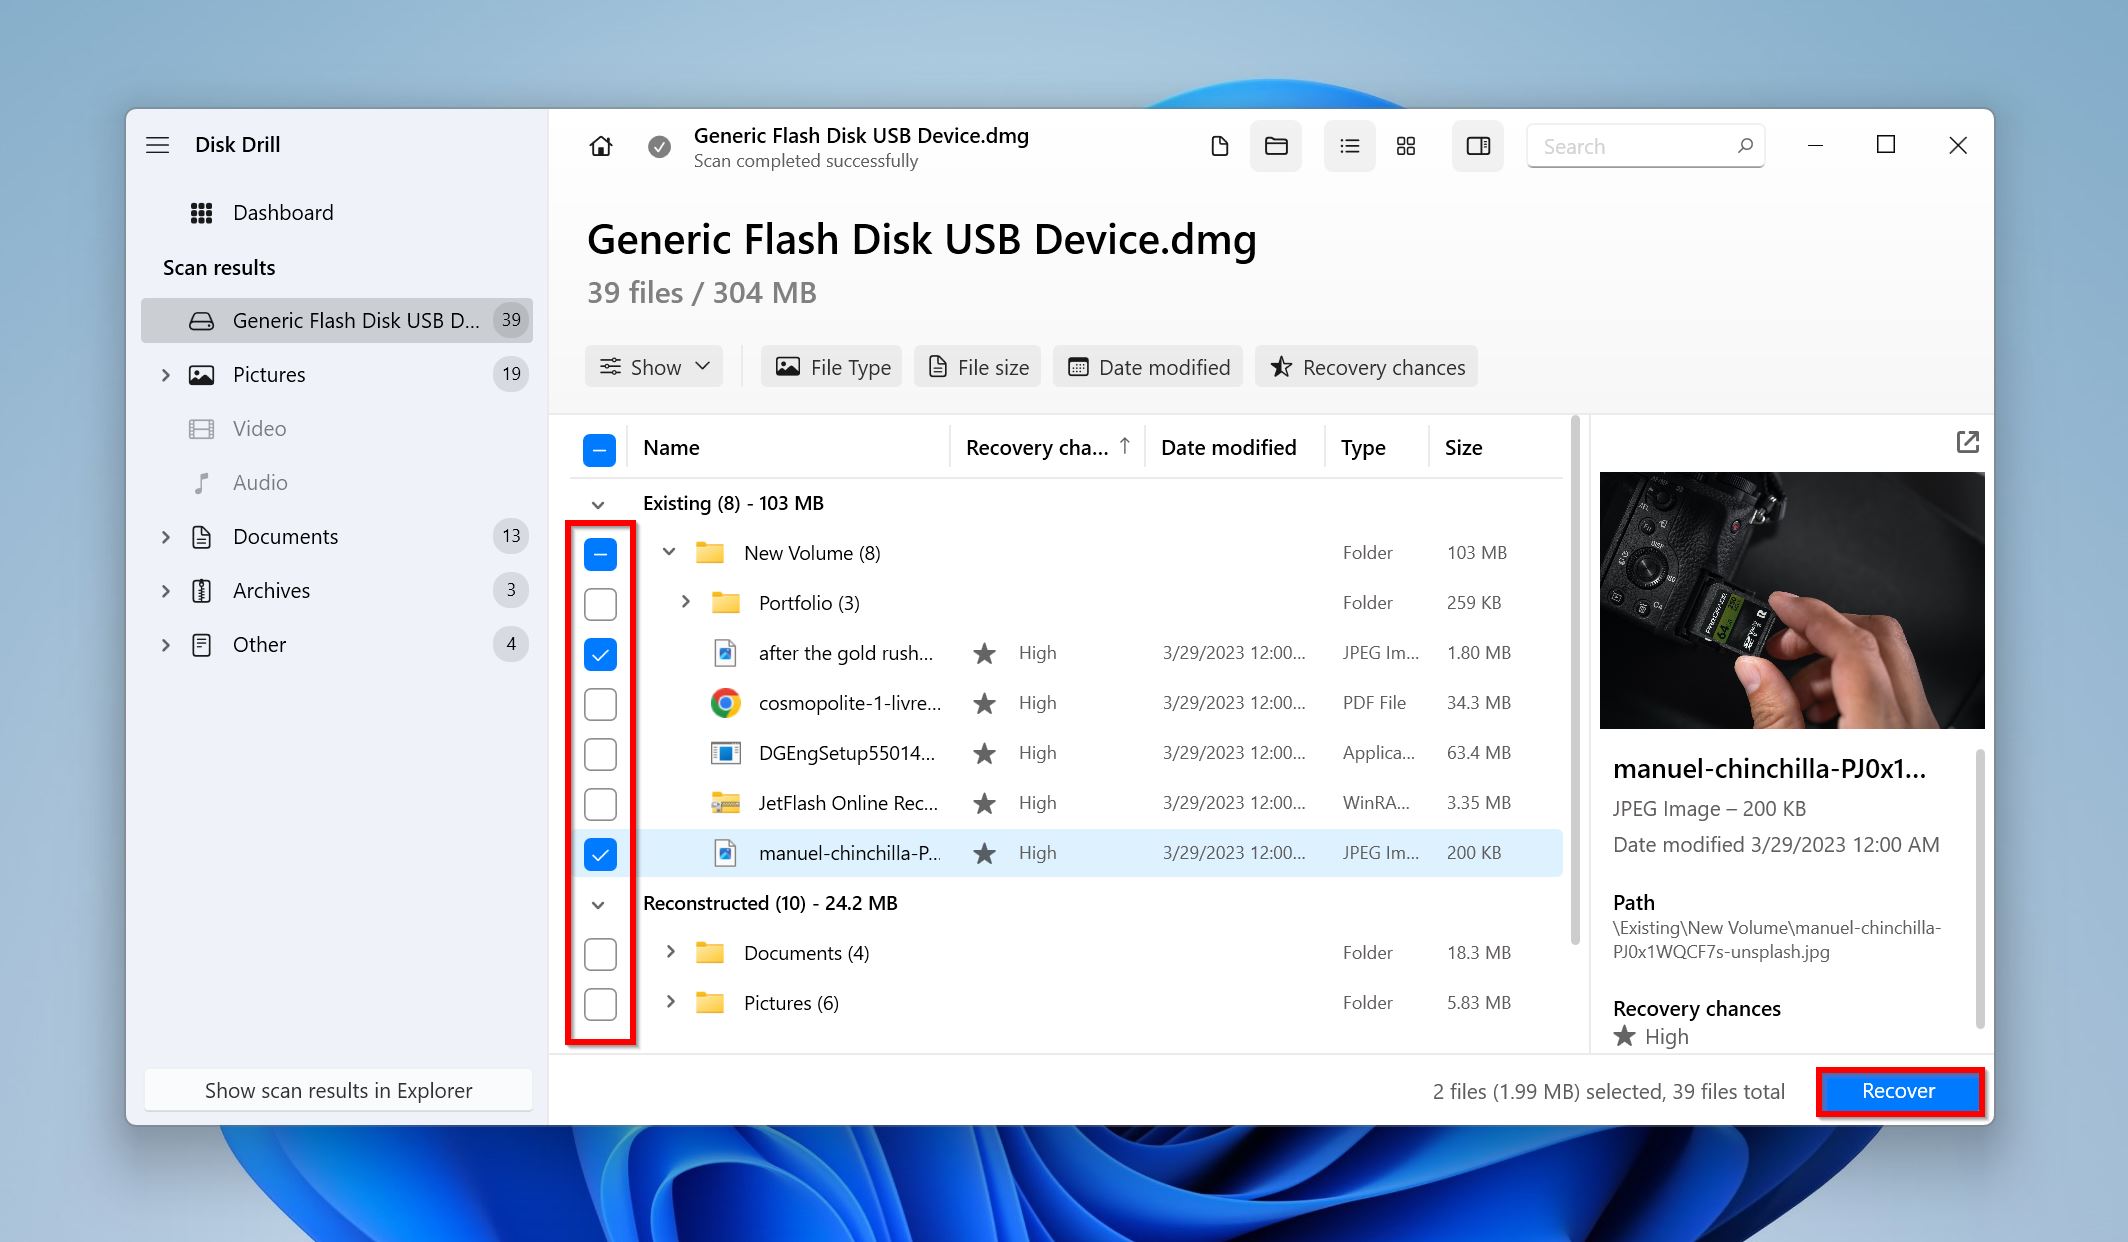
- Click Review found items when the scan is complete.
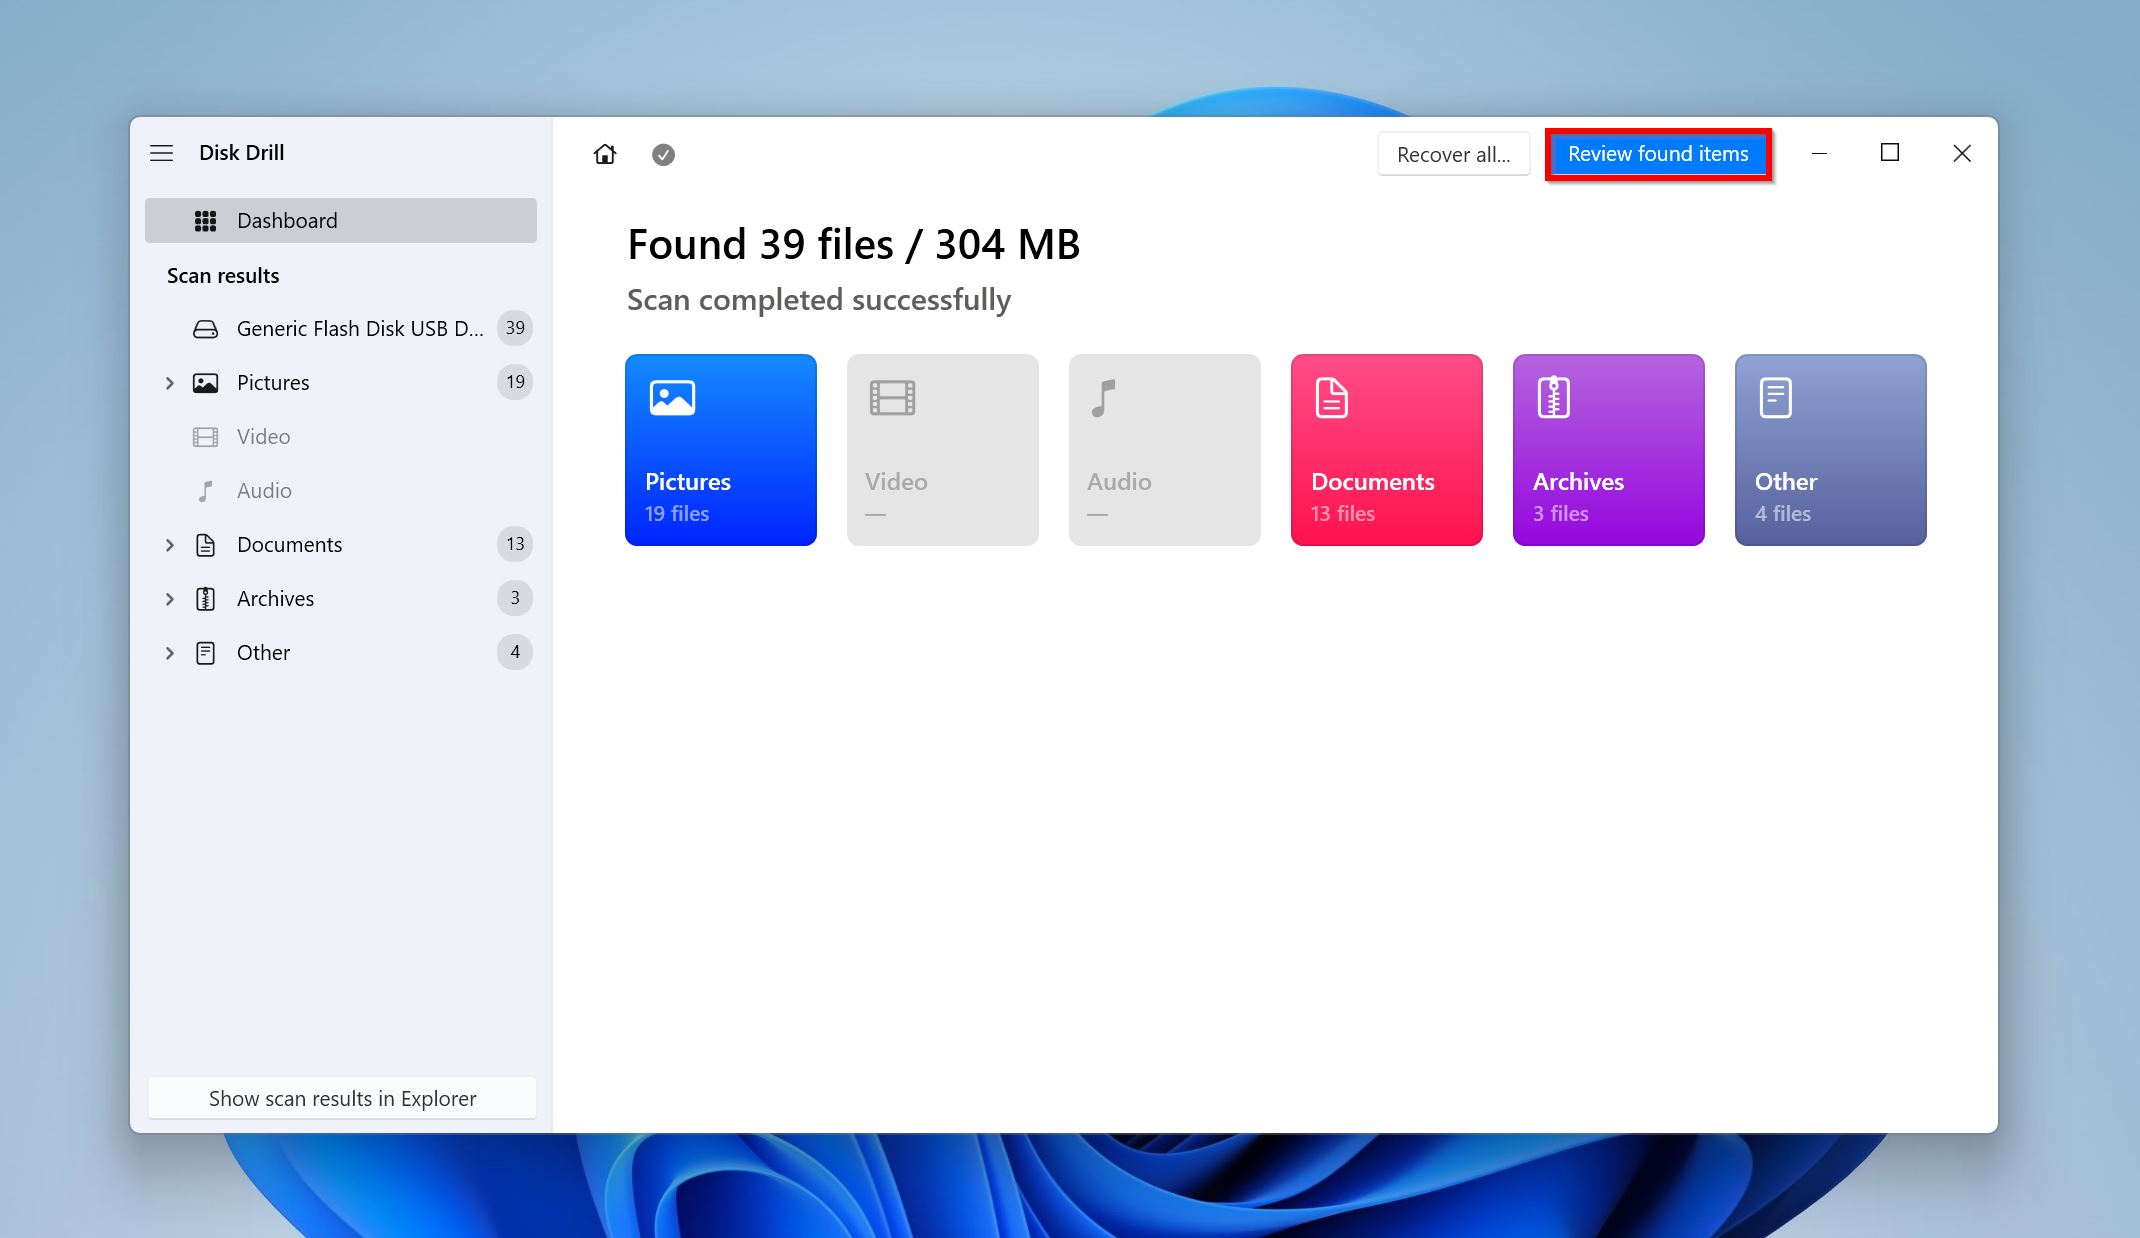
- Mark the files you want to recover from the byte-to-byte copy. The recovery chances column indicates your chances of recovering each file. When ready, click Recover.
- Specify an output location that isn’t on your external hard drive, then click Next.
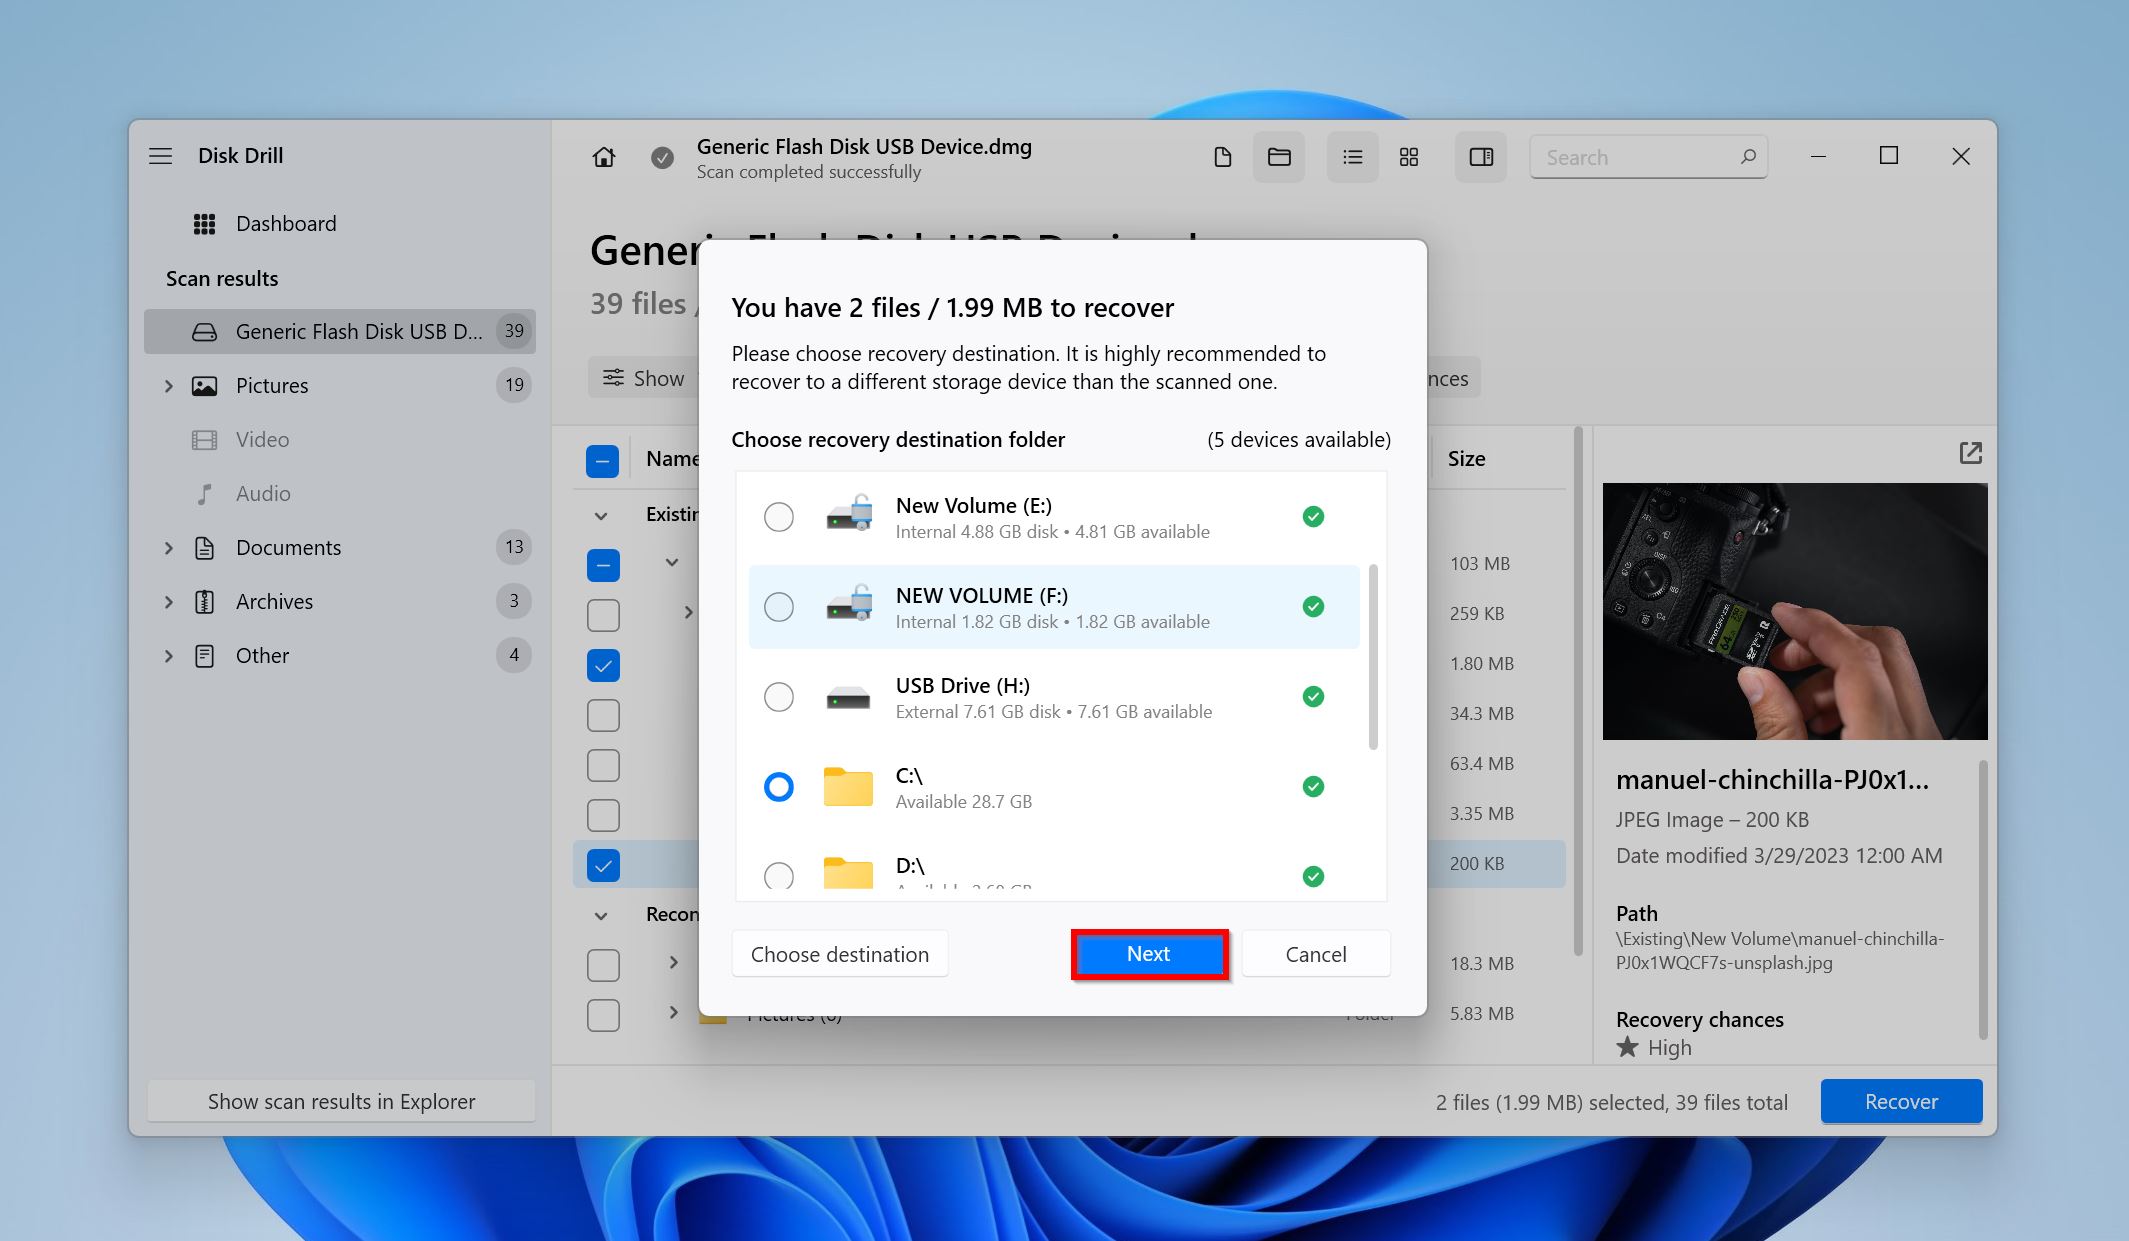
As demonstrated, Disk Drill makes it easy to recover external hard disk data when it is not detected, so long as the hard drive is readable and accurate in Disk Management.
Method 2: Repair Using CheckDisk
CheckDisk is a repair utility included with Windows that specializes in fixing various hard drive-related problems. It’s highly customizable, allowing you to add or redact parameters based on what you want to achieve.
Follow these instructions to repair your external hard drive using CheckDisk:
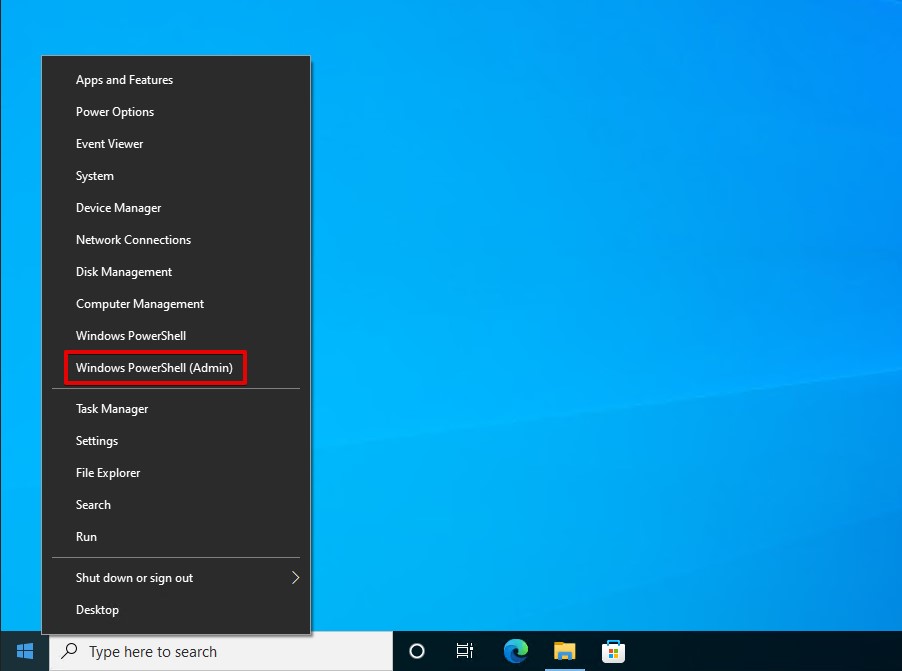
- Right-click Start, then click Windows PowerShell (Admin).
- Type
chkdsk D: /f /r. Replace D: with the letter assigned to your external hard drive. Press Enter.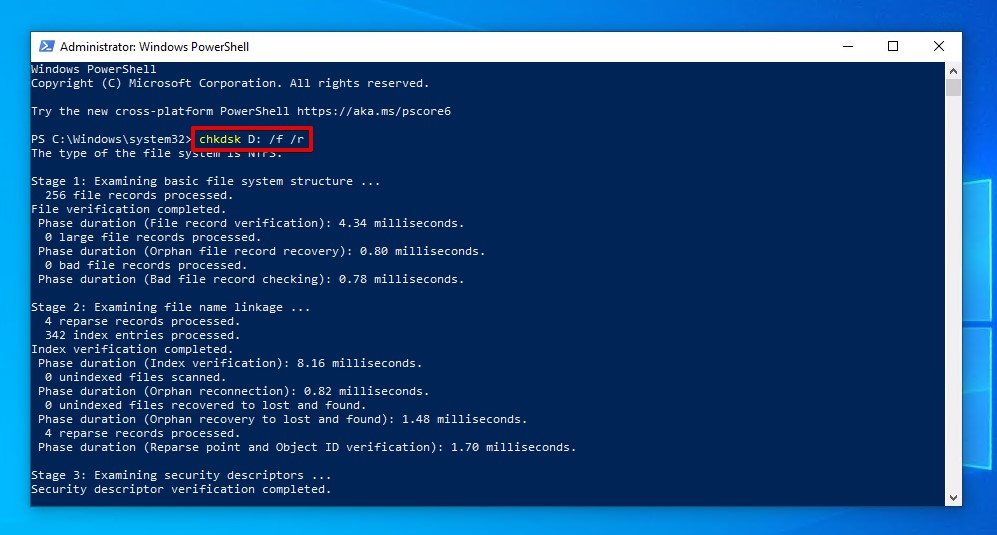
Method 3: Change the Drive Letter
As unlikely as it sounds, changing the drive letter assigned to your external hard drive has the potential of fixing it. There’s also a chance that a drive letter wasn’t assigned. Windows uses drive letters for any attached storage to assign paths.
This method will guide you through changing the existing drive letter, or assigning a new one:
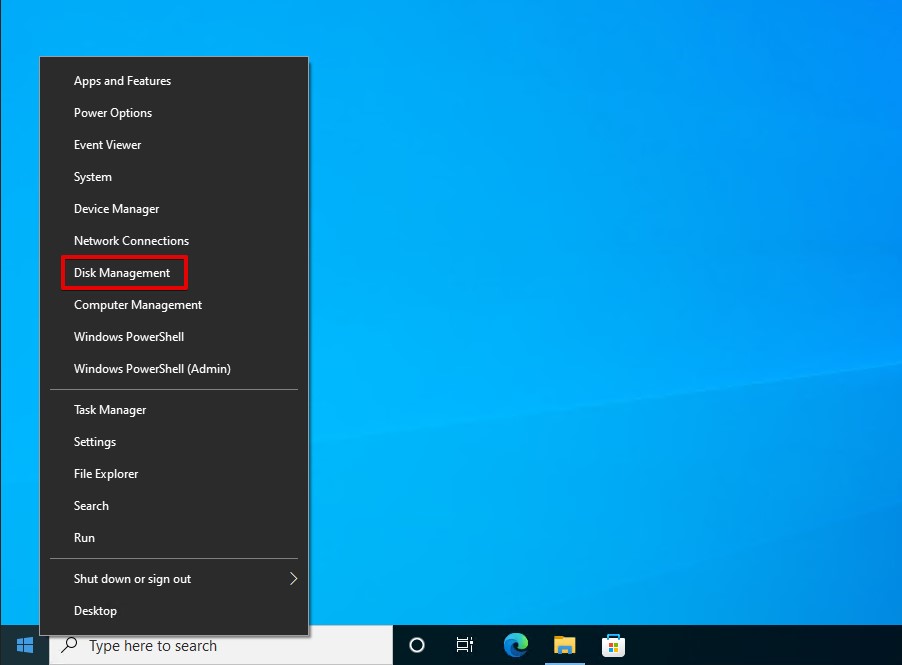
- Right-click Start, then select Disk Management.
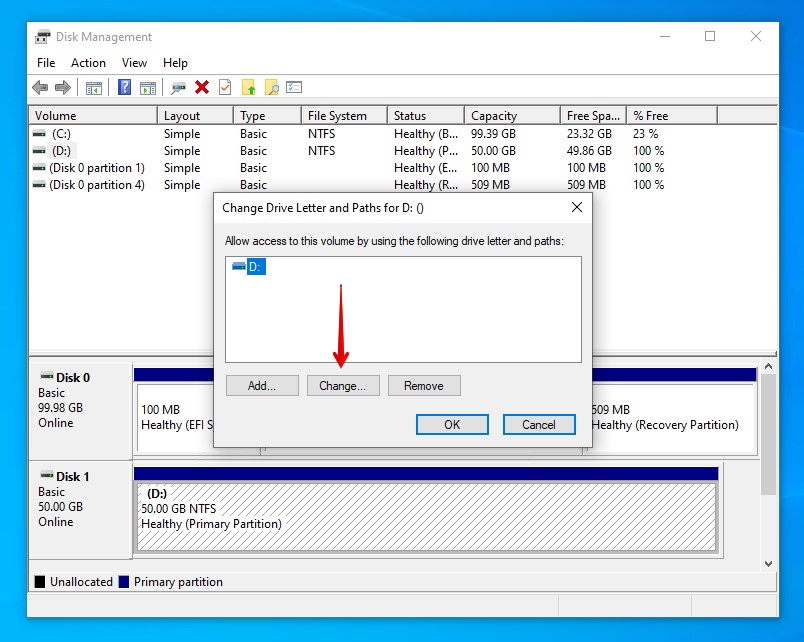
- Right-click the partition of your external hard drive, then select Change Drive Letter and Paths.

- Click Change. If there is no drive letter, click Add instead.
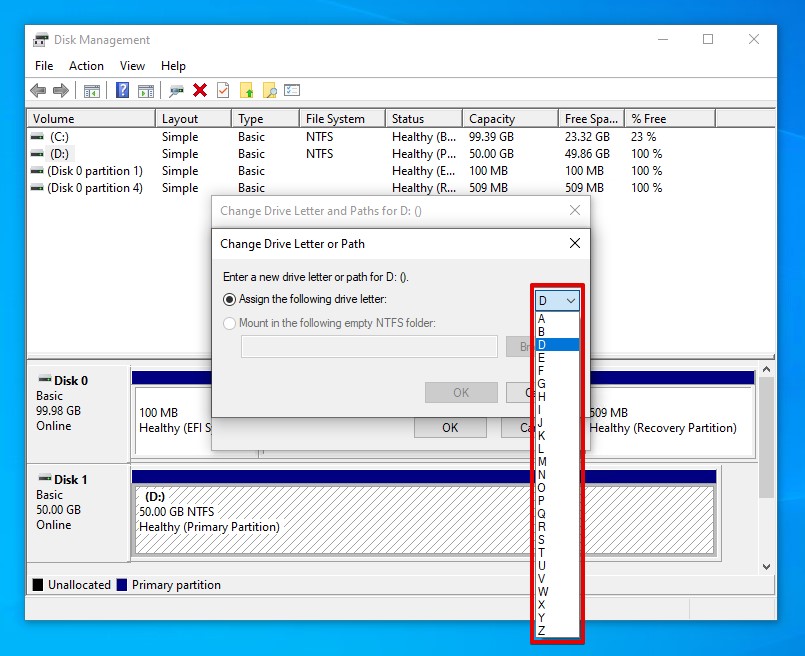
- Select a new drive letter from the dropdown, then click OK. Click OK again to finalize.
Method 4: Format the External Hard Drive
Formatting involves removing the existing file system on your external hard drive and either refreshing it or replacing it with a new one. This process will delete any data that’s present and should only be done if you’ve created a backup of the data or you’re prepared to lose it.
These steps will show you how to format an external hard drive:
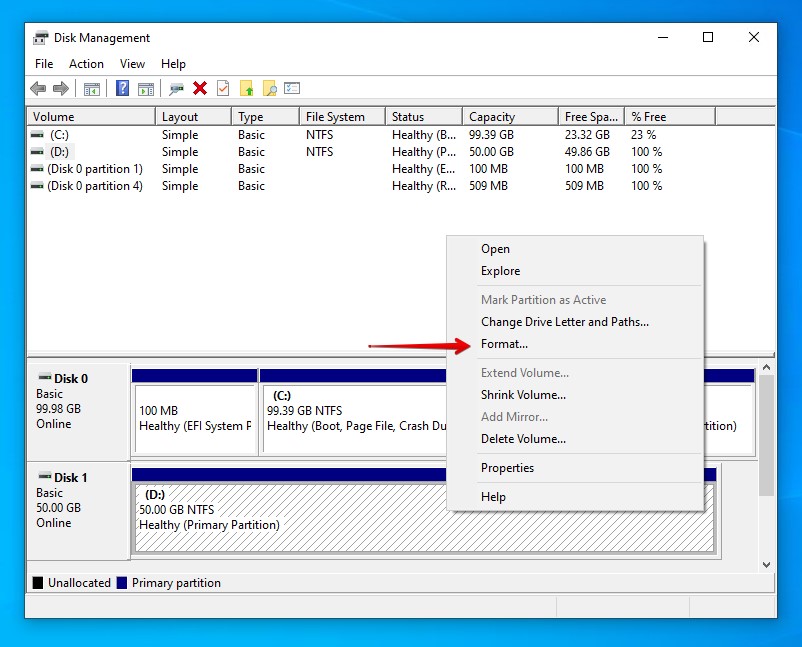
- Right-click Start, then select Disk Management.
- Right-click the partition of your external hard drive and click Format.
- Make sure NTFS is selected and Perform a quick format is ticked. Click OK.
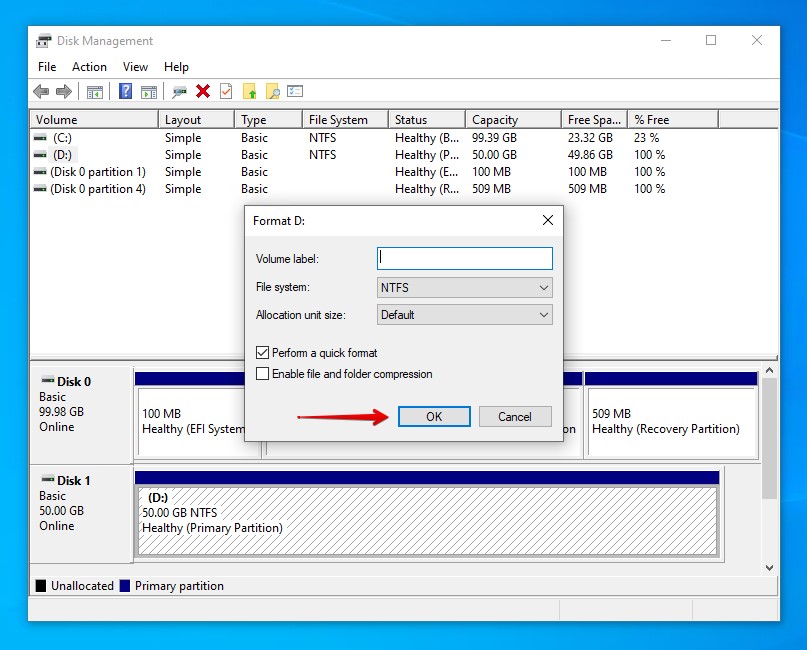
- Click OK again to confirm.
Fixes for External Hard Drives That Aren’t Visible at All
If your external hard drive isn’t visible in Disk Management, the damage may be more severe. In such cases, you have limited options.
Method 1: Recover Data Using a Data Recovery Service
Before you move on to fixing your drive, you should first employ a data recovery service to ensure your data is safe before taking further action. They have the ability to recover files from an external hard drive that’s not detected with a higher degree of success by using industry-grade equipment in an ideal environment. Moreover, they have the expertise necessary to identify the issue and diagnose it.
These steps will show you how to recover data from an external hard drive that’s not recognized by completing a data recovery center work order:
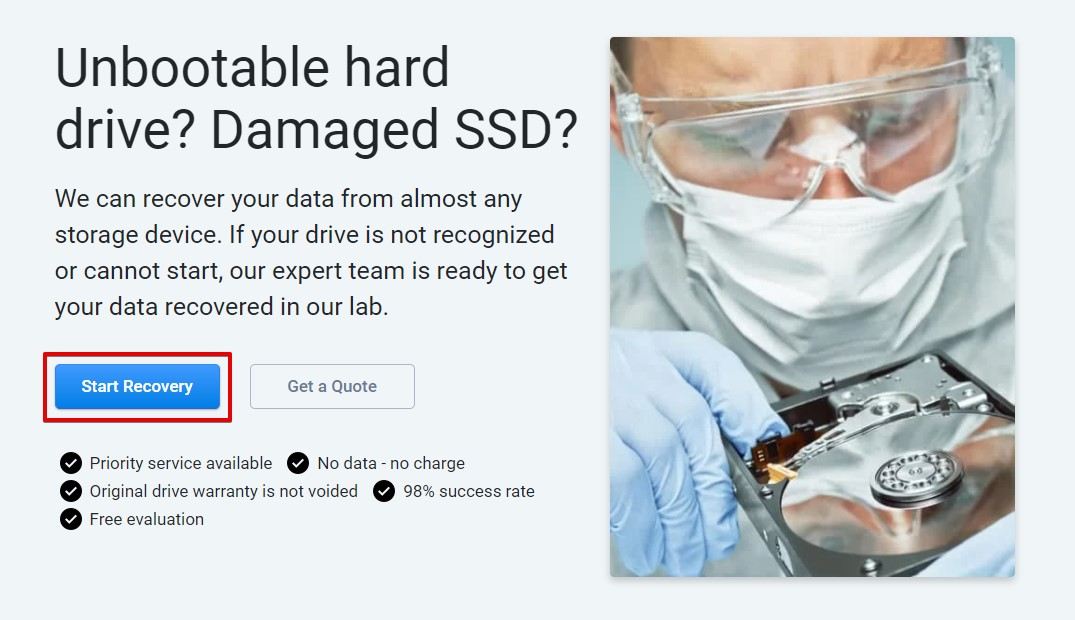
- Open the Data Recovery Center website and click Start Recovery.
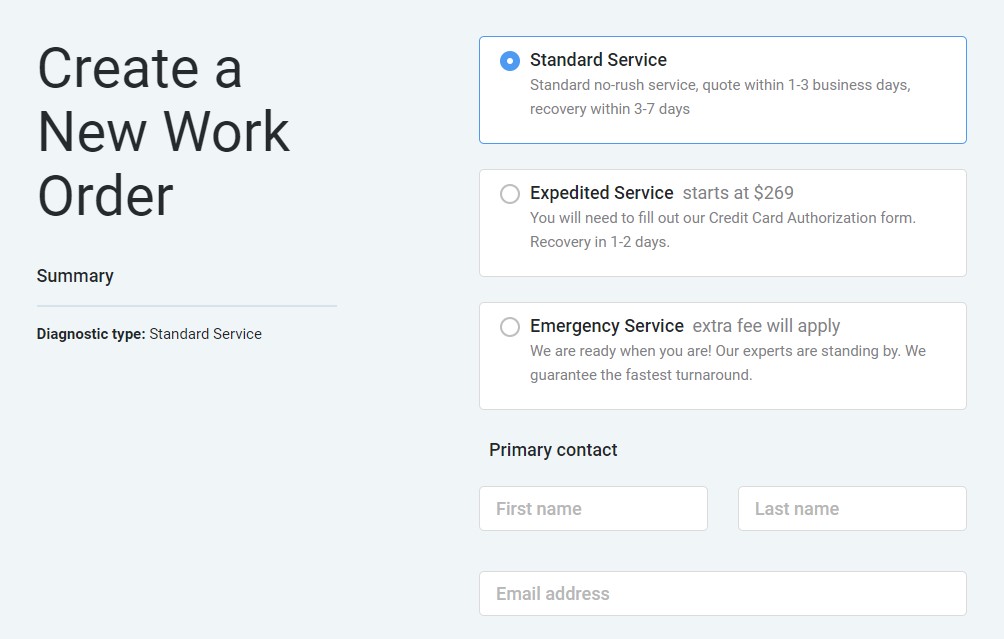
- Choose the type of service you require and begin to fill in your information.
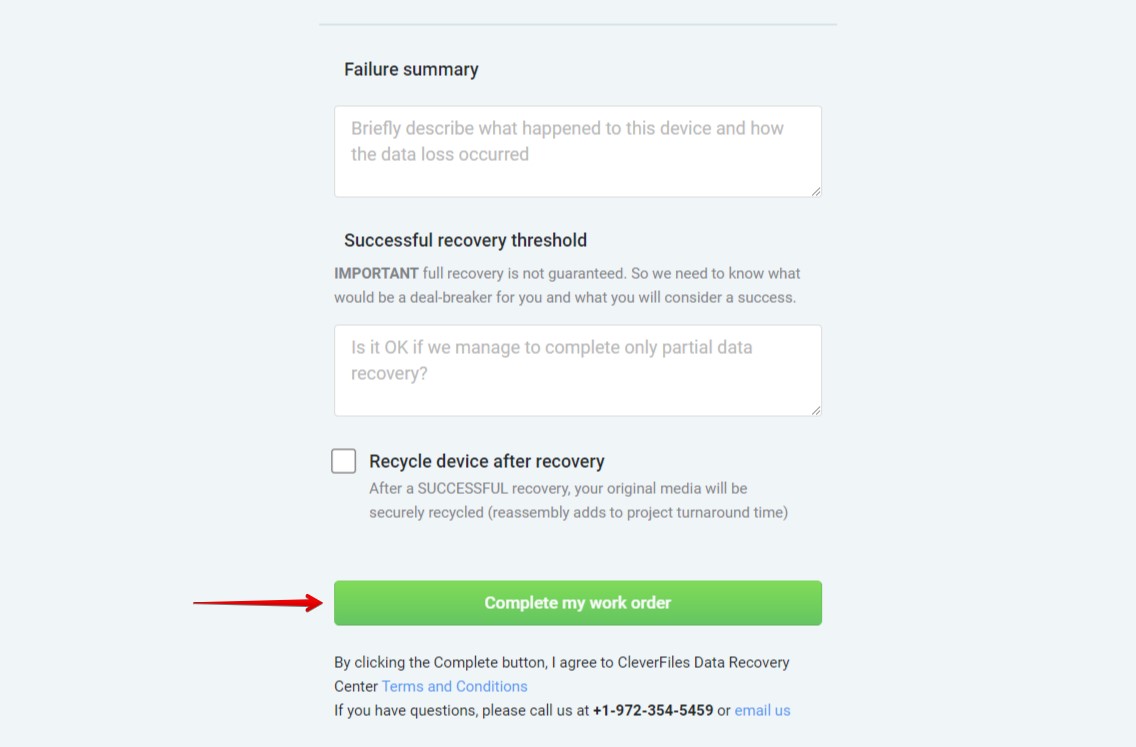
- Click Complete my work order when ready to submit.
Method 2: Update the Drivers
As we mentioned earlier in the article, drivers are critical in establishing and maintaining communication between your external hard drive and your Windows computer. Without them, your external hard drive is unusable.
These steps will show you how to update your external hard drive’s drivers:
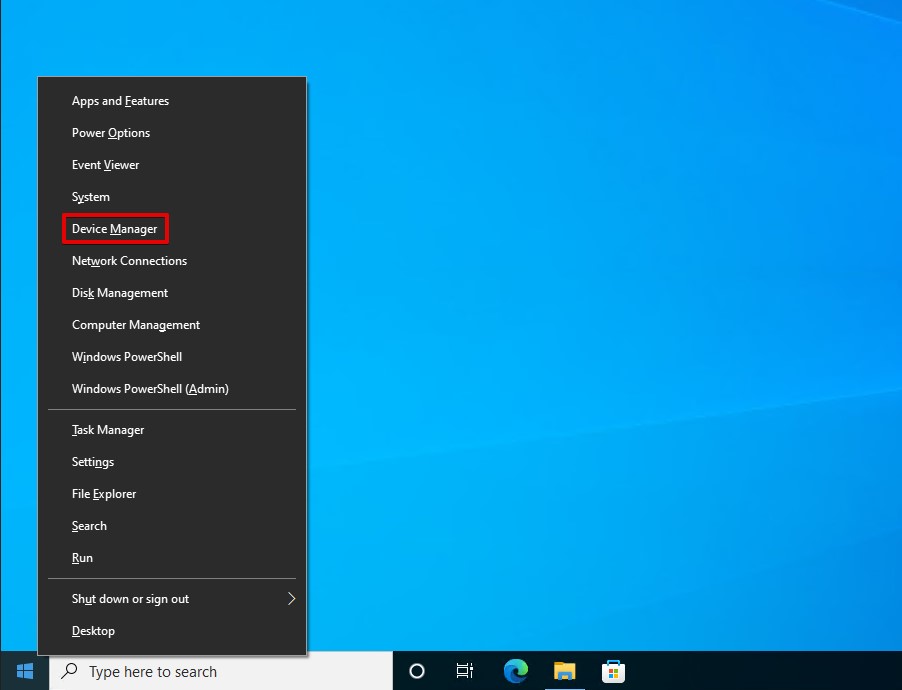
- Right-click Start and select Device Manager.
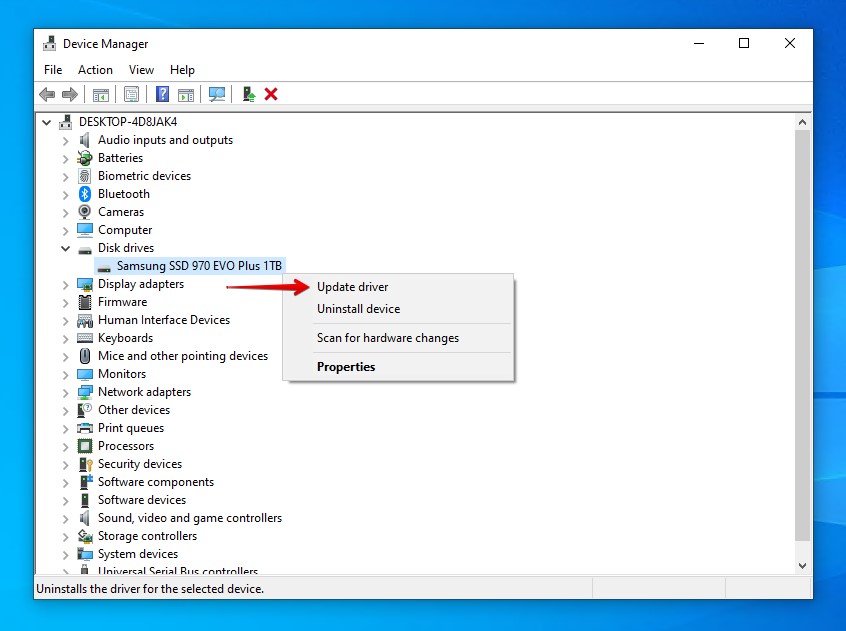
- Expand the Disk drives drop-down. Right-click your external hard drive, then click Update driver. If your drive doesn’t appear in the list, it may appear as an unknown device in the Other devices dropdown.
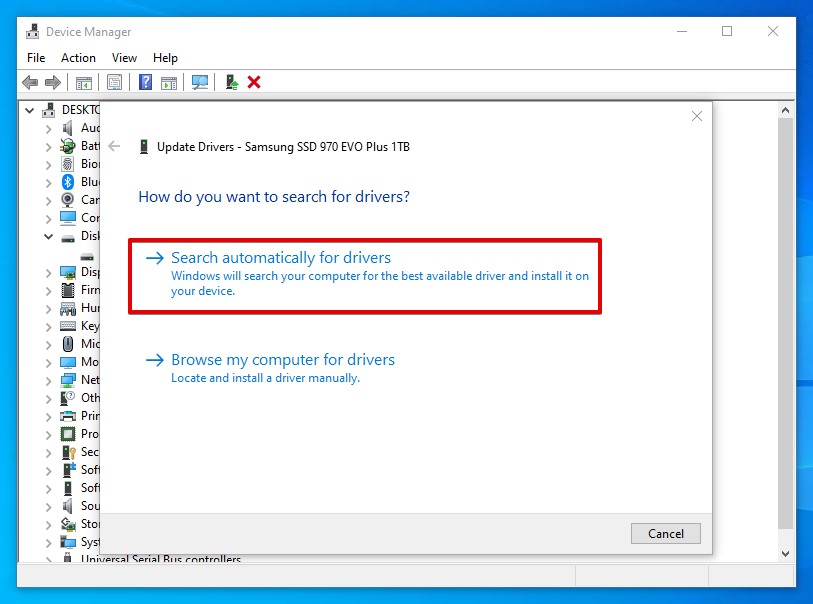
- Click Search automatically for drivers.
Bear in mind that these instructions are useful only if the drive is visible in Device Manager. If it’s not, then you should check your hard drive manufacturer’s website for up-to-date drivers, as they can be installed manually.
Method 3: Connect With a Different Cable
Of course, it could be as simple as a faulty cable. If you’ve tried connecting your external hard drive to another computer and it’s still not working, try switching out the cable that you’re using to connect with.
Additionally, check the connection point on your external hard drive to ensure the pins aren’t bent out of place. You can also inspect it for any foreign debris, like lint or dust, as it could be preventing a stable connection.
Method 4: Enable External Drive in BIOS
Your external hard drive may not be appearing because the USB port it’s connected to is disabled in your BIOS. You can turn the port on in your BIOS, but the exact steps will vary depending on your motherboard’s manufacturer. Here are some general steps you can take:
- Turn off your PC.
- Turn the computer press the BIOS key to enter your BIOS. Use this list if you don’t know which key to press.
- Find USB Configuration.
- Make sure the Enable External USB Port option is ticked, then save and exit.
If you can’t figure out how to enable your USB ports in the BIOS, you can always reset the BIOS settings to default. This can be done within the BIOS, or by turning your computer off, removing the CMOS battery for 10 seconds, then reconnecting it and booting the computer again.
Conclusion
An undetected external hard drive is typically caused by premature drive removal, corruption, outdated or corrupted drivers, or physical damage. In most cases, the data itself will still be fine, though you won’t be able to access it.
If the external hard drive is visible in Disk Management and reading the correct capacity, you should recover the data from it, then repair it by running CHKDSK, changing the drive letter, or formatting it using a quick format. If the drive isn’t appearing, you can recover the data using a data recovery service instead, or attempt to fix the drive by updating/reinstalling the drivers or enabling the USB port in your BIOS.
Once your data is restored, we recommend setting up a backup schedule to ensure a safe copy of your data is always available in case another data loss event occurs in the future.
FAQ
- The cable is faulty and needs to be replaced.
- The port is blocked, preventing a secure connection.
- The USB or SATA port you’re connecting to isn’t enabled.
- A physical component is broken.


