 Whether you’ve accidentally deleted a wrong file from the external hard drive or the data disappeared by itself because of file system corruption, drive damage, or any other reason, don’t panic just yet. If your file hasn’t already been overwritten and is still physically present on the device, you have a good chance of successfully restoring it.
Read on to learn about the quickest and most effective ways to recover data from an external hard drive on a Mac.
Table of Contents
How to Recover Deleted Files from an External Hard Drive on Mac
In this section, we’ll demonstrate different methods to recover deleted files from your external hard drive. The method that works for you depends on how your Mac is set up, what caused the data loss, and whether or not you have any backups.
To give yourself the best chance of successfully getting your files back, make sure that you stop using the drive until you’ve gone through the guides below and you’re ready to attempt recovery. This prevents your system from potentially overwriting the missing data.
Method 1: Check Trash on the External Device
In case you didn’t know, when you delete a file from an external hard drive on your Mac, it gets moved to the Trash folder (just like when you delete any other file from your Mac’s main drive). If you eject the drive from your computer, the deleted file will also disappear from the Trash. But as soon as you connect the hard drive back to your Mac, it will reappear.
Note: If you’ve configured Trash on your Mac to automatically remove the deleted files, the data you’ve deleted from the external hard drive will also get permanently erased after 30 days.
Follow these steps to recover files from an accidentally erased external hard drive on a Mac via Trash:
- Connect the external hard drive to your computer.
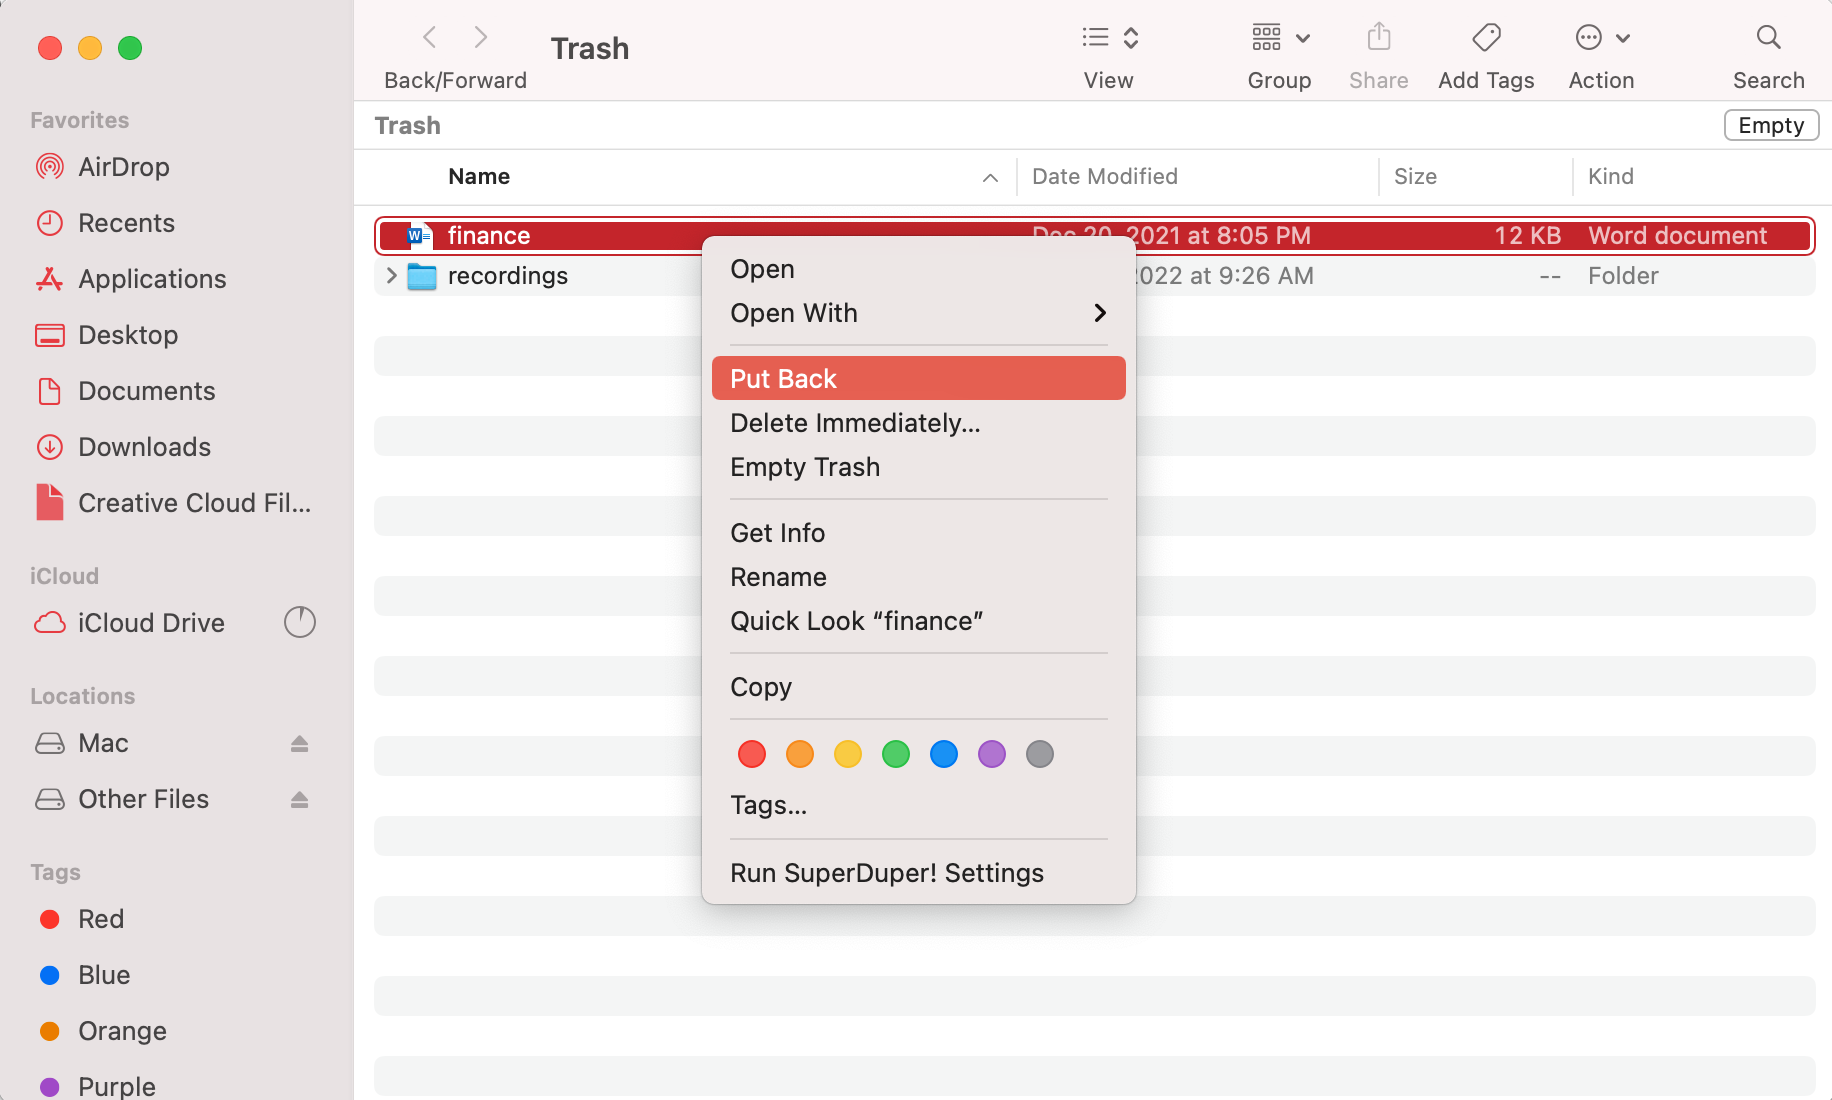
- Open the Trash folder (click the last icon on the Dock).
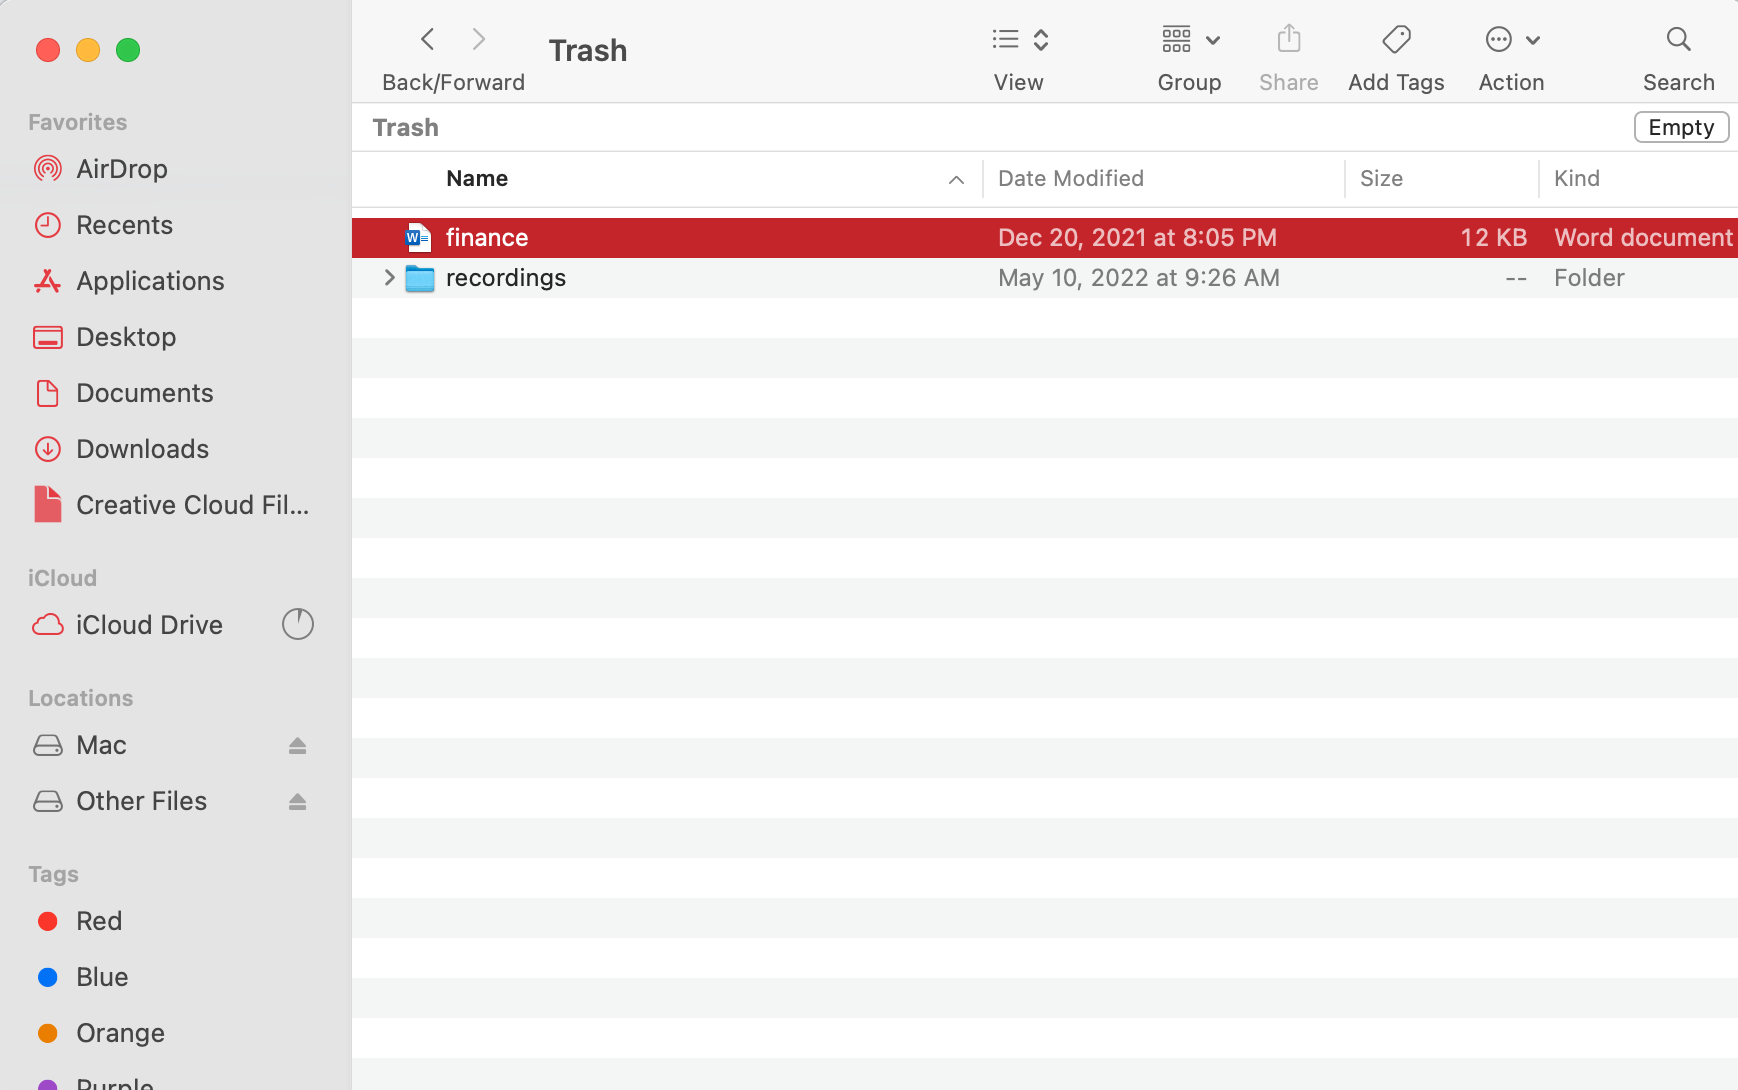
- Look through the deleted files to find the needed one.
- Right-click the file and choose Put Back from the drop-down menu to place the file back in its original location. Or drag and drop the file into any drive or folder.
Alternatively, you can enable hidden folders on your external hard drive and access the deleted files directly from there. Here’s how to do it:
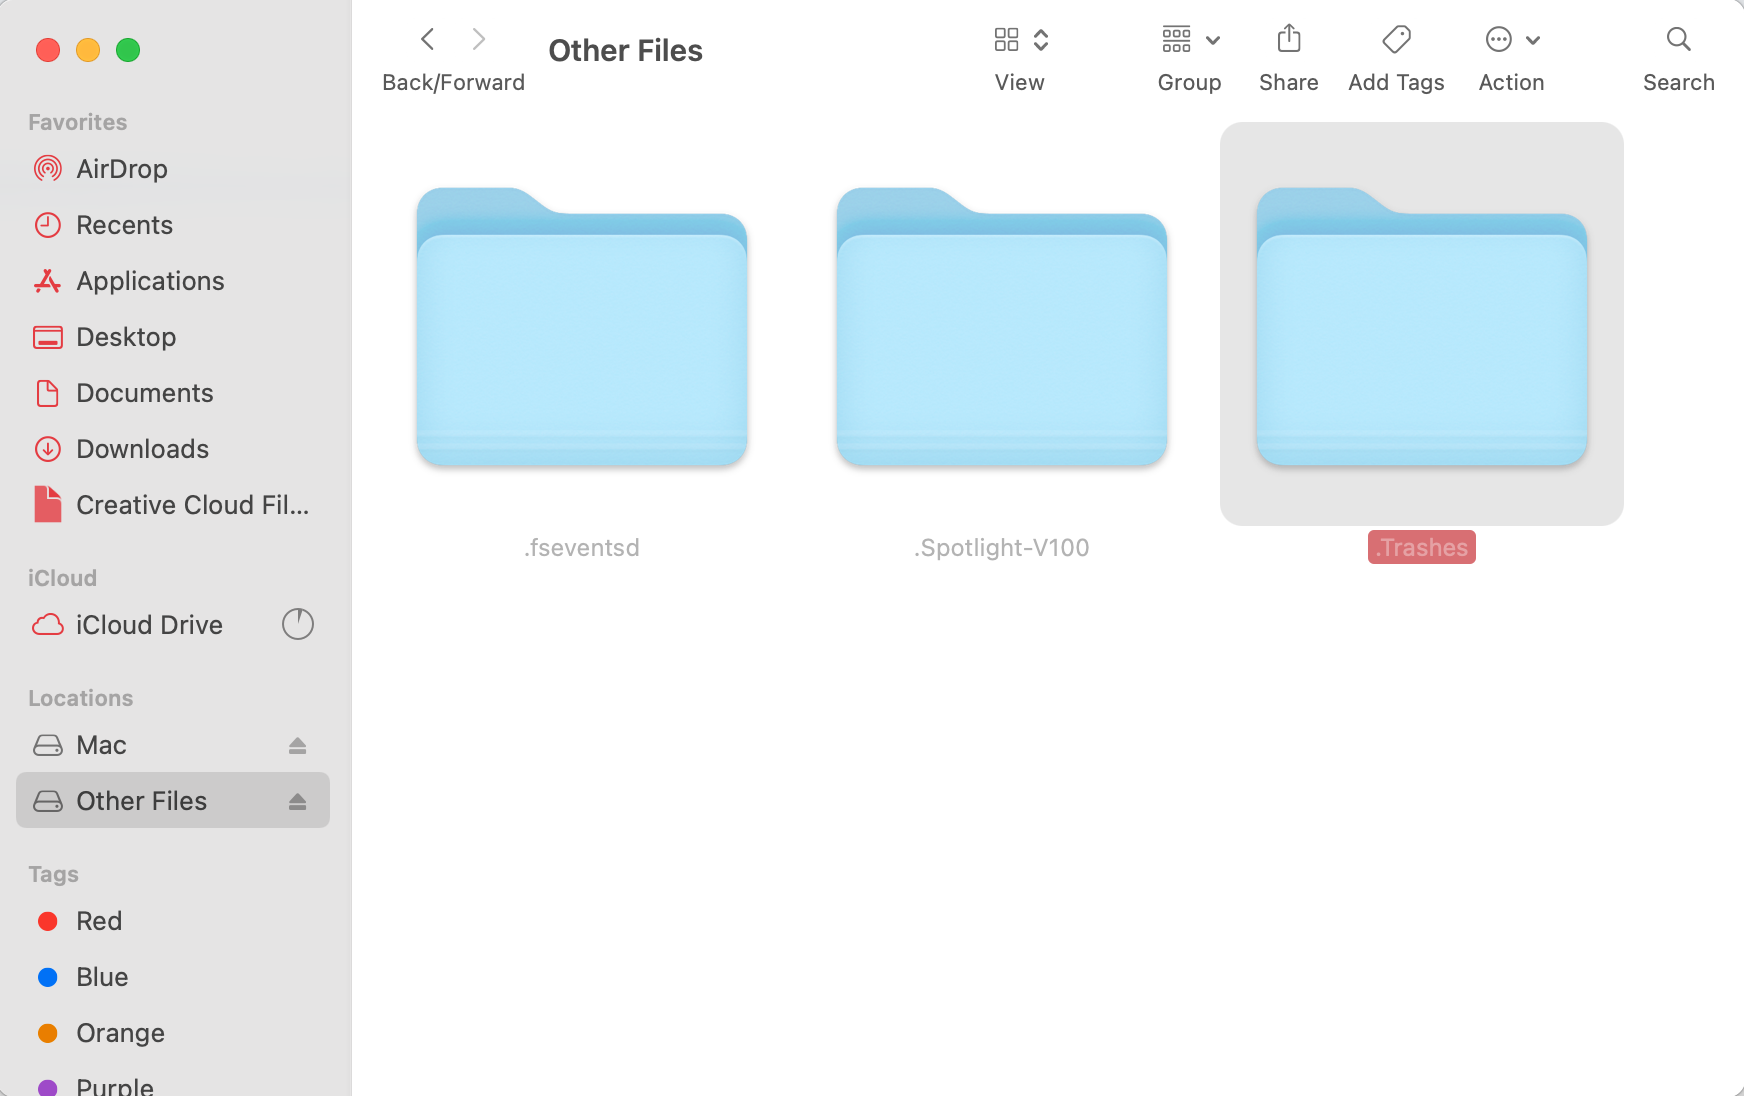
- Connect the external hard drive to your computer and open it through Finder.
- Press the following key combination: Shift + Command + .
- Open the .Trashes folder and look for the deleted file.
- If you need to change the folder permissions to open it, right-click the folder and choose Get Info from the drop-down menu. Click Sharing & Permissions and change your user privilege to Read and Write.
- Look for the deleted file and drag and drop it into a different folder.
Method 2: Use Data Recovery Software to Retrieve the Files
The other method that can help you to recover files from an external hard drive on a Mac is to use data recovery software. Such an application should be able to successfully recover the lost data from an external hard drive, but only in one condition — if the deleted files haven’t been already overwritten with new data.
If you’re unsure of what data recovery tool to use, give Disk Drill a try. It’s suitable for all computer users since it has an intuitive interface and a simple navigation system. It supports over 400 file formats, so you can be sure that this tool can handle restoring all of your lost data.
If your storage device is in a working condition and is recognizable by your computer, follow these steps to recover deleted files from the external hard drive on your Mac using Disk Drill:
- Download Disk Drill and follow the onscreen instructions to install the app.
- Launch the application (go to Finder > Applications > Disk Drill).
- Connect the external hard drive to your computer.
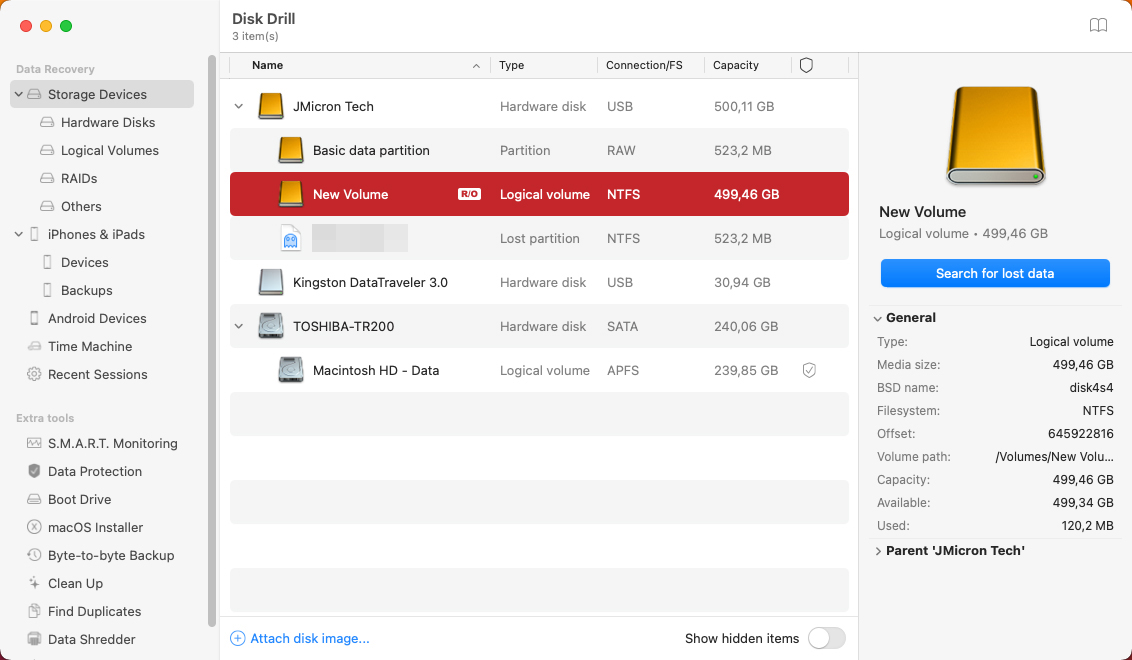
- Choose the drive from the list of available devices and click Search for lost data.
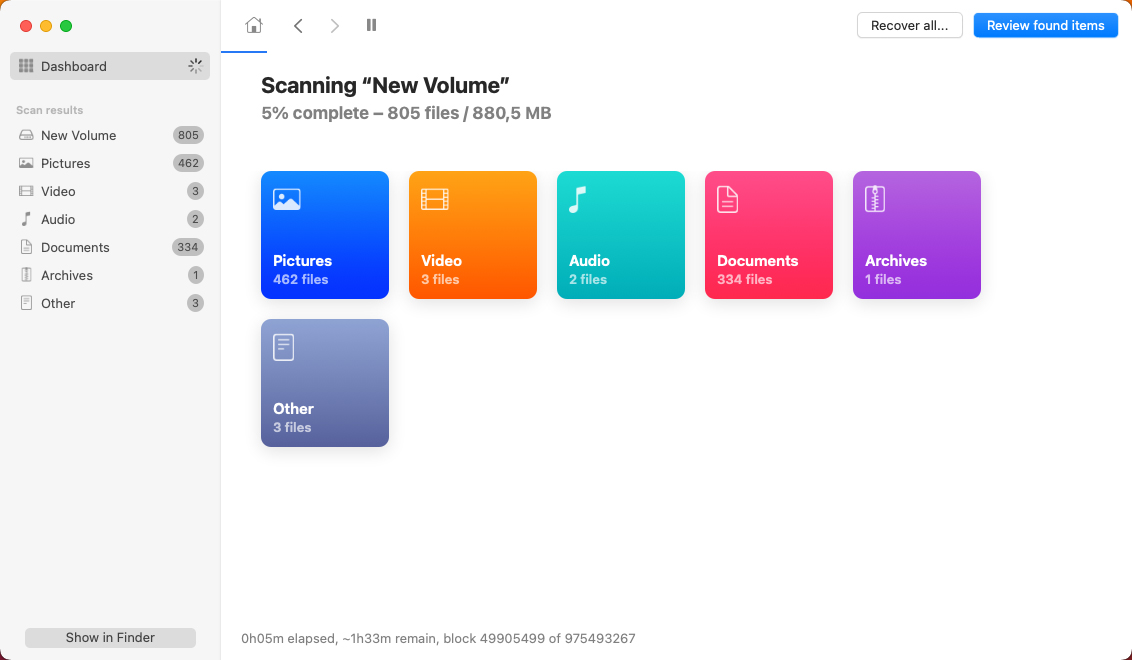
- Wait for the scan to finish and click Review found items.
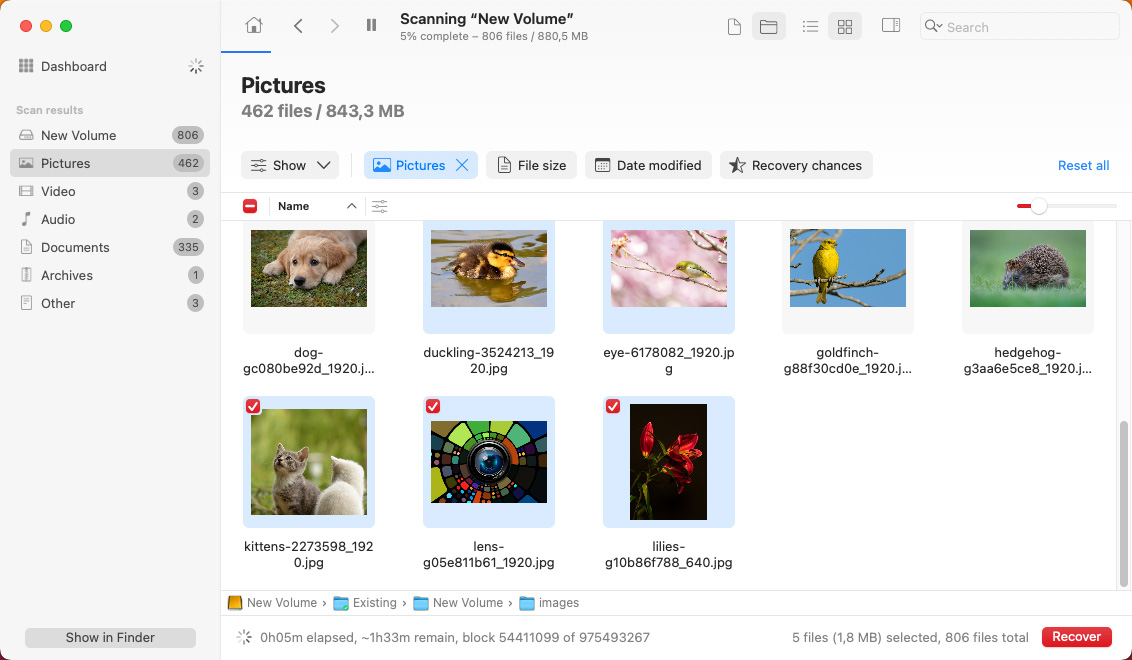
- Use the sidebar on the left to narrow down your search to specific file types.
- Select the files that you want to restore and click the Recover button on the bottom right. You need to upgrade to Pro version to recover the files, with free version you can only preview them.
- Choose a preferred folder for your recovered files (make sure that it’s not located on your external hard drive) and click Next to confirm.
But in case your external hard drive has severe issues and fails to mount for recovery, it’s better to create a byte-to-byte backup image and use it instead to recover your data. It will minimize the possibility of your drive failing altogether and increase the chances of successfully recovering the needed files.
Here’s what you should do to restore external hard drive on a Mac:
- Connect the external hard drive to your Mac.
- Launch Disk Drill.
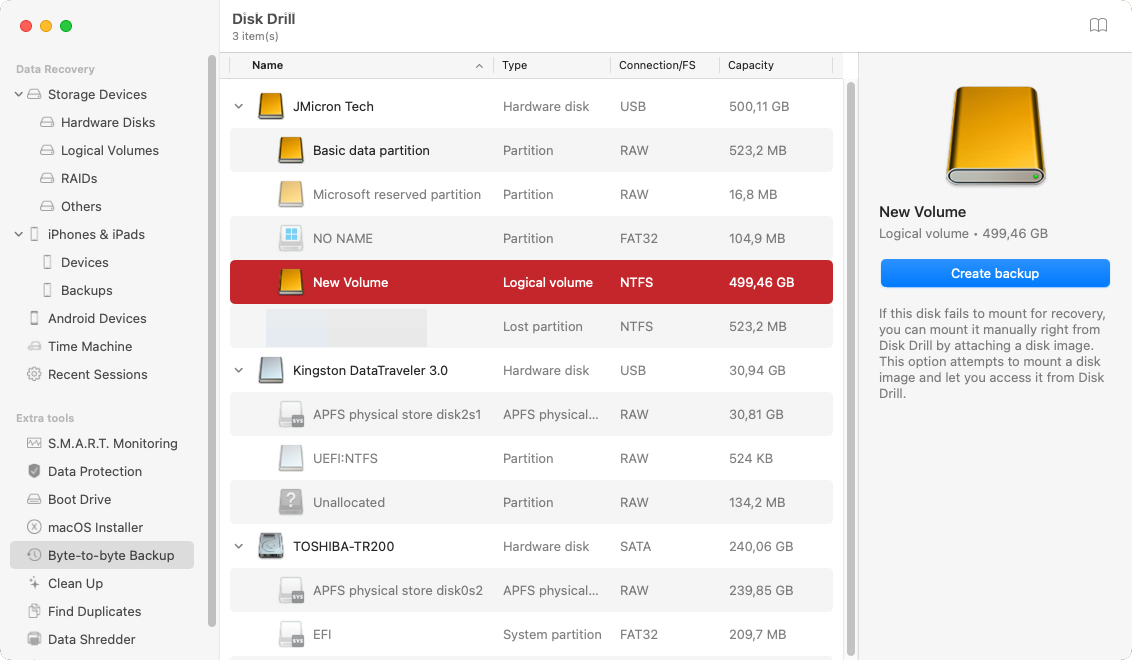
- Choose Byte-to-byte Backup from the list on the sidebar.
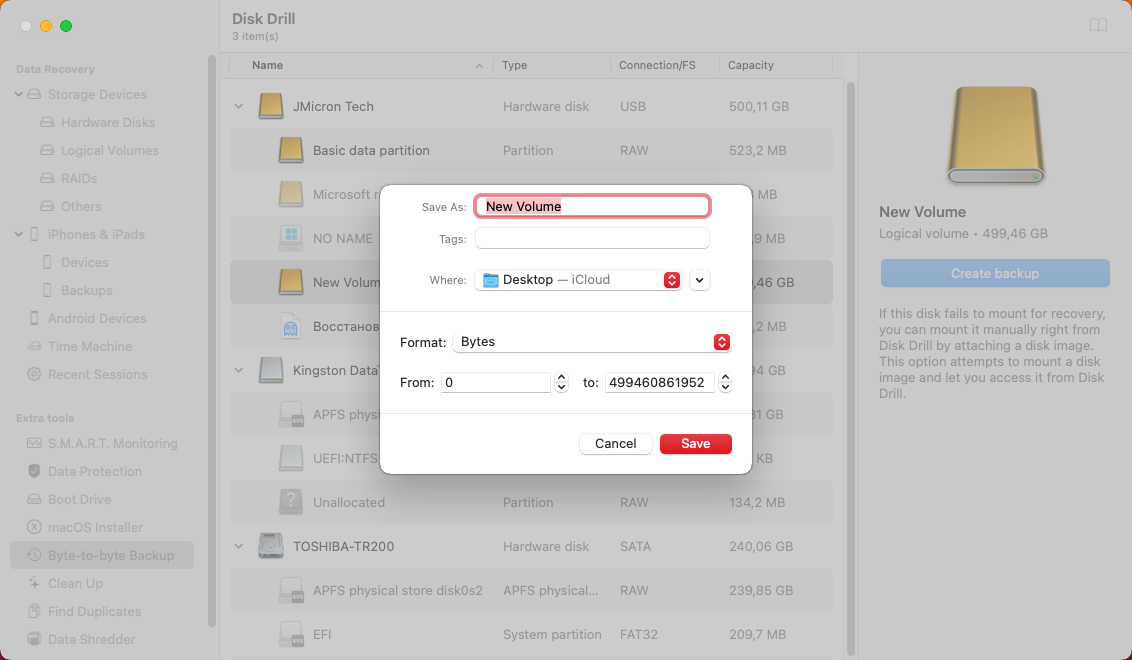
- Click your external hard drive to select it and click the Create backup button on the bottom-right of the screen.
- Type in a name for the backup and choose a preferred location. Click Save to confirm.
- Once the process is finished, eject your external hard drive.
- Choose Storage devices from the sidebar on Disk Drill and click Attach disk image at the bottom of the screen.
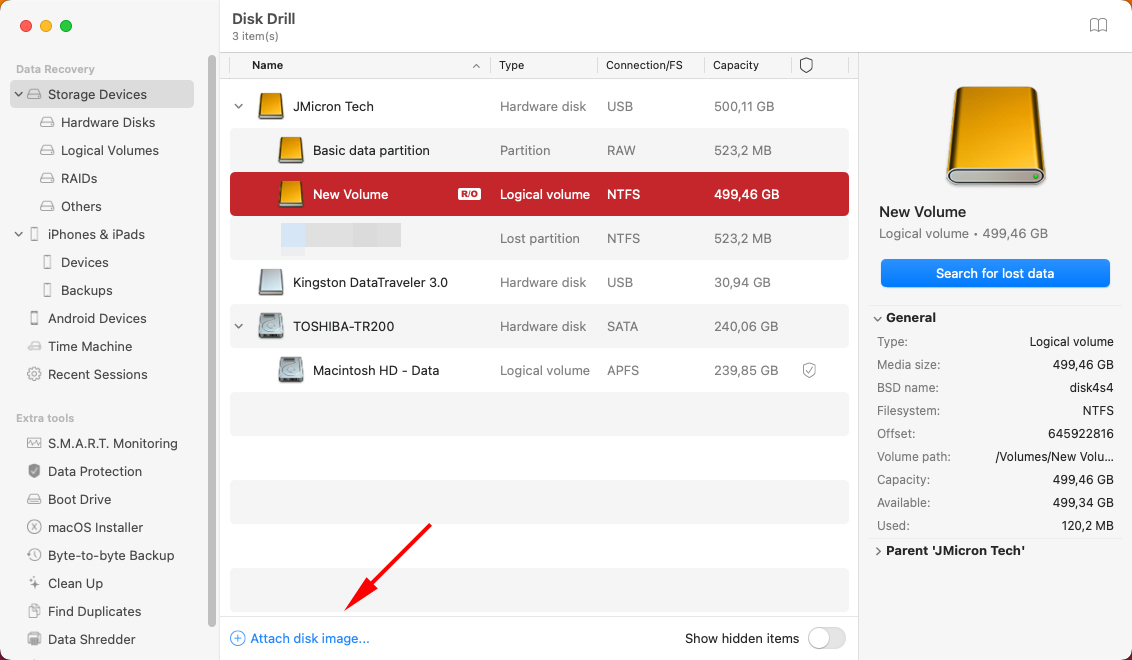
- Choose the DMG backup file you’ve previously created and click Search for lost data.
- Follow the data recovery instructions described above (steps 5-8).
Method 3: Recover Data from Backup
While it’s unlikely you created a Time Machine backup for your external drive, you may have other types of backups of your data available. They may not even be immediately obvious, so try to recall as much information about your files as possible. Did you receive it from a contact? Which app did you use to create or save the file? Did you upload your data anywhere?
To help you jog your memory, here are common locations where you may find copies of your data:
- Cloud backups – Cloud backup services like iCloud and Google Drive let you upload files to a cloud server, which you can access from any device. Even if you deleted your files from your external drive, the data may still be on the server.
- Message history – If the files you saved were originally received as attachments to messages, the files should still be on the server of the specific messenger app you used. You’ll just have to backread your messages to find the attachments.
- Mail history – Similar to messages, mail attachments are saved to the mail app’s online server and remain there even if you’ve already downloaded them. If you’re able to locate the right email, you can download the attachments again.
- App tools – Certain apps like Pages have utilities that directly and indirectly create copies of your files. Examples of such utilities are Revert To, Restore Previous Version, and Autosave. These utilities may also produce copies of your files on your Mac’s Temp folder.
Method 4: Get Help From a Data Recovery Service
If the options described above didn’t bring any results, you can send your external hard drive over to a data recovery service and let professionals take care of the issue. Without any doubt, our recommendation is the Cleverfiles Data Recovery Center since they offer a free evaluation of your drive and have a no data – no charge policy.
Here’s how to recover external hard drive on a Mac with the help of a data recovery service:
- Contact the chosen data recovery center and describe your issue.
- Send your external hard drive over to the lab.
- Get a price quote from the data recovery professionals.
- If you agree with the price, the center will start the data recovery process.
- Receive the recovered data on a new storage device.
How to Repair an External Hard Drive on Mac
Once you’ve secured your data using one of the methods in the last section, you can now safely attempt to repair your drive. In the sections below, we prepared step-by-step guides for 4 different methods for DIY drive repair (all 4 methods are completely free, and most of them use built-in tools).
However, before proceeding, physically inspect your drive for external damage. While the DIY repair methods below are effective for logical damage, such as corruption, physically damaged drives should only be handled by professional technicians.
Caution: Even then, physically damaged drives should no longer be used – repair attempts are for the sake of data recovery only.
Method 1: First Aid in Disk Utility
A native tool called Disk Utility can check and repair any disk connected to your Mac. Of course, it won’t do miracles, but it sure can deal with some basic issues such as file corruption or formatting.
Follow these steps to repair an external drive on your Mac using Disk Utility:
- Launch Disk Utility (open Launchpad and type Disk Utility in the search field).
- Choose your external hard drive from the list of devices on the sidebar.
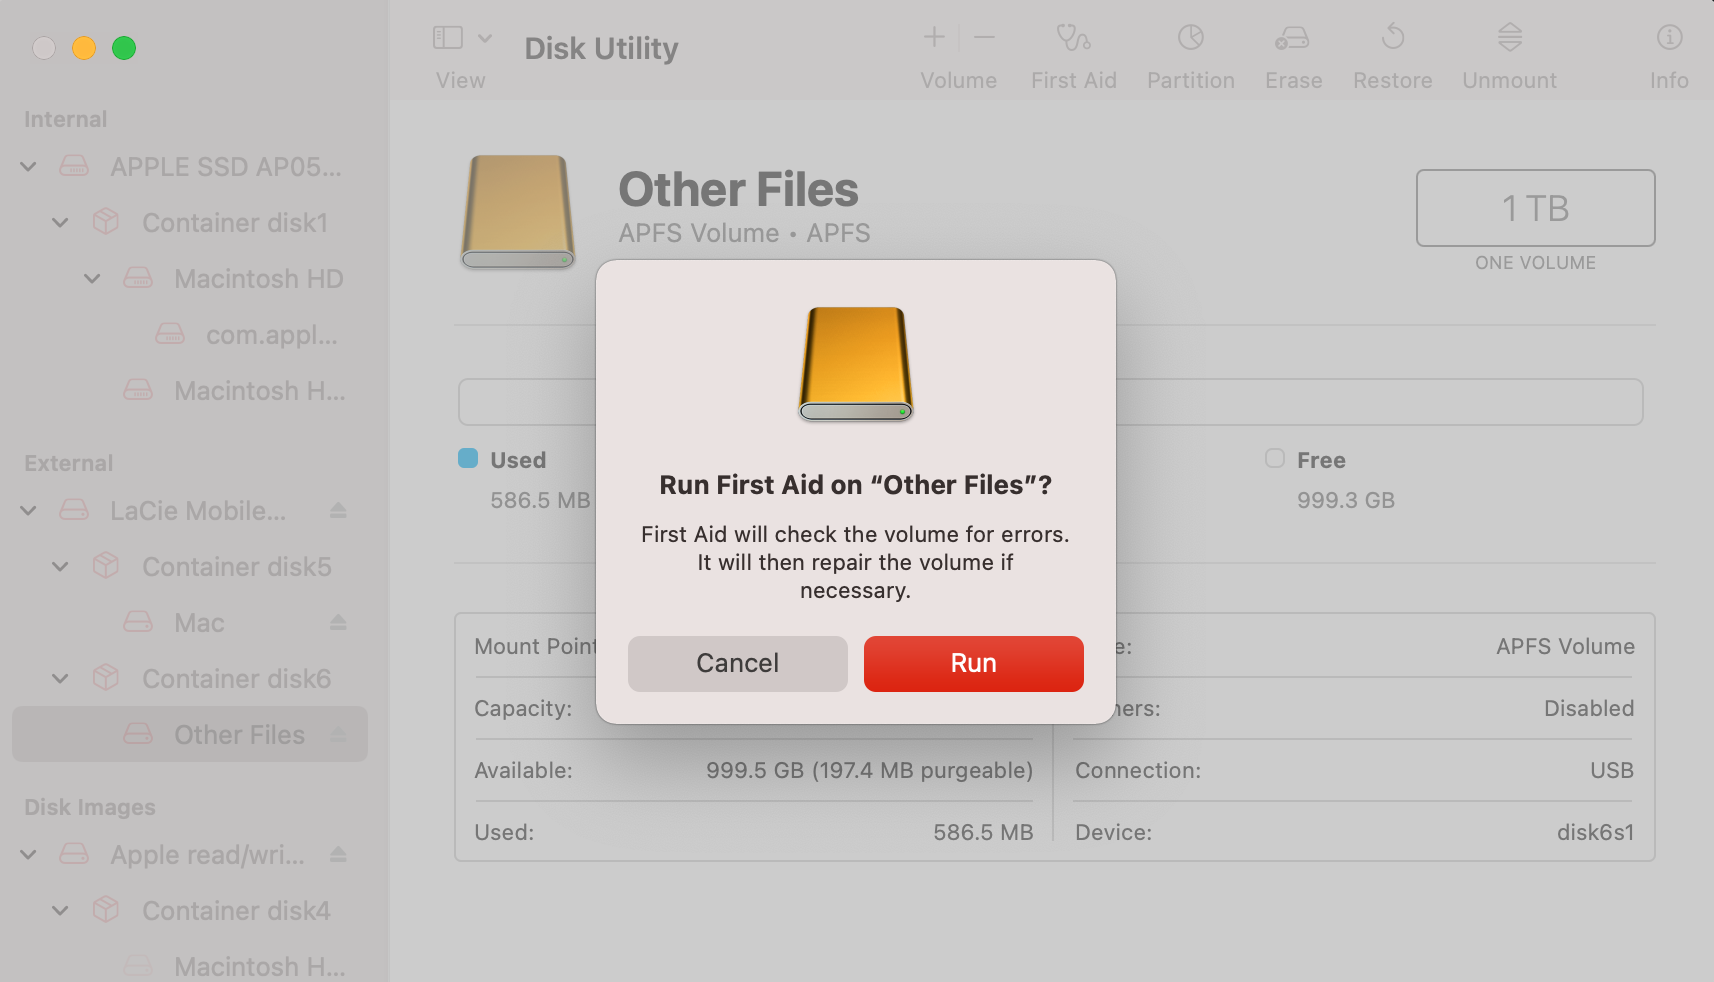
- Click the First Aid button at the top of the window.

- Click Run to confirm.
- Once the process is finished, click Done.
Method 2: FSCK Command
FSCK, also known as File System Consistency Check, is a command that can help you repair any inconsistencies in the file system of your external hard drive. To use it, you’ll need to launch the Terminal app and then boot into the Single User Mode.
Follow these steps to repair an external drive on your Mac using the FSCK command line:
- Open Terminal (go to Launchpad and type Terminal in the search field).
- Type in the following command and hit the Return key:
diskutil list
Find your external drive on the list and note its identifier path (it should be similar to /dev/disk3).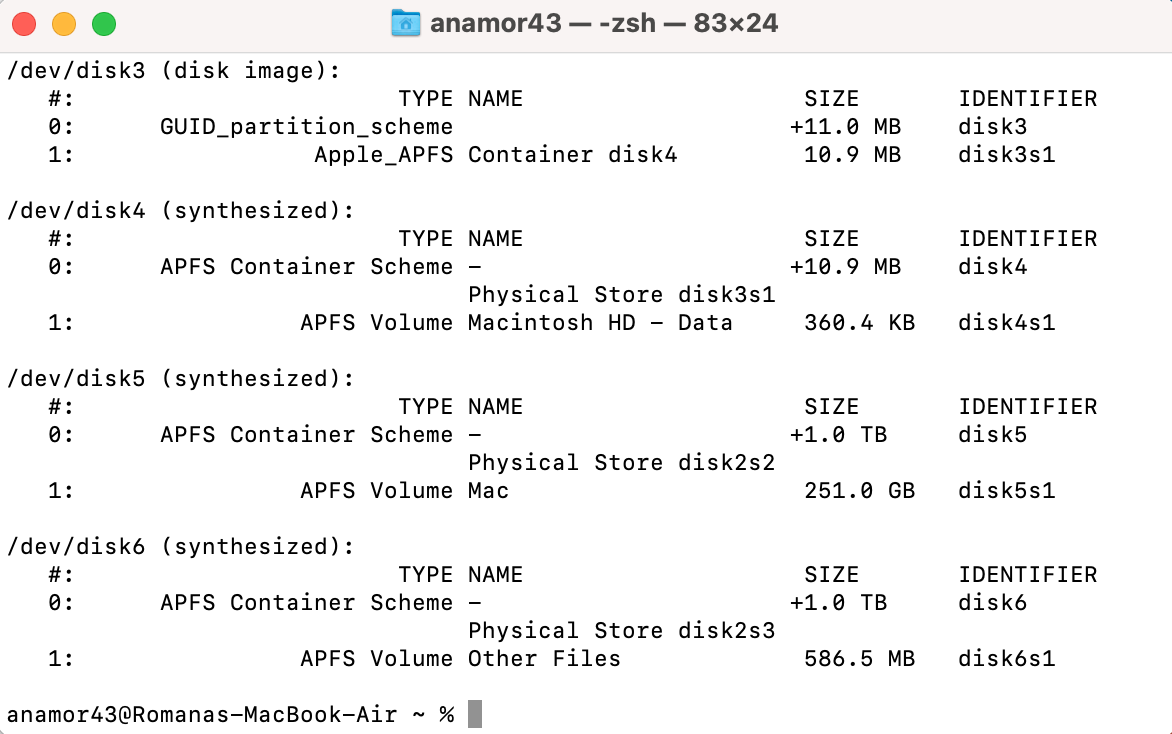
- Restart your Mac and immediately press and hold the Command + S keys to boot into the Single User Mode.
- Type in the following command and hit the Return key:
/sbin/fsck -fy - Then type this command and hit Return:
/sbin/fsck -fy /(your drive’s identifier path) - When the process is finished, type in
rebootand hit Return. - Restart your Mac.
Method 3: Format the External Drive
If the above-described methods weren’t useful, the last thing that you can try is to format your external hard drive. But before moving forward with this solution, make sure that you’ve created a backup of the data stored on your drive since once you format it, all of the files and folders will get erased.
Follow these steps to format an external hard drive on your Mac:
- Launch Disk Utility (open Launchpad and type Disk Utility in the search field).
- Click on your external drive on the sidebar on the left to select it.
- Click the Erase button at the top of the window.
- Type in a name for your drive, select a preferred format and a partition scheme type.
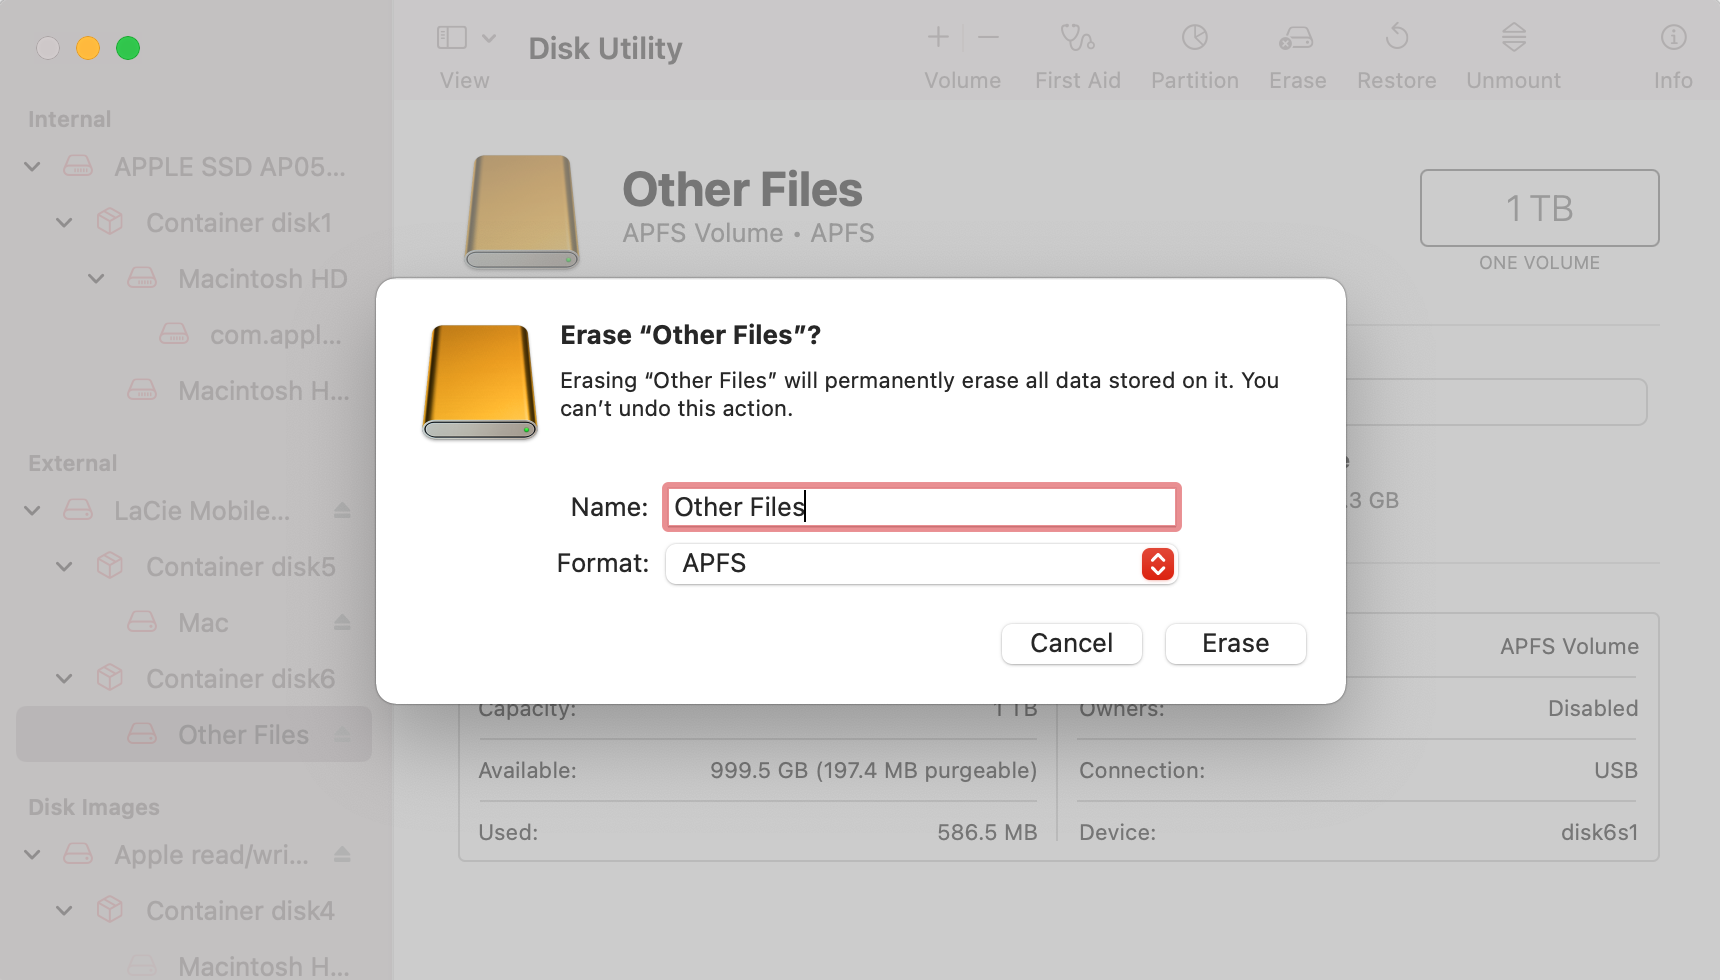
- Click Erase.
Method 4: Repair File System with Third-Party Tools
In case the First Aid tool and FSCK were unable to resolve the issues with your external hard drive, you may still be able to fix it using third-party tools. There are many drive repair tools available, but we’ll be using an app called TestDisk to demonstrate this process.
TestDisk is a bit outdated but it’s well-respected and 100% free. It also doesn’t exactly have a graphical user interface (it looks like the Terminal app or Command Prompt), but even beginners should be fine as long as you follow our guide closely.
- Download and install TestDisk (make sure your drive is disconnected for now to avoid overwriting your lost data with the installer).
- Securely connect your external hard drive to your Mac and open the Terminal app (Finder > Applications > Utilities). Then, type the following command and hit Return:
sudo testdisk
(If prompted, enter your password and hit Return again).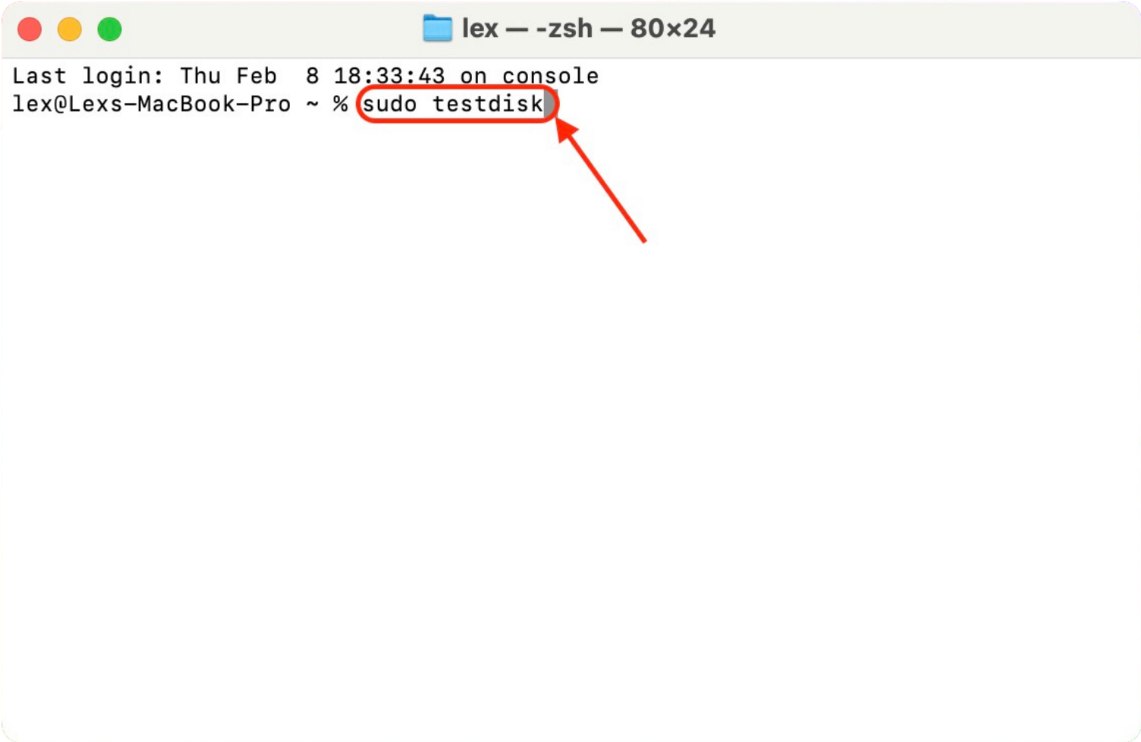
- Using your arrow keys, select
Createand hit Return.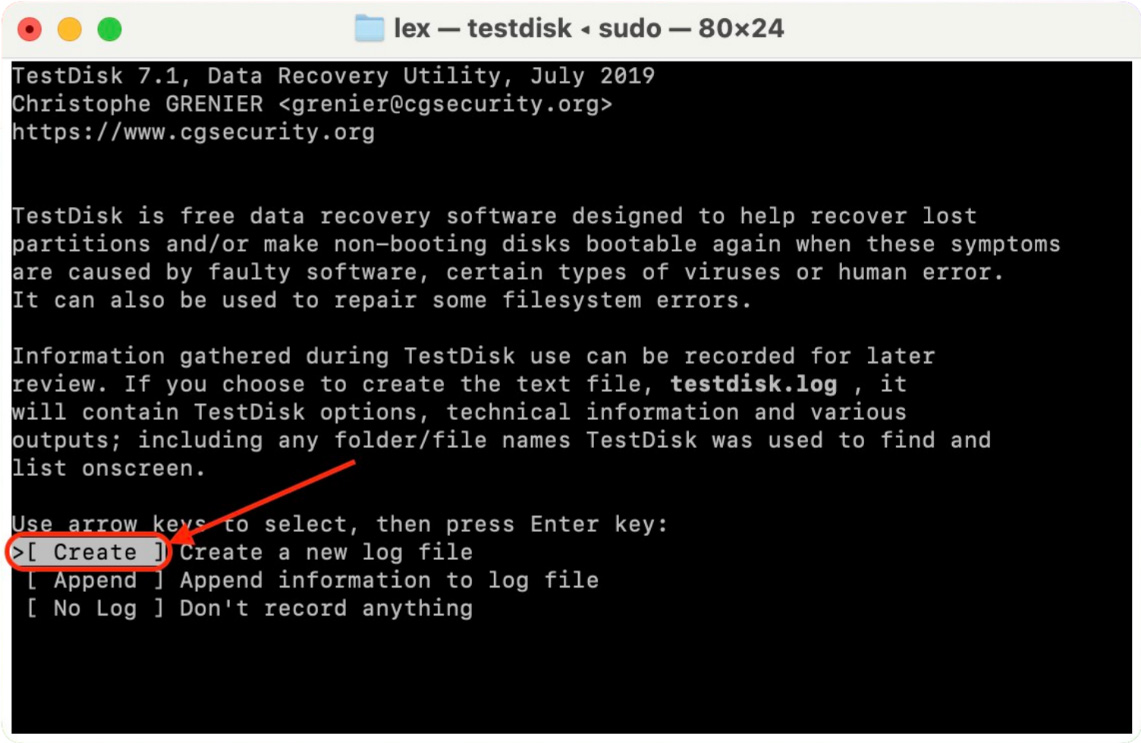
- Using your arrow keys again, select your external drive from the drives list. Then, select
Proceedand hit Return.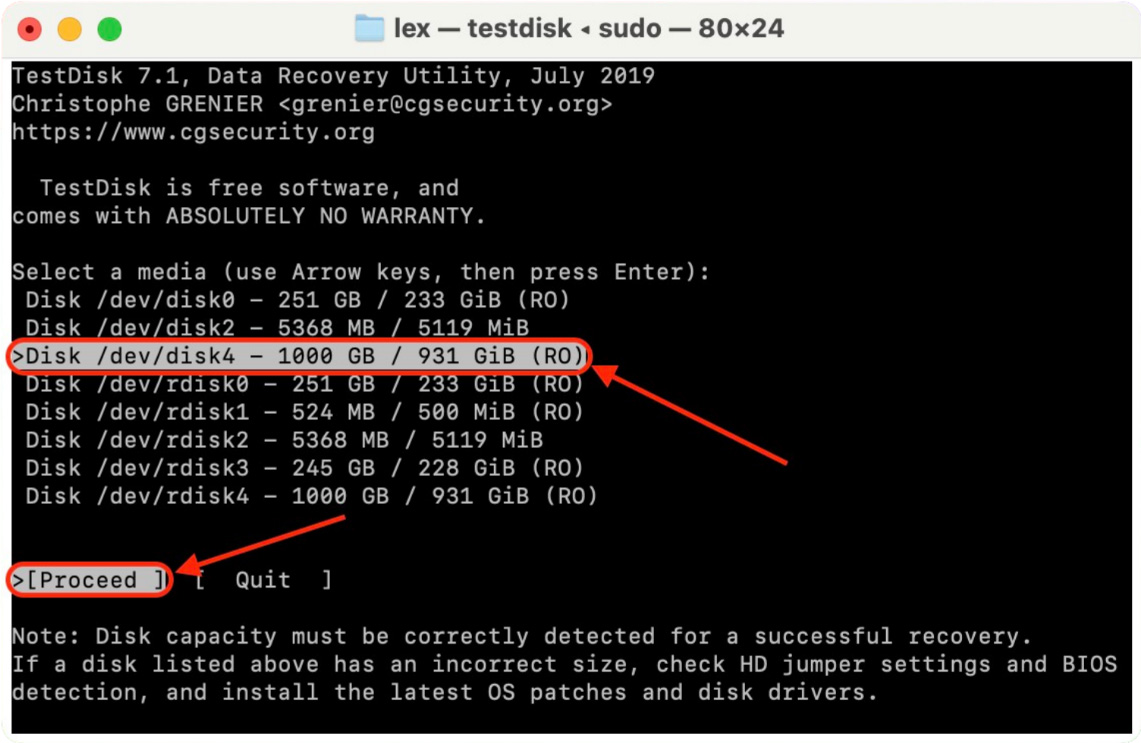
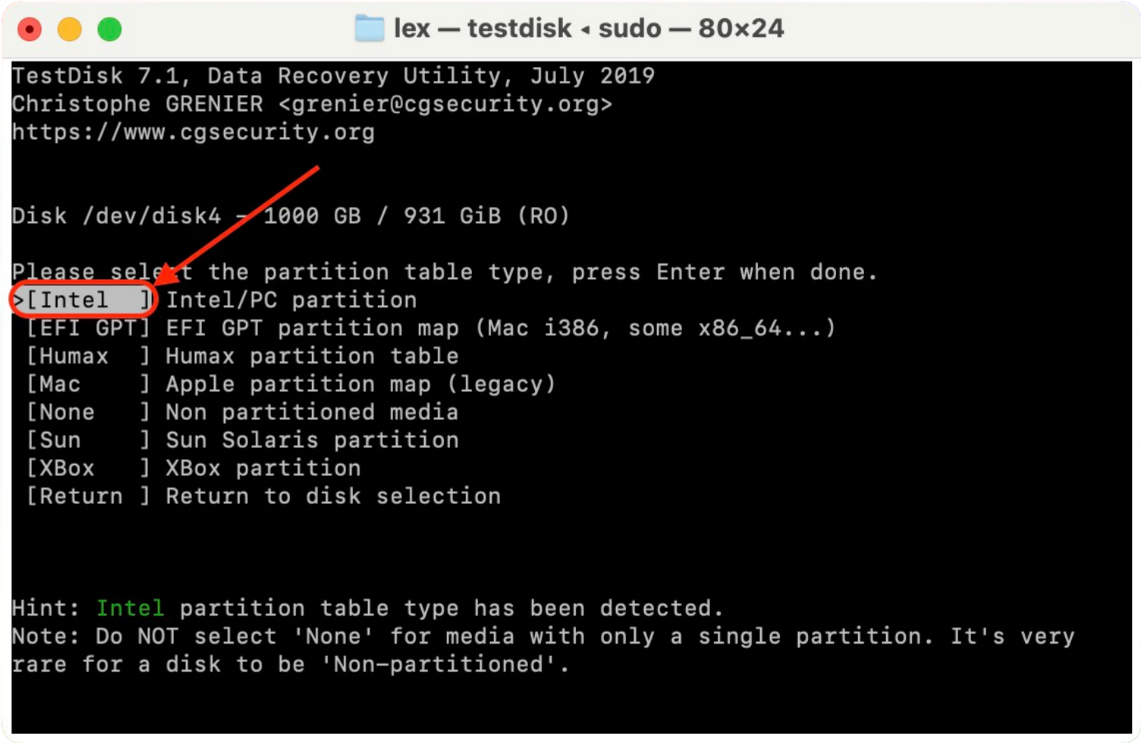
- Select your drive’s partition table type and hit Return (TestDisk will try to choose the right one for you automatically).
- Select
Analyseand hit Return.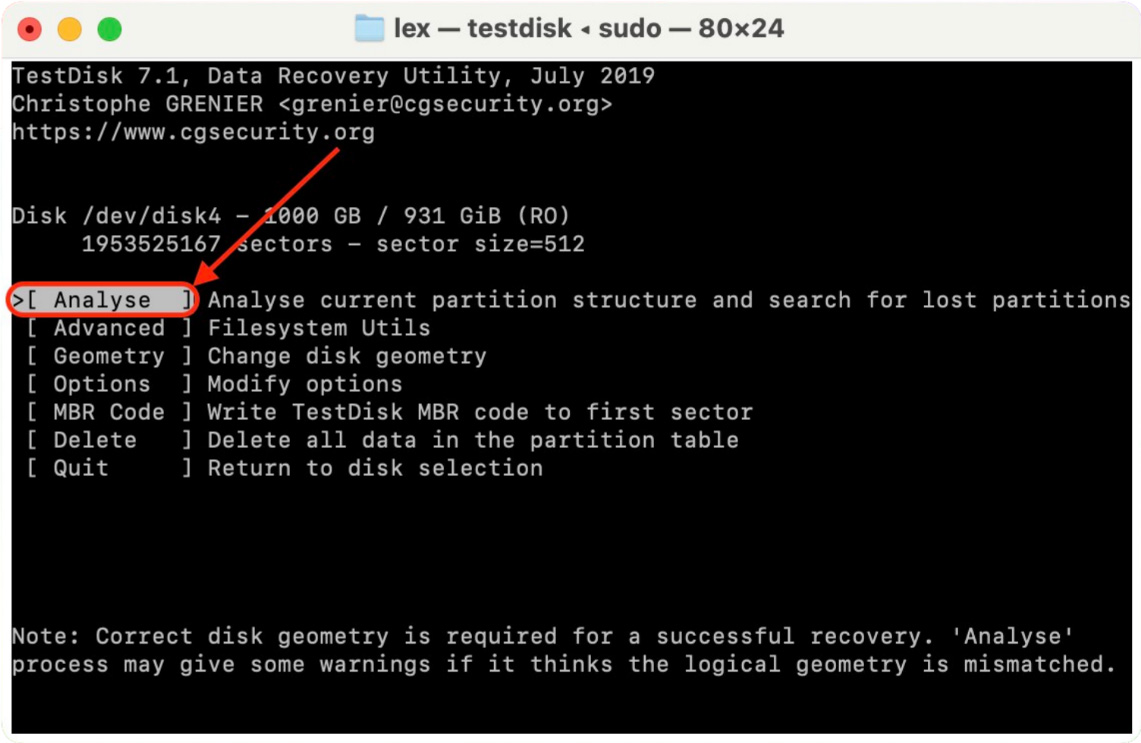
- Select
Quick Searchand hit Return.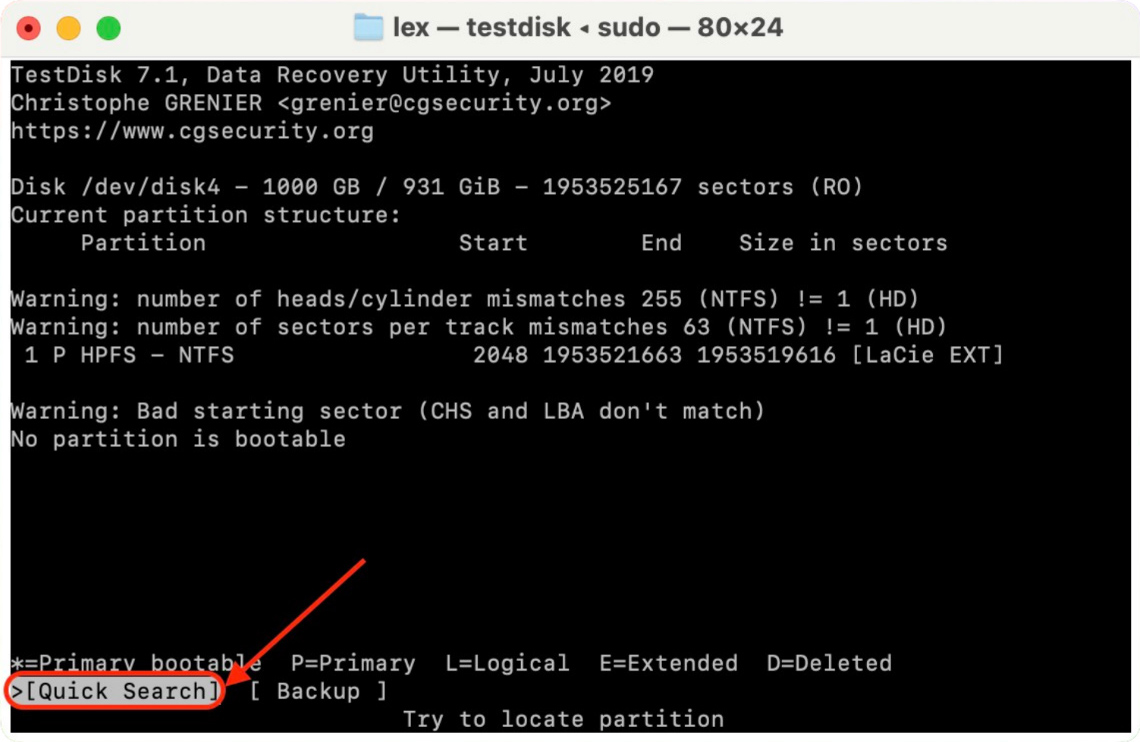
- Select the partition you want to restore. Then, select
Writeand hit Return. If the partition you need isn’t showing up, chooseDeeper Searchand hit Return (make sure to Write the partition if found).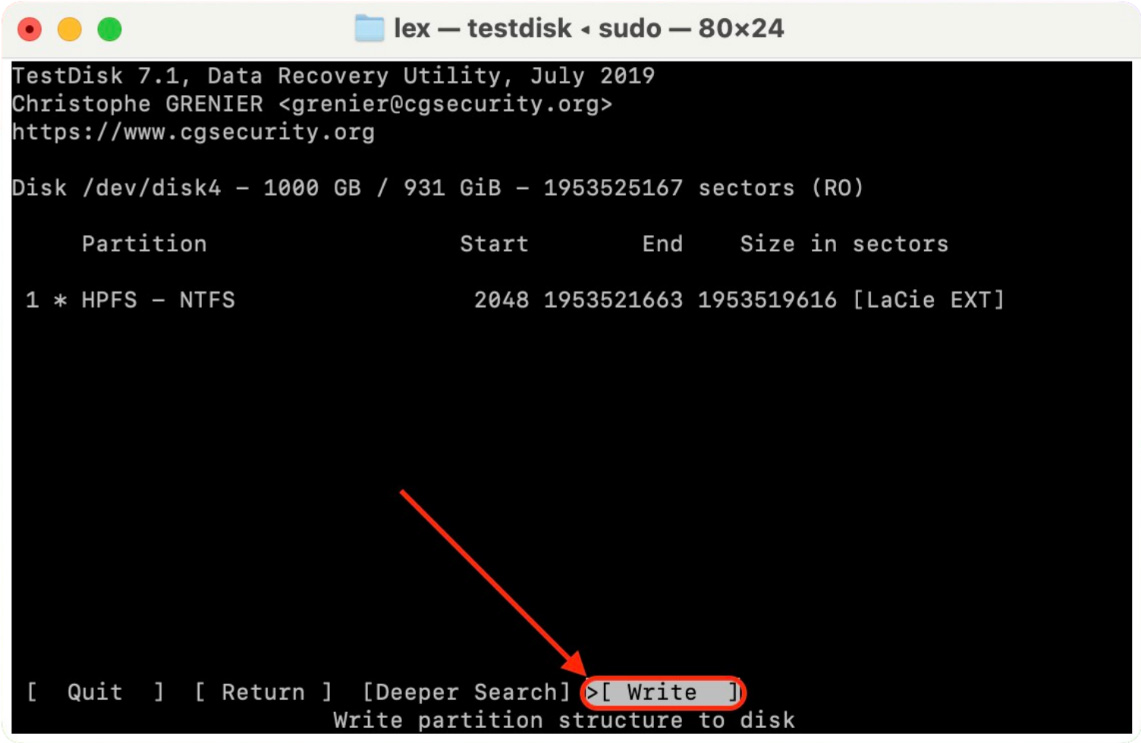
Conclusion
Fixing a malfunctioning drive and recovering data from it can seem intimidating to most users. But thanks to macOS’ intuitive utilities and a variety of impressive third-party apps, users of any level have a fair chance of successfully performing these operations.
However, as in most cases of data loss, recovery is not 100% guaranteed unless you have a backup. We do agree that using Time Machine for external drives can be a hassle – so consider trying other backup methods (e.g. cloud backups) instead. And make sure you turn on the autosave feature of every app you use just to improve your chances.
FAQ:
- Boot into Recovery Mode (for Intel-based Macs, turn on your Mac while holding the Command + R keys; for Apple Silicon-based Macs, press and hold the power button until the Startup Options window appears).
- Open Disk Utility.
- Click the external drive from the list on the left and click Erase. Choose the Mac OS Extended (Journaled) format and the GUID Partition Map scheme.
- Click Erase again to format the drive.
- Once the process is finished, select your internal hard drive from the sidebar.
- Go to File > New Image > Image from Macintosh HD.
- Choose your external hard drive as the destination for the backup, and select read/write as the format.
- Click Save and wait for the process to finish.
- Eject the external drive and restart your Mac.
- Connect the external hard drive to your Mac.
- Open Finder.
- Locate your drive on the sidebar under Devices and click it to open.
- Drag and drop the files and folder from the external drive to any preferred folder on your Mac (alternatively, use the copy-paste method).
- On the Desktop (it will be displayed as a USB hard drive icon)
- In Finder (on the sidebar under Devices)


