 Unlike older 2.5″ SSDs, M.2 SSDs can have various interfaces, including NVMe (NVM Express), the fastest interface based on the PCI Express bus. Like all drives, M.2 SSDs are prone to data loss caused by logical errors and physical damage. NVMe data recovery might seem tricky, but we simplify the entire process for you in this guide.
Before you start the recovery process, take a minute to understand what NVMe SSDs are and ensure the SSD you’re referring to is, in fact, an NVMe SSD.
Table of Contents
What is NVMe SSD and How it Differs from Other SSDs
NVMe (nonvolatile memory express) is a storage access and transport protocol used in USB drives and SSDs for high throughput and fast response times. NVMe SSDs use the PCIe bus on your computer, which is much faster than SATA, which other non-NVMe SSDs use. Theoretically speaking, NVMe SSDs can transfer data up to 64,000 MB/s using PCIe 4.0.
NVMe SSDs are often marketed as M.2 NVMe SSDs. Note that M.2 is a form factor — 22mm wide and 60mm or 80mm long. M.2 SSDs can be both SATA as well NVMe SSDs. To ensure the SSD you’re referring to is an M.2 NVMe SSD, check the specs.
How to Recover Data from an NVMe SSD?
The easiest way to recover data from an SSD is by using data recovery software. In cases of severe physical damage, you’ll need to send your drive to a professional data recovery service.
Method 1:Recover Data from an NVMe SSD Using Disk Drill
Disk Drill is the best data recovery software solution — read our Disk Drill review to learn more. Disk Drill allows creating a virtual image of the disk, which is great when recovering data from NVMe SSDs.
The reason is that scanning can be an intensive activity, and if your NVMe SSD is about to fail, a scan might push it over the edge. Imaging is less intense and helps achieve the same results more safely.
Disk Drill supports all major file systems and storage devices, including internal and external HDDs.
Note: You should disable the TRIM command and create a disk image using Disk Drill before you start the recovery process and as soon as possible after the deletion. The TRIM command wipes out the data, making it irrecoverable. If you’ve deleted files accidentally, disconnect the NVMe SSD right away, disable the TRIM command, and then reconnect the SSD.
Here’s the NVMe data recovery process:
Step 1. Disable TRIM on Windows
Disabling TRIM is an easy, three-step process:
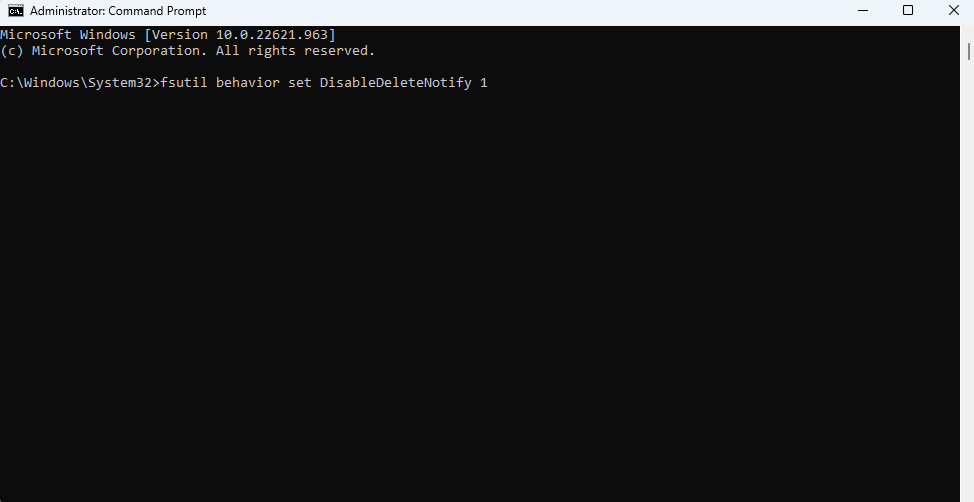
- Search for cmd in the Start Menu.
- Right-click on the Command Prompt and select Run as administrator.
- Type the following command and press Enter:
fsutil behavior set DisableDeleteNotify 1
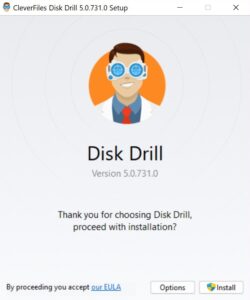
Step 2. Download and Install Disk Drill
Once you’ve disabled TRIM, download Disk Drill and install it on your computer. The free version allows recovering up to 500MB of data.
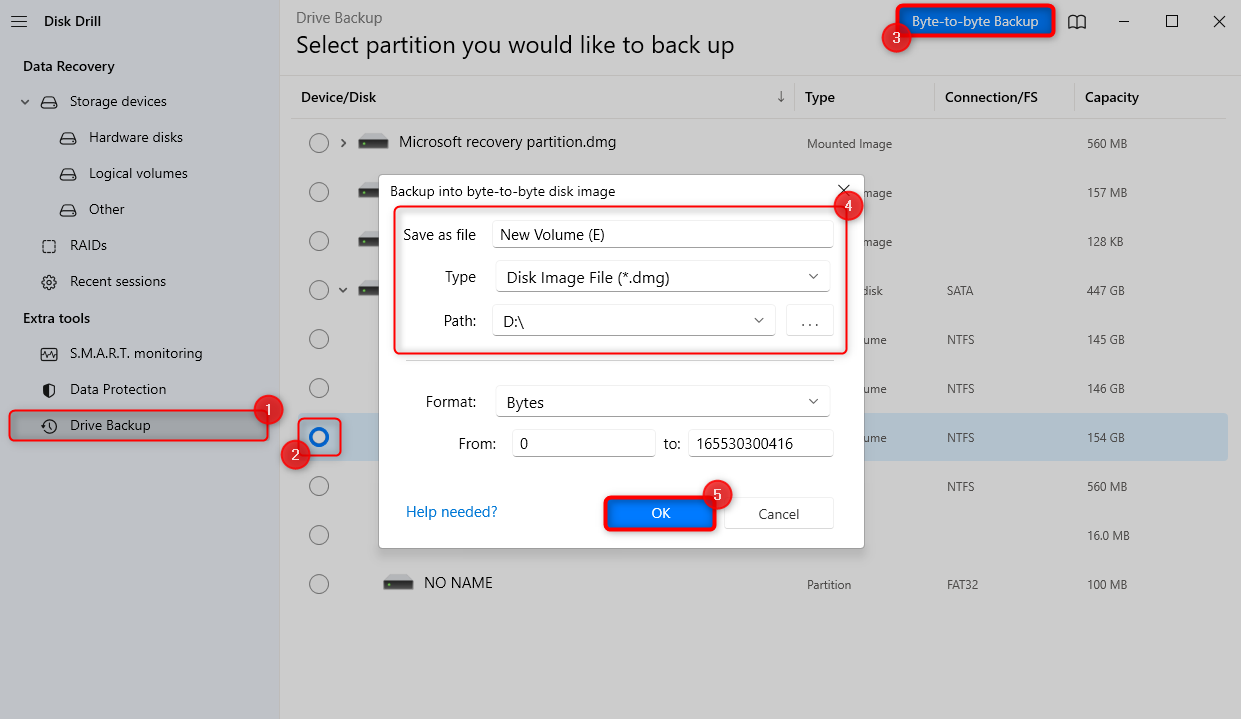
Step 3. Create a Disk Image
Launch Disk Drill and select Drive Backup from the left sidebar. Click OK, let’s do it. Select the NVMe SSD from the list of drives and click on the Byte-to-byte Backup button at the top. Select a file name, type, and path where you want to save the disk image. Click OK when done to start creating the NVMe SSD’s disk image.
Step 4. Scan the Disk Image
Click on the hamburger menu icon at the top left and select Attach disk image. Select the NVMe SSD disk image you just created.
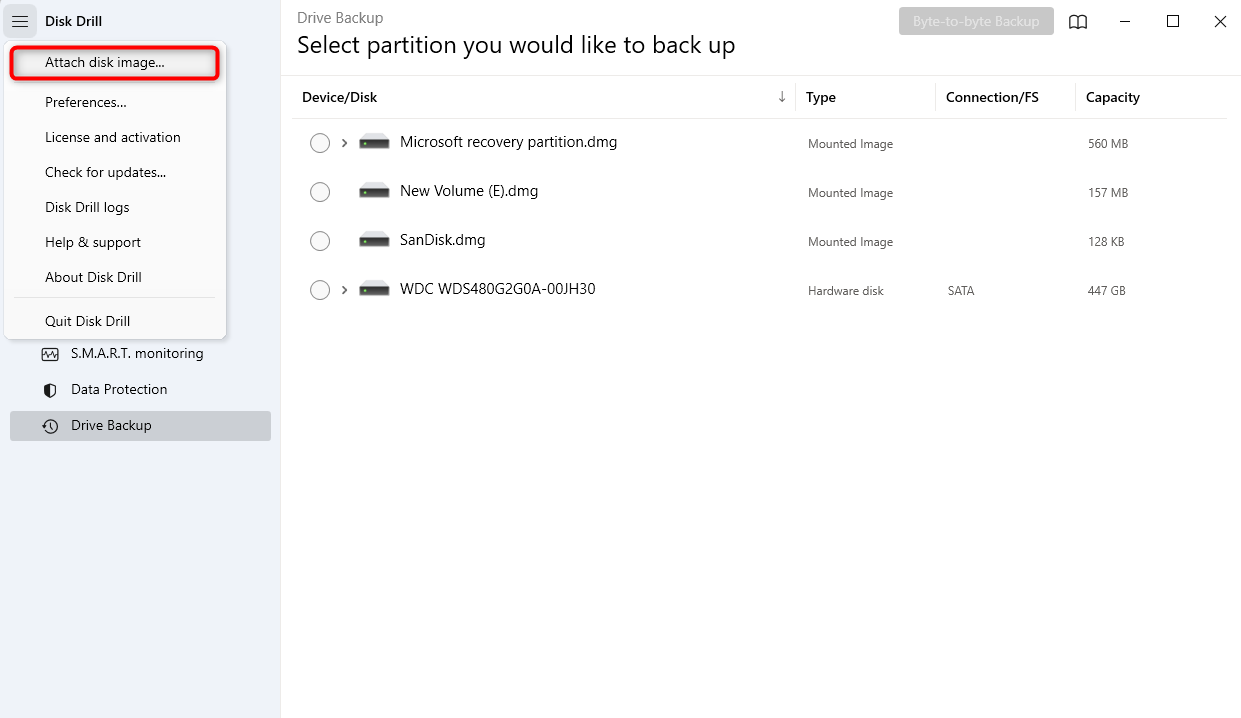
Navigate to Storage Devices from the left sidebar, and you’ll see the disk image appear in the list of drives. Select the disk image and click the Search for lost data button to start the scan.
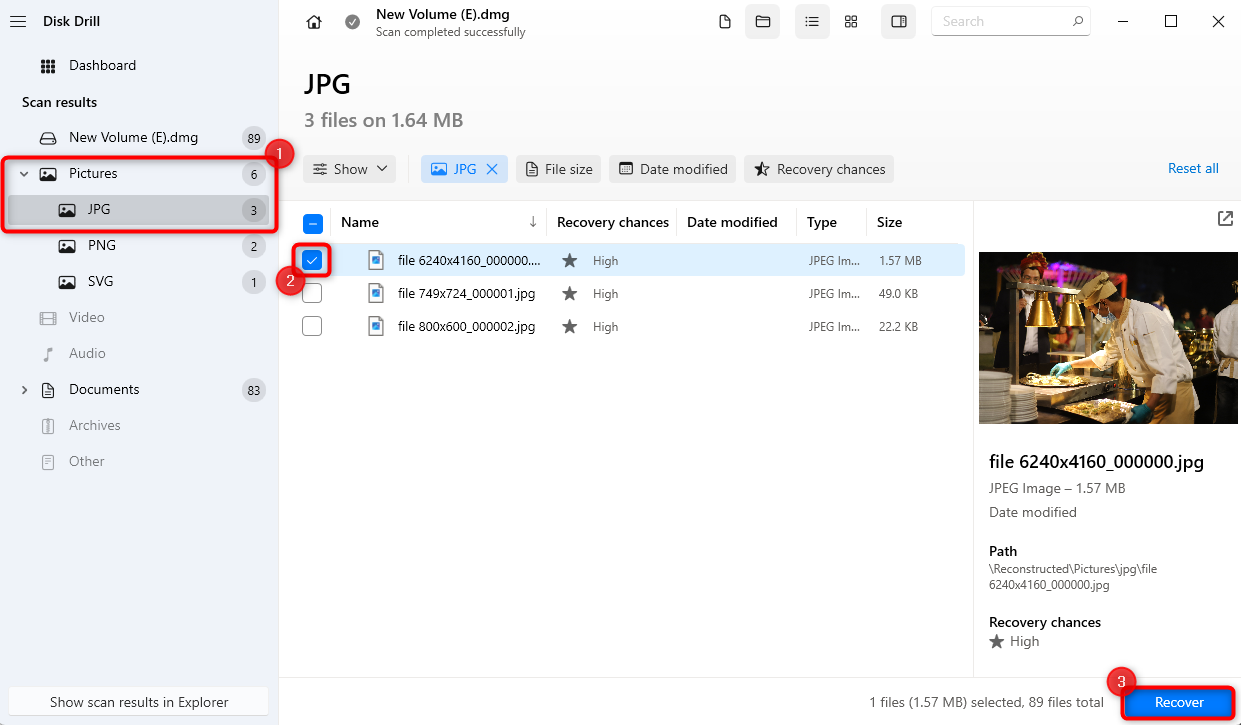
Step 5. Recover Files
You’ll see a list of recoverable files once the scan ends. Disk Drill lets you filter search results by file type (such as Pictures, Video, and Documents) and by file extension.
For example, if you’re trying to recover images from the NVMe drive, you can select Pictures from the left sidebar. If you’re looking for a specific file extension, you can expand the Pictures category and select a file extension. You can also preview the images to confirm you’re recovering the correct image.
When you find the right files, check the box to their left. Once you’ve selected all the files you want to recover, click the Recover button and select a location where you want to save the recovered files.
Note: The recovery location should be different from the drive you’re recovering from (the NVMe SSD) to avoid overwriting data.
When you’re done, navigate to the location where you recovered the files to access them.
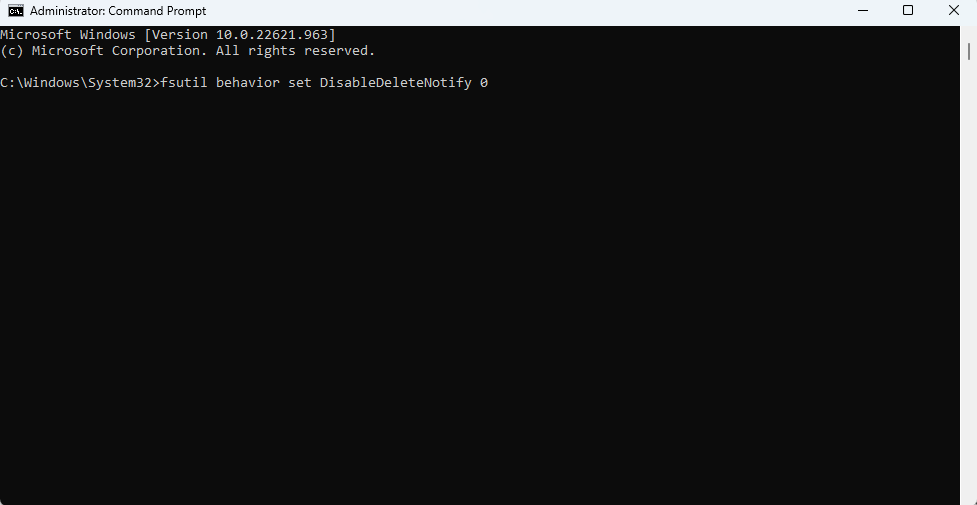
Step 6. Re-enable TRIM
Re-enable TRIM after you’ve recovered the data. TRIM can improve the NVMe drive’s longevity and makes data management more efficient. To re-enable, launch the Command Prompt as an administrator. Search for cmd in the Start Menu, right-click on the Command Prompt, and select Run as administrator.
Then, type the following command and press Enter:
fsutil behavior set DisableDeleteNotify 0
Method 2:Recover Data from an NVMe SSD With Help from a Data Recovery Service
In cases of severe physical damage, the NVMe drive might become unreadable. When your PC can’t read the data, a software solution can’t help recover it. In such cases, you’ll need to seek help from professional data recovery experts.
Typically, you’ll need to send the drive to their lab. They’ll recover the data on the NVMe SSD using specialized equipment. The probability of successful data recovery depends on the severity of the damage, though.
Conclusion
NVMe data recovery is possible. NVMe drives use a different interface, but the same principles of data recovery apply to them as well. Using a software solution is the easiest way to recover data on an NVMe drive. However, in cases of severe physical damage, you’ll need help from a professional data recovery service.


