 Seagate has been around for long. It manufactures and sells reliable external hard drives, but some Seagate external drives are more prone to failure than others. For instance, a study found that Seagate ST4000DM000 had an annualized failure rate of 2.30%. If you’ve got yourself one of these less reliable models and are facing hard drive failure, we’re going to explain how you can fix the drive. But before, you need to secure your data, so we’ll first start with Seagate data recovery.
Table of Contents
Main Causes of Data Loss from Seagate Hard Disks
Your Seagate hard disk could fail because of multiple reasons. The issue might be logical or physical. The following is an inclusive list of possible things that could lead to data loss from a Seagate hard drive:
| Cause | Description |
| 🗃️ Accidental file deletion | If you deleted your files by accident or inadvertently formatted the hard drive, you can end up losing all the data on your Seagate hard drive. |
| 🖥️ System or hardware errors | Failure of a hardware component or a system crash can cause damage to your hard drive, resulting in data loss. |
| 🐞 Virus or malware | A virus or malware could steal data from your hard drive and also delete it, causing data loss. |
| 💽 Physical damage | Physical damage can occur from a range of events. For instance, an abrupt increase in the power supply can fry your hard drive’s components, causing failure. If you recently dropped your hard drive, the platters could have become misaligned, rendering the drive unusable. |
There are several methods for fixing your hard drive, but you should prioritize recovering data from your Seagate external hard drive to avoid overwriting.
How to Recover Data from a Seagate Hard Drive
There are two methods at your disposal for Seagate hard drive recovery. A data recovery tool like Disk Drill should be your first line of defense. In most cases, you’ll be able to recover your data with Disk Drill fairly easily. However, if the damage to the hard drive is more serious, such as severe physical damage, you’ll need a technician’s help.
Method 1: Recover Data Using Disk Drill
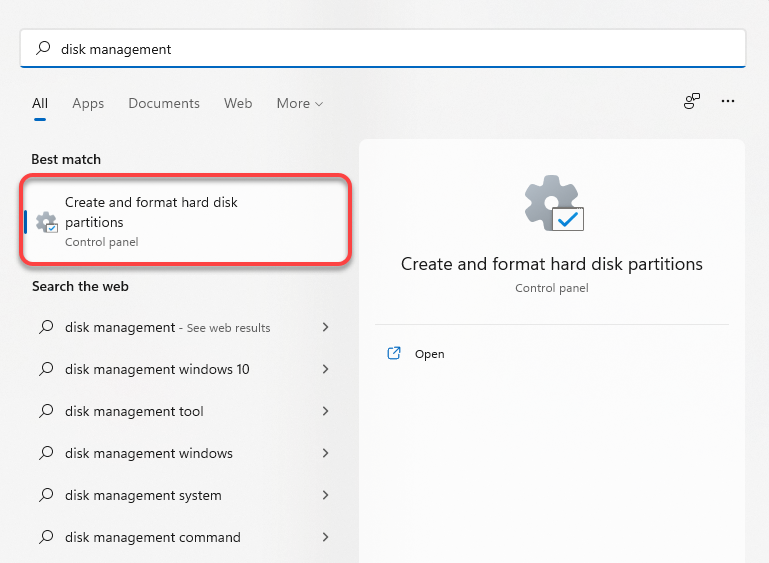
Start by checking if your Seagate hard drive is visible in the Disk Management console. The reason is that you’ll be able to scan the drive only if the Disk Management utility detects it. You can launch the Disk Management console by searching for disk management in the Start Menu and selecting the item called Create and format hard disk partitions.
If you see your hard drive in the Disk Management console listed with its correct size, you’ll be able to scan the drive using Disk Drill.
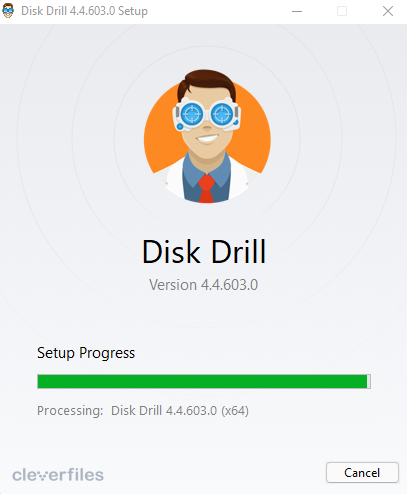
Step 1. Download and Install Disk Drill
Download Disk Drill and install it on your PC. The free version will let you recover up to 500 MB of data.
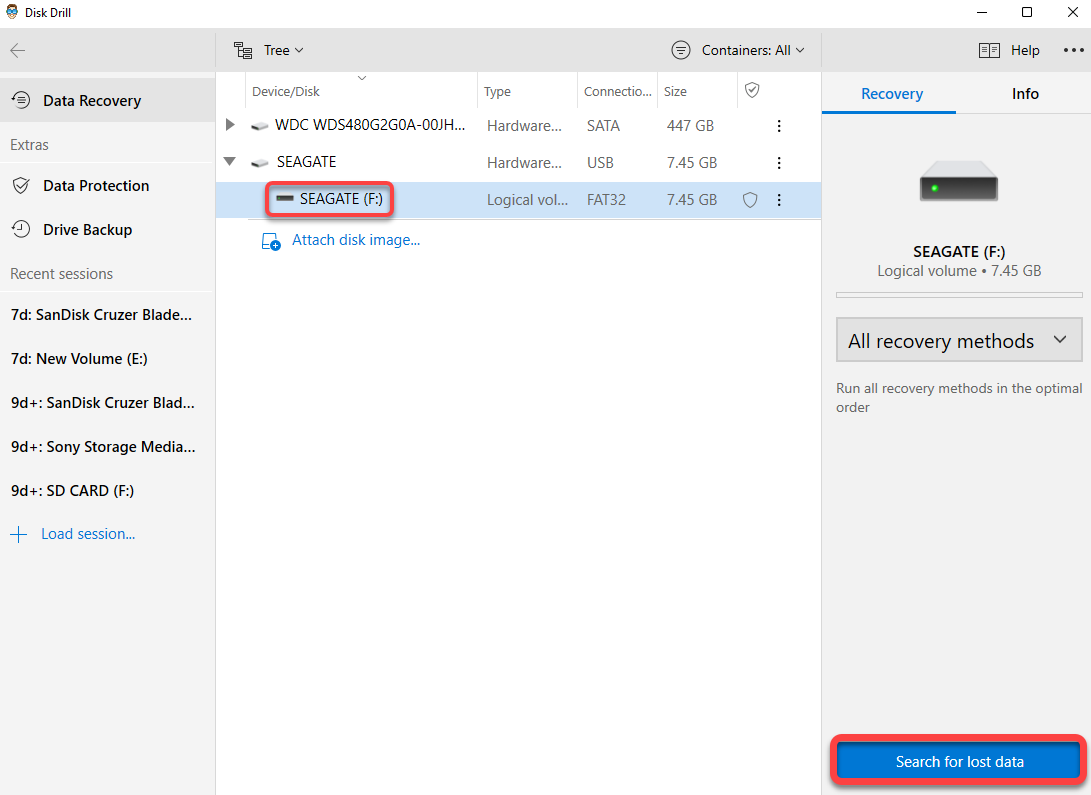
Step 2. Select the Hard Disk and Start Scanning
Launch Disk Drill after the installation is complete. Select your Seagate hard disk from the list and click on the Search for lost data button.
If you believe that the hard disk could potentially fail, it’s best not to scan the hard drive. Scanning involves disk activity and can trigger the hard drive to fail during the scanning process.
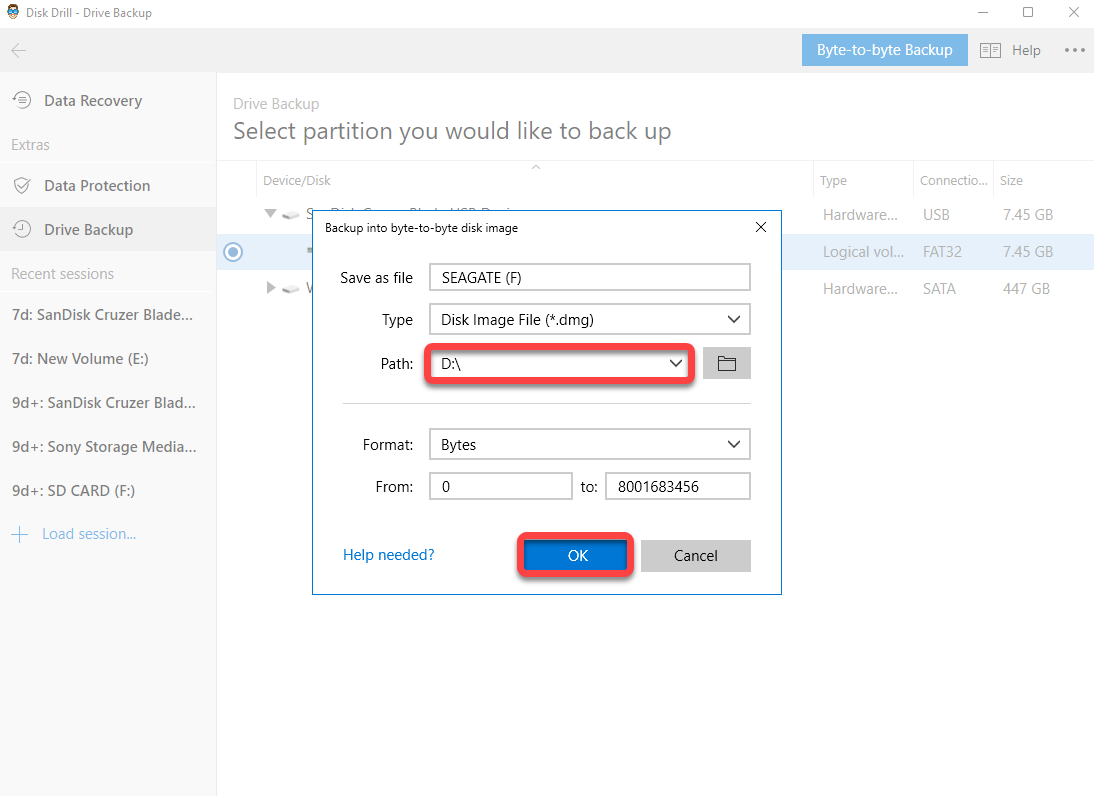
In such cases, you should create an image of the disk using Disk Drill’s byte-to-byte backup feature, which involves a much lower level of disk activity than a scan.
- Switch to the Data Backup tab from the left sidebar.
- Select the Seagate hard drive.
- Click on the Byte-to-byte Backup button at the top.
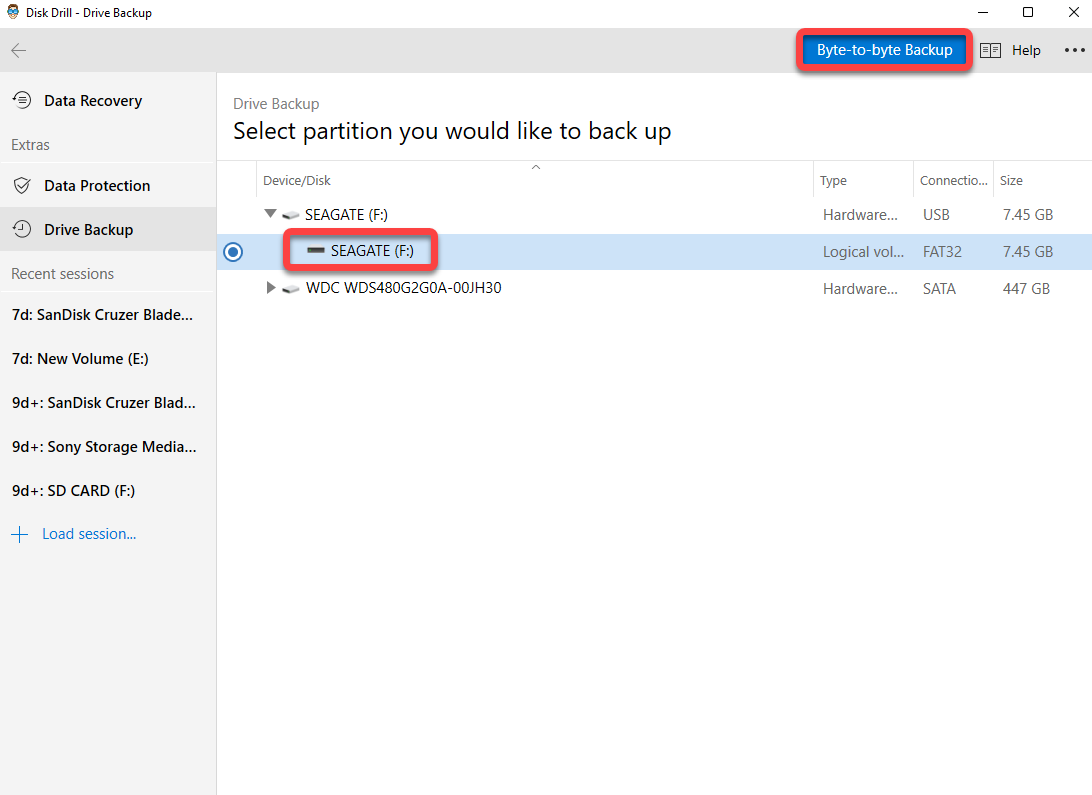
- Select a path where you’d like to save the file and click OK.
- Go back to the home screen, click on Attach disk image, and select the backup file you just created.
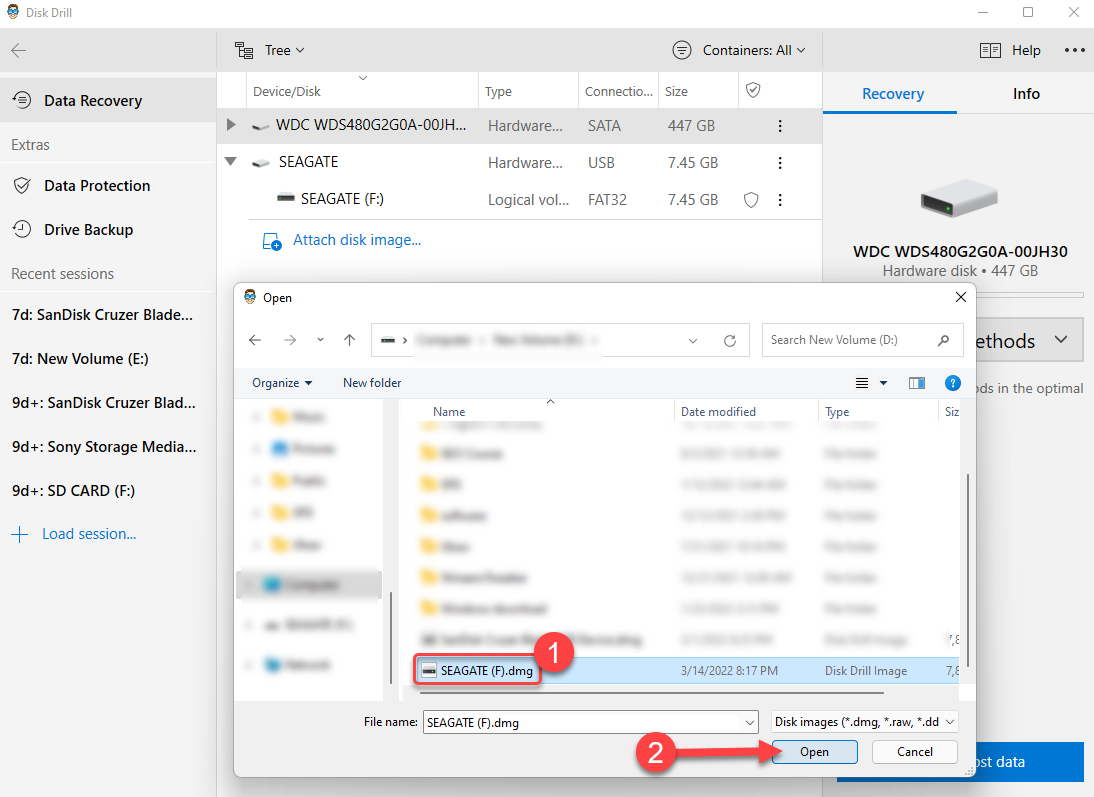
- Instead of selecting the actual disk, select the amount disk, and click on Search for lost data.
Once you’re done, continue as you normally would.
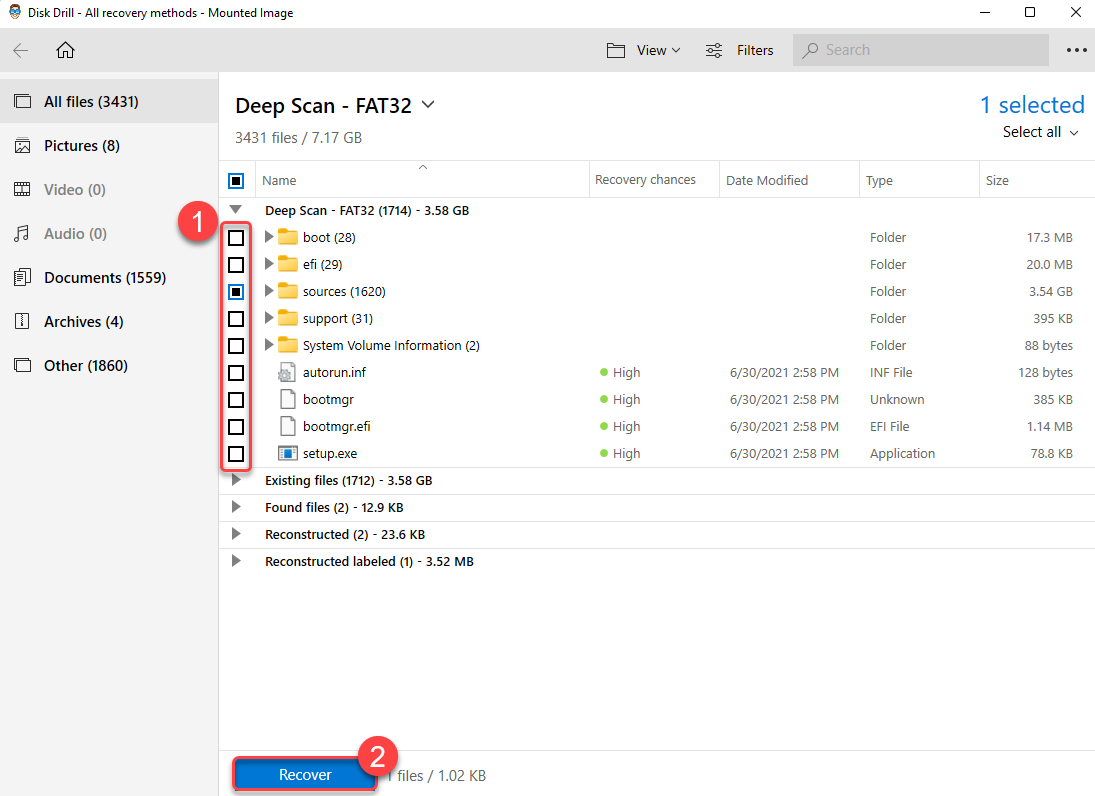
Step 3. Select Files to Recover
Once the scan is complete, click on the Review found items button at the top. Select the files you want to recover by checking the box next to their name and then press the Recover button.
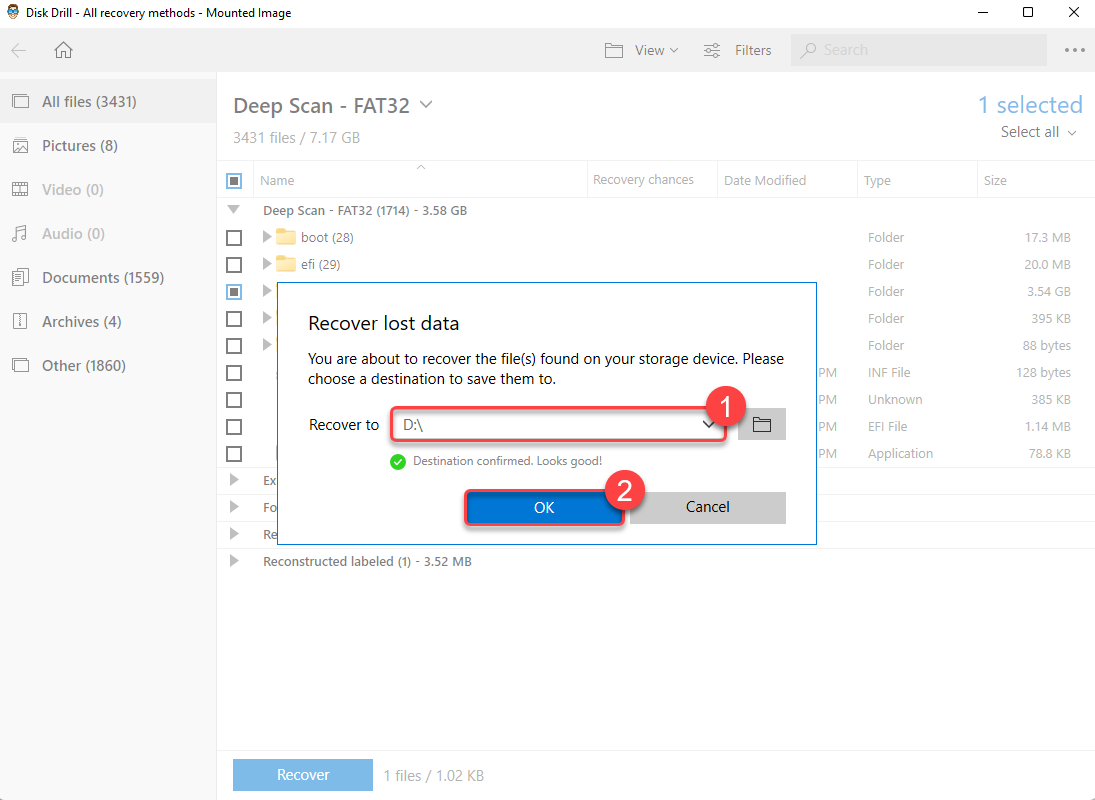
Step 4. Recover Files
Next, you’ll need to select a location where you want to recover the files. Make sure you don’t select the damaged Seagate hard drive as the location, or you might risk overwriting the data. Select OK once you’ve chosen a location, and you’re done.
Method 2: Rescue Data Recovery Service by Seagate
Seagate includes data recovery services as part of its limited warranty. In cases where the hard disk has undergone severe damage, you can use the Rescue Data Recovery Service by Seagate.
Seagate will have the disk picked up from your place to bring it to one of their labs. A Seagate data recovery specialist will try to retrieve data from your hard disk and repair it. Once everything’s fixed, they’ll send the hard disk back to you.
How to Fix Common Seagate Hard Drive Problems
Now that you’ve completed Seagate hard drive recovery, you can start fixing the drive so you can use it again. There are four methods you can use for fixing your Seagate hard drive.
Method 1: Run Seagate Diagnostic Tool
SeaTools is Seagate’s tool for testing a drive’s health and fixing it. It comes with a graphical interface as well as a bootable program that’s more powerful. In either case, the tool helps you test your Seagate hard drive.
- Download Seatools and install it on your Windows PC.
- Close all running programs and connect your computer to a reliable power source.
- Launch Seatools, select a drive, and click on Basic Tests at the top.
- Select Short Drive Self Test. It’s a data-safe option that will quickly fix most hard drives.

If you plan on running the Fix All test or any other test that will take longer, you need to set up the right environment. Alternatively, you can also use the bootable version of the tool for more powerful diagnostic tests.
Method 2: CHKDSK
Chkdsk (or Check Disk) is a built-in command-line utility on Windows that checks a disk for file system errors and bad sectors. If either of those is causing your hard disk to act up, Chkdsk will be able to fix it.
- Start by pressing Win+ R, typing cmd, and pressing Ctrl+Shift+Enter to launch an elevated Command Prompt.
- Execute the following command:
chkdsk F: /r /x
(Replace F: with the relevant drive letter)
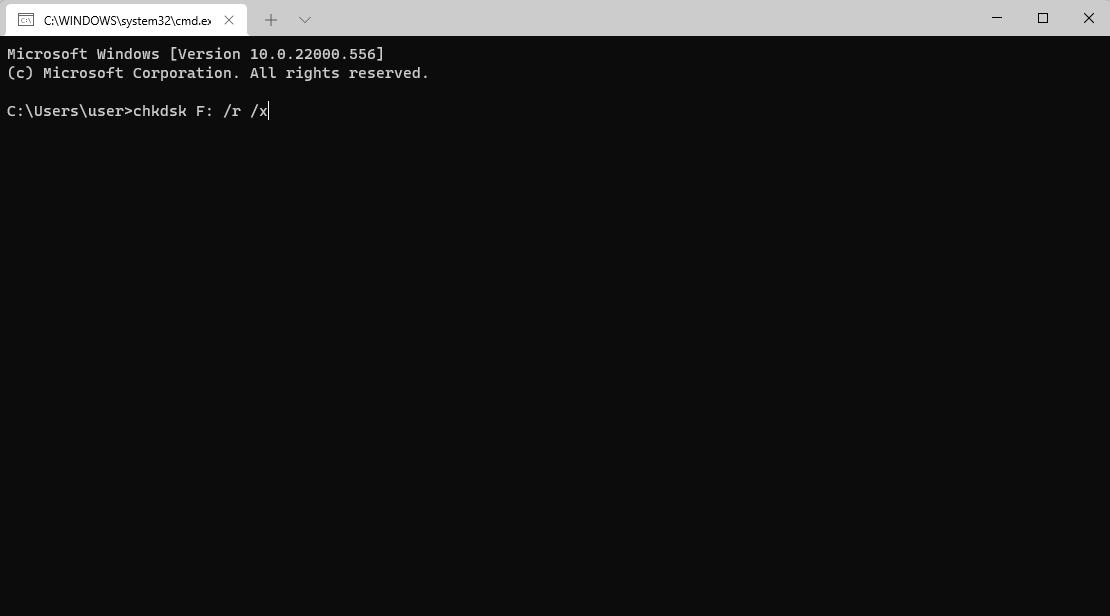
- Let the scan complete and then exit the window.
If Chkdsk finds errors, it will try to fix the errors automatically. After you’re done, see if you can access the hard drive.
Method 3: Update the Drivers
A driver is what helps a hardware component interact with your computer’s operating system. In most cases, you’ll have the most recent driver because Windows updates them automatically. However, sometimes a driver can become corrupt or outdated and cause a hardware component like your hard drive to not work properly. Updating or reinstalling the driver might help fix problems caused by such drivers.
- Press Win+R, type devmgmt.msc, and press Enter to launch the Device Manager.
- Look for a category called Disk drives and expand it by clicking the tiny arrow on its left.
- Right-click on the hard drive and select Update driver.
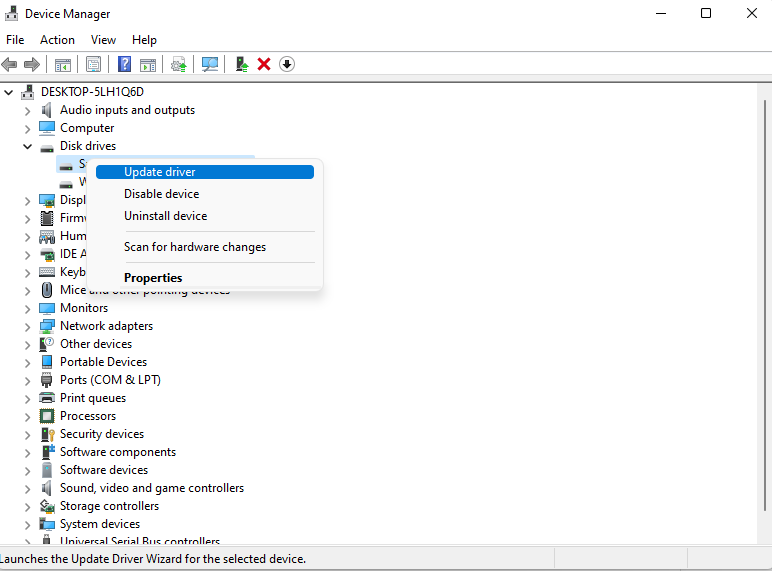
- You’ll have two options in the Update wizard. The first option is to let Windows automatically find and update drivers. In most cases, this option won’t produce any favorable results. The second option is to provide the wizard with the driver installation files. You can get these files from the manufacturer’s website. Ideally, this is the option you’d want to choose.
Once you’ve installed the drivers, see if you can use the Seagate hard drive like before.
Method 4: Formatting
Your last resort is to format the hard drive. Once you’ve restored the data, though, formatting shouldn’t be that big of a problem. You can format the hard drive from the Disk Management console like so:
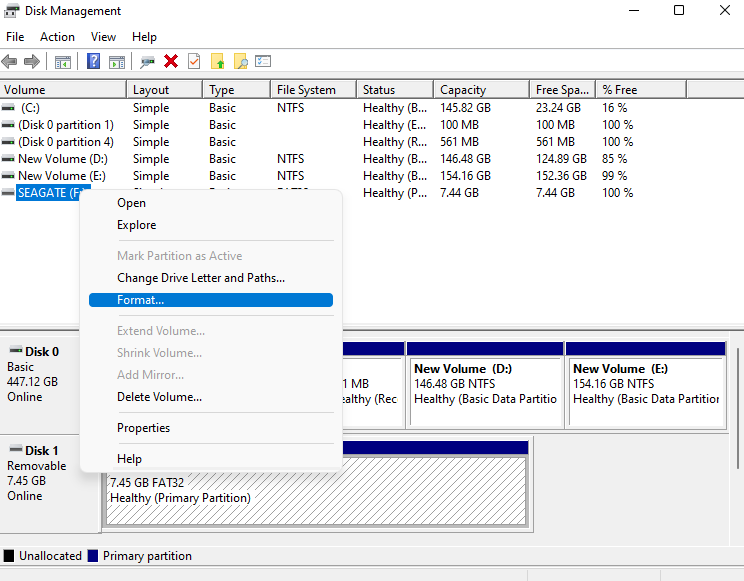
- Press Win+R, type diskmgmt.msc, and press Enter to launch the Disk Management console.
- Right-click on the Seagate hard drive and select Format.
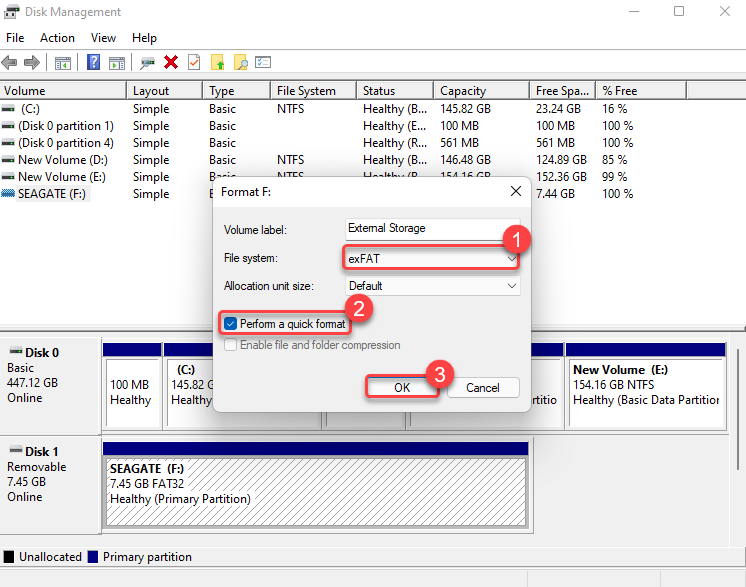
- In the format window, select a file system, check the box next to Perform a quick format, and select OK. Leave other fields as-is, unless you want to change the Volume label to something else.
Once you’re done formatting, you should be able to access the disk, unless it has been damaged physically.


