 You’ll notice there’s a light on your external hard drive that’s constantly blinking as soon as you connect it to your PC. What does the light indicate, and is it something to worry about? What if the light is blinking, but the drive is not detected on your PC? We’ll answer these questions in our guide below, and also explain how to fix a hard drive that has a blinking light, despite not being detected by Windows.
Table of Contents
Reasons Why the Hard Drive Light Is Blinking
Most external hard drives have an activity/status light that indicates whether there’s any activity going on in the drive, such as data transfer. A hard drive’s blinking light can be attributed to one or more of the following reasons:
| Reason | Description |
| 🔁 Data Transfer | The hard drive activity indicator will blink if data is being written to, or read from the hard drive. The blinking may be rapid, and the light may stay on for a few seconds at a stretch as well. |
| ⚙️ Disk Activity Due to Background Processes | Even when you’re not actively copying files to the drive or reading data from it, the activity light could still be blinking. This is because of background services and apps that are using the drive. You can figure out which processes are using the disk by opening the Task Manager (CTRL + Shift + ESC) and looking at the Disk column in the Processes tab. |
| 💻 Operating System Activity | Windows constantly creates and deletes system-specific data from your drive. This too, constitutes disk activity, resulting in a blinking activity light on your hard drive. |
| ☑️ Disk Checking and Defragmentation | Regular disk checking, and defragmentation (HDDs only), are good ways to ensure that your drive works optimally. When any of these processes are underway, the disk activity light will blink. |
| 🔔 Software Updates | The hard drive activity light will blink when Windows, or third-party software updates are underway because new data is being written to the drive. It doesn’t matter whether the updates are automatic or you performed them manually. |
| 🕷️ Malware | A virus or any other type of malware will rapidly create copies of itself, resulting in higher disk usage. You may also notice a slowing down of your hard drive and the disappearance of your data. |
| ⚠️ Drive Errors | If the hard drive isn’t working like it should, accompanied by a blinking activity light, the hard drive may have run into some errors. These errors include–bad sectors, driver issues, and firmware corruption. |
| 🆕 Drive Initialization | Most new hard drives need to be initialized before you can begin storing data on them. During disk initialization, a partition table is written to the drive, resulting in a hard drive’s light blinking on Windows 10/11. |
| 🗃️ Drive Nearing Full Capacity | If you’re nearing the full storage capacity of the hard drive, it can cause the hard drive activity light to blink constantly. This happens due to increased data fragmentation, indexing, and frequency of usage. |
| 🛍️ Vendor-Specific Signals | Some HDD manufacturers like Seagate have specific LED signals that indicate different types of activity. For example, a red light indicates there’s an issue with the drive, whereas a Seagate external hard drive with a blinking blue light is probably working fine. |
In almost all cases, a blinking hard drive activity light is not a cause for concern. It’s part of the normal usage of a drive. However, if you notice that there are other problems that accompany the blinking light–slow performance, freezing, and the drive not being detected by your PC and Windows Explorer–it’s a cause for concern, and you should address the issue as soon as you can.
How to Make a Blinking Hard Drive Detectable Again
The activity light on your hard drive is blinking, but the drive itself isn’t detected by Windows, or even if it is, it’s not showing up in Windows Explorer. Usually, this indicates some sort of logical, or connection issues with the hard drive.
Here are some ways to fix an external hard drive that has its activity light on but is not detected by your computer:
Method 1:Restart the PC
The first thing you should do when diagnosing an undetectable hard drive, is simply restart your computer. Doing so forces Windows to reload all system files and drivers, which can often cause the hard drive to show up again.
Before rebooting, make sure you’ve saved any important projects/documents you were working on.
To reboot your PC, follow these steps:
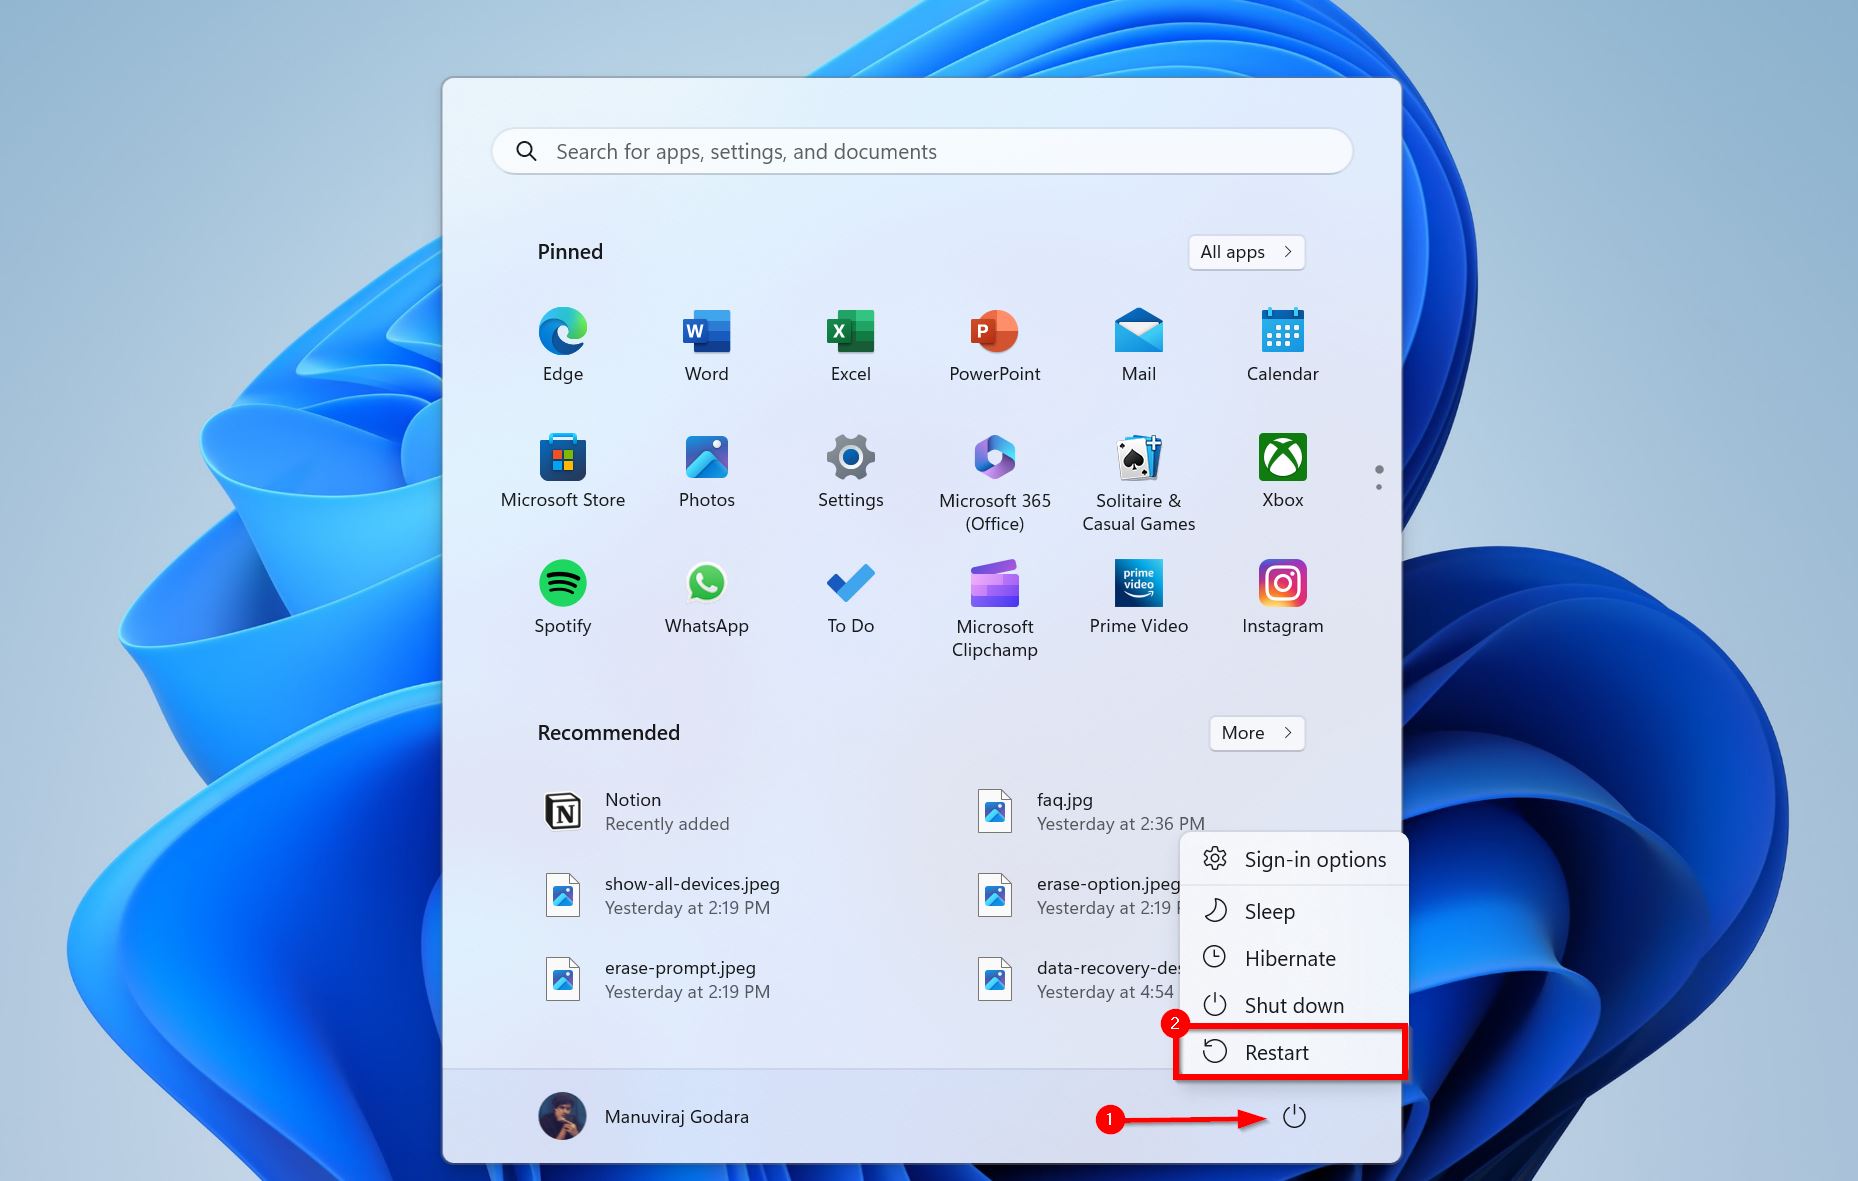
- Click on the Start button.
- Click on the Power button.
- Choose Restart.
Another way to restart your PC is–press ALT + F4 while you’re on the desktop with all other windows minimized/closed, pick Restart from the drop-down menu, and click OK.
Method 2:Check the USB Ports and Cables
Damaged USB ports, cables, and power connectors can cause detection issues with your hard drive. None of the other methods will work if the physical connection between the drive and your PC is compromised.
Carefully examine the USB cable, see that it’s not unusually bent and there are no signs of peeling and other types of damage. Then, take a look at the USB connector as well as the USB ports–ensure the connector isn’t bent, and the port is intact. If your external hard drive has a separate power cable, ensure that the cable and the plug are in good condition.
We also recommend you connect the drive to a USB port that’s directly attached to the motherboard, instead of one that’s part of your PC cabinet.
Method 3:Make Sure the Hard Drive Isn’t Hidden
The external hard drive could be a hidden device on Windows, in which case, it won’t be detected by the OS. Here, you should enable hidden items in the Windows Device Manager, then uninstall the drive, and reboot your PC.
Here are the step-by-step instructions on how to do it:
- Press Windows Key + R to open the Run program. Type devmgmt.msc in the text box and press Enter. Alternatively, search for Device Manager in Windows Search (Windows Key + S) and open it.
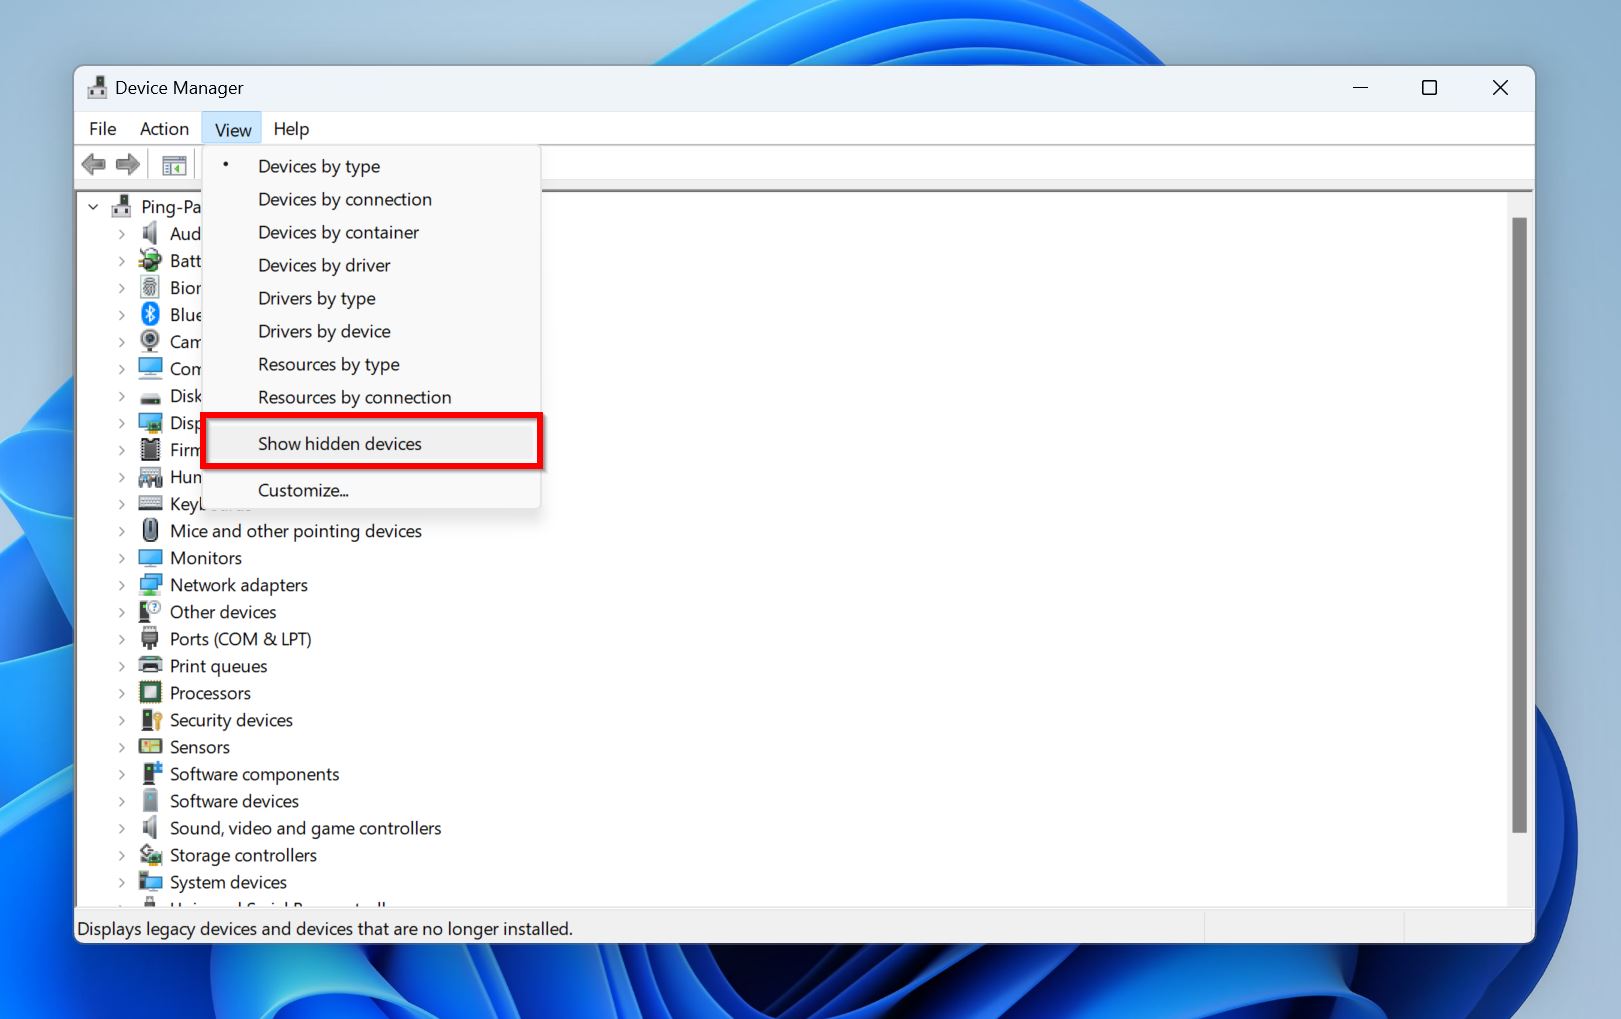
- Click on View > Show Hidden Devices in the Device Manager.
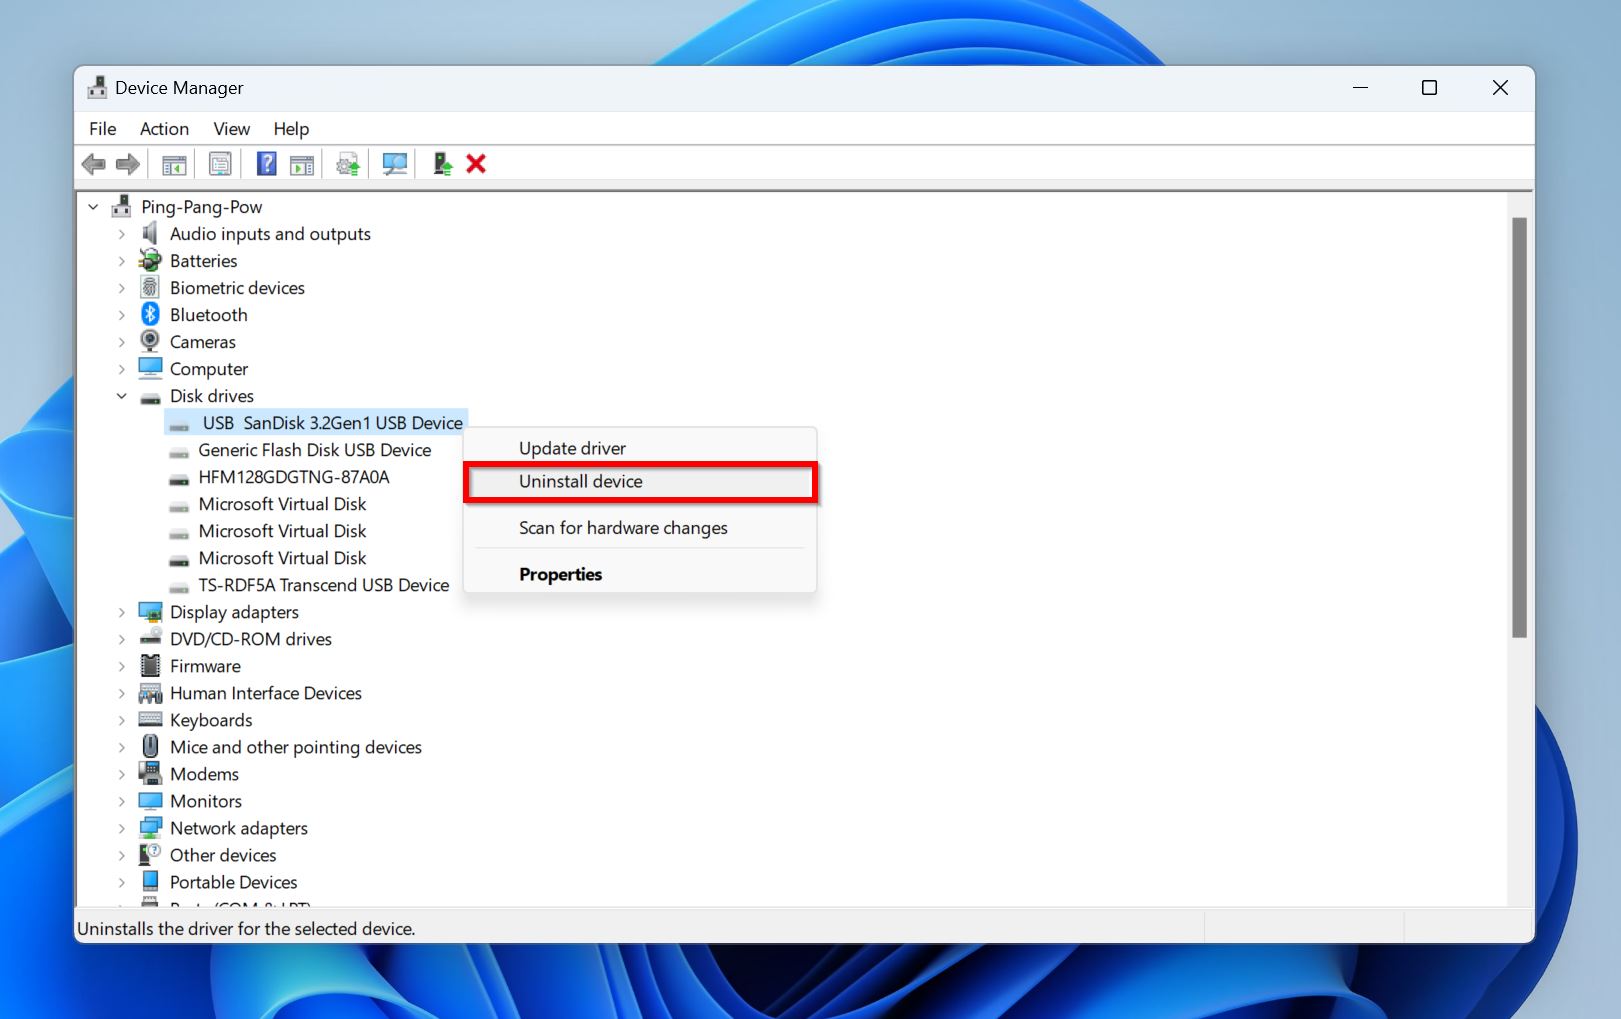
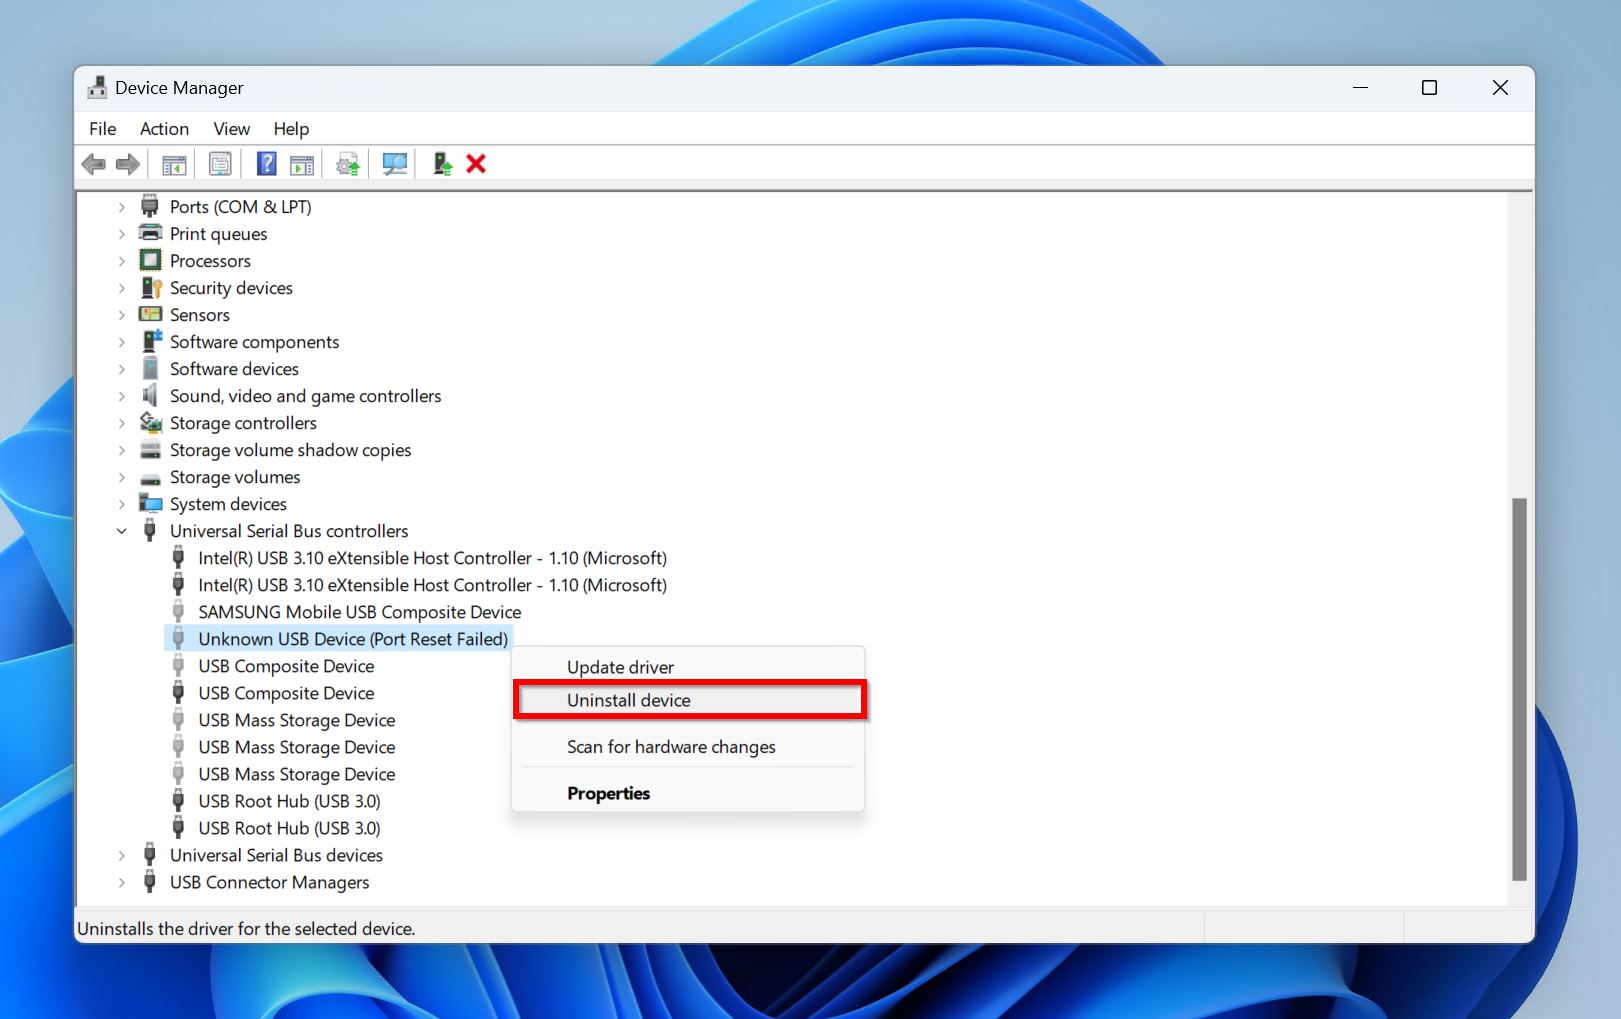
- Expand the Disk drives section, right-click on your drive and choose Uninstall device. Click Uninstall in the prompt that follows.
- Expand the Universal Serial Bus Controllers section. Right-click on each entry that is greyed out and select Uninstall device. Remember to click Uninstall on each prompt that appears.
- Restart your PC.
The hard drive with the blinking light should no longer be undetected.
Method 4:Update Drivers
Drivers help hardware communicate with the OS, and if the hard drive’s drivers are outdated, it may not work as it should. Updating the drivers can help fix an external hard disk that has its activity light on but is not detected.
To do this, you need to once again open the Device Manager:
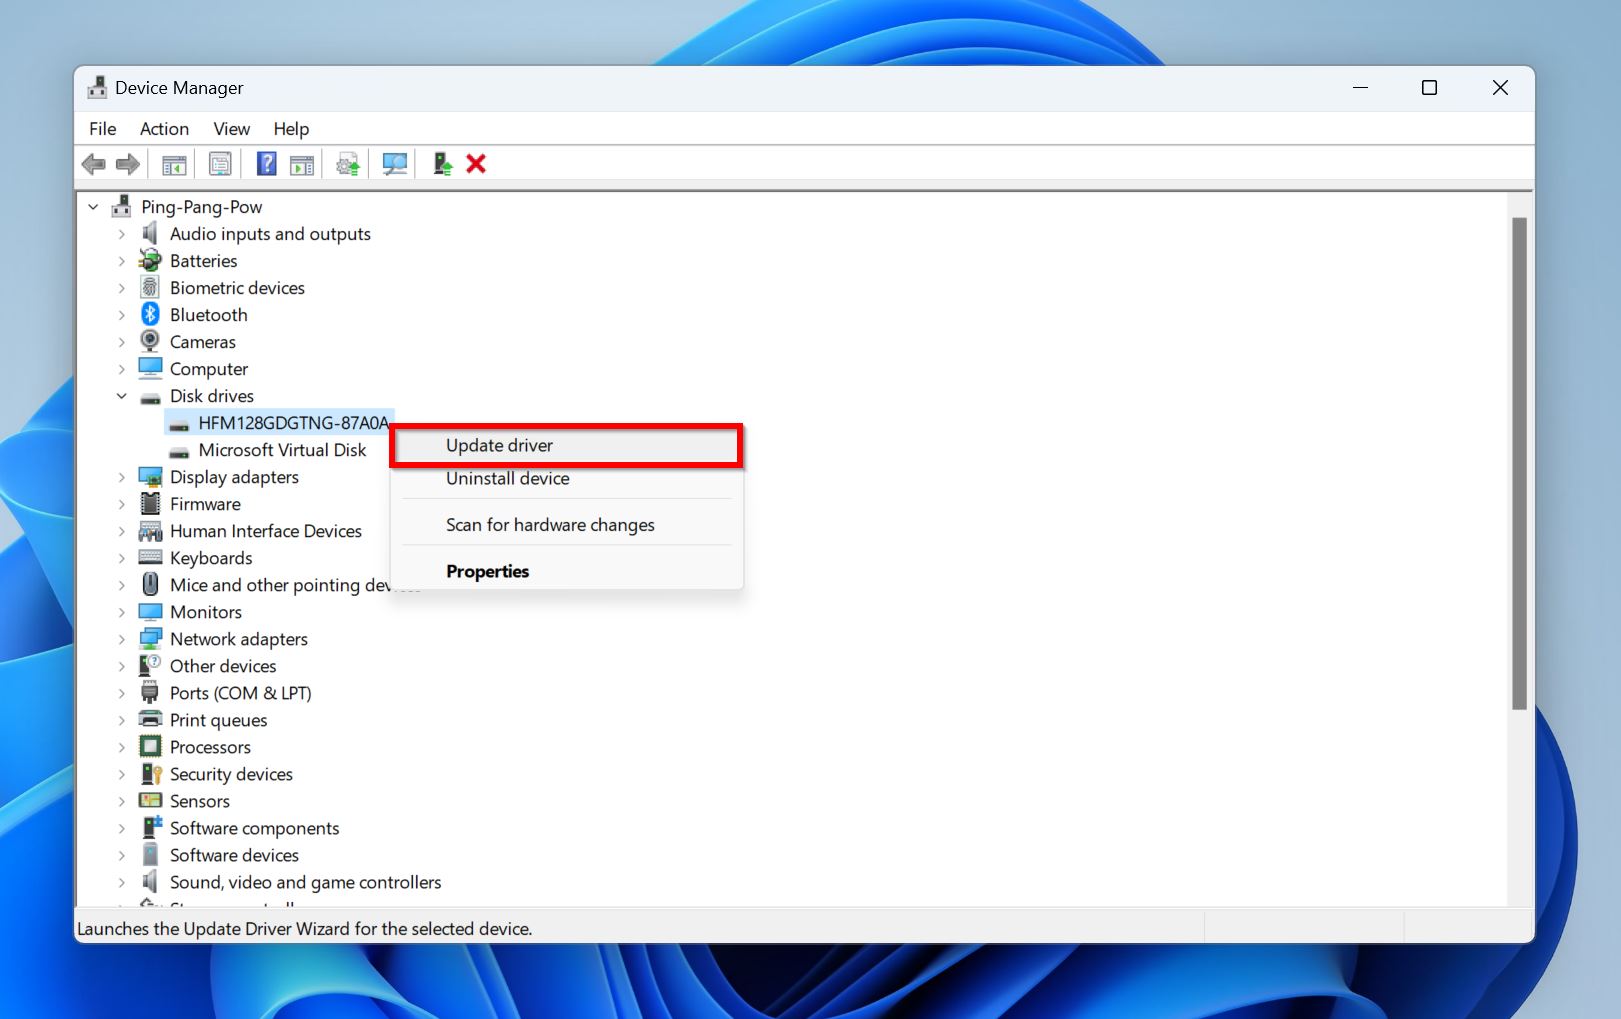
- Search for “device manager” in Windows Search (Windows Key + S) and launch the Device Manager.
- Expand the Disk drives section, right-click on your hard drive, and choose Update driver.
- Click on the Search automatically for drivers option on the next prompt.
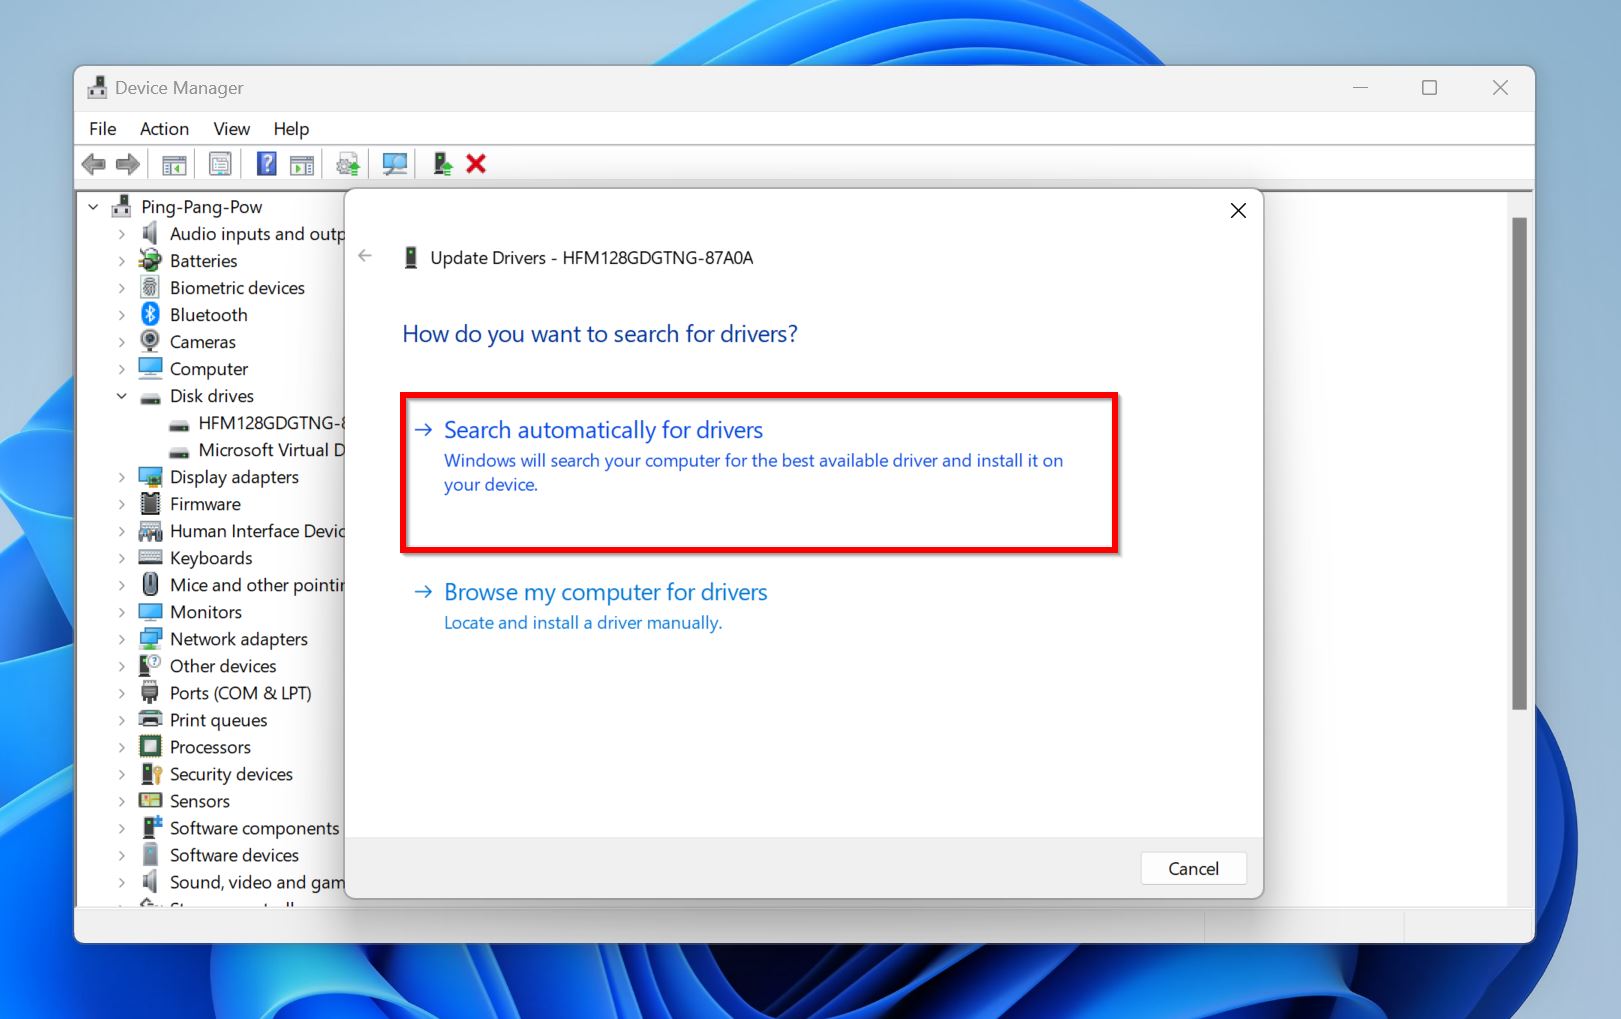
- Windows will automatically download and install the latest drivers for the drive.
- Restart your PC.
Method 5:Scan for Malware
A solid white activity light on your drive can indicate the presence of computer viruses and other types of malware. It’s best to scan your PC and the drive for viruses. While you can use third-party programs to do this, Windows’ in-built antivirus program, Windows Defender, is good enough as well.
To scan your system and the drive for viruses, follow these steps:
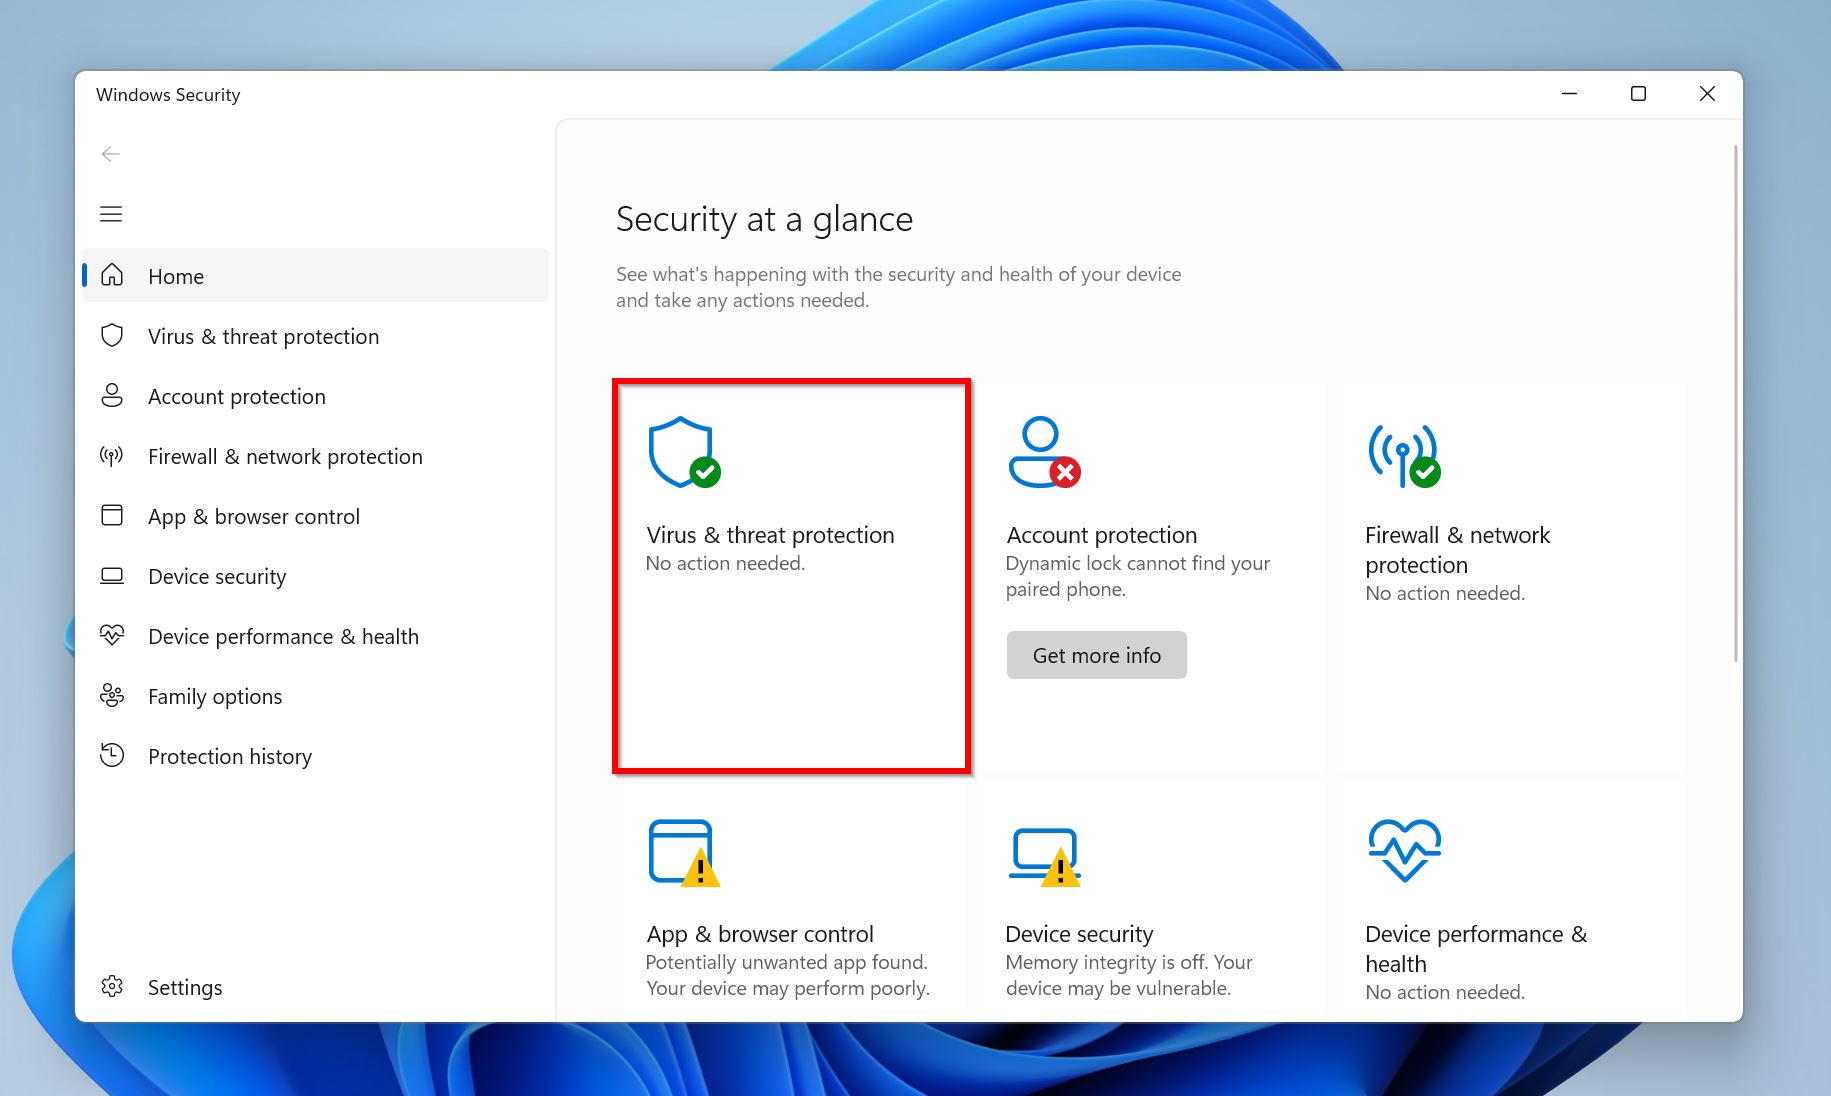
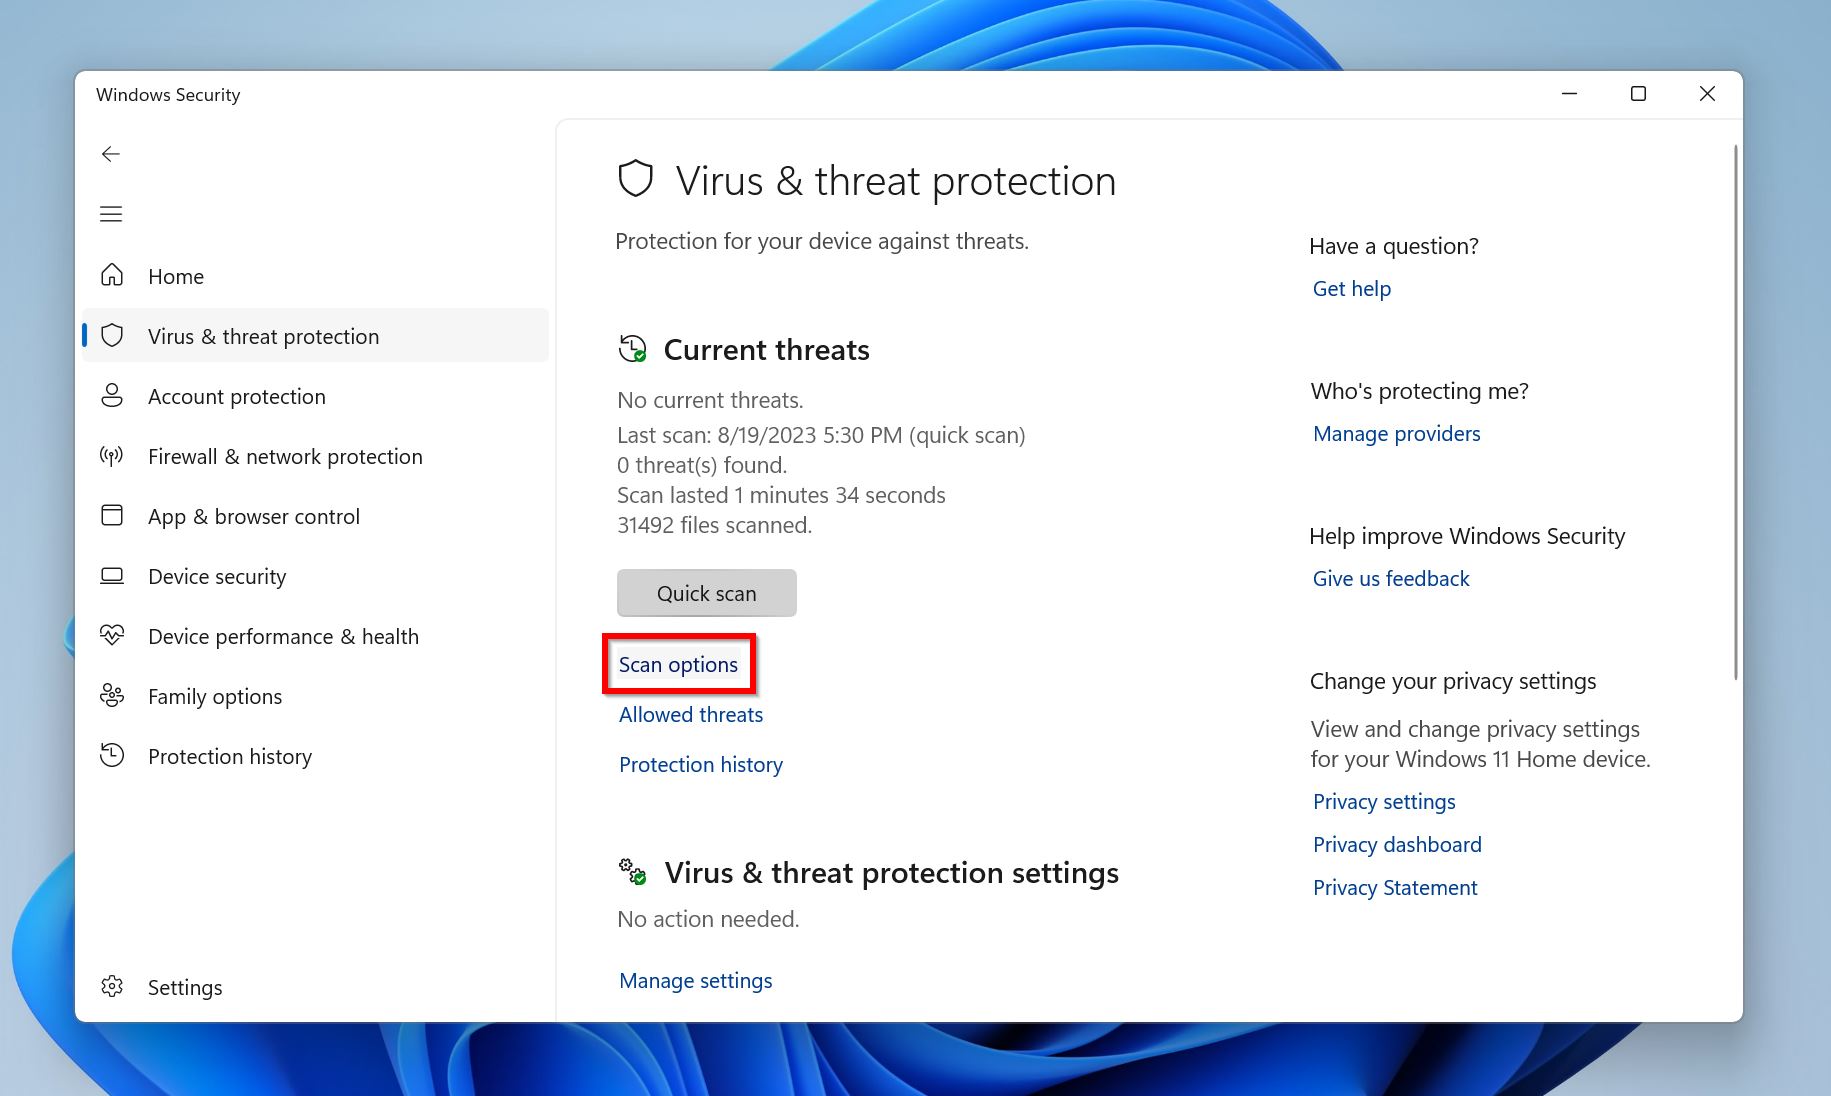
- Search for “windows security” in Windows Search (Windows Key + S). Launch the Windows Security app.
- Click on the Virus & threat protection option.
- Click on Scan options under Current Threats.
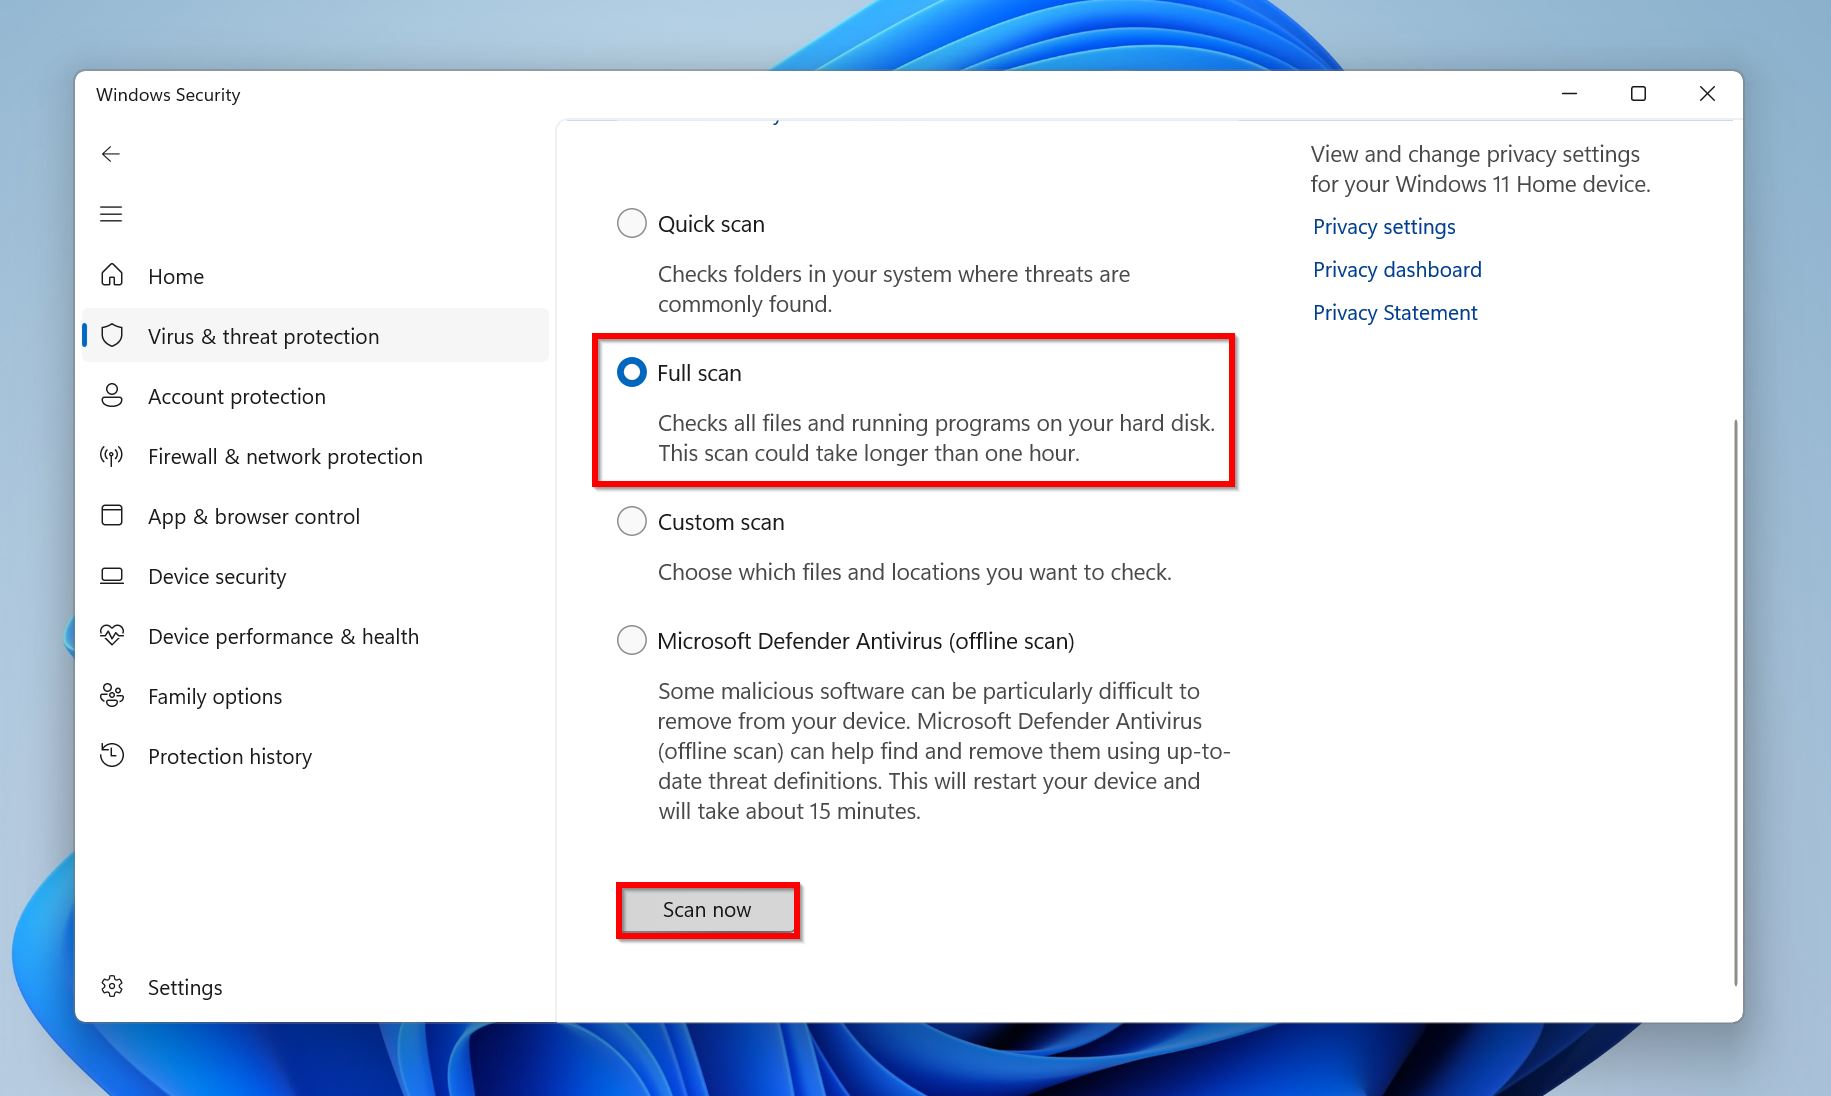
- Select Full Scan and click on Scan now. Wait for the scan to be over. Spoiler alert, it’s gonna take some time.
- Reboot your PC.
Method 6:Change the External Hard Disk’s Drive Letter
The drive letter (C:, D:, E:, etc.) is unique to each partition and external storage drive connected to Windows. If your drive’s drive letter is conflicting with some other storage drive or partition’s drive letter, it won’t appear in Windows Explorer. Luckily, you can manually change the drive letter and fix an external hard drive that’s not detected, despite a blinking activity light.
Here’s how:
- Press Windows Key + R to launch the Run app. Type diskmgmt.msc and press Enter to launch the Disk Management program. You can directly search for it in Windows Search (Windows Key + S), but trust me it’s more satisfying when you use the Run program to launch it.
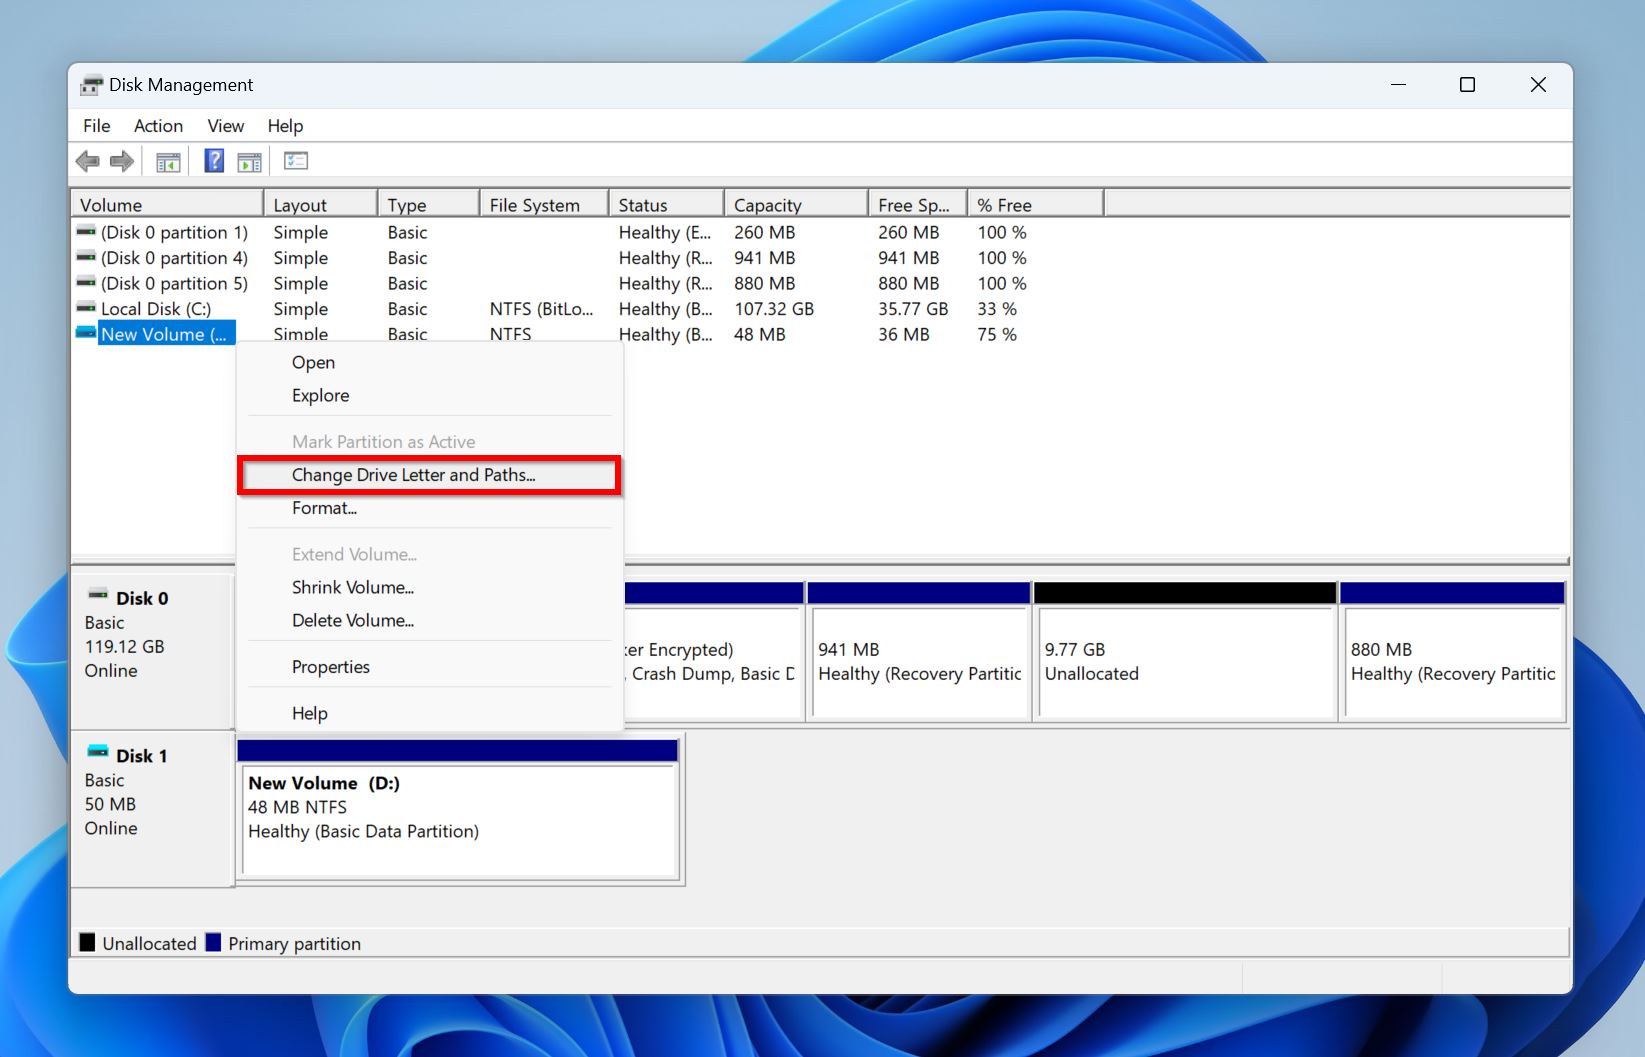
- Look for your external hard drive in the Disk Management window. Right-click on it and choose Change Drive Letter and Paths.
- Select your drive from the following prompt and click on Change.
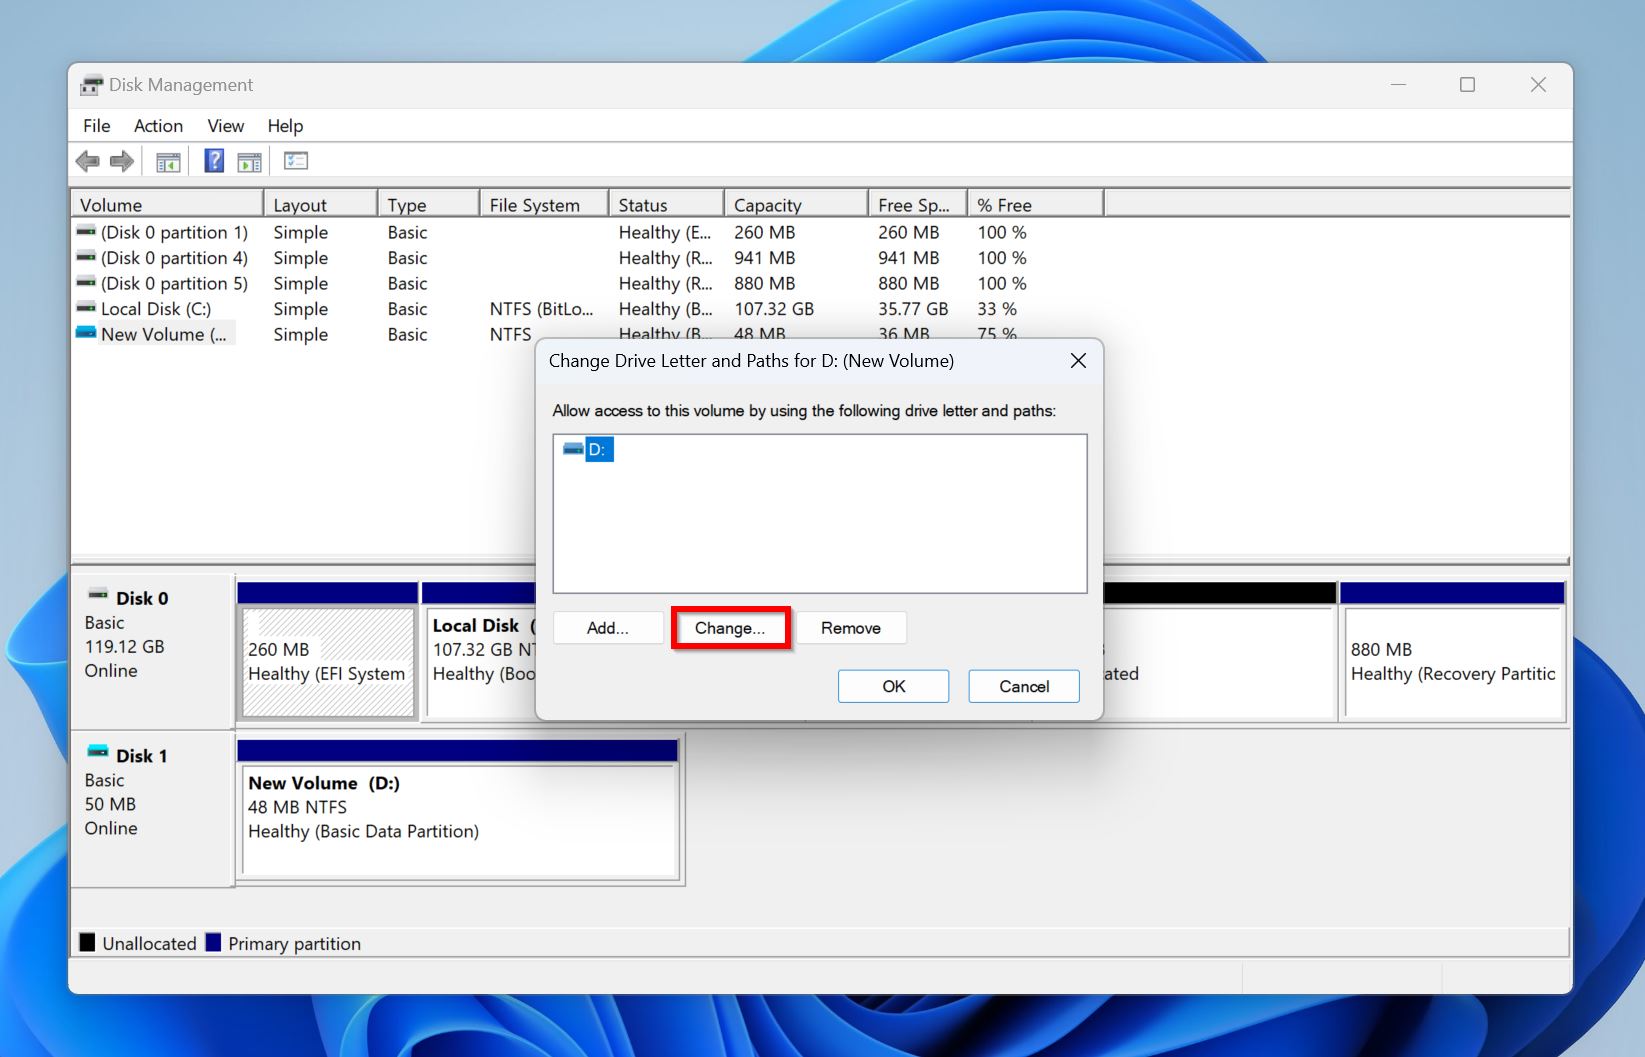
- Choose a drive letter from the drop-down menu and click OK.
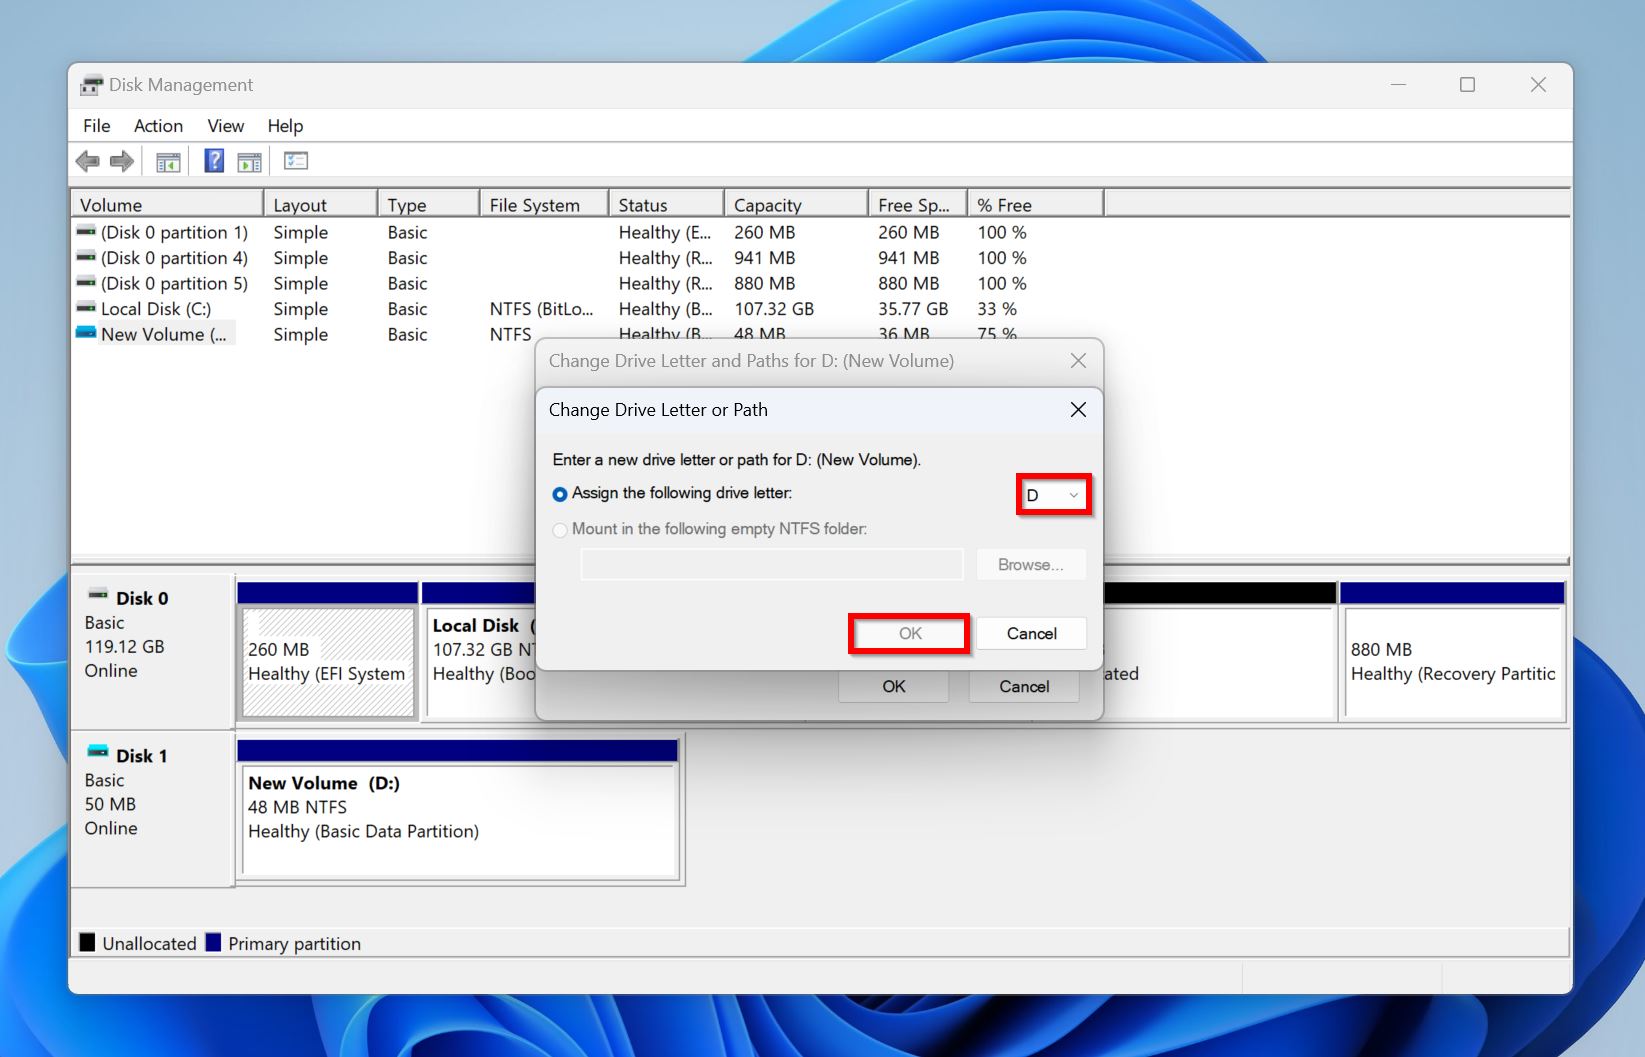
- Click OK and reboot your PC.
Method 7:Reformat and Repartition the Drive
If nothing else works, it’s best to format your drive and repartition it. However, this will only work if the drive is visible in Disk Management. If it’s not, you’re better off contacting a professional hard drive repair service.
Formatting wipes out all your files, so we recommend you use a professional data recovery program to get back your data first. Most programs will work as long as the drive is detected in Windows Disk Management, despite being unavailable in Windows Explorer.
Here’s how to format a hard drive in Windows:
- Open Disk Management, either by searching for it in Windows Search (Windows Key + S), or typing diskmgmt.msc and pressing Enter in the Run (Windows Key + R) app.
- Right-click on the hard drive and choose Format.
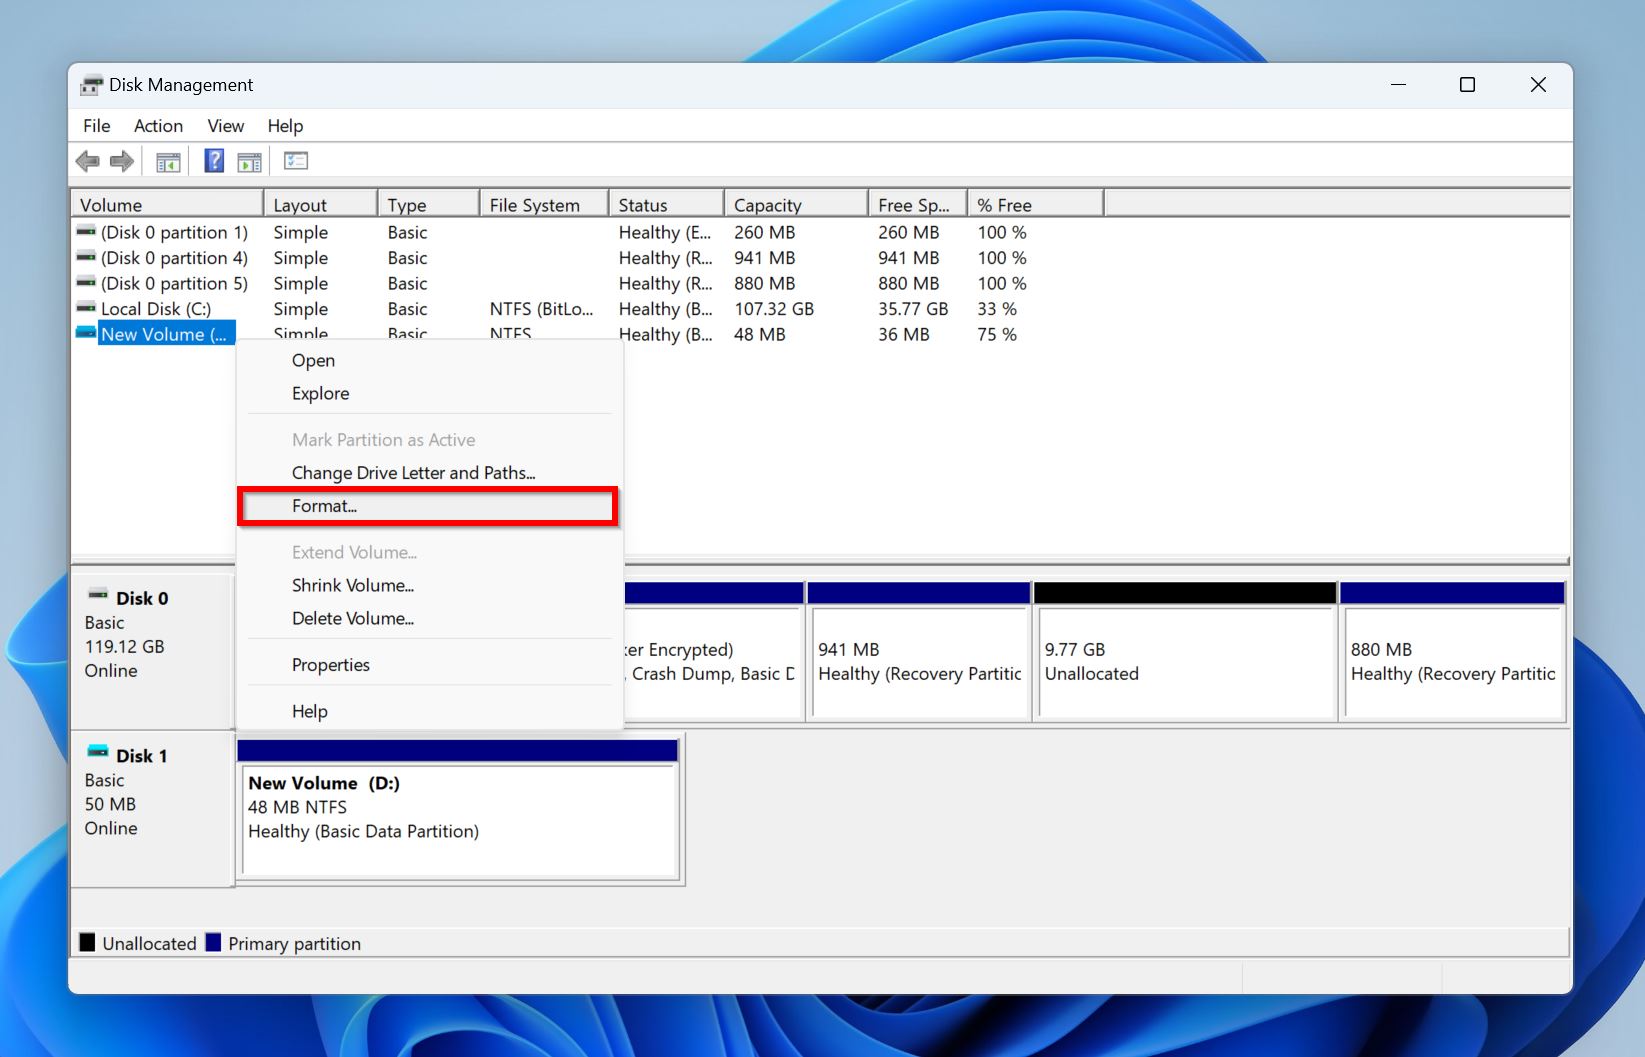
- Choose the file system and volume label you want and click OK.
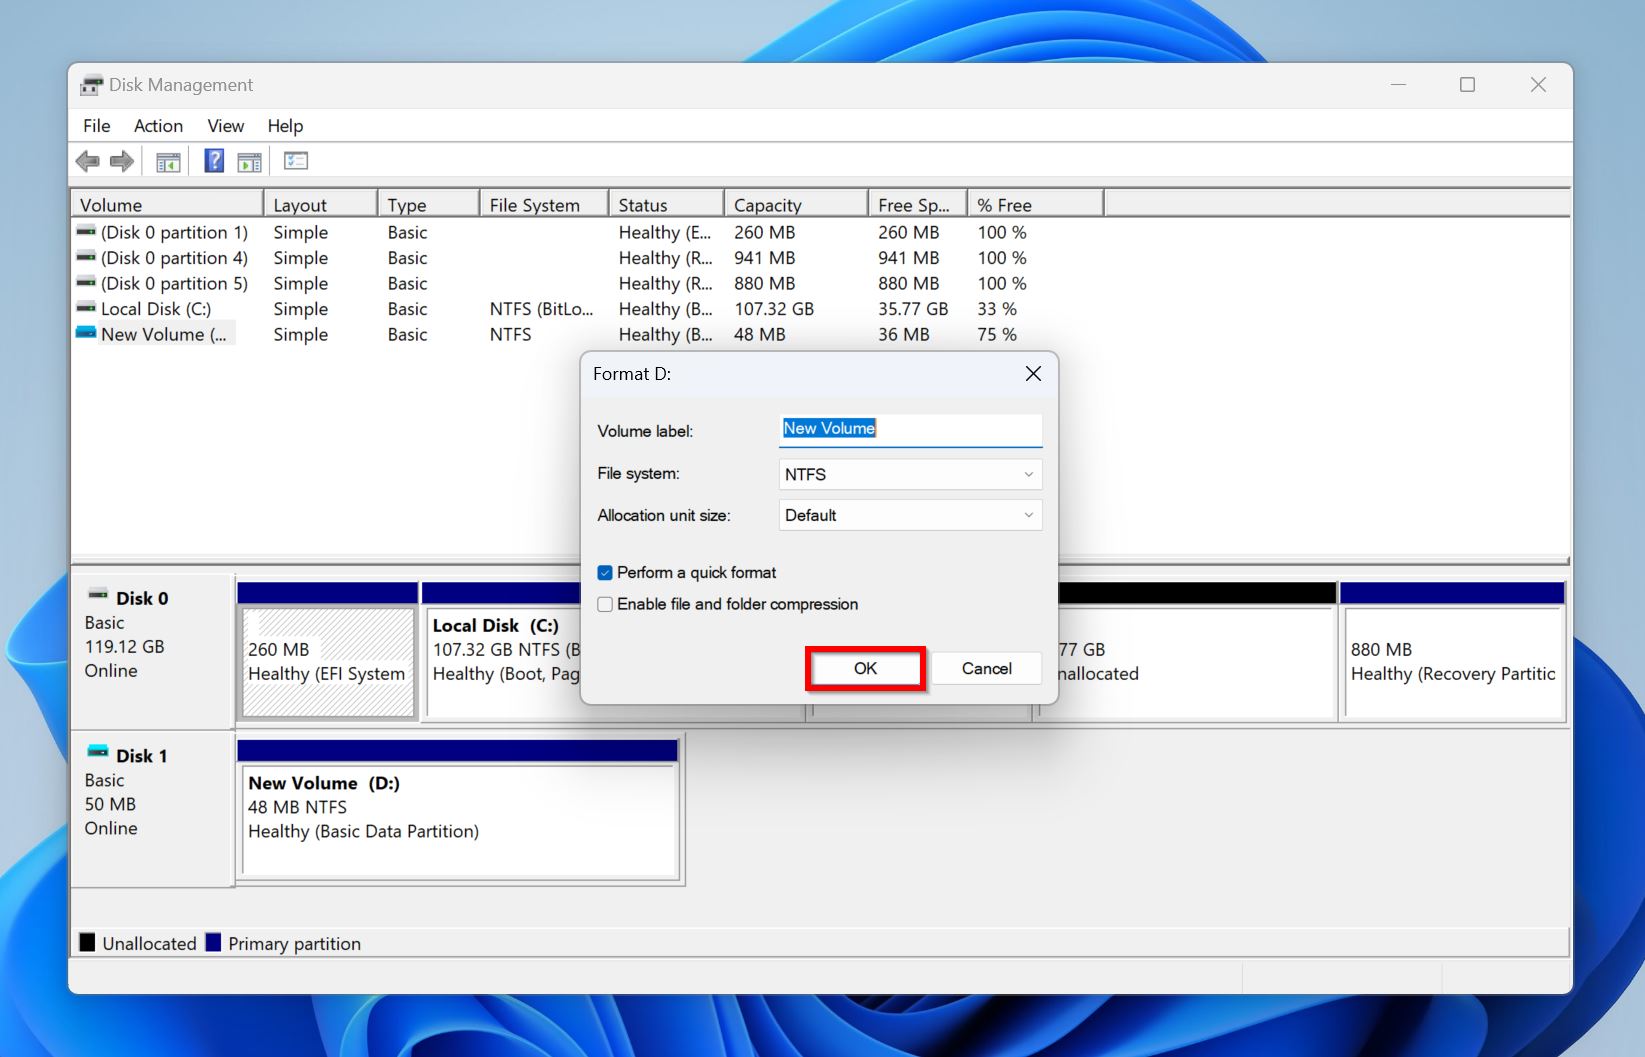
- Windows will format the drive.
You can create partitions using the New Simple Volume wizard in Disk Management.
How to Recover Data After Fixing the Blinking Hard Drive
Incurred some data loss when trying to fix the hard drive with a blinking light? Don’t worry, you can always recover it using a good data recovery program.
For this tutorial, we decided to use Disk Drill, as it’s user-friendly, affordable, and has an excellent data recovery algorithm. It’s also compatible with almost all file systems and will work on your drive even if it doesn’t have a file system at all, i.e., the drive is RAW. The only prerequisite? Your drive should be visible in Disk Management. Once that’s taken care of, here’s how you can recover data from the blinking hard drive:
- Download Disk Drill and install it. Do this on some other drive, and not on the drive you wish to recover data from.
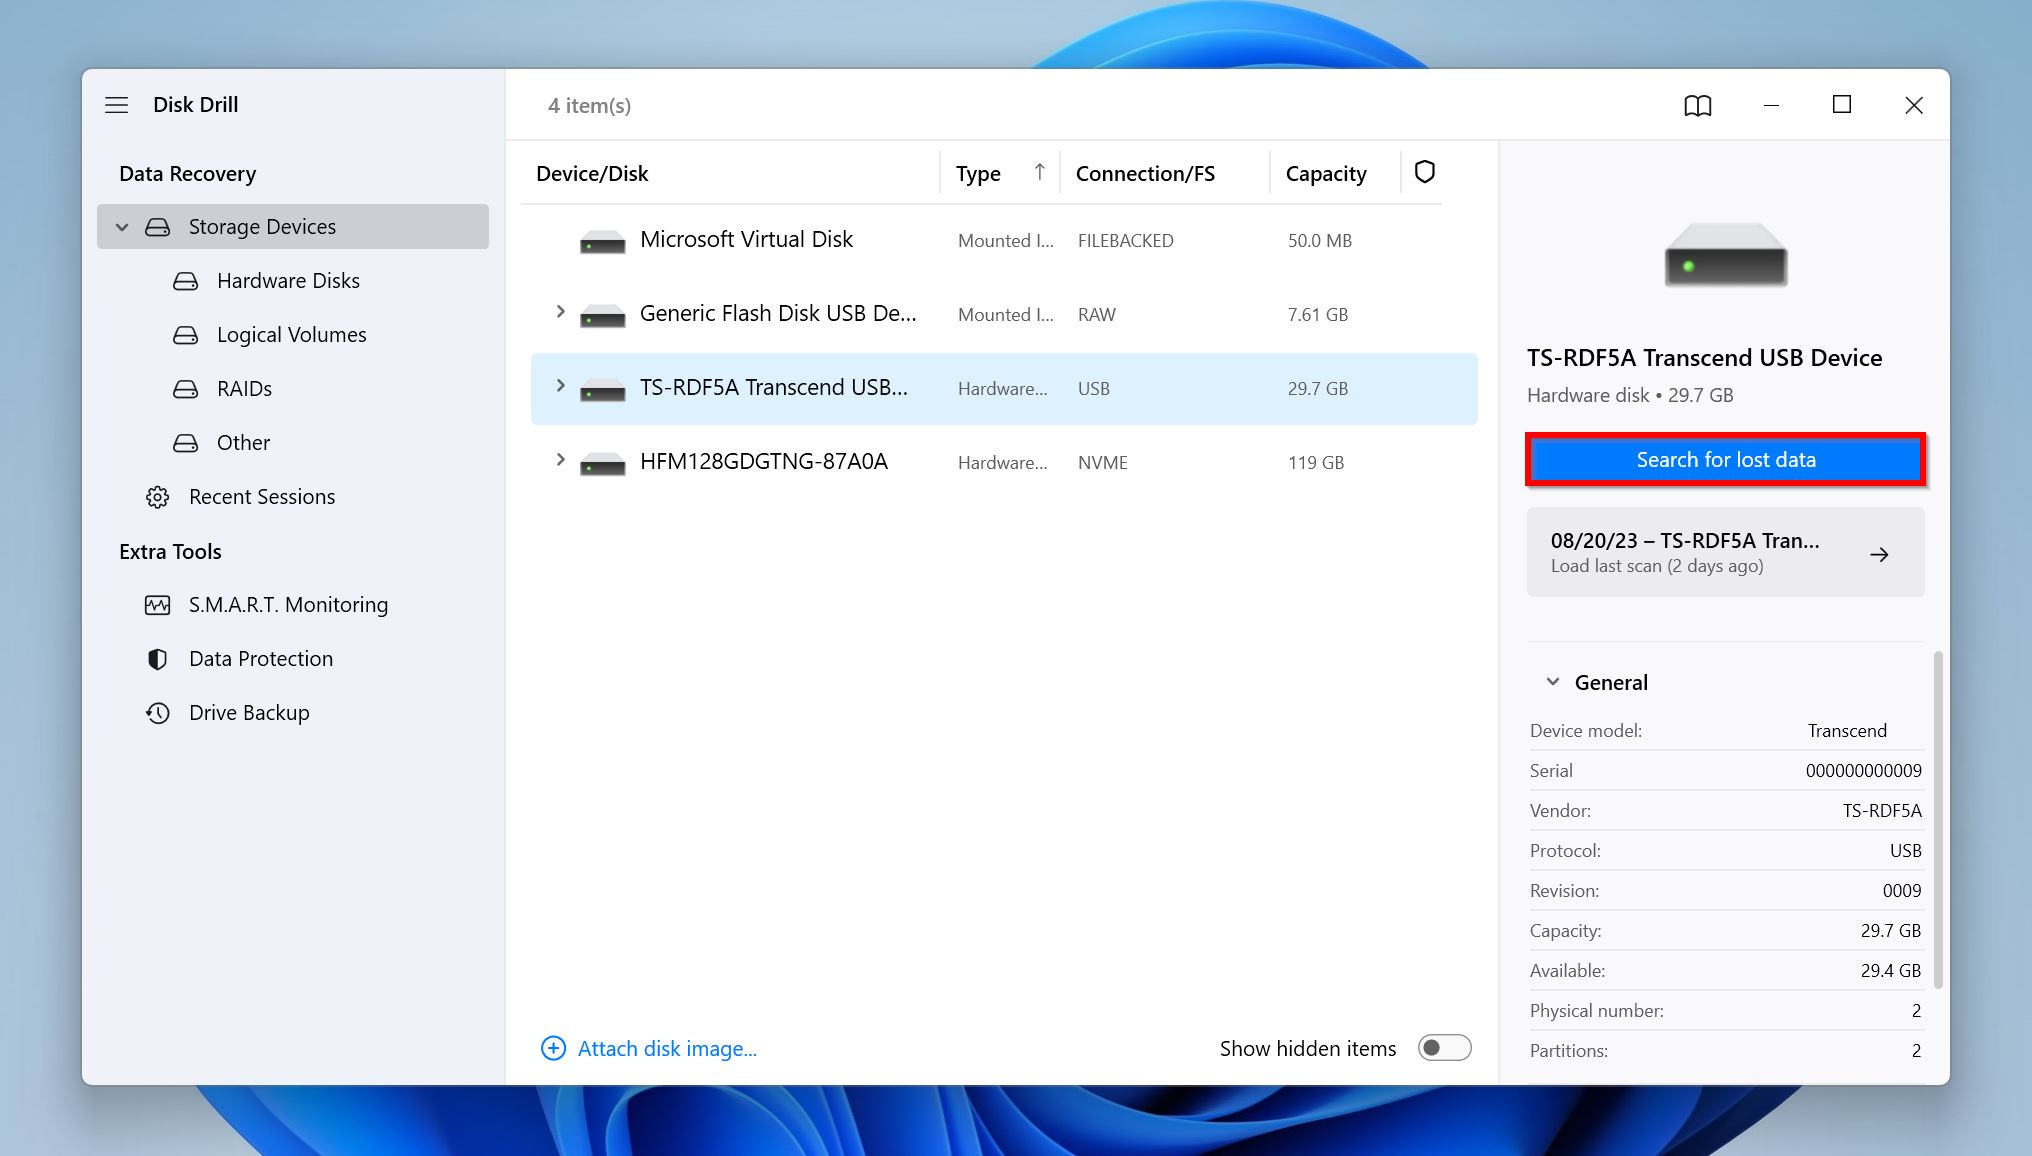
- Open Disk Drill, select the hard drive and click Search for lost data.
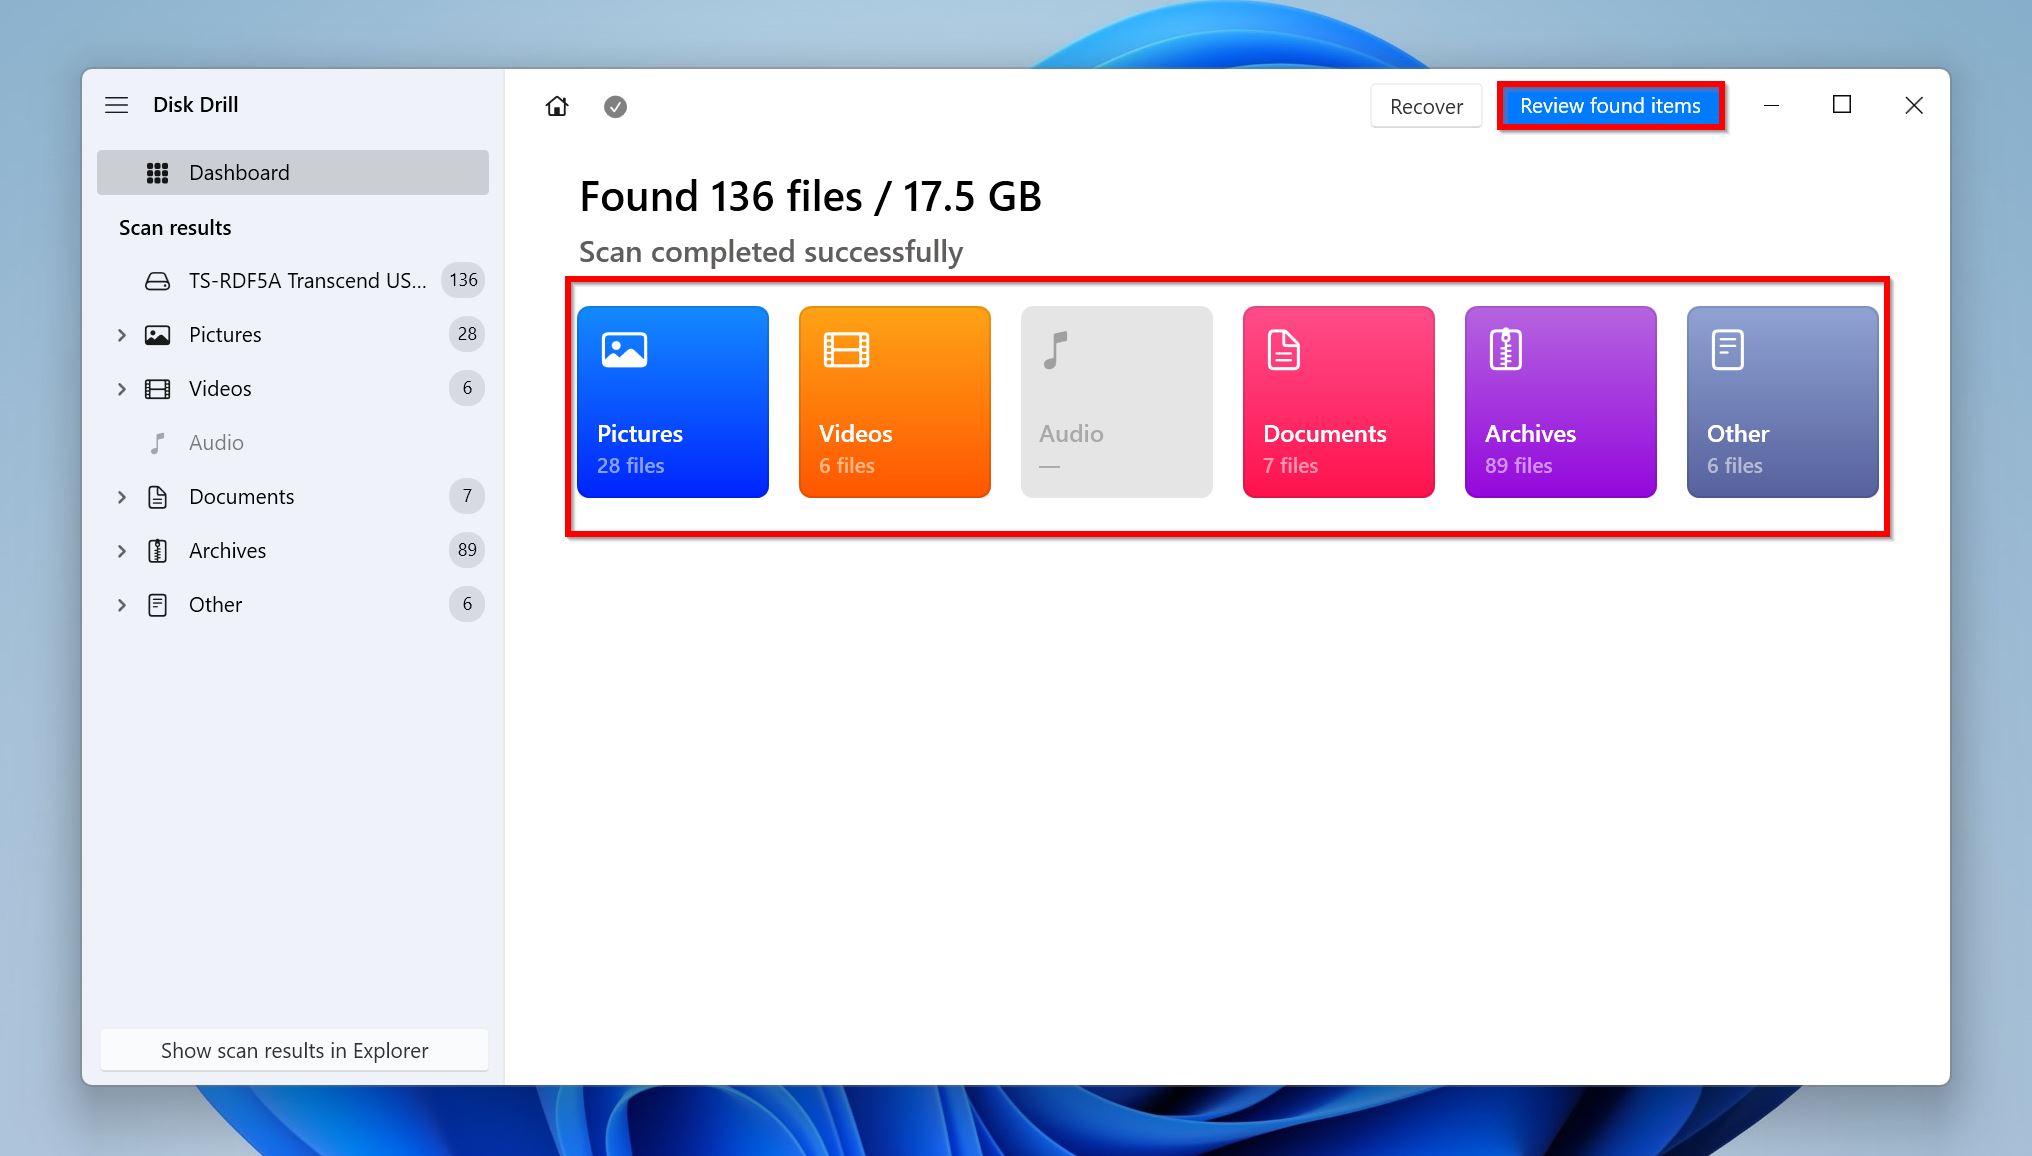
- Click on Review found items to view all recoverable files. If you wish to view only a specific file type, click on the relevant option instead (Pictures, Video, Audio, Documents, Archives, and Other).
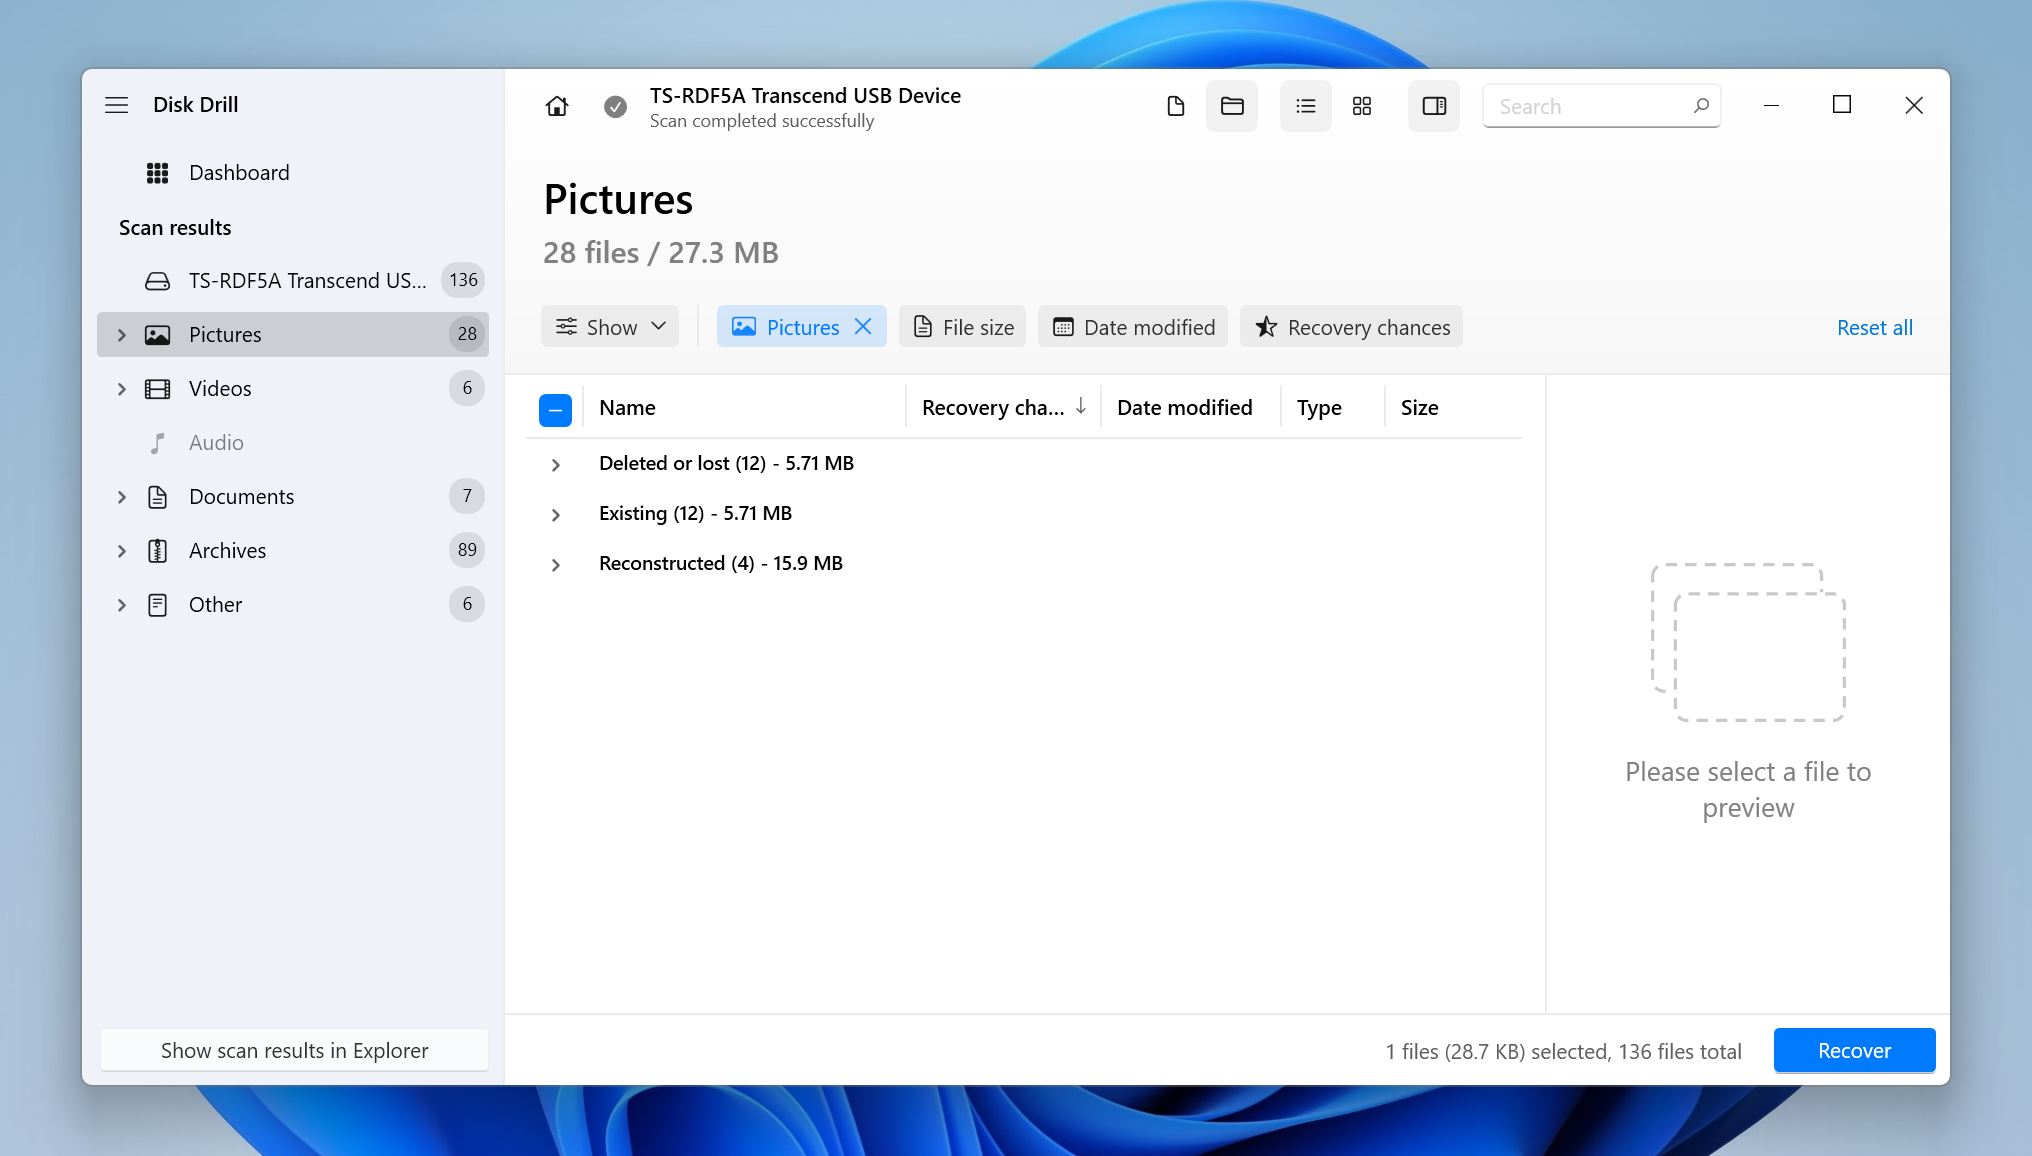
- Expand the Deleted or lost and Reconstructed sections to view deleted files that are recoverable. To view existing files on the disk, expand the Existing section.
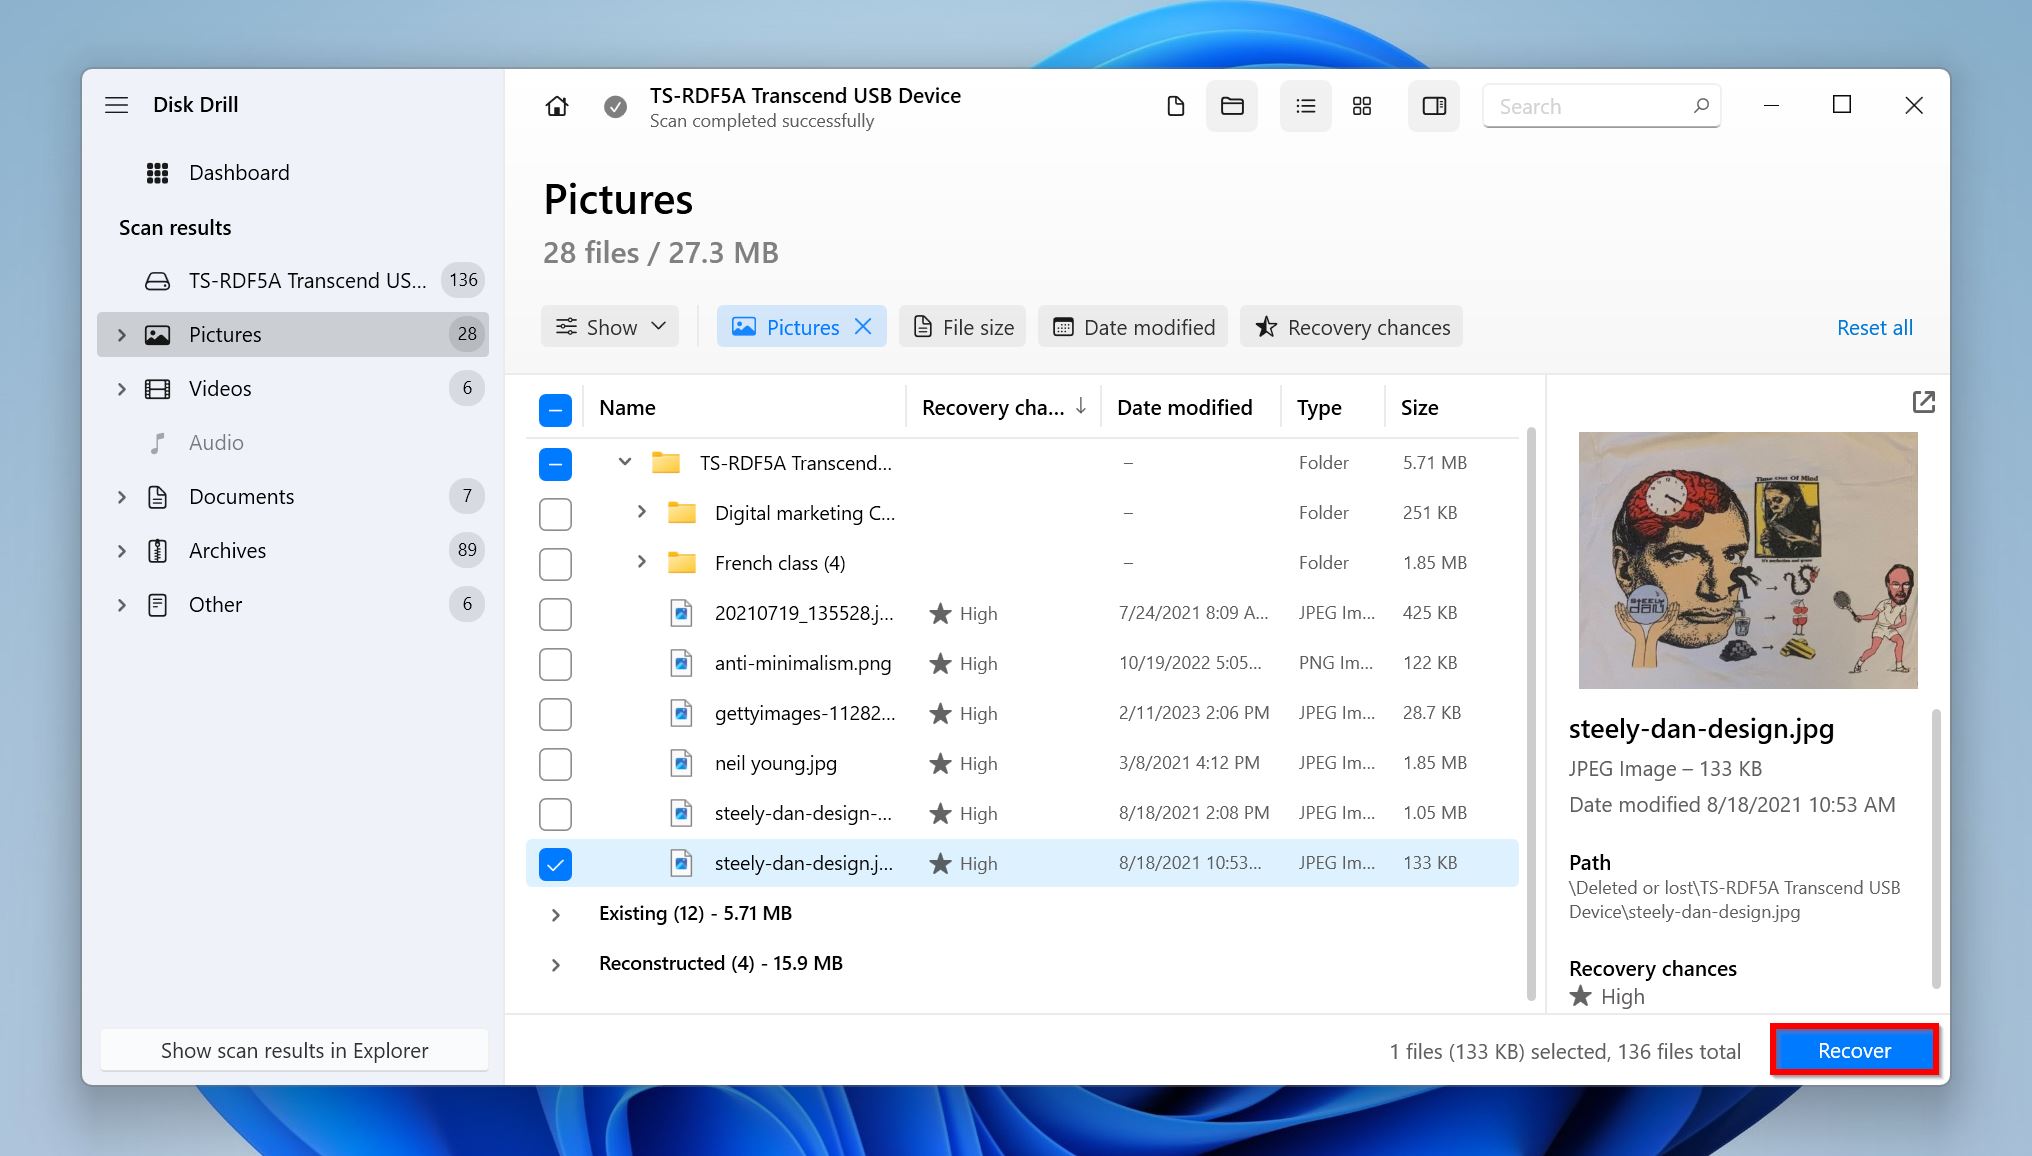
- Select the files you wish to recover. Disk Drill displays a preview of the currently selected file, but you can manually preview a file by clicking the eye icon next to its filename. Click on Recover once you’re done.
- Choose a recovery destination for the files and click Next.
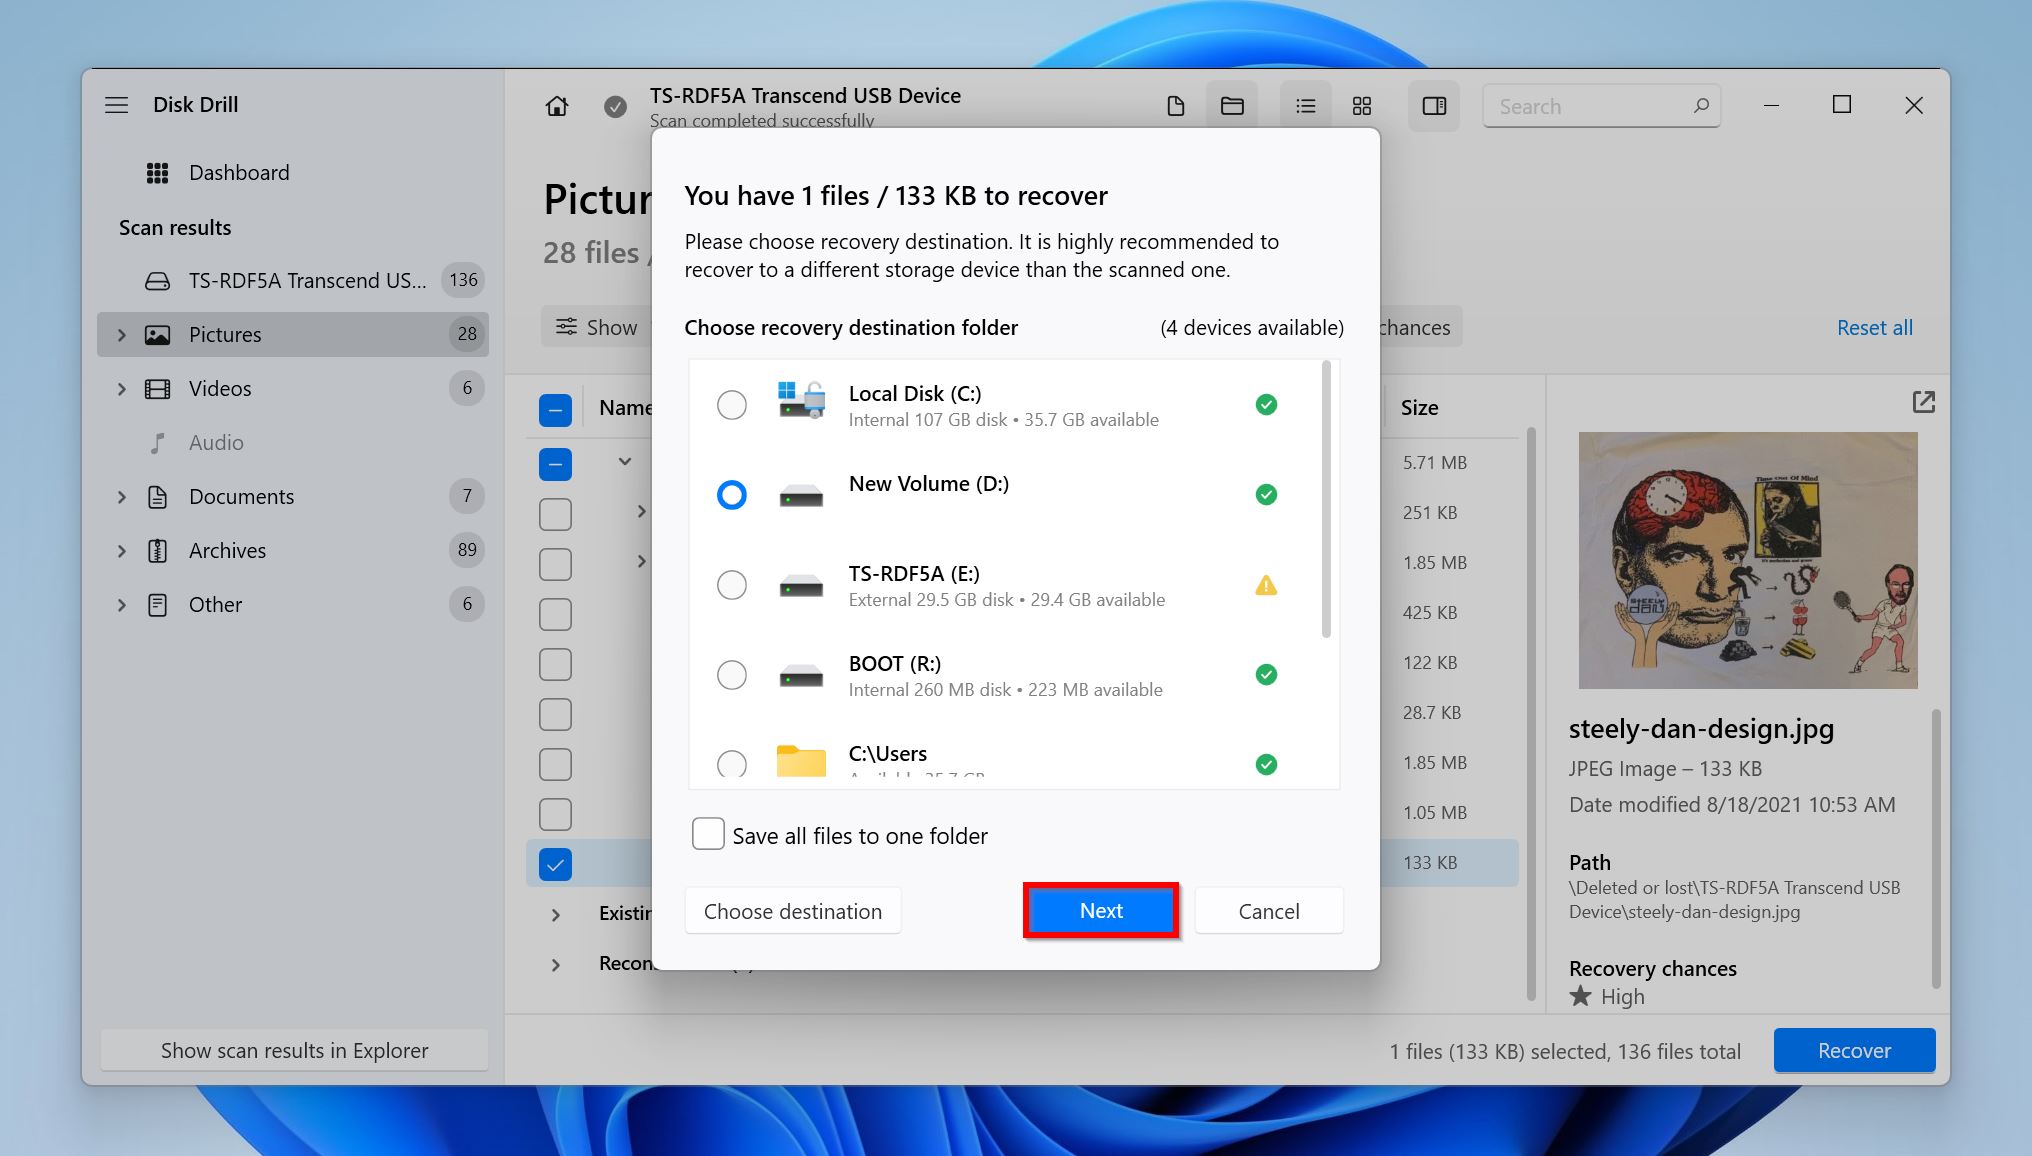
- Disk Drill will recover the files. Windows users get a free trial that lets you recover up to 500 MB of data for free.
Conclusion
A blinking light on your hard drive is usually nothing to fret about, unless it’s accompanied by other issues as well. There are various ways you can fix the drive that has a blinking light but is not detected–checking the cables, updating the disk drivers, ensuring there’s no malware on the PC, and more. If you notice some data is missing from the drive, you can use a data recovery program or contact a professional data recovery service to get it back.


