 If you’ve installed an OS on your PC, you will have come across the term, ‘partitioning.’ Many users assume that partitioning inherently erases your data. In the sections below, we’ll demystify partitioning, how it works, and whether it actually erases your data. As a bonus, we’ll also show you how to recover your data.
Table of Contents
What Happens When You Partition a Drive
When you partition a drive, you split it into regions or sections. Think of the hard drive as a shelf, with the partitions being separate compartments. You could have one compartment or multiple ones. Regardless, you do need to partition your drive to install an OS and begin storing data on it. The operating system sees each partition as a separate, independent section, allowing you to carry out operations in one partition without affecting the other.
Partitioning works similarly on all operating systems, more or less. On Windows, there are three main types of partitions:
- Primary Partition: Usually contains the primary operating system
- Extended Partition: The entire area that can be further subdivided into logical partitions to store data.
- Logical Partition: Used to organize data. You cannot install an operating system on logical partitions. They’re typically created when primary partitions (which have a limit, usually 4), aren’t enough.
Like everything else, partitioning has pros as well as cons.
Multiple partitions allow you to organize your data better and install more than one operating system. Partitioning also works as a good safety measure to protect your files against corruption – if files on one partition get corrupted, files on other partitions will typically remain unscathed.
But, there are some disadvantages of partitioning a hard drive as well. A major one is that it reduces the total usable storage space on your drive because the system creates a separate administration area on each partition. Additionally, multiple partitions can limit your ability to store large files. For example, if you have a 10 GB drive partitioned into two equal partitions (5 GB each), you will not be able to download and store a 6 GB file on the drive.
Does Partitioning Erase Data
By itself, partitioning a hard drive will not erase your data because a partition will be created using the unallocated space on your disk. In the case of existing partitions, Windows won’t let you shrink the space that has files stored in it. This is a protective measure to prevent data loss. However, if you format, or delete the wrong partition, your data will no longer be accessible.
But, the data is not permanently deleted– the OS just doesn’t remember where it is, i.e., its reference is lost. It’s similar to misplacing an object in your house. The object is in the house, you just don’t know where.
The good news is that all your data is recoverable in almost all cases. However, it could be trickier on BitLocker encrypted drives and partitions.
How to Recover Data From a Partitioned Drive
Third-party data recovery programs are a boon when it comes to DIY data recovery from a partitioned drive. The only catch? There are innumerable data recovery programs, and choosing the right one can be quite difficult. It’s best to read through reviews of the best data recovery apps and pick one that inspires the most confidence.
For this tutorial, we decided to use Disk Drill. Its clean UI and advanced data recovery algorithm make data recovery a breeze. The program works with all major file systems across both Windows and macOS, and detects more than 400 file formats. If you’re running Windows, you can take advantage of Disk Drill’s free trial, which lets you recover up to 500 MB of data at no cost.
Let’s see how you can recover data from a partitioned drive using Disk Drill:
- Download Disk Drill and install it. It’s best to download and install the program on a drive, apart from the one which requires data recovery.
- Open Disk Drill, select the partitioned drive, and click Search for lost data. Select the entire drive and not individual partitions.

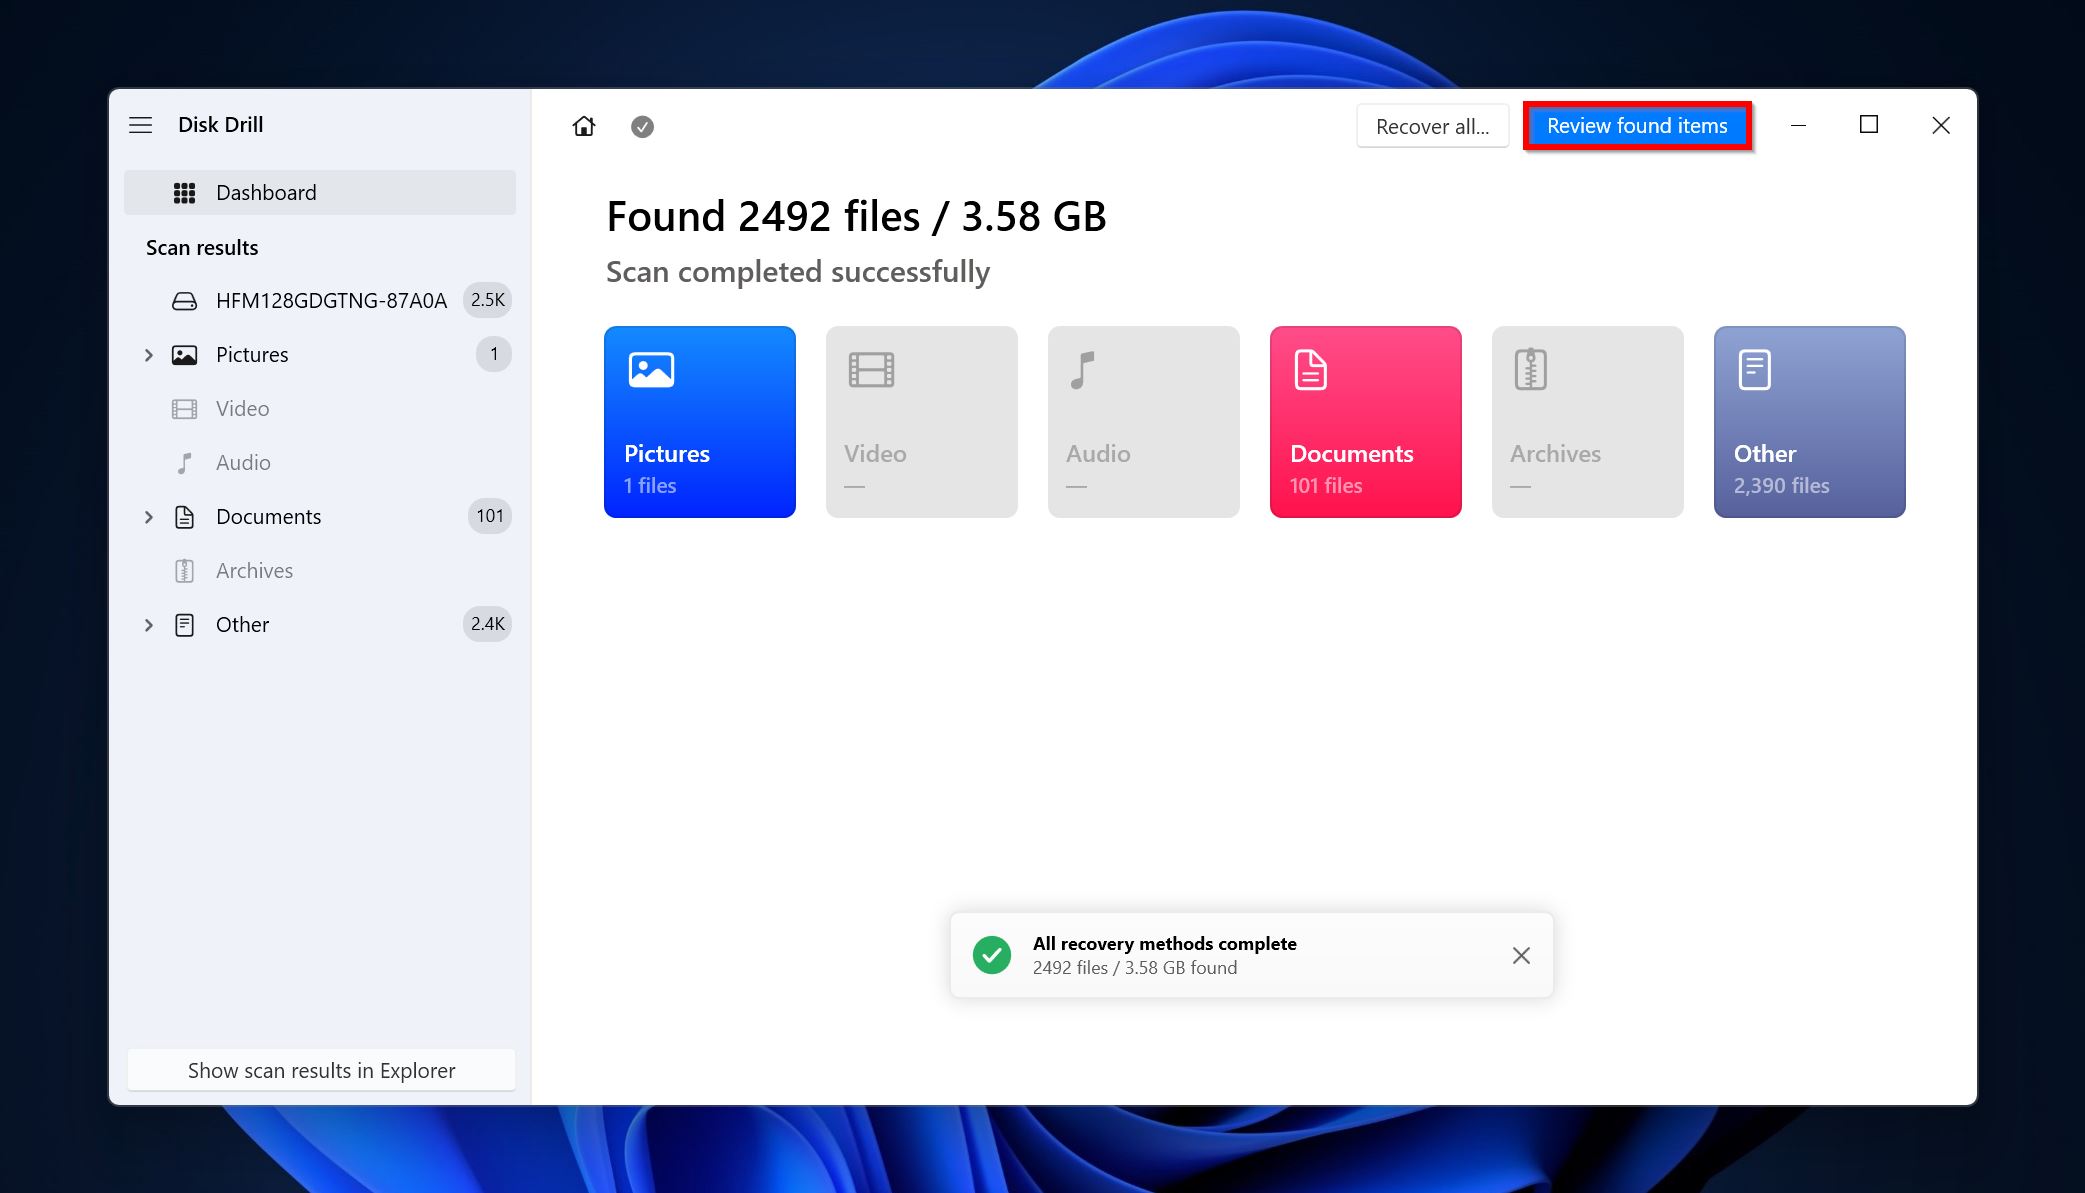
- Click on Review found items to view the recoverable files. You can directly filter out the results by clicking on the file type you wish to recover (Pictures, Video, Audio, Documents, Archives, and Other).
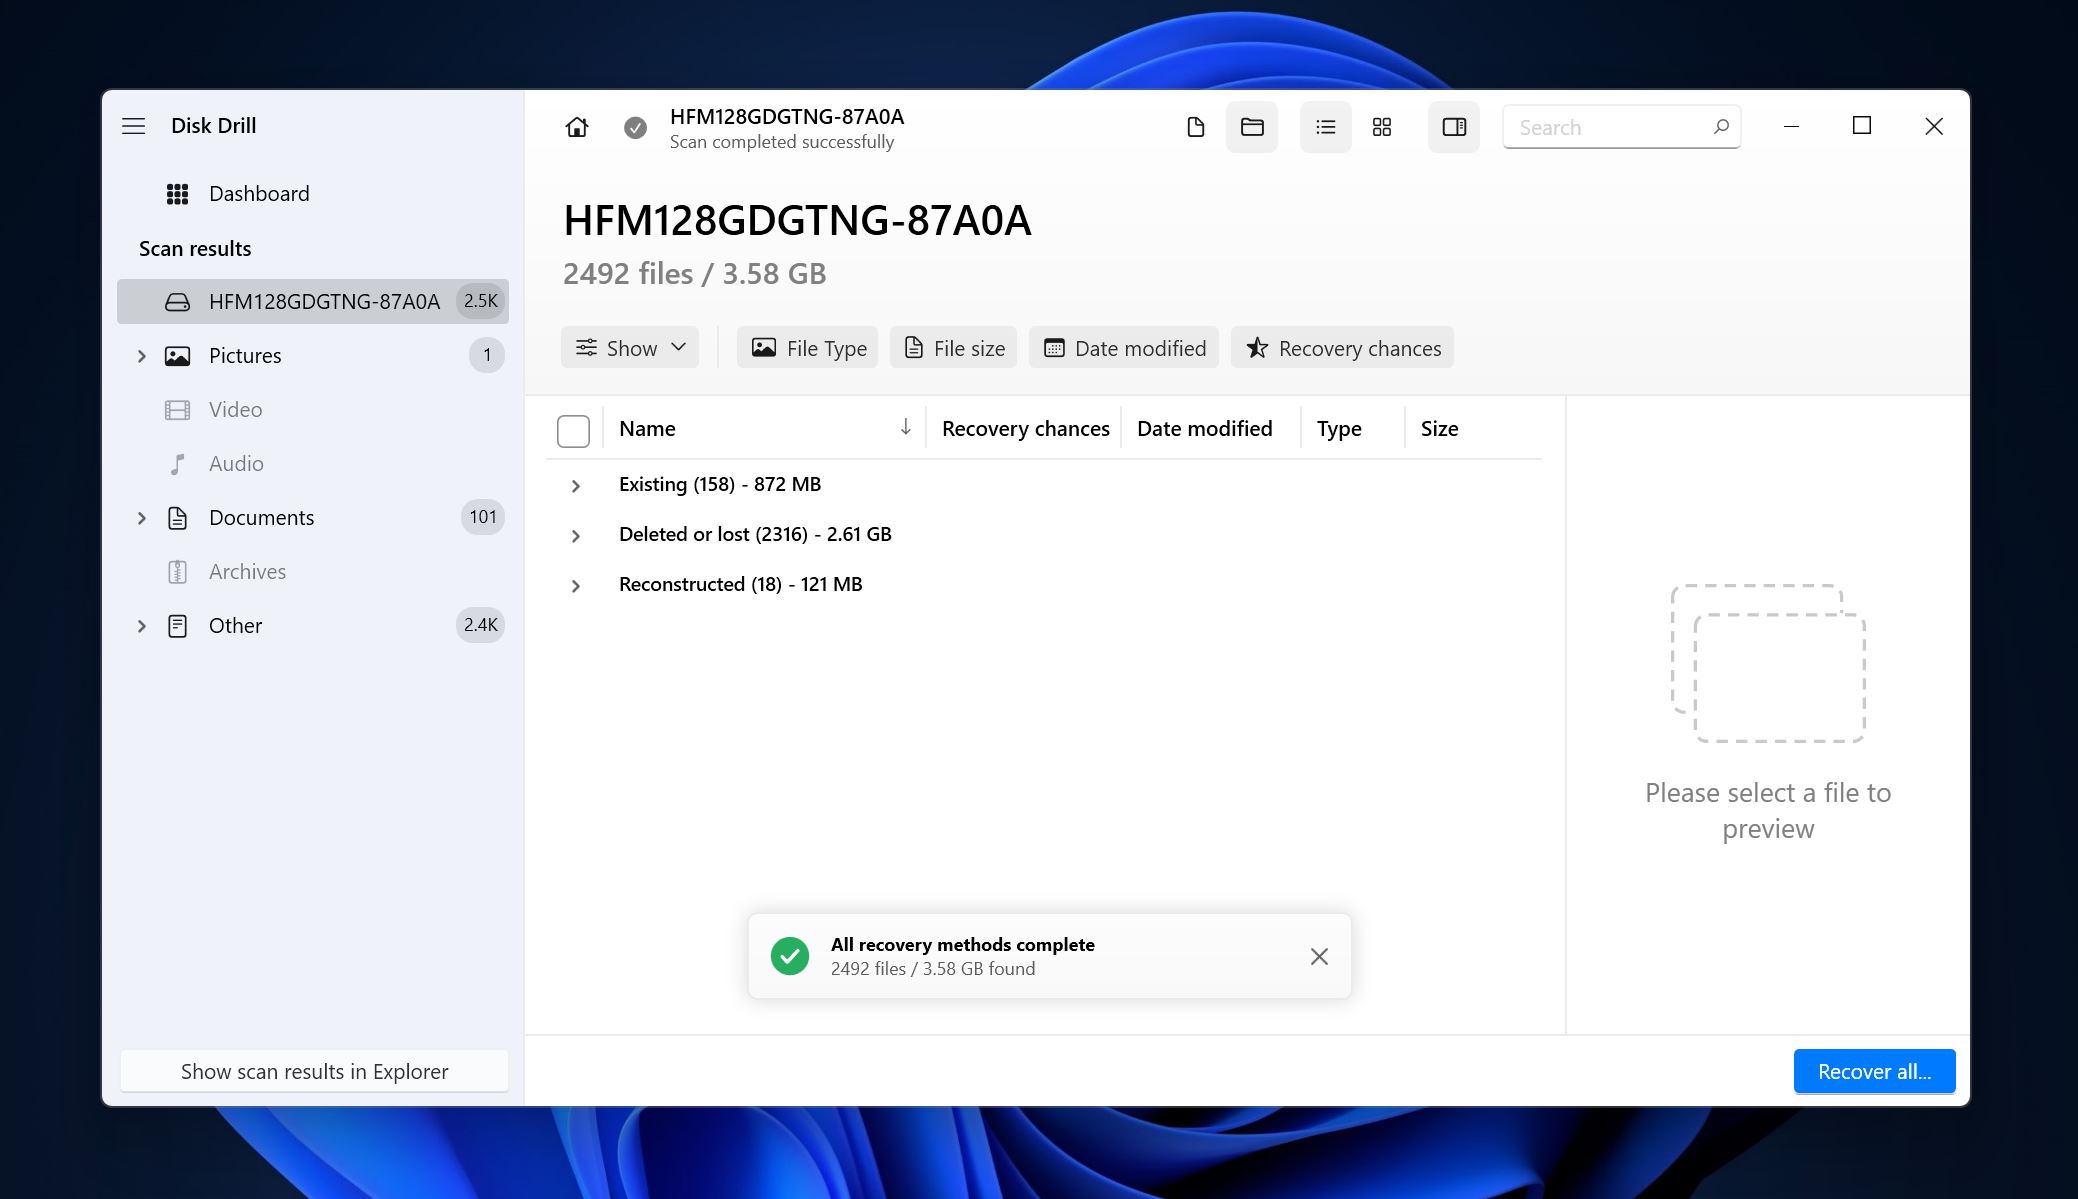
- Expand the Deleted or lost and Reconstructed sections to view deleted, recoverable files. The Existing section will contain files that are intact and stored on the drive, but may not be accessible in the Windows Explorer.
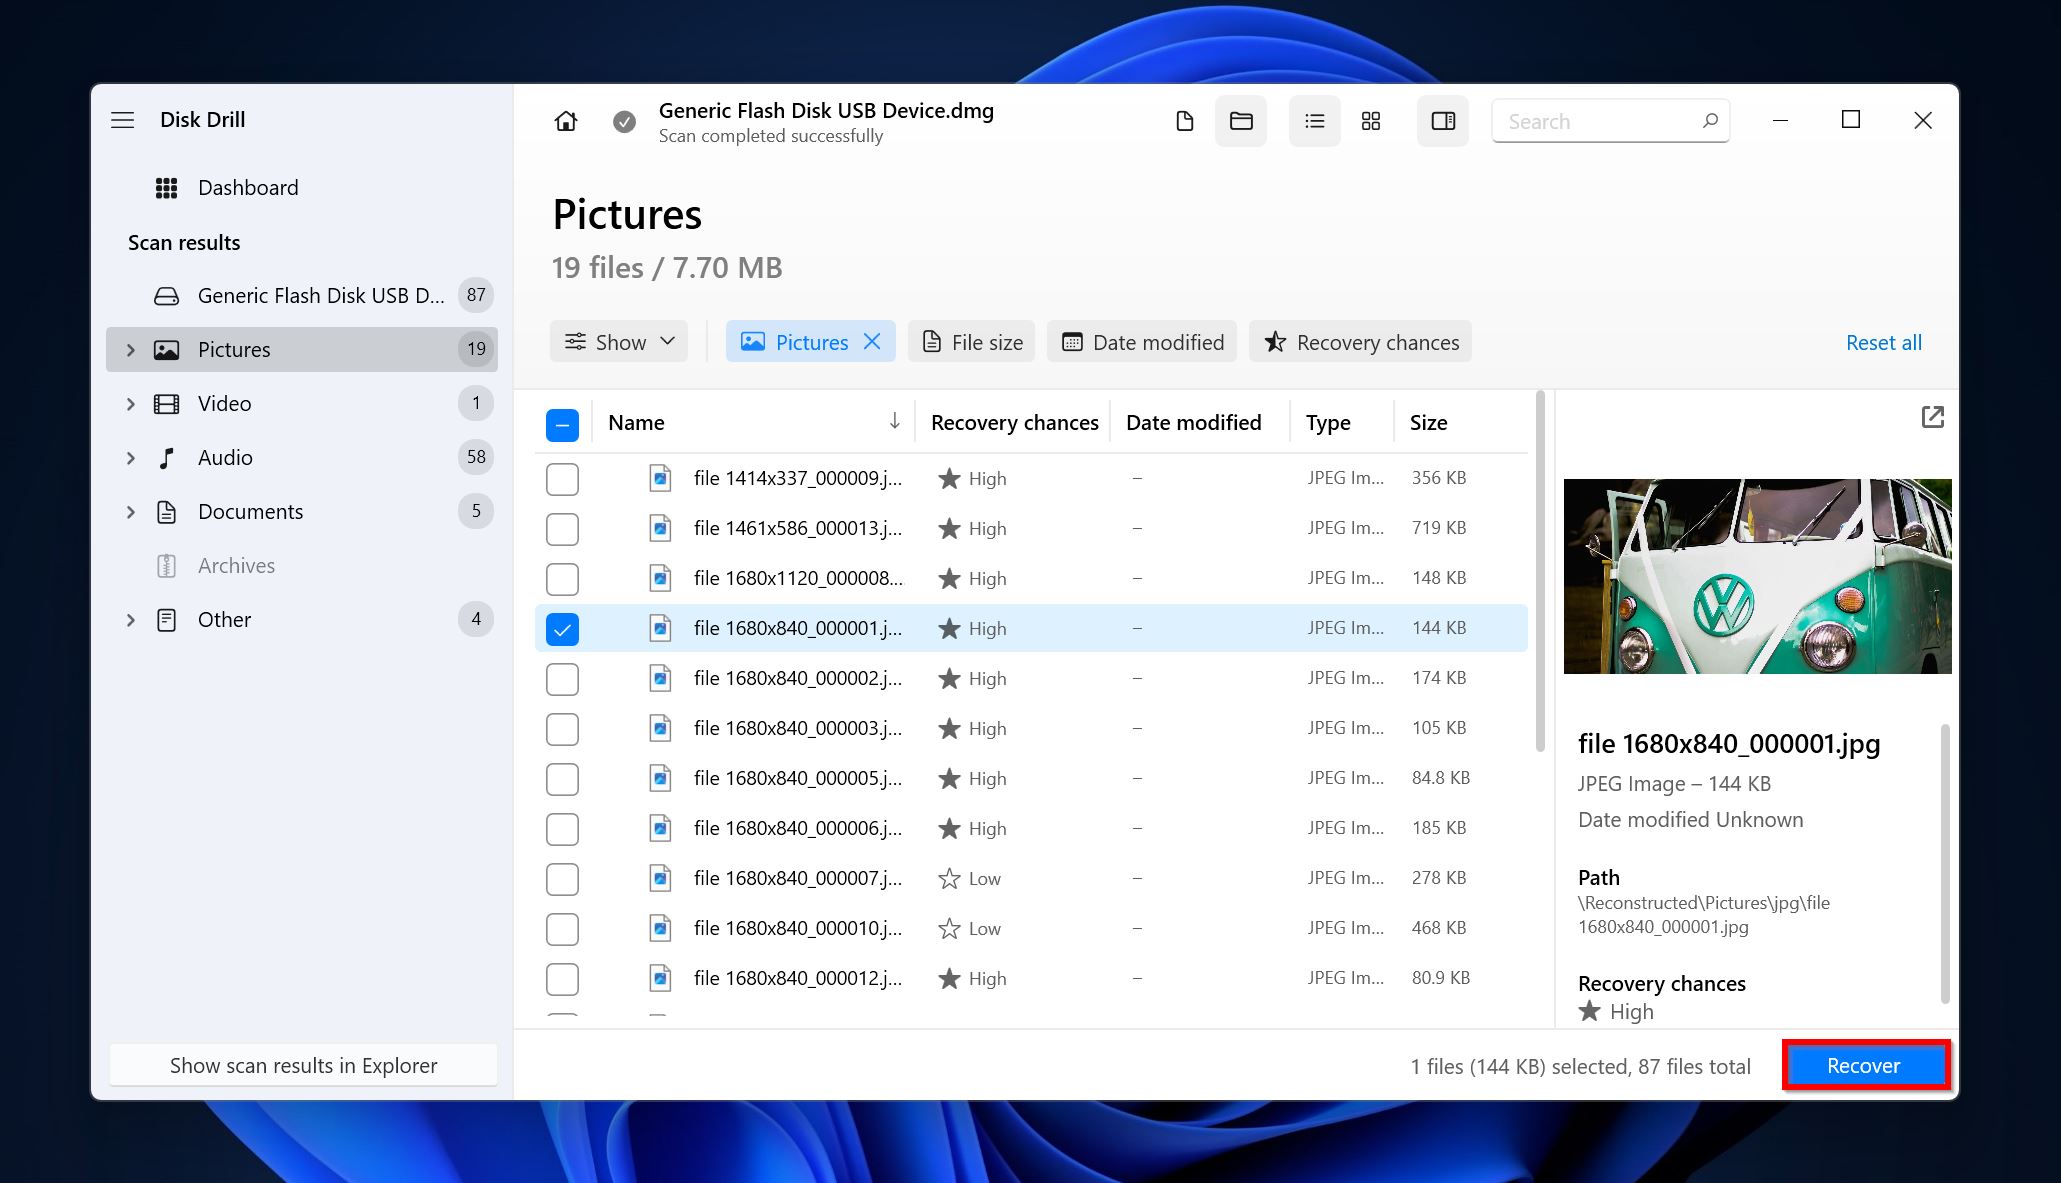
- Use the checkboxes to select the files you want to recover. Disk Drill will automatically display a preview of the currently selected file, but you can manually preview files by clicking the eye icon next to the filename. Click on Recover.
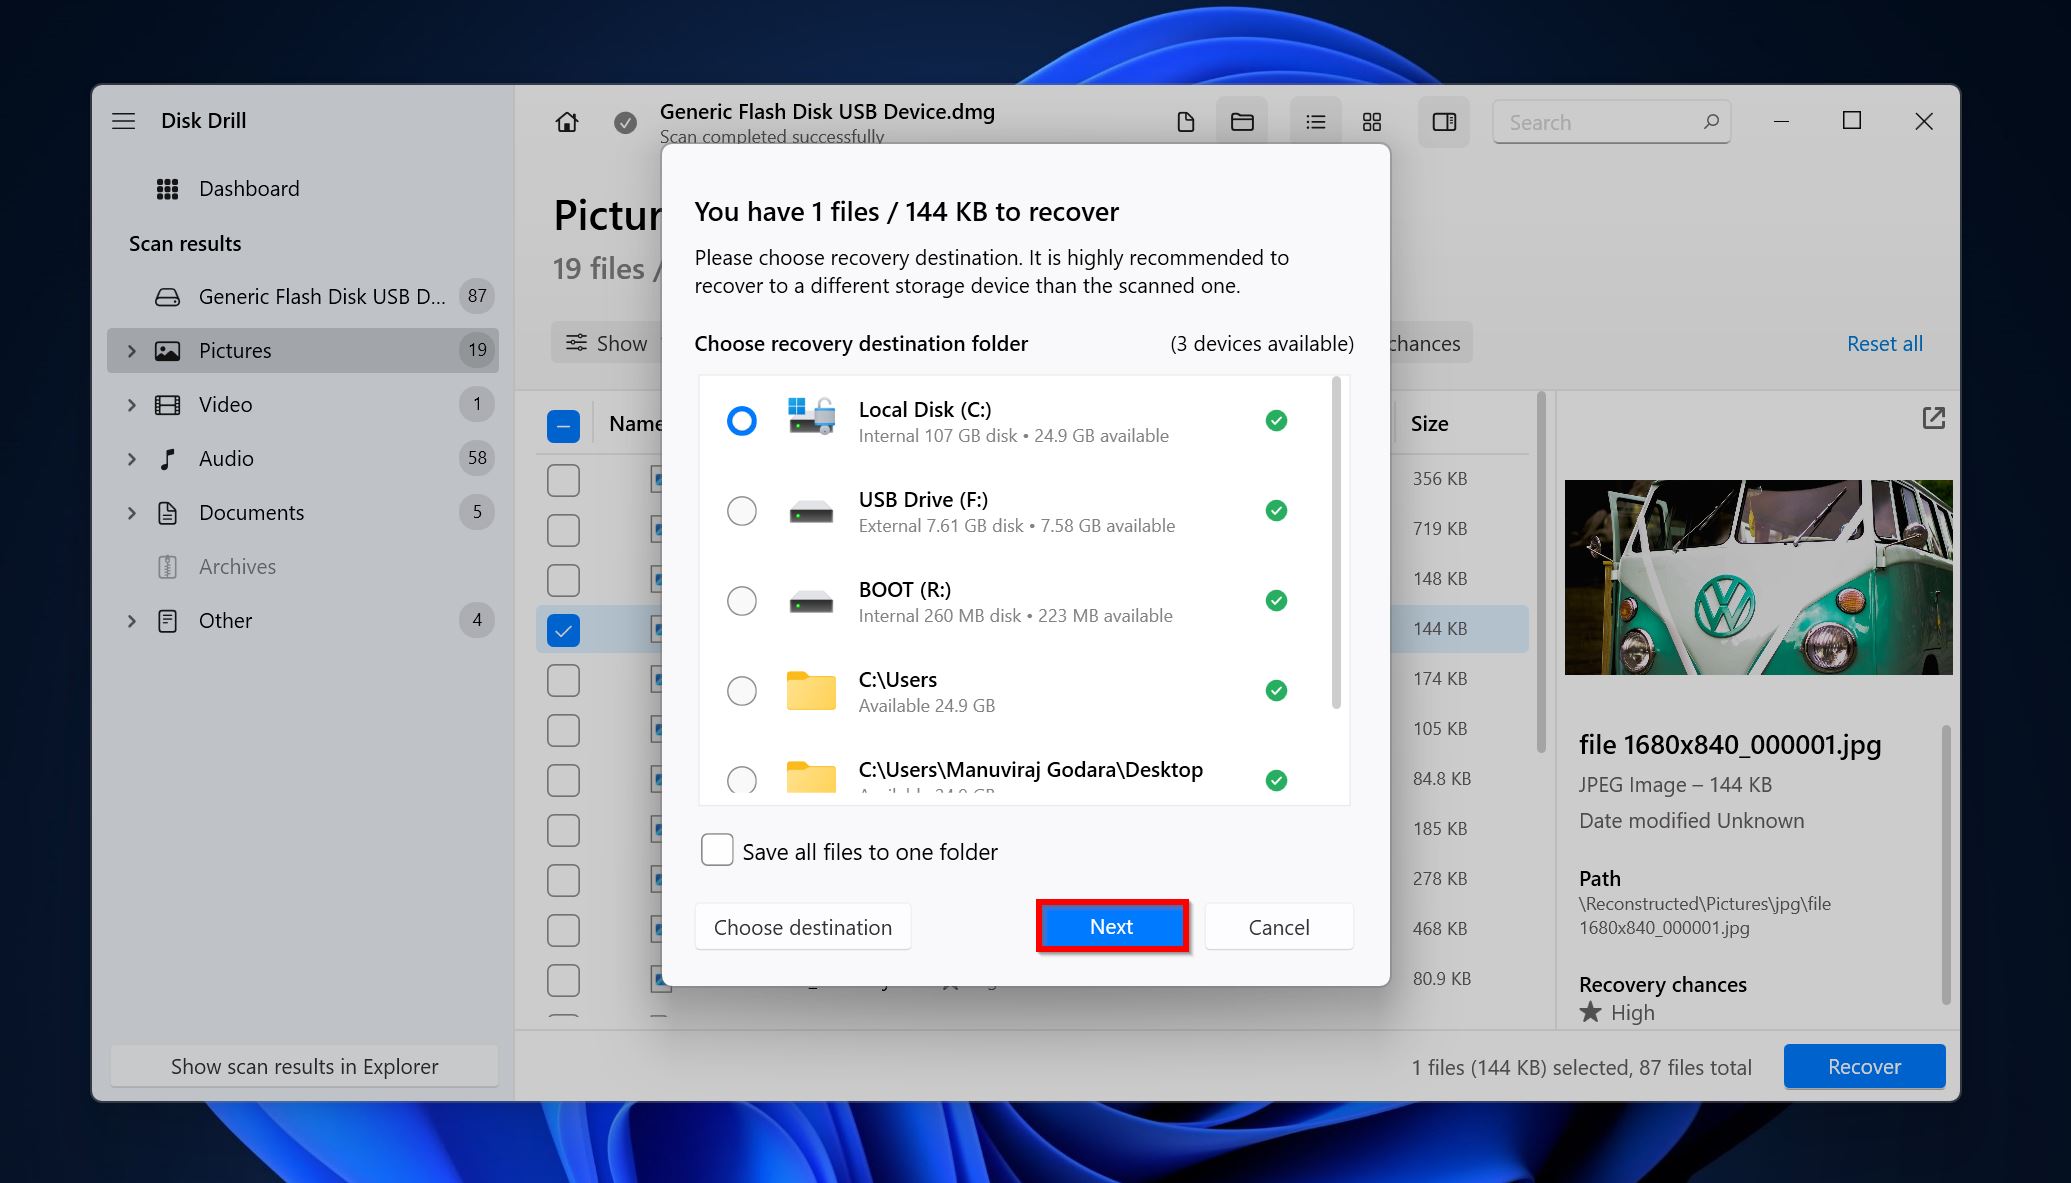
- Choose a recovery destination for the files and click Next. We recommend you save the files to another drive, unless you’re sure you won’t need to recover more data from the partitioned drive.
- Disk Drill will recover the selected files.
How to Partition a Drive without Losing Data
Windows has an in-built utility–Disk Management–which lets you safely partition your drive and make other changes to your drive.
The steps below will walk you through the process of partitioning a drive without losing data:
- Search for “disk management” in Windows Search (Windows Key + S). Click on Create and format hard disk partitions from the search results. If you want to feel like a Hollywood hacker, press Windows Key + R to open the Run app, type diskmgmt.msc in the text box, and press Enter to open Disk Management.
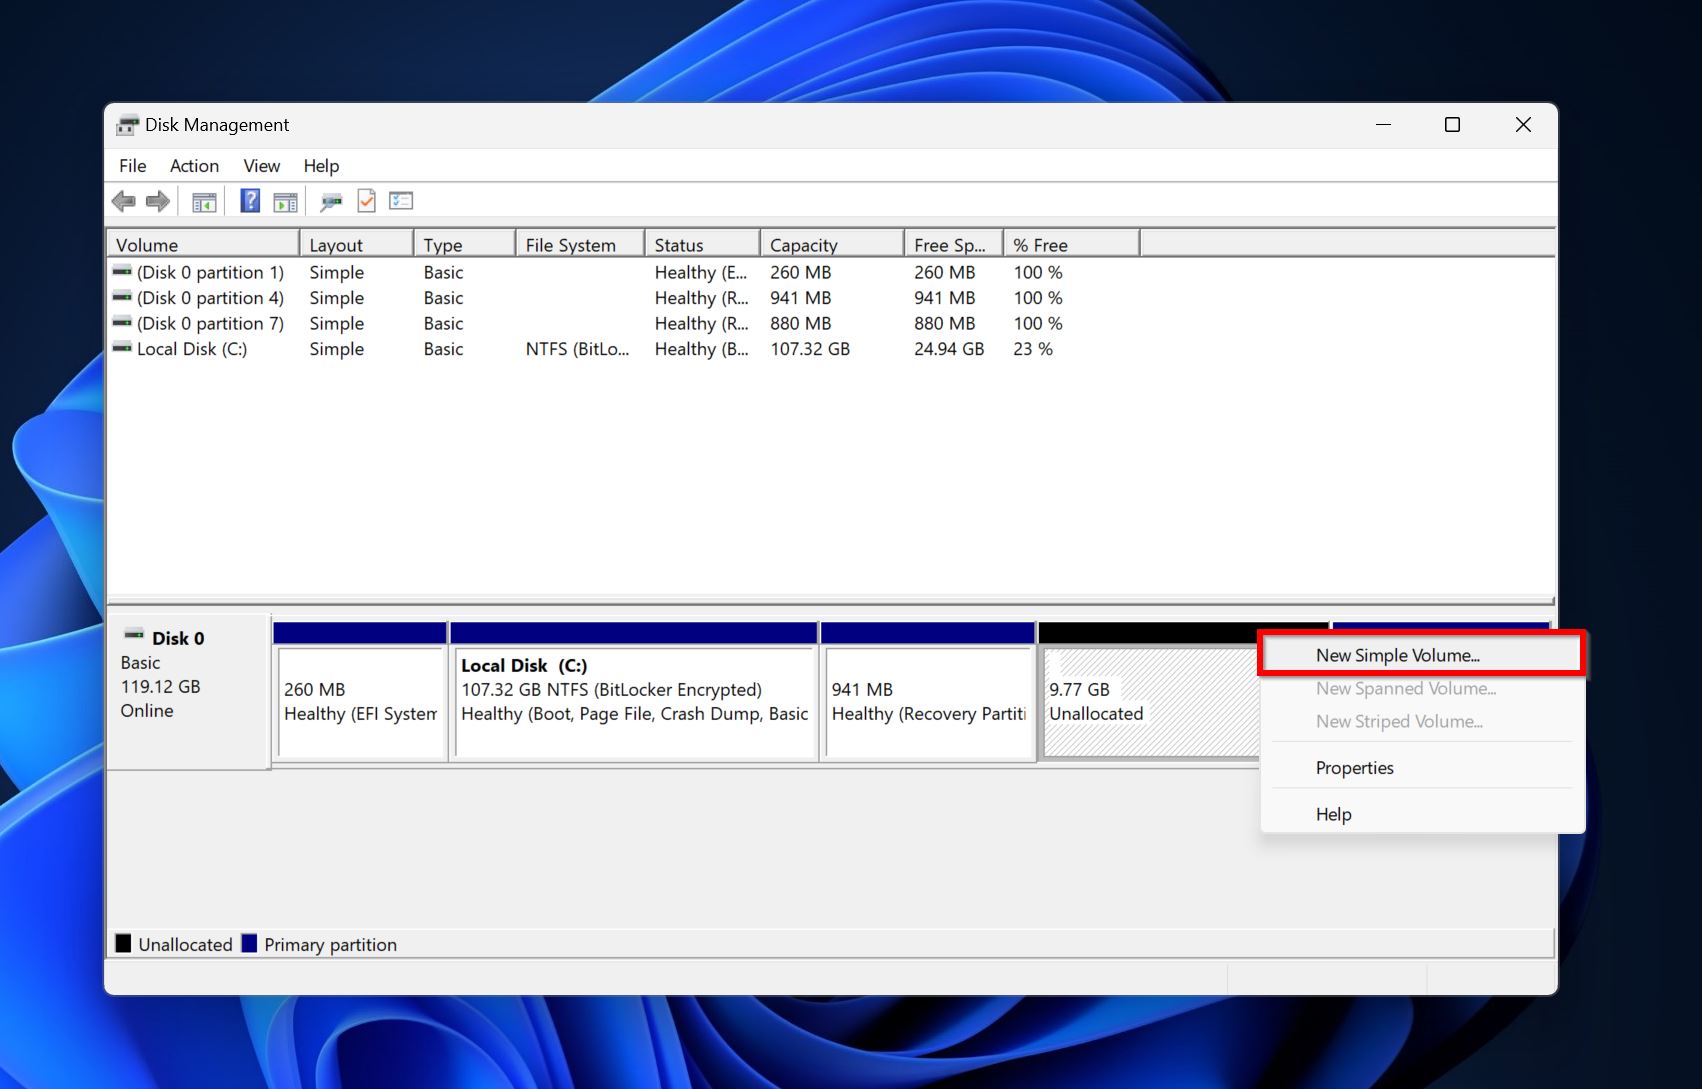
- Right-click on the unallocated space as shown in the image below and click on New simple volume.
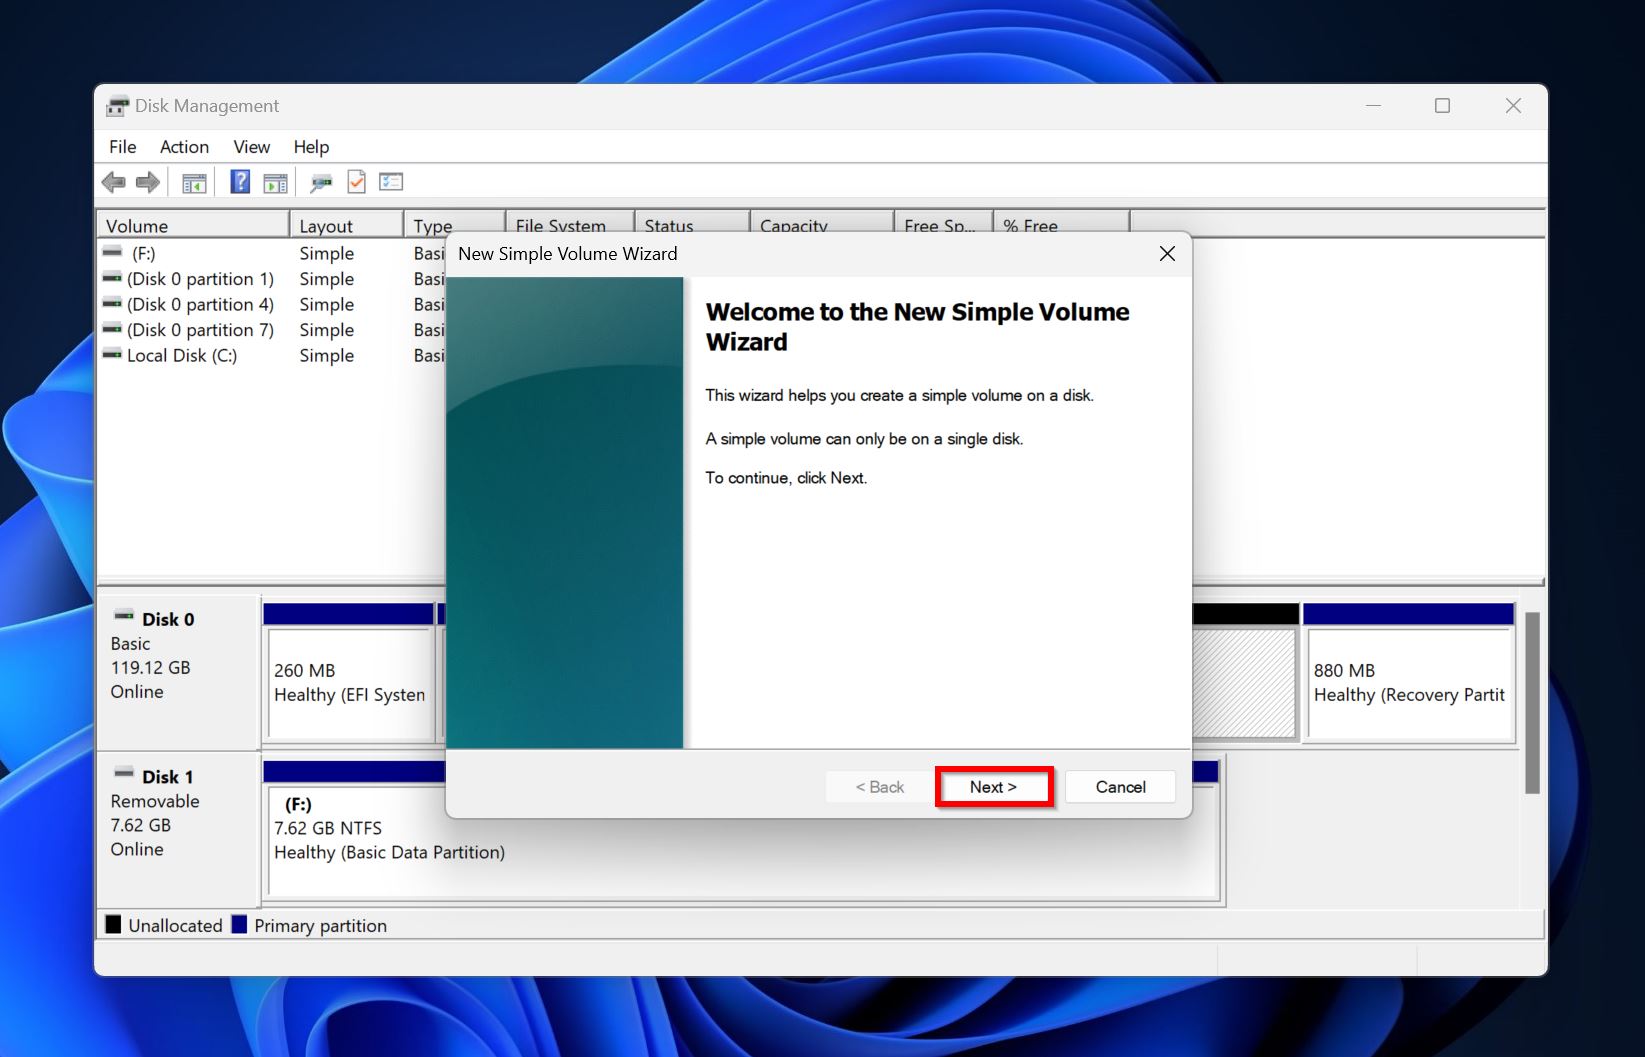
- Click Next on the New Simple Volume Wizard screen.
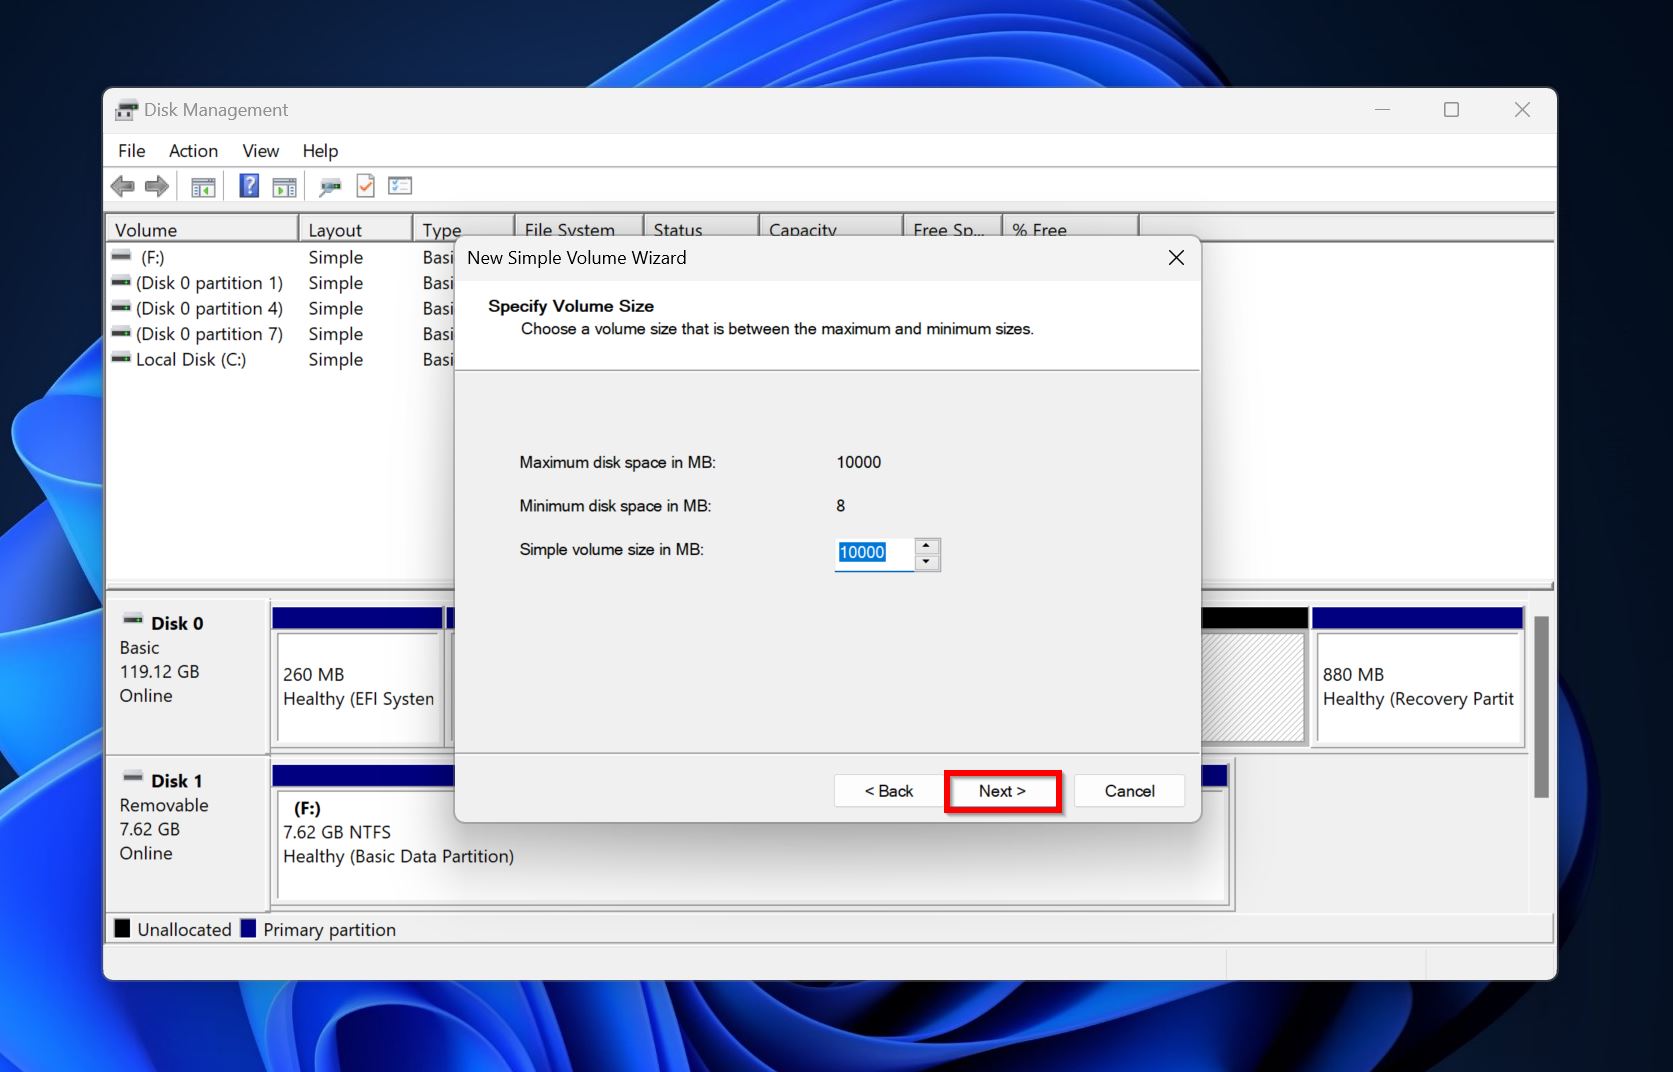
- Type in the size of the partition you want to create in the Simple volume size in MB field.
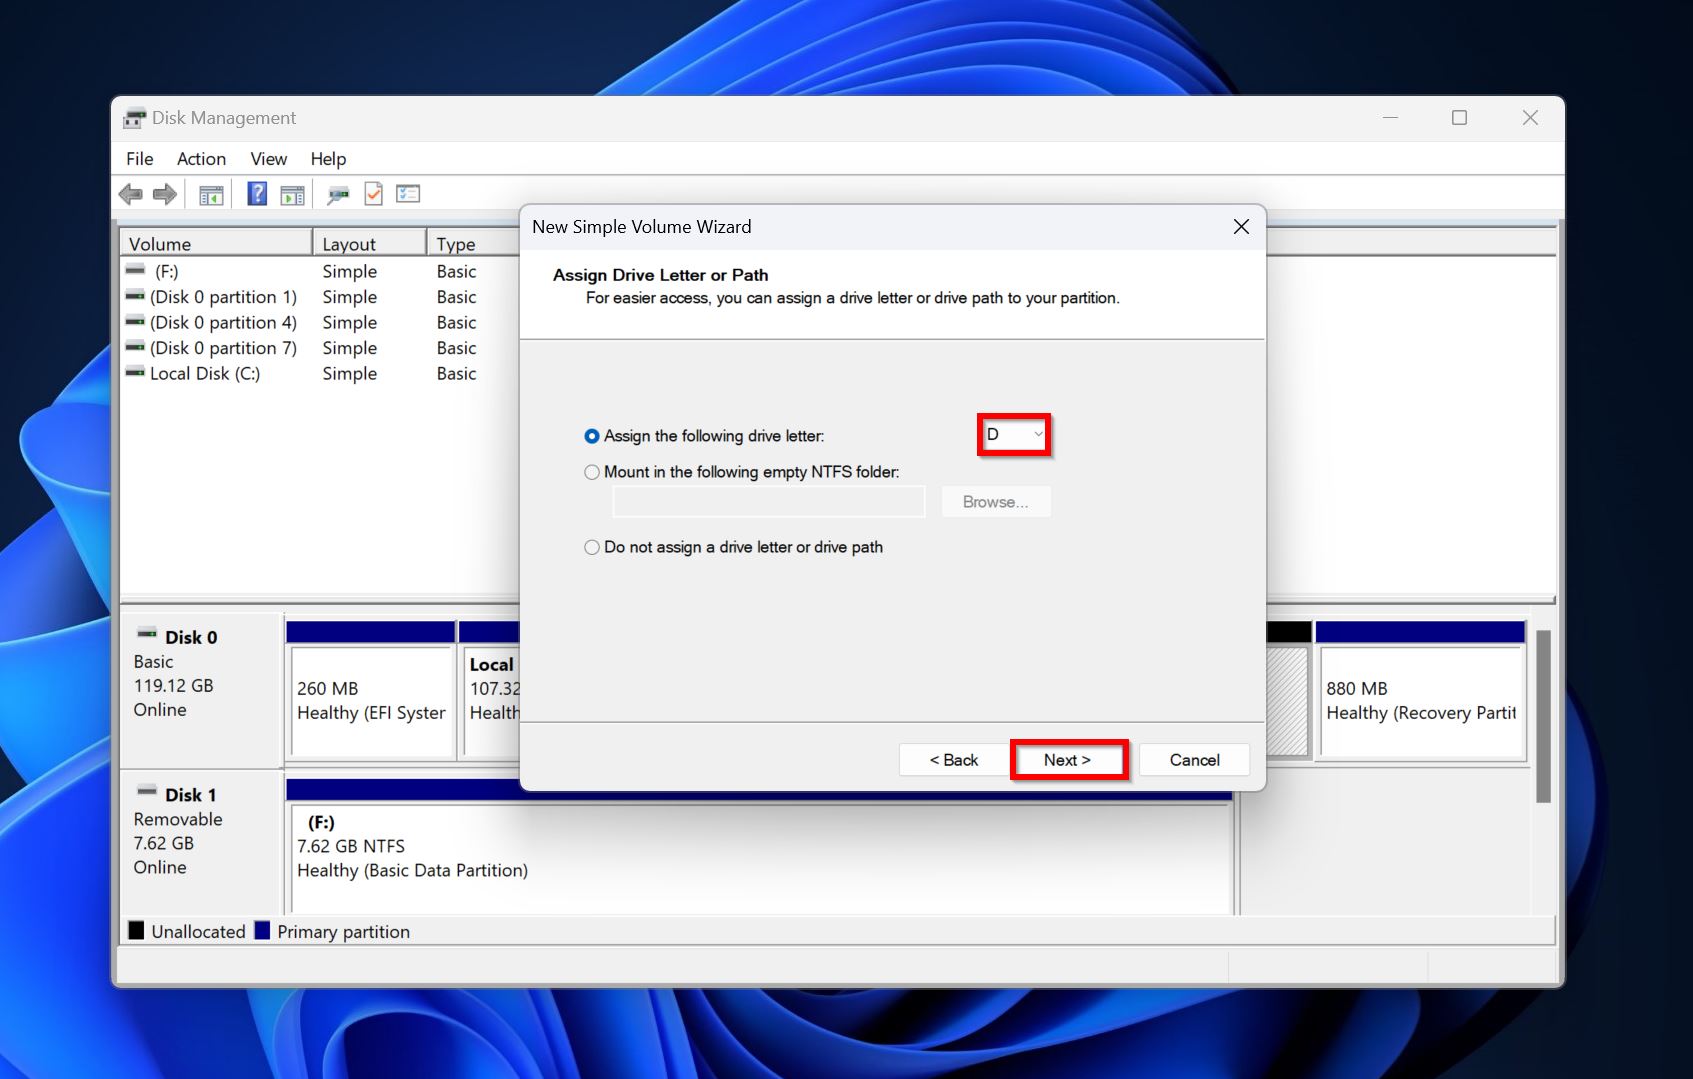
- Pick a drive letter from the Assign the following drive letter drop-down menu.
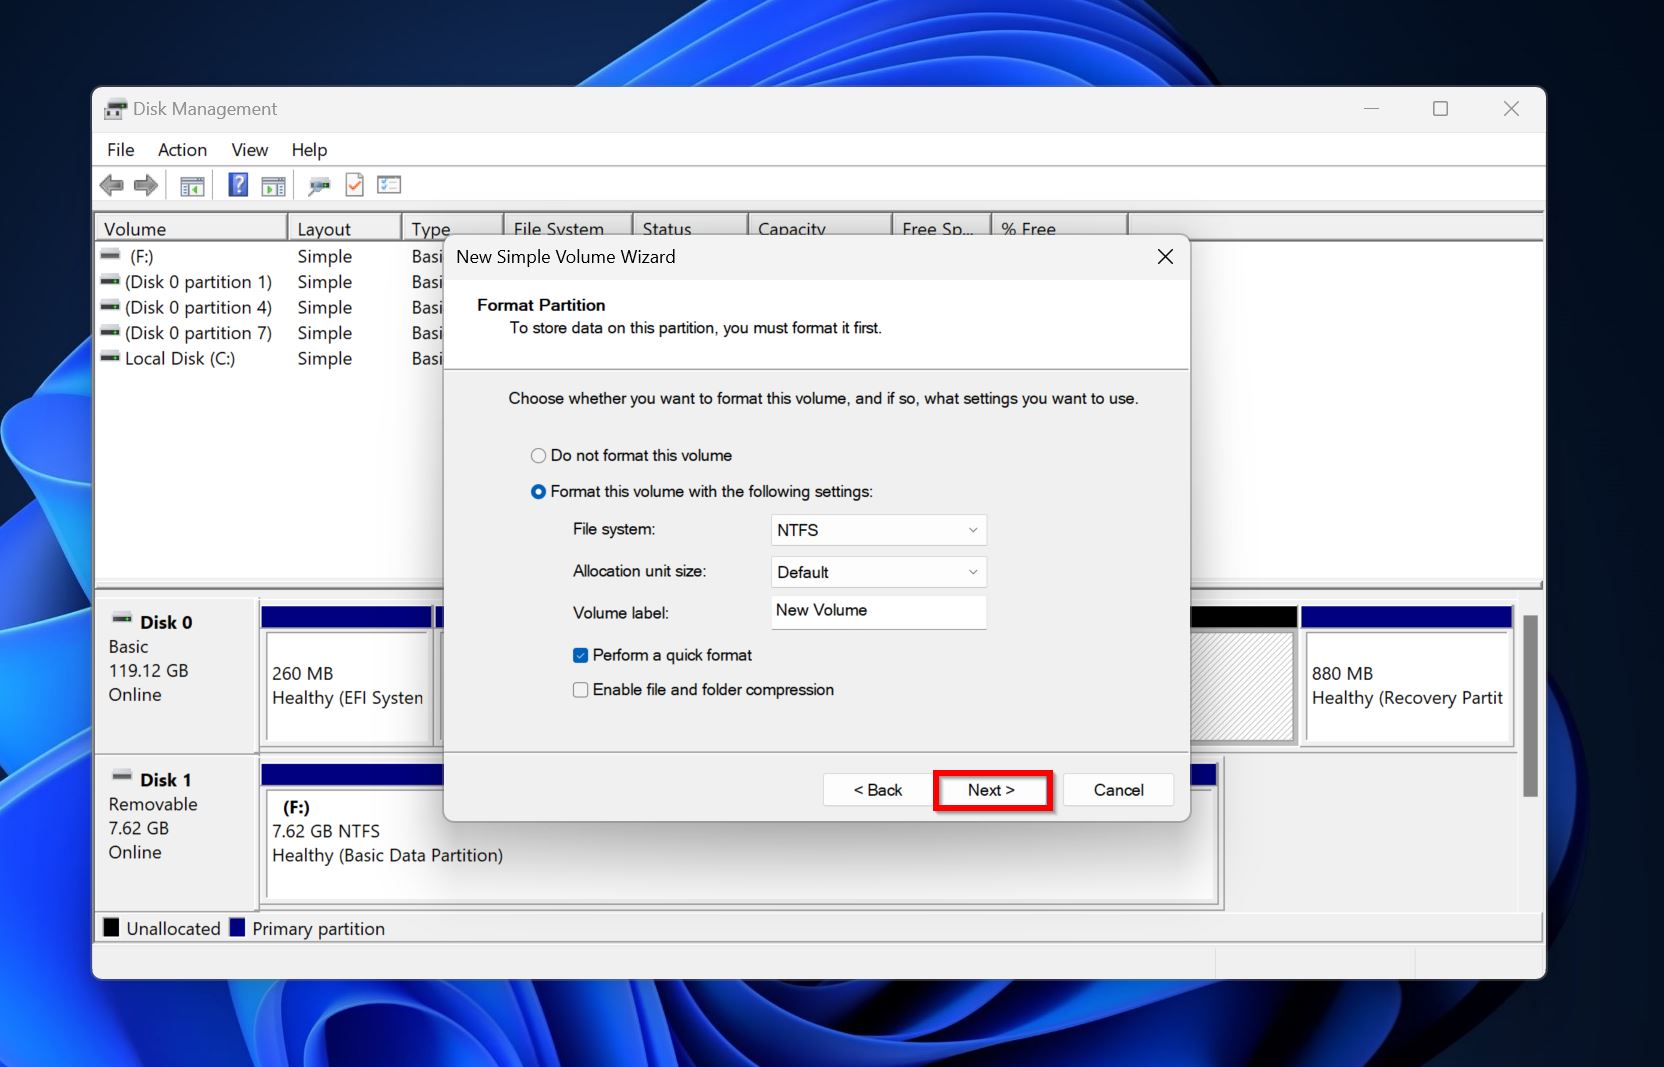
- Decide the format parameters on this screen, such as the file system and Volume label. Click Next.
- Click on Finish.
Conclusion
As long as you’re careful and attentive, partitioning a drive won’t erase any data. In fact, it could help you organize your data and also protect it. But, if you do lose data, it’s best to attempt data recovery as soon as possible, and not write new data to the drive. We also recommend that you regularly back up your data – ideally to a local storage drive and to the cloud.
FAQ
- Back up all important data from the partitions you wish to delete.
- Open Disk Management, right-click on the partitions you want to delete, and choose Delete volume.
- Now, right-click the partition that’s left, and choose Extend volume.
- Follow the steps in the wizard to create a partition.


