
If you searched for a guide in a hurry to rescue your files from a Kingston SD or a Kingston flash drive, I feel you. Even my trusty DataTraveler Exodia was accidentally formatted a couple of times. But you don’t have to be a data professional to try data recovery now.
We’ve all been there: accidentally or suddenly losing files on any of our storage devices because of a virus, unintended formatting, or whatever other reasons.
Don’t waste time, and jump straight to the precautionary steps below to increase your Kingston data recovery success rate! Then, perform data recovery by following our easy step-by-step guide in the following section.
Table of Contents
Tips to Increase Your Kingston Data Recovery Success Rate
Even though there are many shady data recovery services and software applications that promise to reliably recover every single lost file, the fact is data recovery results are never 100% guaranteed. You can, however, do a lot to increase your data recovery success rate.
| Tip | Description |
| ⛔ Stop using the storage device | To avoid accidentally overwriting the lost files and thus making their recovery impossible, you need to stop using the storage device on which they are located. To be extra safe, we recommend you disconnect it from your computer, camera, or any other device it was connected to. |
| 🚀 Start data recovery ASAP | Don’t delay the data recovery process more than absolutely necessary. Experience tells us that those who start data recovery as soon as possible experience better data recovery results than those who take their time with it. |
| 🧩 Don’t defragment the device | Despite what many people believe, defragmentation doesn’t help recover lost files. In fact, there’s a good chance that even the best Kingston data recovery software won’t be able to help you restore files from a defragmented storage device since they most likely will be overwritten. |
| 🖨️ Save your data to a different place | You should never recover lost files to the same storage device from which you’re recovering them because you could partially or completely overwrite them and make their recovery impossible. |
| 🏆 Use the best data recovery tool available | Some data recovery tools deliver mediocre results, and some can even do more harm than good. That’s why you should always start with the best tool available, even if it means spending money on a license. |
Now that you know how to increase your Kingston Data recovery success rate, it’s time we take a closer look at Kingston’s official recovery tool and discuss why it might be best to stay away from it.
Use Reliable Data Recovery Software
Kingston actually had an app for Kingston data recovery. MediaRECOVER 4.0 is a versatile data recovery software that is capable of restoring over 250 file formats. But it was long discontinued by Kingston and shouldn’t be considered a real option in the 2020s.
Nowadays, you need reputable data recovery software like Disk Drill, which has support for Windows and Mac and prioritizes powerful data scanning features. MediaRECOVER and DD’s user interfaces are night and day, with Disk Drill having modern, intuitive, and easy-to-navigate pages.
Disk Drill also has way more powerful data recovery tools, supporting more than 400 file formats. It’s one of the most reviewed data recovery software, and its reputation for successful data recovery is commendable. We even use Disk Drill for data recovery on lots of our own different devices.
Whether it’s an SSD, flash drive, SD card, or other storage device, Disk Drill can scan and recover your data. It also has handy tools that can help monitor and maintain the health of your Kingston device.
Here’s a simple guide you can follow, showing how I used Disk Drill to recover files from my Kingston DataTraveler flash drive:
- Download Disk Drill from the Cleverfiles official website.
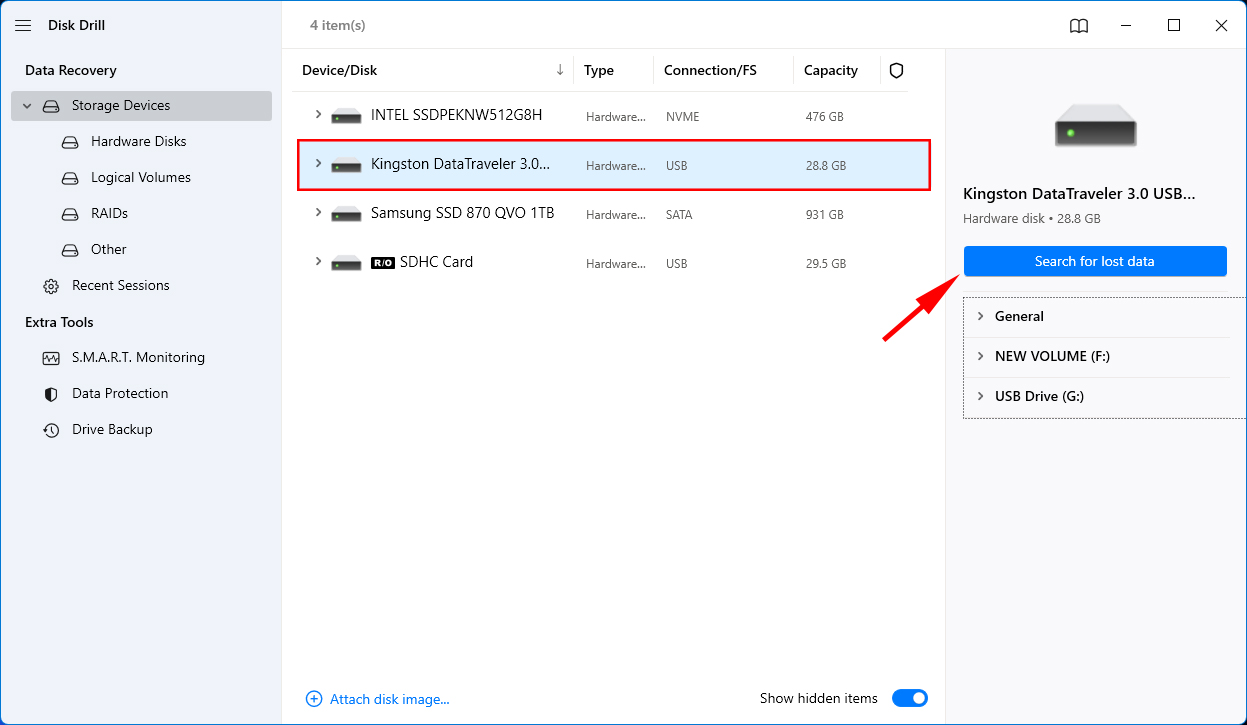
- Connect your Kingston storage device to your computer and open Disk Drill.
- You should see your drive on the list of available devices. Select your device and click the Search for lost data button to start the scan.
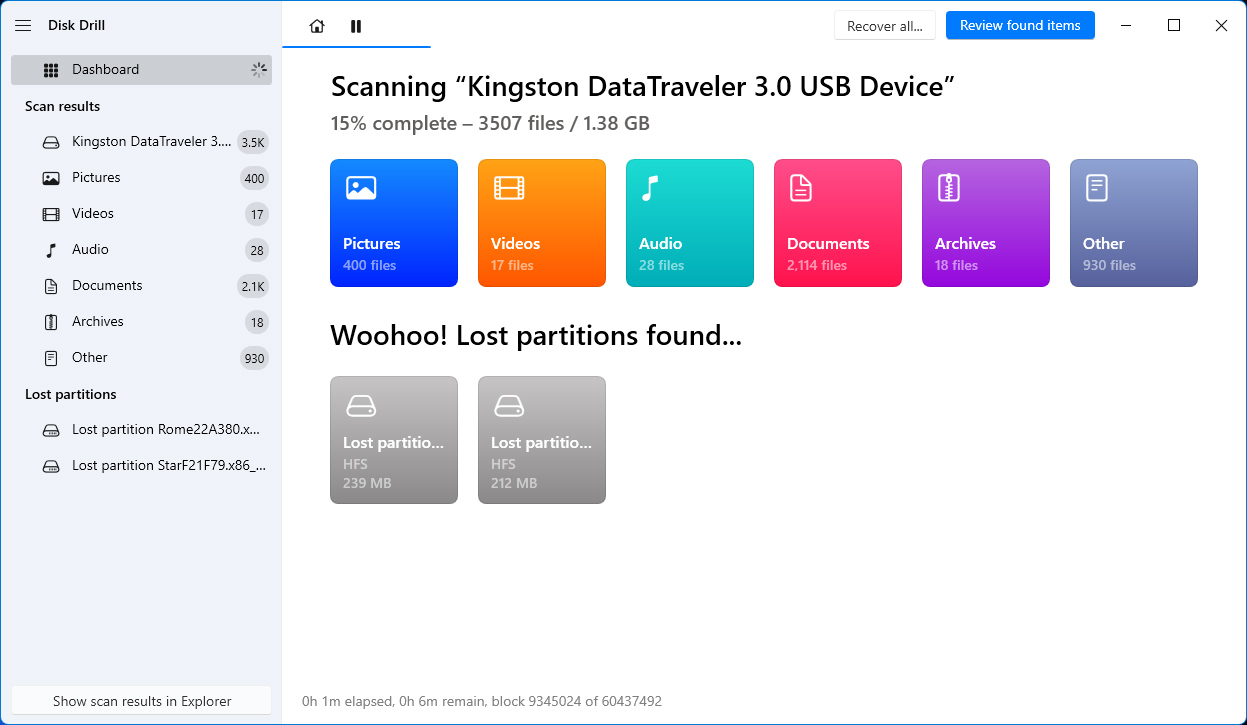
- While the scan finishes, you can preview the files Disk Drill was able to detect so far by clicking the Review found items button. If you want to let the scan finish first, skip this step.
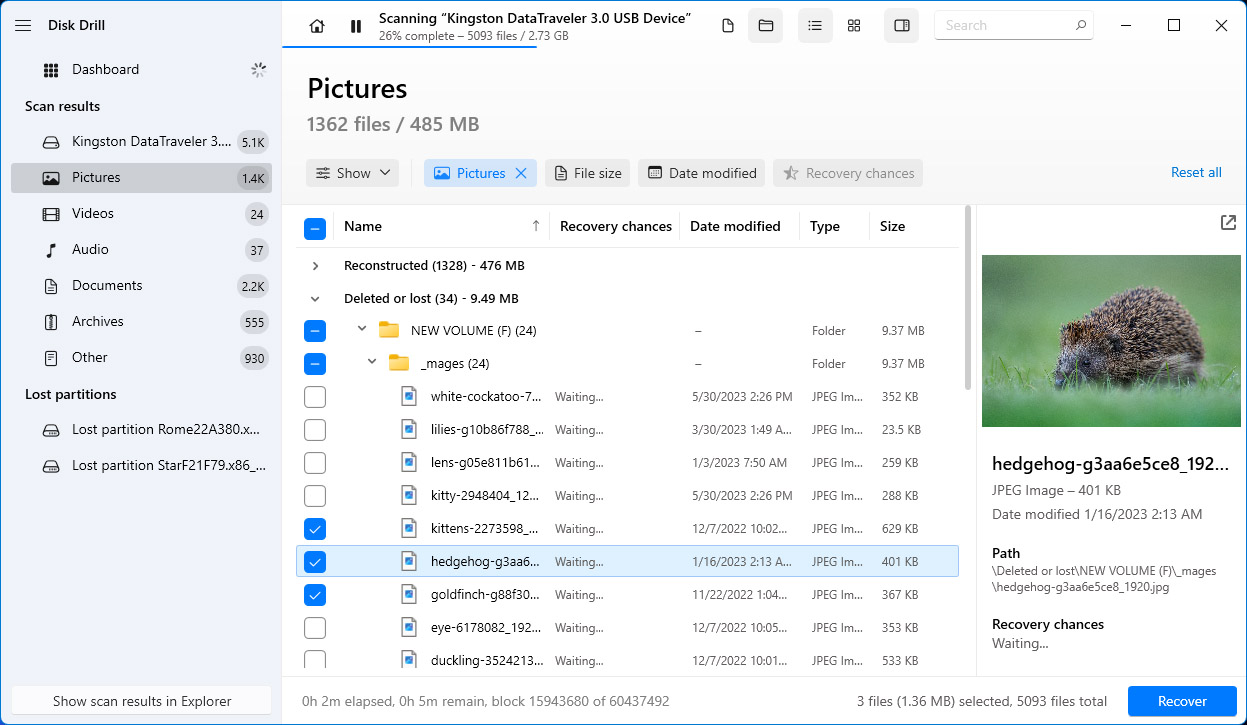
- After the scan finishes, click Review found items to check all the files Disk Drill found.
- Manually scroll through the files to select the ones you want to recover. Alternatively, you can use the search bar if you know the file names of your lost files. You can also preview media files by clicking on them. After selecting your files, click the Recover button.
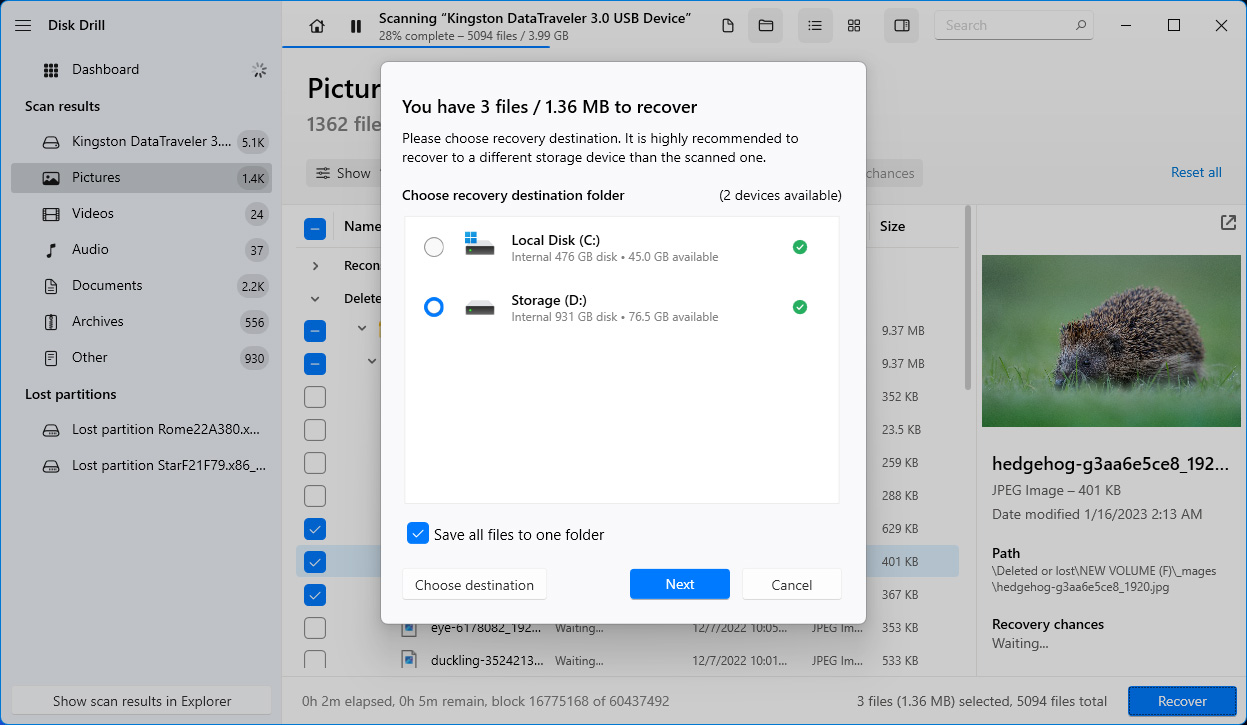
- Choose where you want Disk Drill to store the recovered files. Then, click Next.
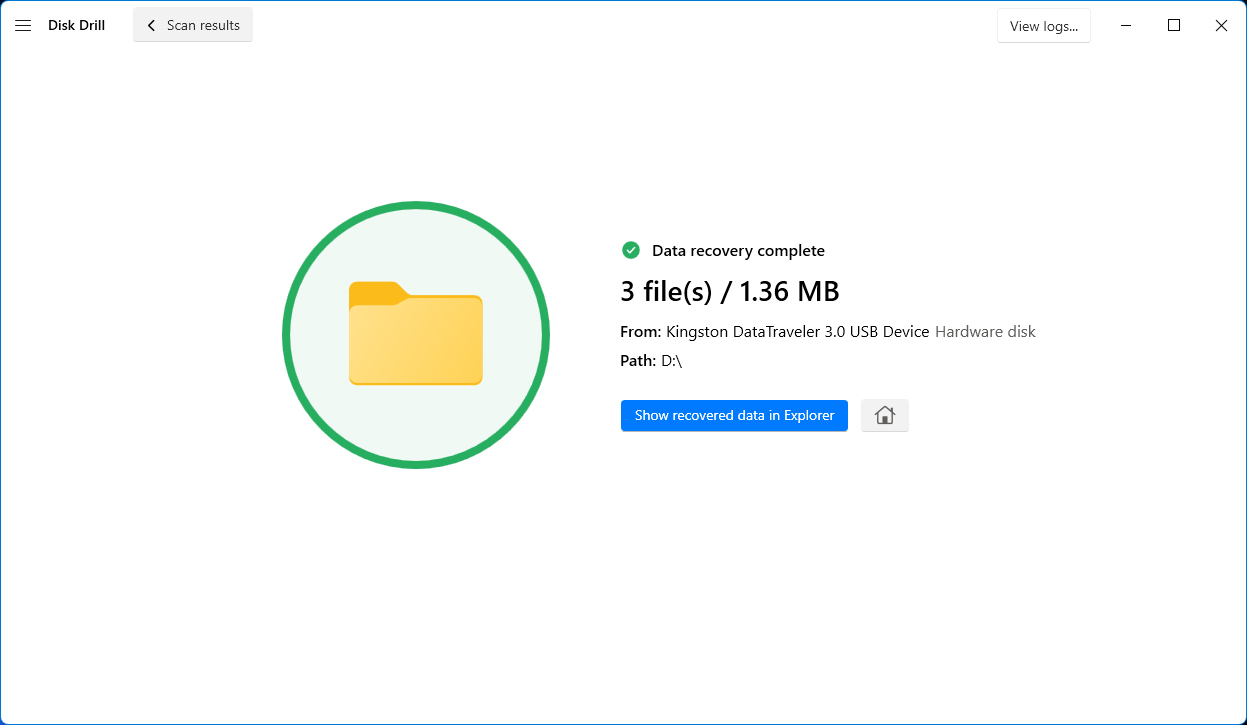
- Once the data recovery process successfully finishes, Disk Drill will show you a data recovery result summary. Click the Show recovered data in Explorer button to browse your files in File Explorer.
Pro Tips to Keep Your Storage Device Healthy
While some practices for storage health are device-specific, there are a few that can be applied to all flash memory storage devices. So here are some pro-curated pieces of advice to keep your storage device healthy:
- Limit Write Cycles – Flash memory has a limited number of write cycles before it starts to degrade. To prolong the life of your Kingston SD card or flash drive. Try to minimize writing or deleting files when you can.
- Always safely eject your drive – Always safely eject your USB drive from the device it’s on before removing it. This makes sure that all the pending write operations are completed beforehand, minimizing the risk of data corruption.
- Store the Device in a cool, dry place when not in use – Avoid exposing your Kingston storage device to extreme temperatures, humidity, or dusty environment to prevent damaging the memory chips or other components of your device.
- Avoid Overfilling – Leaving some free space can help maintain your device’s performance and extend its lifespan.
- Keep the metallic contact area clean – The metallic contact area of your Kingston storage device is a vital component for seamlessly connecting to computers or other devices. Damage to this area can not only hinder its connection but also put it at risk of data corruption or data loss.
- Use high-quality USB adapters – Make sure that you’re using high-quality components when you use USB adapters or ports to connect your drive or SD card. Low-quality components may put your storage device at risk for physical damage.
Conclusion
Whether your data was lost due to accidental deletion, formatting, file system errors, or other reasons, recovering data from Kingston SD cards and flash drives can be done in easy steps.
It’s important to stop using the storage device, avoid defragmenting the device, and perform data recovery ASAP to increase your chances of successful data recovery. Don’t forget to choose another storage location to put your recovered files to avoid overwriting data.
By using one of the best data recovery software programs available, such as Disk Drill, you can perform Kingston data recovery on your own.
Make sure you follow best practices to maintain the health of your Kingston storage device to prevent data loss: limiting your write cycles, safely ejecting your drive, using proper storage when not in use, not filling your device storage, keeping the metallic component clean, and using high-quality USB ports and adapters.
FAQ:
- Connect your USB to your computer.
- Click This PC (Windows) or Finder (Mac)
- Find your drive and right-click > Format (Windows) or click Erase (Mac)
- Choose the appropriate settings and click Start (Windows).


