 When it comes to ultra-portable and cost-effective storage devices, SD cards are hard to beat. But sometimes, mishaps can happen — like when you get an error saying your SD card is full or not accessible.
If you encounter this issue, there’s no need to panic. This article will discuss how you can fix this error and protect yourself from unnecessary data loss.
Let’s dive in, shall we?
Table of Contents
What is the “SD card is full or not accessible” error?
When you encounter this error, you’re facing two possible scenarios:
1. Your memory card is actually full.
Hey, we get it. It’s easy to get carried away taking pictures and videos on your camera. When this happens, the only resolution is to free up space by deleting some of your files. If deleting is not an option, you will have to transfer your files to your computer, hard drive, or cloud storage.
Not sure if your SD card is full? There’s a section on how to check available SD card space further down in the article.
2. Your SD card says it’s full, but it’s not.
It’s frustrating when an empty SD card says it’s full when you know otherwise. If this is the case, then your card has likely become corrupted.
Yes, the term sounds scary. But the good news is fixing corrupted SD cards is easy even for a tech novice.
That said, we strongly suggest recovering your files before attempting to do any fixes. This protects you from unwanted data loss should things go south.
How to check the available space on your SD card
Assuming it is not corrupted, you will be able to check for available memory when you connect your SD card to your computer. Follow these steps:
- Plug your SD card into your PC.
- Open File Explorer.
- Look for This PC on the left pane.
- Look for your SD card under the Devices and drives section.
Under the icon, the amount of space currently available on your SD card is displayed.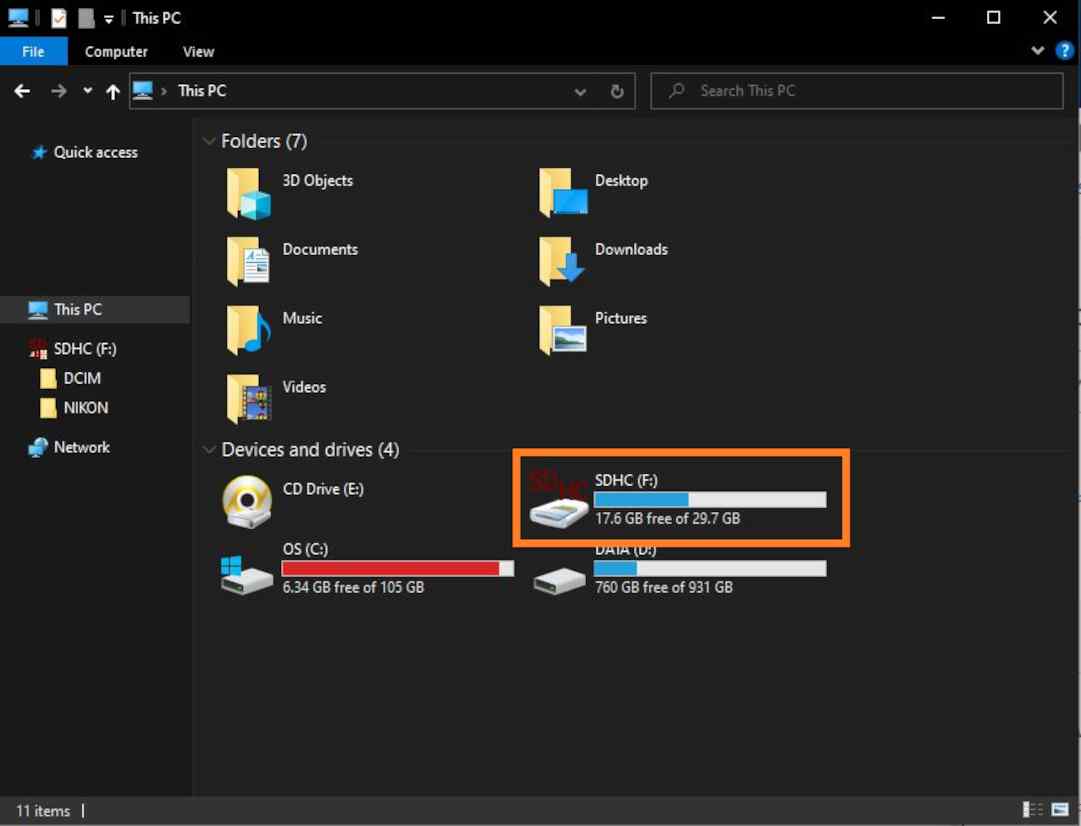
How to recover files from an SD card that is not accessible
When your SD card is not accessible, your first instinct might be to attempt to fix it. However, you might lose the contents of the card if you happen to mishandle the process. That said, it’s always practical to recover the data from your SD card before doing anything else.
You can use a data recovery tool to secure your SD card’s contents. There are tons of data recovery software out in the market, but Disk Drill SD Card Recovery tops our recommendations list.
Here’s how to recover files from an SD card that is not accessible:
- Download and install Disk Drill for Windows. You might be asked to restart your computer after installation. Go ahead and do so.
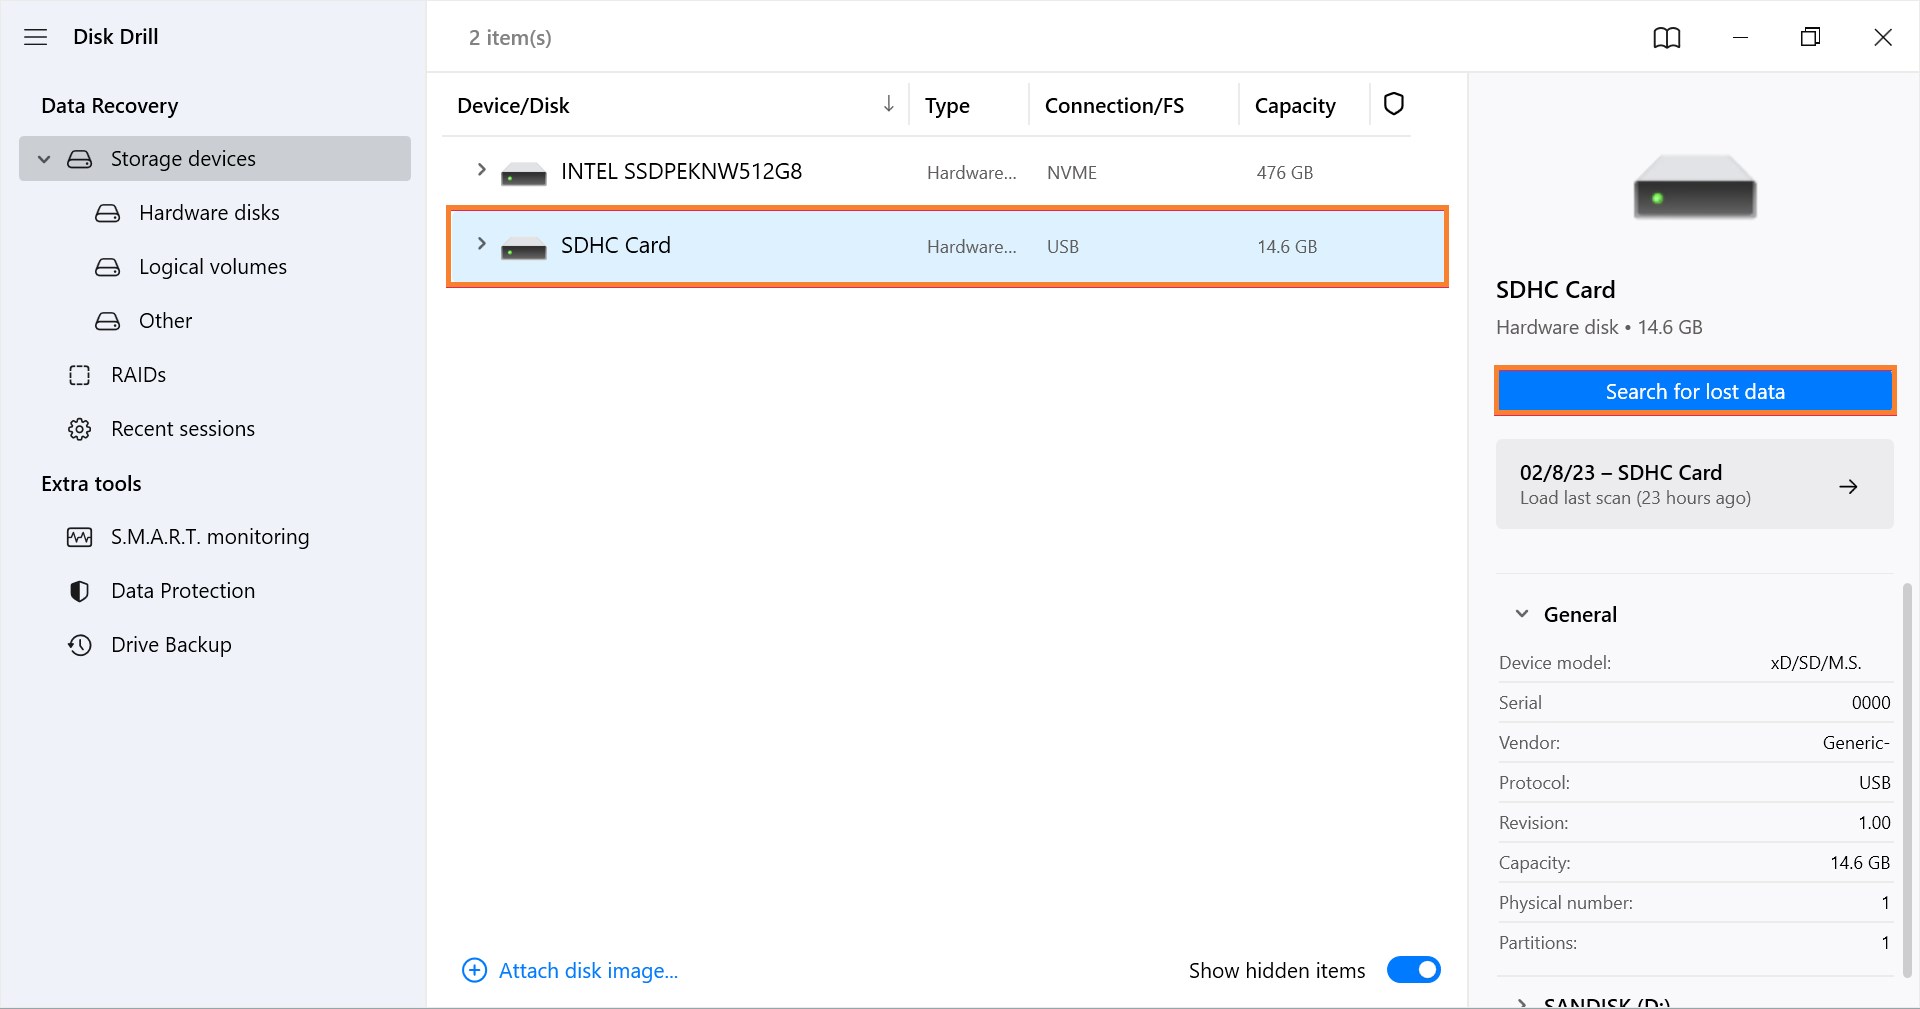
- Connect the SD card to your PC.
- Select the SD card under Device/Disk, then click Search for lost data.
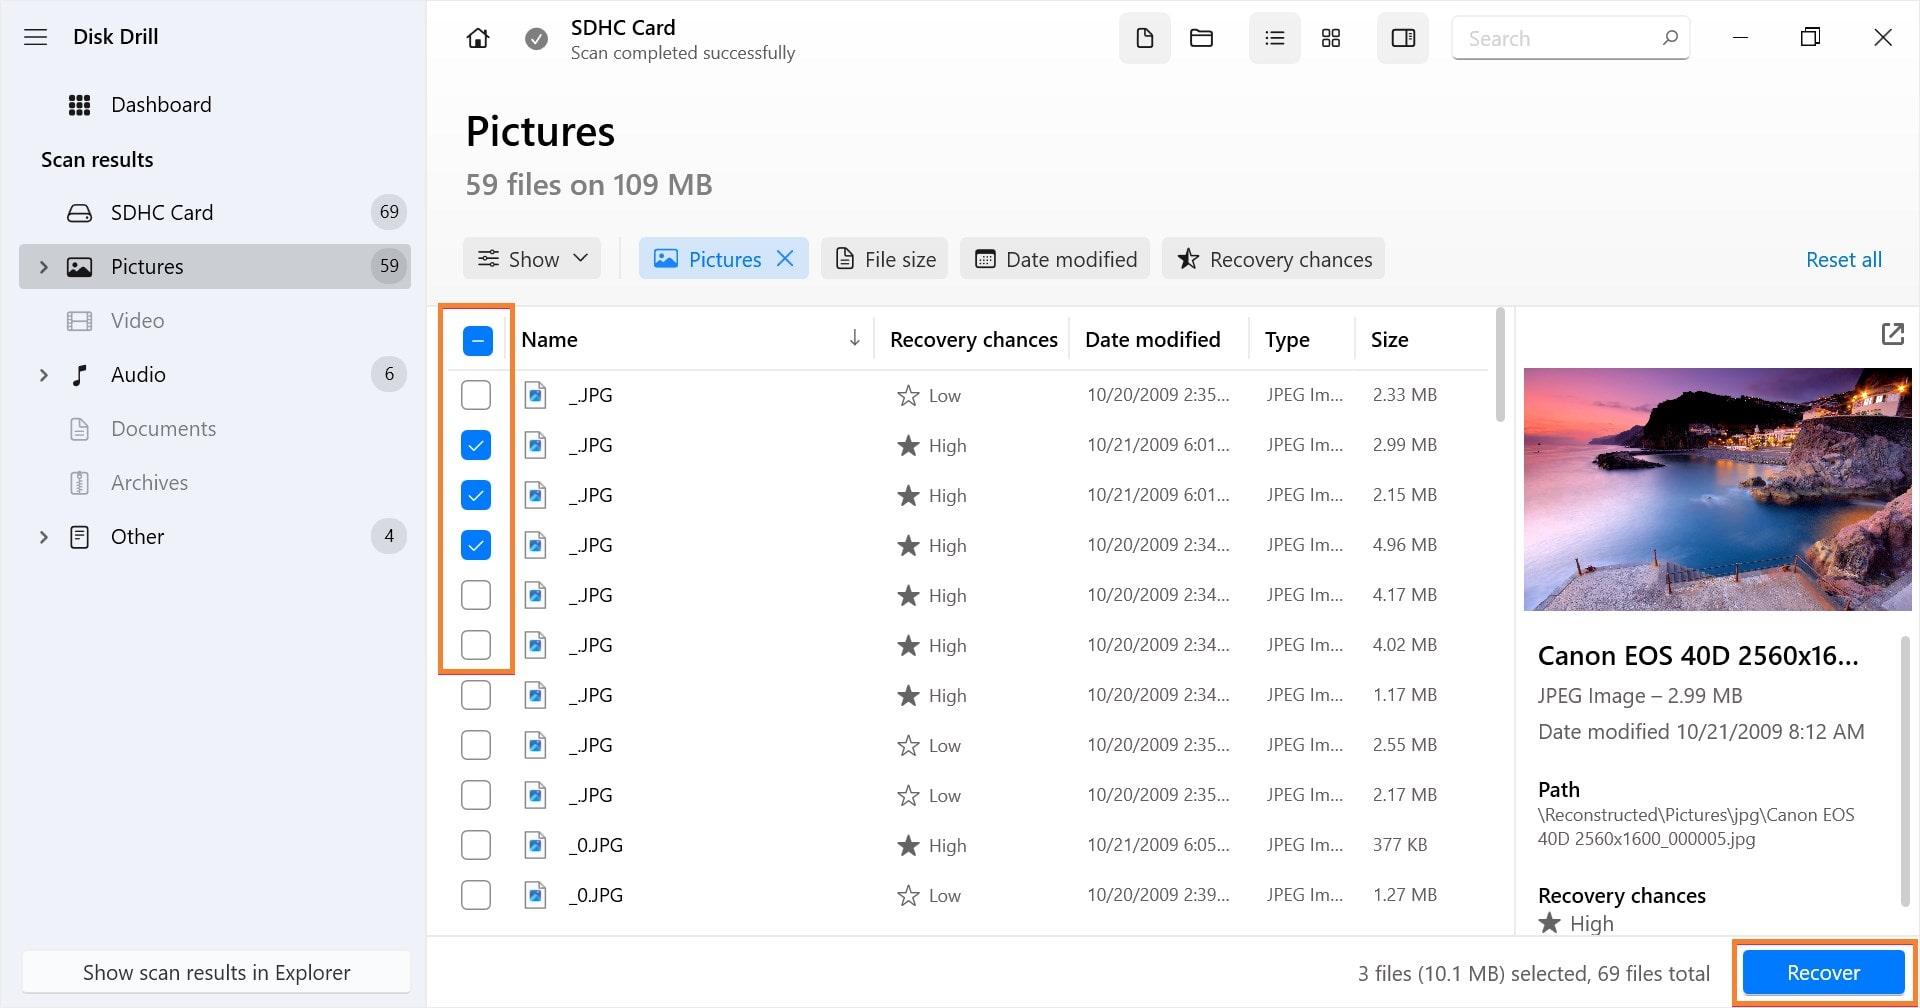
- You’ll get a list of files after the scan is complete. Use the preview feature to choose which files you want to recover.
- After selecting your files, click the Recover button.
And you’re done!
You can also use Disk Drill to recover data from a Micro SD card, USB drive, HDD, SSD, Mac, and PC, among others.
How to fix an SD card that is not accessible
Now that your important files have been safely stashed in your computer, you can move on to the next step: fixing your SD card.
Thankfully, there are various methods you can use to do this.
Method 1: Clear the cache
If you encounter the “SD card is full or not accessible” error while using your phone, clearing the cache is a sensible first resort. Cached data refers to junk or temporary files that take up space on your device.
To clear all cached data on your phone, go to Settings and tap Storage & memory. The screen will display an overview of your device’s memory usage. Next, tap Cache or Cached data. You will then be given an option to clear the cache. Confirm your choice when prompted.
Method 2: Use CheckDisk (CHKDSK)
You can also use the CHKDSK command to scan your SD card for logical and physical errors. Running it will locate issues on your SD card. At the same time, you can modify the command to automatically attempt to fix any error it finds. Here’s how you can repair using CheckDisk:
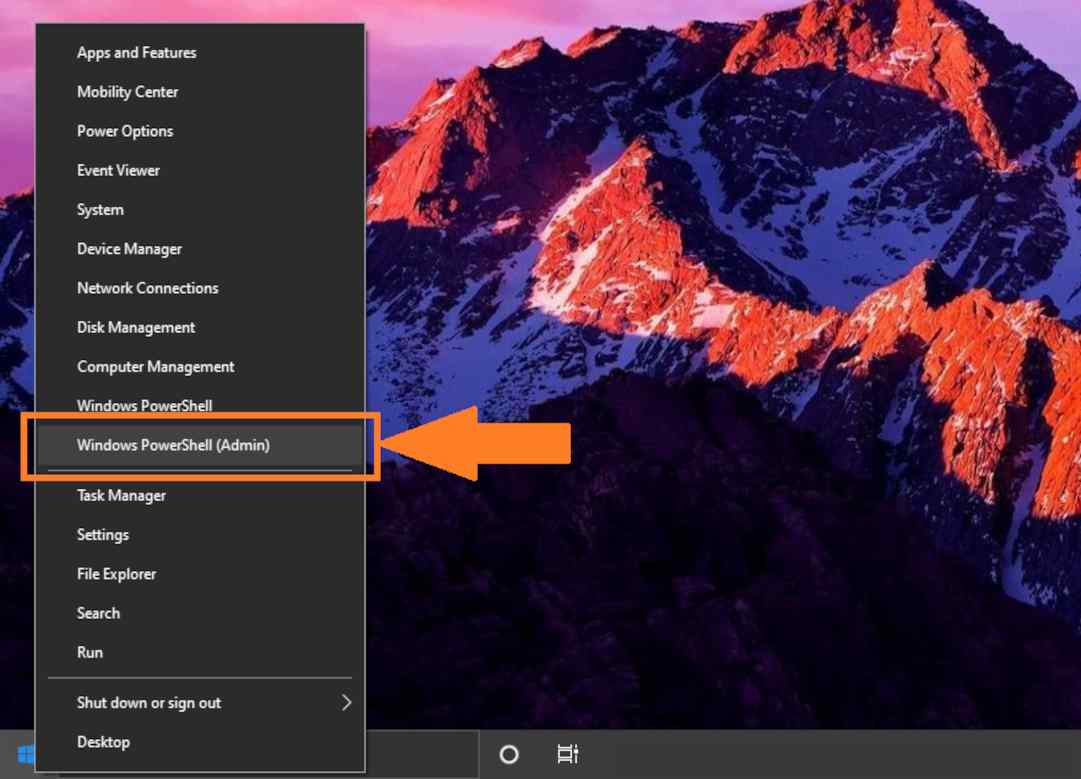
- Right-click on the Windows icon in the lower-left corner of your screen.
- Click Windows Powershell (Admin).
- Type chkdsk E: /r on the window. Replace E: with the drive letter assigned to your SD card. If you don’t want your computer to automatically repair errors, remove /r from the command.
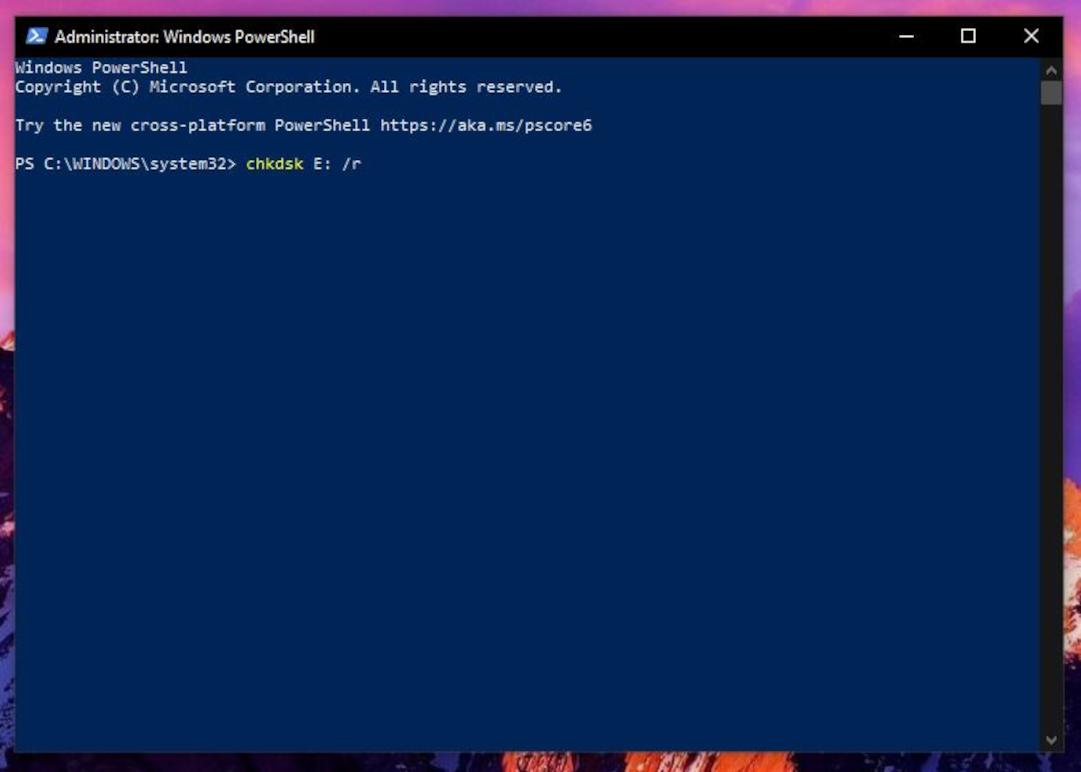
- Press Enter.
Wait for the command to finish running, and then check your SD card to see if the issue has been fixed.
Method 3: Switch the drive letter
This method sounds simplistic, but it can work in some cases. Here’s how to do it:
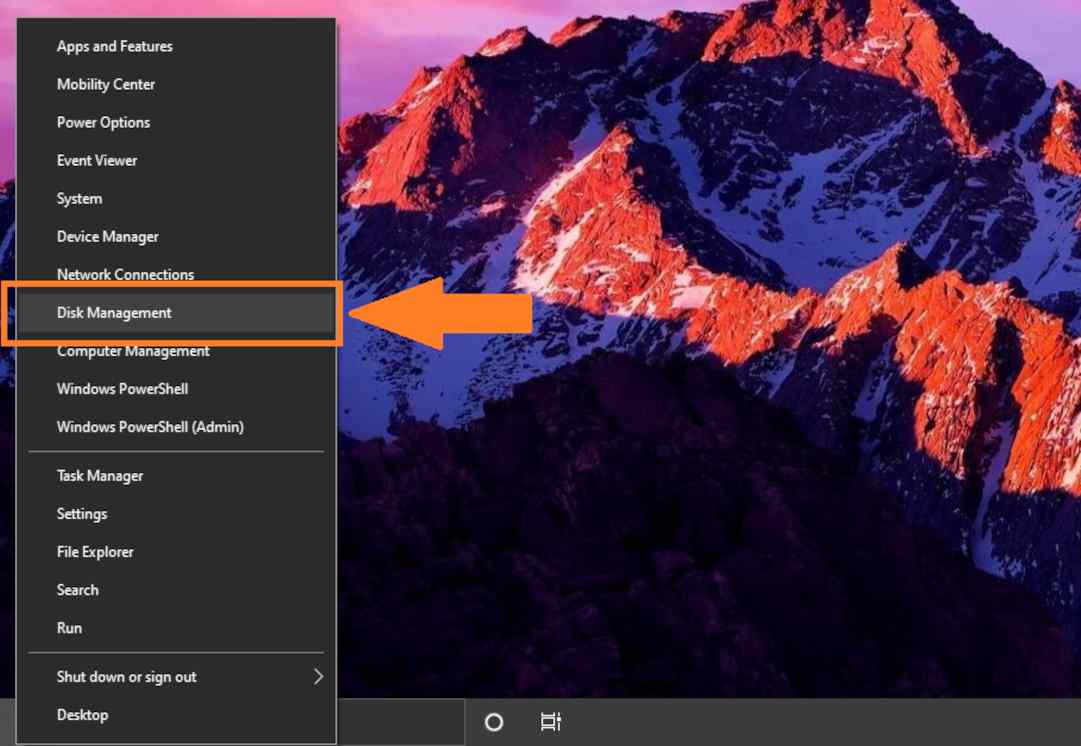
- Right-click on the Windows icon in the lower-left corner of your screen.
- Select Disk Management.
- Right-click on your SD card and select Change Drive Letter and Paths.

- Click Change and choose a new letter to assign to your memory card.
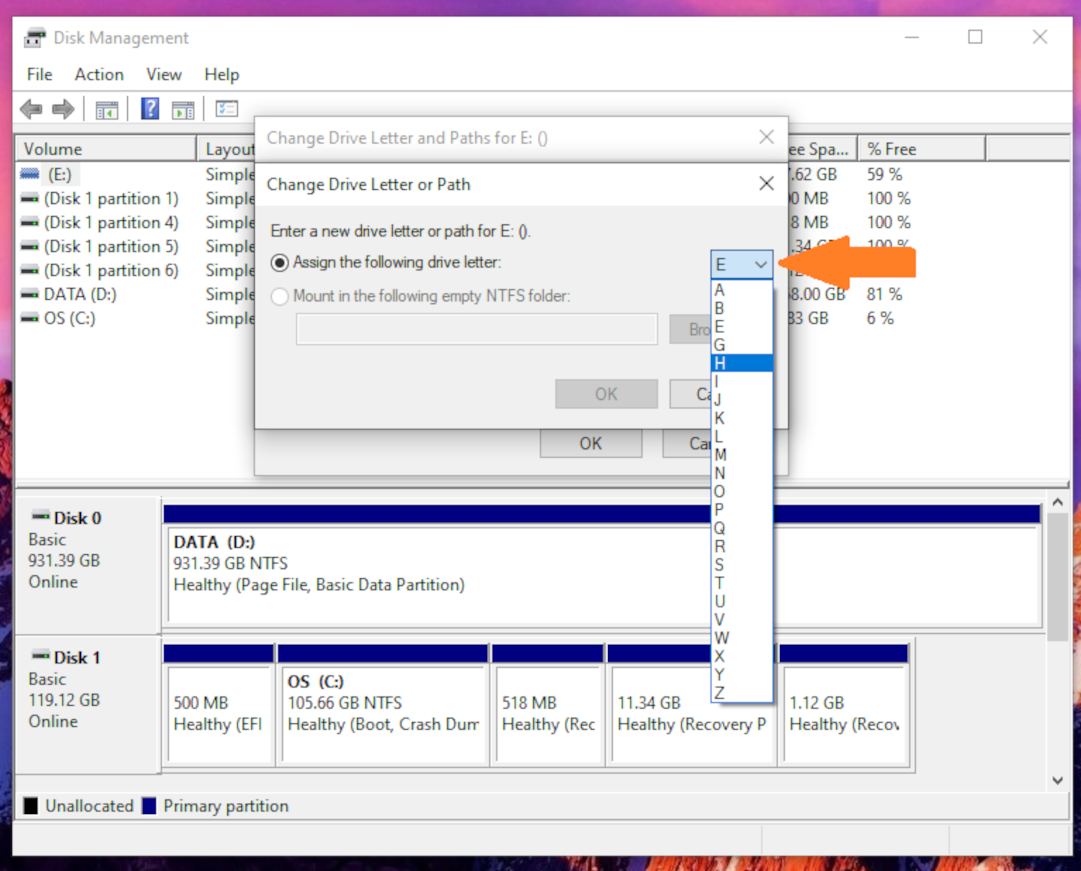
- Click OK.
While this tactic is worth a shot, it is not an all-encompassing solution. If changing the drive letter doesn’t fix the issue, it’s time to go to Method 4.
Method 4: Use the Windows Repair Tool
Windows has a built-in tool for scanning drives for errors. Typically, the Windows Repair Tool automatically launches when you insert a faulty drive. But if you need to manually initiate the process, just follow these steps:
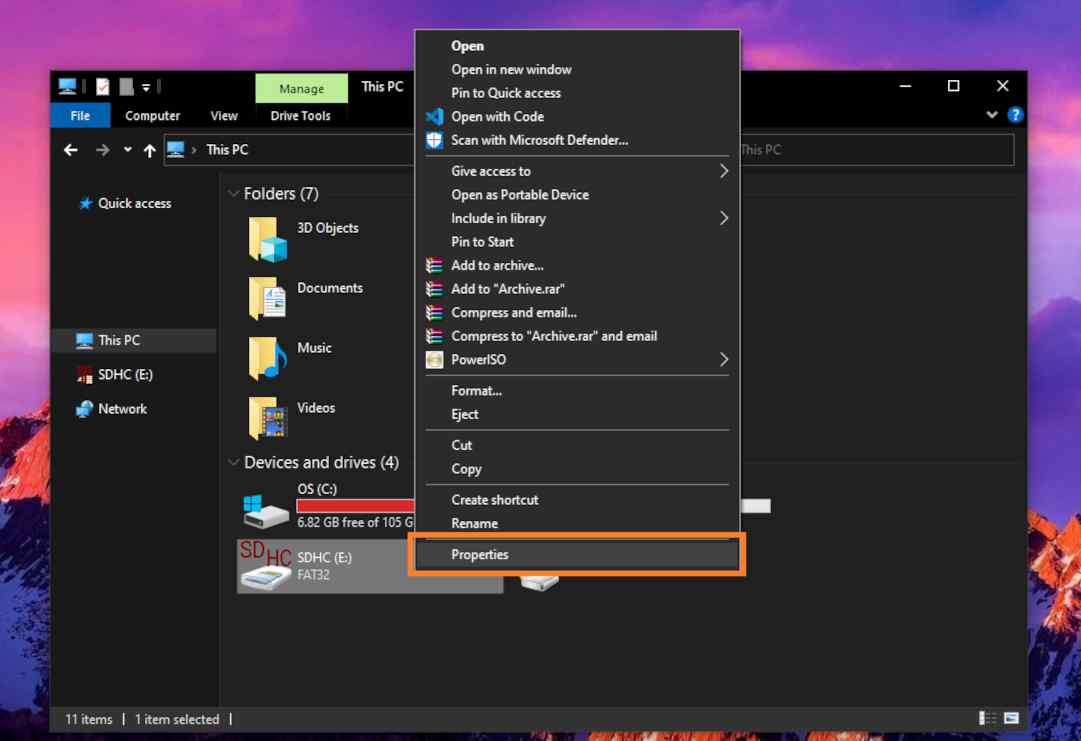
- Open File Explorer.
- Look for This PC on the left pane.
- Look for your SD card under the Devices and drives section. Right-click on it and select Properties.
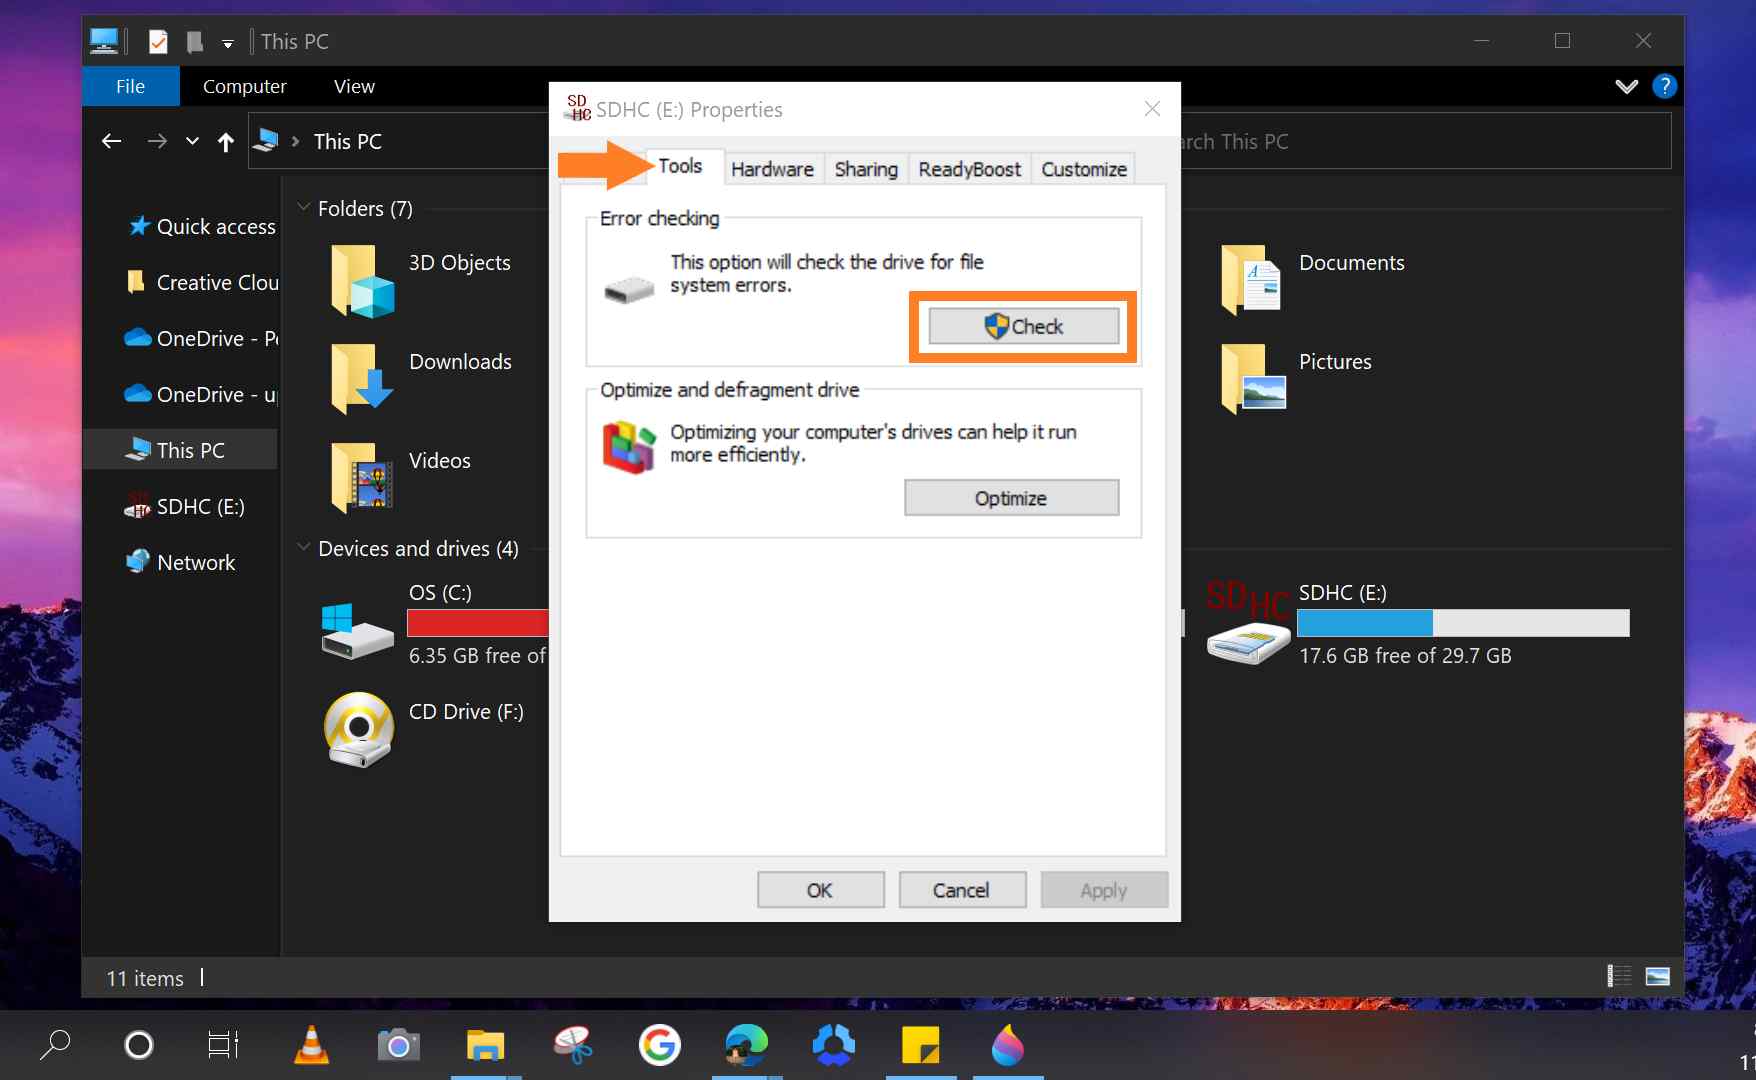
- Under the Tools tab, click on the Check button.
- Select Scan and repair drive.
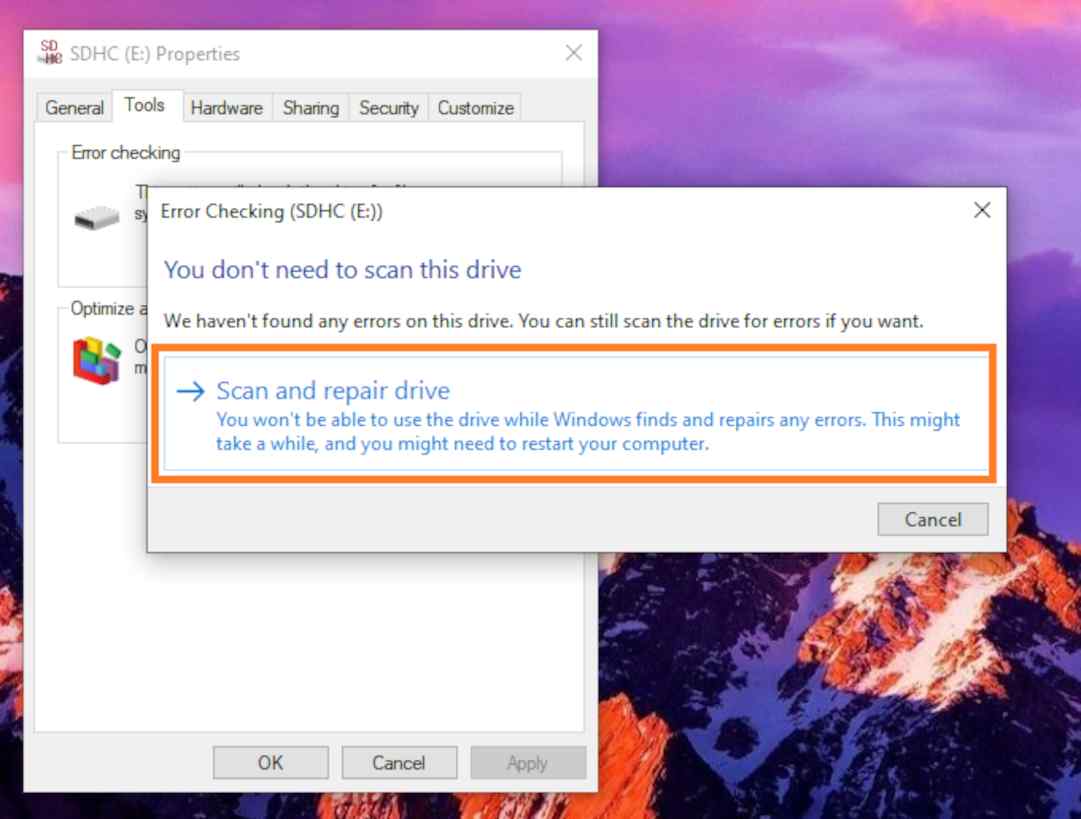
Note that Windows cannot scan and repair your drive while it’s in use, so make sure to save any unsaved work on your SD card before starting the process.
Method 5: Format the SD card
If all else fails, you can always reformat your SD card. This is often the last resort because it deletes all of the data stored in your memory card.
Simply follow these instructions:
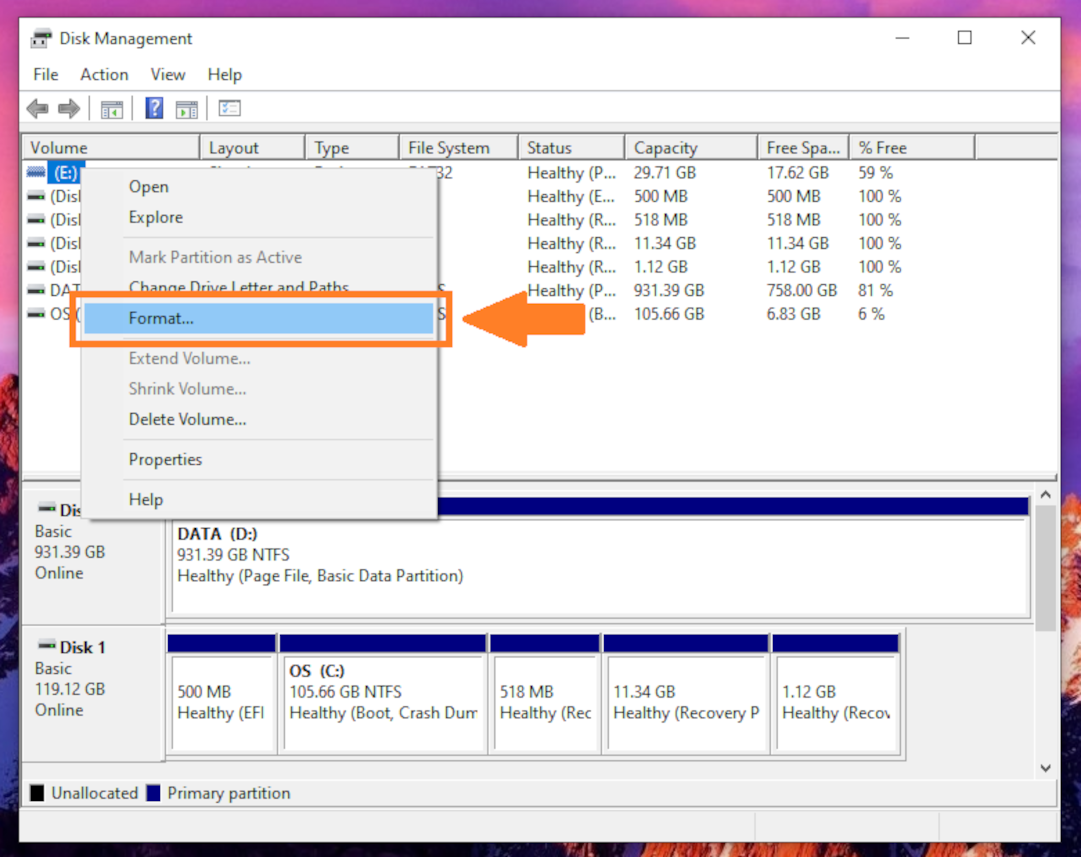
- Right-click on the Windows icon in the lower-left corner of your screen.
- Select Disk Management.
- Right-click on your SD card and select Format.
- Input a name for your SD card and adjust the settings. Choose a file system and tick Perform a quick format.
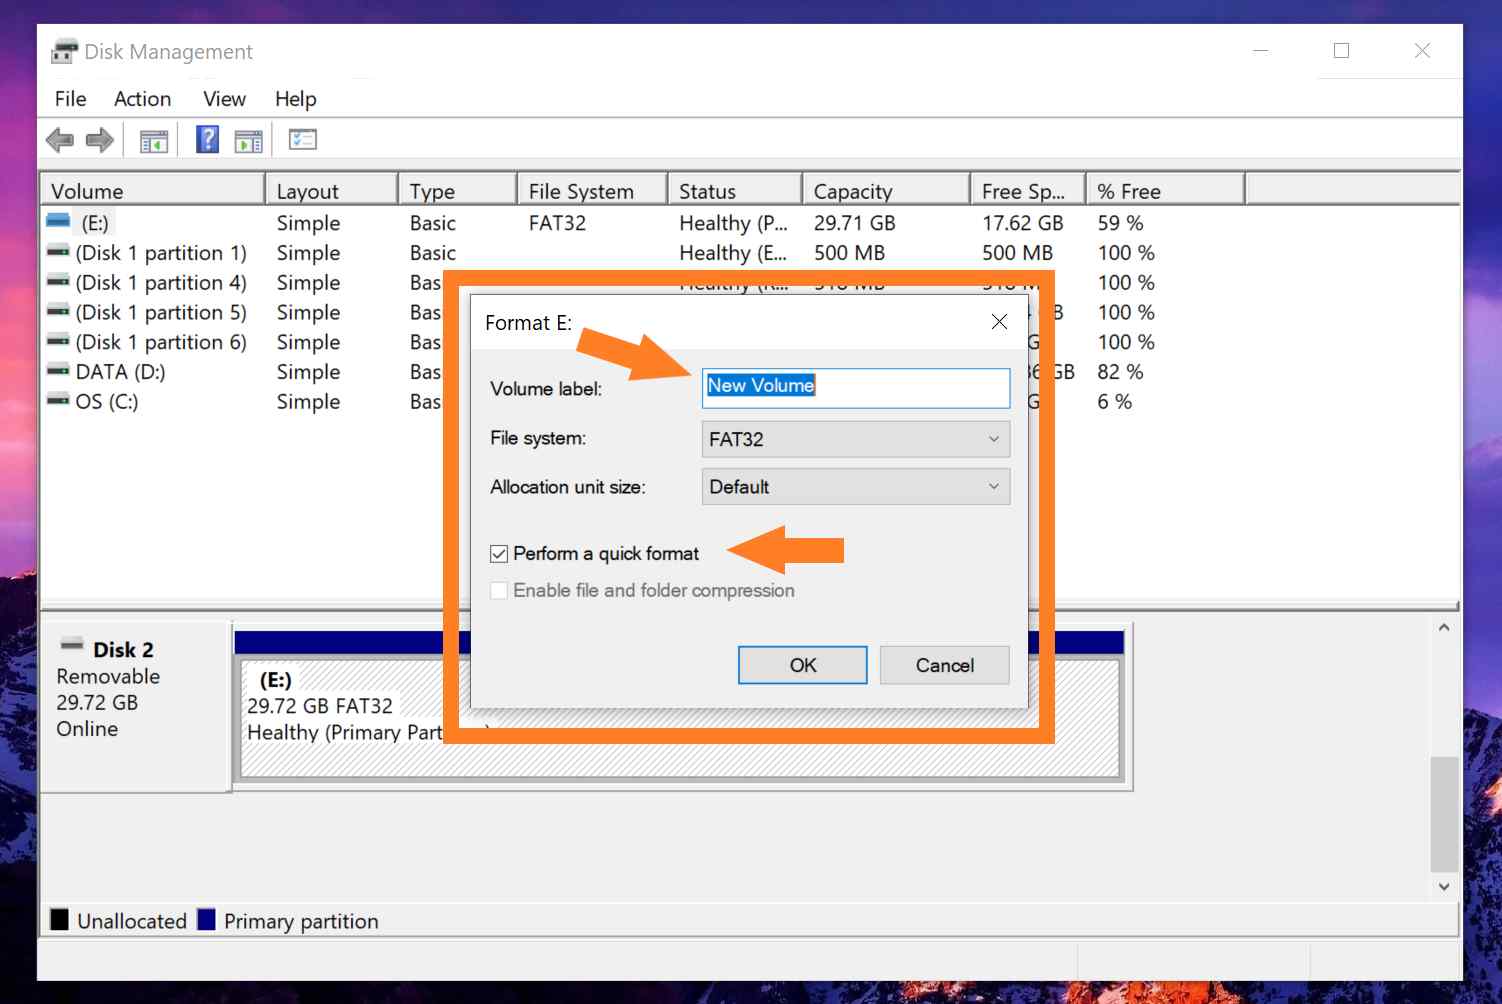
- Press OK.
After a successful reformat, your SD card should be fixed and ready for reuse.
FAQ
- The SD card contains invisible or hidden files that are taking up space.
- The SD card is corrupted and needs to be reformatted.
- Delete some files.
- Export your files to a computer or a different storage device.
- Use a file cleaner app.
- Reformat your SD card.


