
Lexar makes some of the best and most-respected SD cards. There are options across all price ranges, with a huge range of different storage options, and tons of different features. But no SD card is perfect. Whether by user error or otherwise, there may be times where you have to recover data from a Lexar SD card.
Thankfully, there are plenty of ways to do so. Lexar SD card recovery is actually quite easy, if you have the proper tools and expertise. Here’s everything you need to know about Lexar SD cards, from common to problems with Lexar SD cards, to how to perform Lexar memory card recovery.
Table of Contents
Common Problems with Lexar SD Cards
All SD cards run into some kinds of issues, and Lexar SD cards are no exception to that rule. Some of those issues are easy to fix, while others require a little more work, and others still will require the use of some kind of data recovery tool.
| Problem | Description |
| 📝 Write-protection | SD cards usually come with a small switch on the side, and that switch is used to “lock” the card. If you run into write failure error messages when trying to save files to an SD card, it’s worth double-checking that the physical switch on the card is in the correct position. |
| 🧹 Accidental deletion | Accidental deletion is one of the most common reasons for data loss on storage devices. For example, you may have deleted a file on your card, only to realize you still need it. You may also have formatted your memory card without checking if there are still files you will need in the future. |
| 🦠 Virus | It’s possible that there is some kind of virus or malware that has infected the card, in which case you can run antivirus software to get rid of the viruses. If you still can’t access your files, it’s time to turn to a data recovery tool. |
| 🤕 File System Corruption (RAW file system) | Any file system corruption can cause data loss. This is especially true in the case of a RAW file system. Corrupted file systems often result in inaccessible or unreadable files/data, which may require specialized data recovery methods to get back. |
| 🔨 Physical Damage | Lexar SD cards damaged by water exposure, electrical problems, or being dropped or chipped may result in data loss. The worst case scenario is that these damages affect your card’s memory chips, which might make it very difficult for it to function. The file retrieval would be tricky and require data recovery methods assisted by a professional. |
| 🔎 Missing Files | Another common issue is that when you plug your SD card into your computer, you find that there are missing files or that your computer can’t find any files at all on your SD card. This might simply be because of a temporary glitch in your system. In that case, it’s a good idea to start by ejecting the SD card and plugging it back into your computer. |
How To Recover Data From Lexar SD Cards
In common data loss scenarios such as accidental deletion, formatting, and file system corruption, among others, you can try out data recovery software to easily attempt file retrieval.
Data recovery software such as Lexar’s own Lexar Recovery Tool and third-party apps like Disk Drill provides support for people wanting to DIY getting their files back. These apps are both effective for a number of users, with one being better than the other depending on your use case. Let’s dive into how to recover data from Lexar SD cards:
Method 1: Using Lexar Recovery Tool
Lexar actually provides its own data recovery tool for its SD cards. The Lexar recovery software will likely do the job for some users, and those users should stick to it — since it’s free. But there are a few caveats.
This tool only provides a basic scan. This means that you can’t recover your file systems or files while retaining their original filenames. It also struggles to recover less common professional file types (e.g., RAW photos or videos, .psd files, .lrcat files, etc. ). Additionally, it is not available for download in the US.
However, the Lexar data recovery tool is available for both Windows and Mac users — so no matter which operating system you use, it’s worth trying out before you buy other software.
To recover files using the Lexar Data Recovery Tool, simply follow the steps below:
- To get started, download the Lexar Recovery Tool from Lexar’s official website.
- Extract the zip file. Then, connect your Lexar memory card to your computer and open the Lexar Recovery Tool.
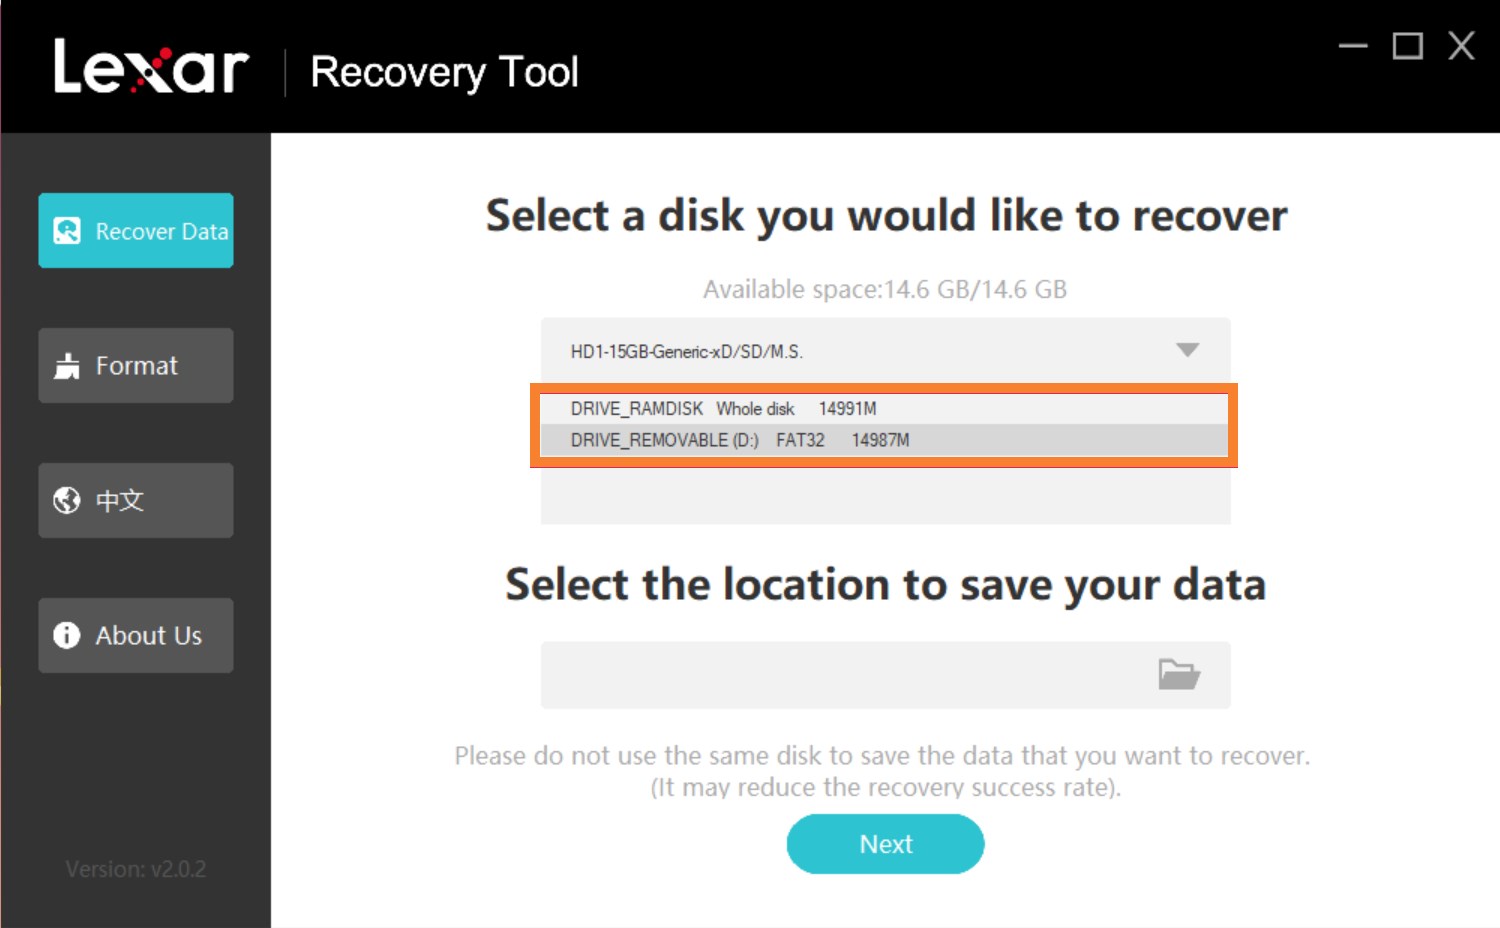
- Next, select the disk you want to recover files from and choose where you want to save your recovered data.
- After that, select the file types you want to recover, or click All Types to allow the app to scan for all file types. Then, click Next.
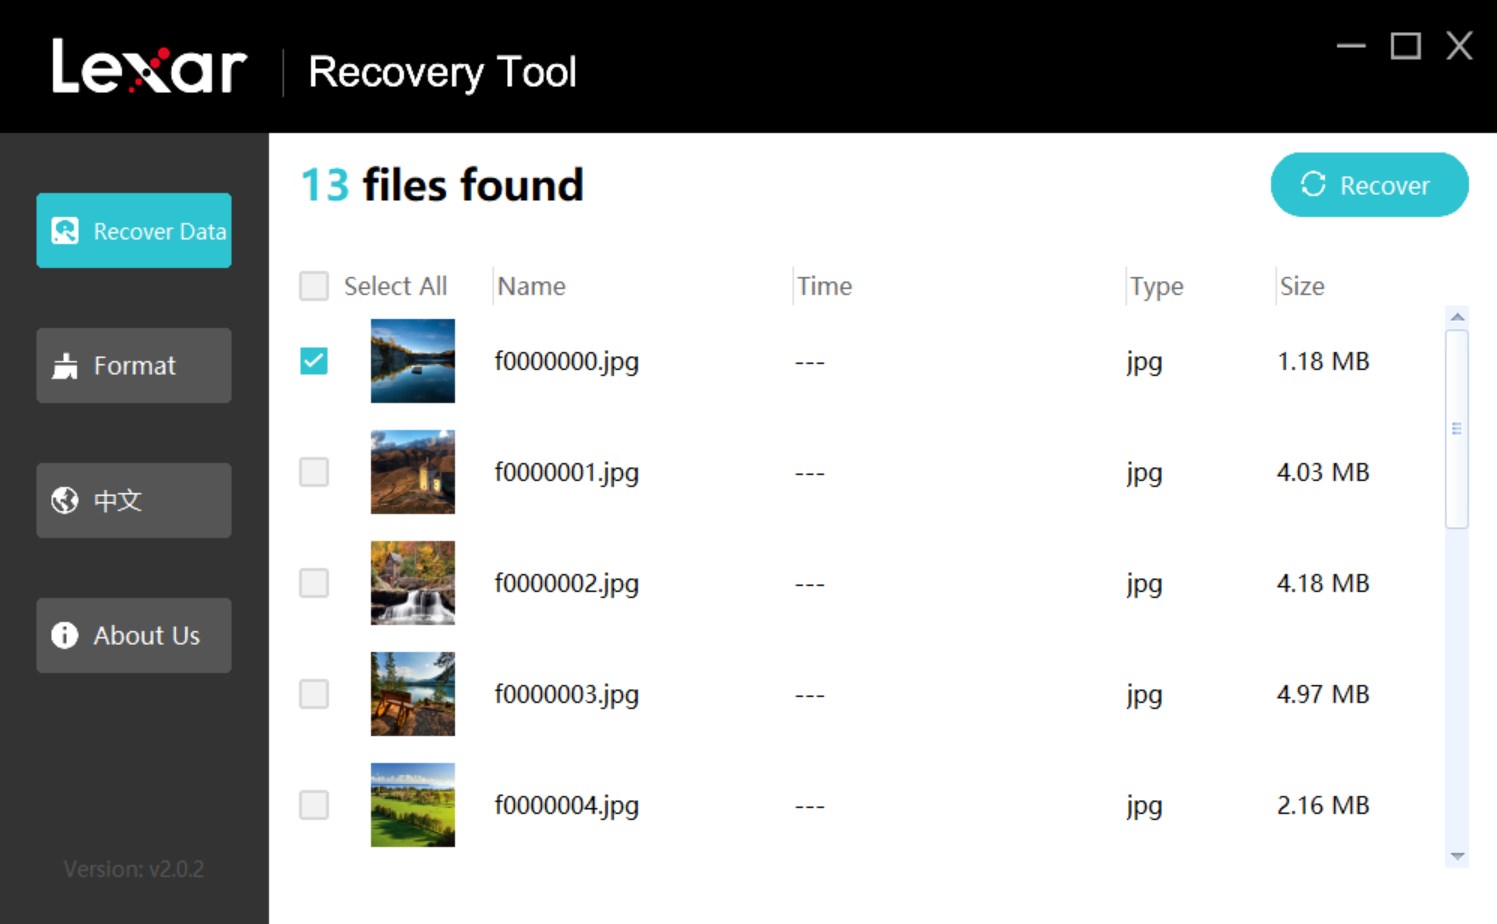
- After the scan finishes, select the files you want to recover and click Recover.
- A confirmation will pop up after recovery. Click Confirm to close the pop up window and continue file recovery or go to the file location you provided to check your files.
Method 2: Using Professional Third-Party Data Recovery Tool
Disk Drill is a third-party data recovery software that wins over users left unsatisfied by some limitations of the Lexar Data Recovery Tool. It provides significantly deeper scans and can find a wide variety of file formats, including common formats for photos, videos, audio, documents, and even RAW photos and videos, along with other uncommon file types.
On top of that, Disk Drill can create a byte-to-byte copy of a Lexar SD card to safely extract data if your card is corrupted. You can also download the app’s free version on both MacOS and Windows, with the Windows version allowing up to 500 MB of recovery for free.
Note that while the screenshots below show the tool on Windows, the interface is similar on Mac, and the data recovery process is the same.
Here are the steps on how to recover data from a Lexar SD card using Disk Drill:
- Download and install Disk Drill for Mac or Windows.
- Plug your Lexar SD card into your computer. Some computers allow you to insert the SD card directly into the computer. For others, you’ll need a dongle or adapter.
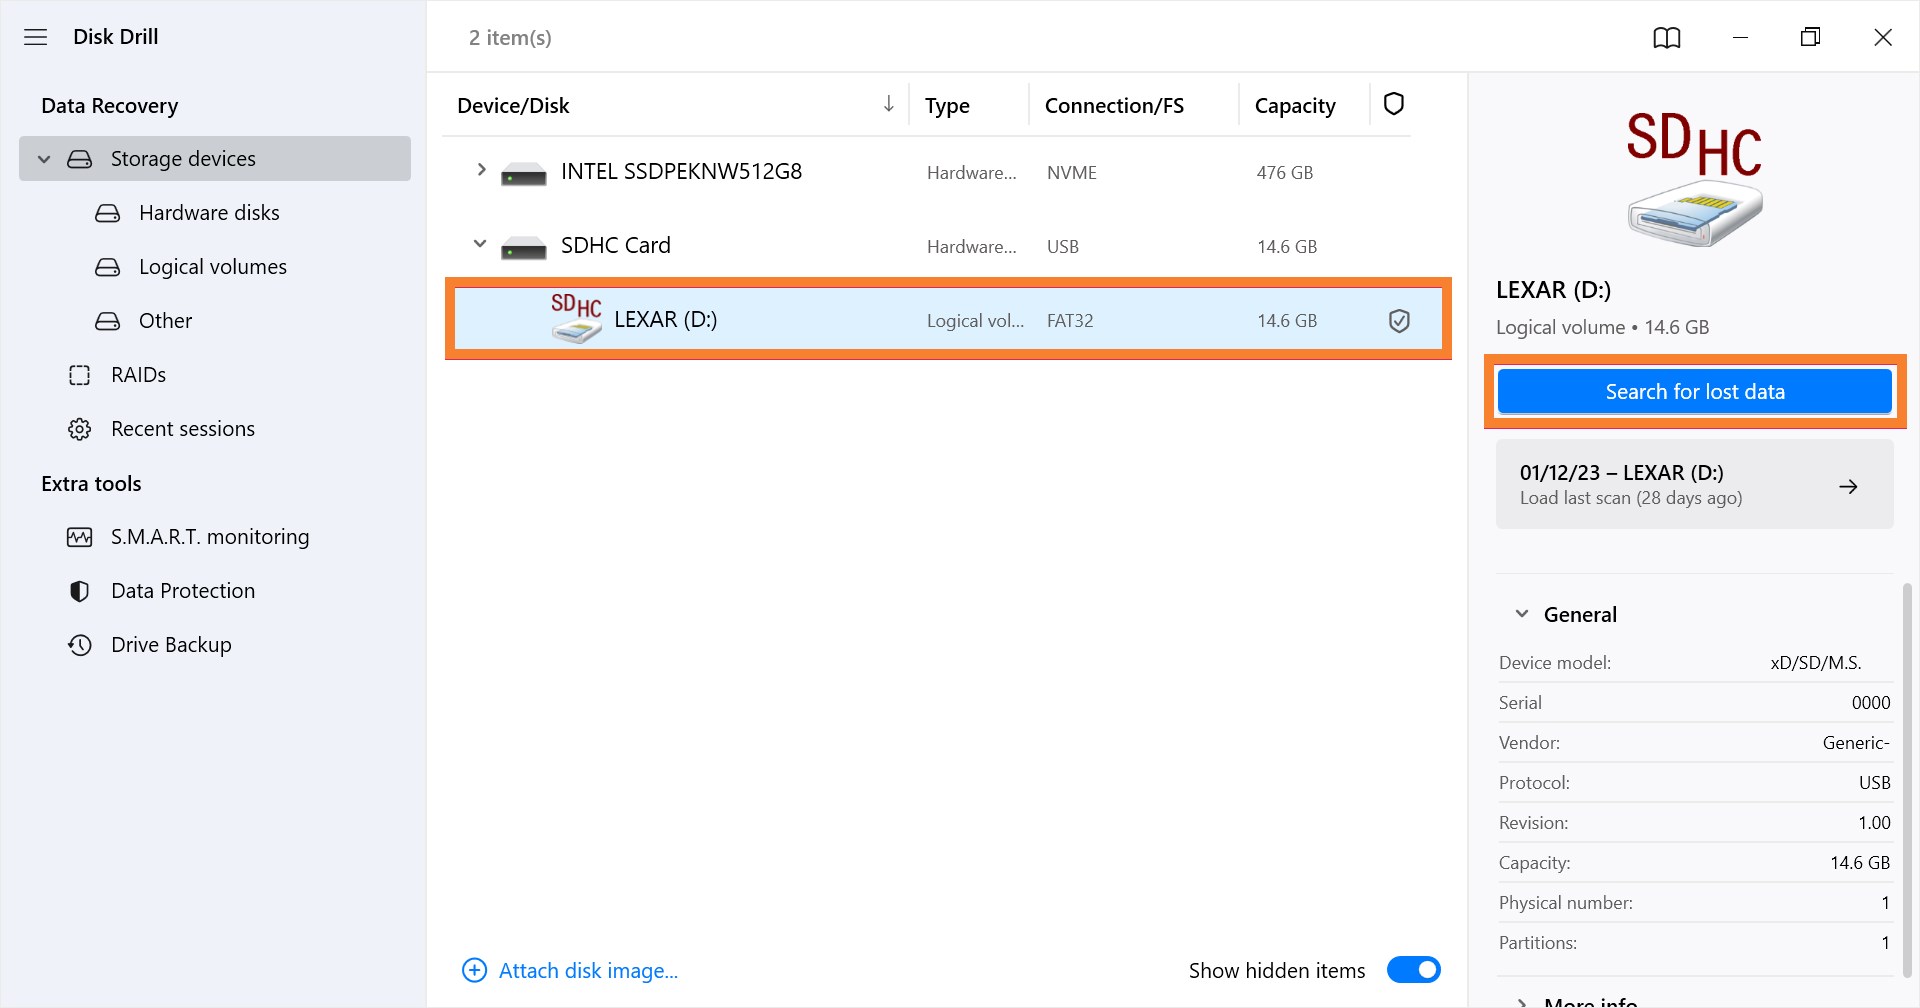
- Open Disk Drill and find the right SD card on the list of drives that show up on the screen. Select the “Search for lost data” button on the right of the display.
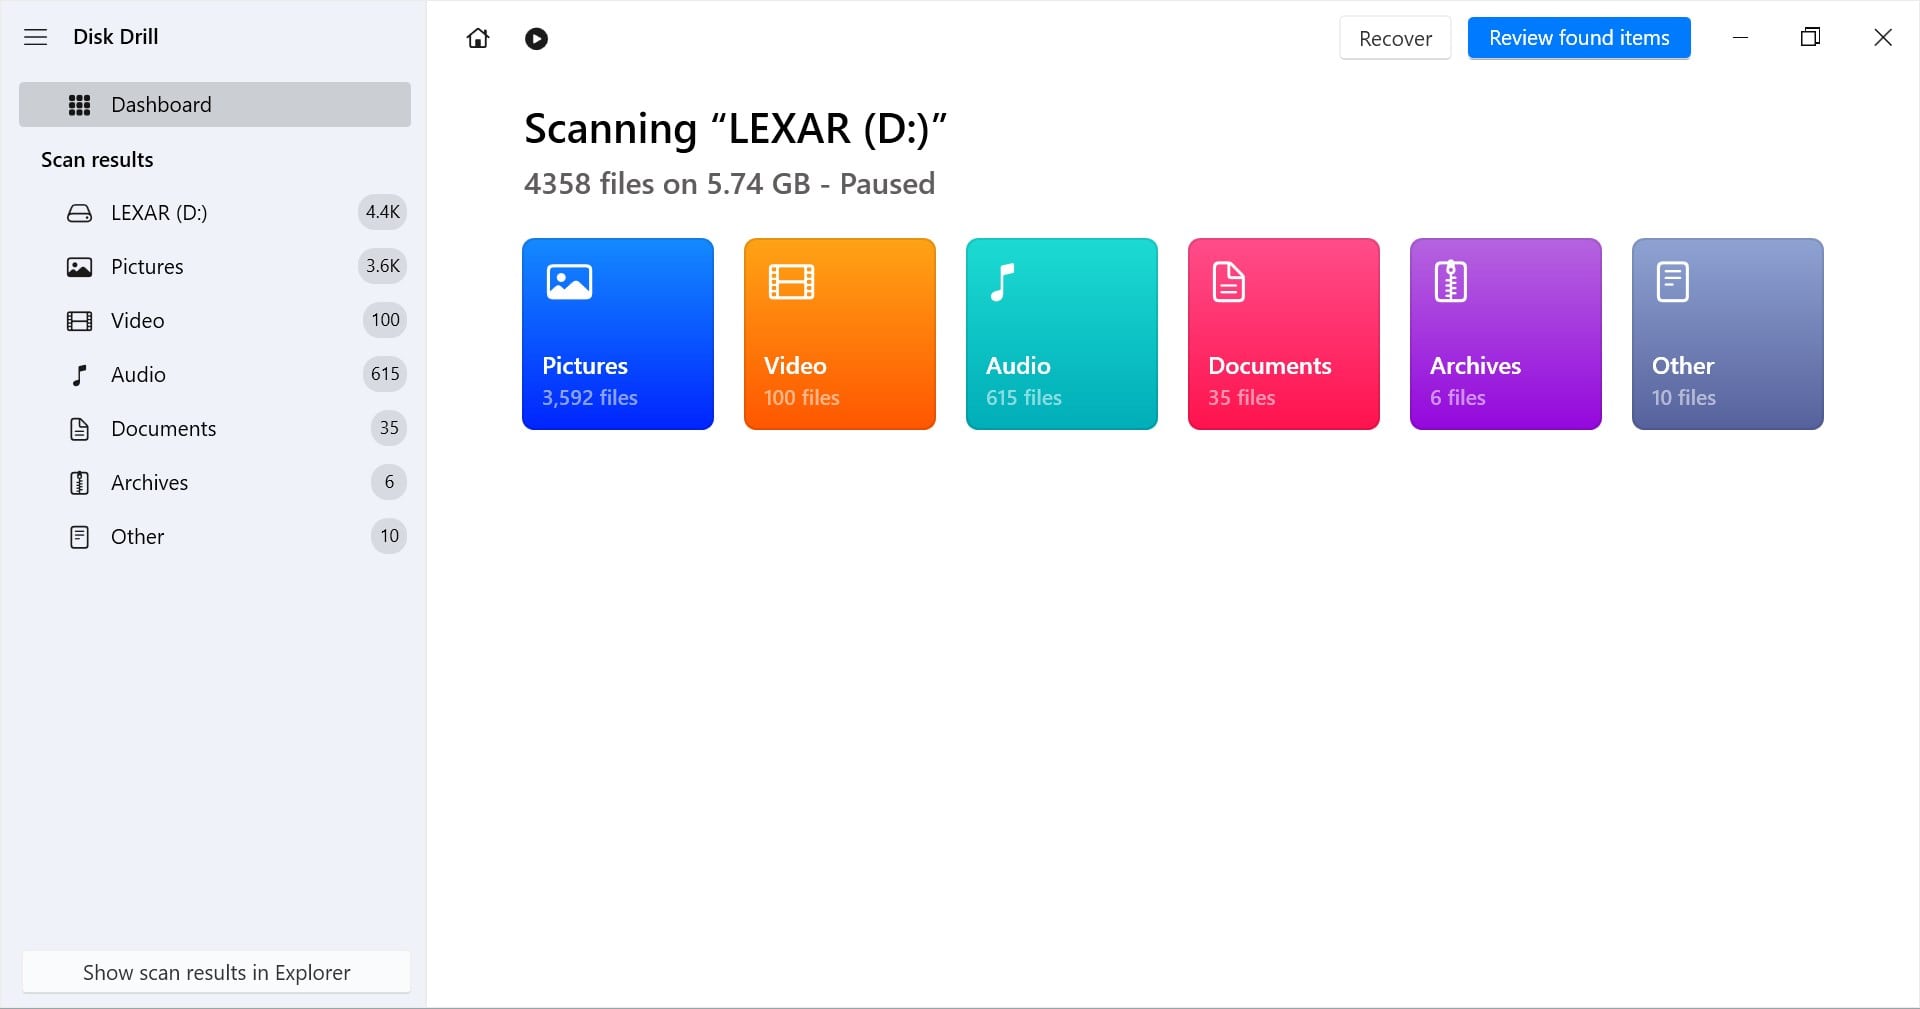
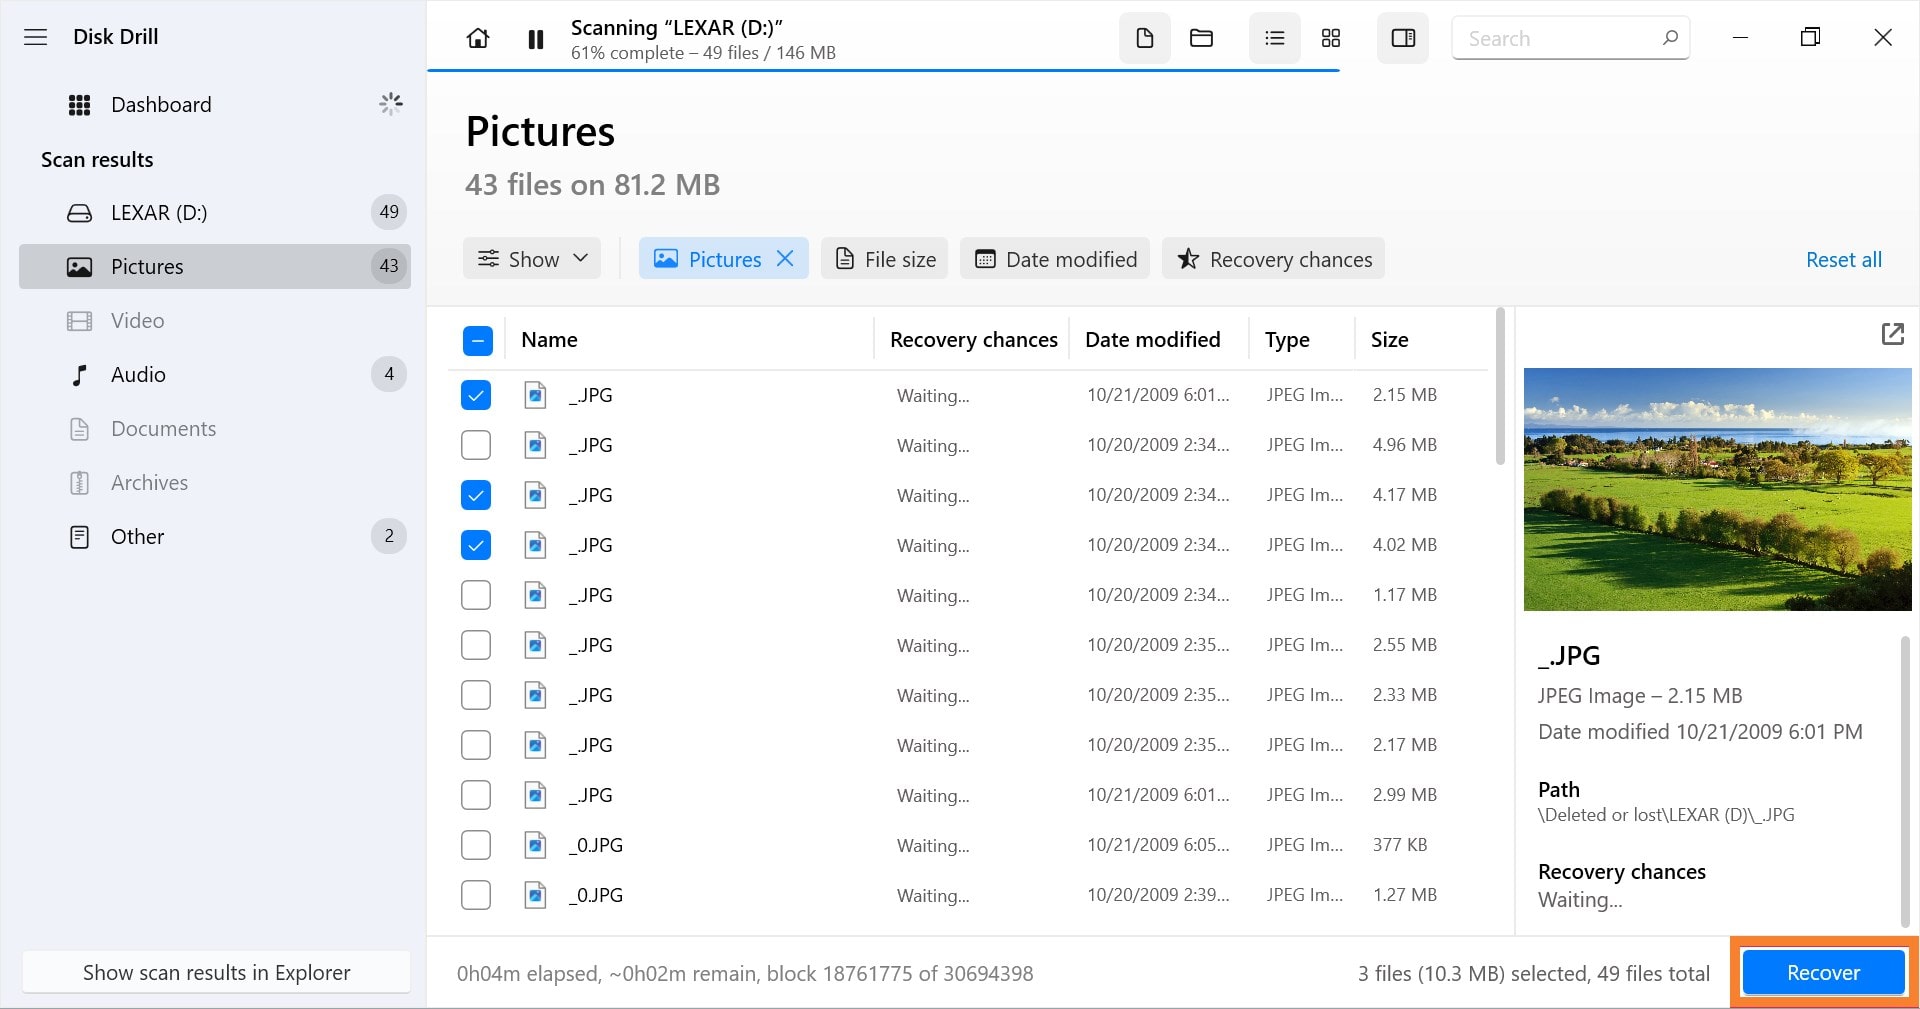
- Wait for Disk Drill to scan your drive for lost files. This may take a few minutes, depending on the type of files that were lost and the size of those files. Choose “Review found items” to preview the files and folders that were found during the scan.
- Tap the “Recover” button at the bottom of the display, after which you’ll be able to select a folder to save those files too. Then, wait for the program to save the recovered files, which may take a few minutes.
Your files should now be saved to your computer. You can then head to the folder that you saved your files to, and find the files that you were trying to recover. Or, simply tap the “Show result in Finder” button to be taken straight to them.
Conclusion
Lexar SD Card data loss due to accidental deletion or formatting, file system corruption, or similar issues can be solved by using data recovery apps.
Lexar provides its own data recovery tool for free. However, third-party apps like Disk Drill would be a much more ideal data recovery option if you need more advanced features.
Otherwise, you might need help from data recovery professionals. To avoid data loss in the future, it’s recommended to keep updated backups of your important files.
FAQ:
- First, connect your Lexar memory card and launch Disk Drill.
- Select your memory card on the list of available devices and click Search for lost data.
- Next, choose the files you want to recover and click Recover.
- Select the file location for your data.
- After that, wait for the recovery to finish. Click Show recovered data in File Explorer to verify the files recovered.
- Connect your Lexar SD card to your computer.
- Next, open File Explorer/Finder.
- Find your device and right-click/control-click on it. Then, select Format.
- Configure the file system, name/volume label, and Quick Format settings for your device and click Start or Format.


