 Crucial is a well-received brand that offers various storage devices but is known primarily for its quality SSDs at an affordable price point. While these SSDs are certainly reliable, that doesn’t make them immune from different data loss scenarios.
In this guide, we’ll outline the best way to recover data from Crucial SSDs. We’ll also go over the different fixes you can implement if your Crucial SSD isn’t being detected by your computer.
Table of Contents
Is Crucial a Good Storage Brand?
Crucial is a respected storage media brand under Micron Technology, Inc., an American tech company known for developing computer memory and storage solutions. The brand is particularly famous for its line of capable SSDs, offering a solid mix of top-notch performance and quality builds without breaking the bank. Many consider Crucial to be one of the frontrunners in the SSD industry.
In addition to computer memory and storage devices, Crucial offers a couple of nifty free programs for its users. Crucial Storage Executive is a tool that lets you monitor, optimize, and maintain your Crucial SSDs, while Acronis True Image allows you to clone drives and create OS backups.
How to Recover Data from Crucial SSD on Windows
The most tried and tested way of recovering data from a Crucial SSD is to leverage an effective data recovery program to scan the device and retrieve your missing files. That being said, this method is not foolproof and can be influenced by several factors, such as:
- 💡 The cause of the data loss: The situation that led to the data loss is a key factor in determining the success of data recovery. For example, files from an SSD that was formatted using the “Quick” method can still be restored, unlike if the SSD was formatted using the “Full” method.
- 💿 The physical state of the SSD: The physical health of your Crucial SSD is another key element that will determine the success of data recovery, as a physically damaged device greatly reduces the chances of file retrieval.
- 🖋️ Whether or not the lost files have been overwritten: No matter the data loss scenario, lost files can only be recovered if they have yet to be overwritten on the Crucial SSD.
Disk Drill is one of the programs for Crucial data recovery, boasting exceptional success rates, superb performance, and an inviting user interface. It also supports just about every file format around and is compatible with the majority of storage device file systems. If you’re not quite sold on Disk Drill just yet, you can try out its free trial version, which gives you access to all the app’s features along with a recovery limit of 500MB.
While the program does work with all modern versions of Windows, you’ll need to use an older version of the app for any systems below Windows 10. Here’s an easy step-by-step guide on how to use Disk Drill to perform Crucial SSD data recovery:
- First, download Disk Drill from the official Cleverfiles website and install it on your Windows PC.
- Once successfully installed, run Disk Drill. Then, select your Crucial SSD from the list of devices and hit the “Search for lost data” button.

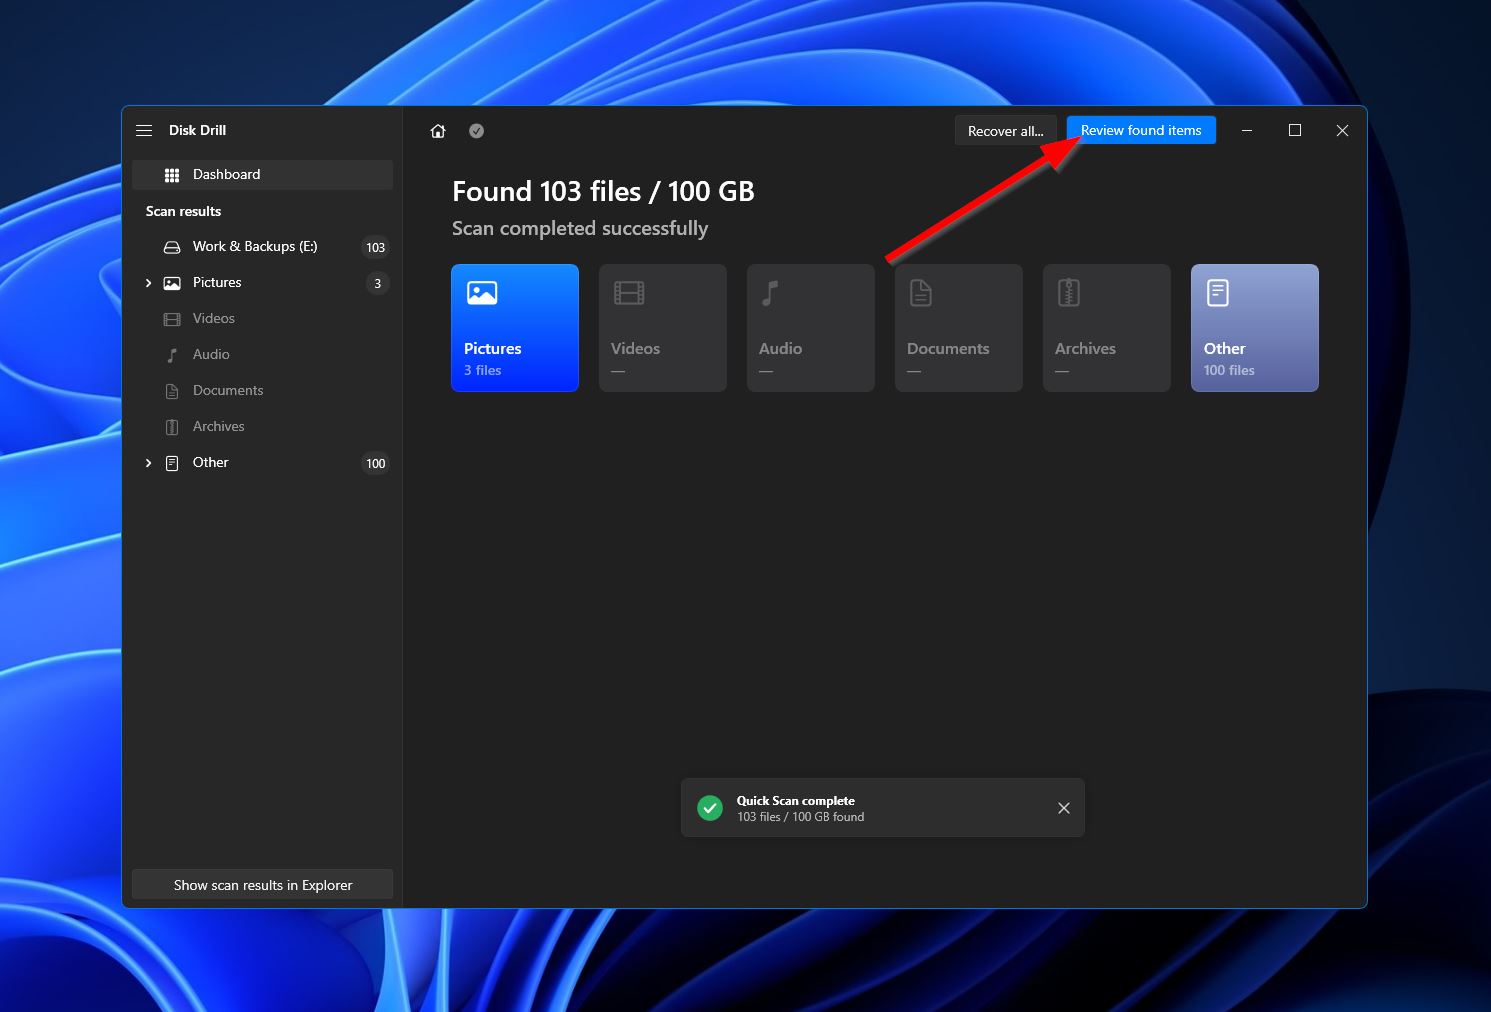
- After clicking, Disk Drill will now begin a thorough scan of your Crucial SSD. As the scan progresses, you can click the “Review found files” button at the top-right corner of the window to check out what the search has uncovered so far. Alternatively, you can just wait for the scan to finish and click the same button to head to the results section.
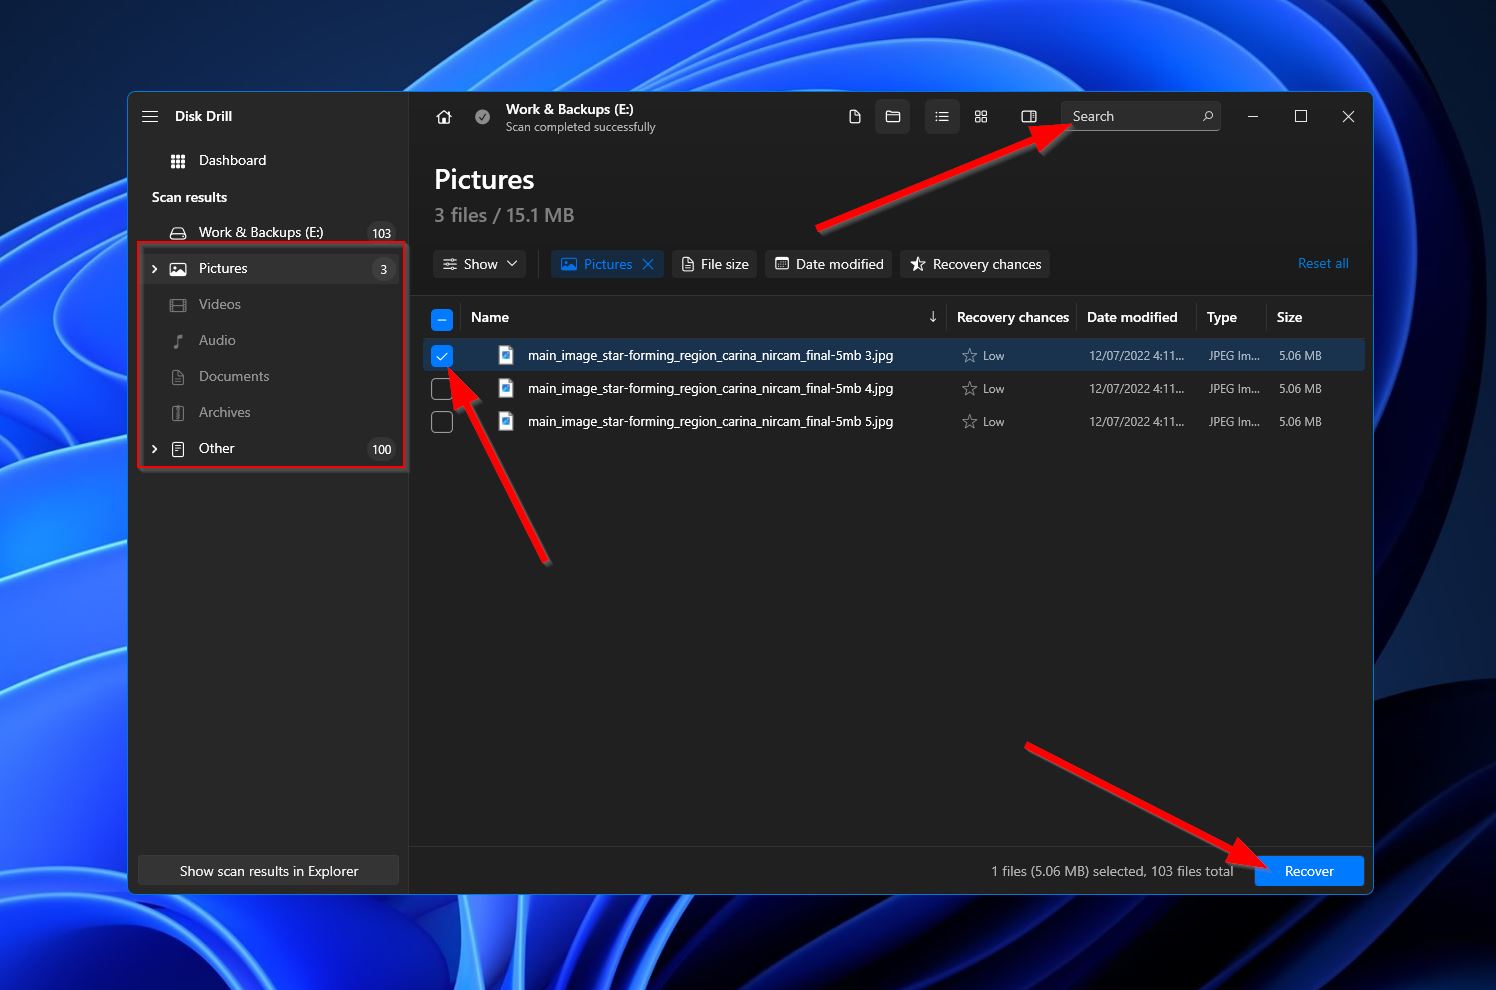
- If you’re facing an overwhelming number of found files, you can narrow down the results by using the categories on the left side of the window or the search bar at the top right. Keep in mind that the search bar accepts both file extensions and file names. When you find the files you’re looking to restore, highlight them by ticking the checkboxes next to their names and then click the “Recover” button.
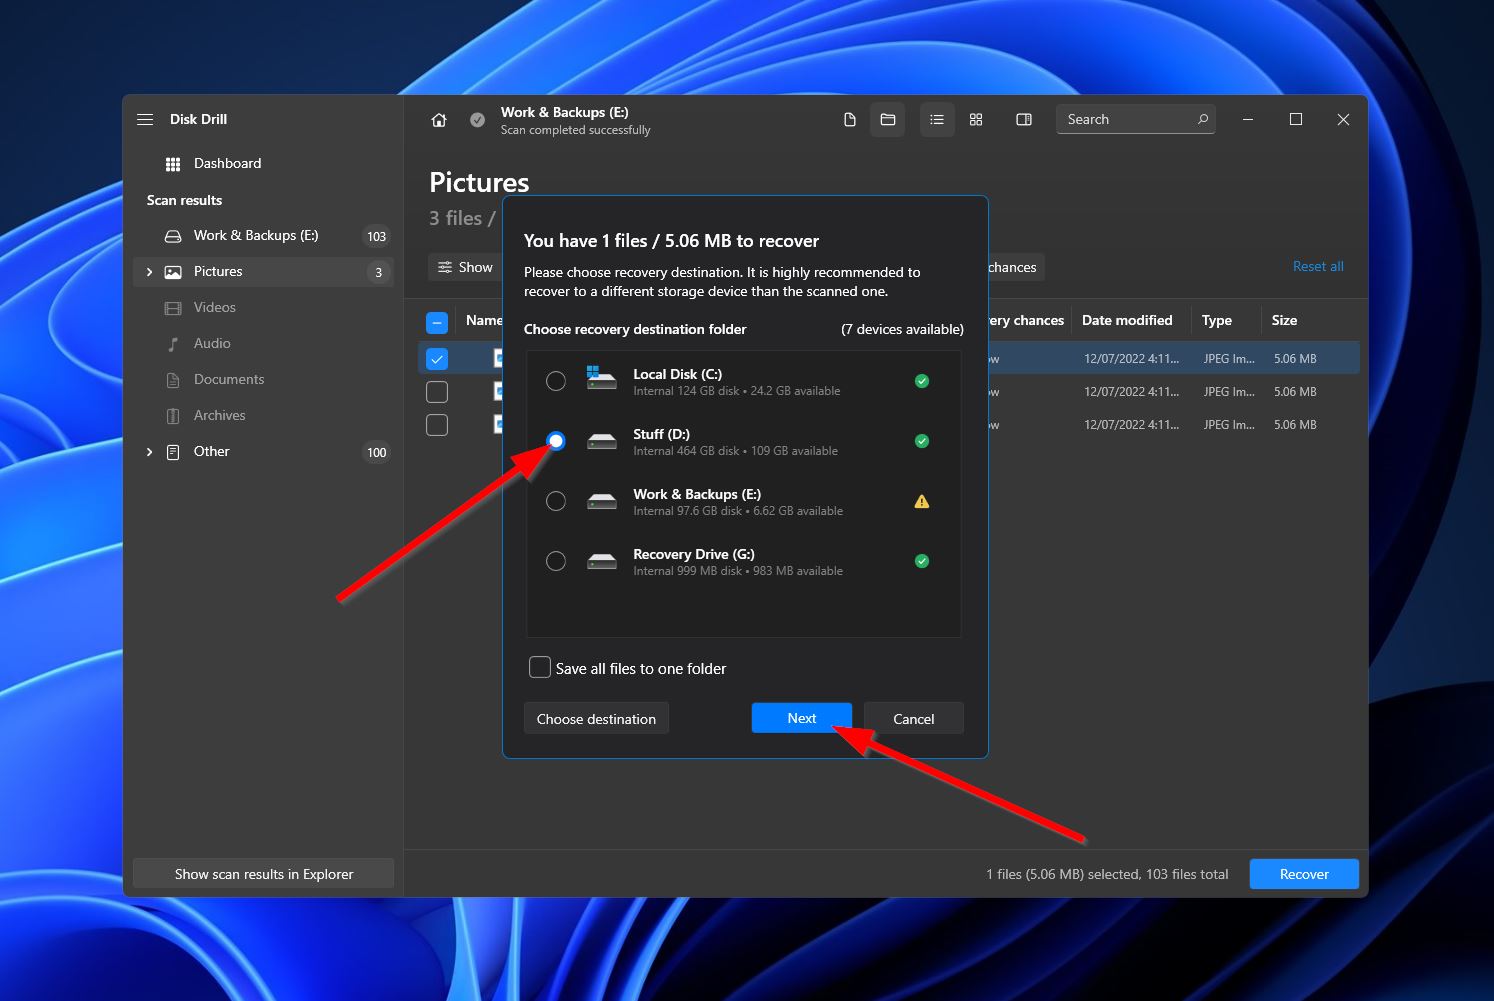
- Upon clicking, a small window will show up, asking you to decide on the destination folder for your recovered files. This has to be on a different storage device than the Crucial SSD you just scanned. Hit “Next” once you’ve decided.
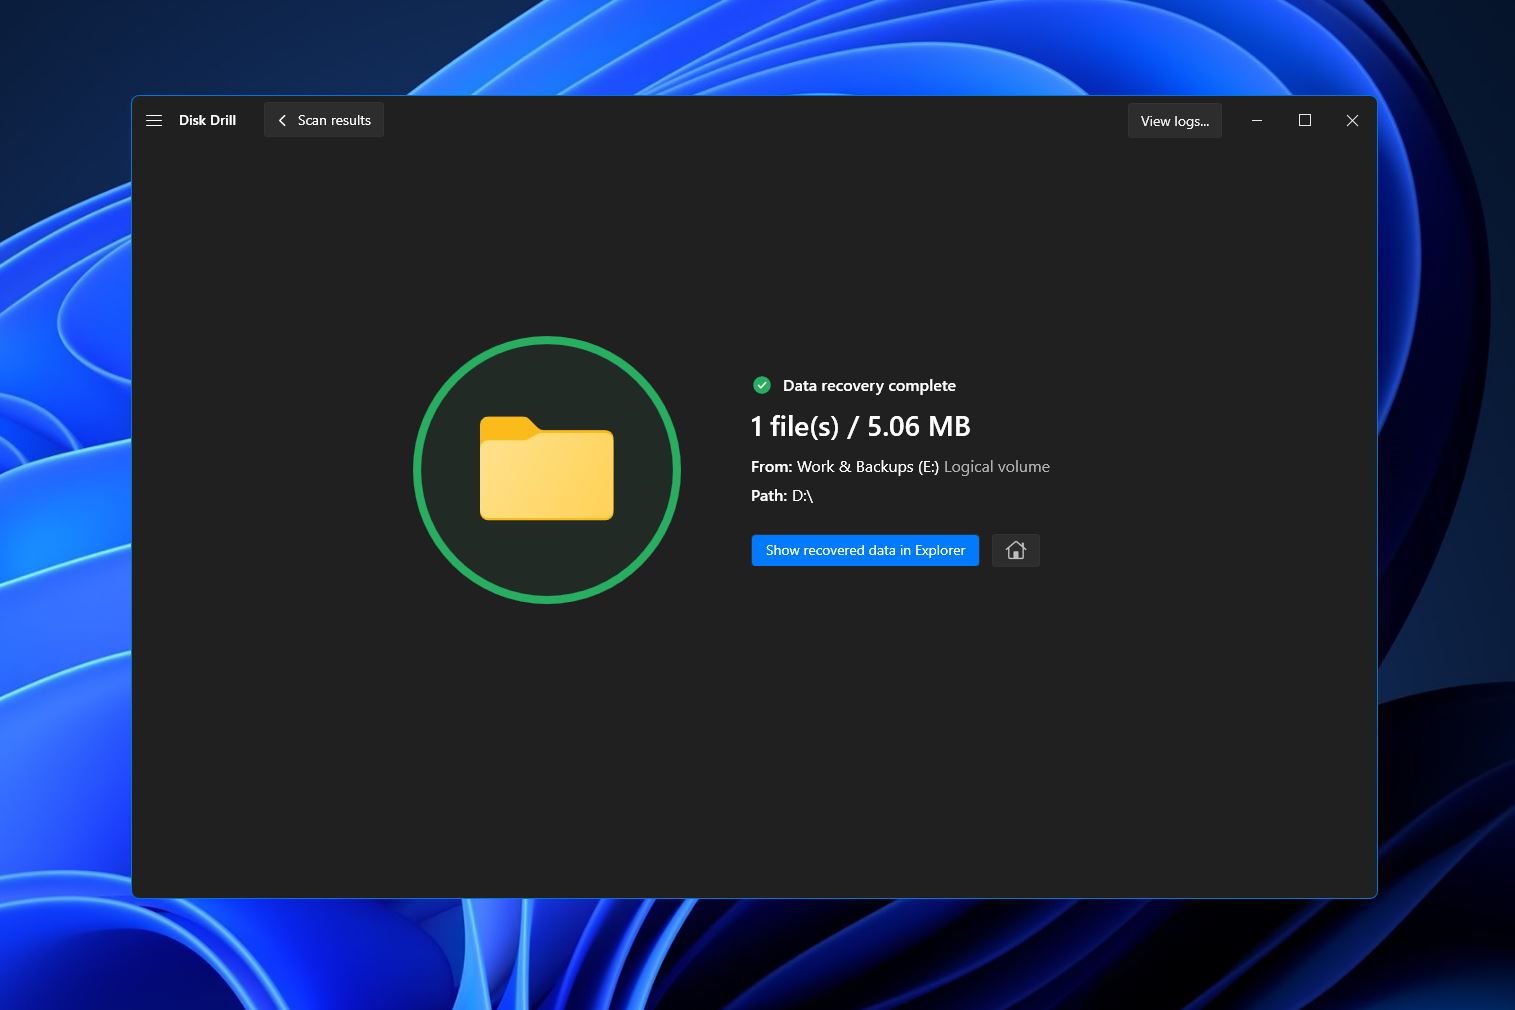
- Disk Drill will now attempt Crucial SSD data recovery. If successful, you’ll be met with a completion screen and a button labeled “Show recovered data in Explorer.” Click the button if you’d like Windows to open the folder where your retrieved files are located.
How to Fix Crucial SSD that is Not Detected
Is your Crucial SSD not showing up in Windows? This may happen due to a number of reasons, including faulty cables, Crucial SSD driver issues, file system incompatibility, and more. But don’t panic just yet, as there are several fixes you can try in order to get your SSD up and running.
- Connect to another PC or laptop. The first thing you should try if your Crucial SSD is not being detected is connecting it to a different PC or laptop. If that works, then the issue lies with your initial computer.
- Update drivers. Outdated drivers can cause a myriad of issues when it comes to SSDs, including the device not being recognized by your operating system. With that said, the second solution you should attempt is updating your Crucial SSD drivers.
- Format the SSD. If updating drivers and connecting to another computer doesn’t do the trick, your final course of action is to format the SSD into a supported file system. This can be done using Windows Disk Management or the Command Prompt.
Conclusion
While Crucial is a highly trusted brand when it comes to SSDs, they’re still prone to various data loss situations. If you’ve encountered such a scenario, the best way to retrieve lost files is to utilize an effective data recovery program. Furthermore, just like other storage devices, Crucial SSDs may become undetected by your operating system. There are several fixes outlined above that you can try in order to remedy this issue.


