 If your external hard drive isn’t formatted correctly, you won’t be able to access your data. To use it as intended, you have to make sure your external hard drive’s file system is compatible with the operating system you’ll be using it with.
However, formatting leads to data loss unless you set up the parameters correctly. This article is the ultimate guide for formatting hard drives for Mac and PC – learn the right file system to use, how to format your drive to the correct file system, and how to preserve/recover your data in case of formatting.
You can also opt to partition a hard drive for Mac and PC with the desired format instead of using a single file system for the entire drive. The formatting instructions are the same, but you will only be applying it to an individual partition.
Table of Contents
What is the Best Format for Mac and Windows
The best hard drive format for Mac and Windows is ExFAT. Like its older cousin, FAT32, ExFAT is universally compatible with all mainstream devices (so ExFAT will make your external hard drive compatible with Mac and PC).
You may often encounter the FAT32 file system out in the wild because it’s still commonly used, so we’ll quickly break down the differences between the two.
The points below will also illustrate why you should be using ExFAT instead of FAT32.
- FAT32 has a maximum individual file size limit of 4 GB. In other words, you can’t store a 20+ GB 1080p video on a FAT32 drive.
- ExFAT is more efficient at organizing data and has a superior read/write performance.
- You can’t create individual partitions larger than 32 GB on a FAT32 drive.
- While FAT32 is still supported by many devices, ExFAT is newer and more future-proof.
For its system drives, Macs use either the APFS (macOS High Sierra and above) or HFS+ format. However, they aren’t compatible with Windows and other non-Mac operating systems.
How to Format External Hard Drive on Mac
macOS provides you with all the tools you need to properly format your external hard drive. The method you choose in the sections below will depend on whether you want a more visual tool or you prefer to operate with the command line.
Formatting your external hard drive will lead to data loss. We strongly recommend that you back up your data before proceeding.
Method 1: Format Your Drive on Mac With Disk Utility
Disk Utility is Mac’s all-in-one disk toolkit. It’s super user-friendly with a highly visual GUI that allows you to partition, repair, and format your drives with a few clicks.
To format your drive using Disk Utility:
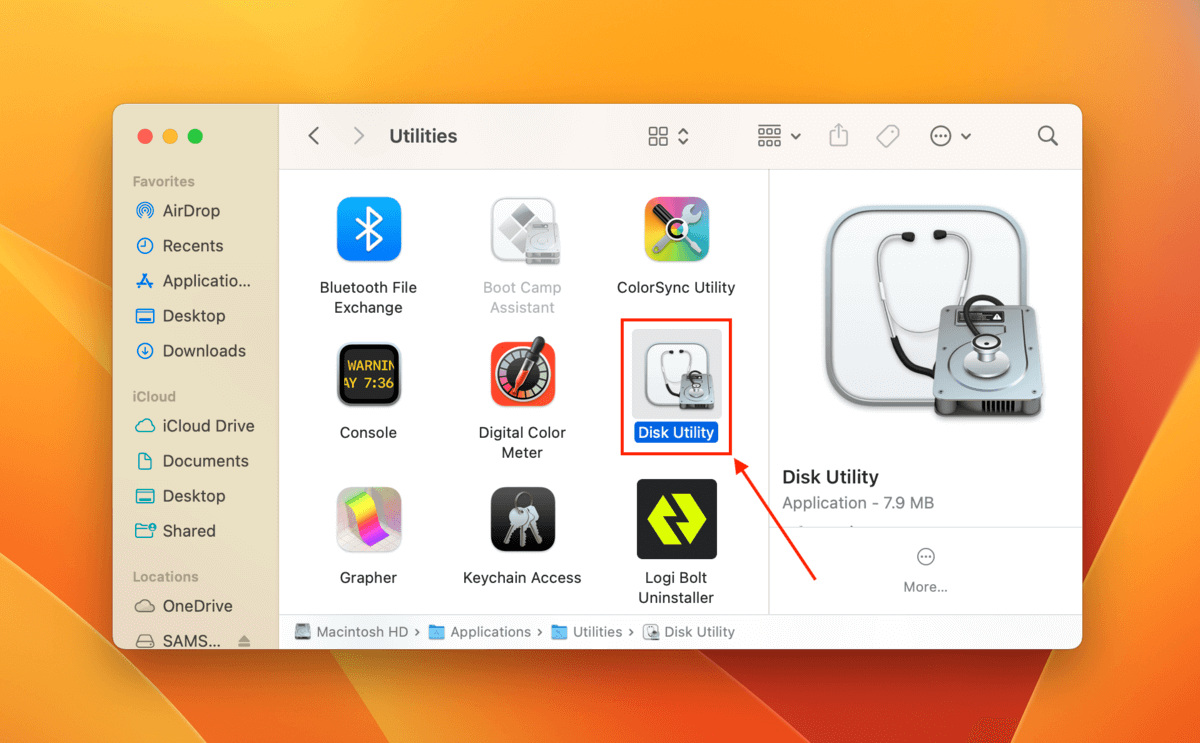
- Connect your external hard drive securely to your Mac and launch Disk Utility (Finder > Applications > Utilities).
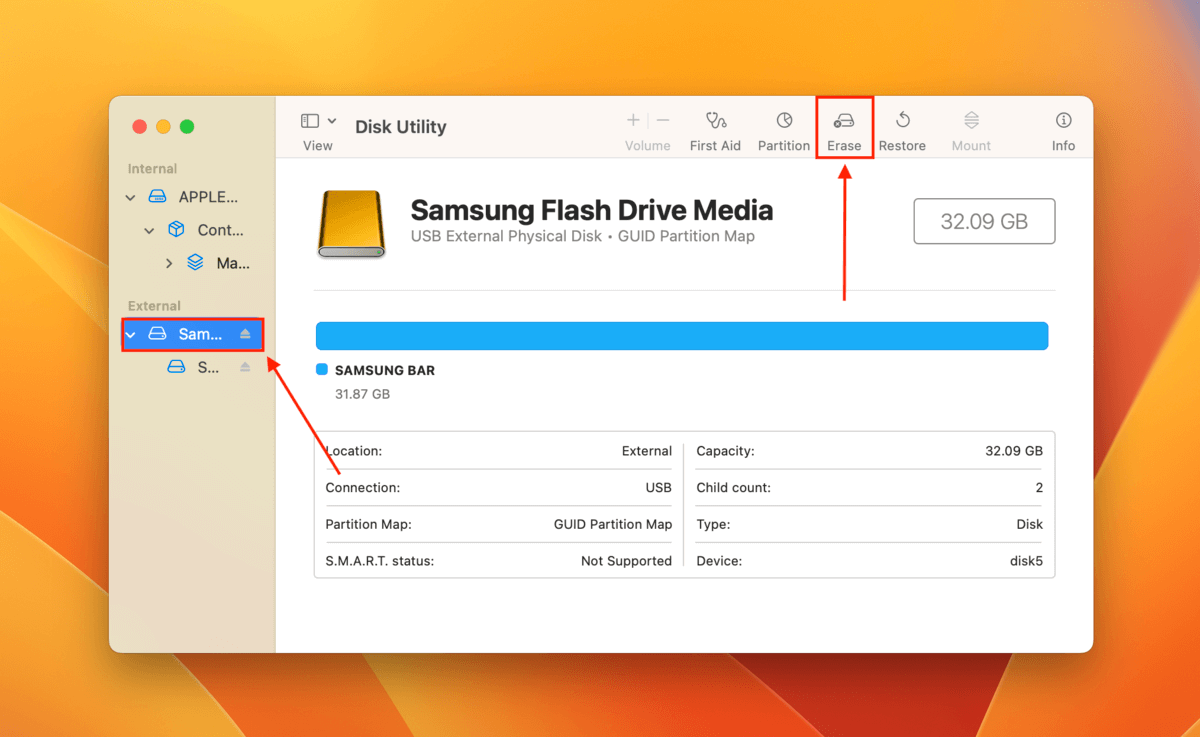
- Select your drive from the left sidebar and click Erase.
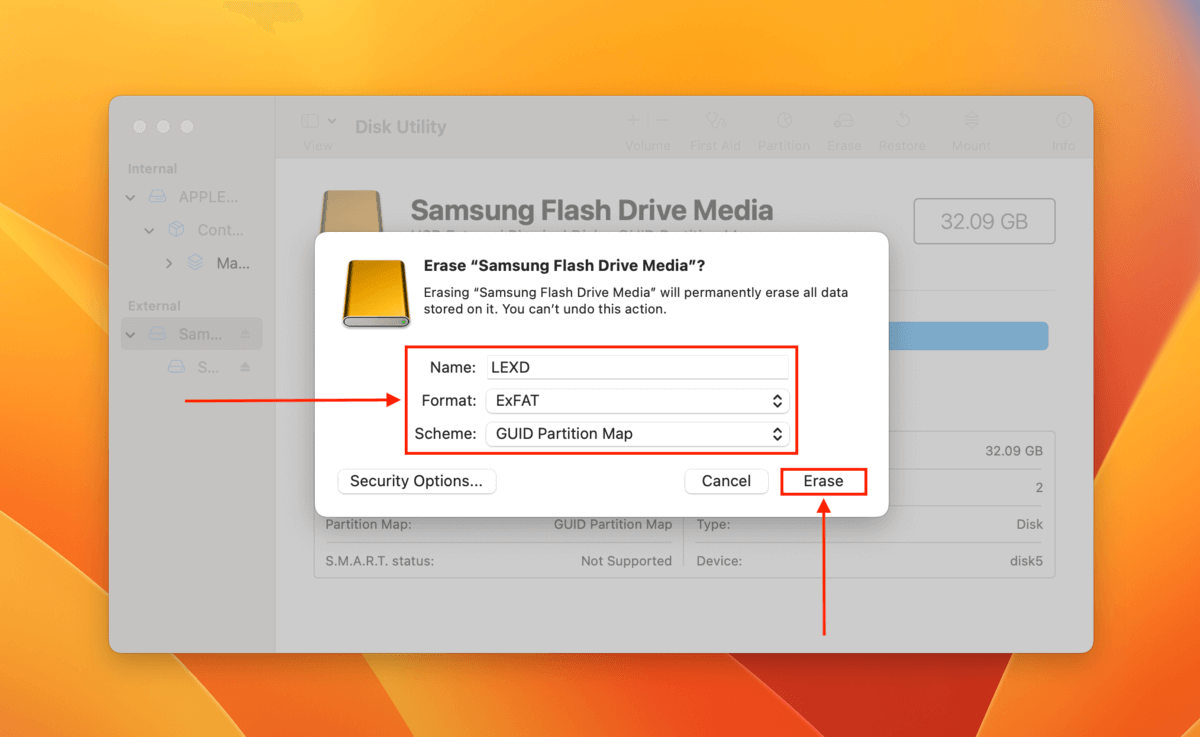
- Name your drive, select the ExFAT format, and select the GUID Partition Map scheme. Then, click Erase.
Disk Utility will let you know once the formatting process is complete.
Method 2: Format Your Drive on Mac with Terminal
If you prefer working with the command line for its efficiency, you can also format your drive using the Terminal app. Even if it’s your first time using commands, the formatting process is really simple and it’s a great opportunity to try some easy commands.
To format your drive using the Terminal app:
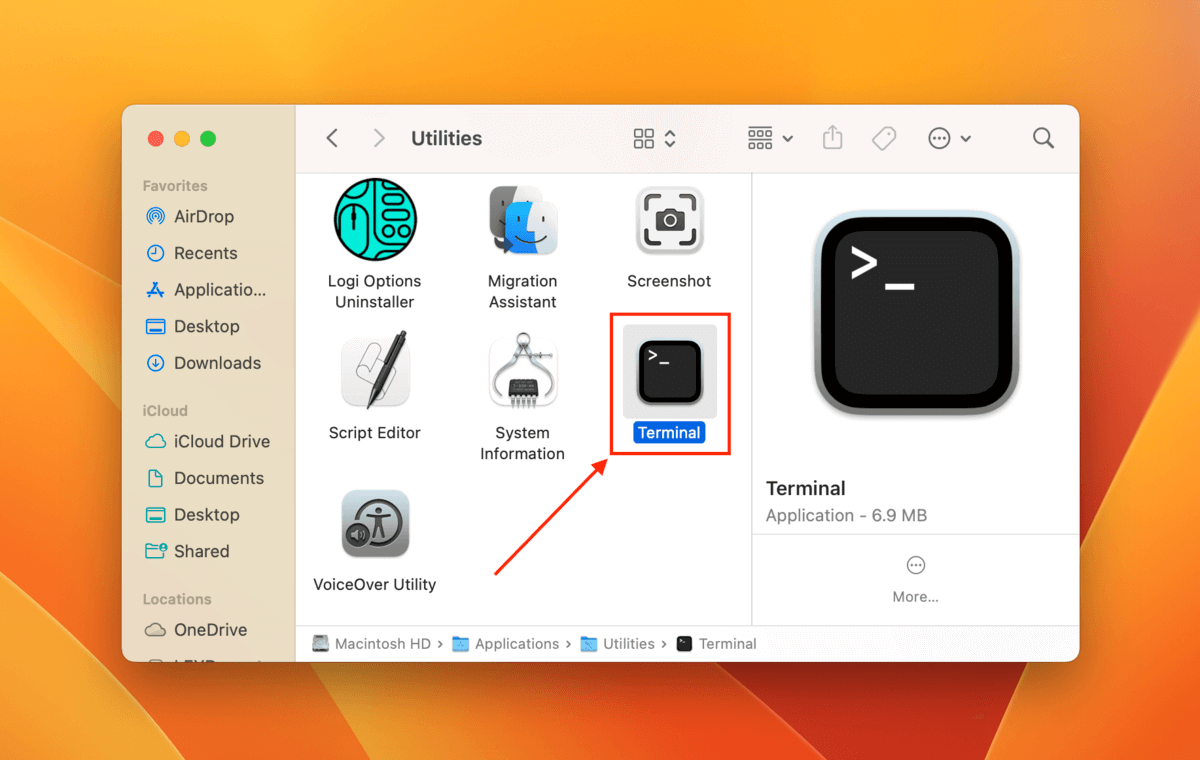
- Connect your external hard drive securely to your Mac and launch the Terminal app (Finder > Applications > Utilities).
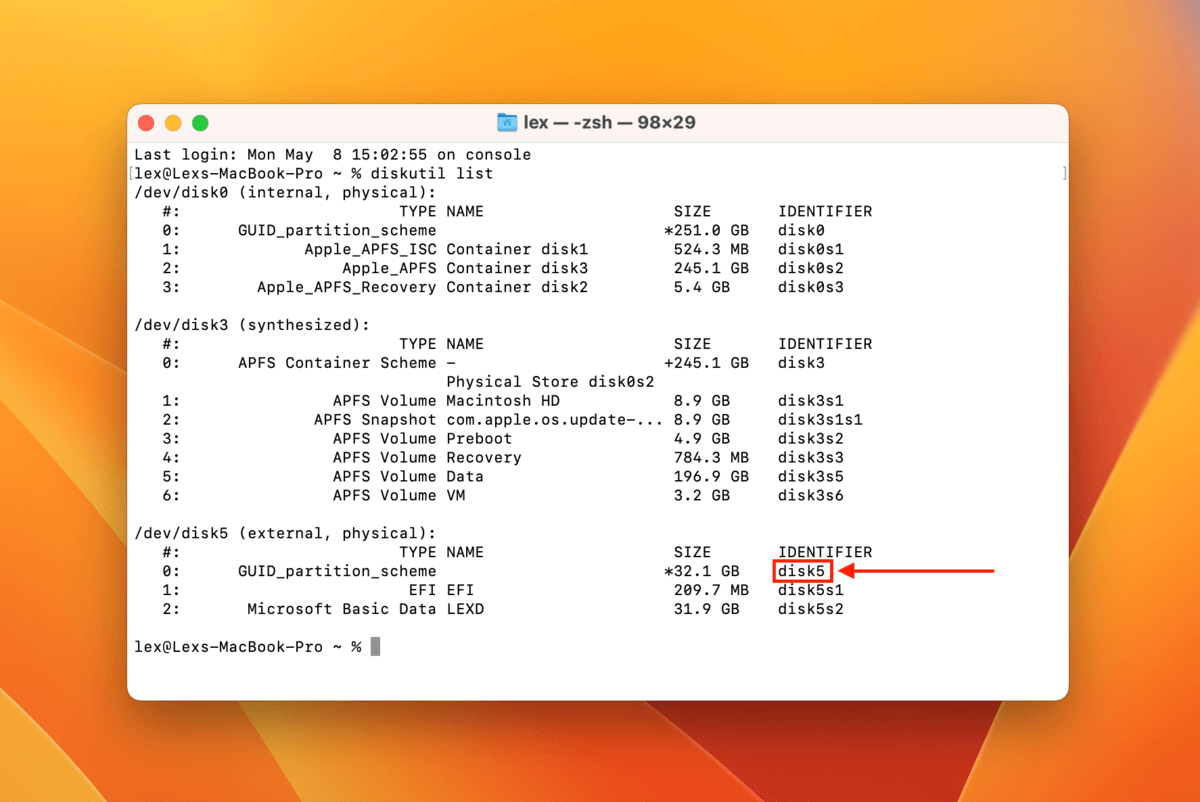
- Type the following command and hit Return:
diskutil list
Take note of your SD drive’s identifier.
- Type the following command and hit Return:
diskutil erasedisk exfat disk_name disk_identifier
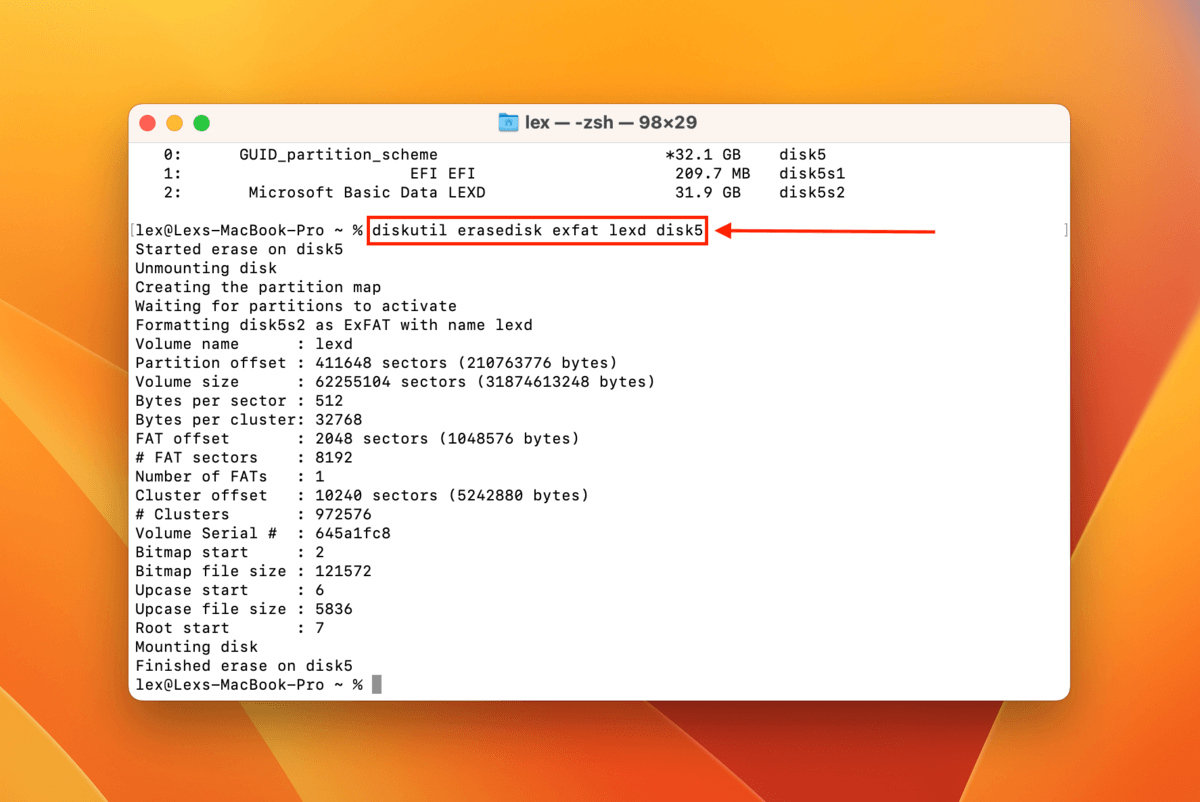
Once you see the message “Finished erase on disk”, the formatting process is complete.
How to Format External Hard Drive on Windows
If you want to format your external hard drive on Windows, you’ve got 3 methods to choose from: (1) using File Explorer, (2) using Disk Management, and (3) using Command Prompt.
The first 2 methods provide a visual interface for users to format their drives with a few clicks. The third method uses simple commands to perform the format.
Your choice of method will be a matter of preference, but they all lead to the same result!
Method 1: Format Your Drive on Windows with File Explorer
The most straightforward way to format an external hard drive is through File Explorer, where you can access a simple formatting setup window from your drive’s right-click menu.
To format your drive with File Explorer:
- Connect your external hard drive to your PC and open File Explorer.
- Right-click your drive in the left sidebar and click Format.
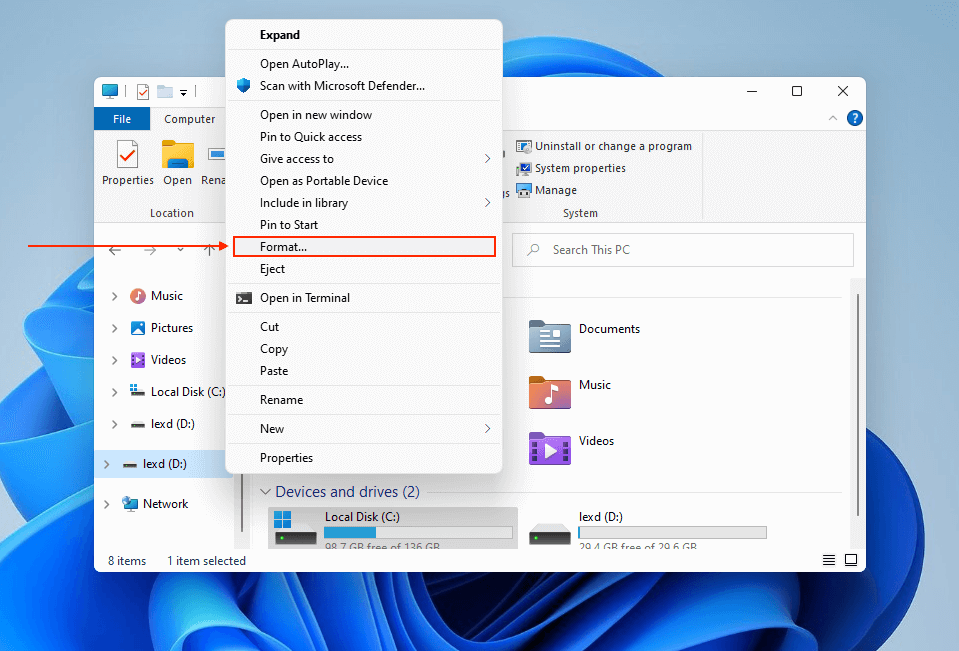
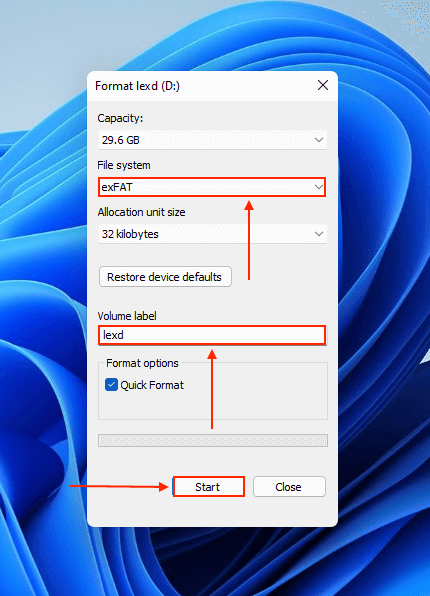
- Create a label for your drive and select the ExFAT format. Then, click Start to begin the formatting process.
Method 2: Format Your Drive on Windows with Disk Management
Disk Management is a Windows toolkit for organizing your computer’s storage devices. Here, you can organize, create, and modify partitions.
Disk Management is the go-to option if File Explorer can’t recognize your drive and/or the right-click formatting option isn’t available for some reason.
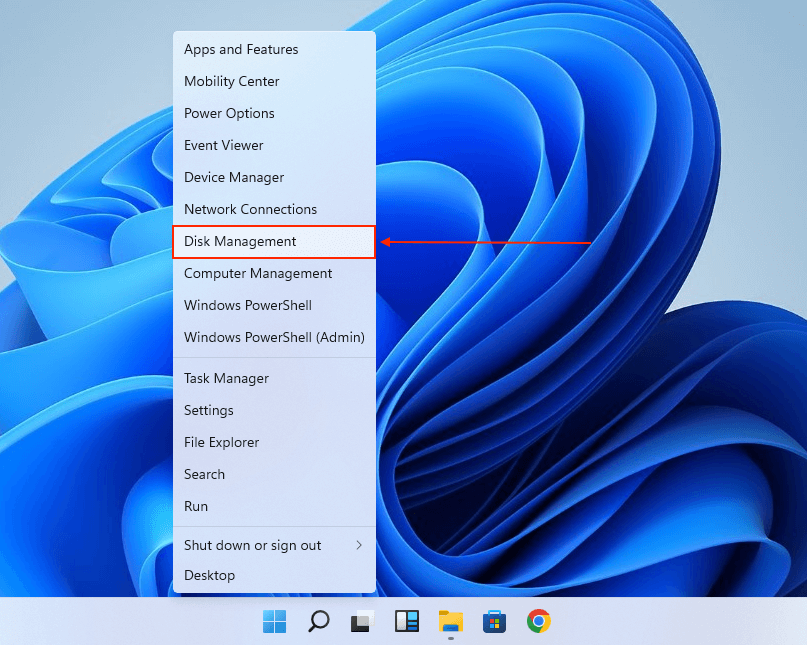
- Connect your external hard drive to your PC. Then, right-click the Start button and click Disk Management.
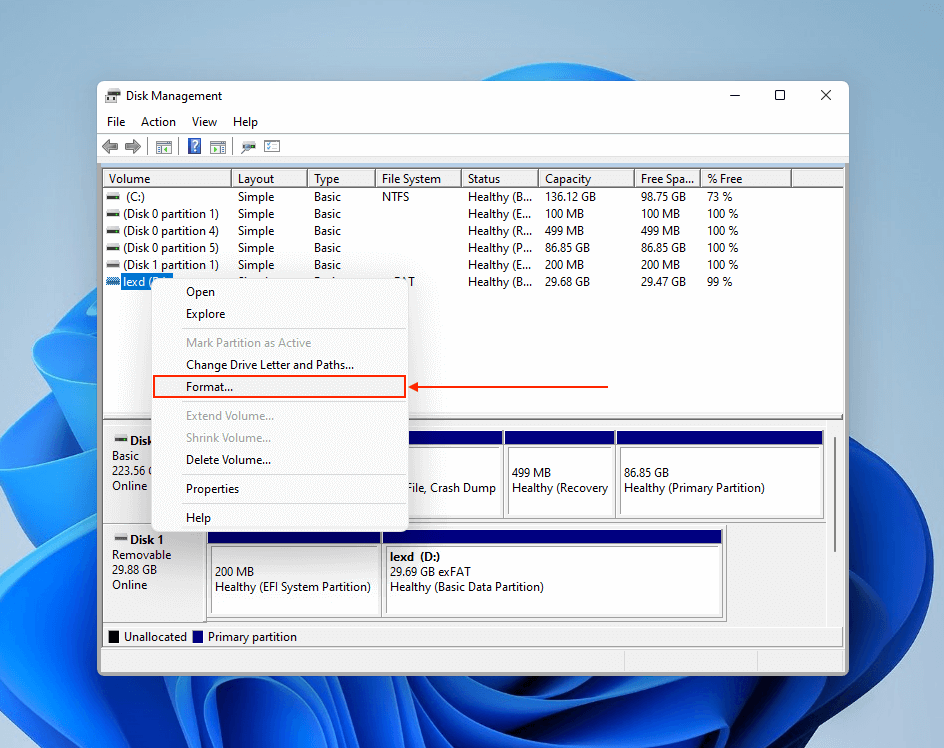
- Right-click your drive volume > Format.
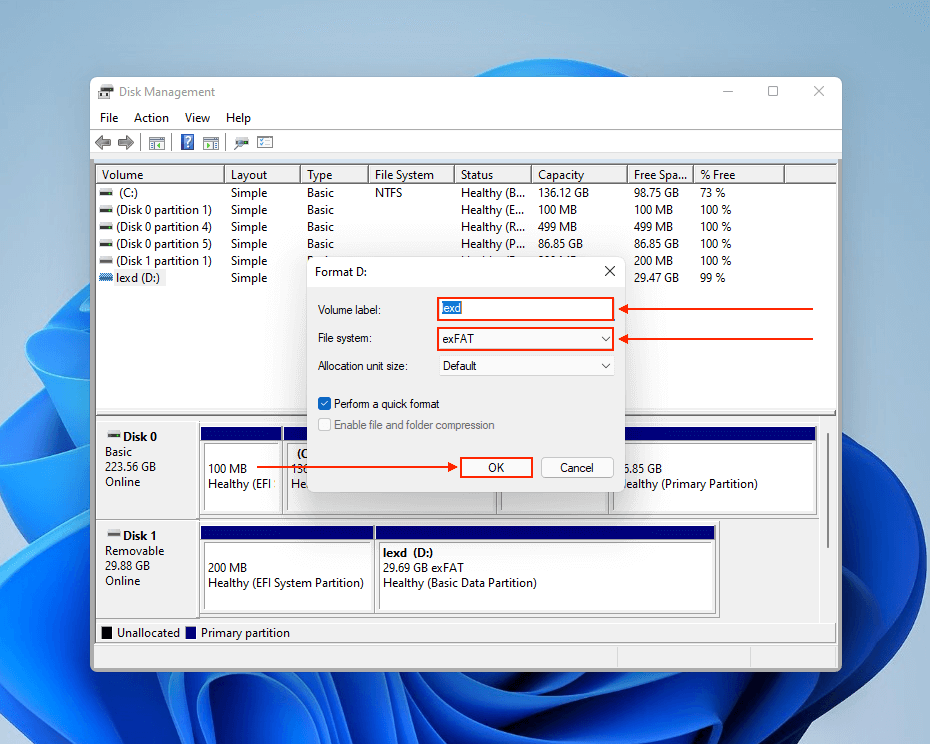
- Name your drive and select the ExFAT file system. Then, click OK to proceed with formatting.
Method 3: Format Your Drive on Windows With Command Prompt
Finally, if you prefer to format your external hard drive exclusively using commands, you can use the Diskpart command-line tool. Like Disk Management, Diskpart allows you to organize and modify your drives.
Even if this is your first time using Command Prompt, the commands we will be using are fairly straightforward. As long as you follow the instructions closely, you should be fine!
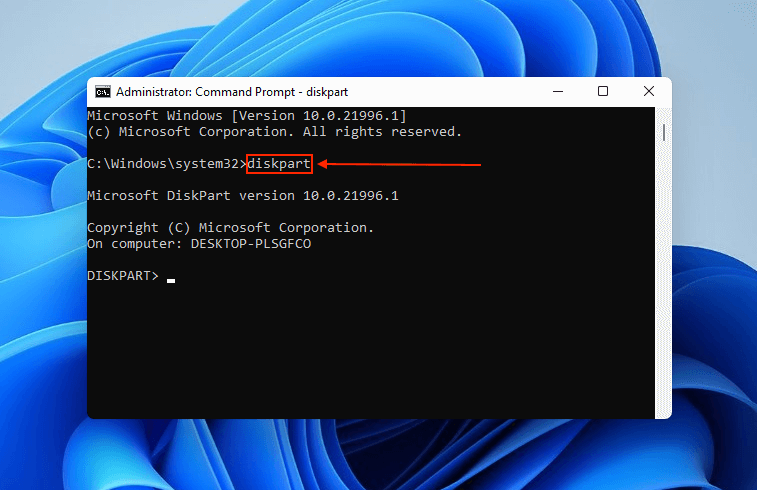
- Connect your external hard drive to your PC and launch Command Prompt as Administrator.

- Type the following command and hit Enter:
diskpart
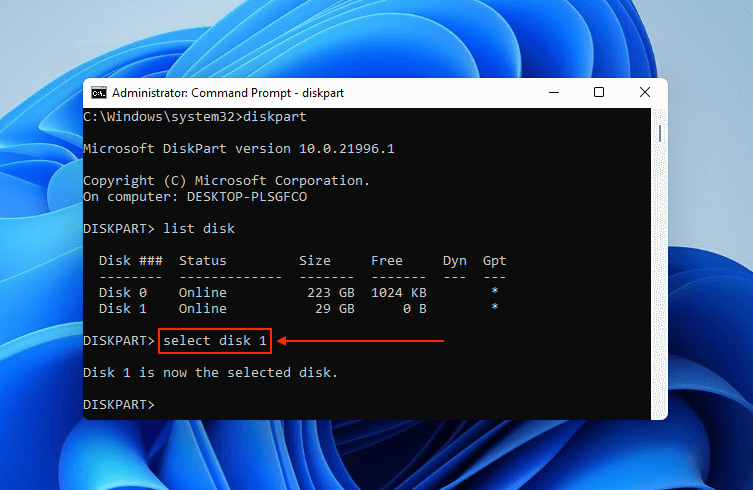
- Type the following command and hit Enter:
list disk
Take note of your external hard drive’s disk number.

- Type the following command and hit Enter:
select disk disk_number
- Type the following command and hit Enter:
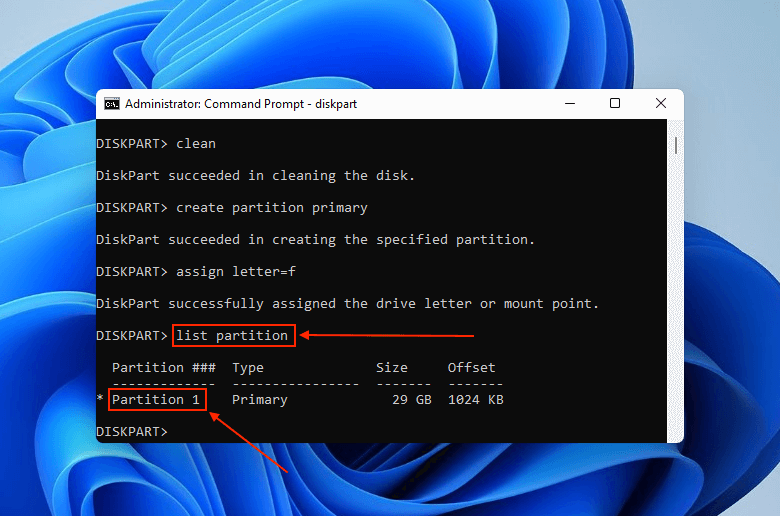
clean
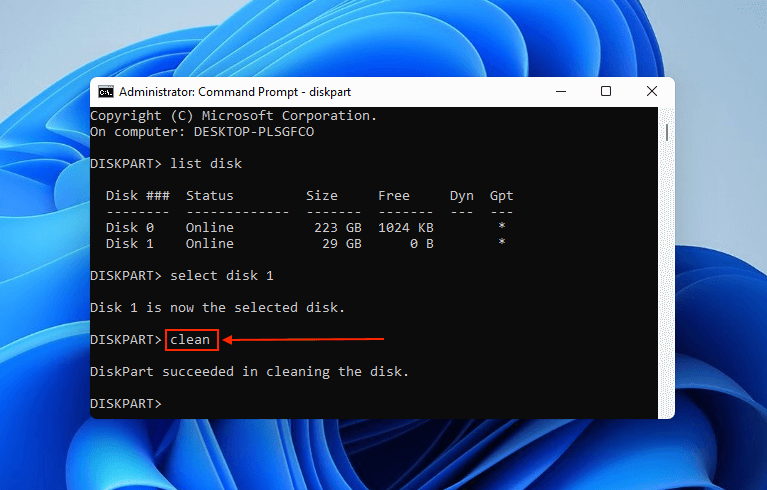
- Type the following command and hit Enter:
create partition primary
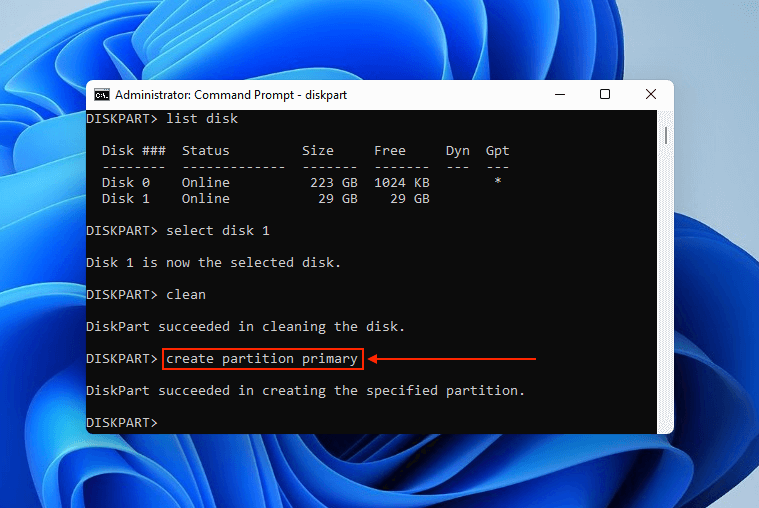
- Type the following command and hit Enter:
assign letter=any_unused_letter

- Type the following command and hit Enter:
list partition
Take note of your drive’s partition number.
- Type the following command and hit Enter:
select partition your_partition
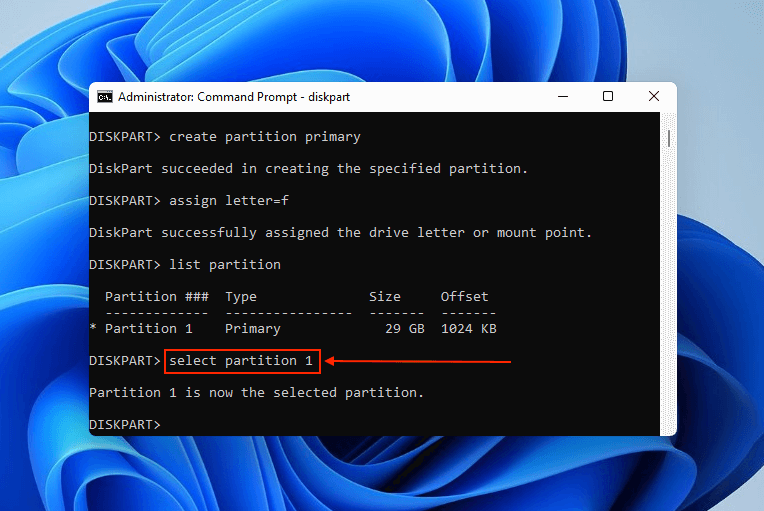
- Type the following command and hit Enter:
format fs=exfat
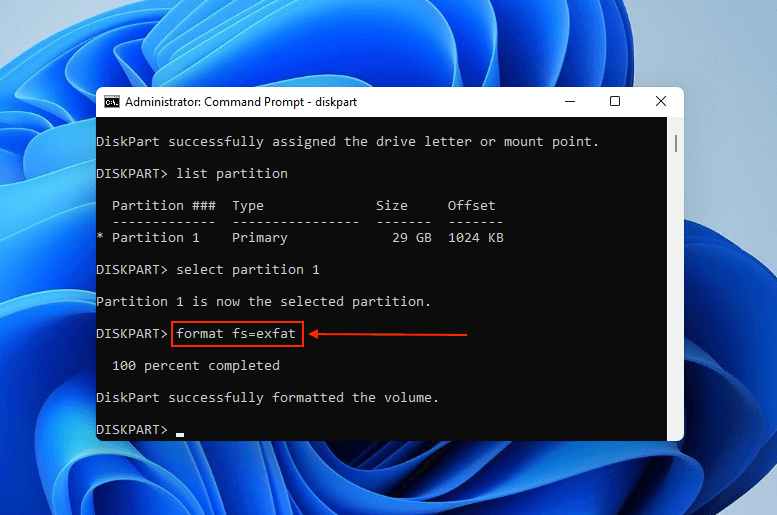
Once you see the message “DiskPart successfully formatted the volume”, you can then close the Command Prompt window with the exit command.
How to Recover Data from Formatted Hard Drive
As we previously mentioned, if you format your external hard drive for Mac and PC, you’ll wipe your data. Unfortunately, accidents happen often. You may have formatted it without the knowledge of data loss or you could have accidentally confirmed a formatting prompt (which appears when your drive uses an incompatible file system).
Fortunately, you can still recover a formatted hard drive if you act fast. The files still exist on your drive, but they are marked to be overwritten by new data. We need to restore it before that happens. To access data directly on the file system, we need to use a tool called data recovery software.
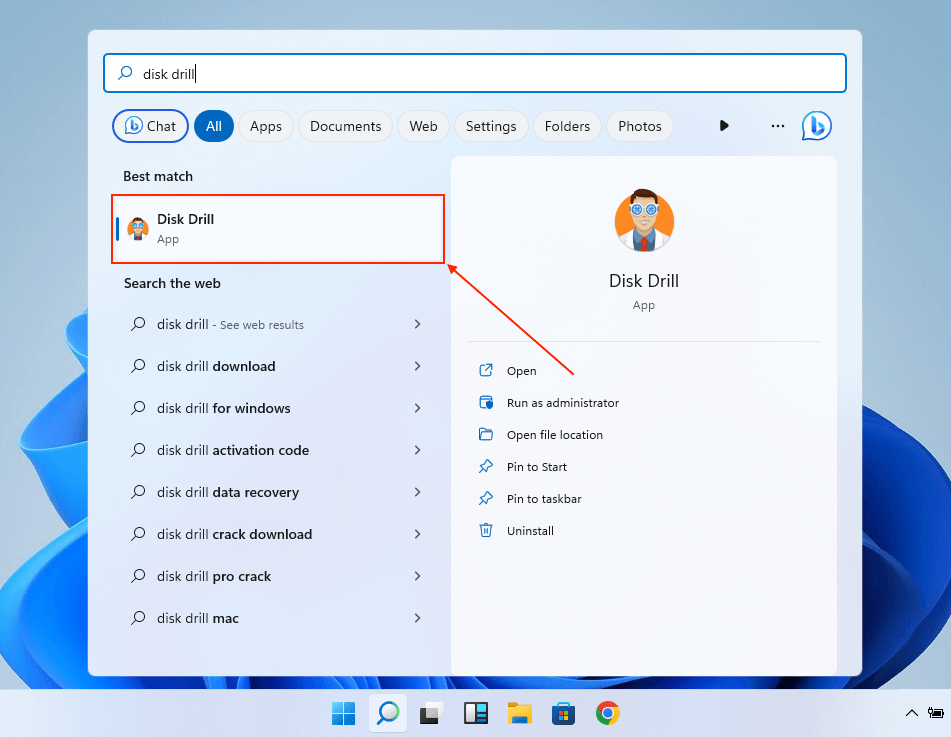
For this demonstration, we’ll be using Disk Drill. It has Windows and Mac versions, both of which fully support each other’s file systems (ExFAT, FAT32, NTFS, HFS+, and APFS). It can also recognize over 400+ file types, which is perfect for large external storage devices with a variety of stored data.
To recover data from a formatted external hard drive using Disk Drill:
- Download and install Disk Drill.
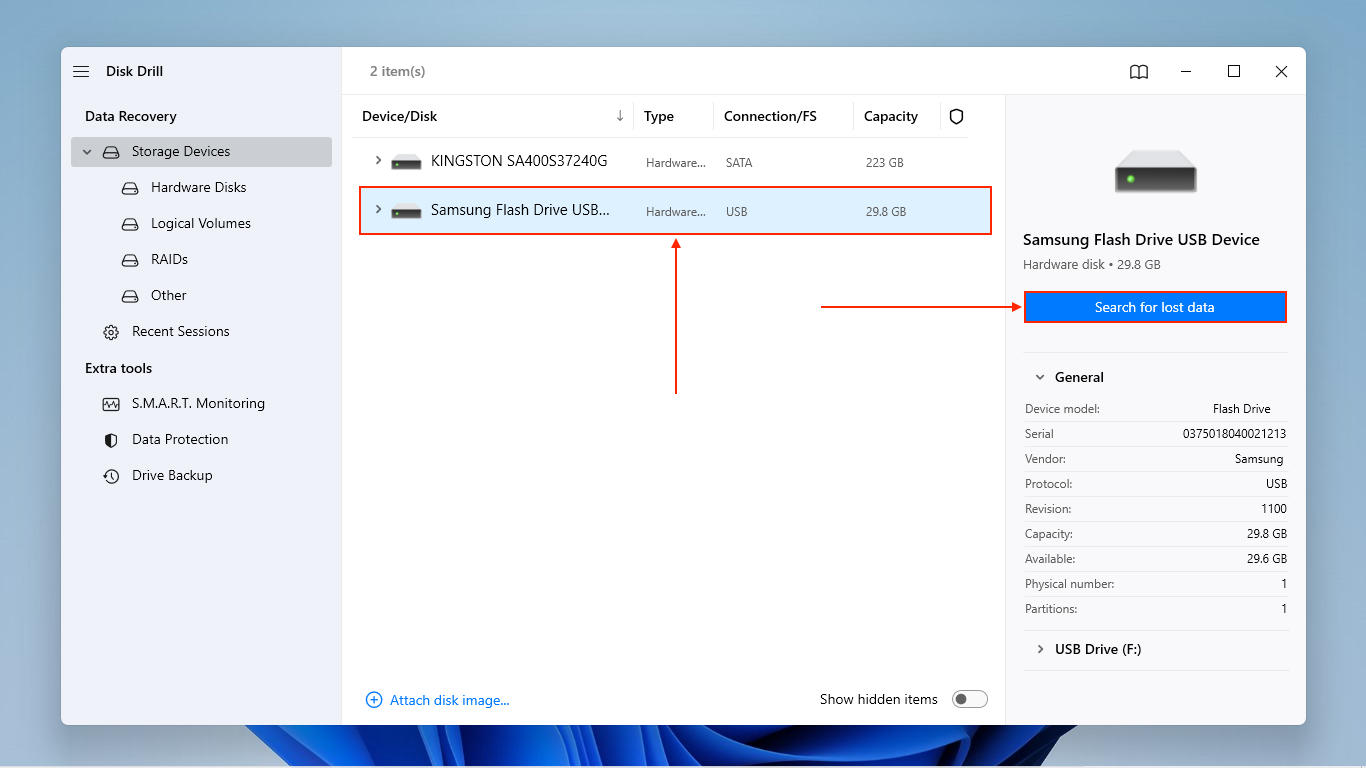
- Connect your external hard drive to your PC and launch Disk Drill.
- Select your drive and click Search for lost data.
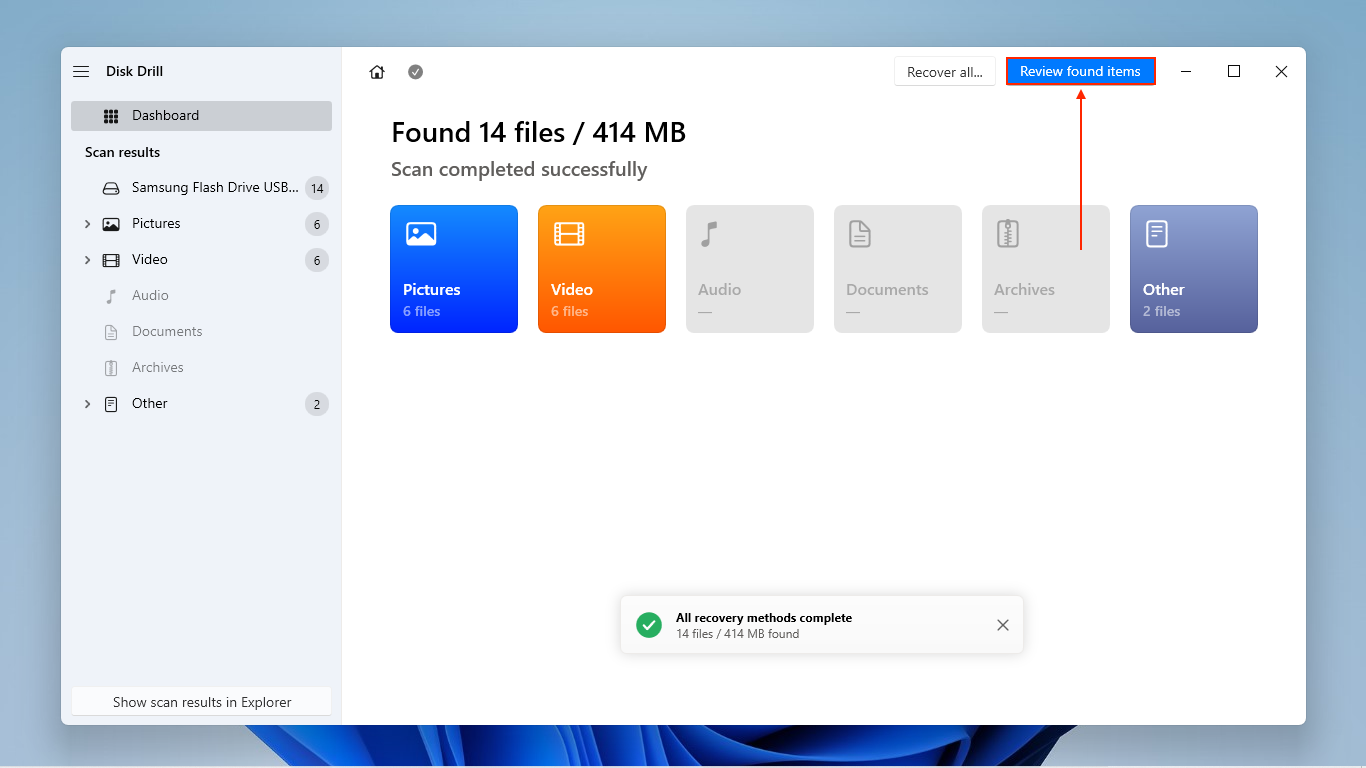
- Wait for Disk Drill to finish scanning your drive and click Review found items.
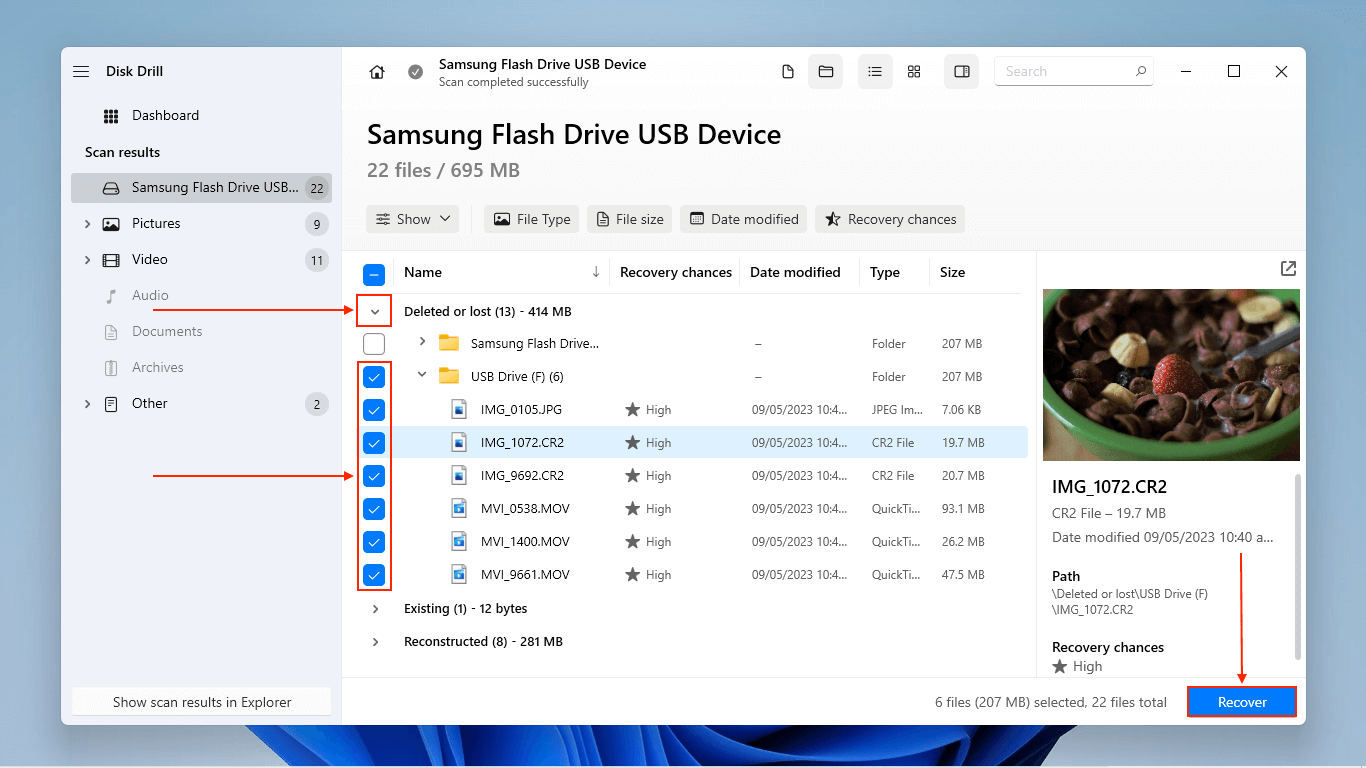
- Expand the Deleted or lost tab to view all the files that were lost due to deletion or formatting. Clicking on any file once will display its preview. Then, use the boxes in the leftmost column to select the files and folders you want to restore. Finally, click Recover.
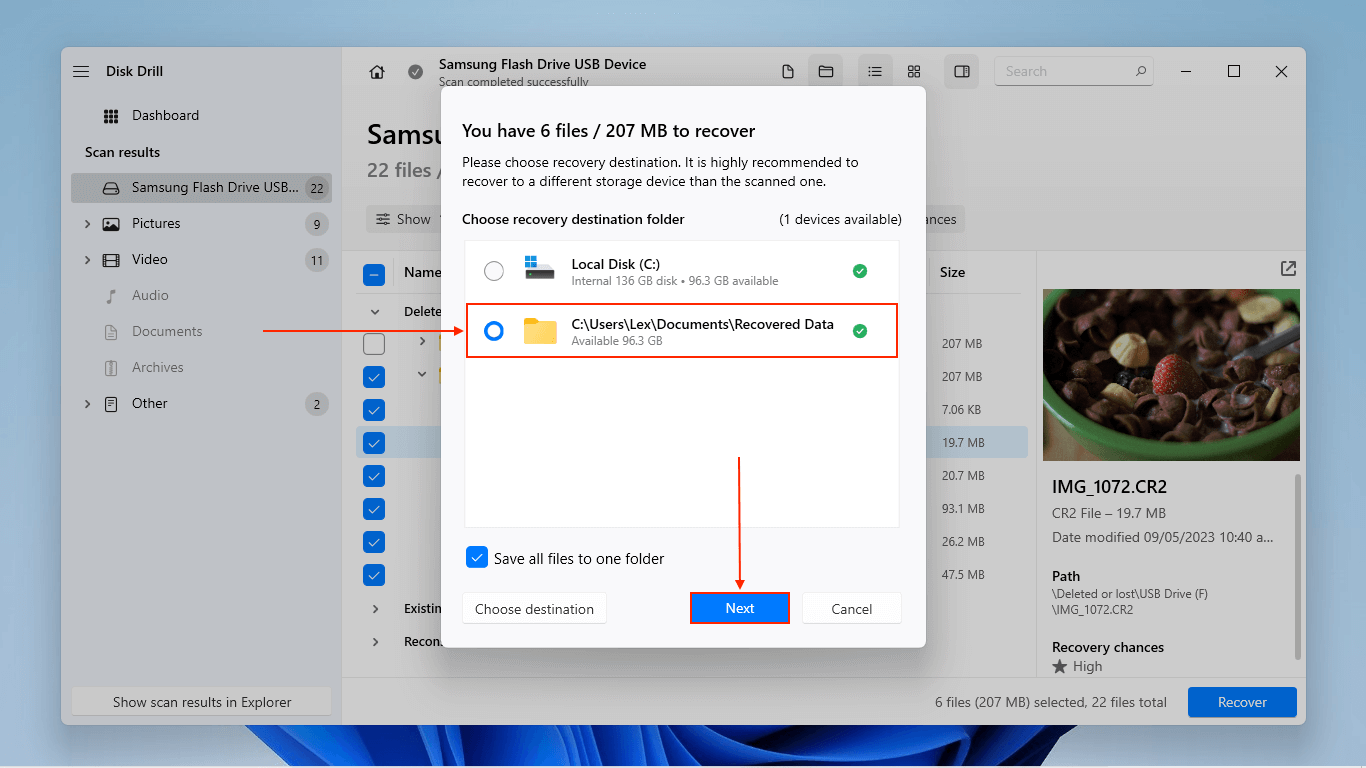
- Select a location on your computer and click Next to proceed with recovery. Do not save your data to your external hard drive, as it will overwrite the files in the recovery queue.
Disk Drill Basic for Windows only offers 500 MB of free data recovery. However, you can scan and preview your data as much as you want – this is super useful for figuring out whether or not your data is still recoverable. The rule of thumb is: if you can preview it, you can recover it.
How to Make External Hard Drive Compatible with Mac and PC without Formatting
While using the correct file system is important for maximizing the use of your external hard drive, there are some situations where formatting a portable hard drive for Mac and PC isn’t an option. Maybe you need to access important data on an HFS+ drive and you only have Windows computers in the office.
This isn’t possible with native tools, but you can download third-party apps that are specially designed to work around the limitations of your operating system. We rounded up our top picks for you below.
To recap, we know that you can use an external hard drive on Windows and Mac using the ExFAT and FAT32 file systems. With that in mind, our recommendations focus on NTFS, APFS, and HFS+ file systems.
- Microsoft NTFS for Mac – Developed by Paragon, Microsoft NTFS for Mac is a very well-known software that allows users to read and write on NTFS drives on a Mac machine. This is paid software.
- APFS for Windows – Released by the same developer of NTFS for Mac (Paragon). With APFS for Windows, users can read and write on APFS drives on a Windows PC. This is also paid software.
- HFSExplorer for Windows – HFSExplorer is a free Windows app by Catacombae that allows users to read data from HFS and HFS+ drives. You can’t write new data, though.
- UFS Explorer Standard Access – UFS Explorer by SysDev Laboratories is a paid Windows app that allows users to access undamaged (corrupted, etc.) data from a variety of file systems, including Apple-based and Linux-based formats.
Conclusion
Formatting is a very important step toward ensuring the proper usage of your external hard drive. Unfortunately, it causes data loss. While you can use data recovery software to restore your lost files, it’s not always guaranteed to be 100% successful.
Moving forward, we suggest that you use the ExFAT file system to format your hard drive for Mac and Windows. You should also consider backing up your data just in case you accidentally format your drive.


