 SSD showing up as not initialized in Windows or macOS? It’s likely because the SSD is brand new, or there’s an issue with the drive (in the case of used SSDs). We’re here to help you out. Use our easy-to-follow guide (for Windows and Mac) to know the reasons behind an SSD that’s not initialized and what you can do about it.
Table of Contents
Reasons Why an SSD Is Not Initialized
Initialization writes a partition table to the drive and prepares an SSD or HDD for use. Initialization is typically followed by a format, prompting many users to wonder whether the actual initialization process erases the storage drive.
The reasons why your SSD shows up as “uninitialized” are as follows:
| Reason | Description |
| 🆕 The SSD Is Brand New | Most new storage drives need to be initialized before they can be used, while others may come initialized from the factory. As soon as you connect an uninitialized disk to a Mac, the OS will prompt you to initialize it. On Windows computers, the new SSD will show up as uninitialized in the Disk Management utility. |
| 🧹 The SSD Was Wiped | If the SSD’s partition table was removed, you may need to reinitialize it, although this isn’t always the case. By wipe, we don’t mean format. A simple format won’t require you to initialize your drive again. |
| 📊 Damaged Partition Table | An SSD with a damaged partition table will need to be fixed and initialized again. Improper usage and computer viruses can damage the Master Boot Record (MBR) partition table of your SSD. You can’t store data on a drive with a damaged SSD. In fact, any existing data will also be compromised unless it’s recovered. |
| ⚠️ Software Errors | A drive suffering from any form of logical corruption can show up as uninitialized. Additionally, damage to the drive’s firmware can also lead to the issue. These problems can generally be resolved, unless they are accompanied by physical damage also. |
Since initialization and formatting go hand-in-hand, it’s advisable to recover your data, before fixing the SSD not initialized error. We’ll take a look at the data recovery process in the next section.
How to Recover Data from an Uninitialized Drive
Thanks to data recovery programs, you can recover data from a drive, even if it’s not initialized.
Before proceeding to recover data, keep these things in mind:
- For data recovery software to work, the SSD that’s not initialized should be visible within Disk Management (Windows), or Disk Utility (macOS), with the correct storage size.
- It’s best to perform data recovery as soon as possible.
- Use a good data recovery program, right from the get-go. It’s usually not a good idea to experiment, since the first data recovery scan is usually the most successful.
For our tutorial, we picked Disk Drill to recover data from an SSD that’s not initialized. It ticks all the checkboxes of a good data recovery tool–an easy-to-use interface, an advanced data recovery algorithm, compatibility with major file systems across Windows and macOS, and a file preview feature. Windows users can also take advantage of Disk Drill’s 500 MB free trial.
Note: Most data recovery experts recommend scanning a disk image of the drive, instead of directly scanning the physical drive. This is because data recovery scans are stressful to the drive as each sector is scanned for recoverable data. We advise you use Disk Drill’s Byte-to-byte Backup feature to create a disk image. You can then attach this disk image to Disk Drill and scan it for your files.
The data recovery steps remain the same for both Windows and Mac users:
- Download and install Disk Drill.
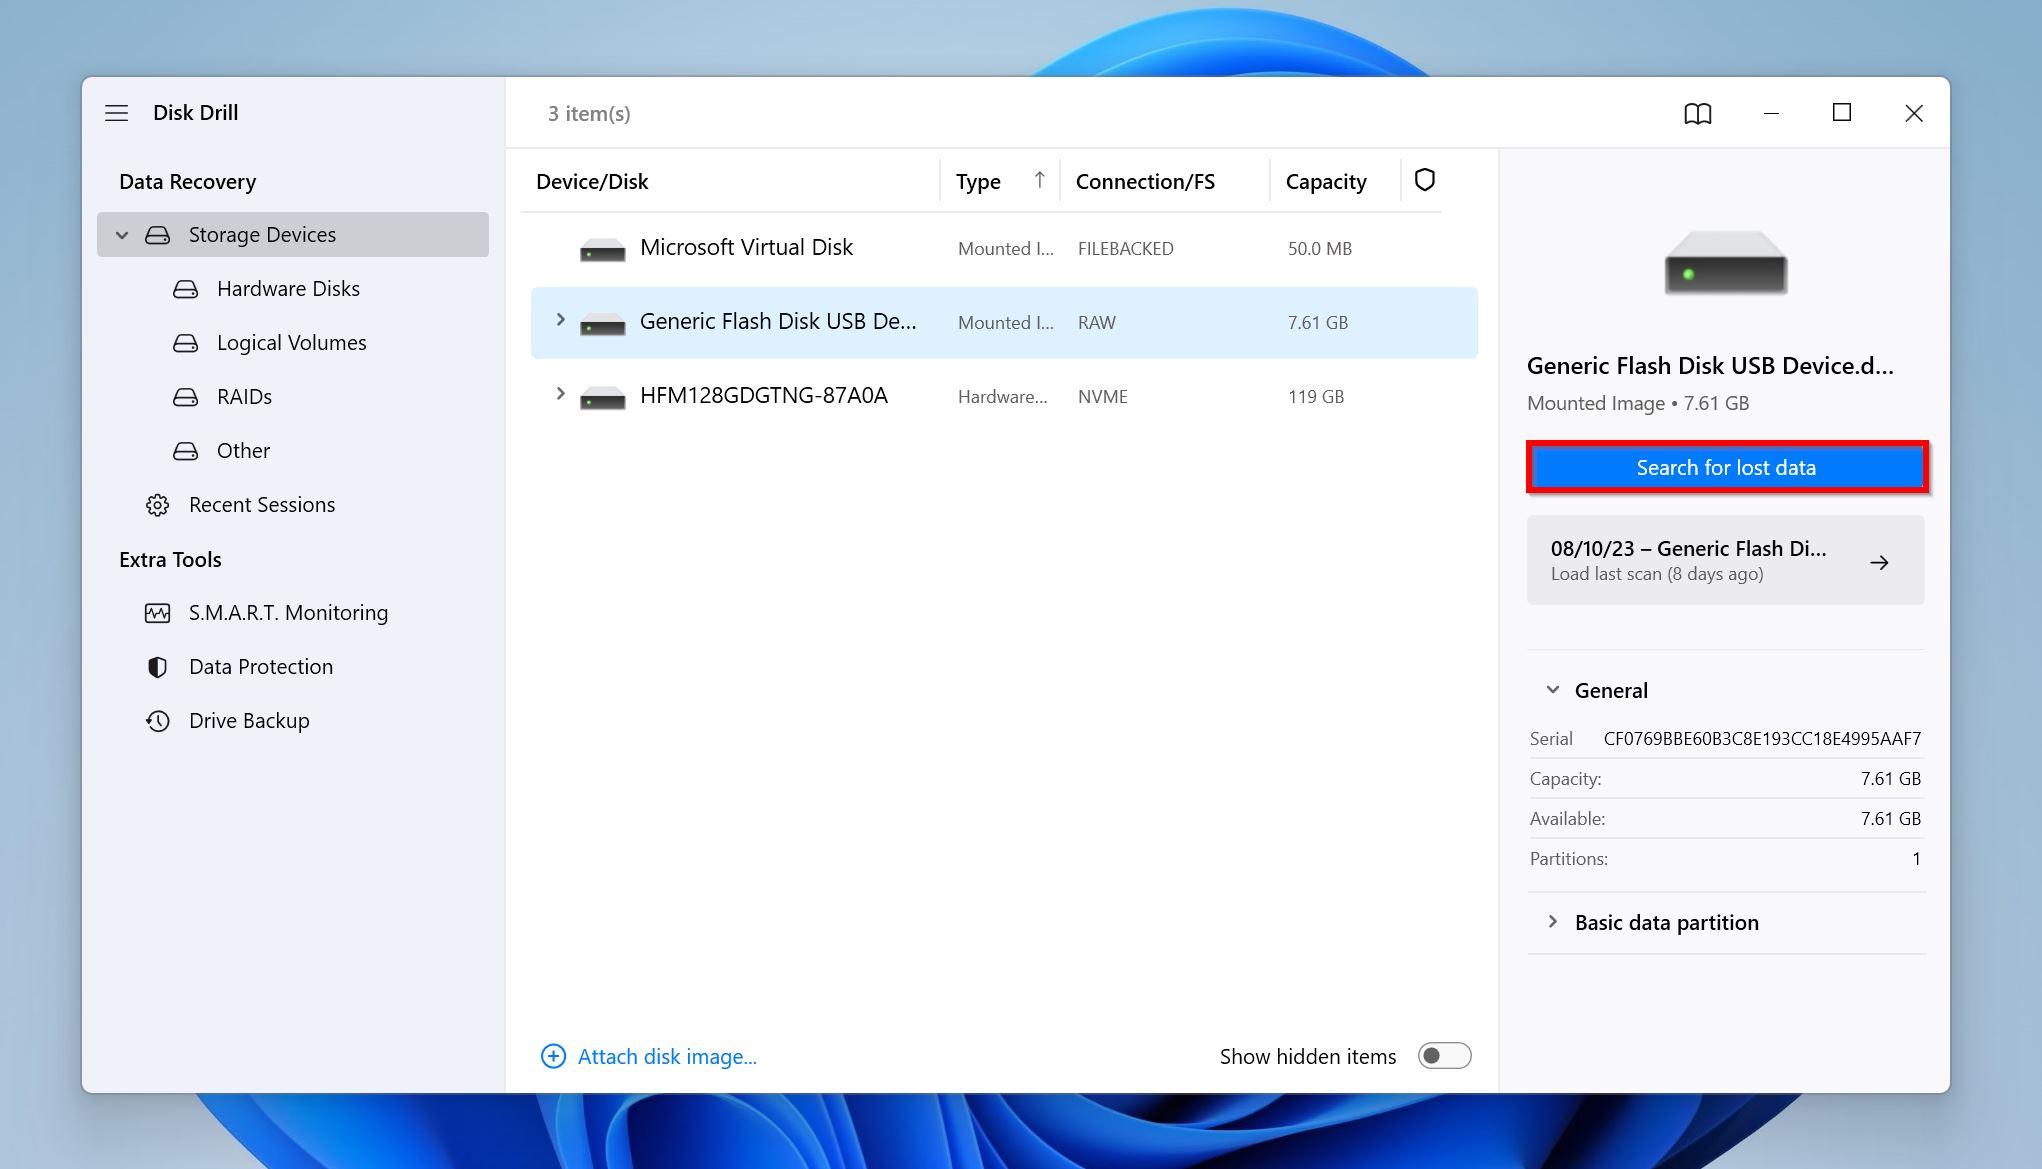
- Open Disk Drill, and ensure you’re on the Storage Devices screen. If you created a disk image, click on Attach disk image and double-click on your drive’s disk image to add it as a mounted image in Disk Drill’s Storage Drive’s screen.
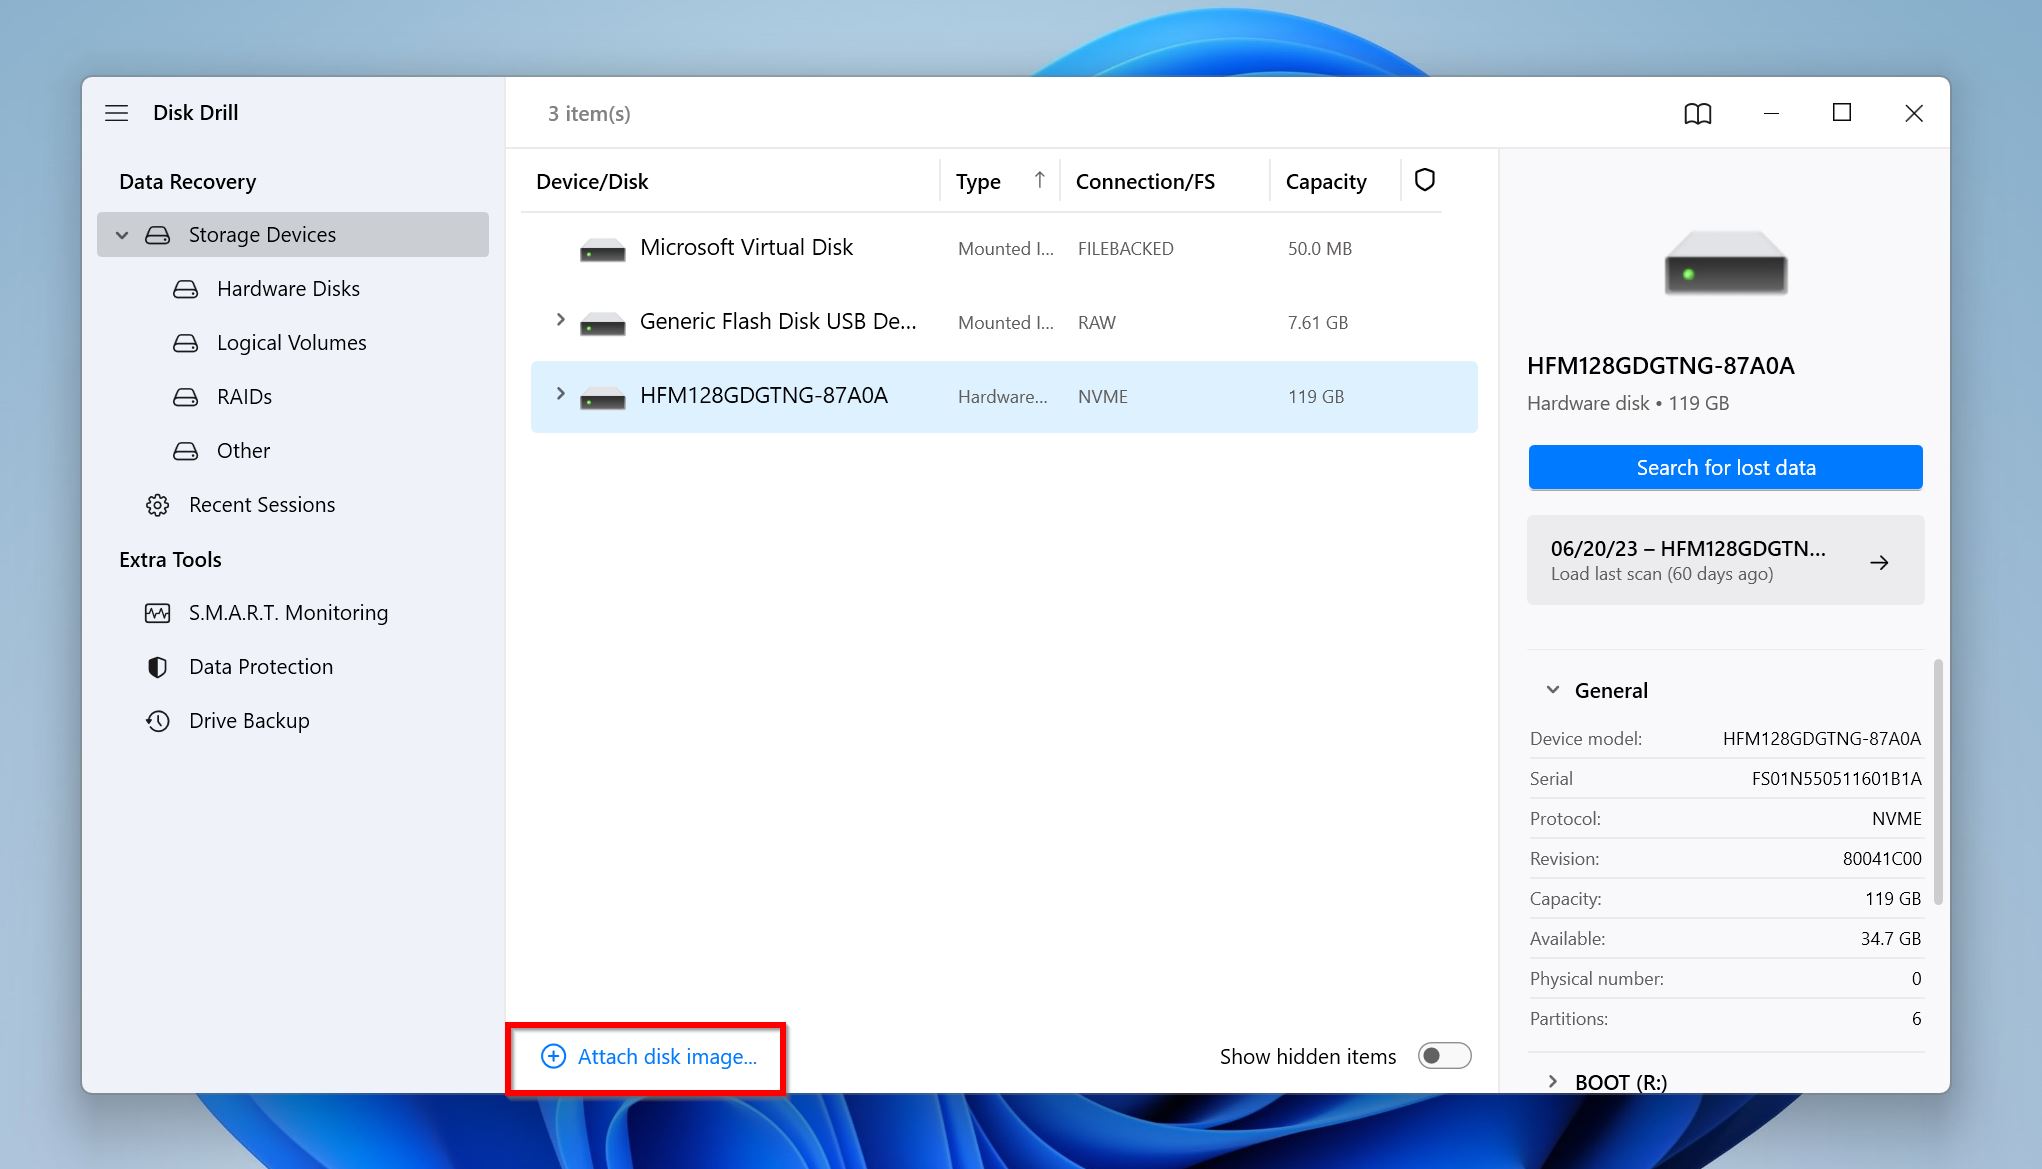
- Select the not initialized SSD, or its disk image, and click on Search for lost data.
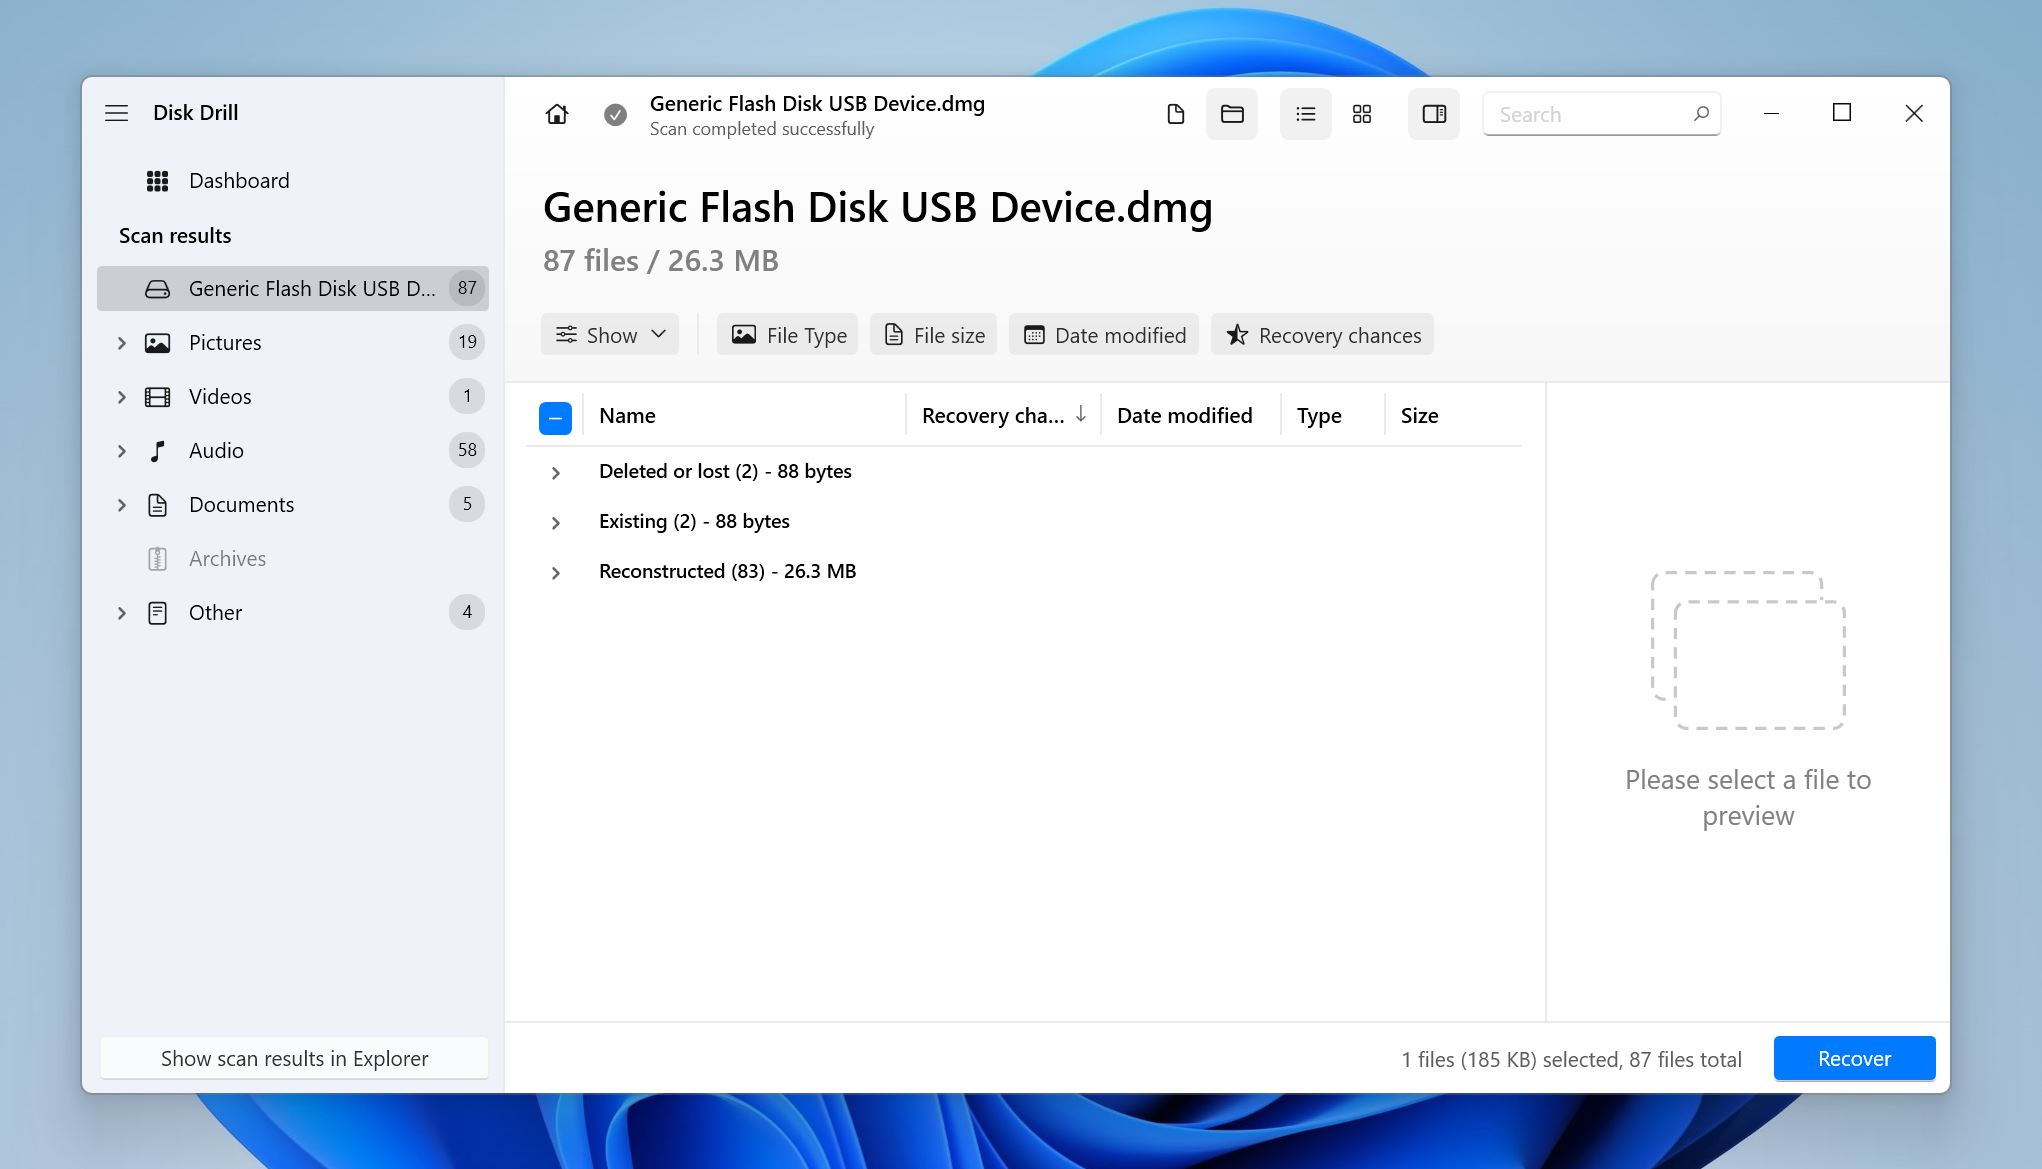
- Click on Review found items to view all recoverable files. If you wish to filter out the results right away, you can directly click on the relevant filetype you’re looking for (Pictures, Video, Audio, Documents, Archives, and Other).

- Expand the Existing section to view all the currently stored files on the SSD. To view deleted or corrupt files that are recoverable, expand the Deleted or lost and Reconstructed sections.
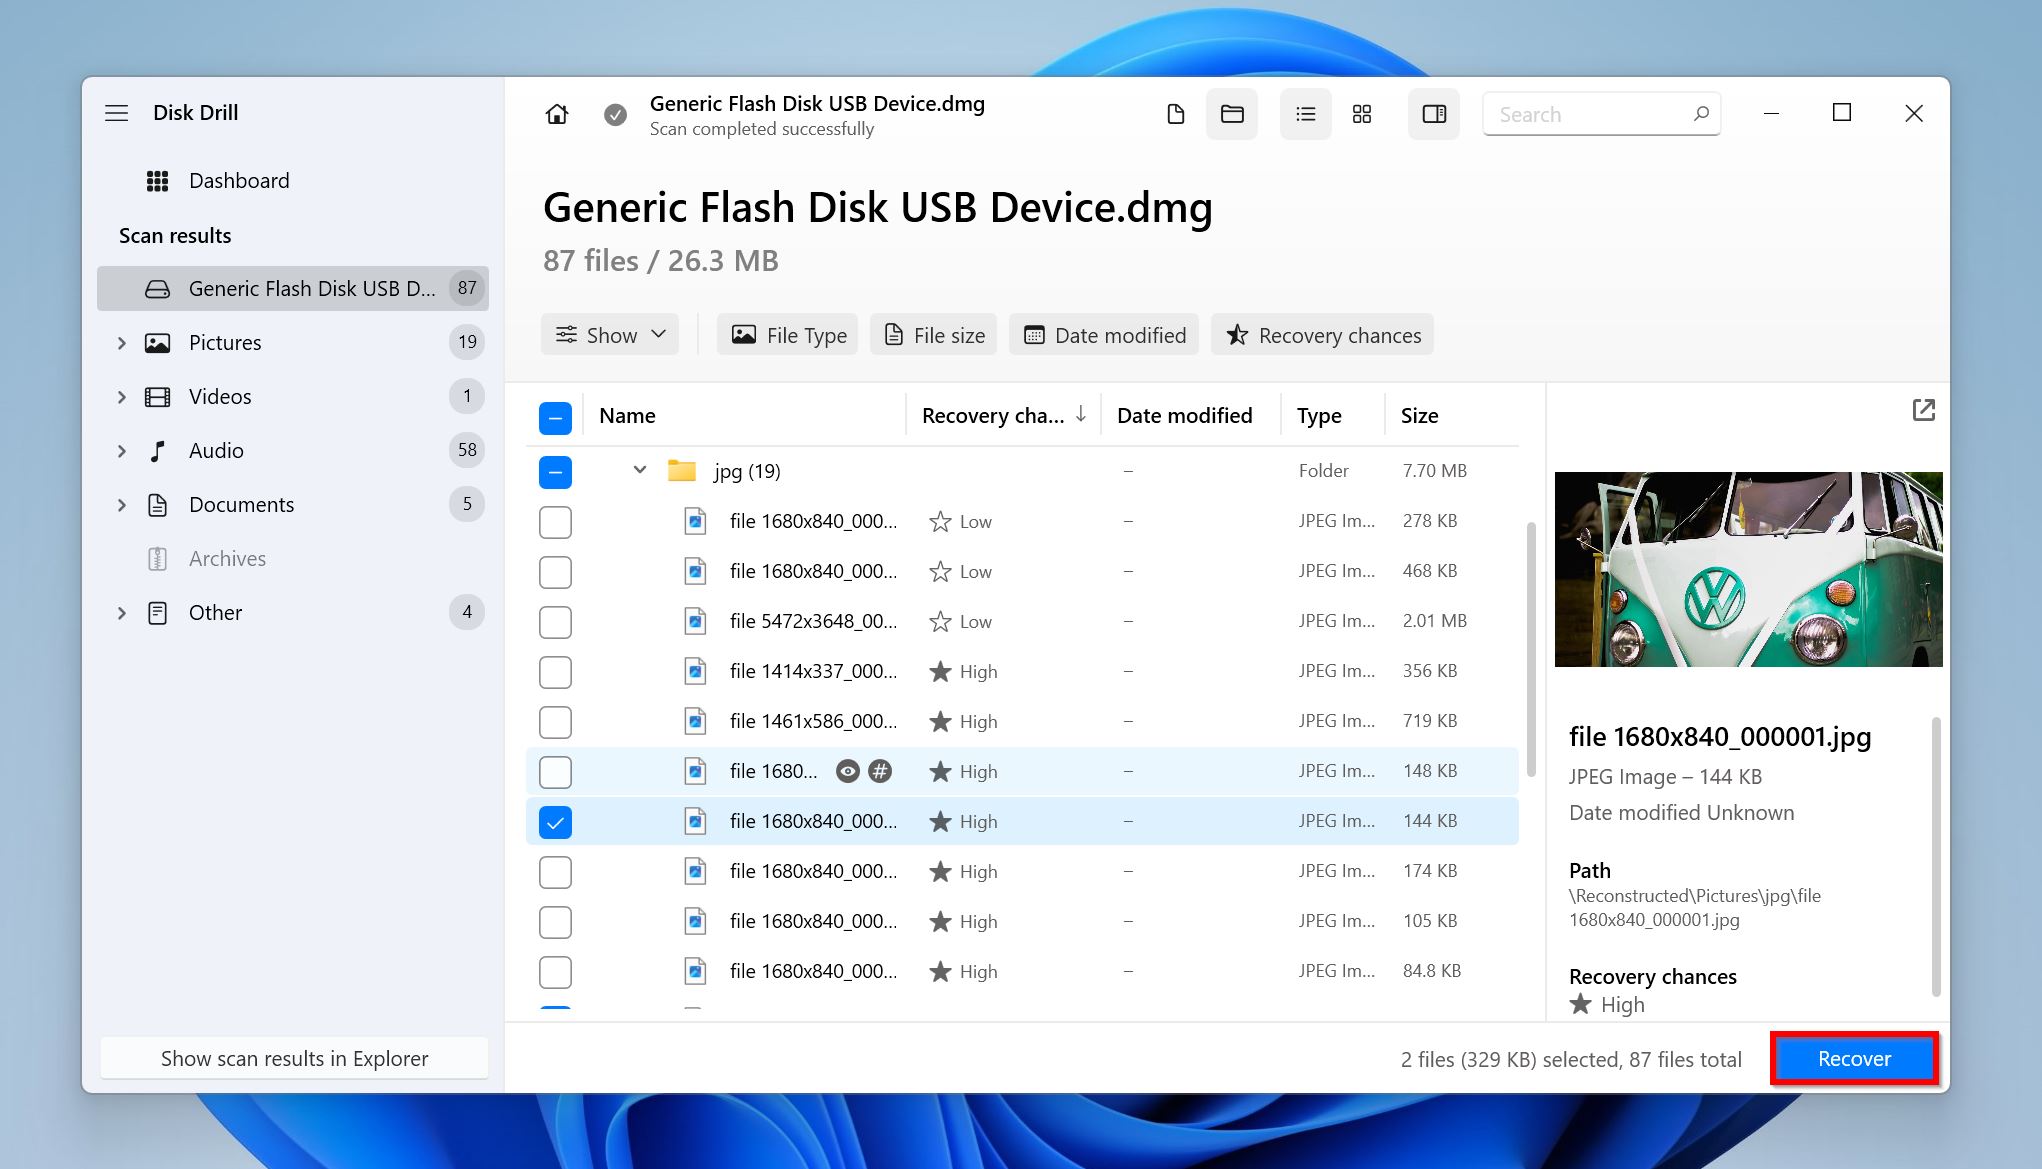
- Select the files you wish to recover. Disk Drill displays a preview of the currently selected file, but you can manually preview any file by hovering the cursor next to its filename and clicking the eye icon. Once you’ve confirmed your selection, click on Recover.
- Choose a recovery destination for the files and click Next.
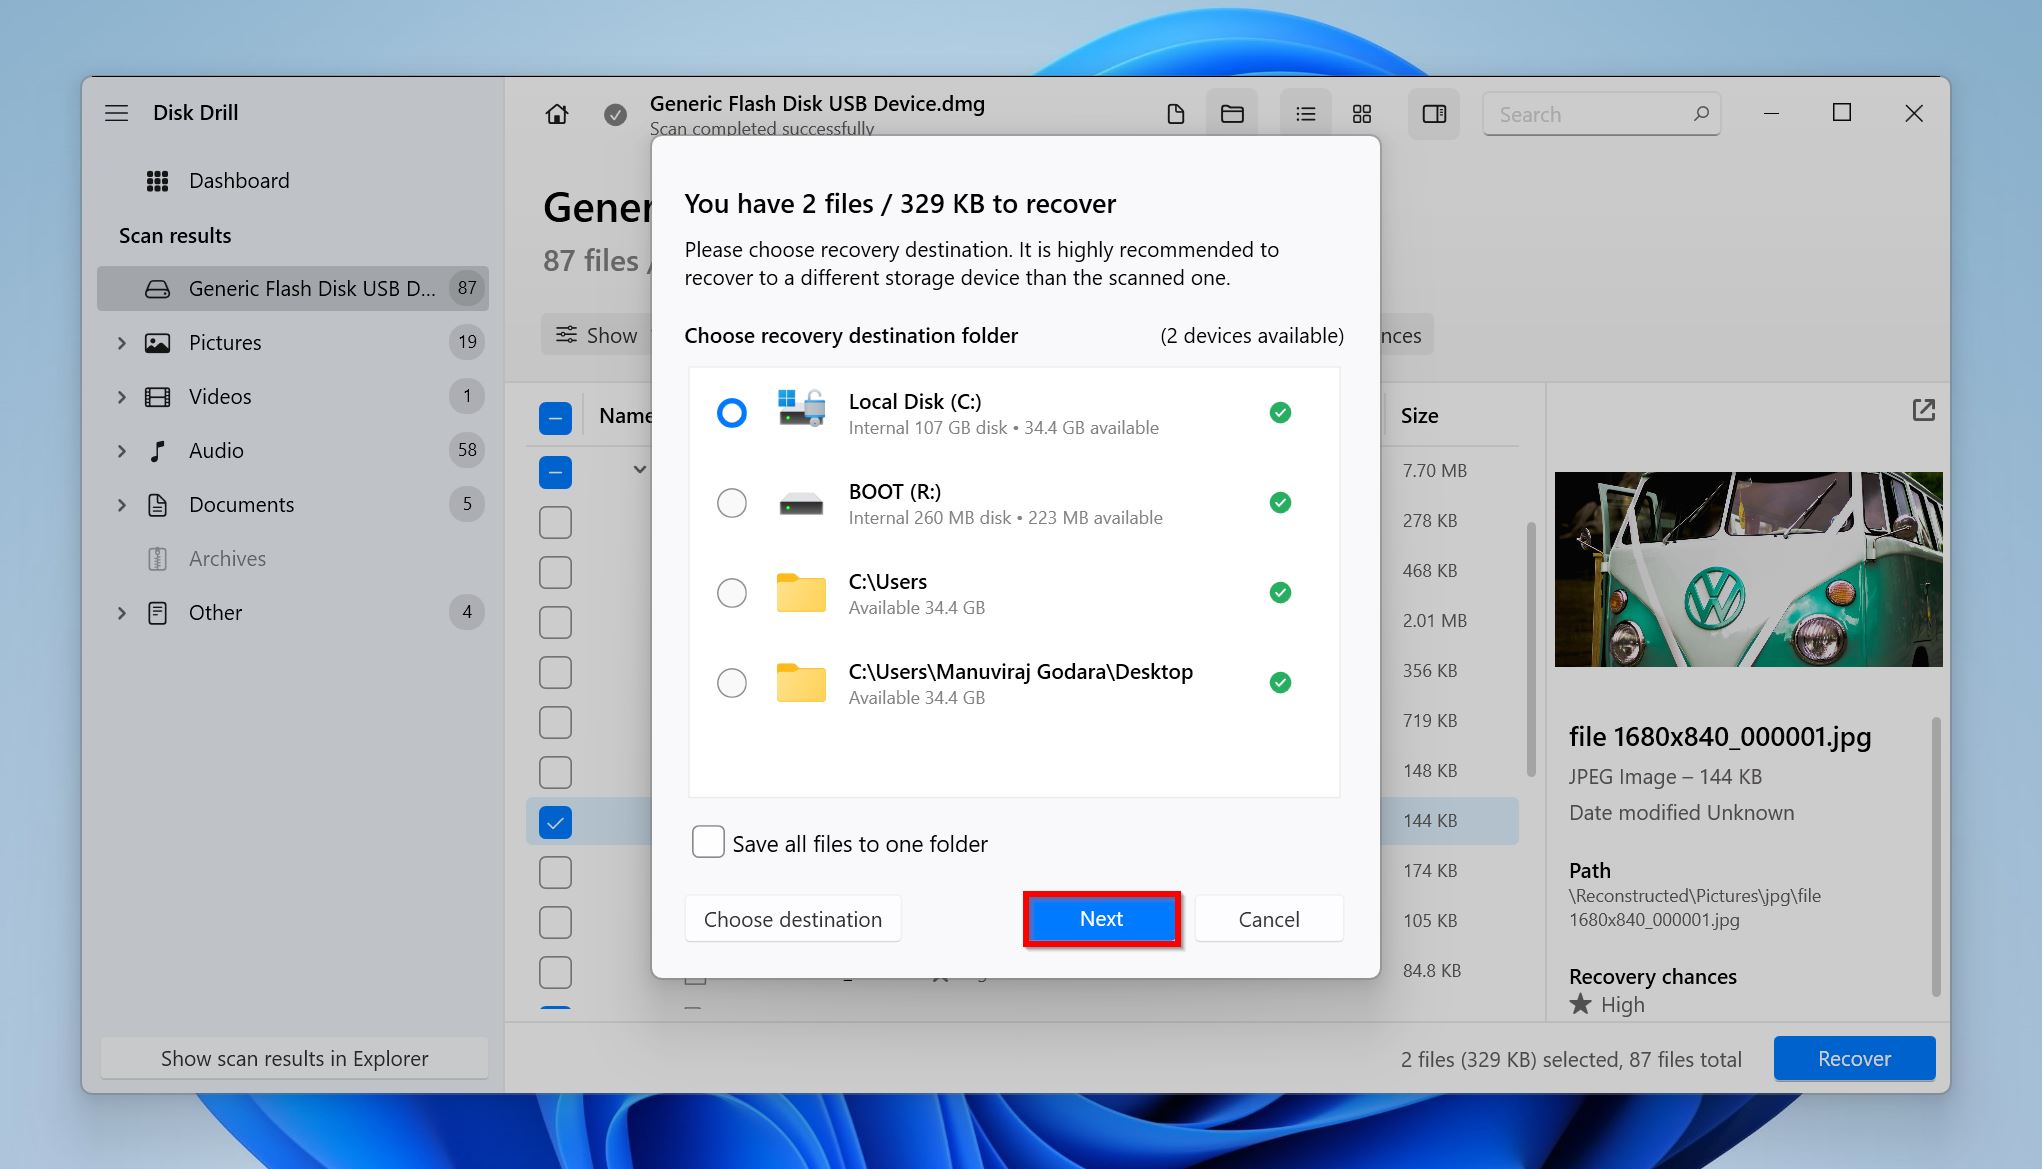
- Disk Drill will recover your files.
How to Initialize an SSD
SSD initialization is a straightforward process in both Windows and macOS. However, if you encounter errors during the initialization process, it’s usually because of connection issues between the SSD and your device, or the drive not being enabled in the BIOS. We also recommend you contact an expert if the disk error persists, or the SSD is not visible in the Disk Utility (macOS) and Disk Management (Windows).
Here’s how to initialize an SSD in Windows and Mac:
Initialize an SSD on Windows
- To open Disk Management, press Windows Key + R to open the Run app, type diskmgmt.msc in the textbox and press Enter. You can also search for the Disk Management utility in Windows Search (Windows Key + S).
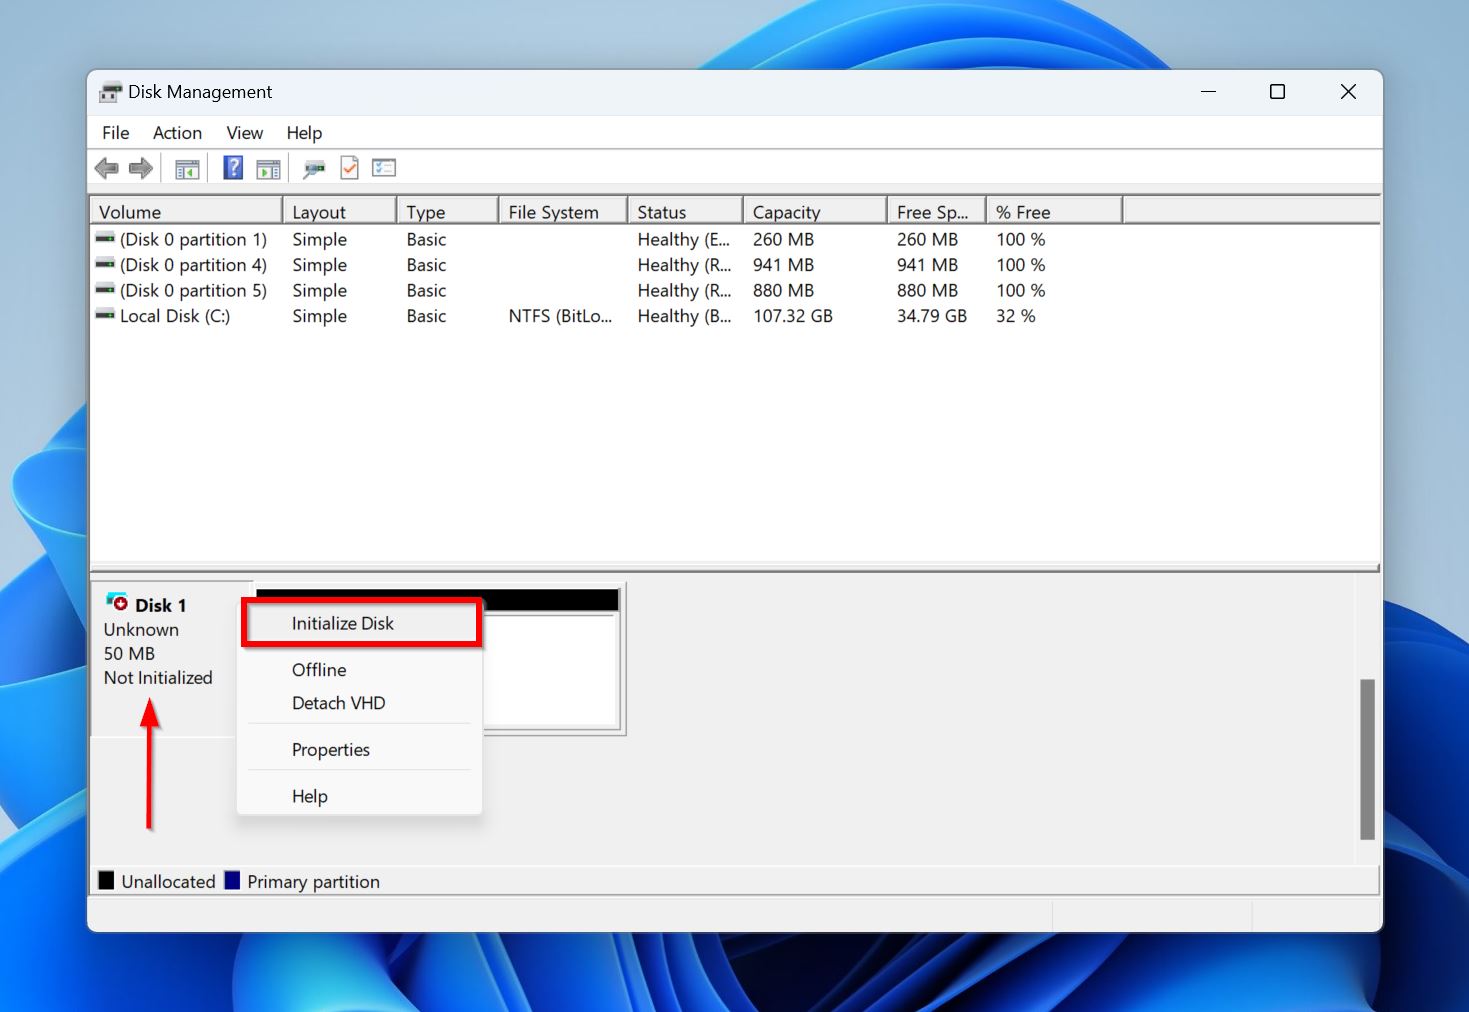
- If you only have the primary storage drive attached to your PC, the uninitialized SSD will show up as, “Disk 1 Unknown, Not Initialized” in the Disk Management window. Right-click on the SSD and pick the Initialize option.
- Tick “Disk X” (X denotes the SSD’s disk number), choose the partition style (MBR or GPT), and click OK. You can leave the default partition style selected, as Windows automatically selects the appropriate one.
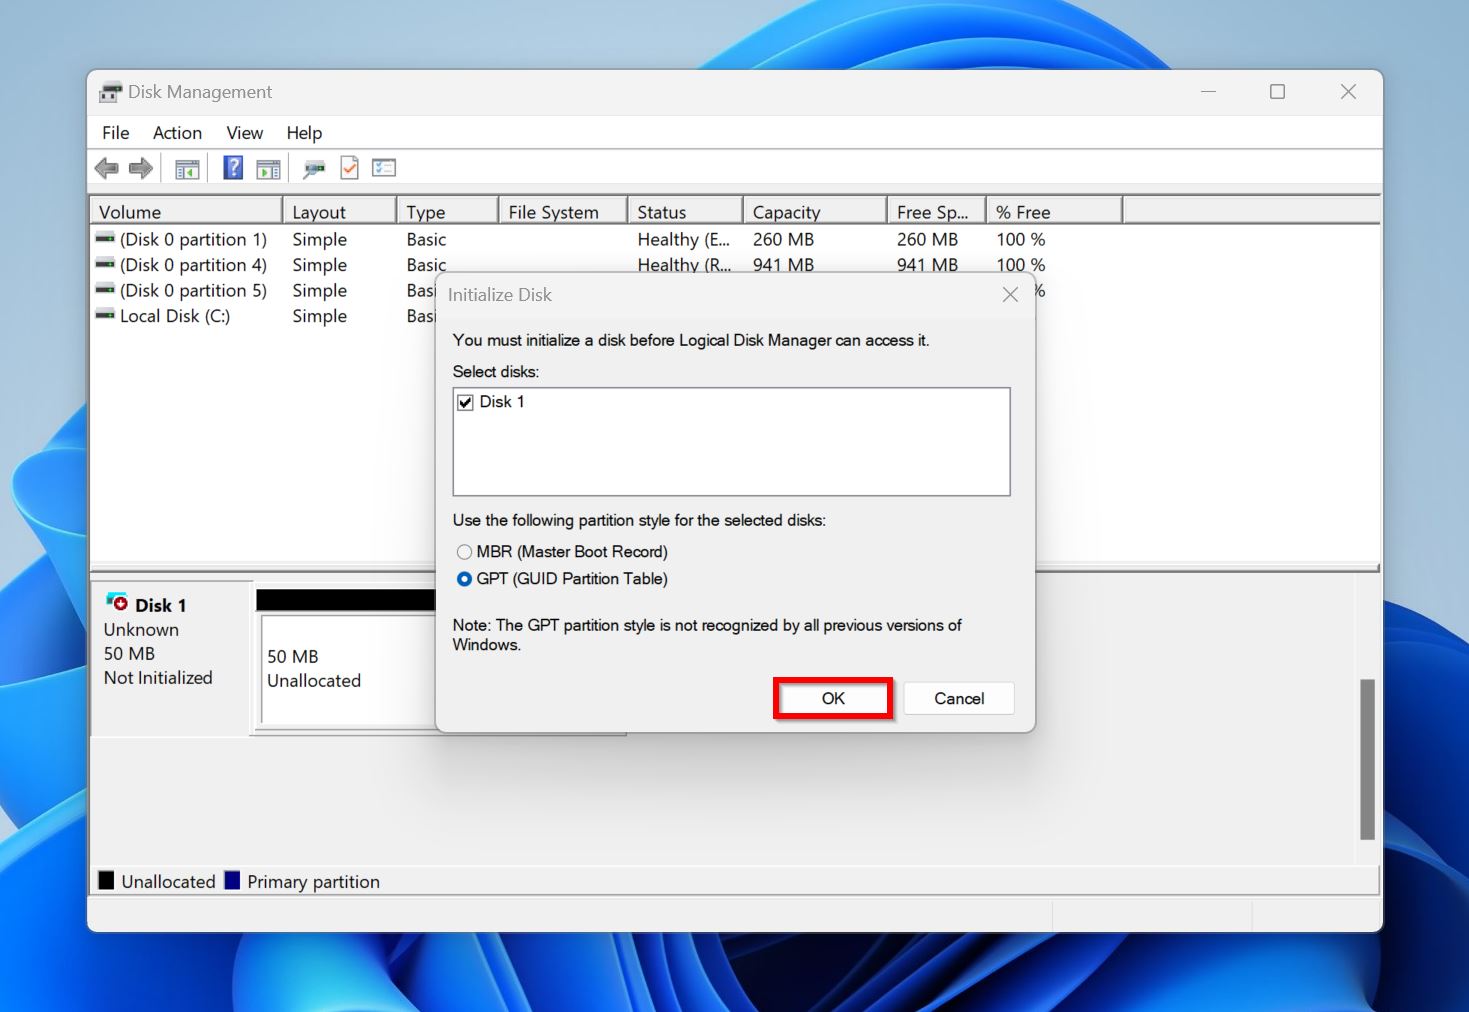
- Windows will initialize the SSD.
Initialize an SSD on Mac
Mac will usually prompt you to initialize the SSD as soon as it’s connected to your device. You can click the Initialize option in this prompt.
If the prompt doesn’t appear, you can easily Initialize the SSD using the Disk Utility:
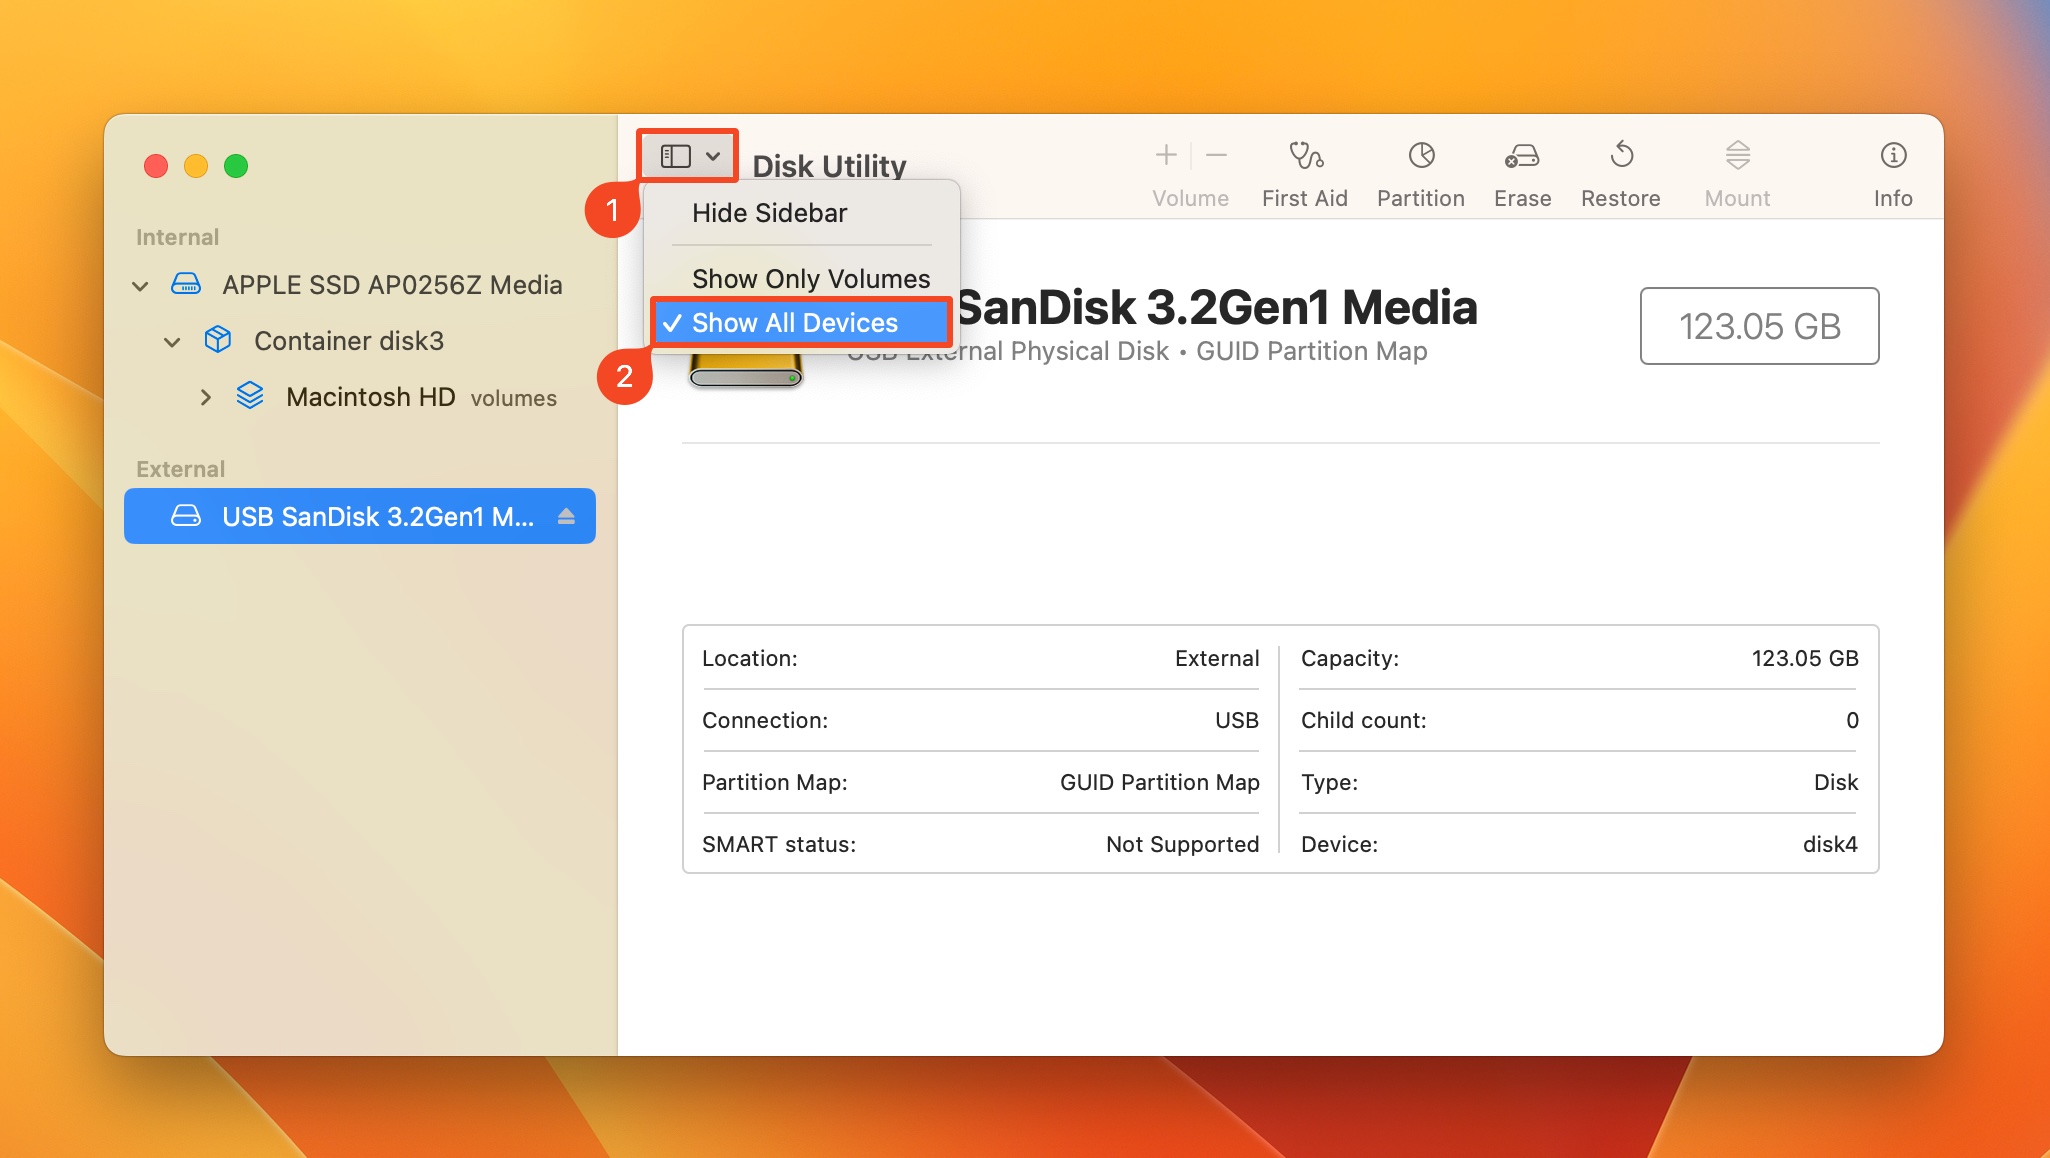
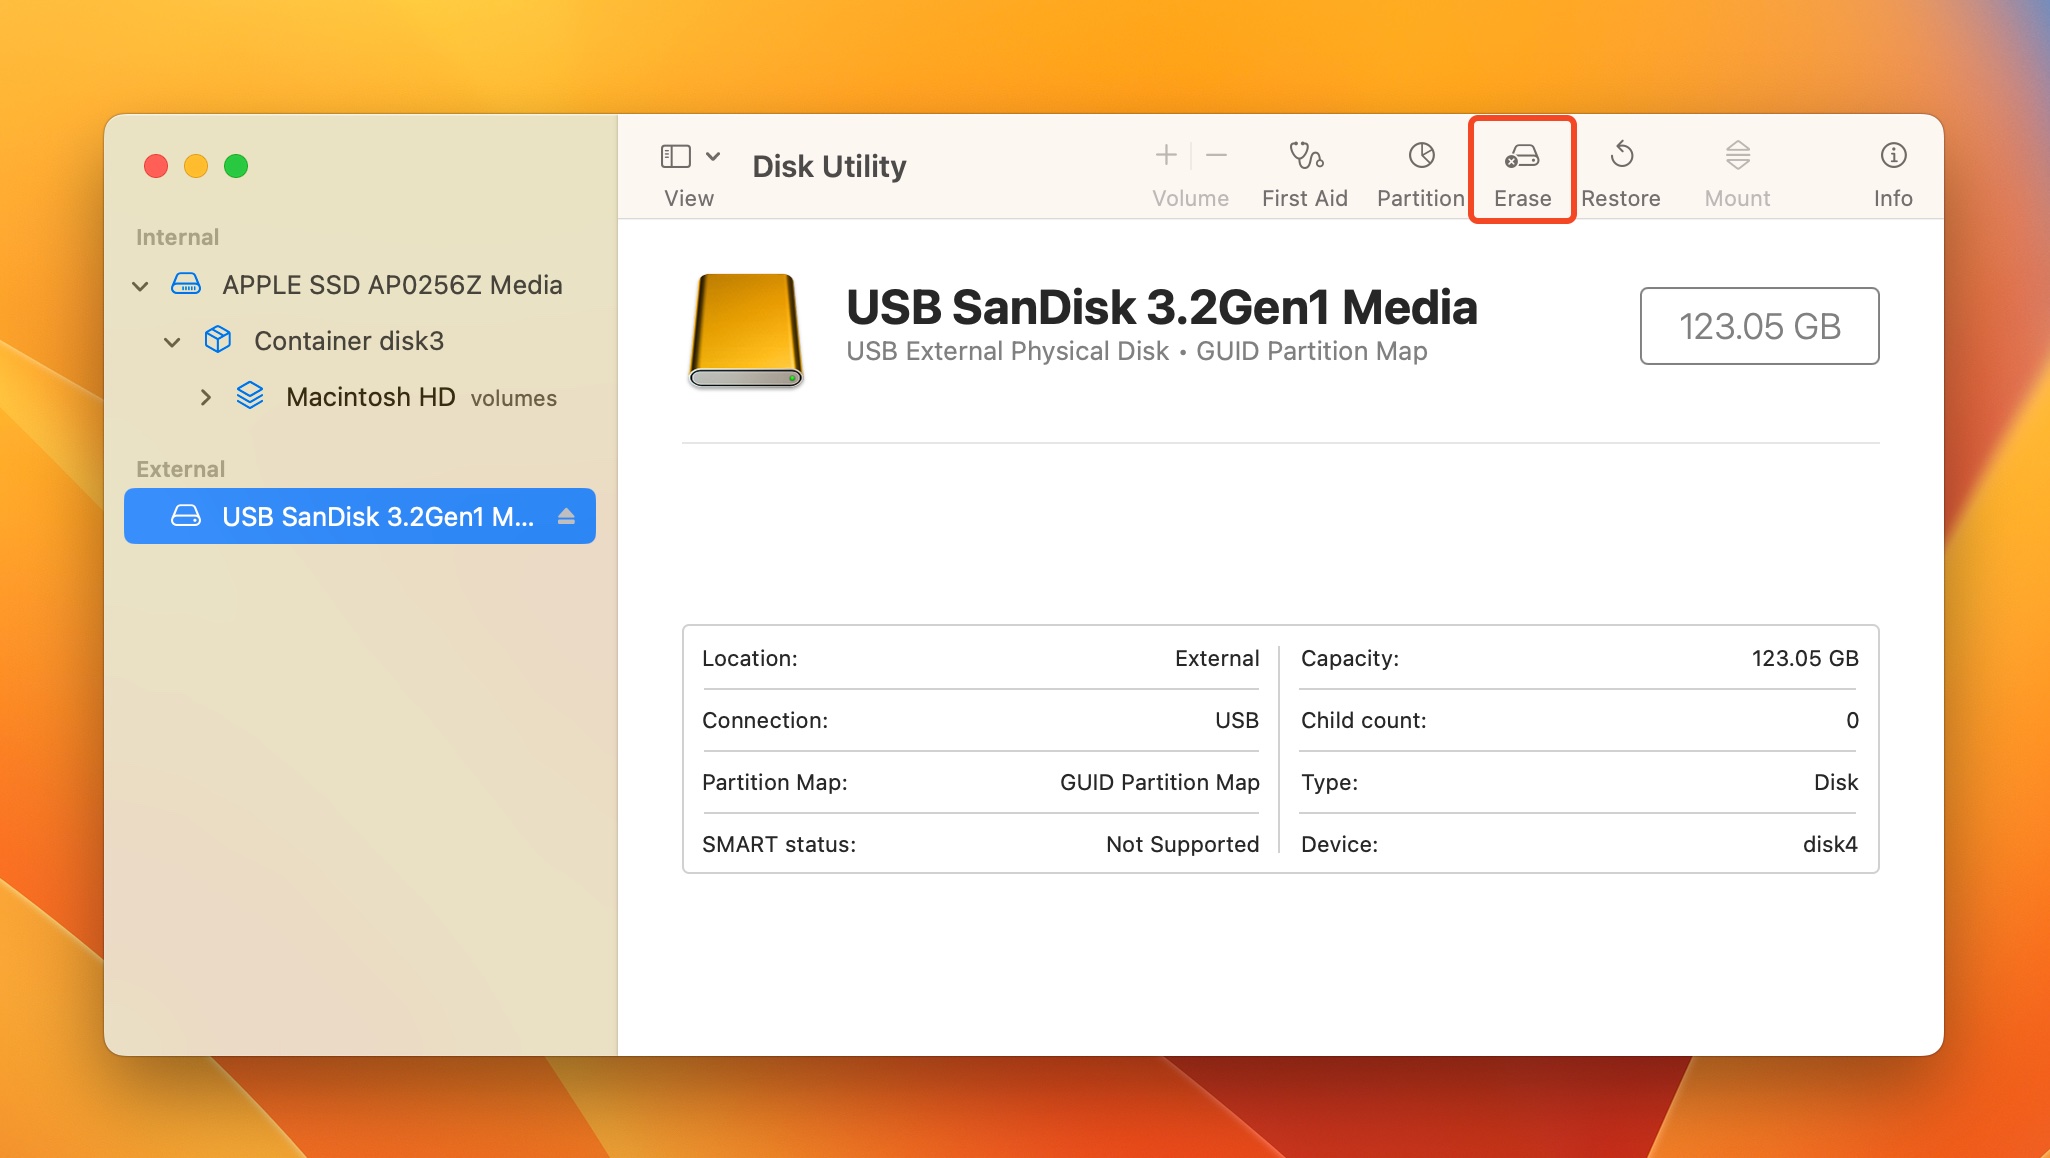
- Open Spotlight Search (Command + Space), search for Disk Utility and launch it.
- Click on the View drop-down menu towards the top-right corner. Select Show All Devices.
- From the left sidebar, select the SSD you want to initialize and click on Erase.
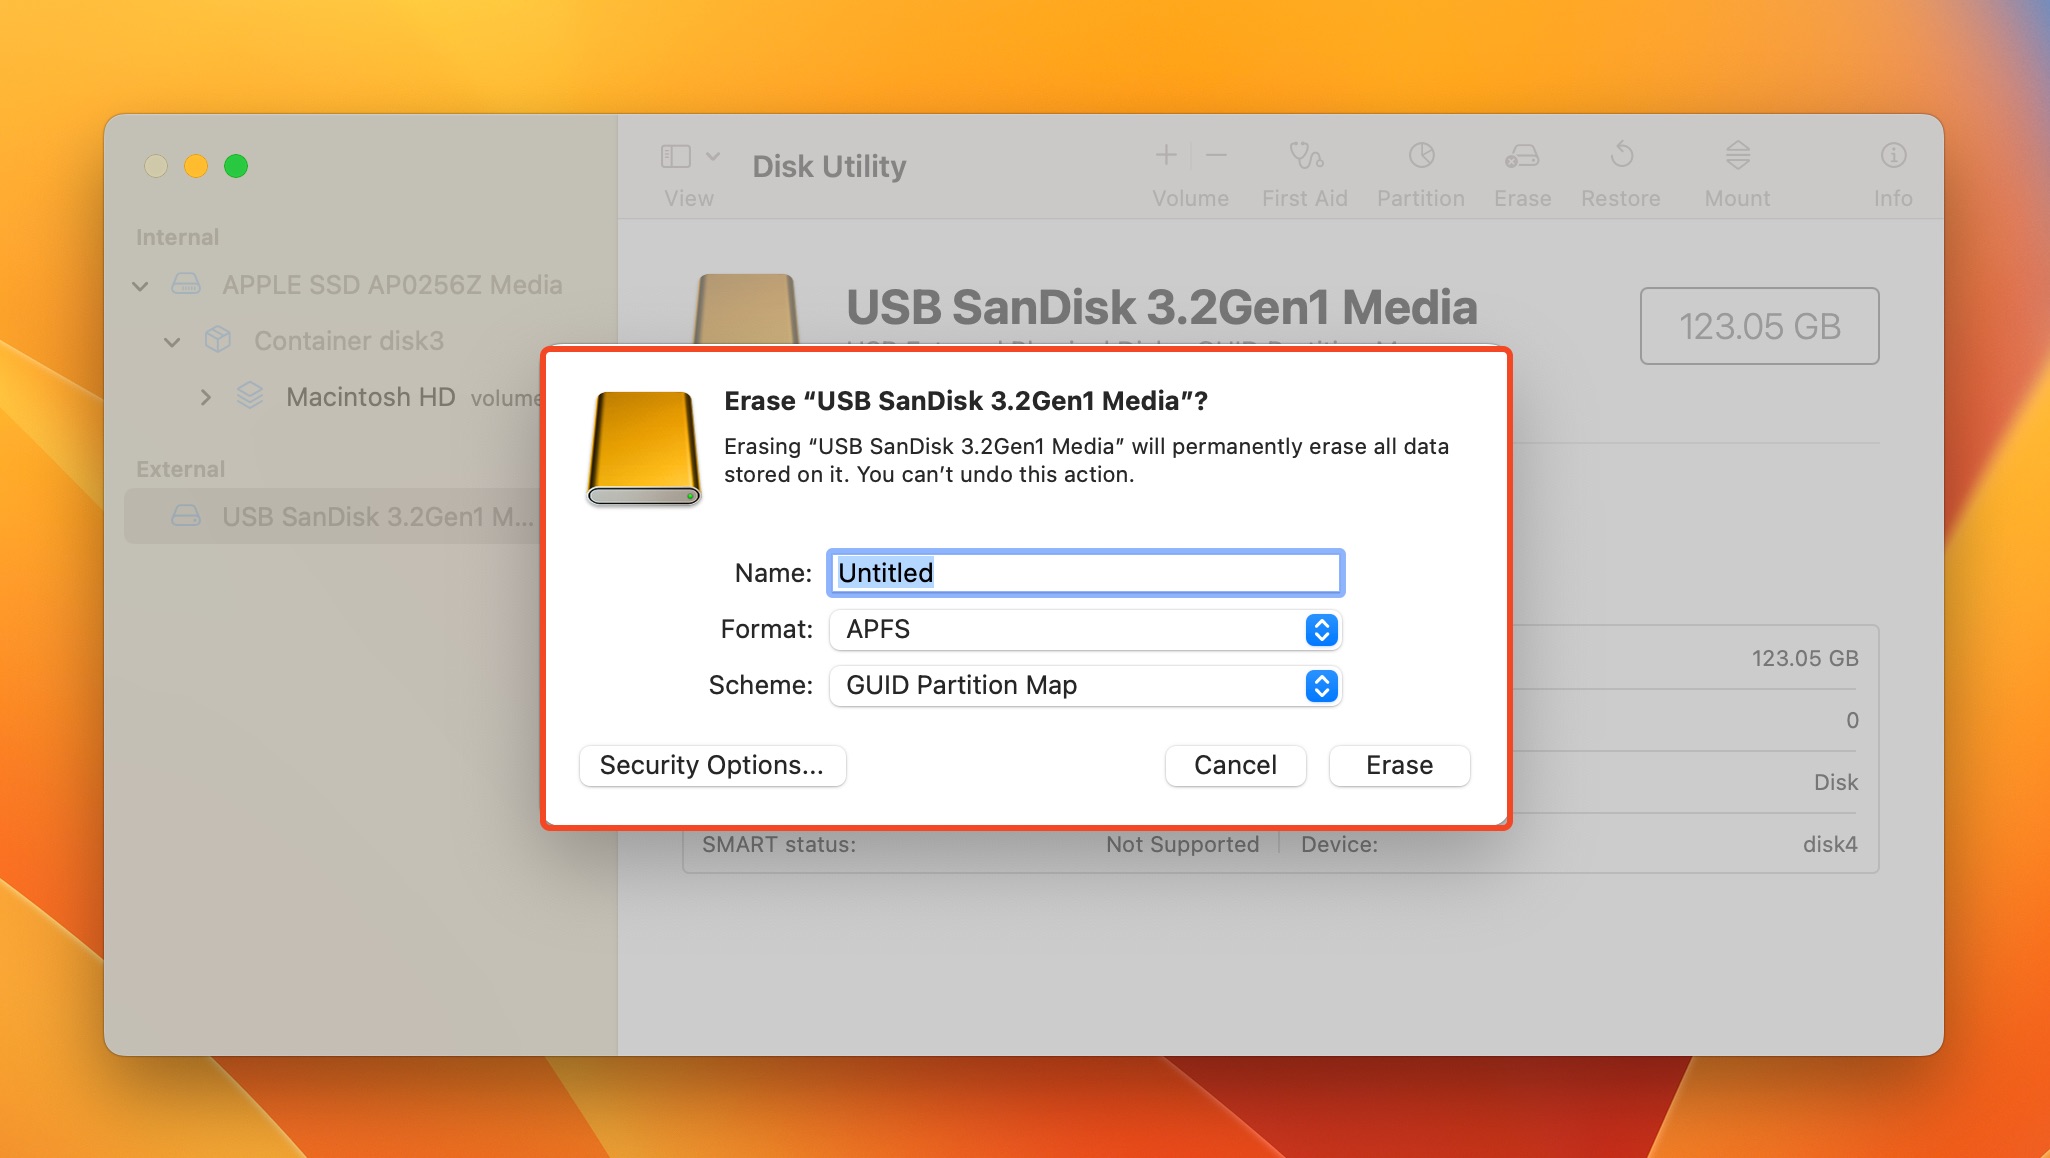
- In the Erase prompt, choose the required parameters and click Erase. We recommend you use the exFAT format if you wish to use the SSD on Windows and Mac devices, and use the AFPS format for Mac-only drives. The Scheme parameter should be left as it is, unless you know what you’re doing.
- Your drive will be initialized and formatted.
Conclusion
Whether you’re using a Mac or a Windows PC, SSD initialization in itself is not a complex process. The only exception is when an old SSD suddenly becomes uninitialized–in which case, you need to first recover your data from it and then proceed to initialize it using Disk Management, or Disk Utility for Windows and Mac systems respectively.
Ideally, you should keep multiple backups of your data to avoid the hassle of data recovery, and instead focus your efforts on fixing the drive and initializing it again. If you do need to perform data recovery, use an easy-to-operate, yet functional data recovery program like Disk Drill.
FAQ
- Restart your PC and press the relevant keys to enter the BIOS settings. The exact key or key combination will differ across different motherboards.
- Go to the BIOS config or storage adapter settings.
- Set the “Configure SATA as” option to IDE.
- Save your settings and exit.
- Press Windows Key + R, type diskmgmt.msc in the textbox and press Enter to launch Disk Management.
- Right-click on the SSD that shows up as uninitialized and click Initialize.
- Choose the required partition table type and click OK.
- Look for “disk utility” in Spotlight Search (Command + Space) and open the Disk Utility.
- Set the View option to Show All Devices.
- Select your SSD in the left sidebar and click on Erase.
- Choose the partition table and file system, then click Erase.


