 Solid-State Drives (SSDs) offer better speeds than hard drives, but it does come at a greater financial cost. However, unlike hard disk drives, SSDs usually display fewer apparent symptoms before they fail completely. Therefore, it’s even more important to regularly check the health of your SSD, especially if you’ve noticed performance issues on it lately.
To help you out, we’ve curated a guide that describes three ways to check an SSD’s health, as well as some tips to increase its lifespan.
Table of Contents
3 Ways to Check SSD Drive Health
There are three main ways to check your SSD drive’s health–using in-built Windows utilities, third-party S.M.A.R.T. tools, and manufacturer-specific programs.
To get the most accurate results, ensure that the SSD is properly connected to your PC. Double-check the SATA connectors and cables, and in the case of an M.2 SSD, make sure it’s properly slotted into the motherboard.
Let’s take a look at some ways to check your SSD drive’s health:
Method 1:Use the Command Prompt
You can do a basic SSD health check using the Command Prompt on Windows. By basic, we mean you’ll simply get an ‘OK’ or ‘Error’ output, depending on the state of your drive. This won’t tell you what is wrong with your SSD, but whether there is something wrong with it.
Here’s how to check SSD health by using CMD:
- Type “cmd” in Windows Search (Windows Key + S). Right-click on Command Prompt > Run as administrator.
- Type
wmicin the console and press Enter.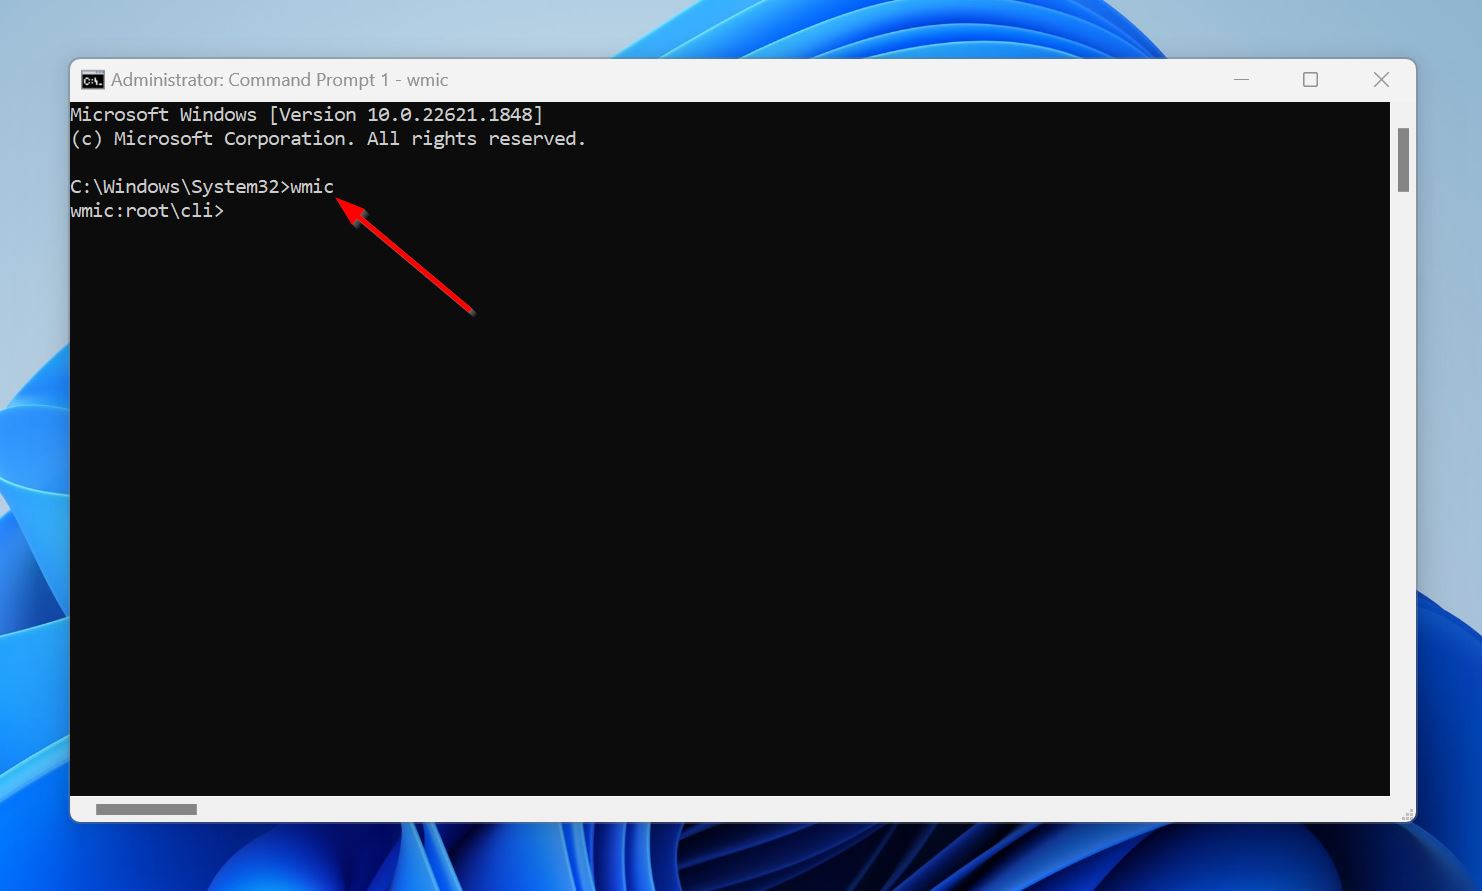
- Type
diskdrive get statusand press Enter.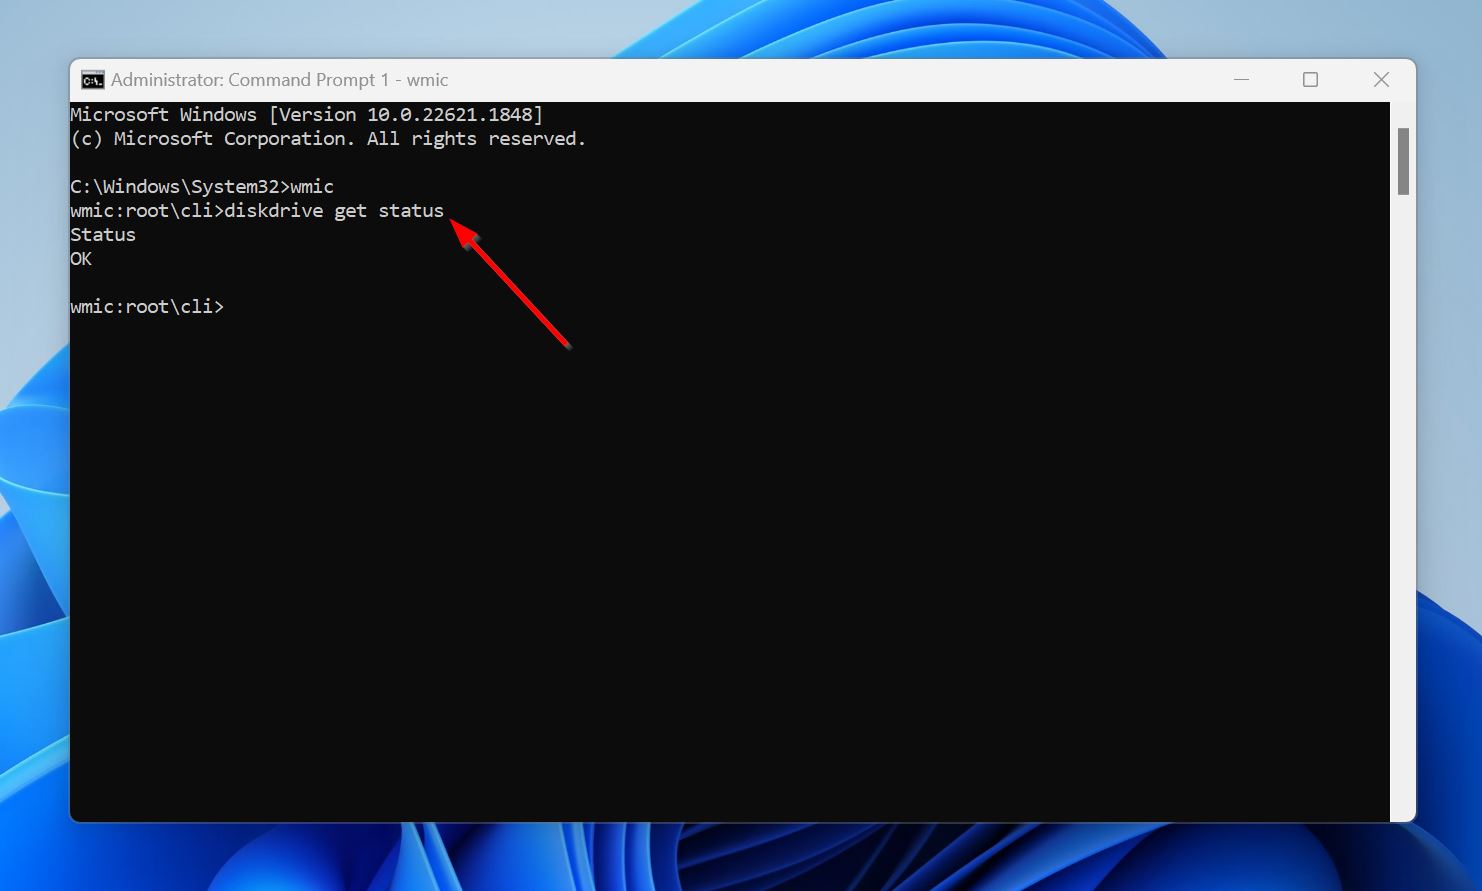
- CMD will either display “OK,” or “Error” for each drive that’s connected to your PC.
If you do get the “Error” message, it’s best to back up your data as soon as possible. After doing that, you can run the CHKDSK command to potentially fix the drive.
Method 2:Use Third-Party Tools to View the SSD’s S.M.A.R.T. Status
Most modern storage drives have a feature called S.M.A.R.T. (Self-Monitoring, Analysis, and Reporting Technology), that lets you view the disk’s health across a variety of parameters. It can be used to predict impending failures, so you can take the required steps for prevention and data preservation. This is especially useful in SSDs because they usually fail suddenly and there are no clear functional symptoms.
A reliable and easy way to check an SSD’s S.M.A.R.T. status, is to use third-party S.M.A.R.T. monitoring tools. Two decent S.M.A.R.T. monitoring utilities are CrystalDiskInfo and AIDA64. Download any S.M.A.R.T. monitoring program. Here’s how the S.M.A.R.T. status of your SSD will typically be displayed.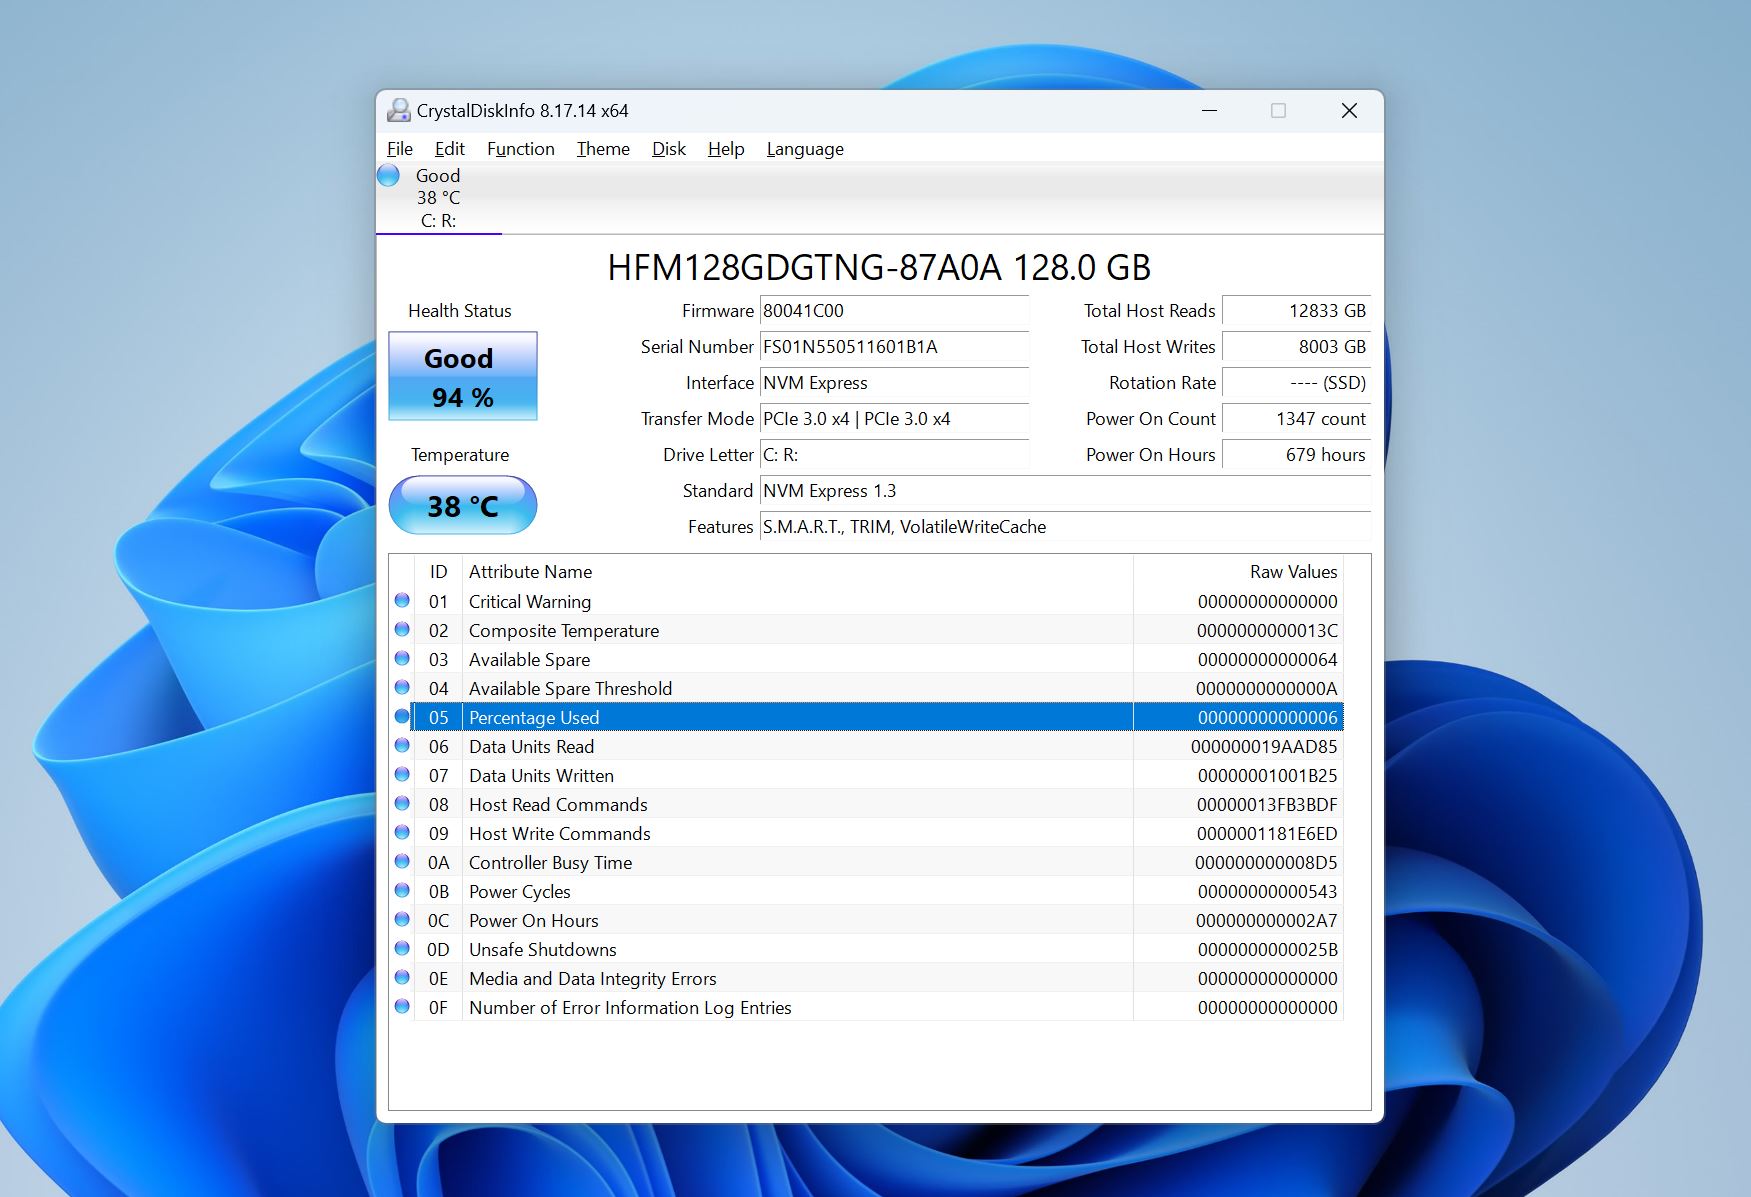
Take a look at parameters such as:
- Critical Warning: Critical warnings related to the controller states.
- Media and Data Integrity Errors: Indicates the number of times the controller detected an unrecoverable data integrity error.
- Erase Fail Count: The number of failed erase operations on the flash memory.
- Wear Leveling Count: Essentially an indication of the remaining endurance of the drive. The value usually has 100 at the end and decreases linearly as the drive is used.
The RAW values should be as far from the Threshold as possible, and ideally have zeroes toward the end (except wear leveling count). There may be other parameters in addition to the ones displayed in the image, depending on your SSD.
Method 3:Using Manufacturer-Specific Tools
Chances are, your SSD vendor has a specific tool that can accurately check your SSD for errors, and often, fix the issue. These programs are an ideal choice since they’re specifically designed for that particular manufacturer’s SSDs.
We also recommend using vendor-specific disk monitoring programs to view the S.M.A.R.T. status of your drive. You can also use these programs to update your SSD’s firmware, as outdated firmware can be the culprit behind drives that are not functioning optimally.
Popular vendor-specific SSD health check tools include:
How to Avoid Losing Data Due to SSD Corruption
Due to how SSDs work, they usually fail without warning, which makes it crucial to back up your data if you notice the S.M.A.R.T. values are deteriorating, or the program is unable to read the values at all. Additionally, fixing your SSD warrants using certain parameters in the CKHDSK command, and other similar utilities. When using these utilities, some data can often be lost as collateral damage.
To prevent this, it’s best to back up your data beforehand. You can even use this backup to recover data that was already lost, and avoid stressing an already damaged SSD with a direct data recovery scan.
An effective way to back up your SSD, is to create a disk image of it, which is essentially a soft copy of the entire drive. If you have trouble accessing the SSD using Windows Explorer, then creating a disk image is your only option.
We recommend you use Disk Drill to create a disk image and, if need be, recover data from the SSD. The program makes the backup and data recovery process simple, thanks to its beginner-friendly UI and in-built tutorials. Additionally, it’s compatible with all major file systems, and will even work on drives that have no file system at all (RAW). Disk Drill will be able to detect your drive, even if the SSD isn’t visible in Windows Explorer, or you’re having trouble accessing it.
Step 1: Create a Disk Image Using Disk Drill
- Download Disk Drill and install it. Do not download and install the program on the SSD that’s facing problems.
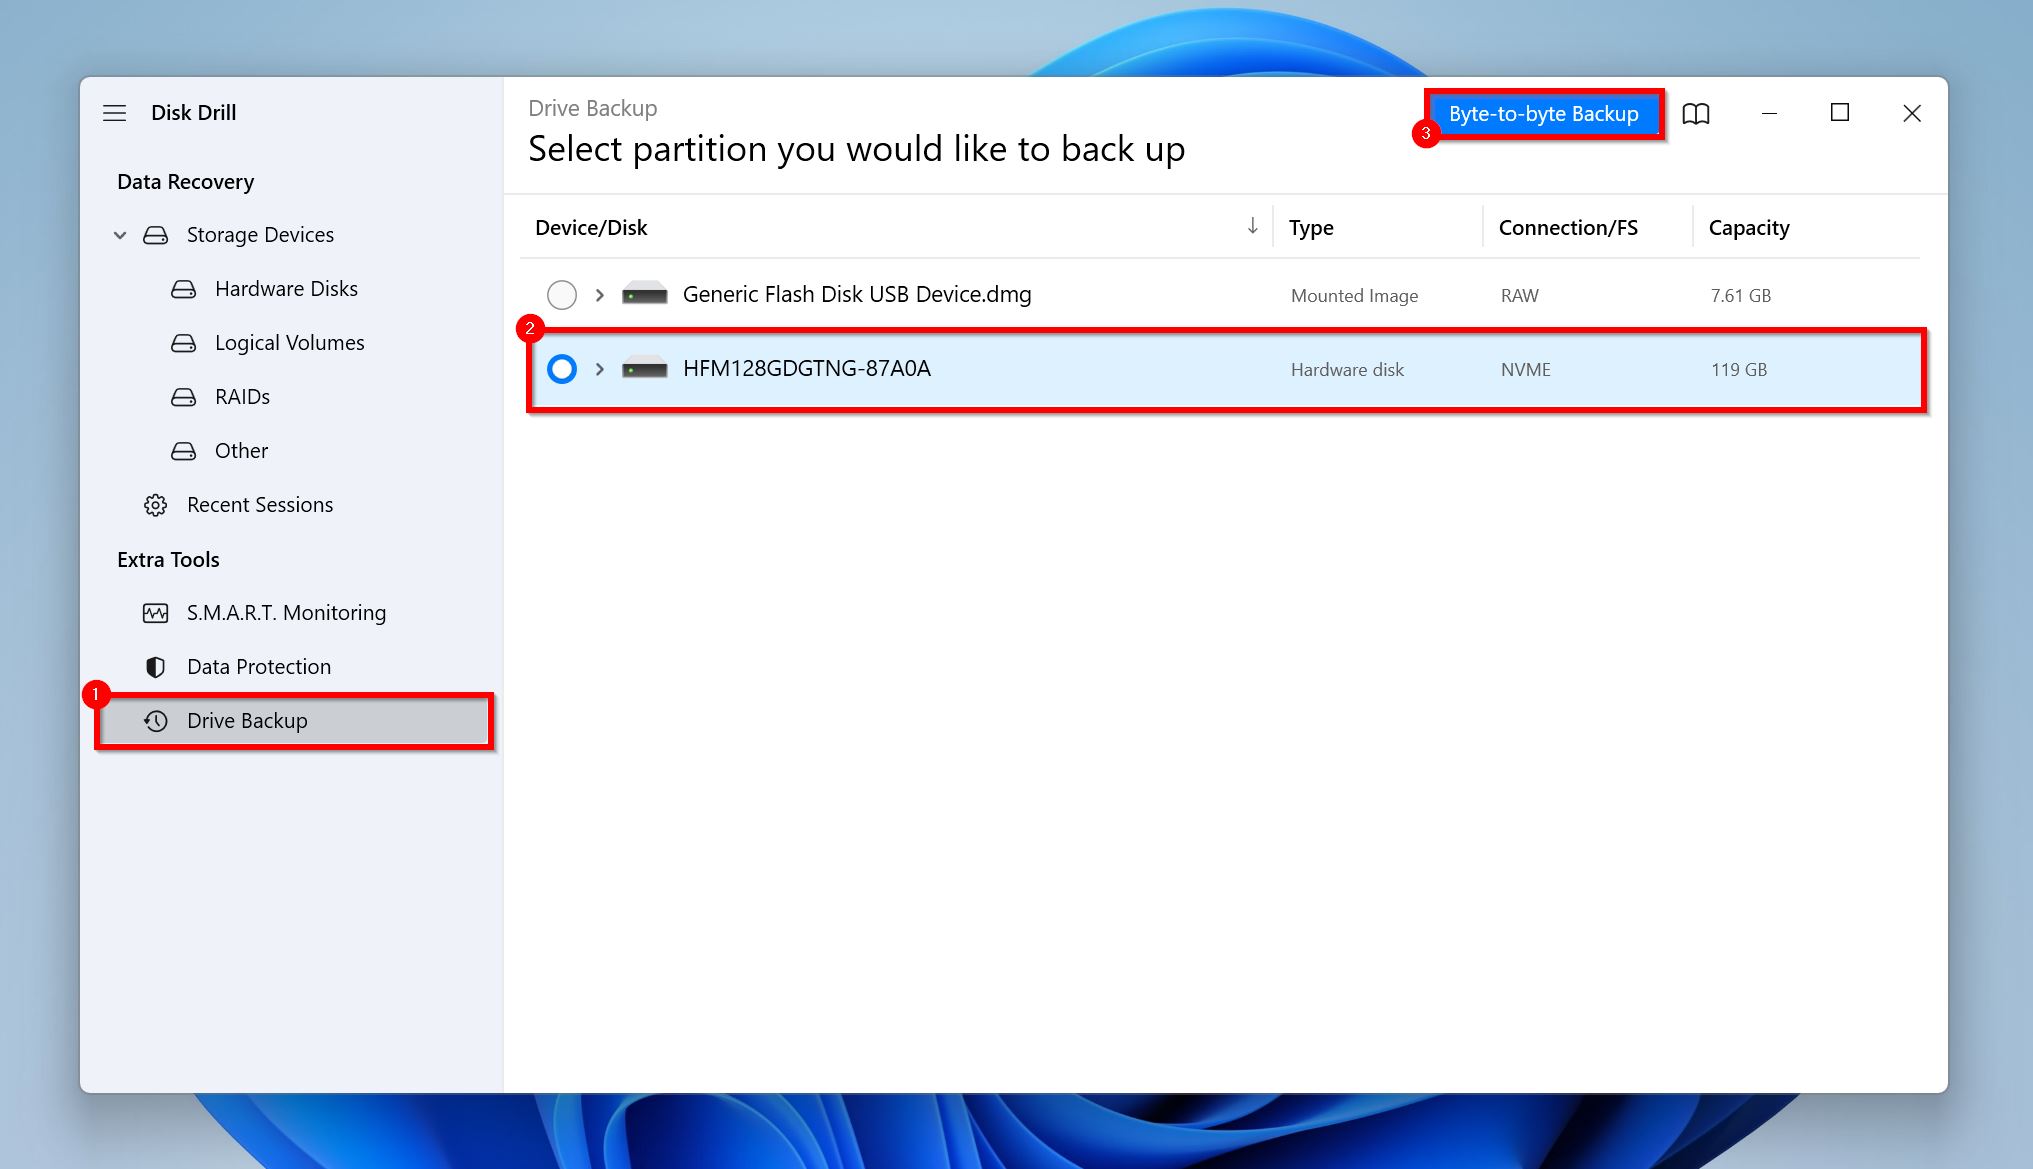
- Open Disk Drill, and click on Drive Backup under Extra Tools in the navigation bar.
- Select the SSD and click on Byte-to-byte Backup.
- Choose where you wish to save the disk image. Ensure the destination has enough free space–more than or equal to the total storage capacity of the SSD. Click on OK.

- Disk Drill will create the disk image.
Step 2: Recover Data from the SSD Using Disk Drill
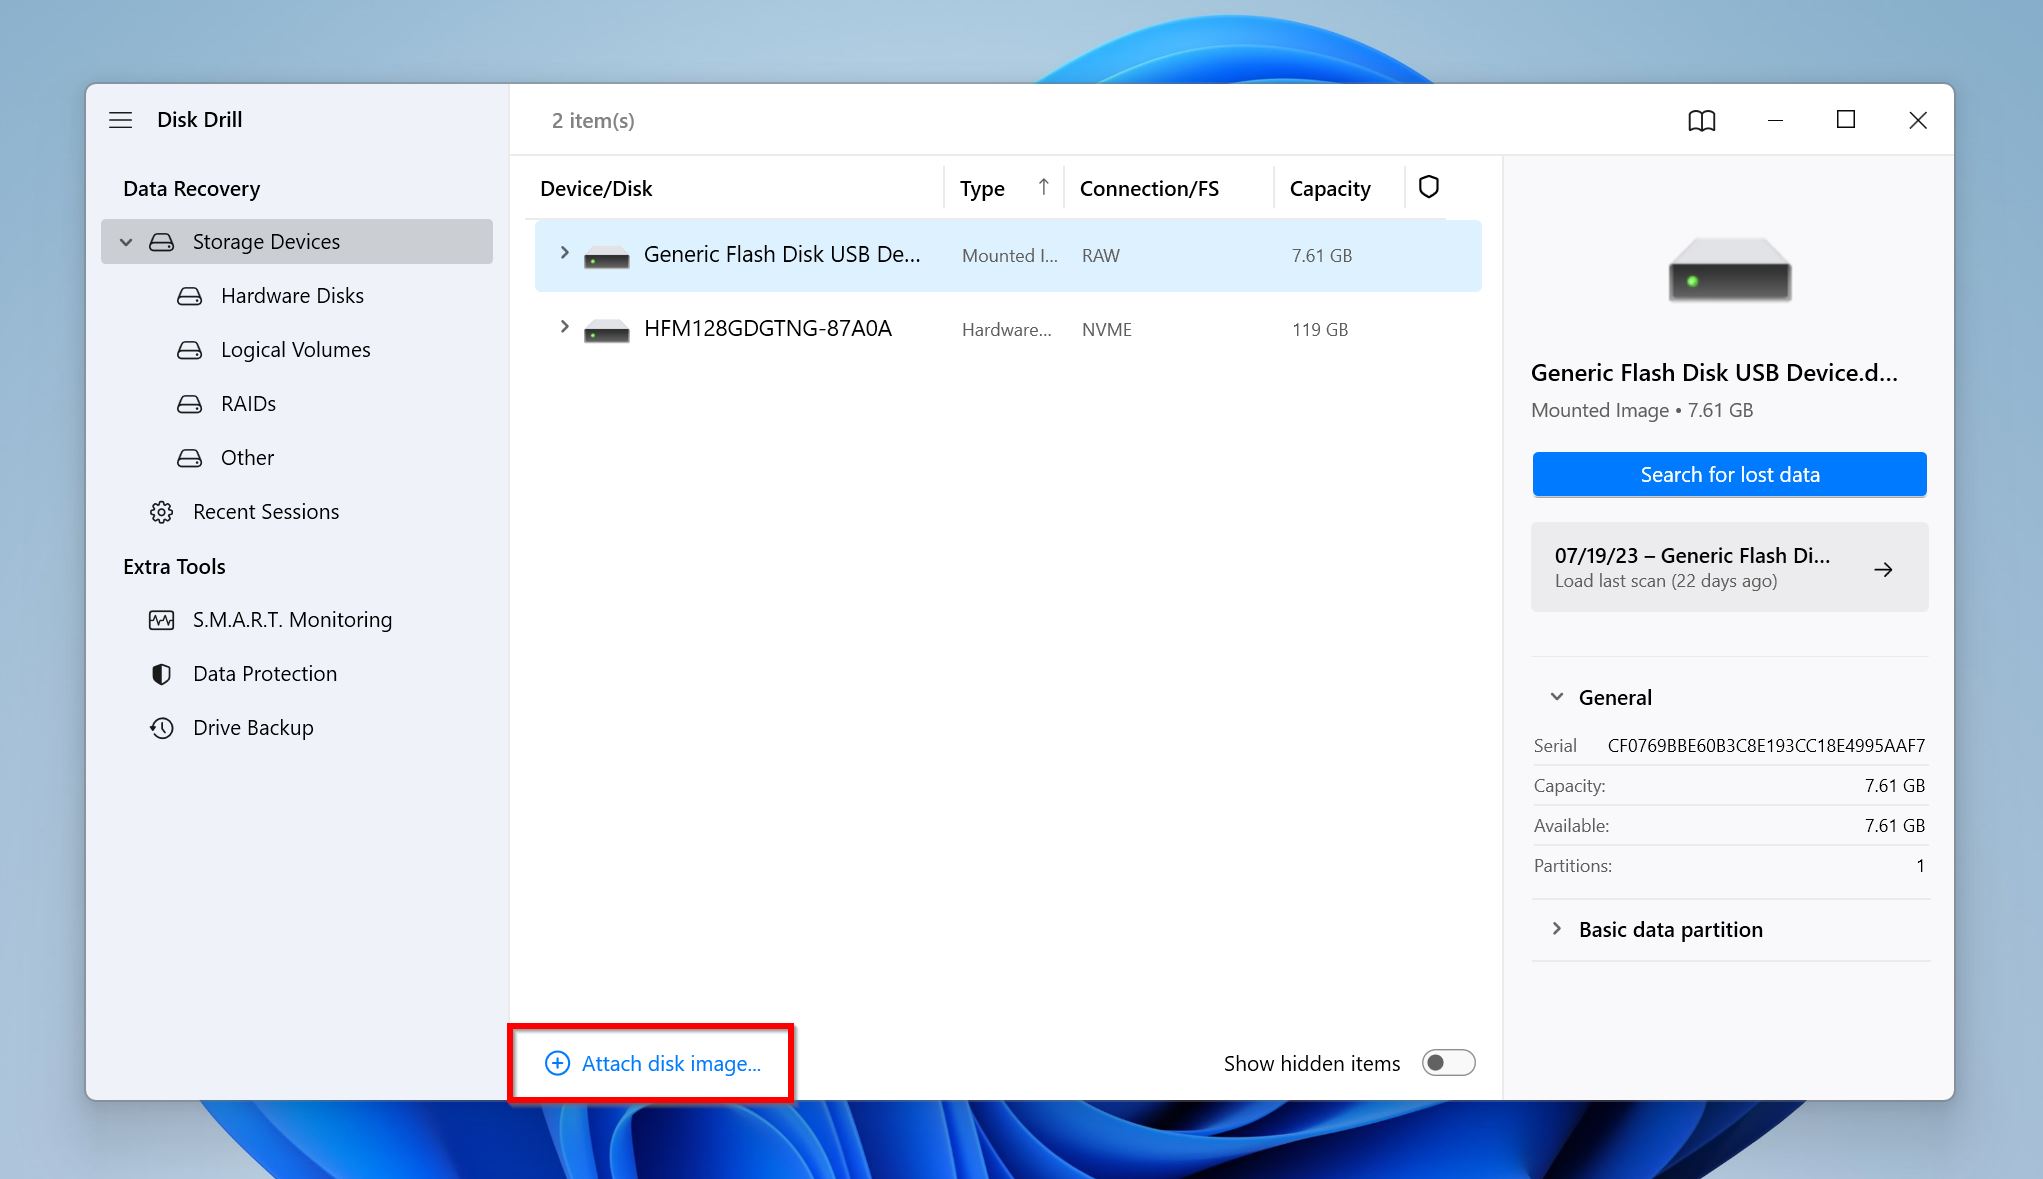
- Open Disk Drill and ensure you’re on the Storage Devices screen.
- If you created a disk image earlier, click on Attach disk image, browse for it, and double-click on it.
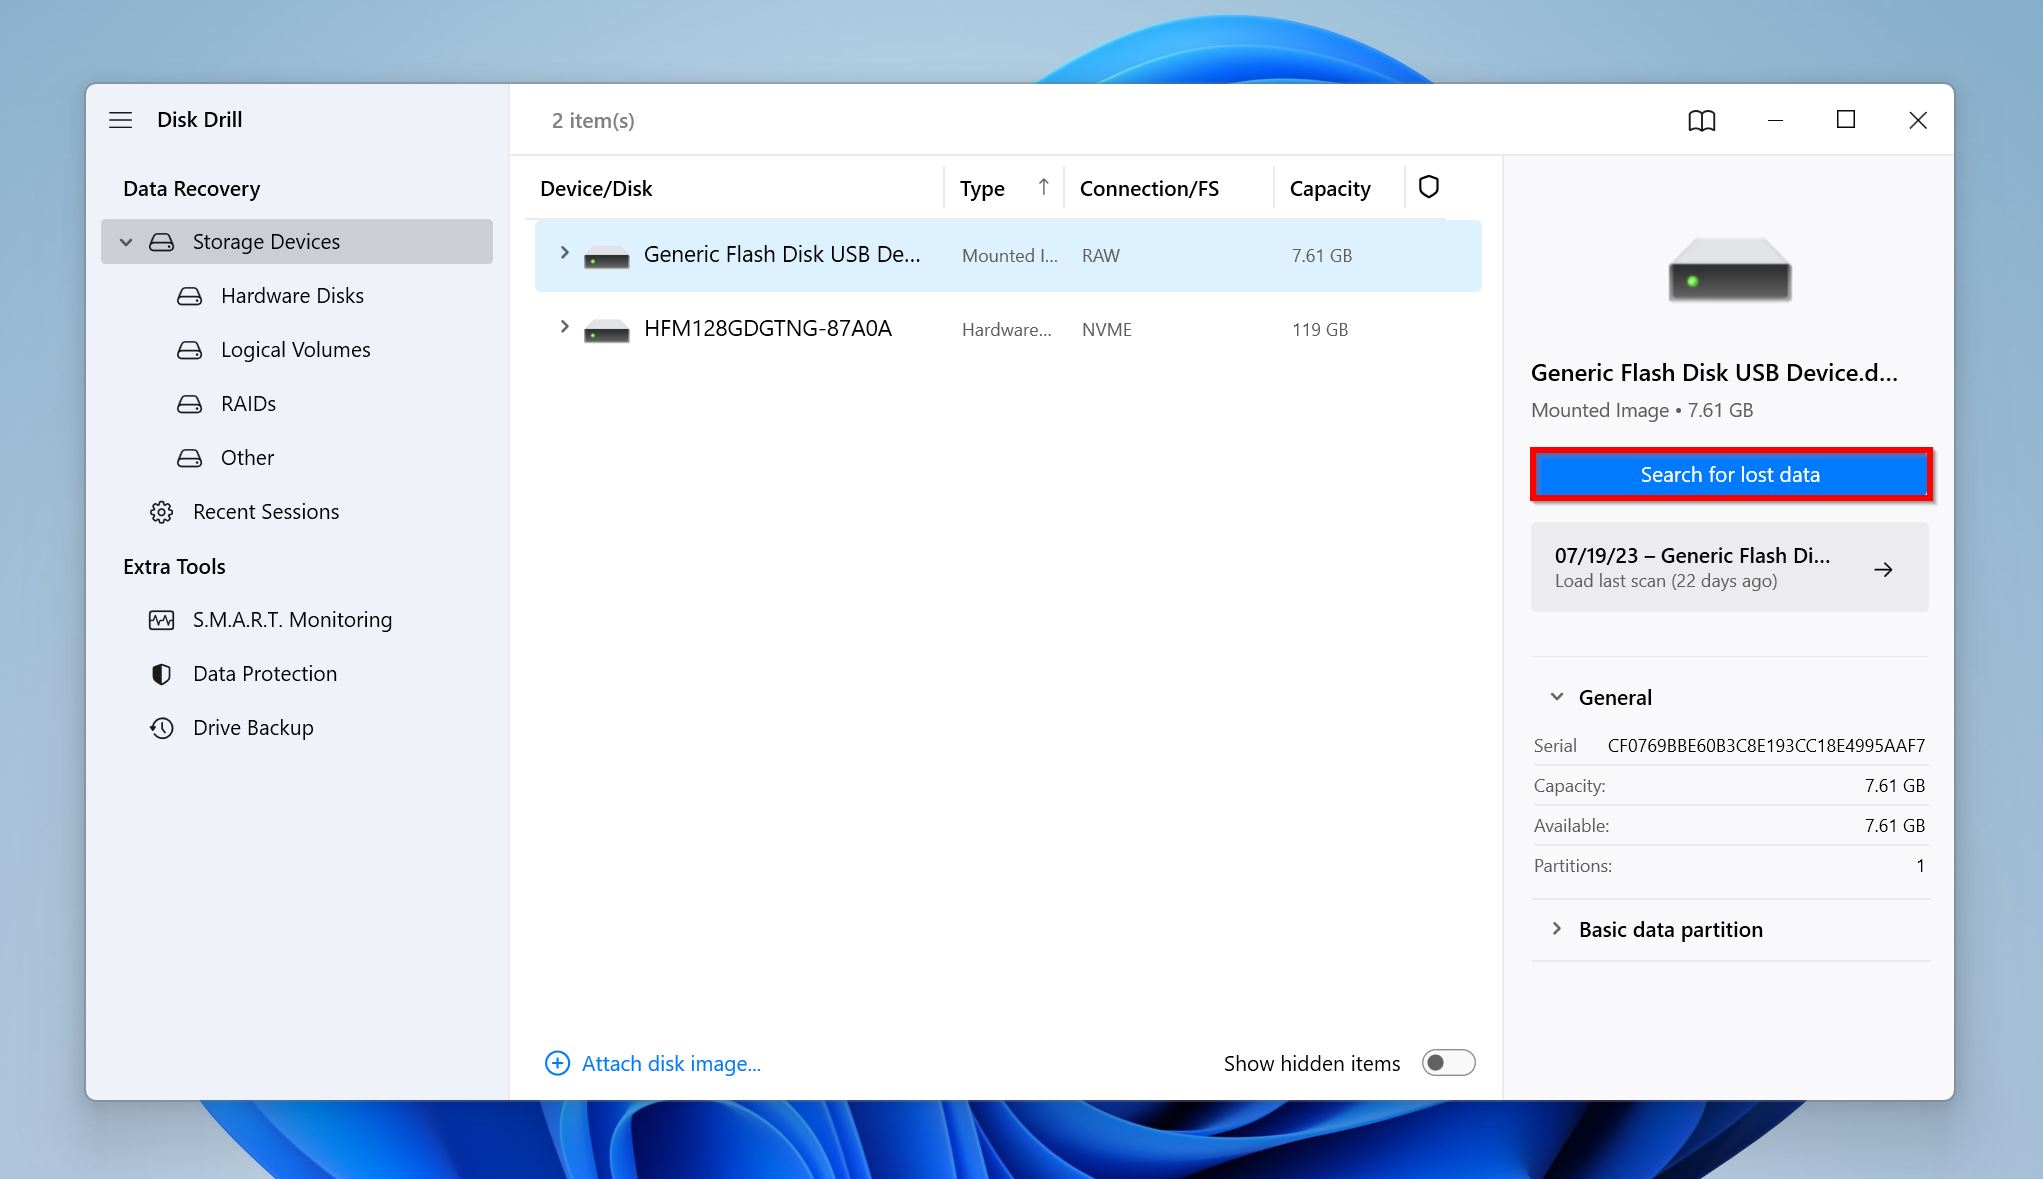
- Select the SSD’s disk image and click on Search for lost data.
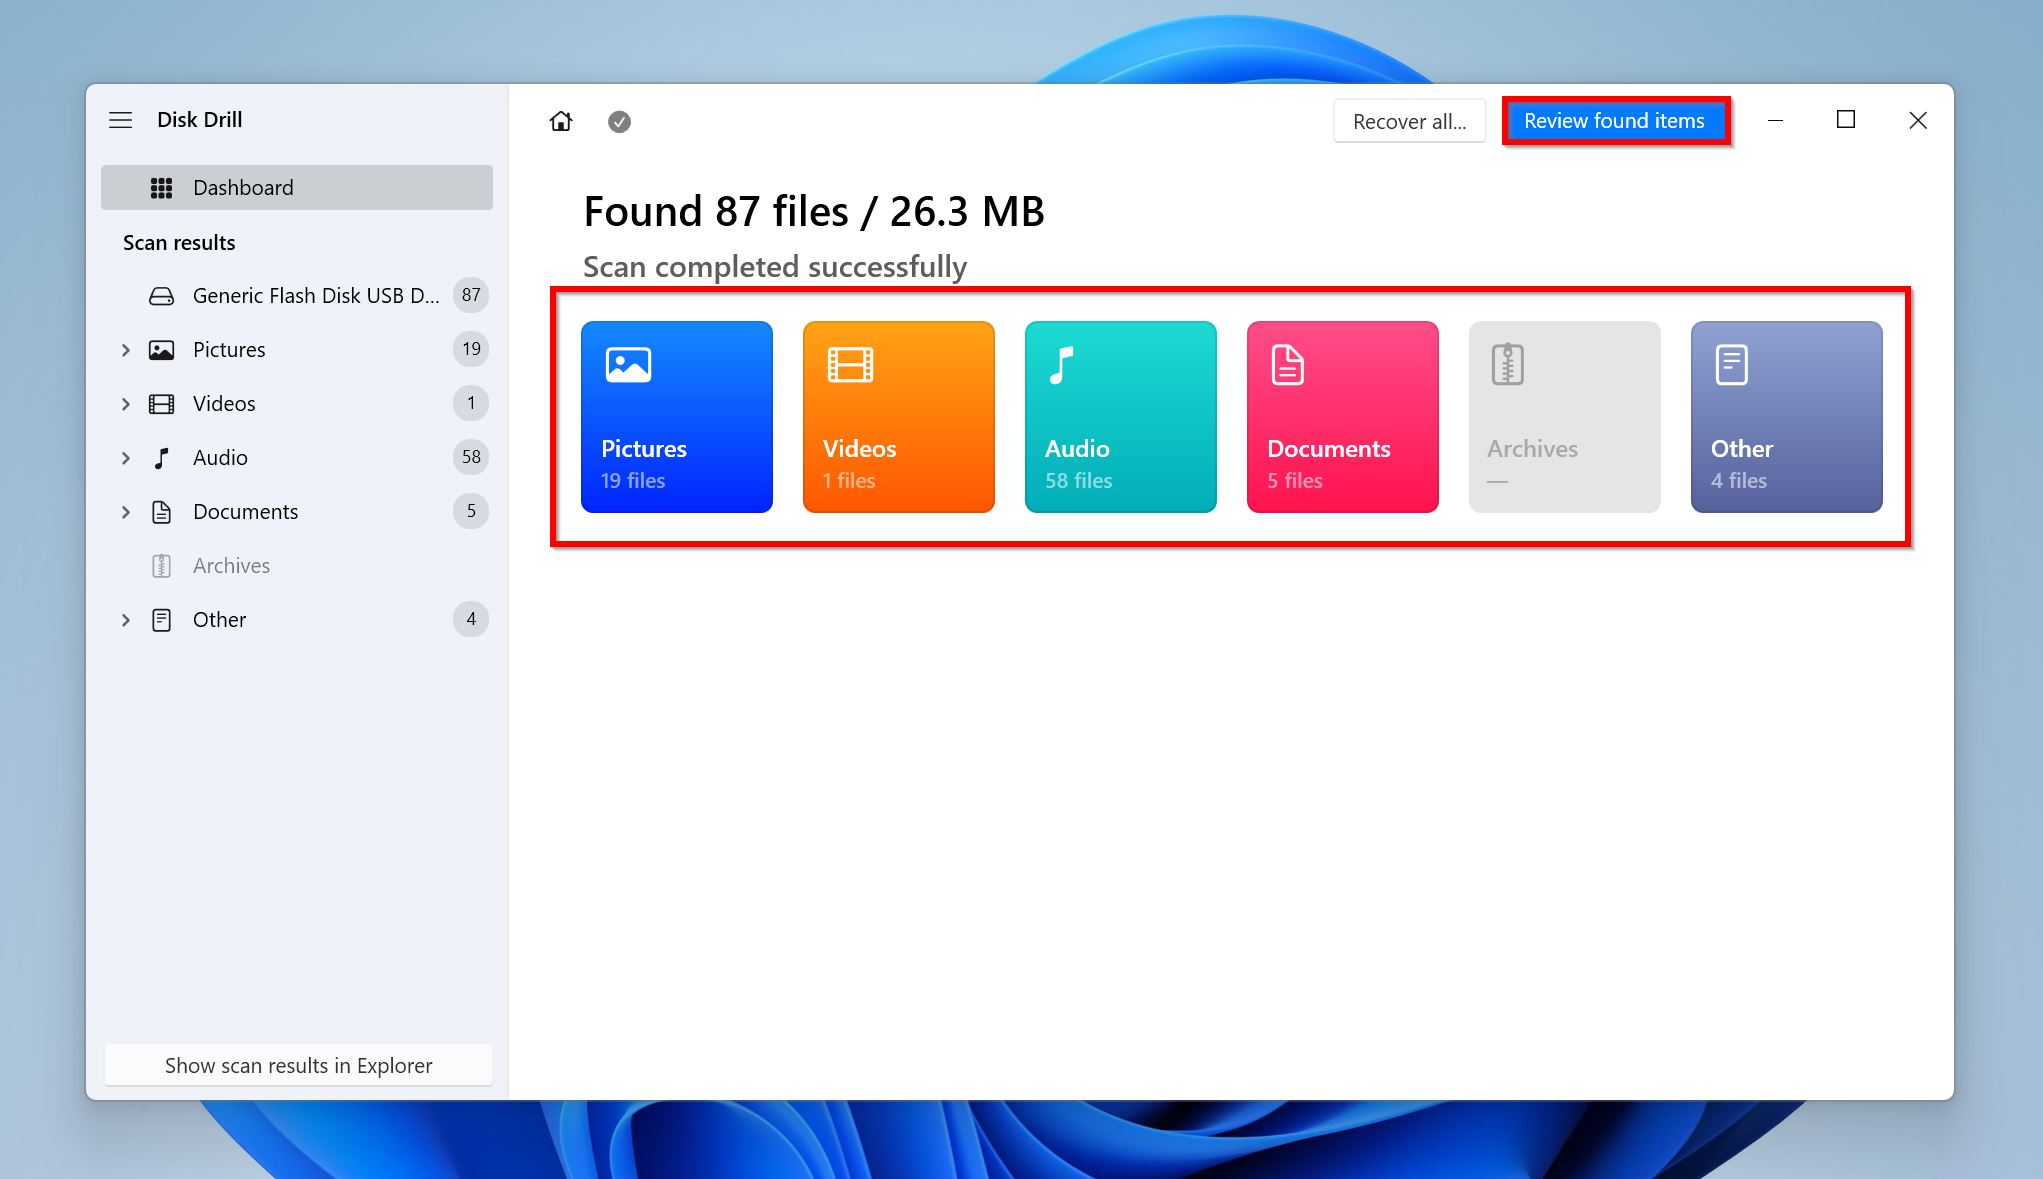
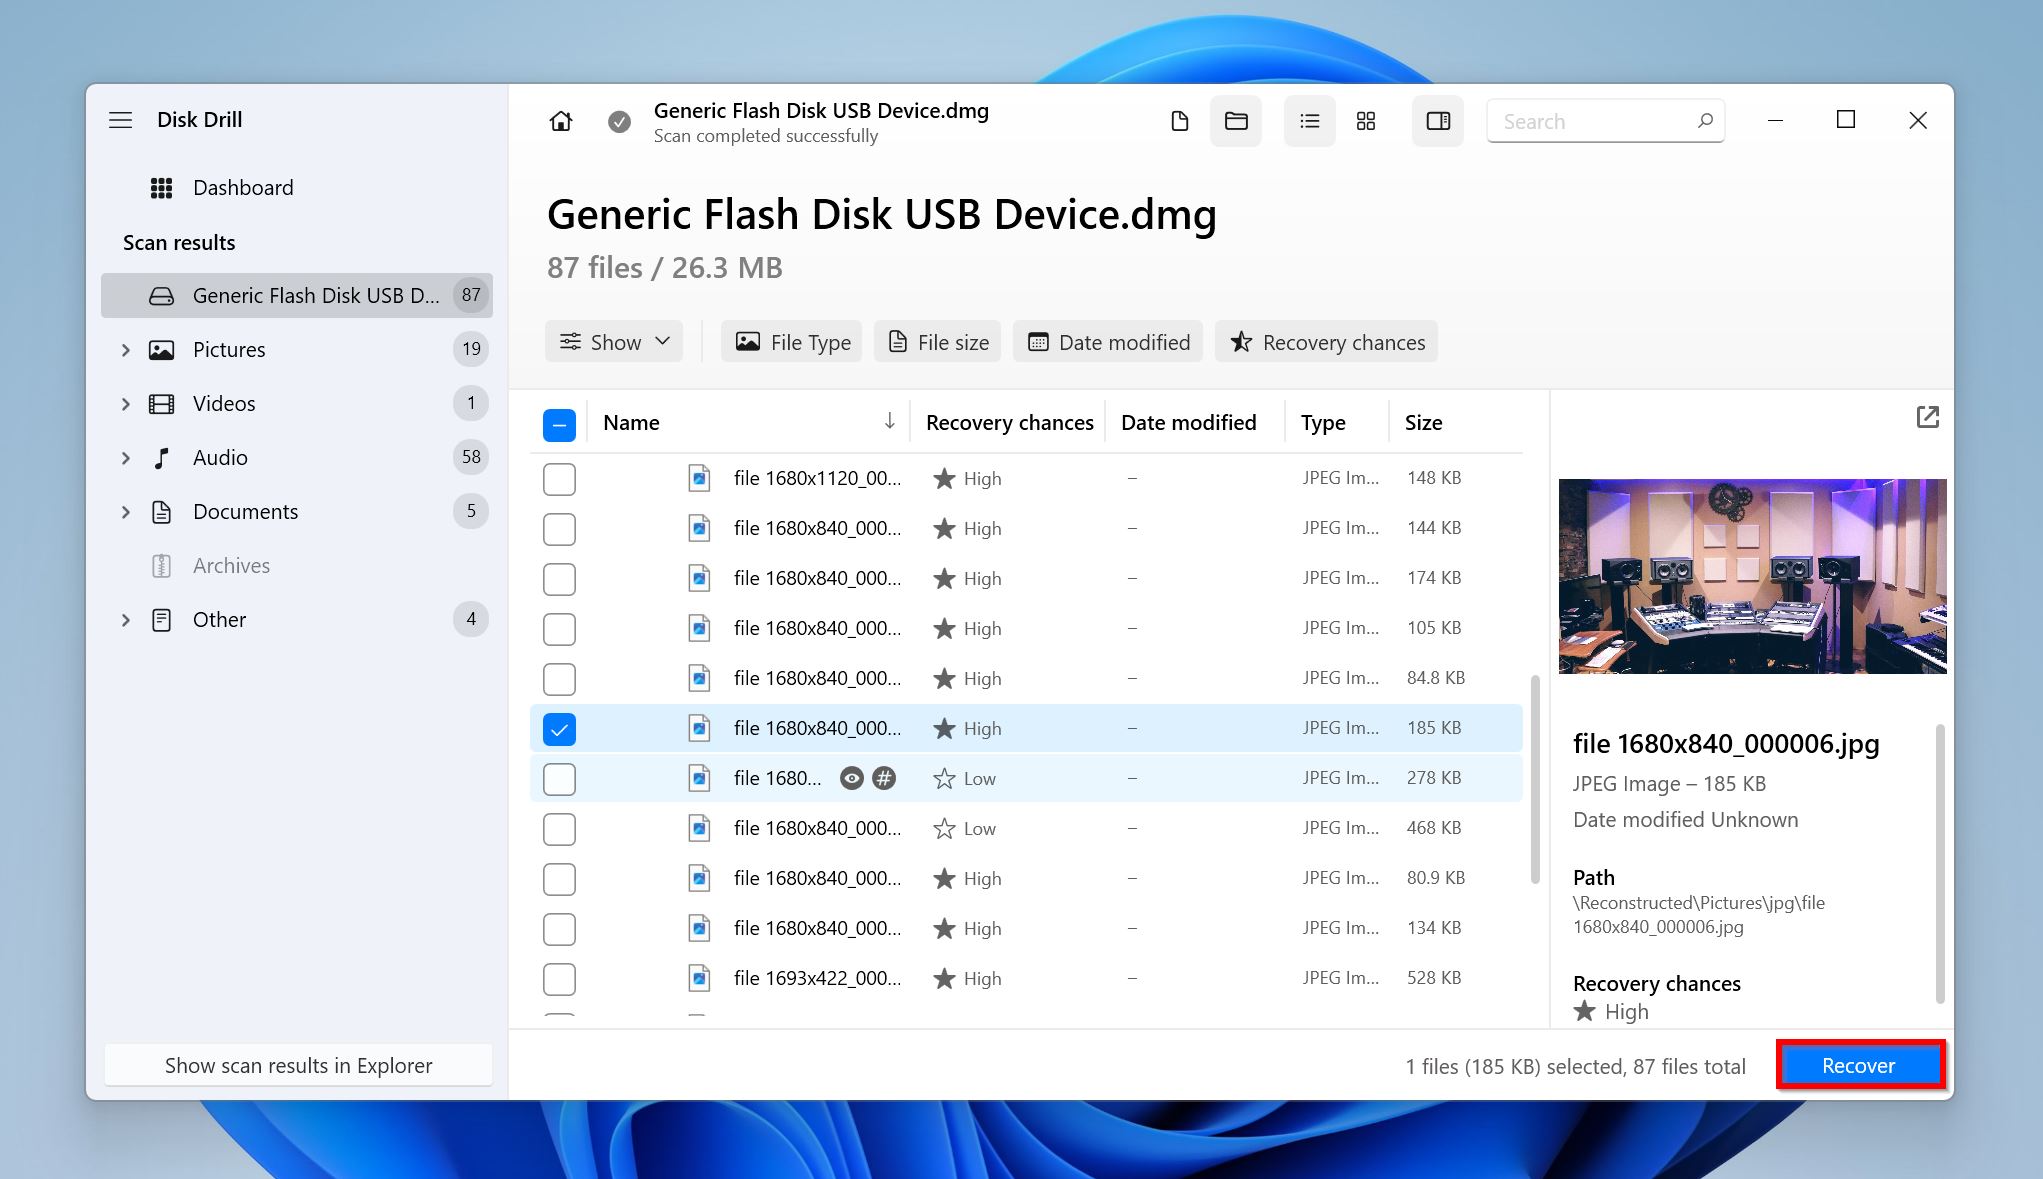
- Click on Review found items to view all the recoverable files. If you only wish to recover certain file types, click on the relevant option–Pictures, Video, Audio, Documents, Archives, and Other.
- Expand the Existing to view all the currently stored files on the disk. To view deleted files that are recoverable, expand the Deleted or lost and Reconstructed sections.
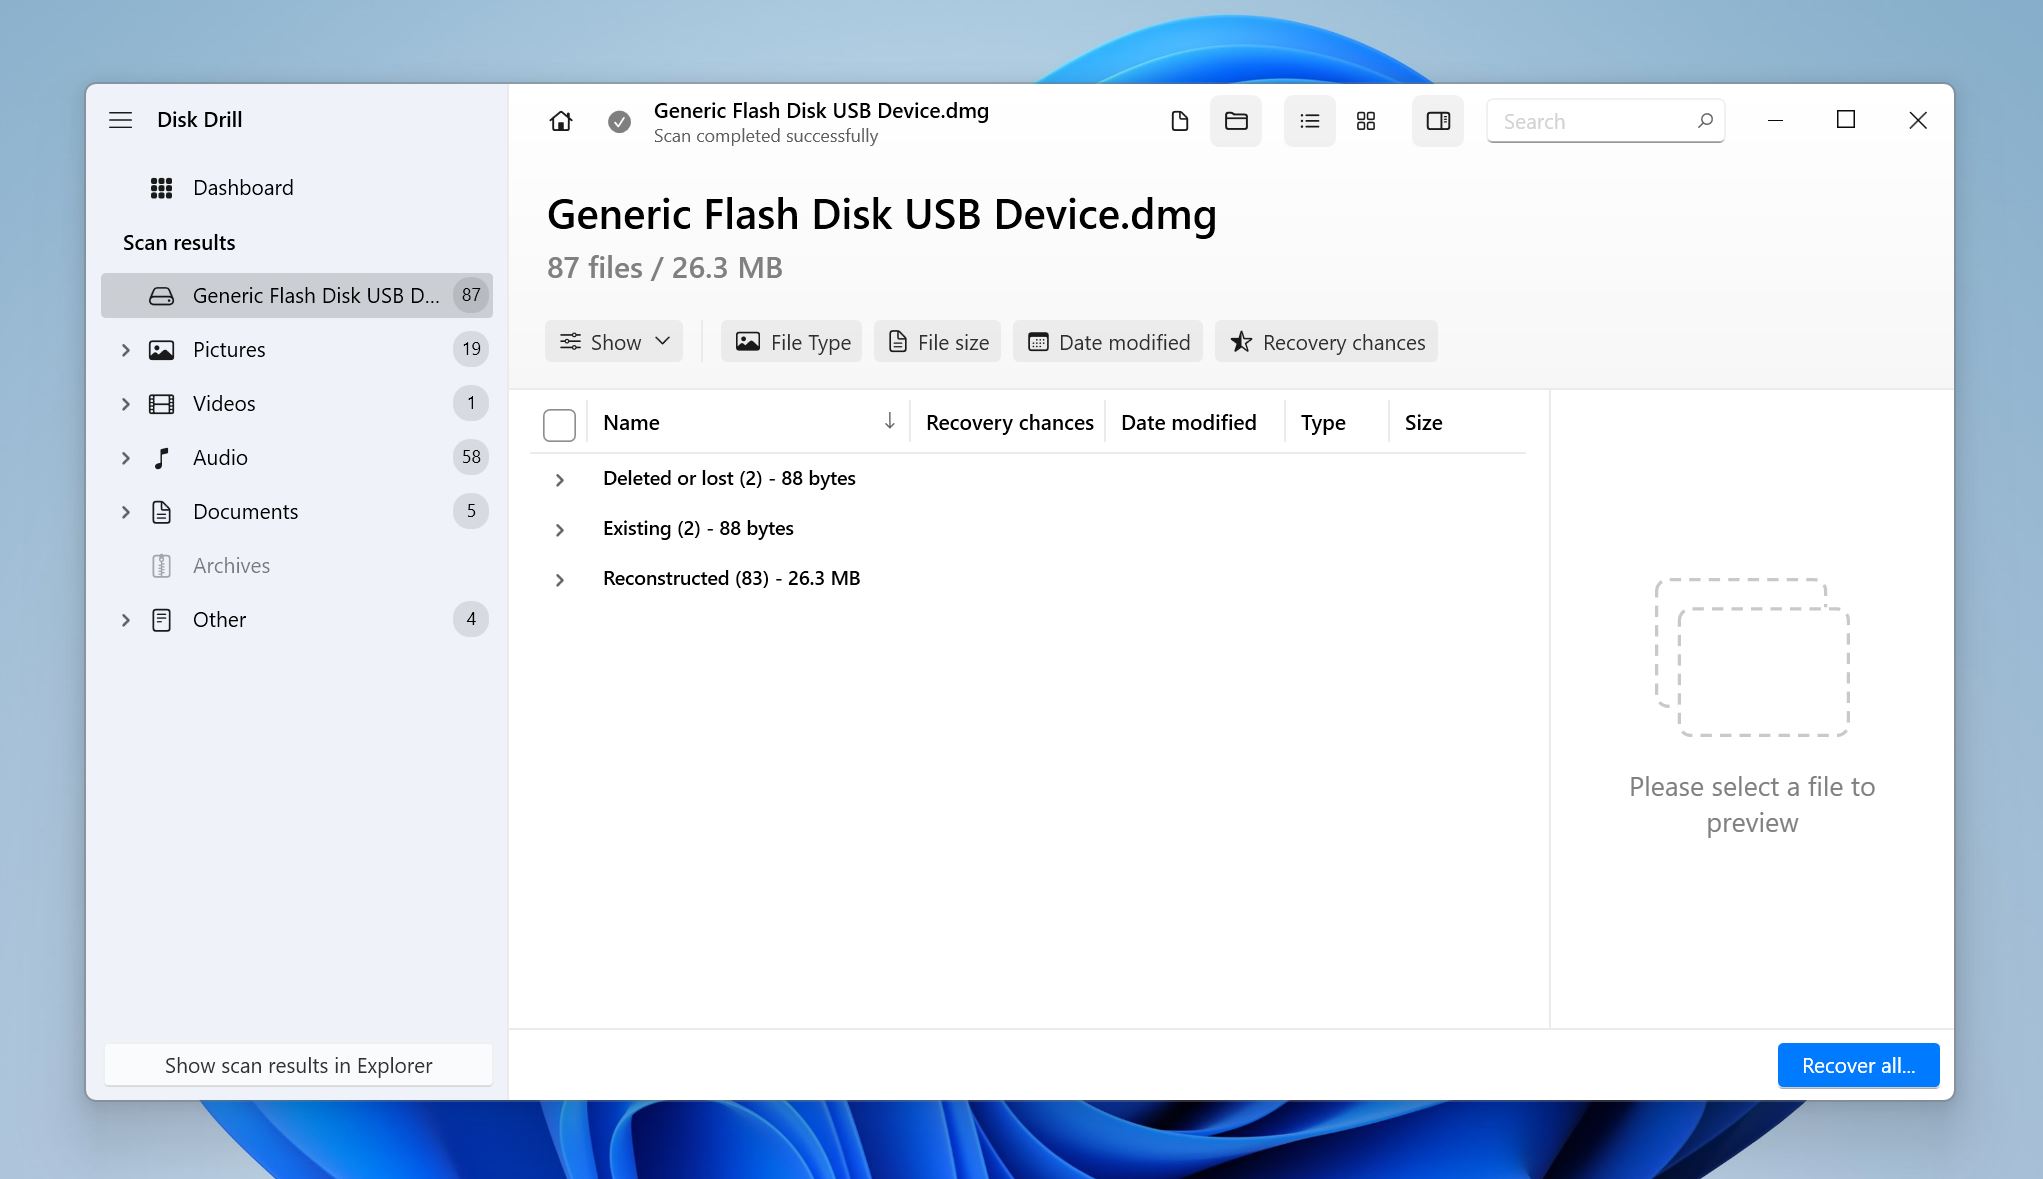
- Select the files you wish to recover. Disk Drill will display a preview of the currently selected file, but you can manually preview any file by clicking the eye icon next to its filename. A previewable file usually has a higher chance of recovery. Click on Recover.
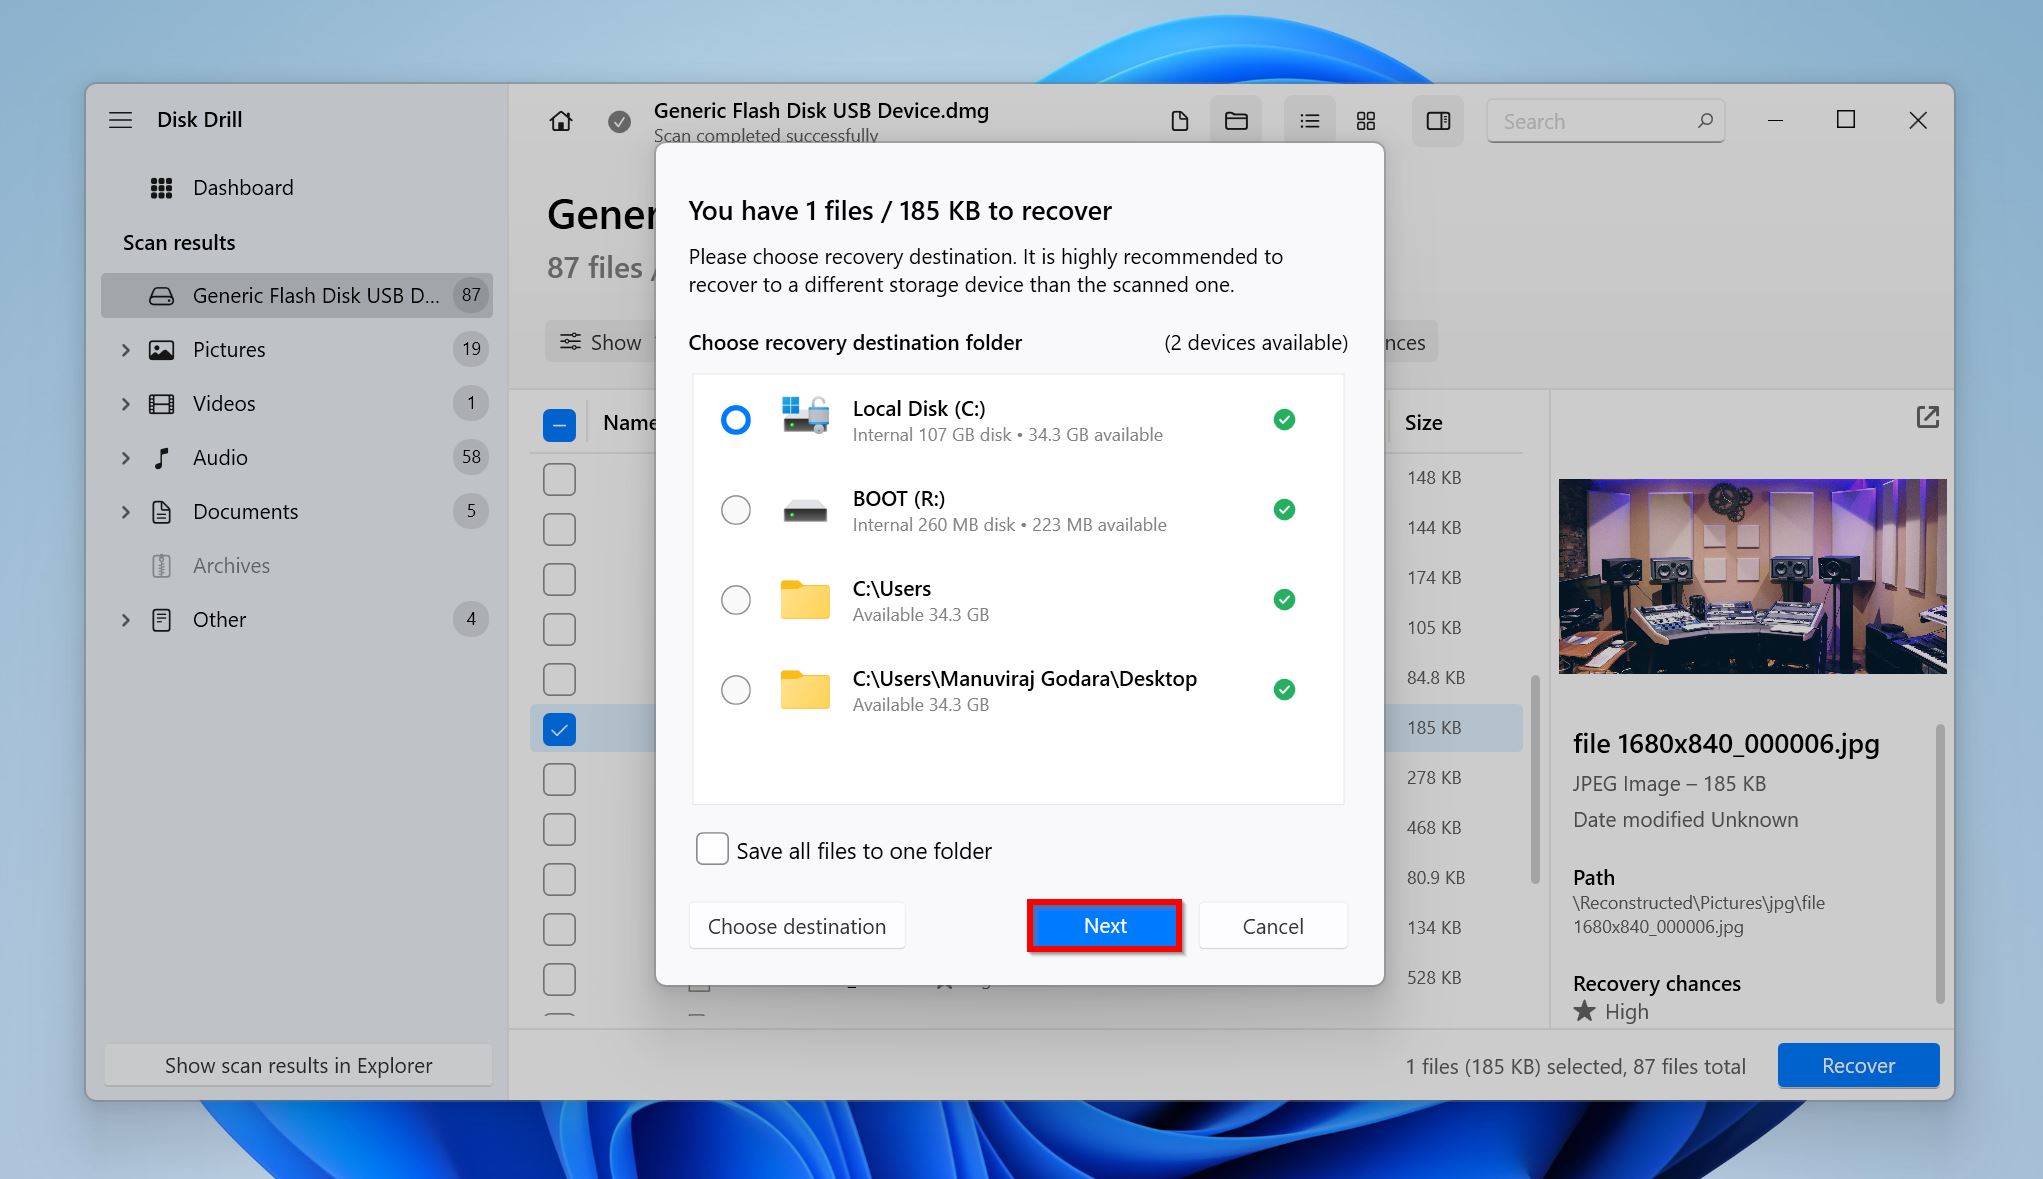
- Choose a recovery destination. Again, it’s best not to recover these files to the problematic SSD itself. Click on Next.
 Disk Drill will recover the selected files. You can recover up to 500 MB of data for free, as part of Disk Drill’s free trial (for Windows users only).
Note: SSDs have a feature called TRIM, which automatically clears up unused blocks of data for better storage management and longevity. The TRIM command is executed automatically during startup or at regular intervals. Thus, time is of the essence when it comes to SSD data recovery, as residual files deleted by TRIM cannot be recovered using data recovery programs.
Tips on Maintaining a Healthy SSD
SSDs offer exponentially faster data transfer speeds compared to HDDs. They’re also less susceptible to physical damage, thanks to the lack of moving parts. However, they are not immune to failure.
Stick to these thumb rules, and you’ll have a fuss-free experience with your SSD:
- Keep the software drivers updated. It’s best to regularly update Windows as well as manually check for driver updates using the Device Manager.
- Don’t Force Shutdown your PC. This can damage the integrity of your data as well as the SSD’s health.
- Don’t defrag an SSD. Unlike hard drives, SSDs do not require defragging. SSDs have limited read/write cycles, and defragging the SSD will shorten its lifespan.
- Avoid filling up the SSD to its full storage capacity. Ideally, don’t fill up your SSD to more than 70% of its total storage capacity. Doing so may cause performance issues.
Conclusion
Due to their tendency to fail unexpectedly, it’s important to regularly test an SSD’s health. You can do so using the Command Prompt, a third-party S.M.A.R.T. monitoring program, or a vendor-specific disk management program. It’s best to immediately back up your data if you plan to fix the errors on your SSD, as some fixes can cause data loss.
FAQ
- CrystalDiskMark (Windows).
- jDiskMark (Windows, macOS, and Linux).
- Parkdale (Windows, macOS, Linux, and Android).
- Run the wmic command, followed by the diskdrive get status command in an elevated instance of Command Prompt.
- Use third-party tools that can display the S.M.A.R.T. status of your drive.
- Use vendor-specific disk management tools.


