 HGST hard drives were known for their reliability and performance in their heyday. Much so that even after their production stopped, HGST drives continue to serve as a good option for data storage devices nowadays. But as your drive ages, it becomes more prone to errors that can cause data loss.
Whether your device has malfunctioned or has suffered data loss, we have different methods that you can try on how to recover data from an HGST hard drive and repair the disk. We’re going to teach you all these methods in this guide.
Table of Contents
What are HGST Hard Drives?
HGST hard drives are storage devices that were manufactured by Hitachi after it acquired IBM’s disk drive business in 2003. They were known for generally good quality products, with hard drives lasting for years in good condition.
HGST (Hitachi Global Storage Technologies) Inc. was initially a subsidiary of Hitachi that manufactured hard drives, solid-state drives, and other external storage devices. In 2012, Western Digital acquired the brand. But the HGST brand was ultimately phased out in 2018, and the products that remained are now marketed under Western Digital.
How to Recover Data from HGST Hard Drive
Using reliable data recovery software is the go-to method when it comes to hard drive recovery or any storage device, for that matter. Here’s how you can recover your files with different HGST hard drive recovery methods:
Method 1:Disk Drill
Disk Drill is a powerful and well-tested HGST data recovery software that has extra features to scan even malfunctioning HGST hard drives. For instance, you can use it to create a disk image of your hard drive for safer scans. It can also recover data from different file systems, including NTFS, exFAT, FAT32, and RAW.
With Disk Drill’s free trial version on Windows, you can recover up to 500 MB of files. Plus, it can scan and restore almost all file formats, from documents, audio, and video to photos and many more.
Here’s a simple step-by-step guide on how to recover data from an HGST hard drive with Disk Drill:
- To get started, download and install Disk Drill.
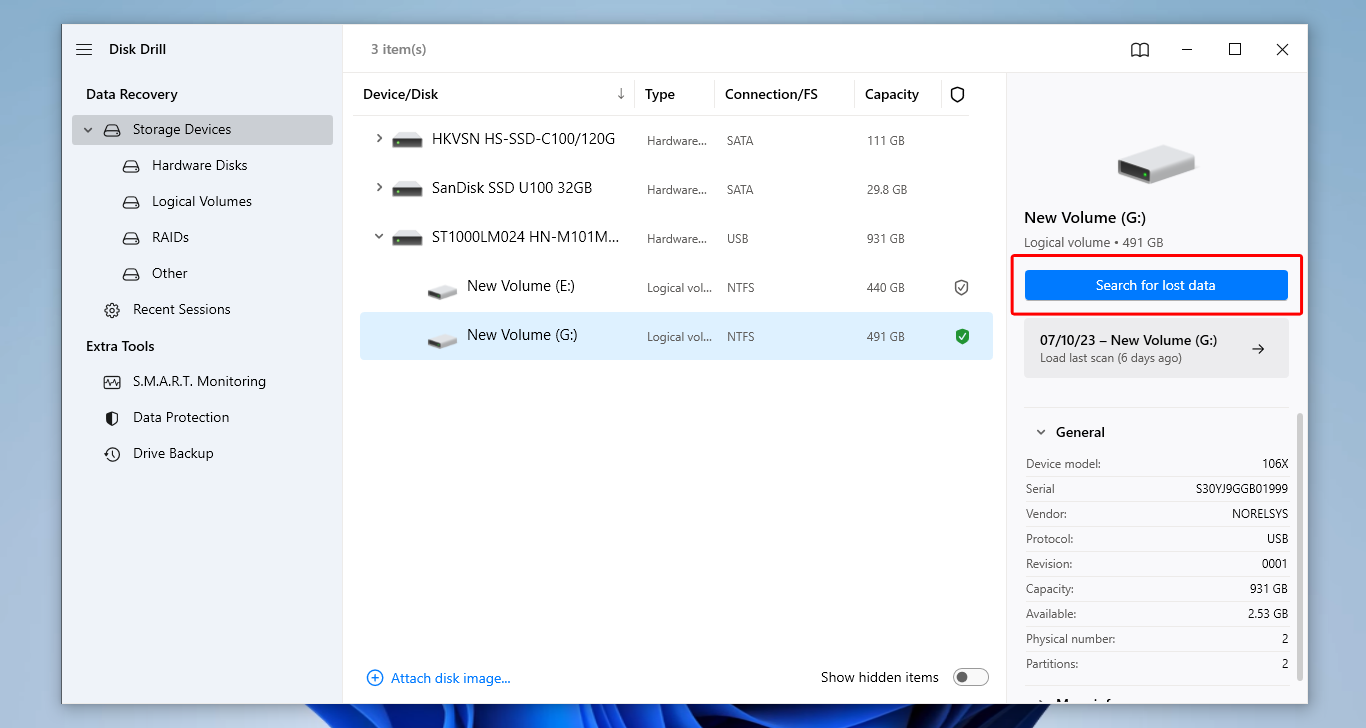
- Make sure that your HGST hard drive is inserted at this point. Then, launch the Disk Drill app. On the home page, you will see all the drives you can scan. Select your HGST hard drive and click the Search for lost data button on the right. This should begin the scan process for your hard disk.
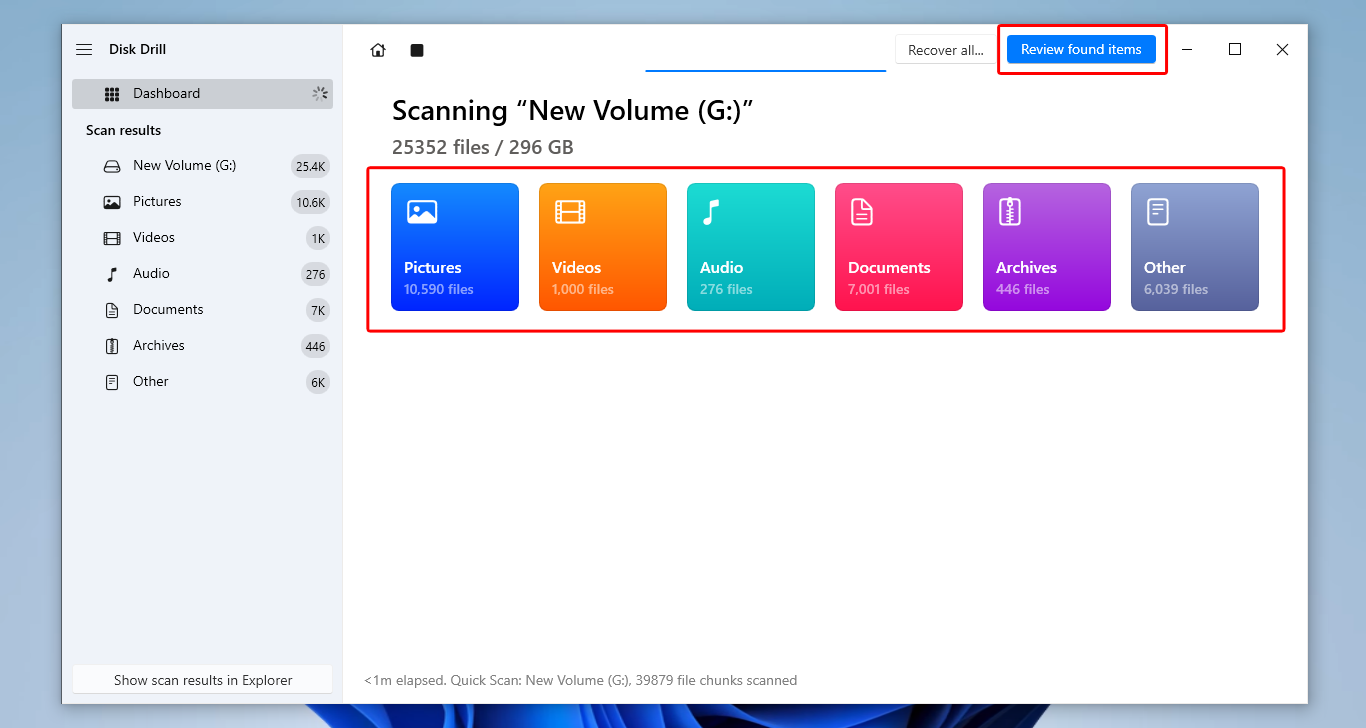
- Preview the files that Disk Drill has scanned so far by clicking Review found items, even when the scan has not finished yet. You can also filter the search results by different file types. Otherwise, you can let Disk Drill finish scanning your HGST drive first and skip to the next step.
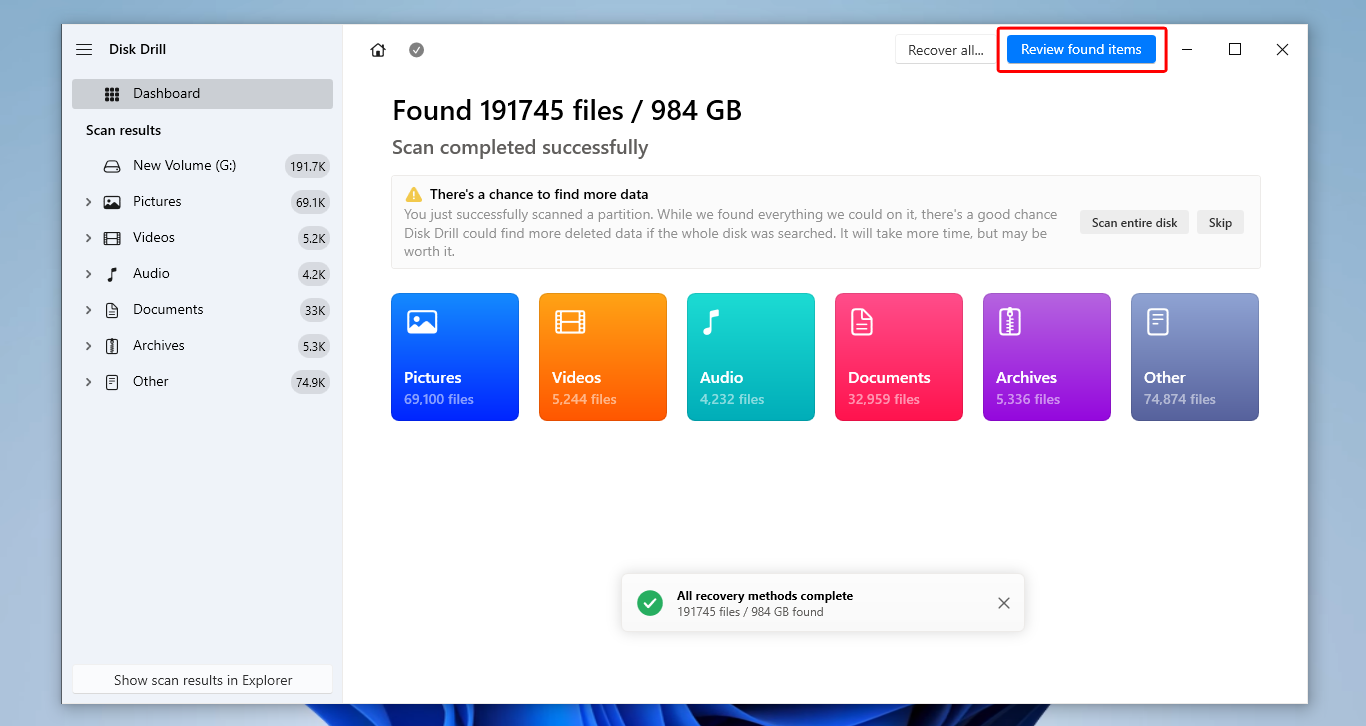
- Once the scan has finished, click the Review found items button on the top-right corner of the screen.
- Use the search bar to find the files you want to recover by filename. You can also scroll through all the scanned files and select every file you want to recover. After choosing your files, click the Recover button on the bottom right.
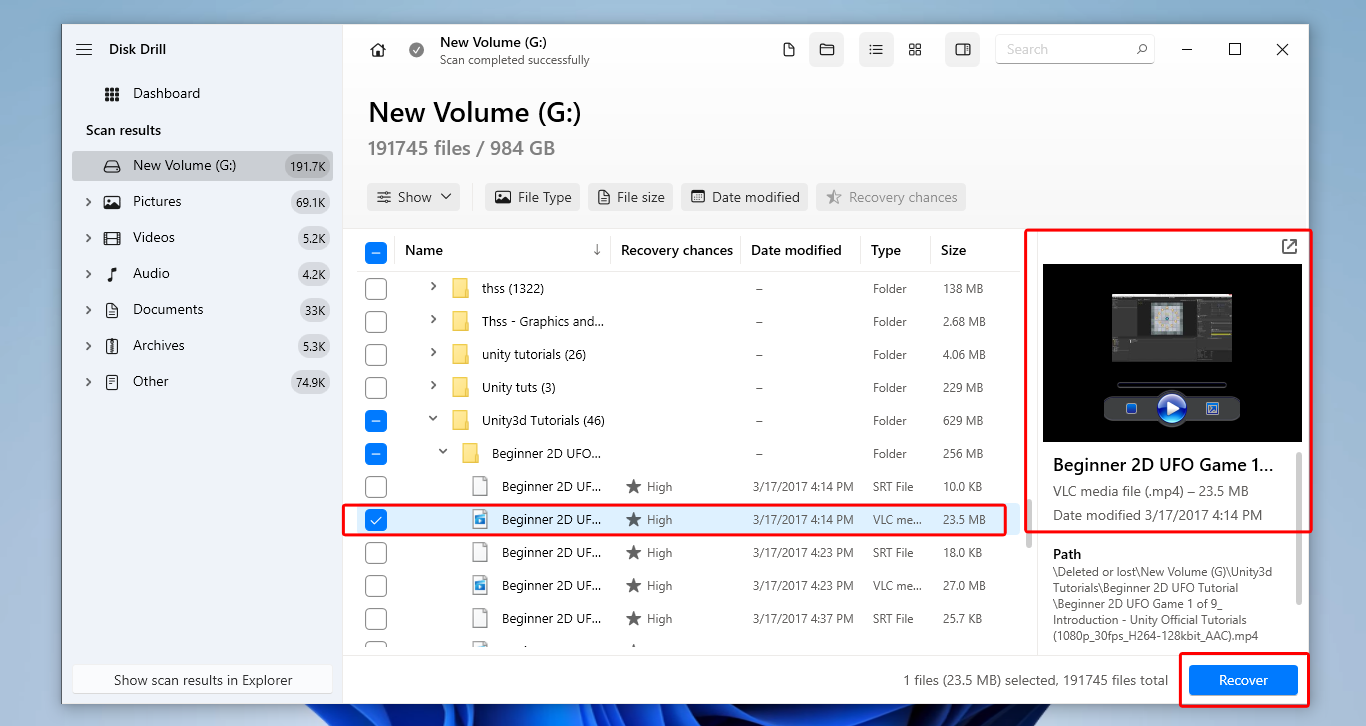
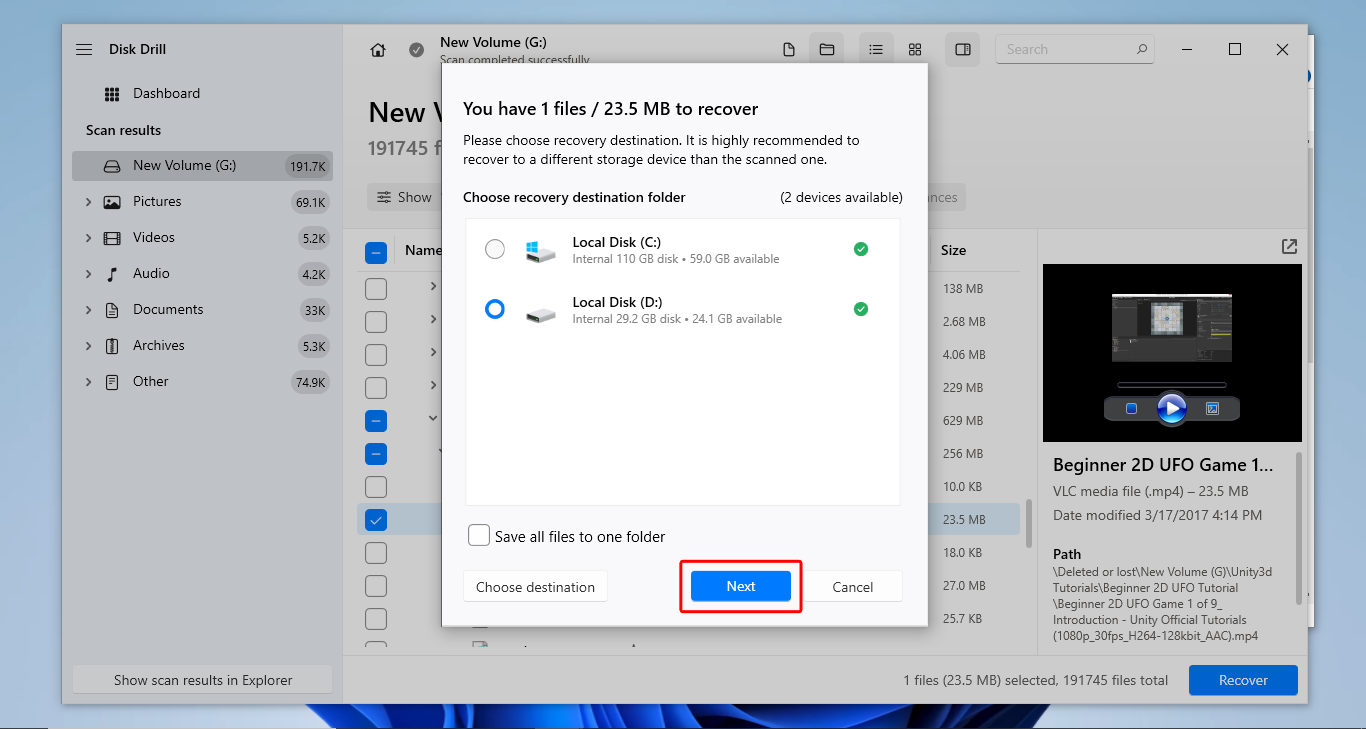
- Select where you want to put your recovered files and click Next. This should start the recovery process.
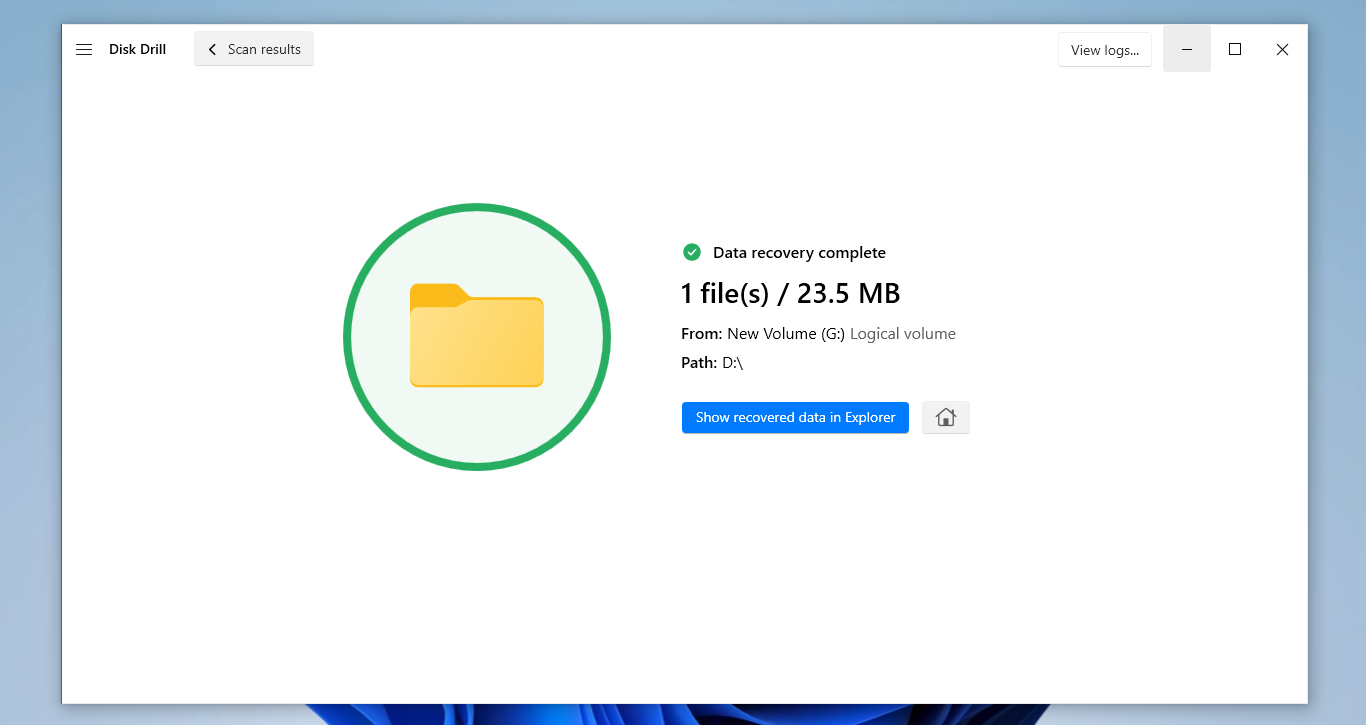
- After recovery, Disk Drill will display an information page containing how many files were successfully recovered, along with other details. Clicking Show recovered data in Explorer will open File Explorer and show all files recovered.
Method 2:PhotoRec
PhotoRec is a completely free data recovery tool that scans and recovers data from different storage devices, including HGST hard drives. This app does not need any installation to be used and can recover most of the basic file formats for photos, videos, documents, audio, and more.
PhotoRec runs on a command-line interface, which makes it difficult to interact with for some users who are not that tech-savvy. However, it’s still a good option to try since it can perform deep scans and effectively restore files.
Recover data from an HGST hard drive using PhotoRec by doing the following:
- First, download the PhotoRec zip from CGSecurity.
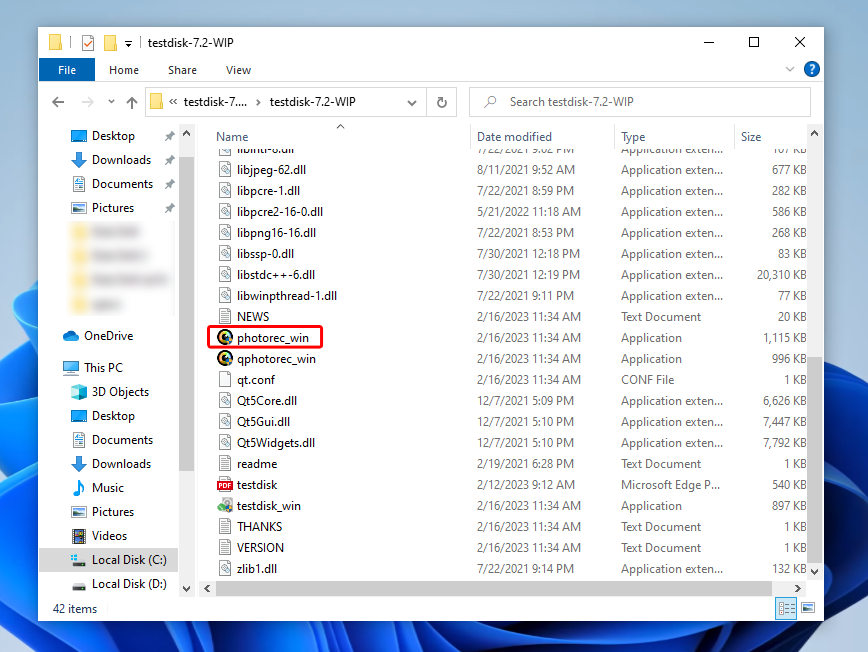
- Extract the zip file. Then, open the photorec_win file.
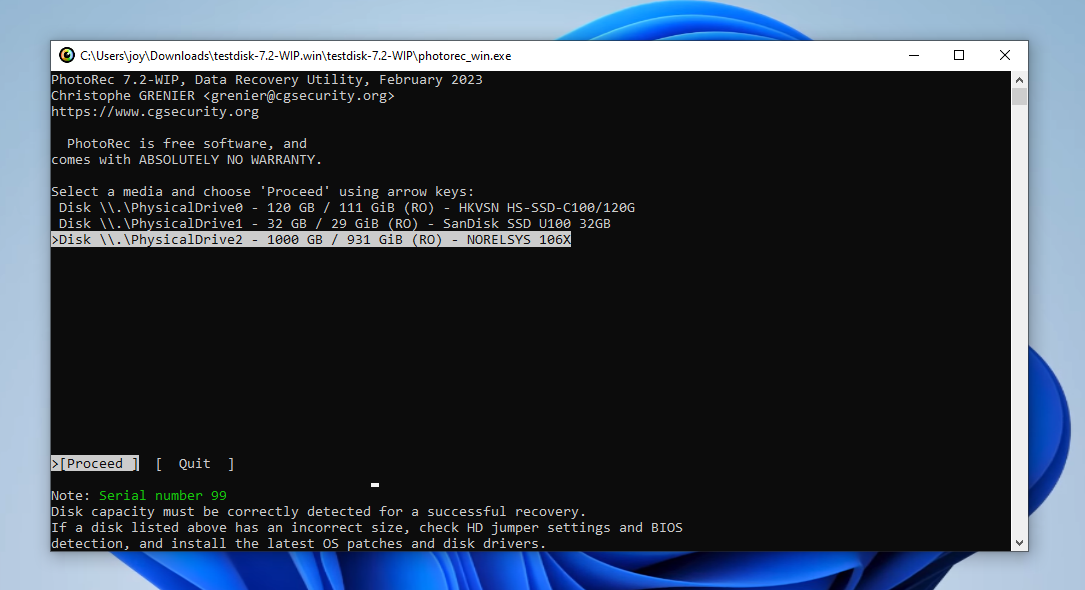
- PhotoRec will open in the command-line interface. This will display the disk partitions it can scan, along with the partition size and other descriptions. It will not show the hard disk names, so you have to find the hard drive you want to scan by size and file system.
- Select your HGST drive and press Enter.
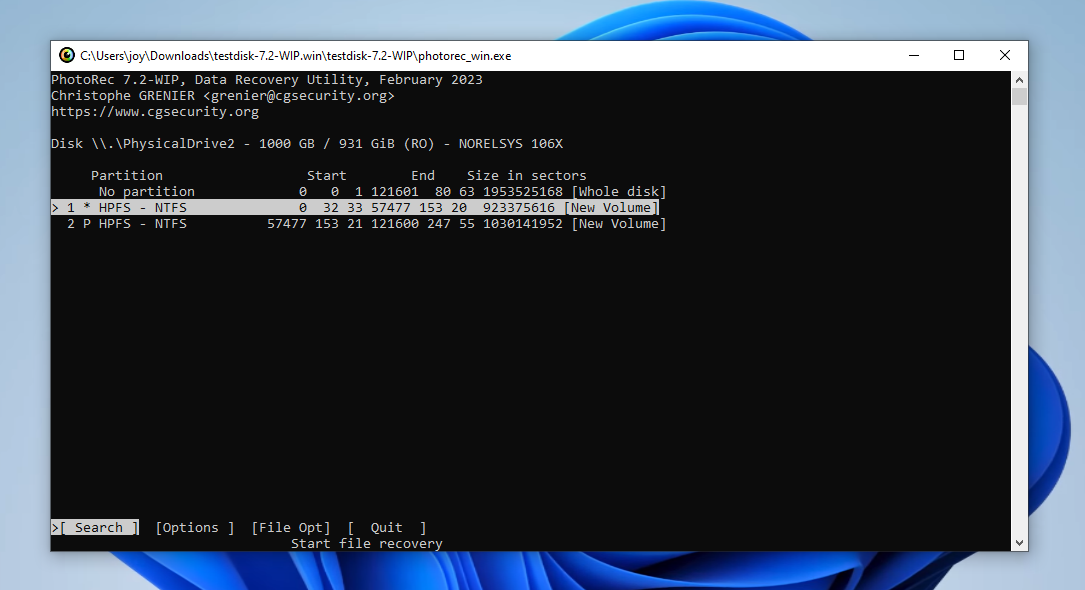
- Select the partition you want to scan and press Enter.
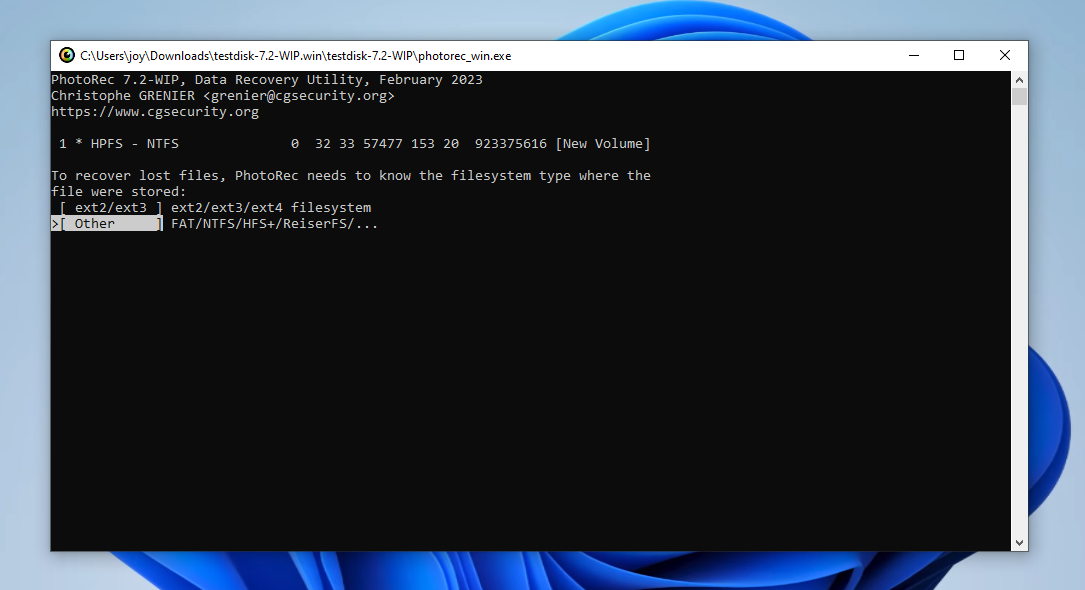
- Select the file system of your drive and press Enter.
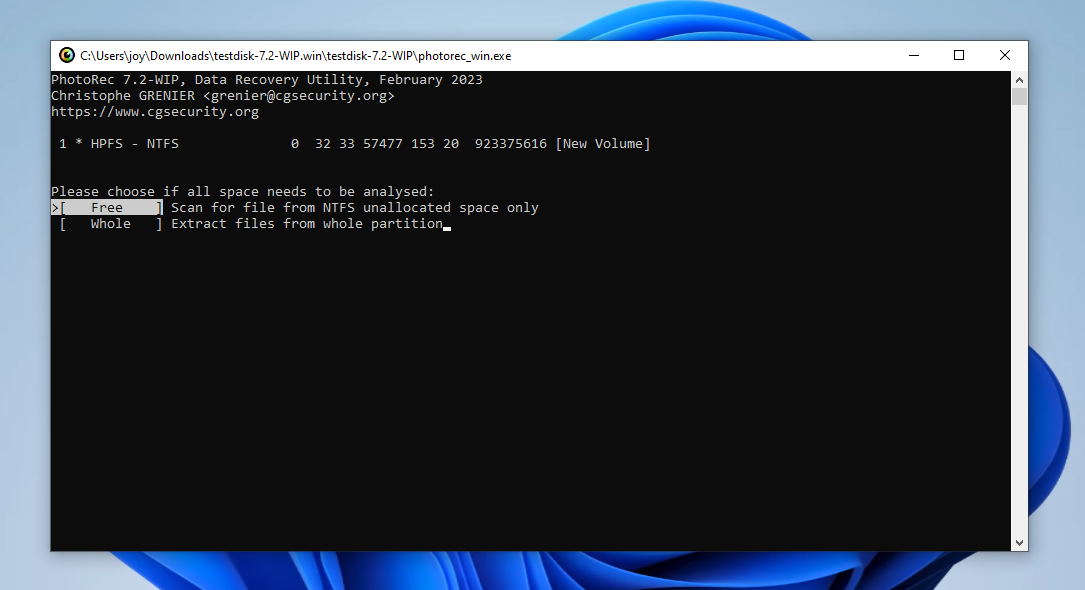
- Select how PhotoRec will scan your drive and press Enter.
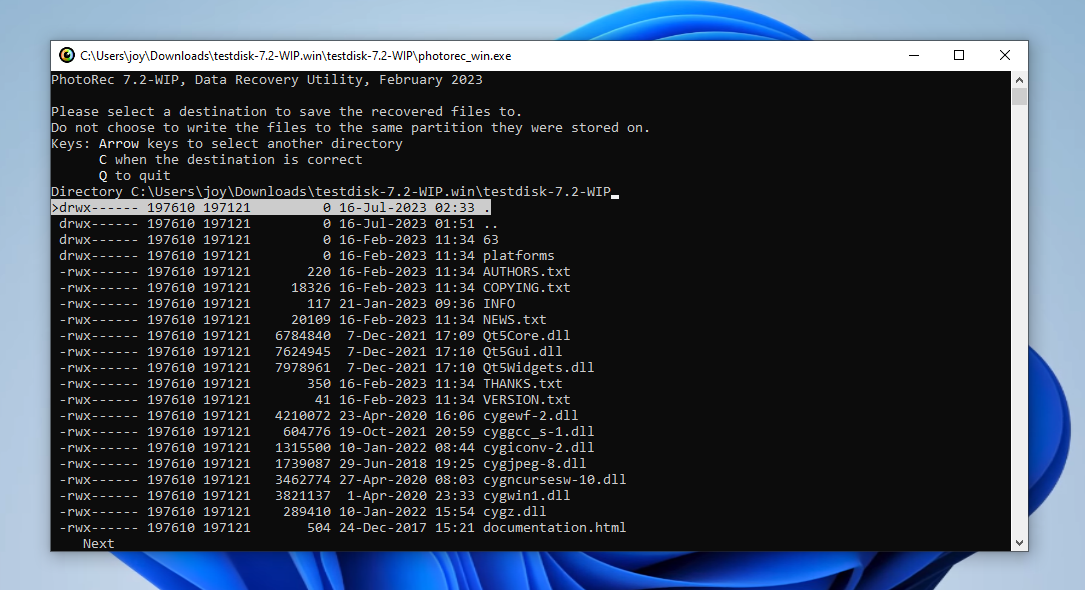
- Choose the file destination where Photorec will put your recovered files and press C. After this, the scanning process should start.
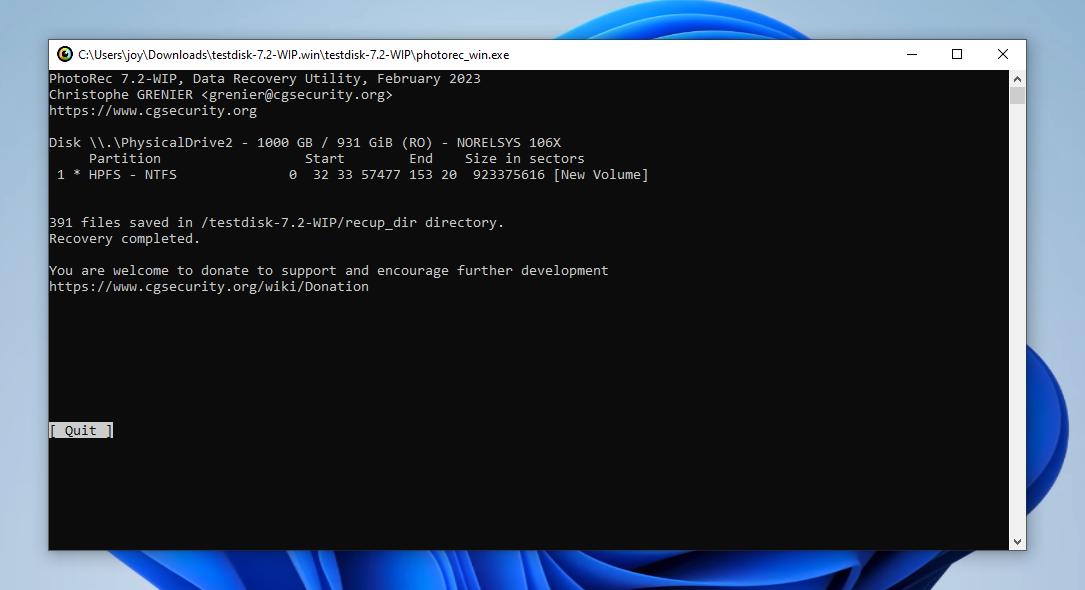
Once data recovery is made, PhotoRec will display a message saying, “Recovery completed.”
Method 3:Data Recovery Center
If data recovery using the previous methods did not work for your HGST hard drive, you could try to find and consult with a free HGST data recovery center near you. They can help you handle more difficult instances of data loss where the chances of successful data retrieval are slim.
Similarly, if your drive has significant physical damage, it might be time to consult a professional to help you get back your files. Handling data recovery on your own might risk your drive to further physical damage if you’re not confident about replacing your hard drive’s physical parts or handling repairs.
Just note that while consulting with a data recovery center might maximize HGST file recovery, it does not guarantee successful data recovery.
How to Repair Corrupted HGST Disk
After performing hard drive data recovery, you can now proceed to these methods to repair the drive without the risk of losing your files.
Method 1:Reconnect the Drive
While this sounds like a no-brainer, reconnecting your drive can be a simple way to reestablish a good connection with your computer. This method can fix intermittent glitches that may have led your drive to become inaccessible, along with other drive issues.
Simply unplug your storage device to start. Then, wait for a couple of seconds and plug in your storage device again. Afterward, test your drive out to see if your files can now be accessed properly.
Method 2:Update the Firmware
Different models of HGST hard drives may have slightly different ways and utilities used to update their firmware. While there are not many online resources on how to update your HGST firmware, they all follow a general guide with these steps:
- Take note of your HGST hard drive’s model and serial number. This is usually found on the label of your hard drive.
- Back up all the important files on your hard disk drive.
- Search for your specific hard drive’s firmware update tool. Install if any is found and follow the update instructions.
You can use different resources, like Dell’s product support page, to search for a possible firmware update utility for your specific drive model. You can also contact your storage device’s customer support to ask for assistance in updating your firmware.
Method 3:CheckDisk
Windows has different tools that can scan and fix different logical errors on different storage devices. CHKDSK is one of the command line tools that checks and repairs different software errors that might be present on your drive. It can also check for and repair bad sectors.
To repair your HGST hard drive using CHKDSK, follow these steps:
- Open Command Prompt as Administrator.
- Enter
chkdsk N: /r /x, where N is the drive letter of your HGST hard disk.
Entering the command above should trigger the repair process for your drive. CHKDSK will inform you once it is done repairing your device.
Method 4:Format
If none of the previous methods worked well for your HGST hard drive recovery, you can try formatting your drive as a last resort. Don’t forget to back up your files properly before proceeding, as formatting your hard drive erases all your files and resets some drive settings.
You can use File Explorer to format your drive or use the Disk Management tool. Disk Management is a built-in Windows tool that handles different drives and partitions.
Format your drive with Disk Management by doing the following:
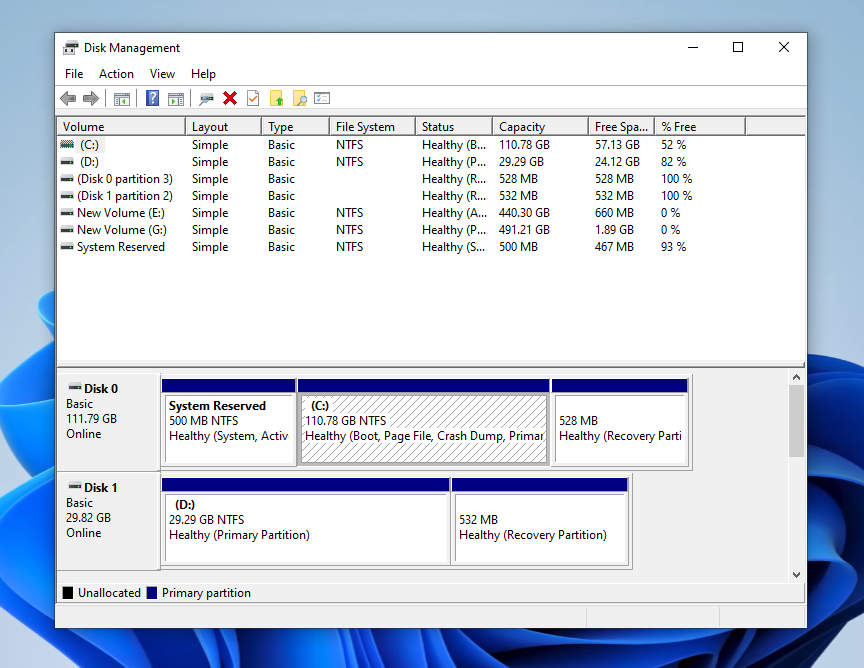
- Make sure that your hard drive is readable by your system. Then, open Disk Management.
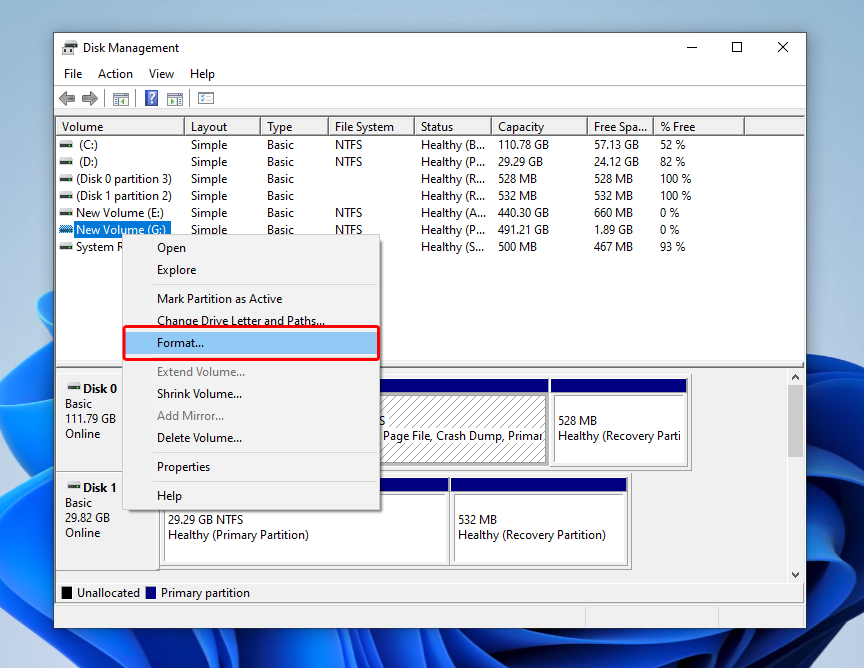
- Right-click on the drive you want to format and select Format.
- You can edit your hard drive name and select the appropriate file system before proceeding.

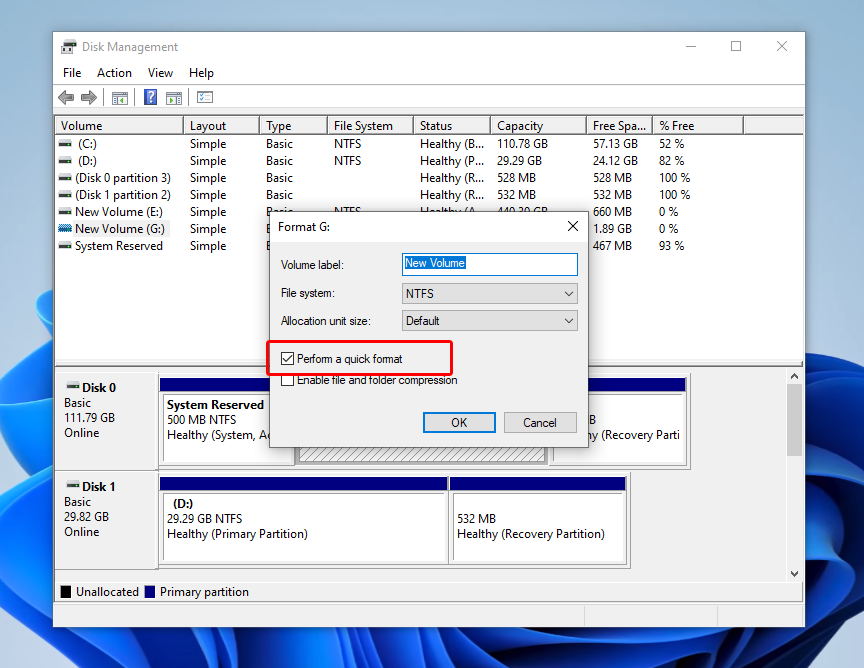
- Tick the Perform a quick format checkbox to enable quick formatting. Leave it unchecked to perform a full format.
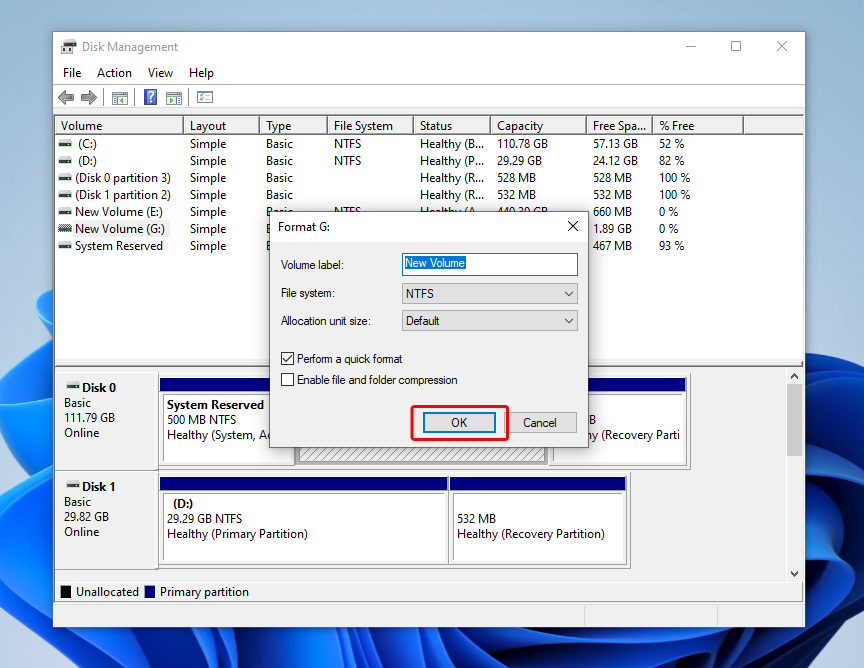
- Click OK to start the format process. This may take some time, depending on the size of your drive and the format process you selected.
Conclusion
Knowing how to recover data from an HGST hard drive and repair the disk can save you significant time, effort, and the possible cost of consulting a data recovery professional. If your hard drive is corrupted or malfunctioning, you should carefully use reputable data recovery software available online to restore your files.
Once you have a backup of your files, you can attempt to repair your drive with simple fixes like reconnecting your hard drive, updating its firmware, running CHKDSK, or formatting the hard drive.
Remember that your chances of successfully recovering your files and repairing your drive depend on the extent of the damage your hard drive suffered. For disk drives that have extreme physical damage, consult with professional data recovery services to maximize the chances of recovery.
FAQs
- Use reputable data recovery tools like Disk Drill or PhotoRec.
- Verify if you have an existing backup of your drive.
- Contact data recovery professionals for assistance.


")
