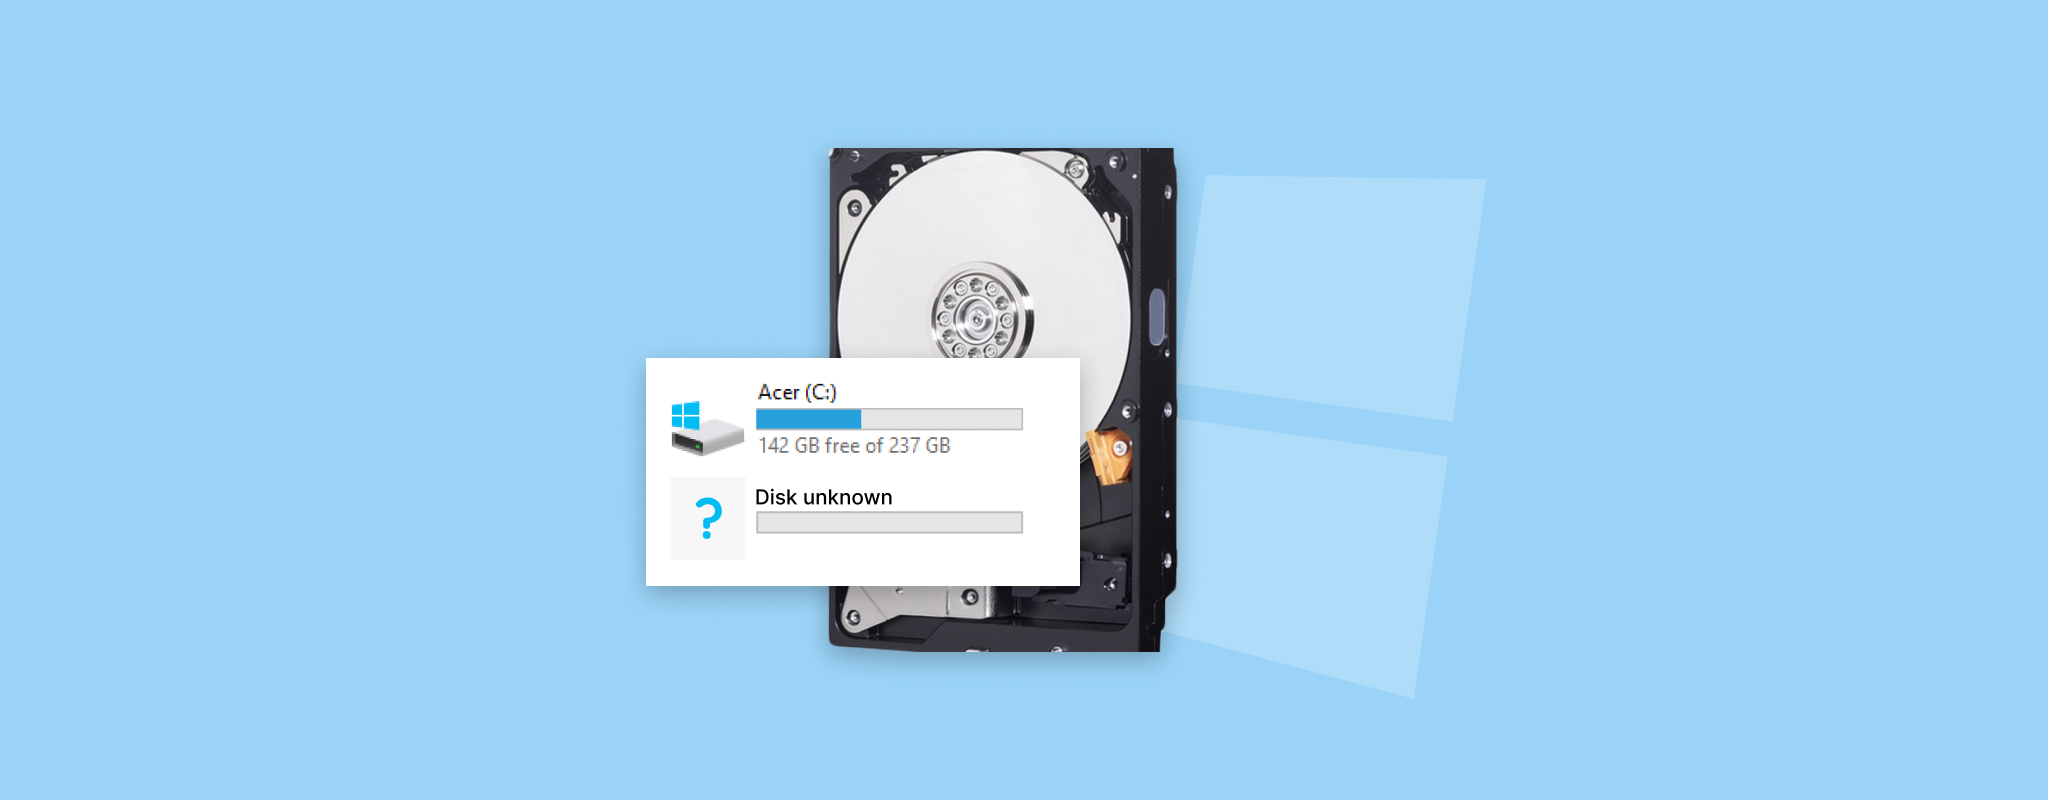
 You’ve probably at least once came across an instance where your PC won’t detect your hard drive. If you’re experiencing the same problem right now, you’re probably wondering why your hard drive is not showing up and how to recover data from it.
In this guide, we tell you why your computer isn’t recognizing your hard drive, how to recover important data from an inaccessible hard drive, and how to get your computer to recognize the hard drive.
Table of Contents
Why is My Hard Drive Not Showing Up
Following are the reasons why your hard drive might not show up on your PC:
- 📁 File system corruption: A filesystem may become corrupt and render your hard drive inaccessible. However, you’ll still be able to recover data since the damage is logical, not physical.
- 🚫 Unsupported file system: If the hard drive’s file system isn’t compatible with Windows, your computer won’t recognize it.
- ❌ Failing USB port: Your USB port might fail over time because of wear and tear. Try another USB port, or a USB port on another computer if that’s an option.
- ⚡ Insufficient power: It’s possible that your hard drive isn’t able to draw enough power from the USB port. This is especially true for larger, non-portable drives. Try changing the USB port, or if your hard drive comes with two USB plugs, make sure that both of them are plugged.
- 🤕 Physical damage: Physical damage to the hard drive can cause the drive to become inaccessible and even inoperable. When recovering data from a failing hard drive, you should create an image of the drive and then recover data from the image before troubleshooting. This will help avoid further damage or overwriting the files. If there’s severe damage, though, you might not be able to recover data yourself.
Is it Possible to Recover Data from a Hard Drive That Isn’t Detected
There are several factors to consider before you determine whether you can recover data from a hard drive that doesn’t show up. For instance, in case of severe physical damage, you might not be able to recover data from it and will need to avail services of a professional data recovery service.
On the other hand, if your PC isn’t recognizing the hard drive because of a logical error like file system corruption, there’s a good chance that you’ll be able to recover the data using an intelligent data recovery tool like Disk Drill.
To verify if the data on your hard drive is recoverable, you’ll need to check the Disk Management console. Search for disk management in the Start Menu and select Create and format hard disk partitions. This will launch the Disk Management console.
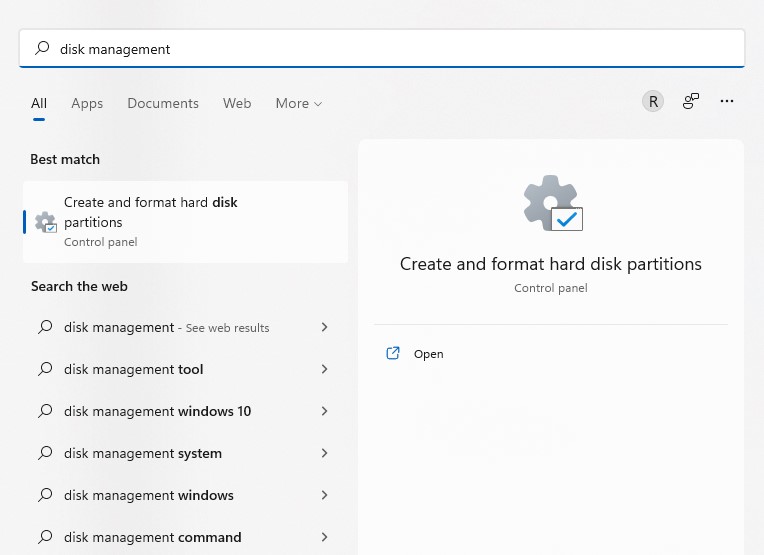
If your hard drive is listed in the console along with its correct size, then you’ll be able to scan the drive and possibly also recover the data. If the external hard drive is not showing up in disk management, you’ll need to send the drive to a technician.
How to Recover Data from a Hard Drive That Isn’t Detected
Disk Drill is a comprehensive and highly trusted data recovery tool that works excellently with hard drives. It has been tested even with corrupted drives and those that do not appear in File Explorer.
For those interested in trying out Disk Drill’s free trial version on Windows, you can explore its features and recover files of up to 500 MB. The application is capable of locating and recovering a wide range of file formats, including photos, videos, music, documents, and more.
To recover files from your hard drive using Disk Drill, simply follow the steps outlined below:
- Download Disk Drill and install it on your PC. The free version will allow recovering up to 500MB of data.
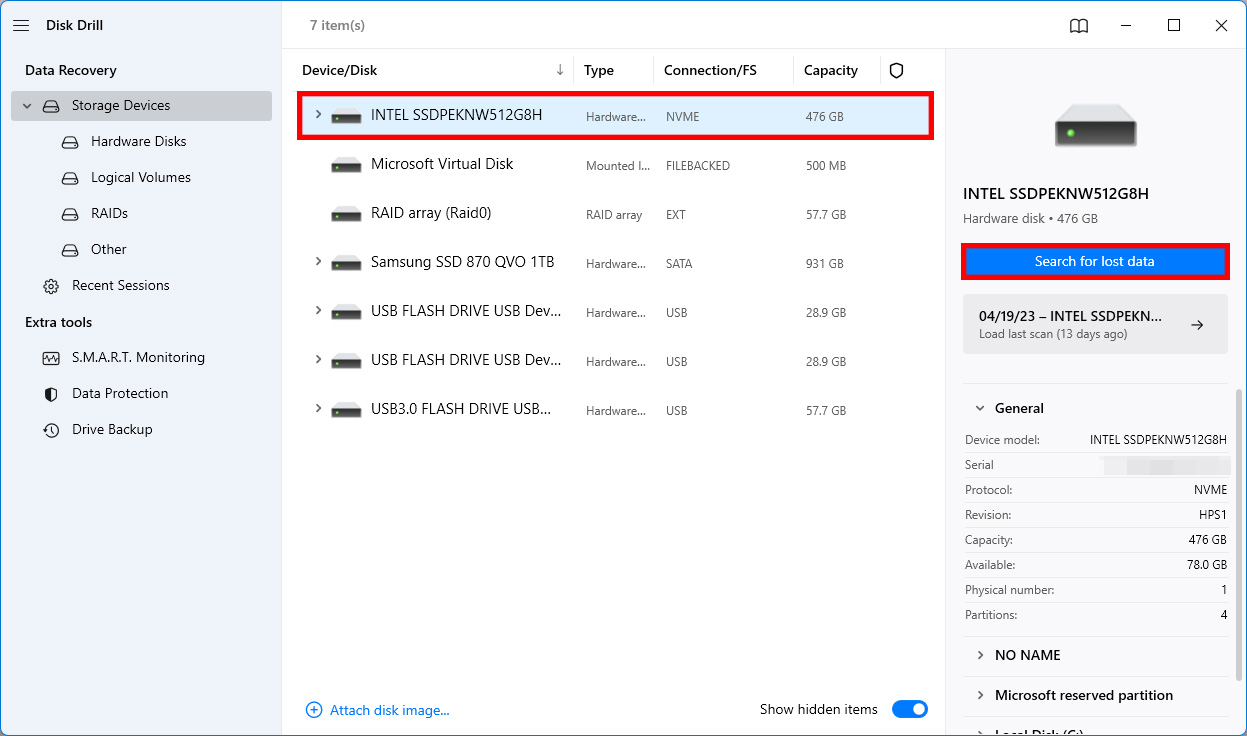
- Once you’ve installed Disk Drill, launch the app and select your hard drive from the app’s home screen. Then click on the Scan for lost data button at the bottom right.
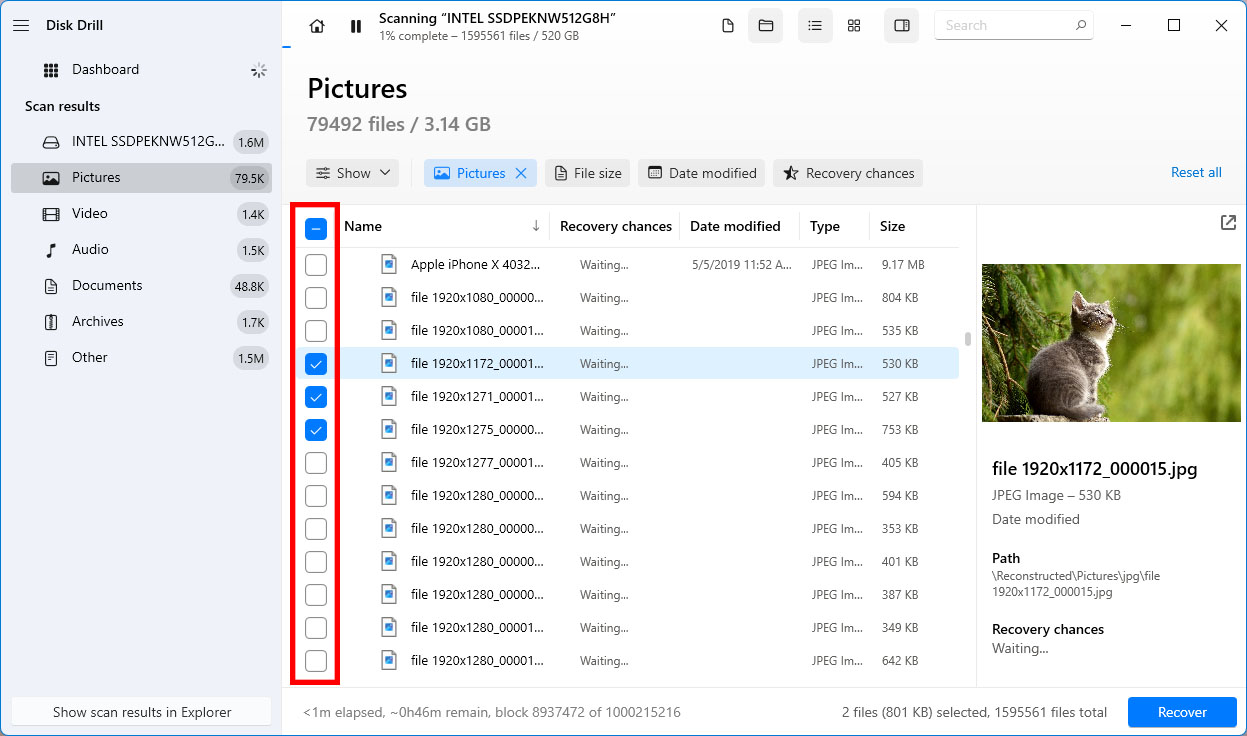
- Once Disk Drill completes scanning, you’ll see a list of files it found on the hard drive.
- Select the files you want to recover by checking the box to the file’s left. Once you’ve selected the files, click on the Recover button at the bottom.
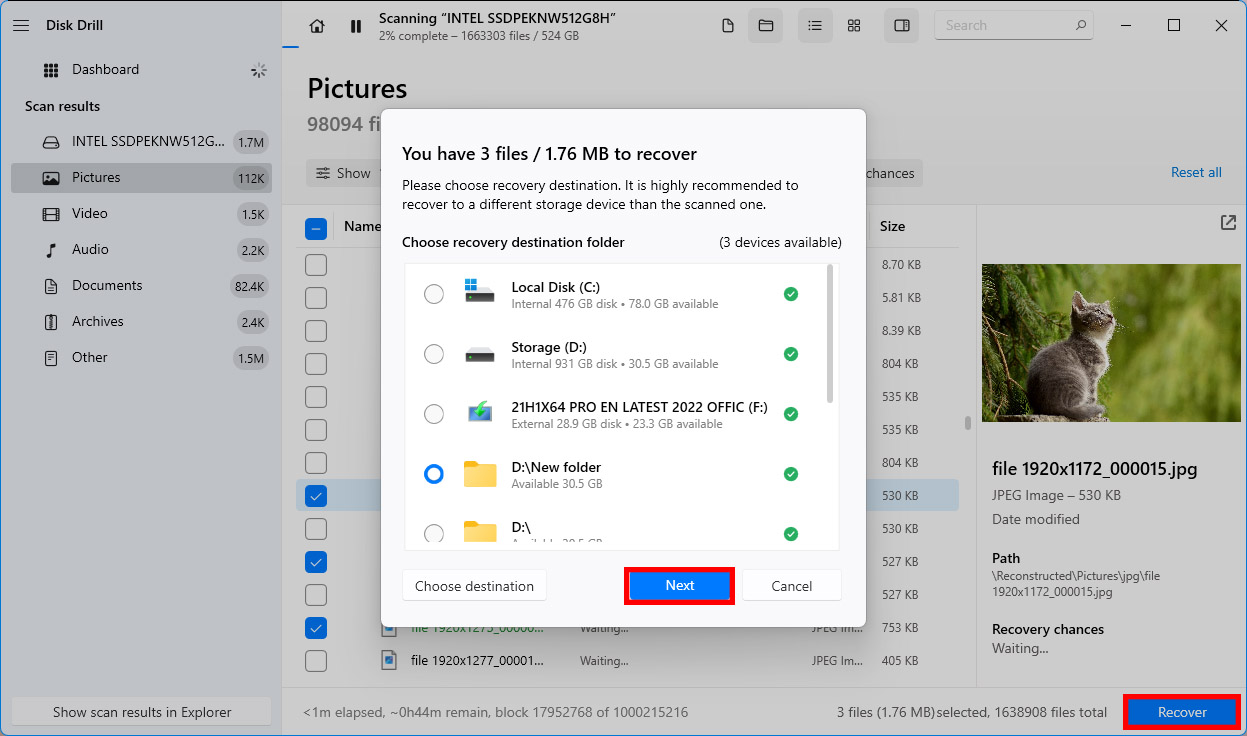
- Choose a recovery location. Note that the recovery location shouldn’t be on the hard drive, otherwise you risk overwriting the data.
What to Do if Hard Drive is Not Detected?
Once you’ve recovered the data, you can start trying to fix the hard drive so you can use it again. Following are a few methods you can try when your PC isn’t recognizing the hard drive.
Method 1: Plug the Hard Drive into Another Port or Computer
If your hard drive is not showing up in the file explorer, it may be because of insufficient power in the USB port or because the port is failing. You should try plugging the hard drive into another port on the same PC. If that doesn’t work, try plugging it into another computer’s USB port to check if the problem is with the PC or the hard drive.
Method 2: Update Drivers
Outdated or corrupt drivers can be another potential reason for your computer not detecting the hard drive. Updating the driver or uninstalling and reinstalling the driver can be helpful. In most cases, Windows will help you update drivers automatically. The easiest way to automatically update the driver is by uninstalling it:
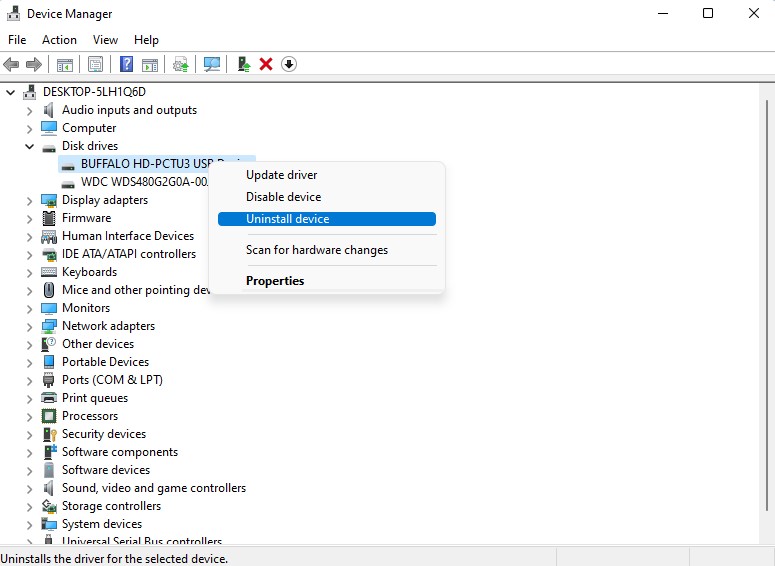
- Launch the Device Manager by searching for device manager in the Start Menu and selecting the Best Match.
- Find the hard drive driver, right-click on it, and select Uninstall. Confirm when prompted by clicking the Uninstall button.
- The driver should disappear once it’s uninstalled. Next, click on Action from the top ribbon and select Scan for hardware changes.
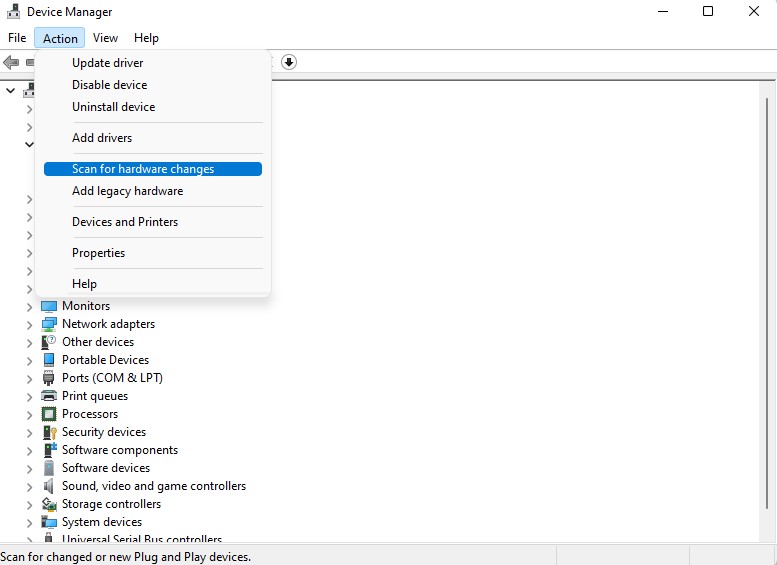
Windows will automatically reinstall the latest driver for the device once you do this. Hopefully, you should also see your hard drive in the file explorer now.
Method 3: Use the Built-in Troubleshooter
Windows has several built-in troubleshooters that help determine and automatically fix issues. If you’ve tried the previous methods but couldn’t access your hard drive, the built-in troubleshooter is worth a shot.
The only problem is that the Hardware and Devices troubleshooter no longer exists in Windows 11. However, there’s an alternative way for running this troubleshooter that works on both Windows 10 and 11:
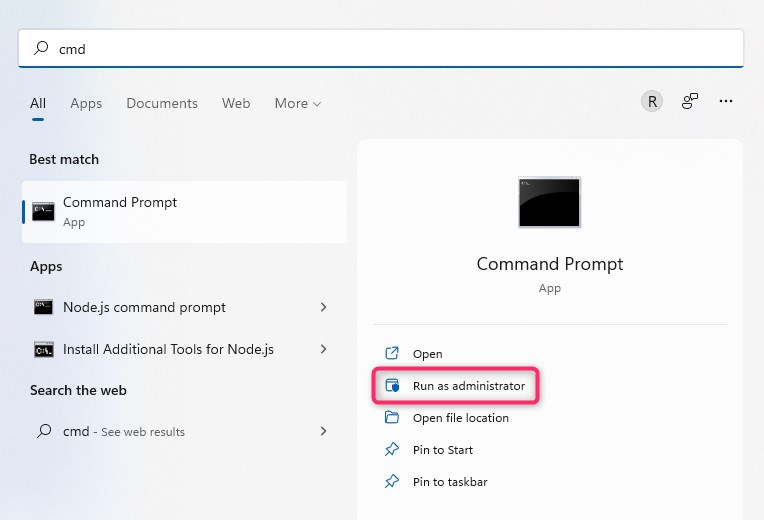
- Search the Start Menu for cmd and run the Command Prompt as an administrator.
- Execute the following command:
msdt.exe -id DeviceDiagnostic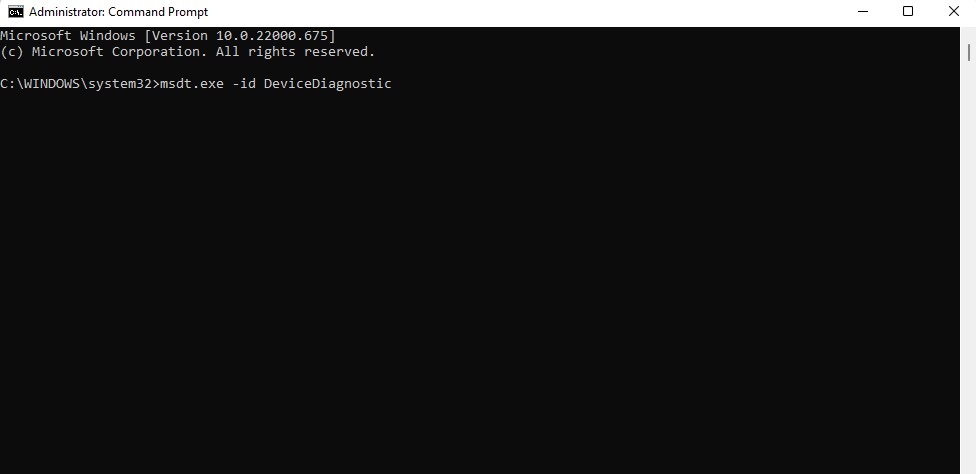
- This will launch the Hardware and Devices troubleshooter. Follow the wizard’s instructions. The troubleshooter will then try to identify the issue and fix the issues it finds automatically.
Method 4: Initialize the Drive
If your hard drive is new and not yet formatted, you may need to initialize it so you can use it. However, note that initializing a disk deletes everything that exists on the drive. To initialize a new disk:
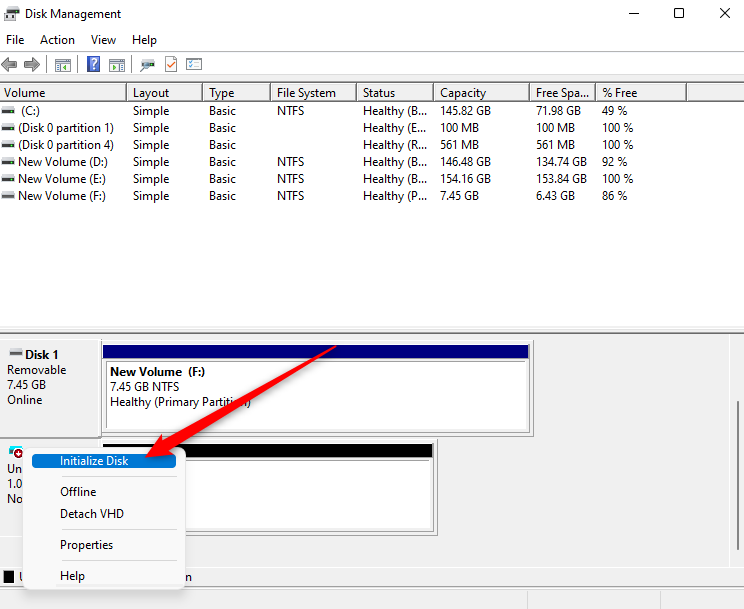
- Search for device manager in the Start Menu and select Create and format hard disk partitions to launch Disk Management.
- Find the disk you need to initialize, right-click on it, and select Initialize Disk.
- A dialog box should open. Select the appropriate disk and partition style (select GPT if you’re running Windows 10 or 11) and click OK.
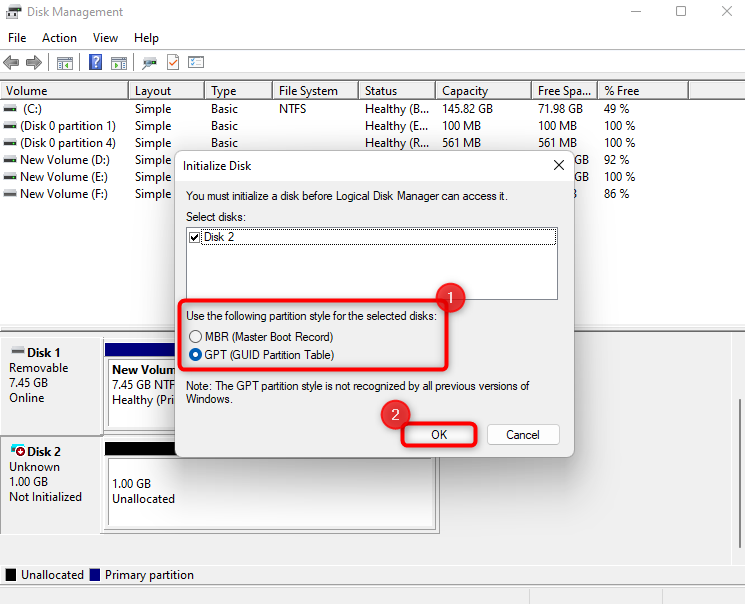
- Continue following the prompts to create a New Simple Volume, give the partition a size (the default is set to the full drive size), assign a drive letter, and select NTFS (or FAT or exFAT based on your preference) and click Finish.
Method 5: Assign a Drive Letter
As simple as it sounds, assigning or changing the drive letter can also make your hard drive accessible. To assign or change the drive letter:
- Search for disk management in the Start Menu and select Create and format hard disk partitions to launch the Disk Management console.
- Right-click on the hard drive and select Change Drive Letter and Paths.
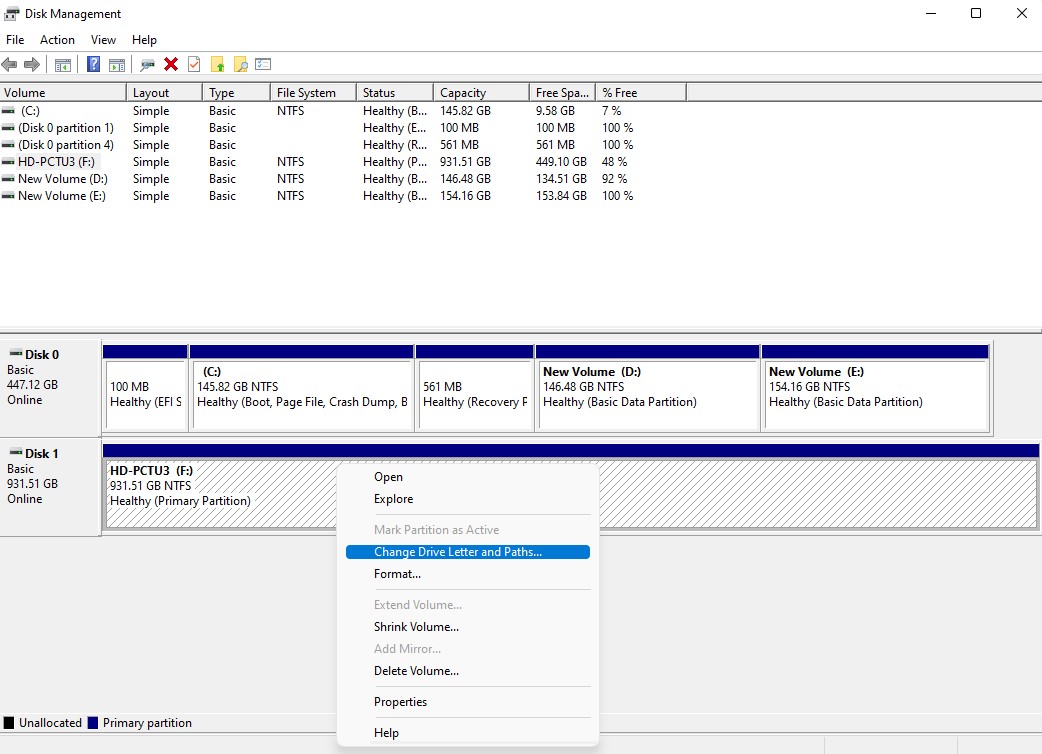
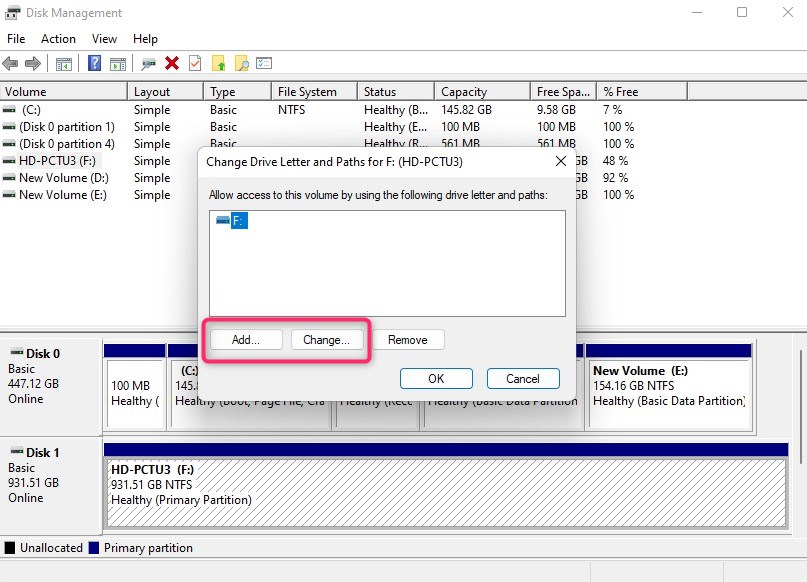
- Select Add to assign a new drive letter or Change to change the currently assigned drive letter.
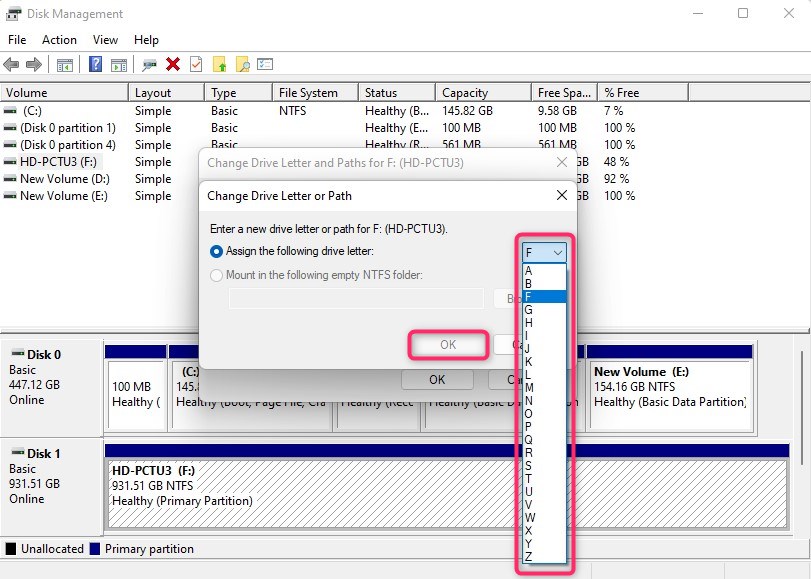
- Select a letter from the drop-down list and click OK to exit.
Method 6: Set Drive Online
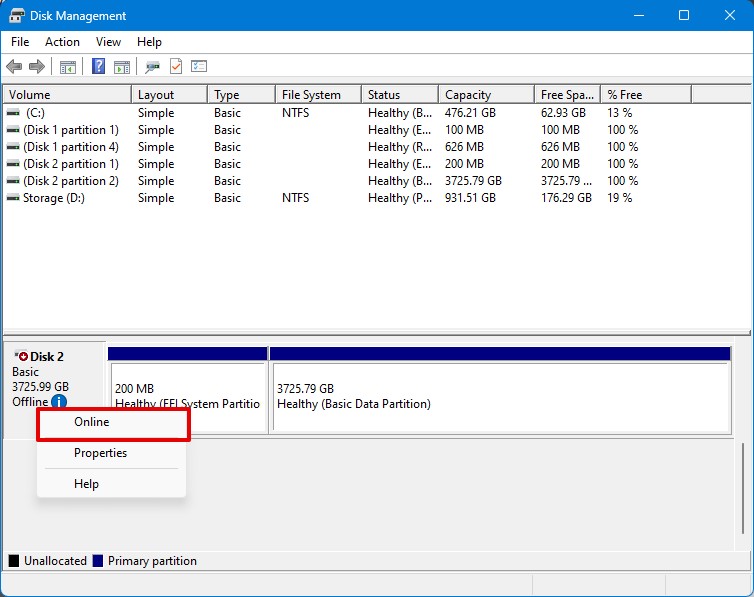
If you find that your hard drive is not appearing in File Explorer due to being offline, you can reactivate it using Disk Management. Follow these easy steps to proceed:
- Press the Win + X to open the shortcut menu. Then, select Disk Management in the options to open the app.
- Look for your hard drive in the Disk Management window and right-click on it.
- Select Online from the drop-down menu to set your drive back online.
After completing this process, you can go back to File Explorer to check if your drive is now accessible.
Method 7: Import Foreign Drive
In some cases, when you insert a dynamic disk into your computer, it may be recognized as “Foreign.” To resolve this issue, you can import your foreign drive using Disk Management. Follow these steps:
- Press the Win + X to open the shortcut menu. Then, select Disk Management to open the app.
- Locate your disk marked as Foreign and right-click on it.
- Select Import Foreign Disks and follow the Windows instructions to successfully import your foreign drive.
Method 8: Configure New Partition
Configuring a new partition is your next step If your hard drive’s current partition is corrupted or your disk space is unallocated. Here’s how you do it in Disk Management:
- Press the Win + X to open the shortcut menu. Then, select Disk Management to open the app.
- In Disk Management, locate your drive and right-click on it. Then, select New Simple Volume.
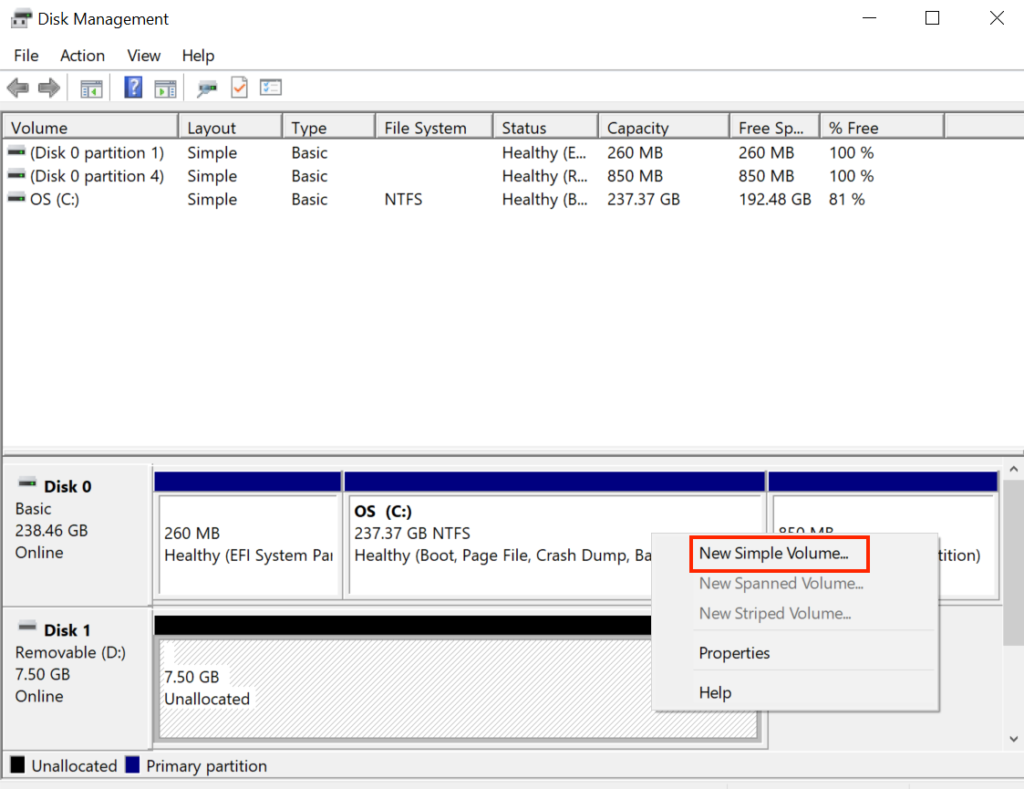
- When prompted, specify the partition size, file system format, and other details for your partition.
Method 9: Format the Drive Using CMD
If you are unable to format the drive using more common methods, such as using File Explorer, it is possible that your drive is suffering from a logical error.
Drives with logical issues can be formatted using DiskPart via the Command Prompt. Here’s how you can do it:
- Run Command Prompt as an administrator by pressing the Windows key, typing “cmd”, and selecting Run as administrator from the options that appear.
- Type
diskpartand press Enter to activate the Diskpart tool.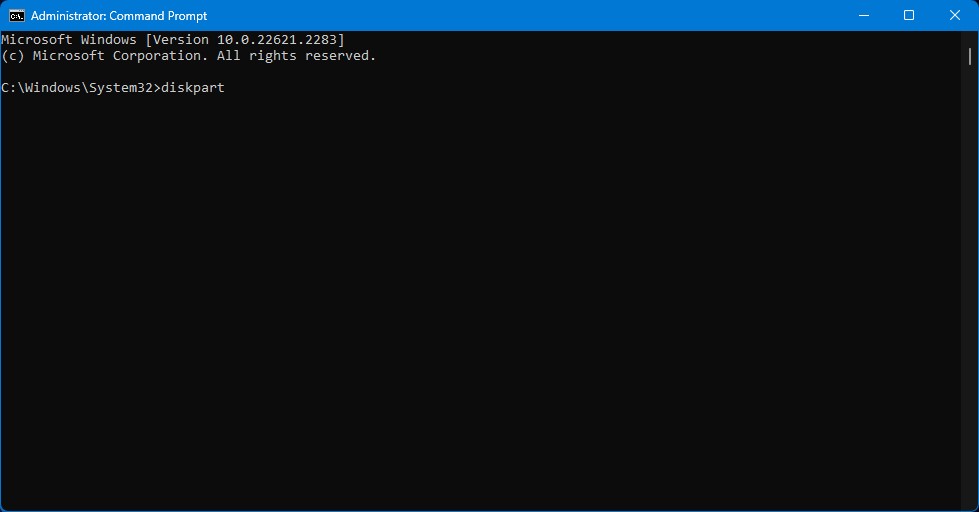
- Type
list diskand press Enter to list all drives currently available in your computer. - Make a note of the disk number corresponding to your hard drive.
- Type
select disk N, replacing N with the disk number of your drive. Then, press Enter. 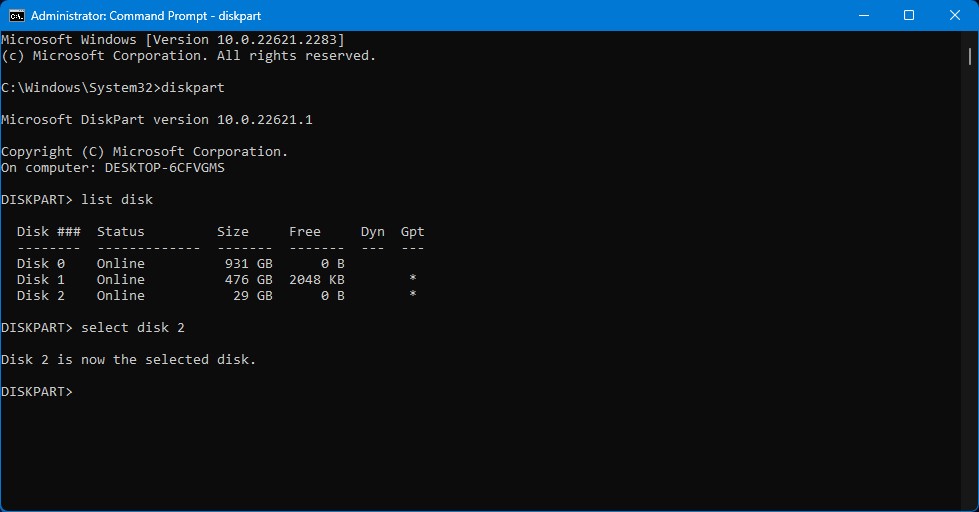 Type
Type cleanand press Enter to erase data and partition information on your drive.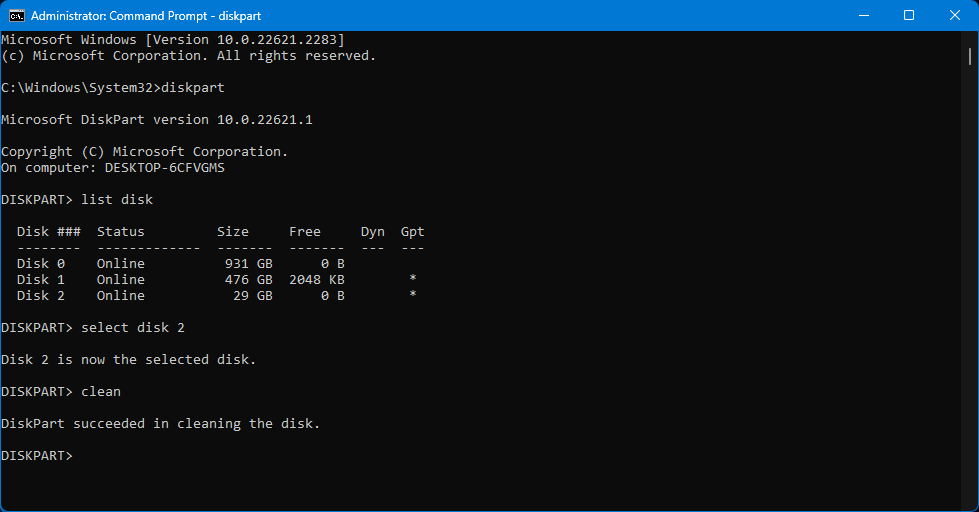
- Type
format fs=fat32to format your disk to fat32. Replace fat32 with with the file system you prefer (e.g. format fs=NTFS).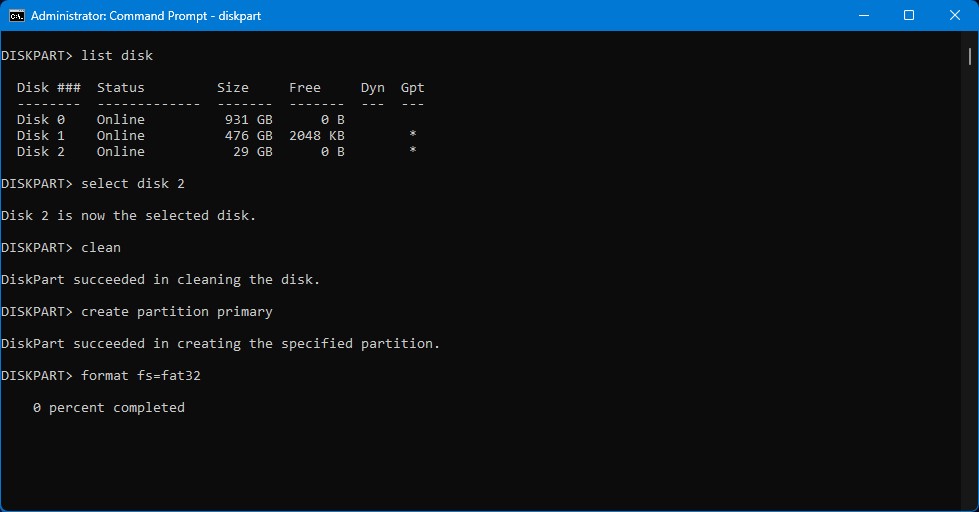
Once the formatting process is complete, type exit and press Enter to exit the tool.
Conclusion
A hard drive that doesn’t appear in File Explorer may be experiencing software or hardware issues. Software problems can arise from file system corruption or an incompatible file system, while hardware issues like a faulty USB port can render your drive inaccessible through File Explorer.
Various methods can be employed to repair your drive, but some of these methods carry a risk of data loss. Since you can’t access your drive, it’s advisable to use reliable data recovery software like Disk Drill to retrieve your files and minimize data loss.
After safeguarding your data, you can attempt repair methods such as updating your drivers, using Microsoft Troubleshooter to identify errors, or utilizing Disk Management. With Disk Management, you can initialize your drive, assign a new drive letter, bring your drive back online, import a foreign drive, or set up a new partition to replace corrupted ones.
If none of these methods prove effective, you can consider formatting your drive using DiskPart in the Command Prompt.


