 Did you know that your external hard drive actually has a recycle bin of its own? Like the Recycle Bin found on your Windows desktop, deleted files are sent there until they’re permanently deleted by being overwritten.
The recycle bin on your external hard drive is great for recovering files that weren’t supposed to be deleted. In this article, we’ll discuss the recycle bin on external hard drives and how you can access it to recover some of your deleted files.
Table of Contents
What Is Recycle Bin on an External Hard Drive
The Windows Recycle Bin is used to temporarily store data that you’ve deleted. This gives users a chance to easily restore data that they weren’t supposed to delete. You’re probably only familiar with the Recycle Bin that appears on your desktop. But, external hard drives (and other removable storage like USB drives) can have their own hidden recycle bin. When visible, it is a folder named $RECYCLE.BIN, RECYCLED, or RECYCLER, depending on your file system.
When a file is deleted, it’s not wiped from your drive. Instead, its entry is deleted from the Master File Table (MFT), telling Windows that new data can be saved to that location. When new data overwrites the old data, then the data is unrecoverable. Until then, there’s a chance you can open the recycle bin folder and restore your data. Even if it’s missing from the external drive’s recycle bin, there’s still a chance of getting it back, much like recovering deleted files from the Windows Recycle Bin.
How to Access and Manage the Recycle Bin Folder
The recycle bin on your external hard drive is hidden by default. You can view the recycle bin by making it visible. Follow these instructions to view the hidden recycle bin on your external hard drive:
- Open File Explorer.
- Click View, then Options.
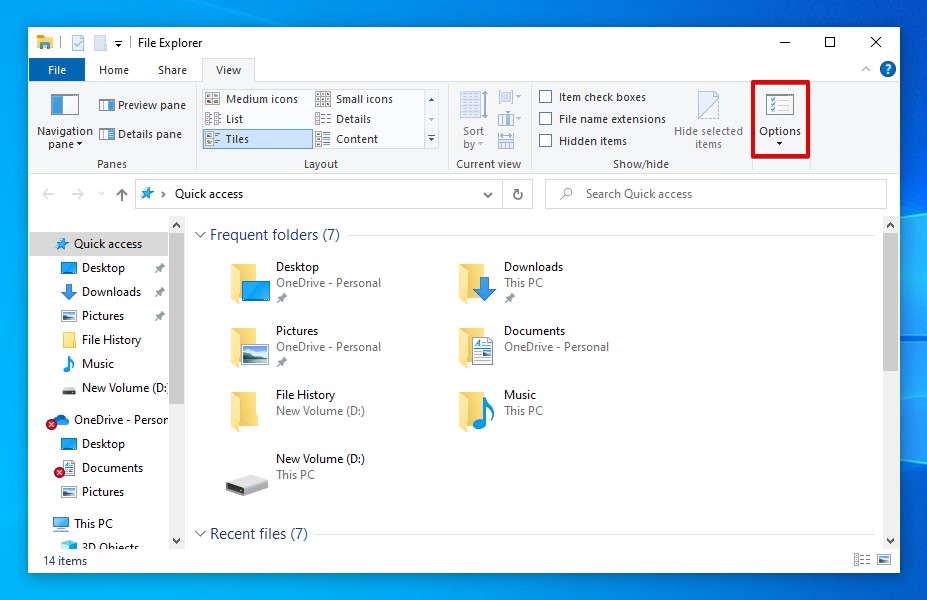
- Click View, then select Show hidden files, folders, and drives.
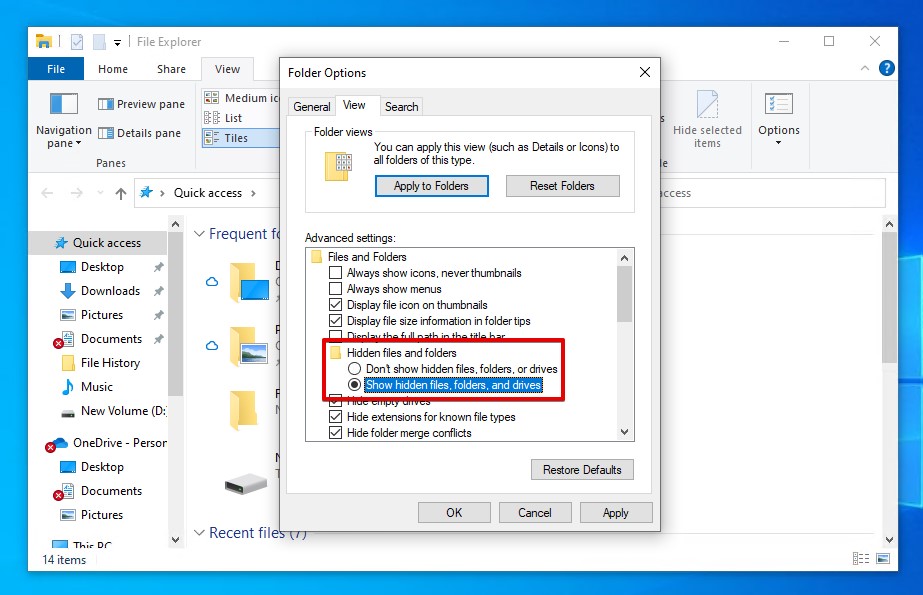
- Click Apply, then OK.
You will notice a number of previously hidden files appear in different places on your computer. If you access your external hard drive now, you will be able to access the recycle bin that was previously hidden.
You can empty the recycle bin on your external drive simply by selecting the files you want to permanently delete and pressing Delete. Be sure to check your Windows Recycle Bin to confirm the data is gone. If you want to restore a previously deleted or lost file, either copy it to your local drive or click and drag it across to another folder.
What to Do If the External Drive Recycle Bin Is Corrupted
The folder that acts as your external hard drive’s trash bin can become corrupted. When the recycle bin folder is corrupted, you won’t be able to access its contents. Corruption occurs as a result of interrupted actions, like removing your drive while files are being moved or shutting down your computer during a format. You can repair corruption of the recycle bin on the external hard drive using CheckDisk, a Windows repair tool that fixes file system-related issues.
Follow these steps to repair a corrupted recycle bin on an external drive using CheckDisk:
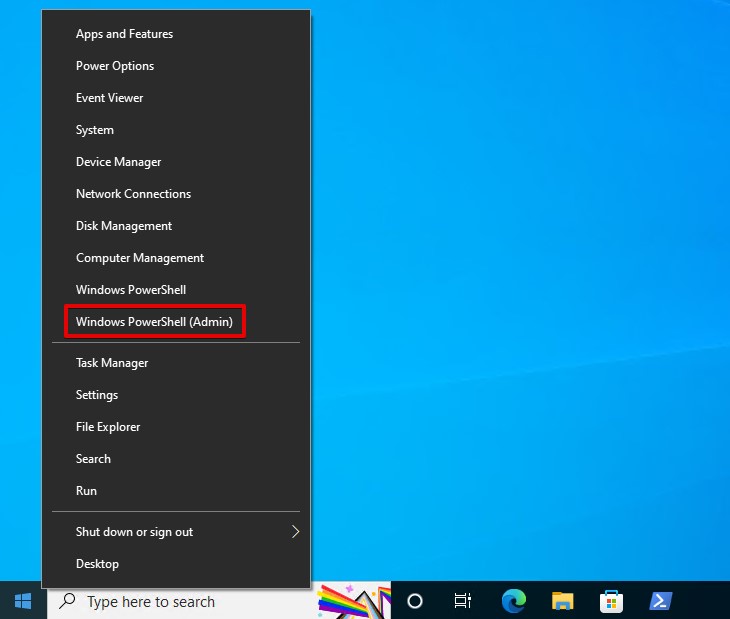
- Right-click Start and select Windows PowerShell (Admin). Click Yes if prompted by UAC.
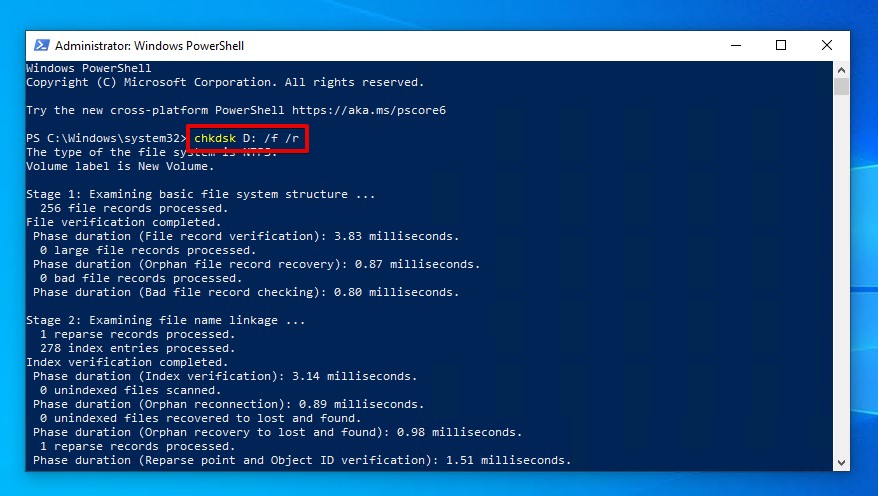
- Type chkdsk D: /f /r. Replace D: with the drive letter of your external hard drive. Press Enter.
How to Recover Deleted Files From an External Hard Drive
In some cases, your lost or deleted files may not be in the recycle bin of your external hard drive. This is where data recovery software comes in. It’s specialized software that focuses on scanning your drive for recoverable data and restoring it for you, even when it appears to be lost for good. To demonstrate this, we’ll use Disk Drill, one of the most reliable data recovery tools currently available.
The below steps will guide you through how to recover files from the external hard drive recycle bin:
- Download Disk Drill and install it on your computer.
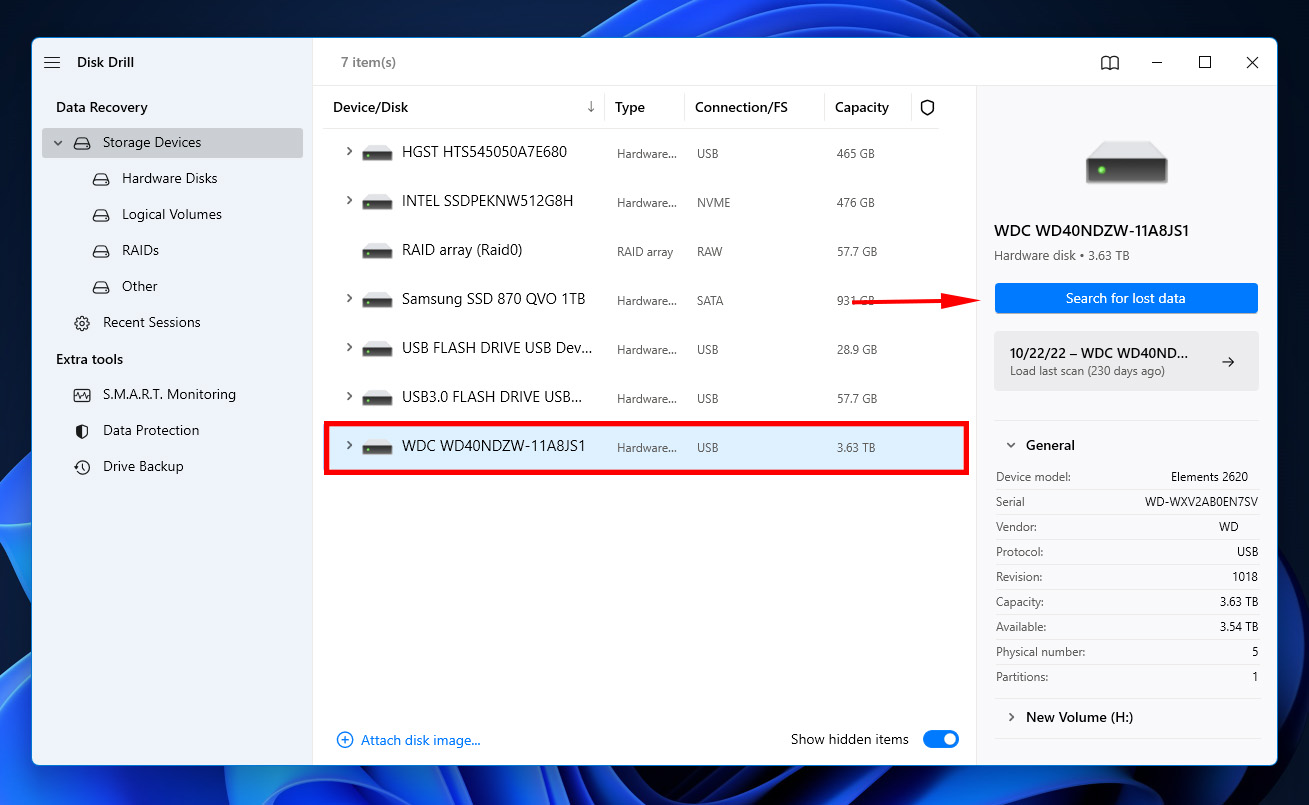
- Select your external hard drive, then click Search for lost data.
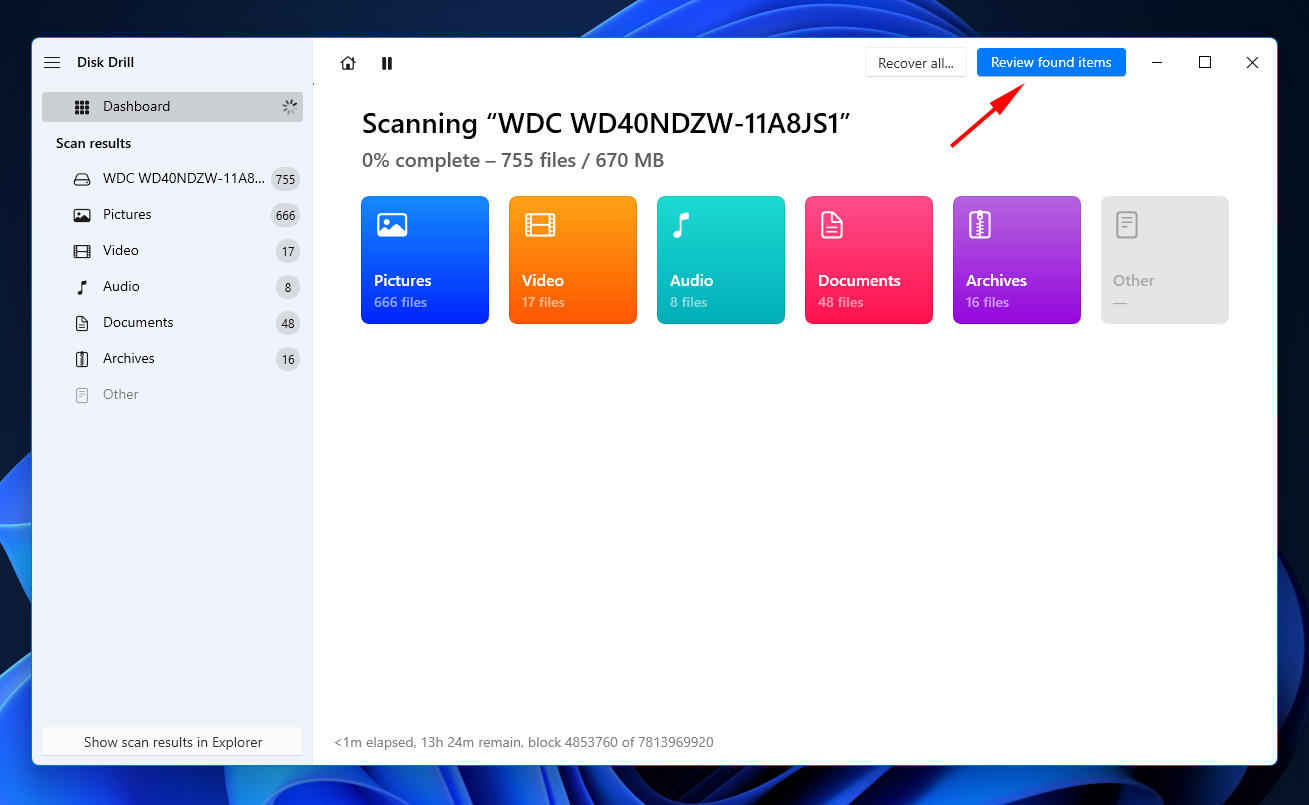
- Click Review found items.
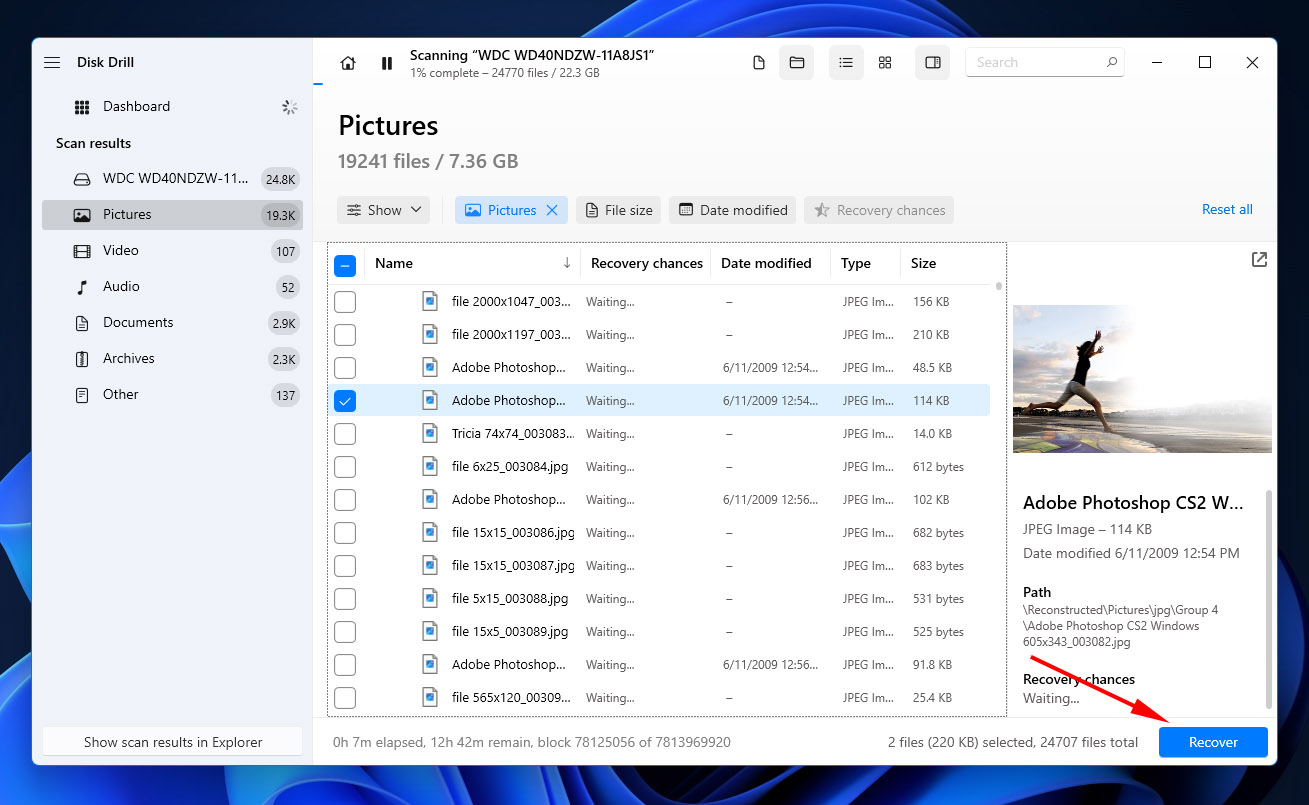
- Mark the files you want to recover then click Recover when you’re ready.
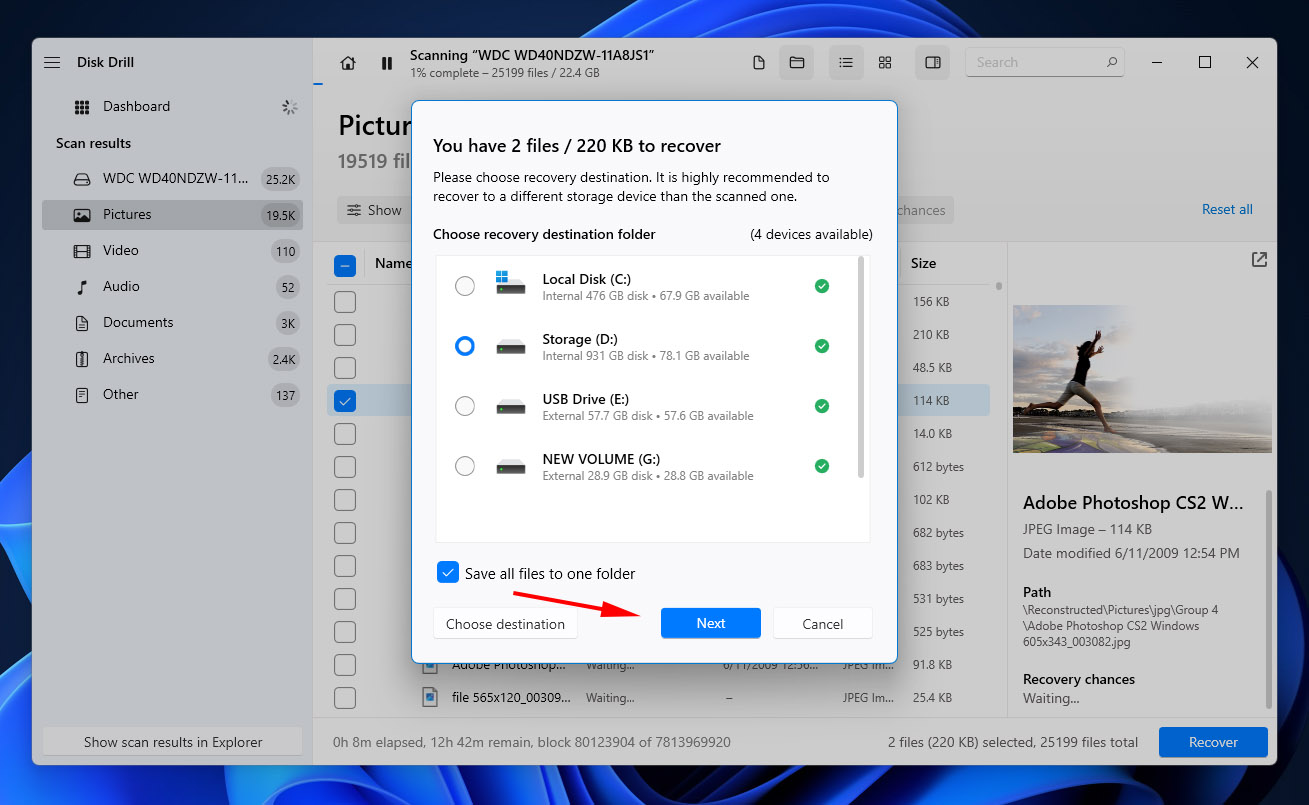
- Click Next to complete recovery.
Once recovery is complete, Disk Drill will display an overview of the recovery. You will be able to find your recovered files in the output folder you specified.
FAQ
- Open File Explorer.
- Click View, then Options.
- Click View, then select Show hidden files, folders, and drives.
- Click Apply, then OK.
- Right-click Start and select Windows PowerShell (Admin).
- Type chkdsk D: /f /r. Be sure to replace D: with the drive letter of your external hard drive. Press Enter.
- Open your external hard drive in Finder.
- Press Command + Shift + . (period).
- Open the .Trashes folder.


