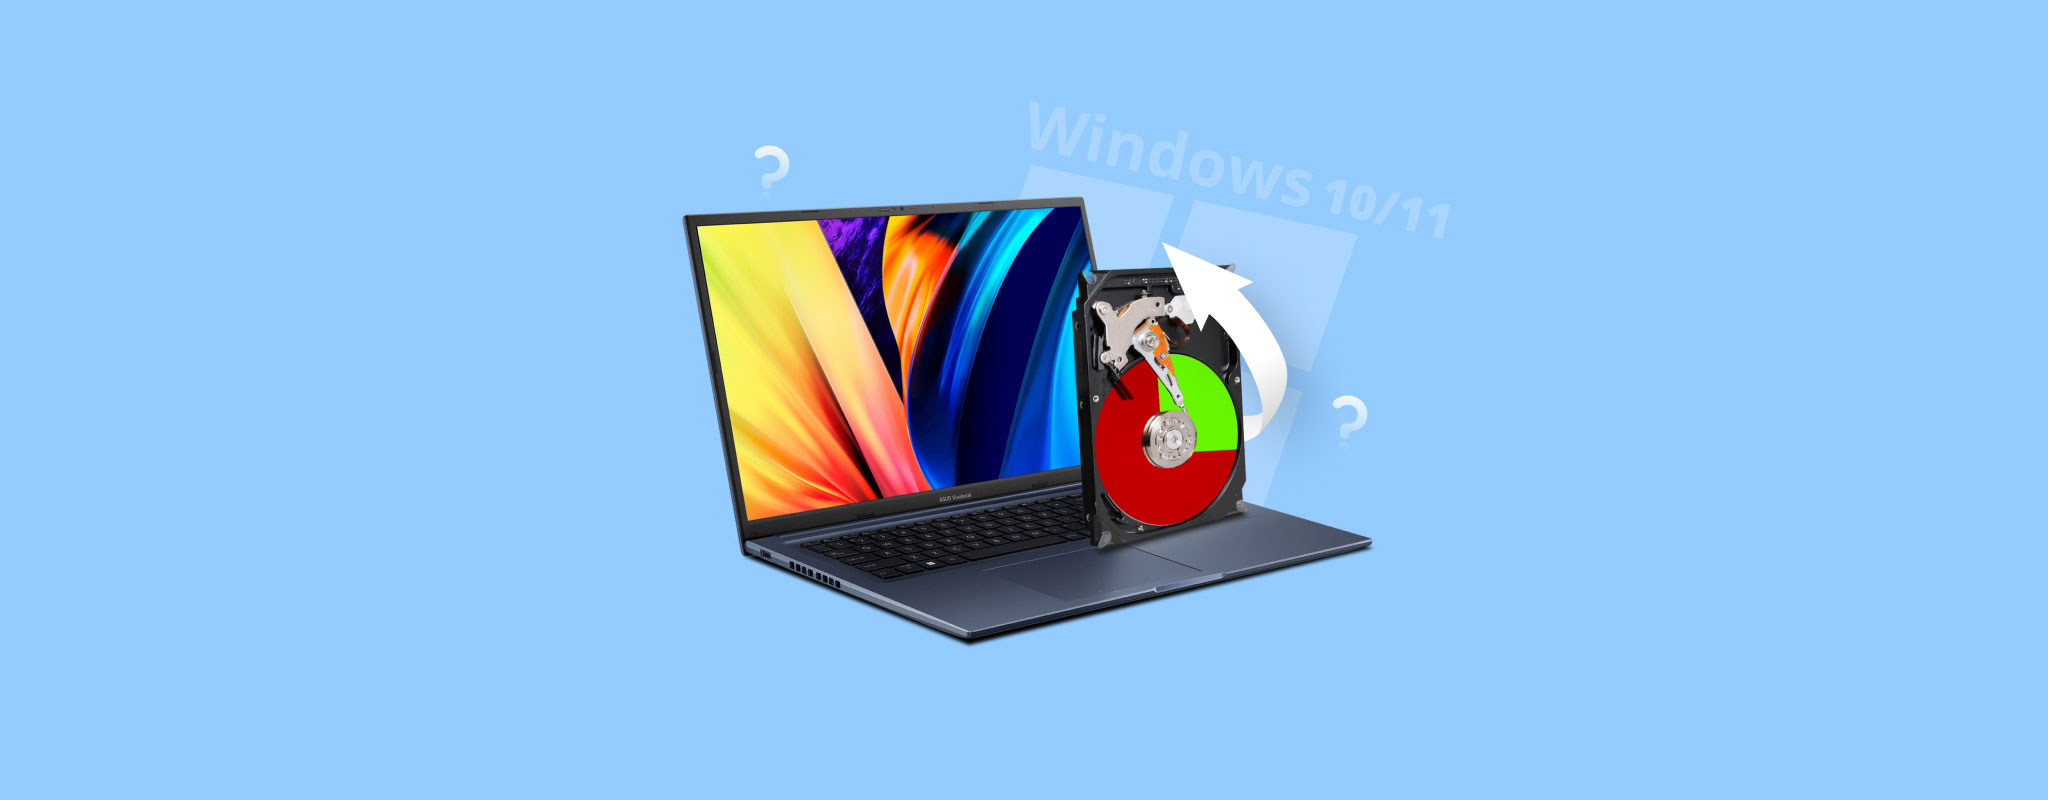
 The EFI partition isn’t well-known, but it is a very vital part of your Windows computer. When tinkering with the partitioning setup of your drive, you may accidentally delete it, resulting in your Windows computer not booting correctly.
If your EFI partition is not showing up, or if you accidentally deleted the EFI partition, read on to understand how you can fix it to restore your Windows computer to working order.
Table of Contents
What Causes “Error Loading Operating System” on Windows?
If your drive uses the GUID Partition Table (GPT) partitioning scheme, you will have an Extensible Firmware Interface (EFI) partition. It’s also commonly referred to as EFI System Partition (ESP). It’s a relatively small (100 MB) FAT32-formatted partition that typically isn’t assigned a drive letter. In fact, it won’t even appear in File Explorer, instead being found in Disk Management. It is responsible for storing essential files that your UEFI firmware uses to boot your Windows operating system, such as the bootloader.
Drives that use the Master Boot Record (MBR) partitioning scheme will not have an EFI partition. Instead, the bootloader is located in the first sector of the disk.
The “Error loading operating system” message will appear when your EFI partition is missing. If no EFI system partition was found, it may be because it was accidentally deleted, or it has become corrupted due to a sudden power outage or the appearance of bad sectors. Until it is fixed or restored, Windows will refuse to boot.
How to Fix Missing EFI Partition on Windows
Don’t worry too much if your EFI partition is lost, as you can easily fix it on your own. Use one of these methods to fix your EFI partition on Windows 10 or 11.
Method 1: Try Using Automatic Boot Repair
Automatic Boot Repair is the easiest way to rebuild your EFI partition and repair your partition table. Its effectiveness will depend on the type of damage your drive has sustained, but it’s a good starting point as it’s a built-in diagnostic tool that attempts to identify and repair boot-related problems.
To initiate Automatic Boot Repair, follow these steps:
- Turn on your computer. Then, turn it off before it finishes the boot process.
- Repeat these steps three times, then turn the computer on again.
- Automatic Boot Repair will run and try to repair the issue.

Should Automatic Boot Repair fail to rectify the issue, you can try manually recreating the EFI partition using Command Prompt instead.
Method 2: Manually Recreate EFI Partition Using DiskPart
When needed, you can always recreate your EFI partition using DiskPart. DiskPart is a command-line disk partitioning utility included with Windows that allows you to manage disks and partitions using Command Prompt, Windows PowerShell, or Terminal (for Windows 11 users). Although it’s more hands-on than Automatic Boot Repair, it’s a viable option to get your EFI partition back.
You will need your Windows installation media for this method. If you don’t have one, read this guide on how to create a bootable USB.
Follow these steps to create an EFI partition using DiskPart.
- Boot into WinRE.
- Click Troubleshoot.

- Click Command Prompt.
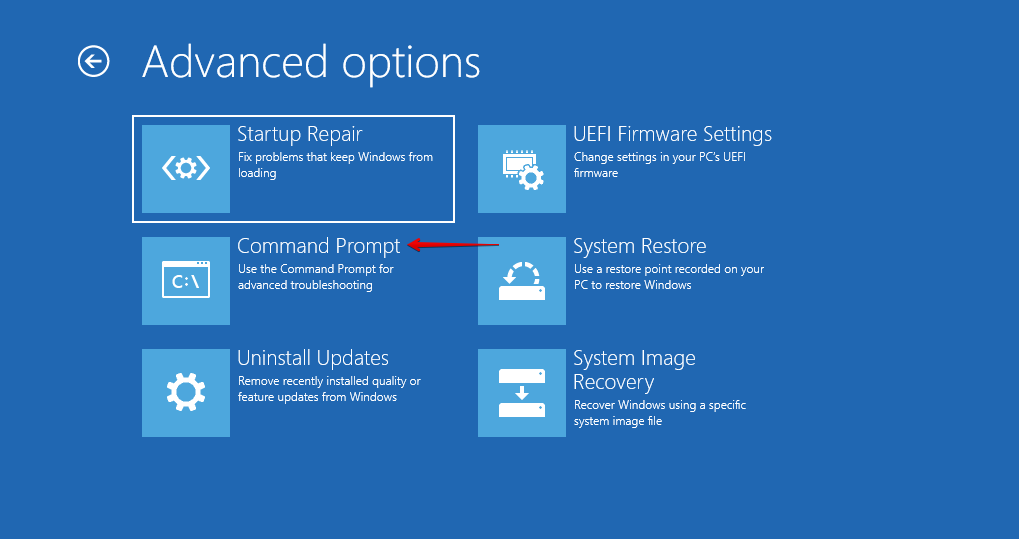
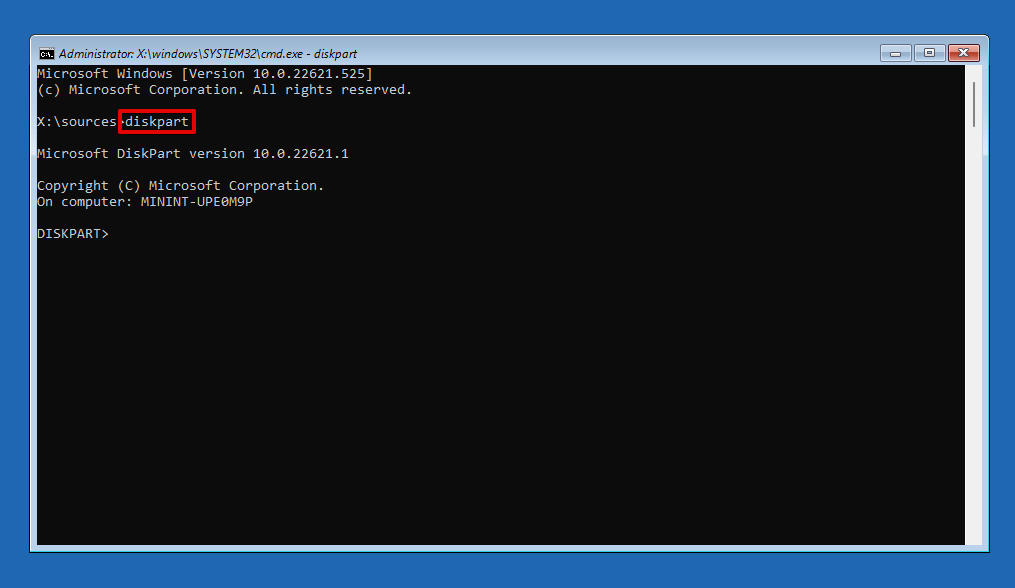
- Type diskpart and press Enter.
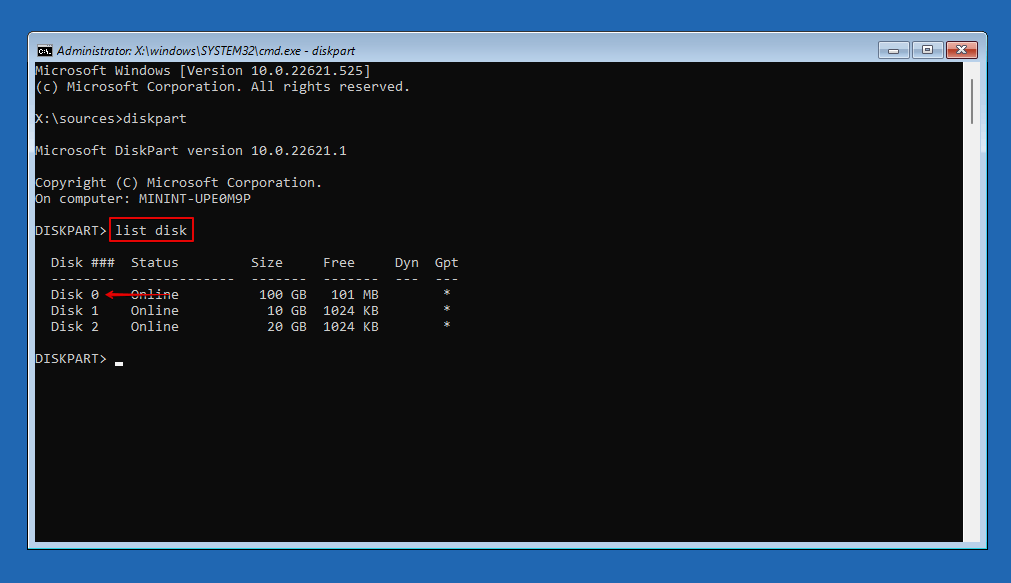
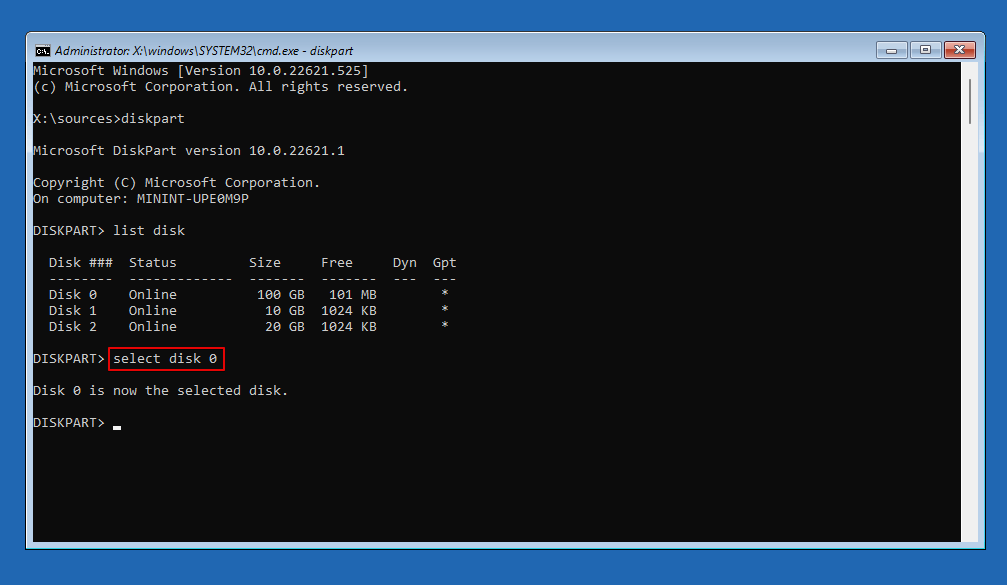
- Type list disk and press Enter. Make note of the disk number associated with your system drive.
- Type select disk *. Replace * with your disk number.
- Type list partition and make note of the partition where Windows is installed.
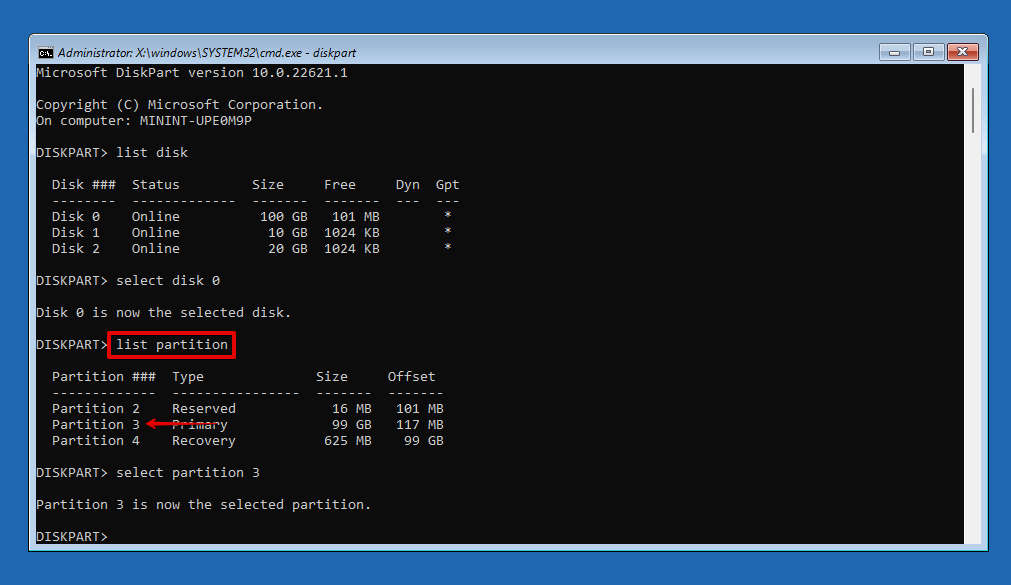
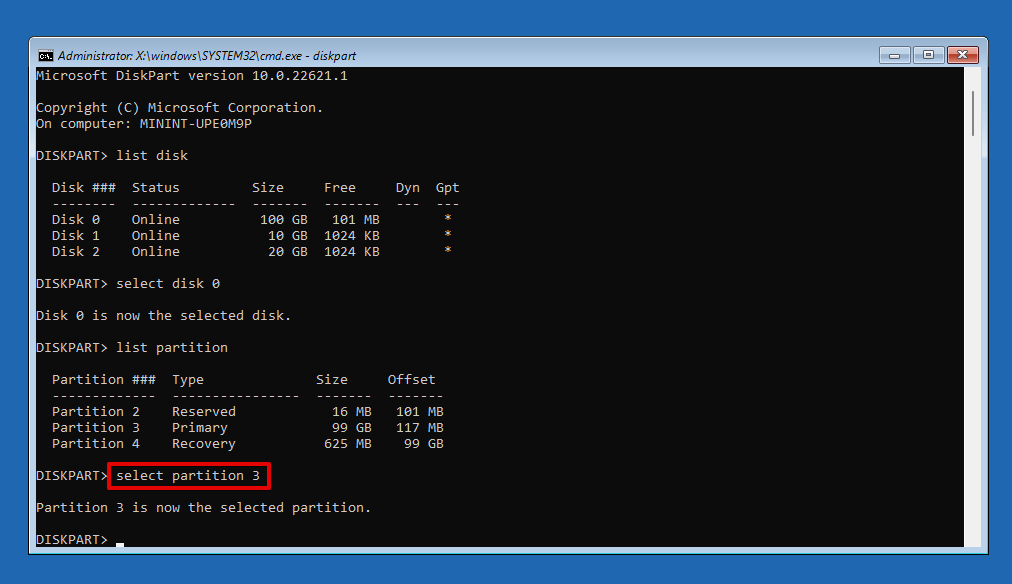
- Type select partition *. Replace * with your Windows OS system partition.
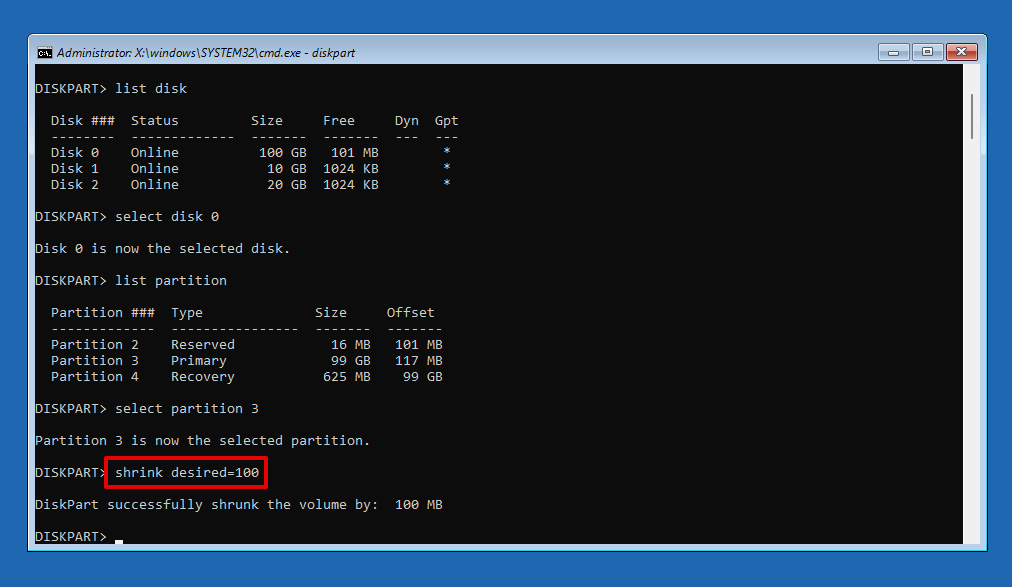
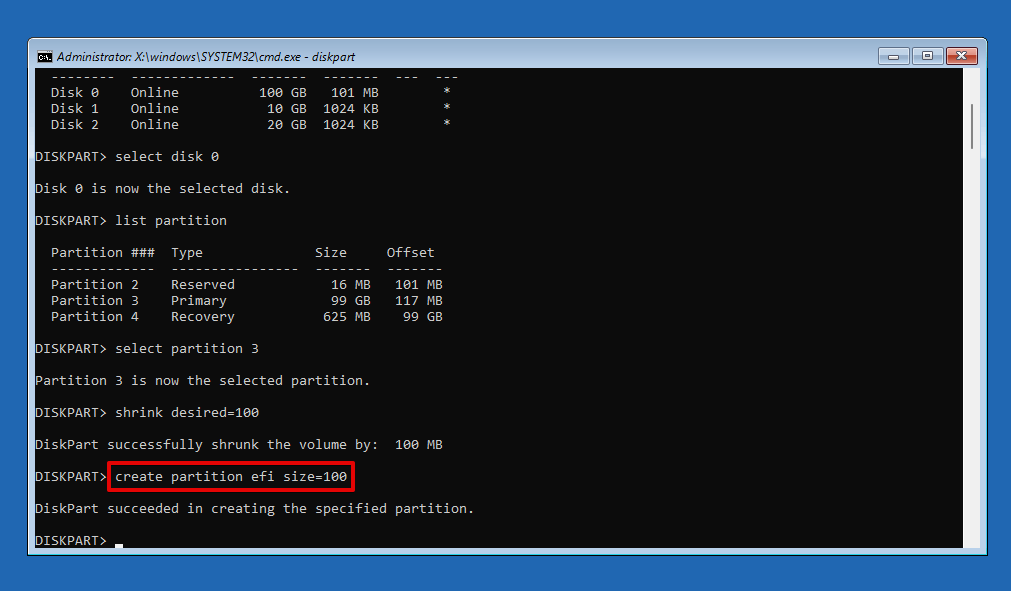
- Next, you will need to free up some space for the EFI partition. If there is already 100 MB of unallocated space due to the previous EFI partition being deleted, you can skip this step. Otherwise, type shrink desired=100 and press Enter.
- Type create partition efi size=100 and press Enter.
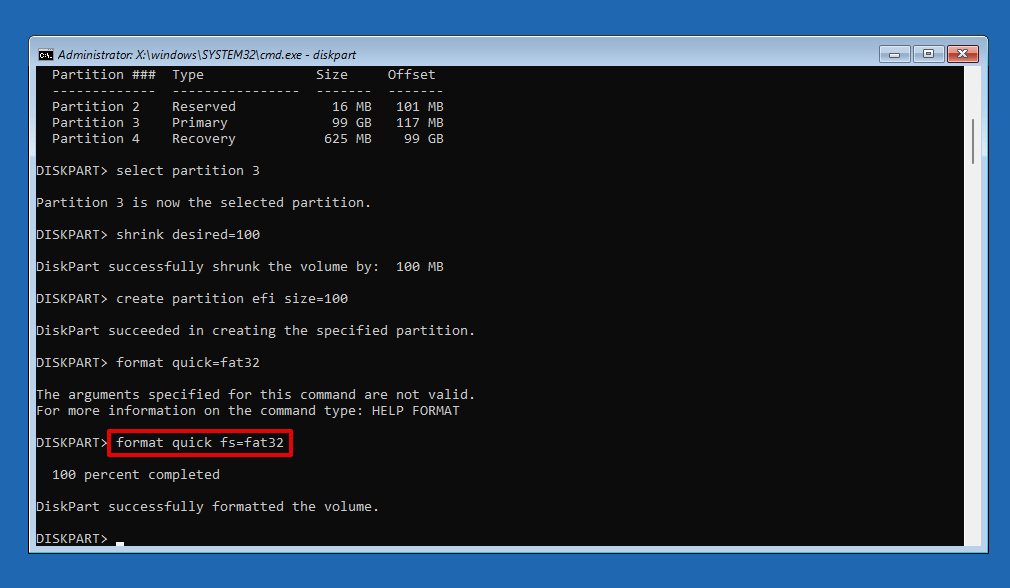
- Type format quick fs=fat32 and press Enter.
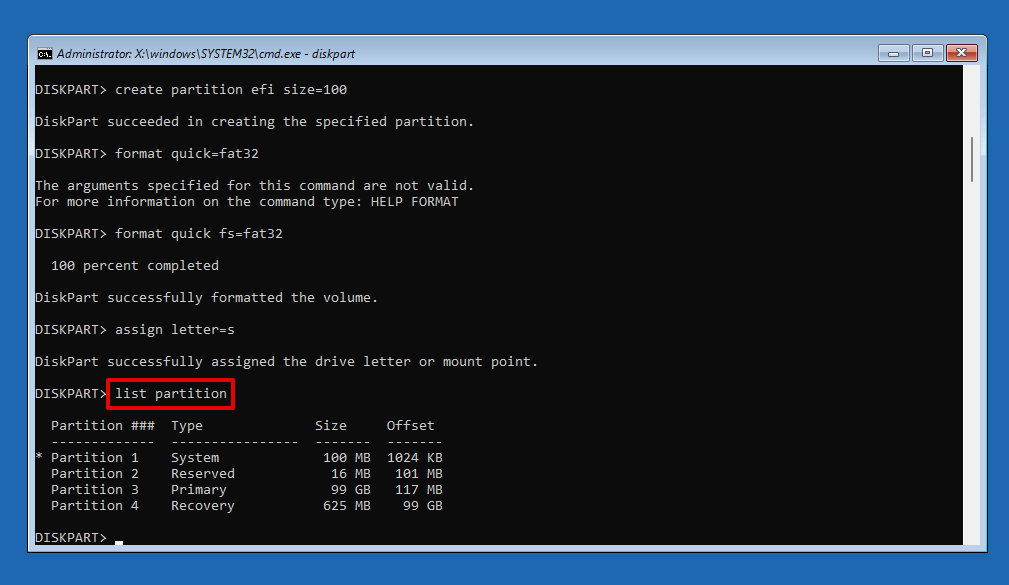
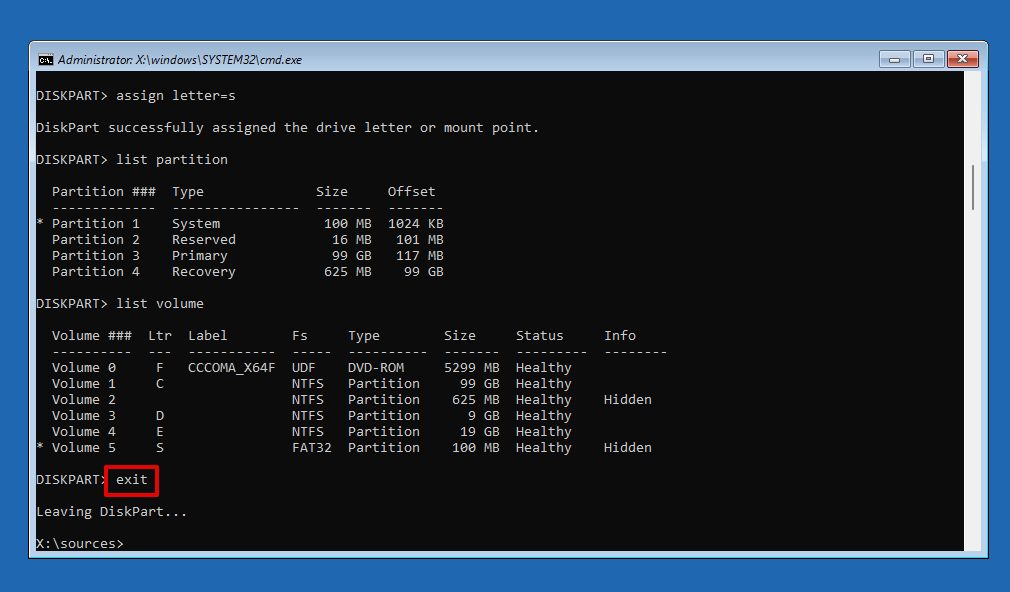
- Type assign letter=s and press Enter.

- Type list partition and press Enter.
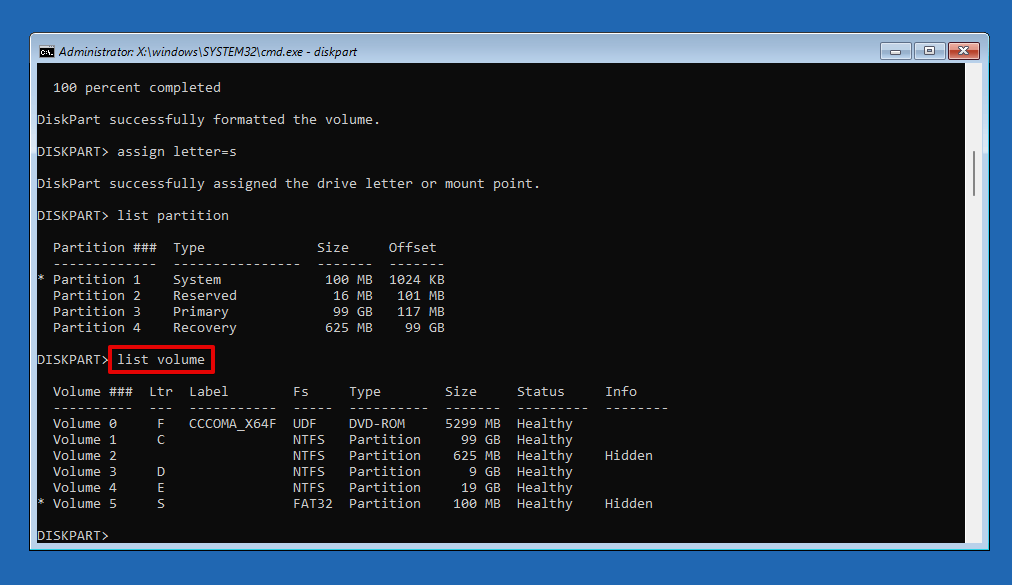
- Type list volume and press Enter. Make note of the volume letter where Windows is installed.
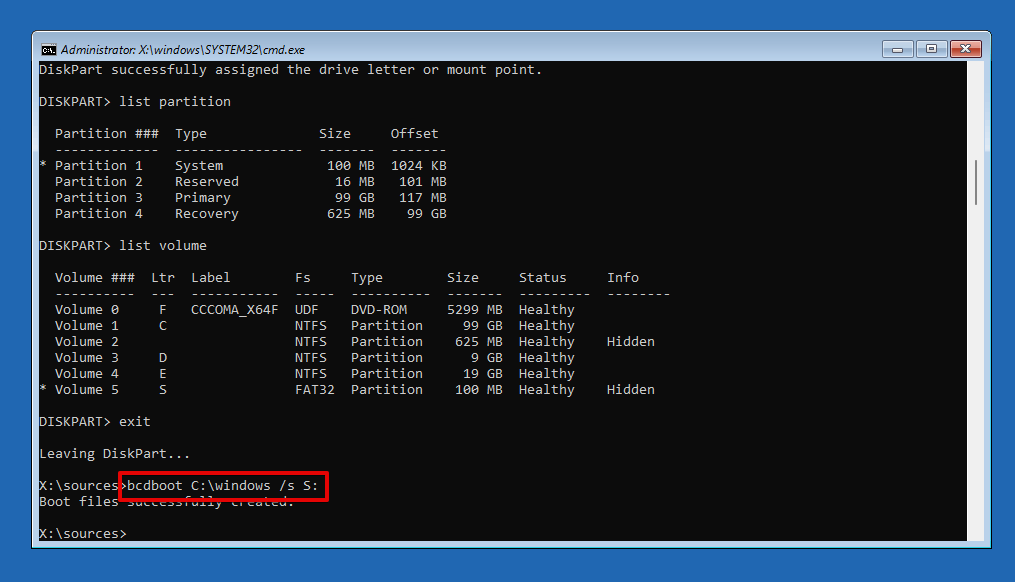
- Type exit and press Enter.
- Type bcdboot *:\windows /s S:. Replace * with the volume letter of your Windows OS, then press Enter.
When you still can’t create an EFI partition with DiskPart, the guaranteed way to fix the EFI system partition is by reinstalling Windows entirely.
Method 3: Reinstall Windows
Should you fail to restore a deleted EFI system partition using one of the aforementioned methods, you can reinstall Windows instead. While reinstalling Windows can seem like a drastic option, it can sometimes be the only one that works. This is a guaranteed fix because a new EFI partition is created as part of every Windows installation (at least on drives that use the GPT partitioning scheme).
It’s essential that you back up your data before you perform this method, as a clean install will delete all data on the disk. Connect your hard drive to another computer and make a copy of your files before proceeding.
These instructions will briefly guide you through performing a clean install of the Windows operating system:
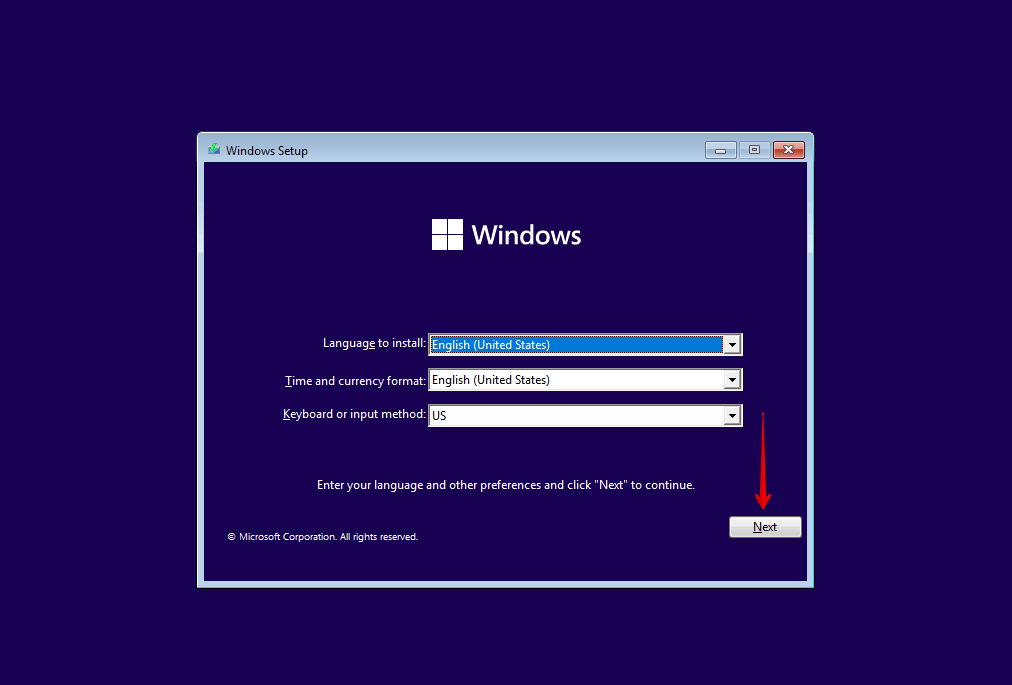
- Boot using your boot media.
- Select your language and currency preferences, then click Next.
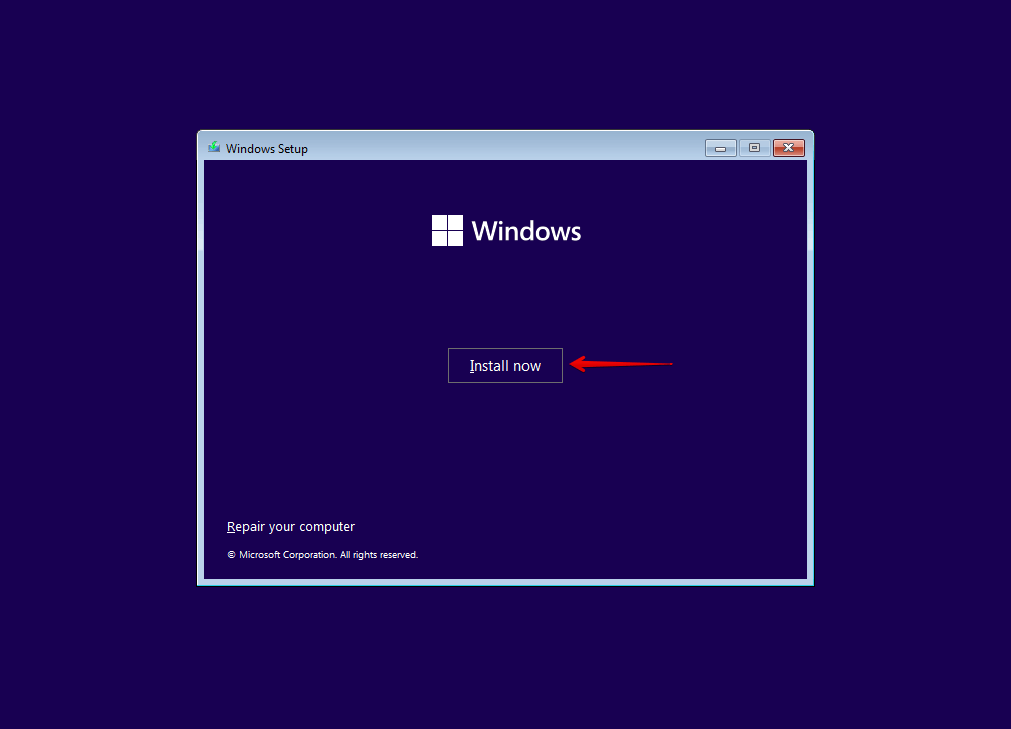
- Click Install now.
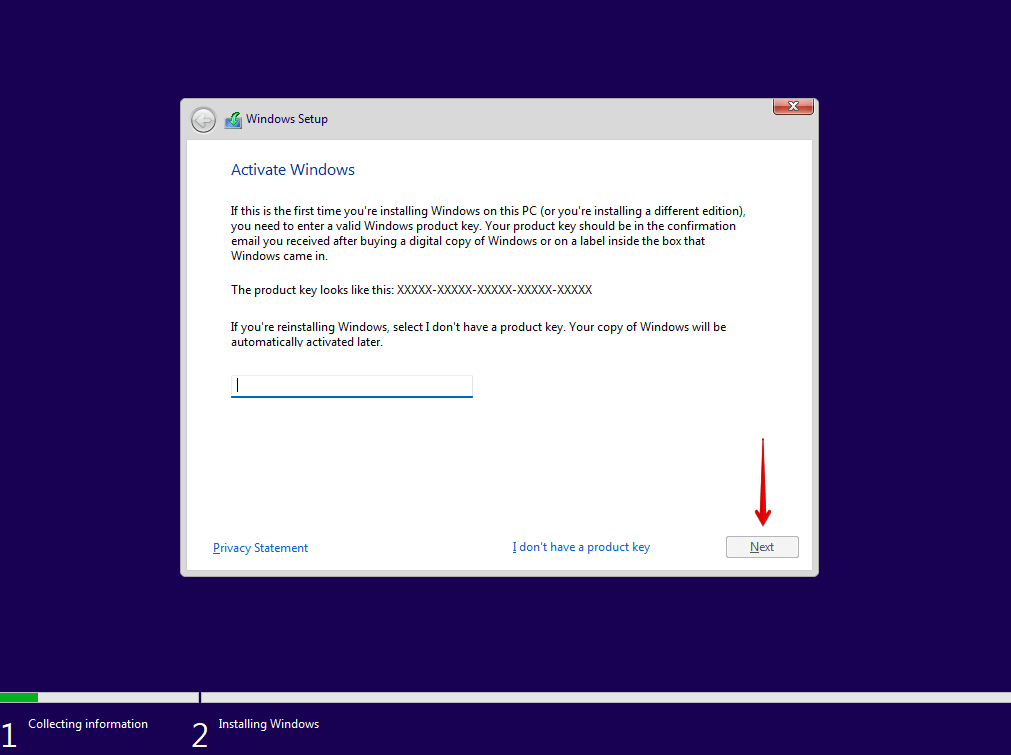
- Enter your product key and press Next. Alternatively, click I don’t have a product key.
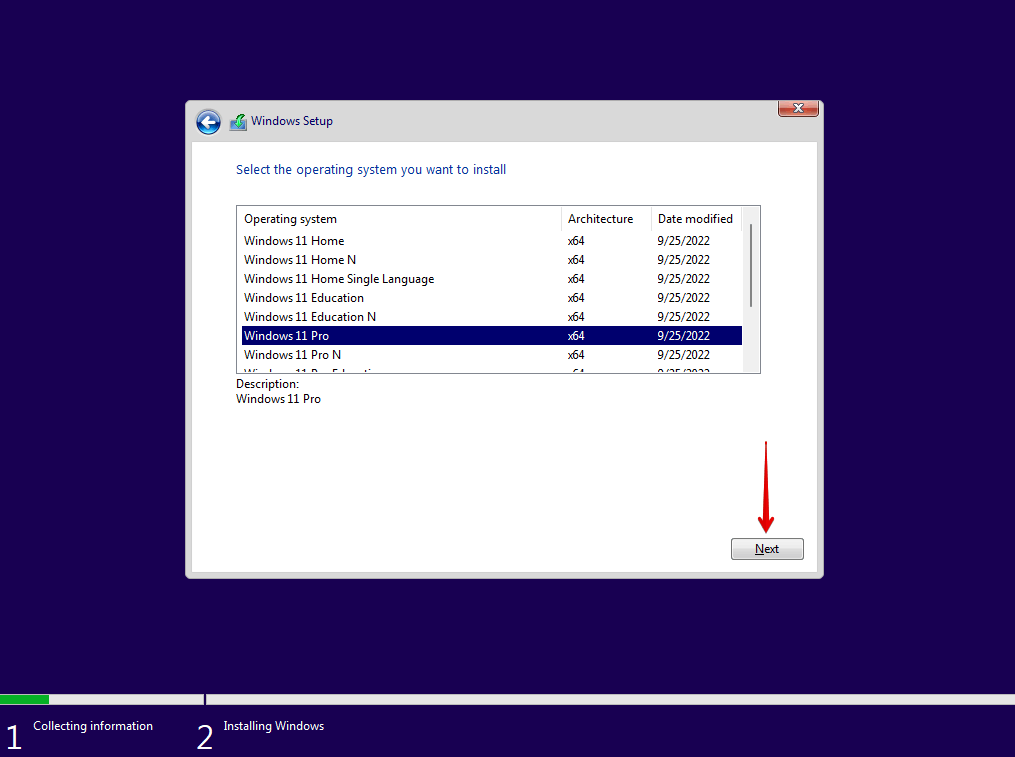
- Select the OS version you wish to install and click Next.
- Agree to the license terms.
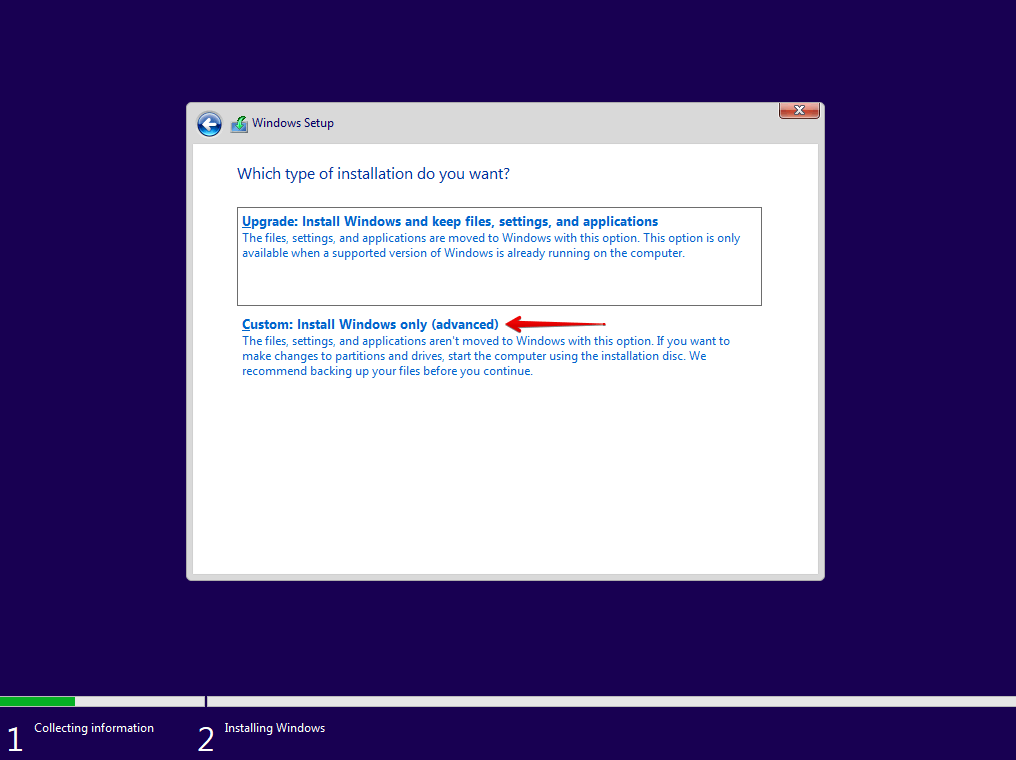
- Click Custom: Install Windows only (advanced).
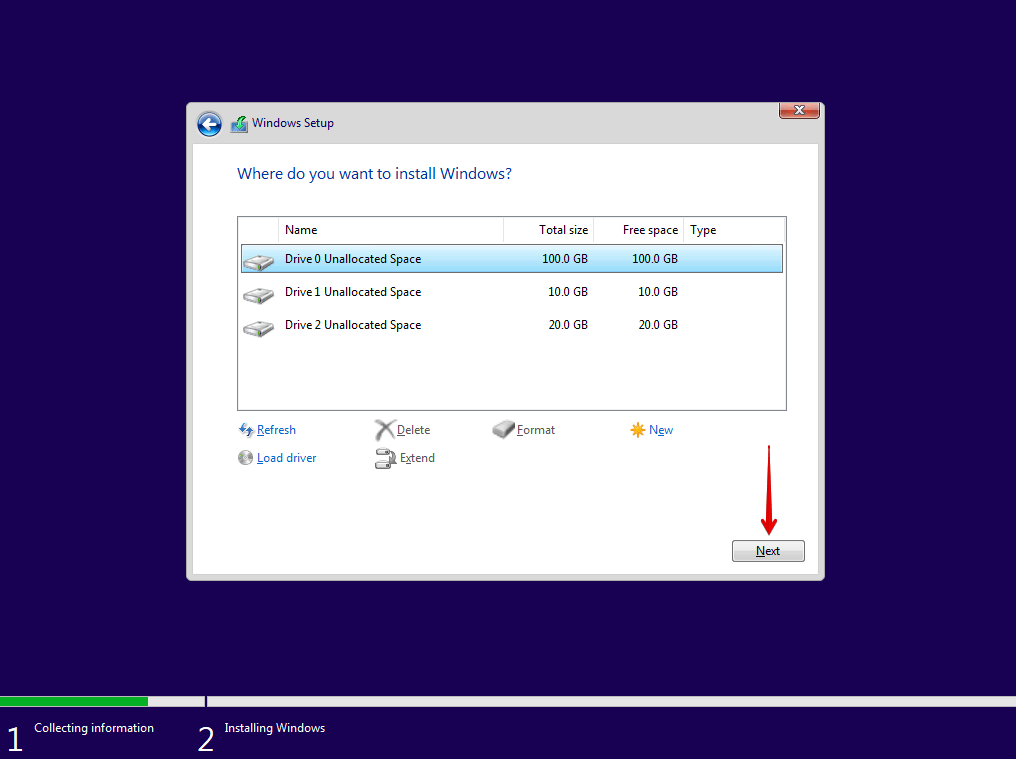
- Delete all existing partitions. Use this opportunity to create the partitions you want (if needed). Select the drive that you wish to install Windows on, then click Next.
- Follow the on-screen instructions to complete the installation.
How to Recover Lost Data From Hard Drive
When corruption causes your EFI partition to become lost, it’s not uncommon for it to affect other parts of your drive. Even after restoring the EFI partition, some of your files may still be missing. In this case, you should use a data recovery tool like Disk Drill. Disk Drill is an effective GPT partition data recovery tool that is able to scan your hard drive for recoverable data and restore it to a safe storage device.
Here’s how you can use Disk Drill to restore lost data from a drive that has been impacted by a missing EFI partition:
- Download Disk Drill.
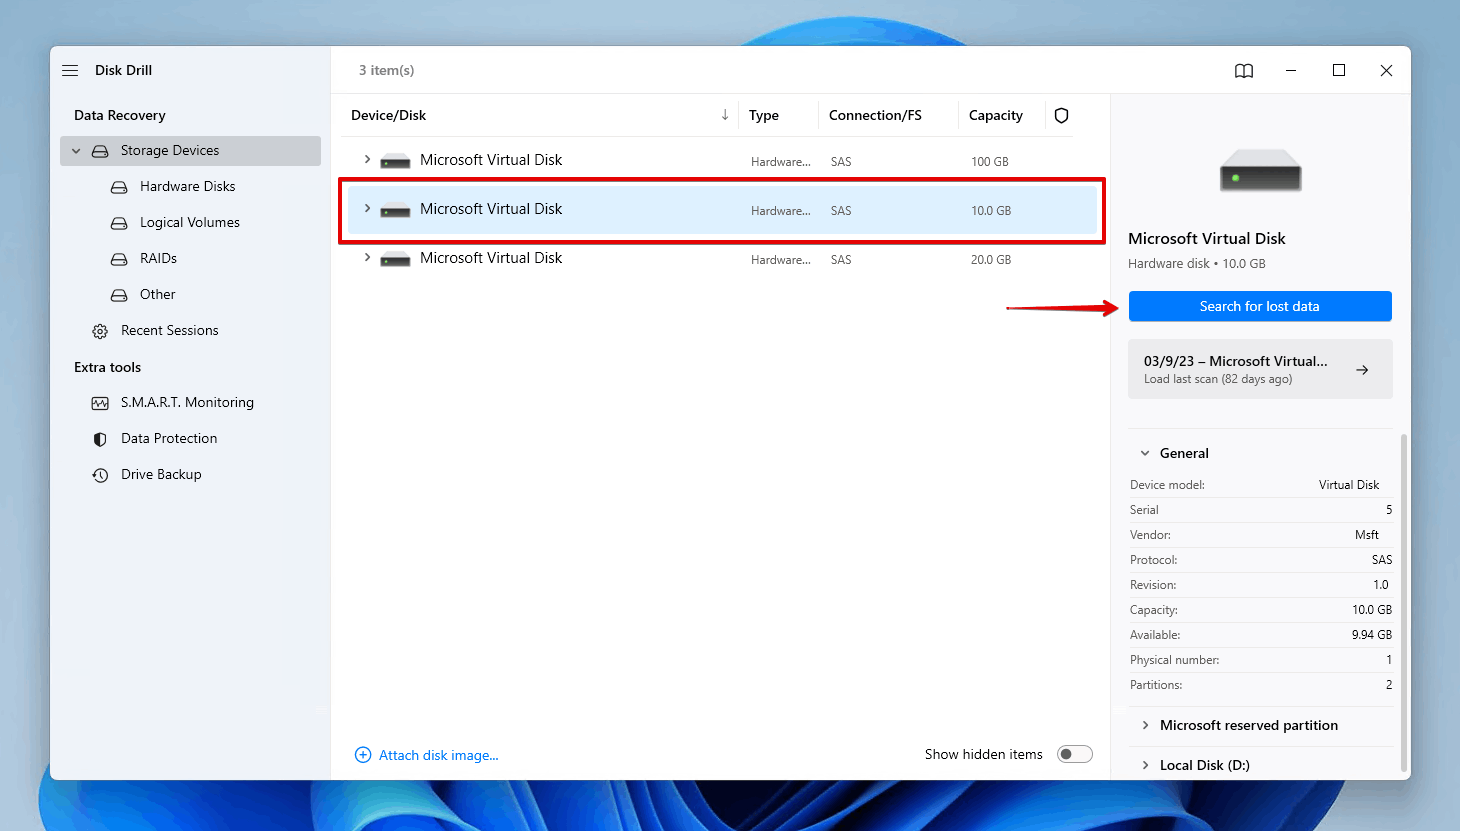
- Connect the drive you wish to recover data from then select it from the list of devices. Click Search for lost data.
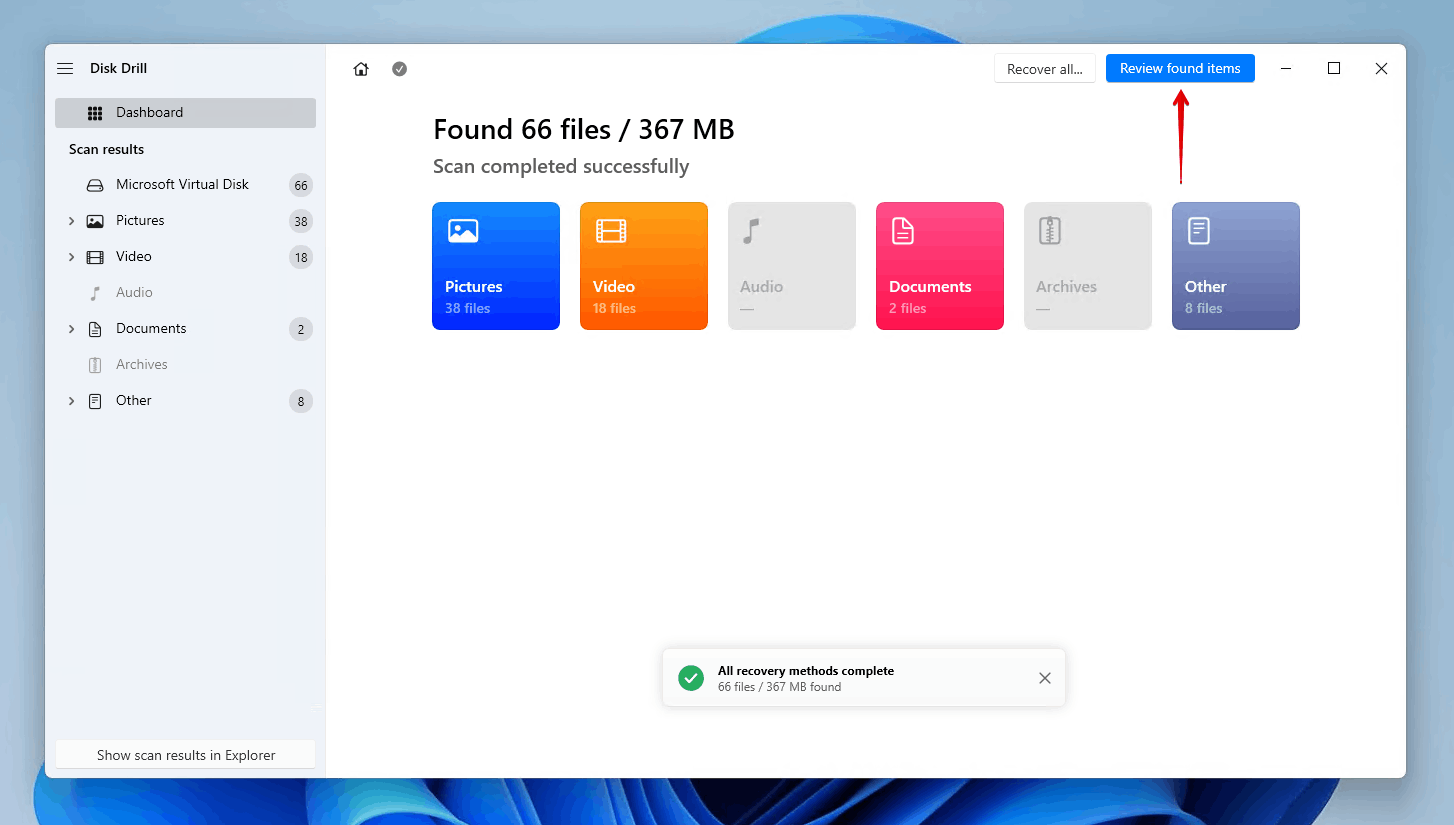
- Click Review found items once the scan has finished. Or, click Recover all to recover everything that Disk Drill found.
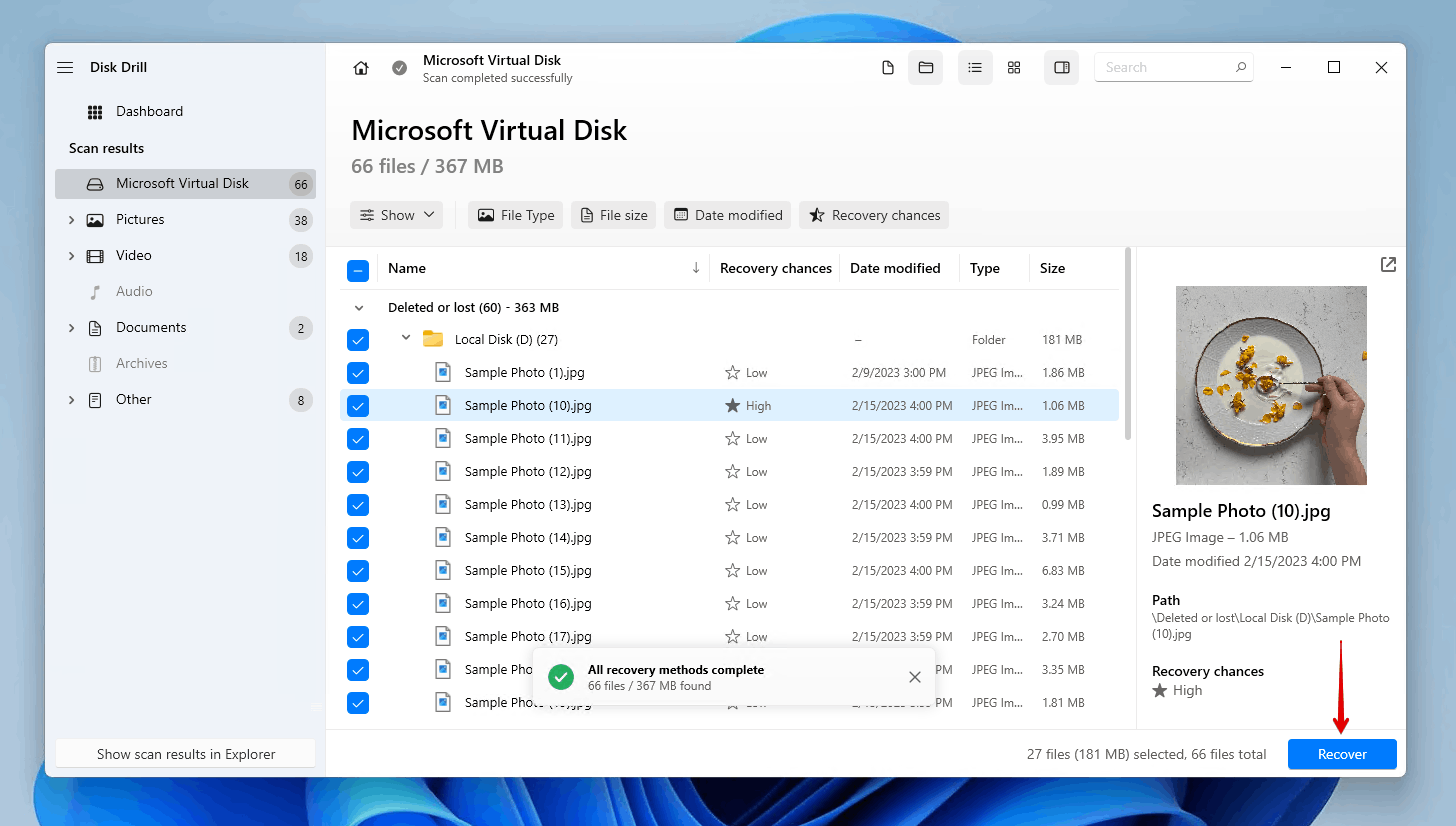
- Select the data that you wish to recover. Pay attention to the recovery chances column and preview panel to see which data is still recoverable. When you’re ready, click Recover.
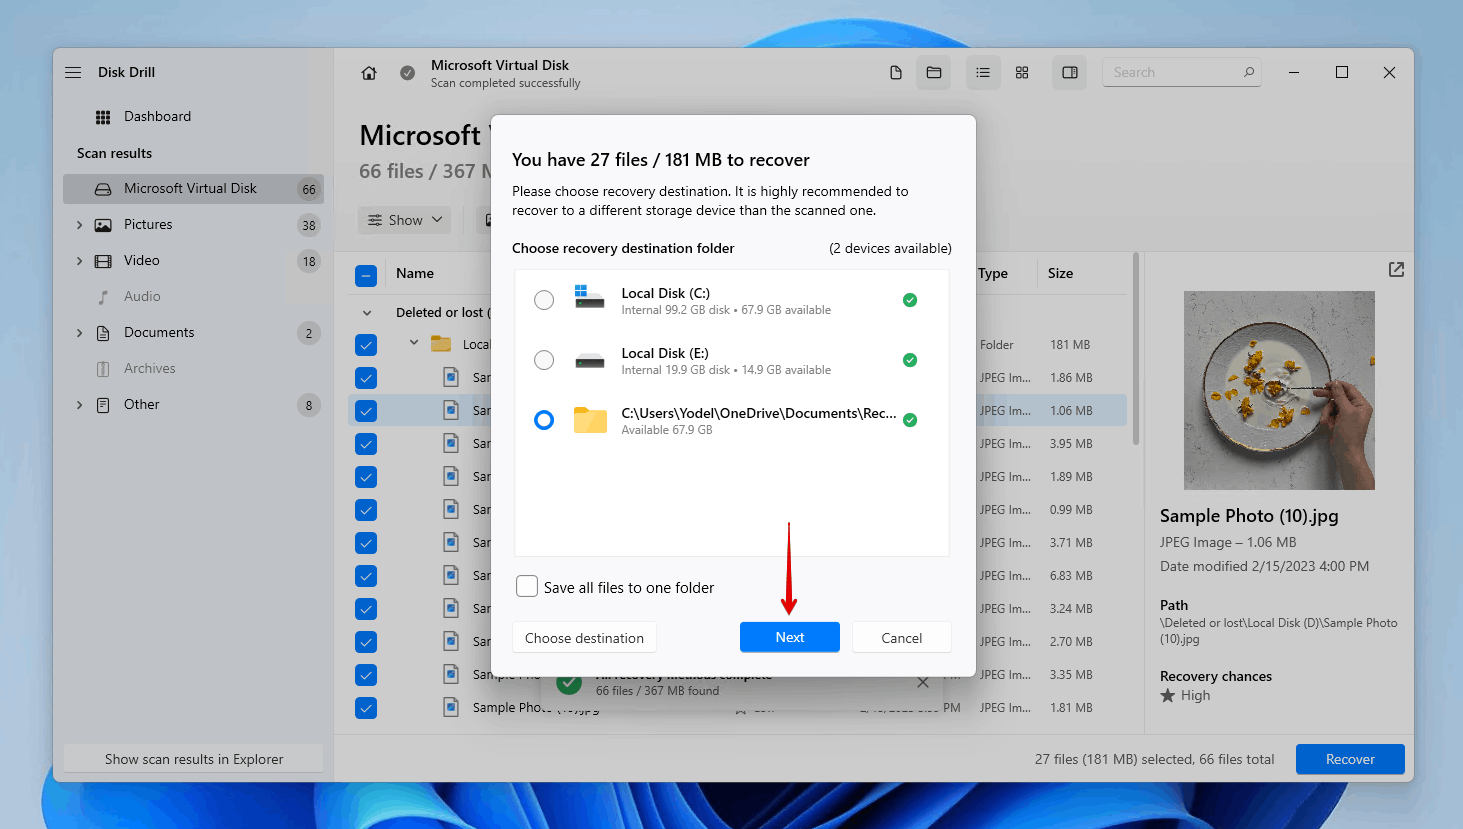
- Select a safe destination for recovery. Avoid recovering the data to the same drive you’re restoring it from. Click Next.
Conclusion
If you’ve accidentally deleted your EFI system partition, or it has become unusable due to corruption, then you won’t be able to boot into Windows. You can attempt to repair it using Automatic Boot Repair. If that doesn’t work, you can get a bit more technical and try manually recreating it with DiskPart. Should that still not work, you should back up your data to another storage device and reinstall Windows on the drive, as this will create a new EFI partition in the process.
Should you notice that some of your data is missing even after restoring the EFI partition, you need to recover the data, either from a backup or through the use of a data recovery tool such as Disk Drill.


